Month

August 2012

Crazy Crap on the Walls: Our Photo Gallery

*Normally on Friday, I do a series called Flashback Friday where I feature a different area of the house and the improvements we have made since moving here, like our kitchen update, our bathroom spruce up, and our living room/dining room improvements. Flashback Friday will be back next week with the bedrooms.

After talking about our living room improvements last week, someone asked me how I went about creating our photo gallery. Creating a photo gallery was a must for Brian and I. We love family photos and wanted to have a place where we could place them all together. This was one of the first projects I did after painting the living room, so there aren’t a ton of pictures (again, this blogging thing is new to me), but I will try to explain as best I can.


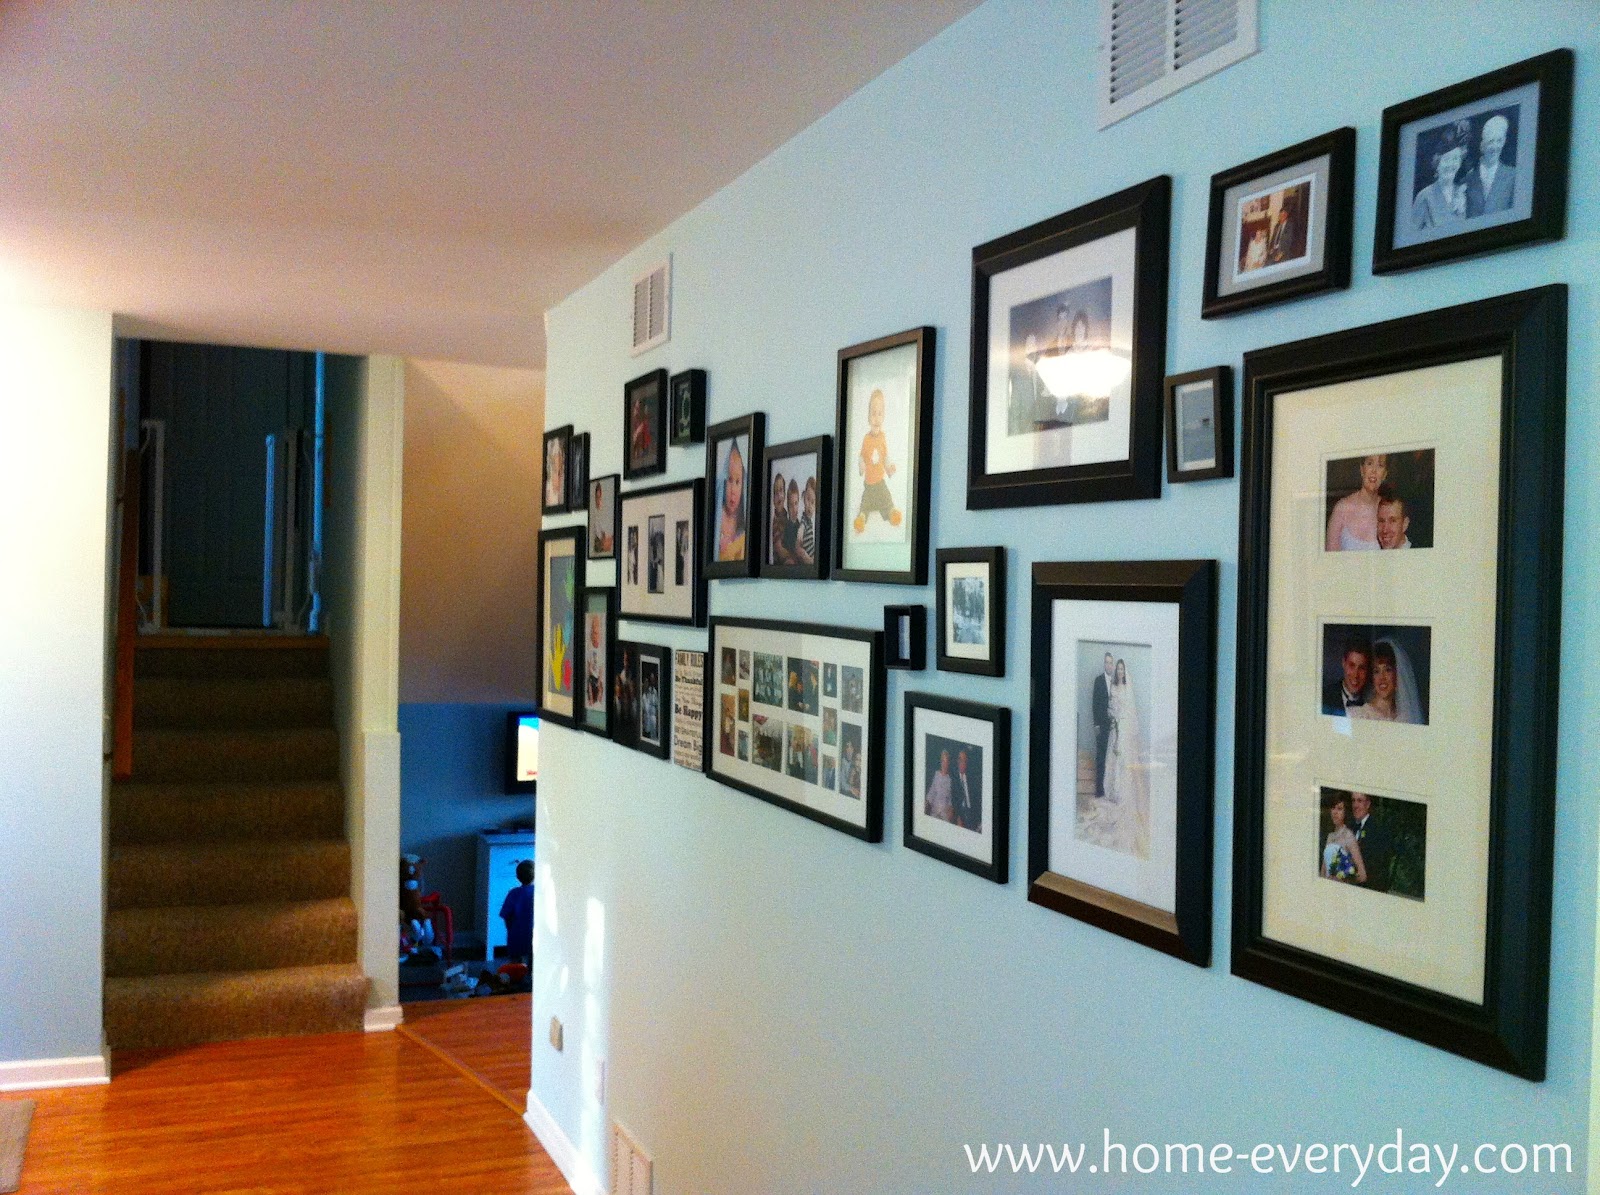
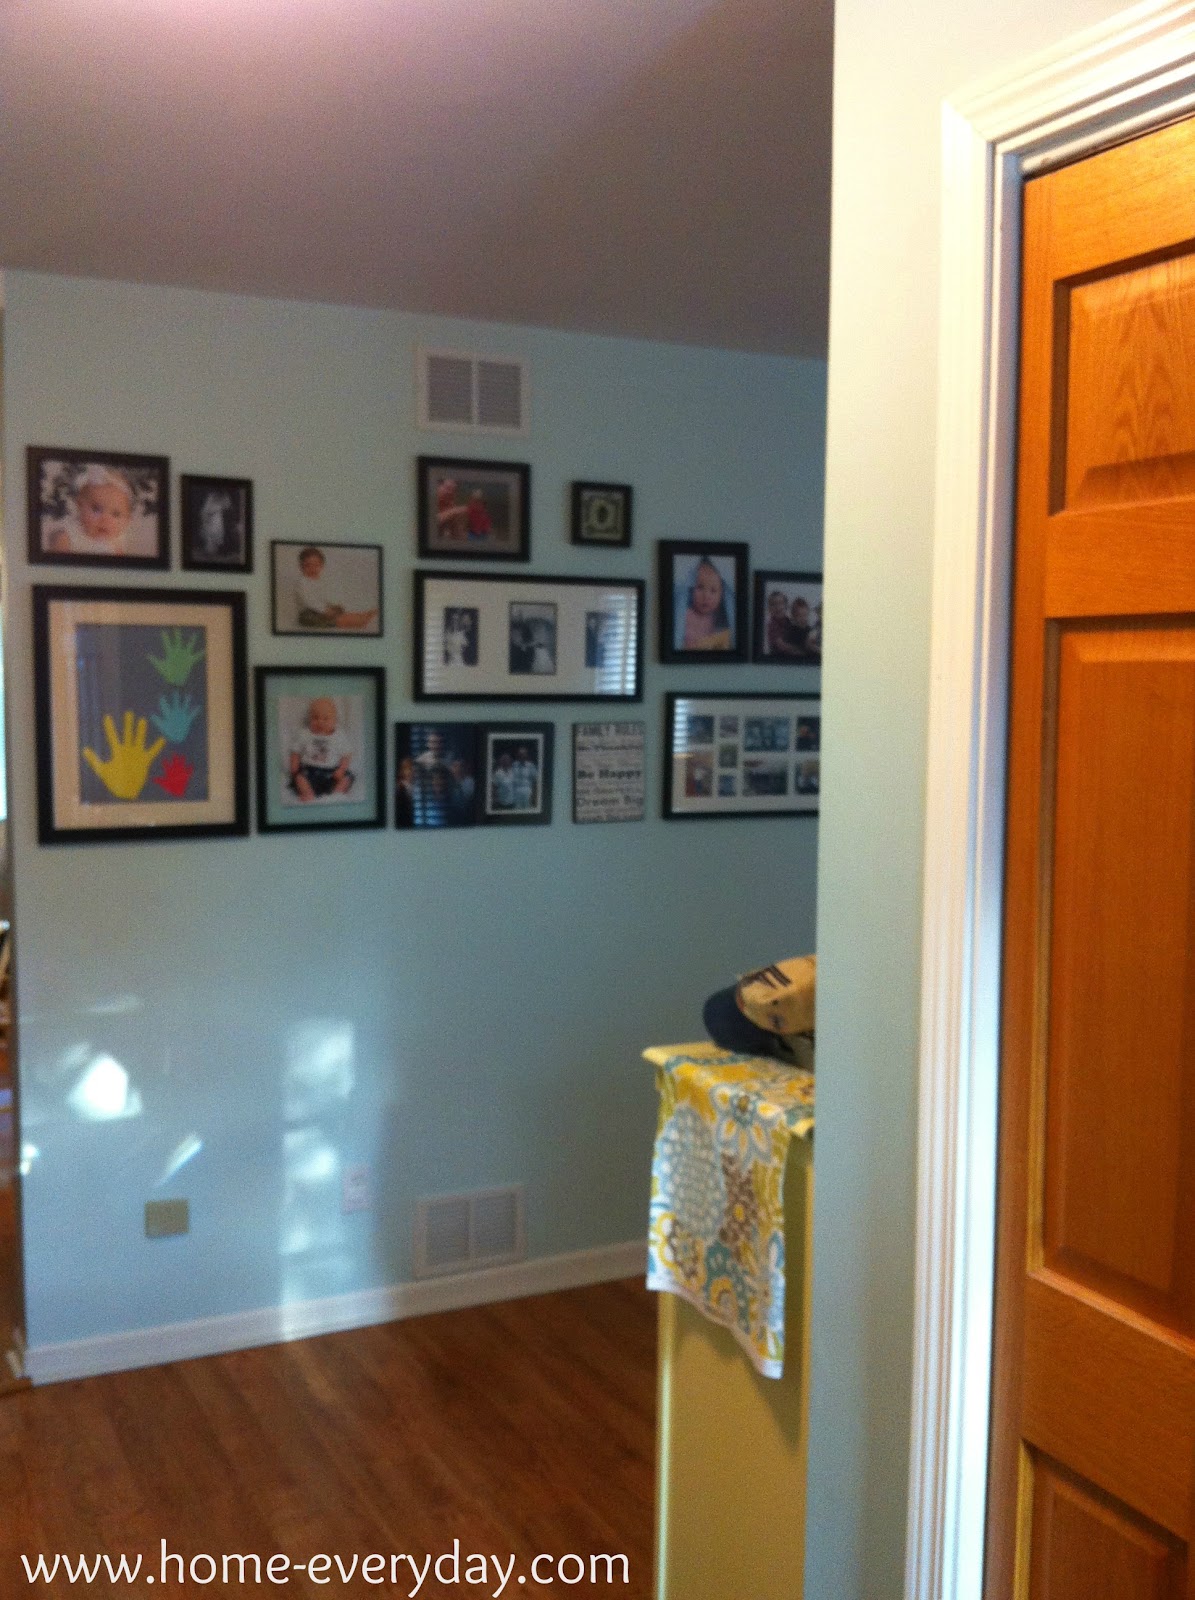
Location, Location, Location: When we bought this house, we had quite a few ideas of where we could put a huge photo gallery. After some discussion, we decided the living room. The wall we chose is one that you see right as you enter our front door, but can also be seen from every angle of the living room. Also, this wall is twelve feet long. We figured that this is enough space to add a number of photos as well as have room to grow.


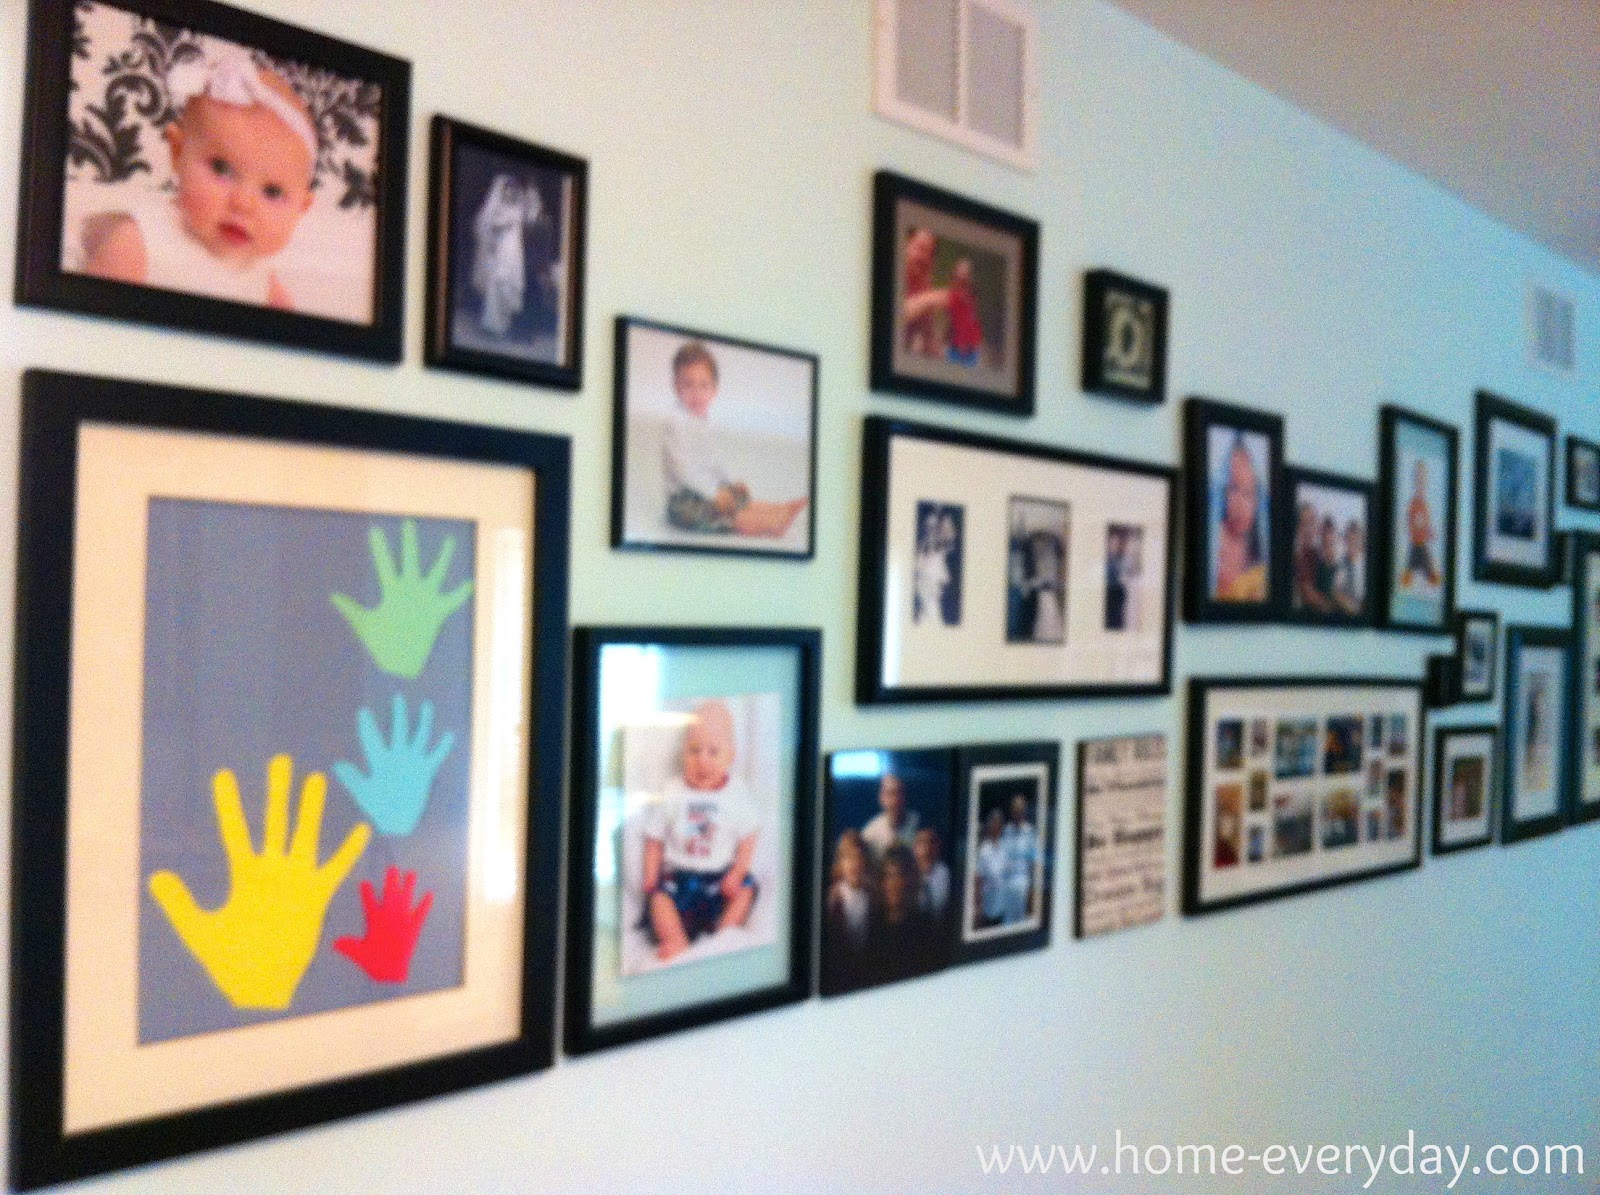
Gather ’em up: The next thing I did, was gather up all the black frames that we owned. A photo gallery doesn’t have to have to have all the same type or color of frame, but Brian and I like uniformity. Even in our previous home we typically only bought black frames so that if we ever wanted to move pictures around the house, nothing would ever look out of place. There are a few exceptions to this rule, but for the most part every picture frame in our home is black.

Shape Up or Ship Out: Once all the frames were gathered up, and I saw what I had to work with, I measured off a twelve foot area of our living room floor and I started laying the frames in that space. I tried arrangements, and I even tried putting them into some kind of shape, but then I tried to think of what kind of furniture might be near the gallery, and the hope is to someday put a long desk there. In the end, I decided that the best arrangement would be to line up the bottoms of all the photo frames in the bottom row and work my way up from there.

Hang ’em Up: Once I decided on an arrangement, I took a picture of the arrangement, and then Brian recreated what I did on the floor up on the wall. He used simple picture hangers, and sometimes would measure the distance between frames to make sure they would all fit. He also used a laser level to line up all the pictures on the bottom.

There you have it. Our family picture gallery.


Root Beer With Me: Easy BBQ Pulled Pork

Before we talk about BBQ, I just wanted you to know I linked up with Hi Sugarplum today to share my ticket stub art project. All of the projects there today only take about an hour to complete. I’ve already browsed around, and after only a few minutes, I have some great projects I want to do. 


Just a little background about me, I often don’t follow recipes exactly, unless of course it is baking. Even then, I sometimes play around with ingredients. This blog has forced me to be better about measurements and cooking times, but overall in my kitchen there is a lot of guesstimation going on. I pretty much eyeball everything. This is how my grandma cooked, and this is how my Mom and sister cook. This is how I learned. So when I’m blogging about a recipe, and I say bear with me on times, measurements, or ingredients, that is what I mean. I’m trying to go on a few pictures, or maybe a few notes I’ve taken on my iPhone or on the back of a napkin, and my memory (which I must say is failing me lately).

Which brings me to this next recipe. I saw this recipe online a few weeks back. It was all over Pinterest, and I saw on several cooking web-sites like allrecipes. I must say this is the easiest recipe I’ve ever “thrown together,” and it is delicious. My youngest devoured it, which means if an almost two year old liked it, I’m pretty sure anyone will like it.


BBQ Pulled Pork

1 Pork Roast (I used a 3 lb pork loin)
Root Beer (I used two 16 oz bottles)
BBQ Sauce to taste (I used Sweet Baby Ray’s)
8 sandwich or hamburger rolls

In slow cooker, place pork roast and pour root beer over. Cook on high for 4-6 hours depending on size of roast.


When cooked, transfer roast to a bowl and shred by pulling apart gently with two forks. Add bbq sauce to taste and serve on rolls.

See? Isn’t that easy?

Six Week Round Up: Busy Busy

Monday marked the start of my 6th week blogging, and I have to say I am enjoying it way more than I ever thought. It is definitely a way for me to “talk” to adults as well as showcase some of the things we do with the kids, our home, and in the kitchen.

Thank you so much to those of you that read. I have only received positive feedback, and I totally appreciate it. It makes me want to share more with you. So stay tuned for more kids crazy antics, home projects, and cooking adventures. Please keep reading because my to do list is forever long, and your reading gives me the motivation to keep going.

Blogging also has the added bonus of being a scrapbook for us to look back. So, here is a round up of our last six weeks. Crazy huh?
We have definitely been enjoying summer with the kids and getting to try some new things in our neighborhood like the fishing derby, soccer camp, and the new gelato place.
We’ve also been enjoying some relaxing time at home enjoying some impromptu play time or the fake Olympics.
Let’s not forget time spent with family.
And the projects Brian and I have been working on around here like our vegetable garden that I talked about here and here.
Not to mention the painting projects that I’m constantly doing in Brian’s parking spot of the garage. So far, I’ve fixed up our mailboxrefinished some chairs, painted an old bookshelf, and painted some nightstands. By the looks of things around here, maybe I should open a furniture refinishing shop.
There have been some smaller projects we’ve tackled like the kids’ art display, my ticket stub art, or replacing the kitchen light fixture as well as the HUGE project of hosting a garage sale.
But let us not forget la piece de resistance, the gorgeous plank table Brian built and I stained.
So far this summer too, I’ve been cooking and baking up a storm (too bad it isn’t storming for real around here; the drought has wrecked havoc on my garden). Here are links to all the amazing recipes that I’ve tried. Luckily, they all have been winners, but trust me I’m sure there are several mishaps to come, and I can share those too.
As you can see we are busy around here. Thank you again for reading and the positive feedback! It really does brighten a gal’s day.

Soaking Up Summer

Almost everyone around here is back at school or about to start again. My kids, on the other hand, still have a few more weeks of summer left. I definitely have mixed emotions about it. I’m excited for them to meet new friends and be learning new things, however, I’m really going to miss having three kids home with me full time.

Sometimes I’m sure I’ll be grateful (going to the grocery store will be easier), but I think that overall I will miss being able to do things at our own pace (which this summer was very slow).

This past weekend, we went for a walk after dinner to the gelato place that recently opened in town. We took our time strolling up there, and took the long way home with a little bypass to the park. The kids went to bed a little later than normal, but that’s what summer is all about, right?

s


Hope you are enjoying the rest of summer!

Making Up Cookie Recipes: White Chocolate, Oatmeal, and Blueberry Cookies

Sometimes I get bored. I bet you are wondering how on earth that could happen with three kids, but it happens. There are only so many re-runs of Big Bang Theory a gal can watch before I decide to get off the couch and do something fun.

I know I’m a nerd. For two reasons A.) I admitted that I watch Big Bang Theory and B.) Doing something fun means baking cookies. I’m sure there are even more reasons than that, but those two are what I’m going with for today.

Anyway, I wanted to make some Smart Cookies, but I was lacking some of the ingredients, so this is what I made with what I had. I have since made them a few more times, and my friends like them so I think it is safe to post the recipe.

Here is my recipe for White Chocolate, Oatmeal, and Blueberry Cookies. (My next project should be to think of a better name for these).

1-1/2 cups all purpose flour
1 tsp baking soda
1 tsp ground cinnamon
1/2 tsp salt
2 sticks of unsalted butter softened at room temperature
1 cup white granulated sugar
1/4 cup packed light brown sugar
2 large eggs
2 tsp vanilla
the zest of one large lemon
3 cups old fashioned oatmeal
1 – 12 oz bag of white chocolate chips
1 – 4 oz bag of dried blueberries

Preheat oven to 350 degrees.

Line baking sheets with parchment paper and set aside.

In large bowl sift together flour, baking soda, cinnamon, and salt. Then set aside.

Using a mixer or beaters, cream together butter, white sugar, and brown sugar until well incorporated. Add eggs, vanilla, and lemon zest and mix until combined. Then slowly add the flour mixture until its incorporated. Stop the mixer or beaters and add oatmeal, white chocolate chips, and blueberries. Then slowly mix the ingredients for a few seconds until everything is well combined.


Next, scoop about 1 tablespoon of cookie dough onto the parchment lined cookie sheets about 2 inches apart. Bake for 10 – 11 minutes. Remove from oven and transfer carefully to a cooling rack. Makes about 4 1/2 dozen cookies.

Now, I will watch Big Bang Theory while I eat some cookies.

This post has been linked up at Serenity Now as a part of the Weekend Bloggy Link Up over there. 


Shazam: Painting Nightstands

Brian and I desperately need bedside tables. Right now we are using an old night table that is very small, and a TV Tray. They serve their purpose, but aren’t really doing anything to make our room look pretty. They are blah.

A few months ago, my Mom gave me these two tables. I know what you are thinking, these tables are pretty blah too. Wait for it.


The first one is a printer table. The idea was to put your printer on the table and your paper in the little shelf underneath. The second table, was a table that has been around for a long time. I think it belonged to my grandmother at one time, and then was in my sister’s bedroom when we were growing up. The top of this table is actually leather.
I decided to make these our nightstands. I know they look nothing alike, and from totally  different eras (as in one was made for a computer and the other was around before computers even existed). Brian, however, thought they were perfect as they are both the perfect height for the bed, and they wouldn’t cover the vents on either side of our beds (Brian tends to be a little finicky about that).
So this is what I had to work with. It was ok that they didn’t match perfectly, and I was eager to paint them. Once they are the same color they will be more unified. Especially after I put some cute matching lamps on top of them too.
They both have some pretty intricate detail to them, so I was hesitant to use a brush to paint them, so the logical step was to spray them. I do have an electric paint sprayer, but I figured to dirty that thing up and to buy a gallon of paint would be more of a pain and a little expensive for two small tables. So I went to Home Depot, and found this.
Rust-oleum’s Universal Paint and Primer in one in a nice Glossy White was the perfect solution to the problem of these tables. I roughed both of the tables up a little bit with some fine grit sandpaper. Both tables already had some kind of glossy finish to them already and I wanted to be sure that the paint would adhere to the tables. Then, I taped the leather top of the dark wood table. I’m thinking I will recover it with some cute fabric or something.
Outside in the driveway with a drop cloth down, I sprayed the tables with fast, long, and even strokes. This is what the tables looked like after one coat.


This is what they look like after the second coat.
When Brian saw them, he said, “SHAZAM.” Which is a good thing. I hope.
Now, I’m almost done. I have to let them sit outside for a bit and make sure they don’t smell too bad before bringing them in the house. Also, I still need to find some fabric.
Stay tuned for the finished product.

Flashback Friday: Living Room/Dining Room

This week’s installment of Flashback Friday covers the Living Room and Dining Room. These rooms required a coat of paint for move in purposes, but there are some plans that we have for the future of these rooms.

I think our eventual goal would be to make the Living Room more family friendly. One of the projects that is coming soon is a desk that Brian will be building (we already have the lumber).

I have one before picture, but this level consisted of more mustard yellow. You cannot tell from this picture but we are talking French’s Mustard. Also, all the walls and some of the trim had marks and dings from the previous owners.

Then with a little help, I chose the perfect shade of blue and started painting. These rooms flow into each other so I knew I would have to choose a color that I really liked as it would be everywhere. I didn’t want to go the neutral route as a lot of the furniture we had planned for the room, was pretty neutral. Also, I wanted to play off all the light these rooms get. I wanted something clean and bright so we chose Behr Aqua Breeze (I apologize for the iPhone photos. I didn’t know I’d be writing a blog when I took these).


So here is our entrance, living room, and dining room after our personal touches. We added a picture gallery, a dining room table that Brian built and I stained, and lots of  other furniture that we already had on hand. Here is our progress thus far.


Minestrone Soup: It Can Cure Anything

So, I have a summer cold. A bad one. Sicker than a dog. Thought it was allergies, but yesterday I realized allergies don’t come with a fever.

Brian’s working long hours, so I have had to rely on the kids to help out a little more around here, and well you can imagine how that is going.

After sitting on the couch for many hours reading books with the kids and watching shows and offering to be the judge for their own version of the Olympic games while sneaking in a snooze or two, I finally felt like maybe I should eat something.

I scrounged around the house, and I had everything to make Minestrone Soup. I don’t know if it is a true Minestrone Soup, but that is what I call it. I made up this recipe last Winter when we were all suffering from various illnesses, and after the soup we were all feeling a little better. It has become a Top 5 Go To Dinner around here.

Basically, it is a bunch of veggies, and this:


This broth is already infused with a ton of flavor.

So here is the recipe. Bear with me on measurements as A.) I’m still not feeling 100% and B.) It is  hard to mess this recipe up

Erin’s Minestrone Soup (weird having an Irish name in front of Minestrone, oh well)
1 tbsp olive oil
1 tbsp butter
1 medium onion chopped
3 or 4 carrots chopped
2 or 3 celery stalks chopped
1 medium zucchini chopped
1 large potato or several small potatoes chopped
3 cloves of garlic minced
1 32 oz box Progresso Tuscany Chicken Broth (if you cannot find it, add any of your favorite herbs to the soup)
1 28 oz can of diced tomatoes drained
1 14 oz can of cannellini beans drained and rinsed
1 cup of cooked short cut pasta (this is optional, I didn’t have any yesterday)
Salt and Pepper to taste


In a large soup pot over medium to medium high heat add olive oil and butter. When butter is melted add onion, carrots, celery, potatoes, zucchini, and garlic cook stirring occasionally until vegetables are just tender. This should take about 7-10 minutes. (This is when you can season the soup, go easy on the salt unless you are using a low sodium broth).
Add chicken stock and bring to a simmer. Lower heat, and then add tomatoes, beans, and pasta and cook until heated through, about 4 minutes. Serve immediately.
Above is a picture of the “sick tray.” This is the tray I use to bring to bedrooms when kids are sick around here. Soup, french bread, green tea, and lemon. Once the kids were in bed, I grabbed my tray, turned on crummy TV shows, and snuggled on the couch.
I’m feeling a little better.


Olympic Fever

Has anyone else been glued to their TV’s every day for the past 11 days like we have? We have a dangerous Olympic Fever going on at our house. I will be going through some serious withdrawal when this is over.

The kids are also loving the Olympics. Instead of just watching though, they have begun to pretend they are real Olympians, and have participated in several of the events.

So far we have seen.

Fencing.


Rowing.


Swimming.

I wonder if we will ever see them do the real thing at the real Olympics.

Top Five Go To Dinners

As I try to get ready for the impending school year (no worries, this is not a school post, I am so not there mentally yet as I try to enjoy the last of summer), I was thinking of some “go to” dinners that I go to when the weather gets cool, and the time to actually cook gets shorter.

I decided to come up with a criteria for a “go to” dinner. A “go to” dinner should be able to be prepared in a short amount of time or can be put in a slow cooker, requires not a lot of clean up, has great leftovers, and has an easy vegetarian option. I asked Brian some of his favorites, and he was pretty quick to rattle them off (apparently these are his favorites), and I didn’t have to go digging through my recipes.

Here is my list of TOP 5 GO TO DINNERS

1.) Enchiladas: The recipe I use for chicken enchiladas is easy and the leftovers are amazing, and I think is Brian’s absolute favorite so that is why they made it to the number one spot. For a vegetarian option, you could just do beans and cheese.


2.) Chili: I use a Rachael Ray recipe for chili which I sometimes doctor up with a few additions and serve with corn bread. A double batch can be made and frozen for a night when you have no time to cook. For vegetarians, I’ll use meatless crumbles (I did this once and Brian didn’t know the difference).

3.) Minestrone Soup: Again, this recipe is versatile and can be served with bread or even sandwiches for a quick weeknight dinner. Brian’s favorite thing is to bring the leftovers for lunch. (Someday I will post my recipe for minestrone soup, the key is the broth shown below). *Update: Here is the link for the Minstrone Soup recipe


4.) Spaghetti and Meatballs needs no explanation.


5.) Frittata: Zucchini Frittata is awesome for a quick weeknight dinner, and also can be adapted with any veggies and cheese. 


So there you have it, 5 Go To Dinners. Maybe some of these will make it into your cooking rotation.

*Update: I linked this post up with Mom of 6 and Moments that Define Life. Both feature a listable life series each week.