When I was in high school, yes, I was a member of the Math Club. Yes, I went to Math Competitions (my specialty was Algebra II, Geometry, and Trigonometry), and yes, I know you’re jealous.
I also know what you are thinking, “how can someone so obviously cool, have been a part of the Math Club?” Well, I will tell you, there were cool kids in the Math Club too (ok, maybe not, but in my case there were some pretty cute nerdy boys that I thought would be impressed with my mad Math skills).
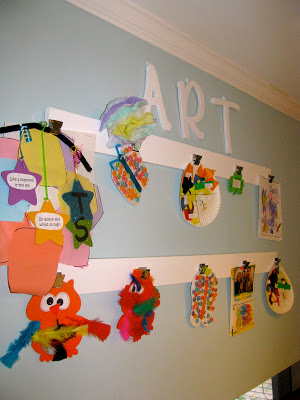
I spent more time measuring out where the clips should be and measuring to make sure it was exactly centered on the wall, than I did putting it together. It was a very simple and inexpensive project, and it has come in very handy to hold all the kids’ beautiful masterpieces. I only had to buy the wooden board, clips, and letters. Everything else I had on hand.
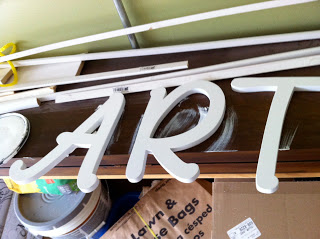
I started out at Home Depot and purchased a piece of pre-primed board (this could easily be done with scrap wood), and had the nice people at Home Depot cut it in half (in case you didn’t know Home Depot will cut wood for you). Then, I bought some letters to spell out ART at JoAnne Fabric, and got some heavy duty metal clips at Staples.
After all the shopping, I was ready for a little bit of painting and assembly. I painted the planks and letters with some leftover Behr Decorator White Paint that I had just used on some other projects like the chairs and bookcase I had just painted. I let all this dry for about 24 hours.
Then, the next day during naps, I started to assemble. I first measured the back of the planks of wood and the letters, and attached a hanging hook on each end of the plank and one on the back of each letter. I made sure to measure the exactly equidistant from each end of the plank so they would be easier to hang.
Then, I flipped the boards over and measured where I wanted to put the clips. This was hard because I wanted them to be evenly spaced, but I also wanted to leave enough room so that I could hang different sized papers or projects. Once I decided where I wanted the clips, I hot glued them to the planks.
Hanging time = more measuring. I first measured and hung the boards then measured and hung the letters. My tape measure got quite the workout with this project, but it was totally worth it.
Look at all the awesome artwork the kids hang from the wall.
It is in the kitchen right above where we eat breakfast and lunch so it makes for a great discussion piece as well as a great way to show the kids we are proud of the work they are doing.


2 comments
How stinkin adorable is your kids' artwork!! I'm a math dork too and got similar gratification from all the measuring when I made a coat rack a while back. Glad to know I'm not alone! 🙂
Thanks, Katie! They absolutely love all things crafty. (Hmm, I wonder where they get it.) Glad I'm not the only Math Nerd out there.
Take care.