
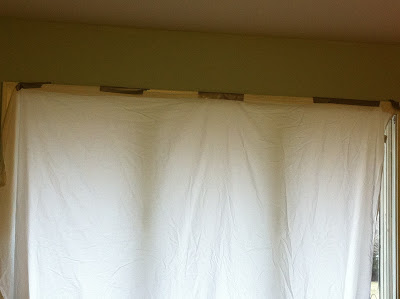
Ok, now that I have got you singing some Brittany Spears circa 2000. I will explain how I did it again. Some people wanted to know where the curtains in our Master Bedroom came from. So I dug up some pictures on my iPhone from when we first moved in, and here is the very long story.See our hillbilly make shift curtain made of a sheet and duct tape. Classy. Can you believe at one time, this was my window treatment solution?

Awhile back, right before we had moved into our house, I ran out to Lowe’s and purchased three roller room darkening shades for the three bedrooms. We were doing so much work to the upstairs, we needed something since purging the previous owners disgusting filthy window treatments that probably hadn’t been dusted since 1975. We were also in a hurry because we wanted to get in the house. So this was the solution. They were easy to install, and they were room darkening which is a bonus when you have three little ones who nap every day. I also figured they could be easily covered up with curtains, roman shades, balloon curtains, or valances which I was planning on putting in the rooms as a decorative treatment. You know when I had nothing better to do. So for convenience sake, I got the inexpensive shades to hold us over until I could cover them all up with something more attractive. I only spent around $30 for each which is a small price to pay for privacy and room darkening.
So, our shades were purchased and with some help from our friend Scott were installed in no time. They worked beautifully, well, two of them worked. The ones in the kids’ rooms were fine, THANK GOODNESS, naptime was saved. However, in the master bedroom the darn thing wouldn’t snap back up in the morning, when we wanted that beautiful natural light that is so prevalant in our new home. We tinkered, we fiddled, we did everything including talking to the people at Lowe’s (who were very friendly) to try and figure out how to get it to work. Long story short… er long, it still didn’t work, so I had to exchange it.
I went back to Lowe’s, and the woman at the returns counter told me the only way I could “exchange” it would be to return the old shade, and purchase a new one. Since, the shades have to be trimmed to fit the window, so I figured it was no big deal. I returned the old shade, and then walked down the window treatment aisle and tried to find a replacement $30 shade, and much to my surprise, they were no longer $30, they were now $50! I know this sounds ridiculous (you know I’m thrifty right?), but I refuse to pay $50 for something that I could buy for $30 just three weeks ago. Especially something that I was planning on covering up with curtains anyway. So I came home shadeless, much to Brian’s annoyance.
It came to covering our window with something, and by something I mean a sheet and duct tape. Ugh. Martha Stewart would be again be appalled (just like this). So, the search for an inexpensive yet beautiful room darkening window treatment began. I had narrowed it down to curtains, as I think they have a more sophisticated look, and that is kind of the look we are going for. Because of this, I knew I would have to make them myself to save some money, and to look just right with our bedding, new headboard, and freshly painted room.
That’s when I remembered my cloth napkin cafe curtains, and voila, I did it again. I used something that isn’t supposed to be used for curtains, and I made it into curtains with those little ring clips. I found shower curtains on clearance at Target. They coordinated with our color scheme, they had a pattern that wasn’t too feminine, and did I mention they were on clearance? I bought some room darkening fabric at JoAnn Fabrics for about $2 a yard. I cut it to size. Then I clipped clipped room darkening fabric to the back of the shower curtains before hanging them. So, I did it again. Another set of no sew curtains. They are a little short, but you cannot even tell with the headboard and bedside tables. Jenky no more!


Thank goodness the sheet and duct tape are gone!


