Tag

curtains

Buffalo Check is my New Obsession: Or How I Made No Sew Cafe Curtains (Again)

After adding the new kitchen countertops and installing a subway tile backsplash, I decided that I liked the neutrality of our kitchen. I liked that everything was starting to look more clean and fresh and could kind of be tweaked with some flowers or dish towels to match the seasons.

Backsplash without Thinset 1

Rather than add a pop of color with a rug or curtains, I decided to go with a black/white/gray motif. So, I found a few black and white fabrics that I liked, and went with it.

Kitchen Curtains Black and White Fabrics COLLAGE

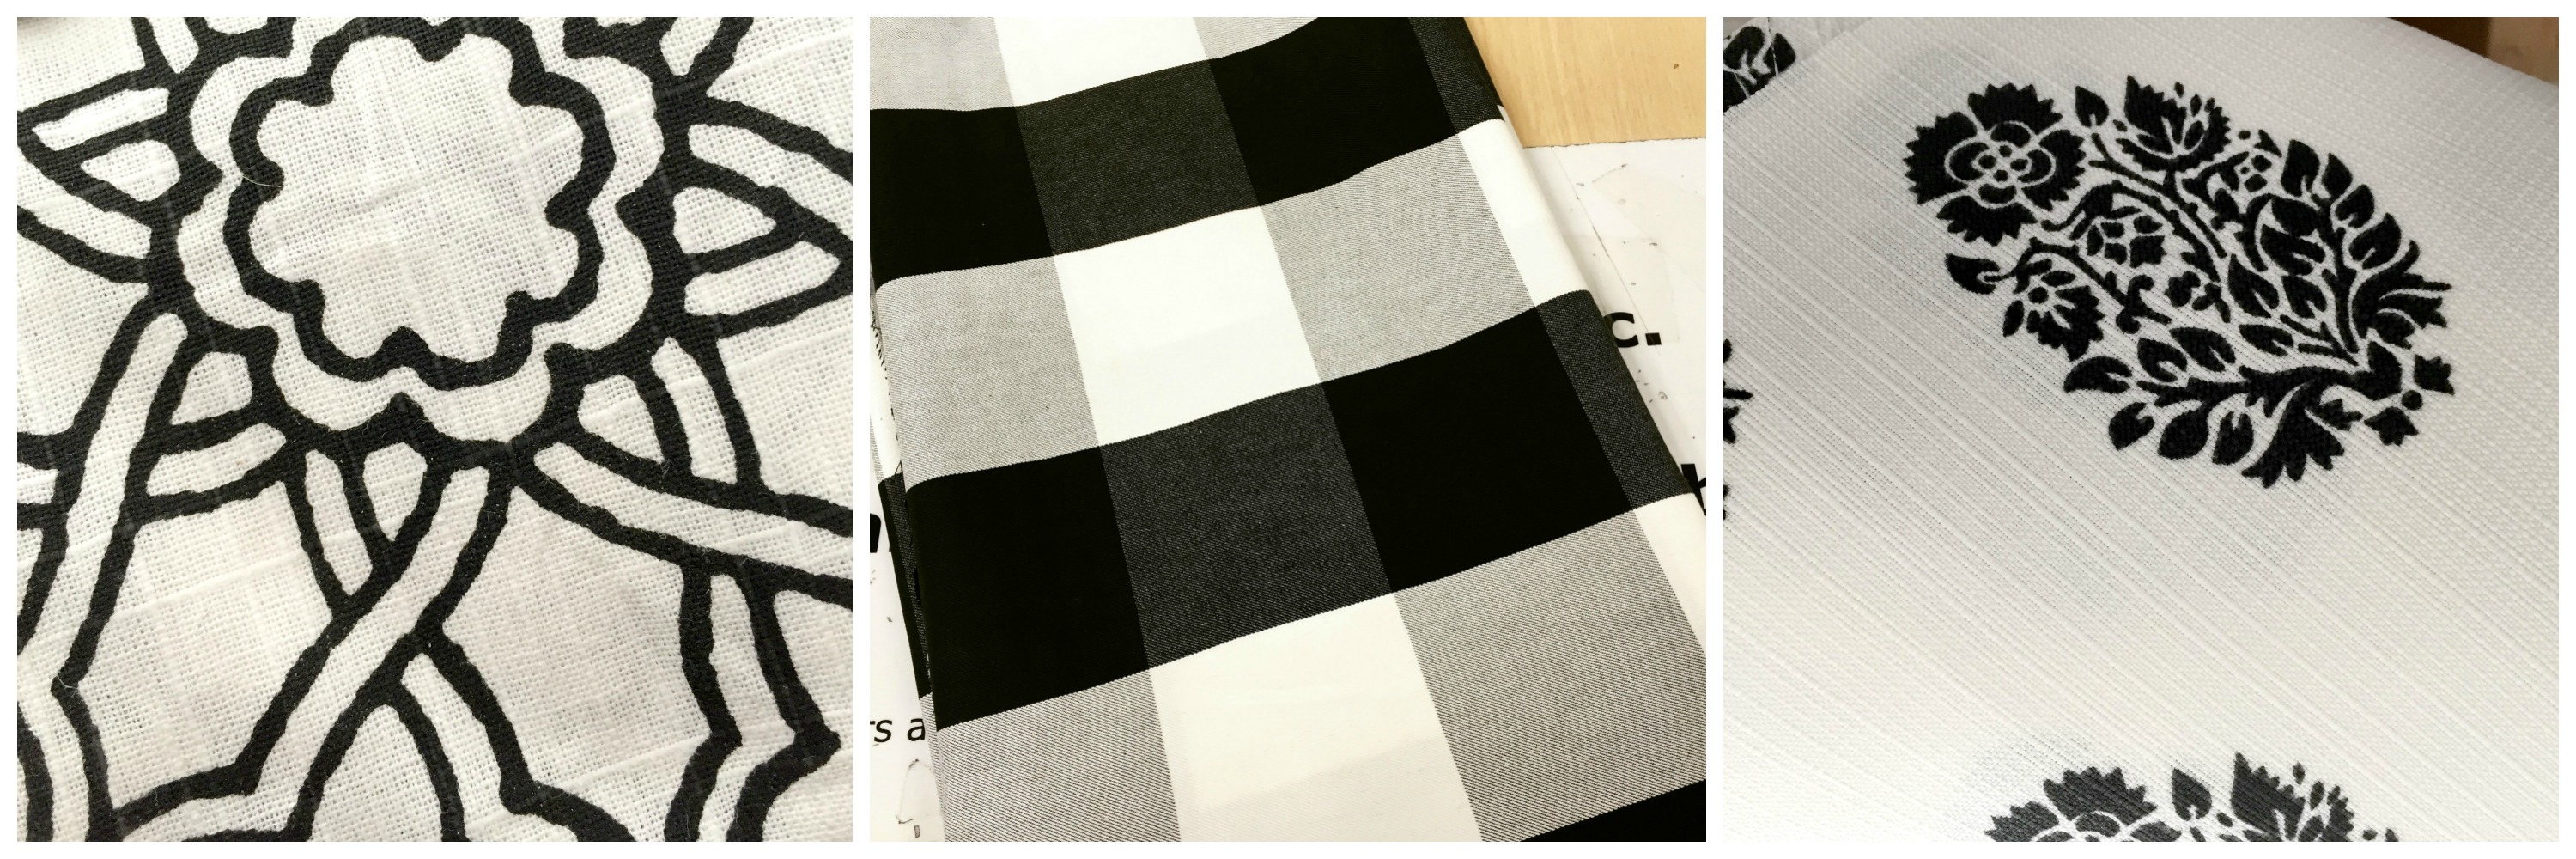
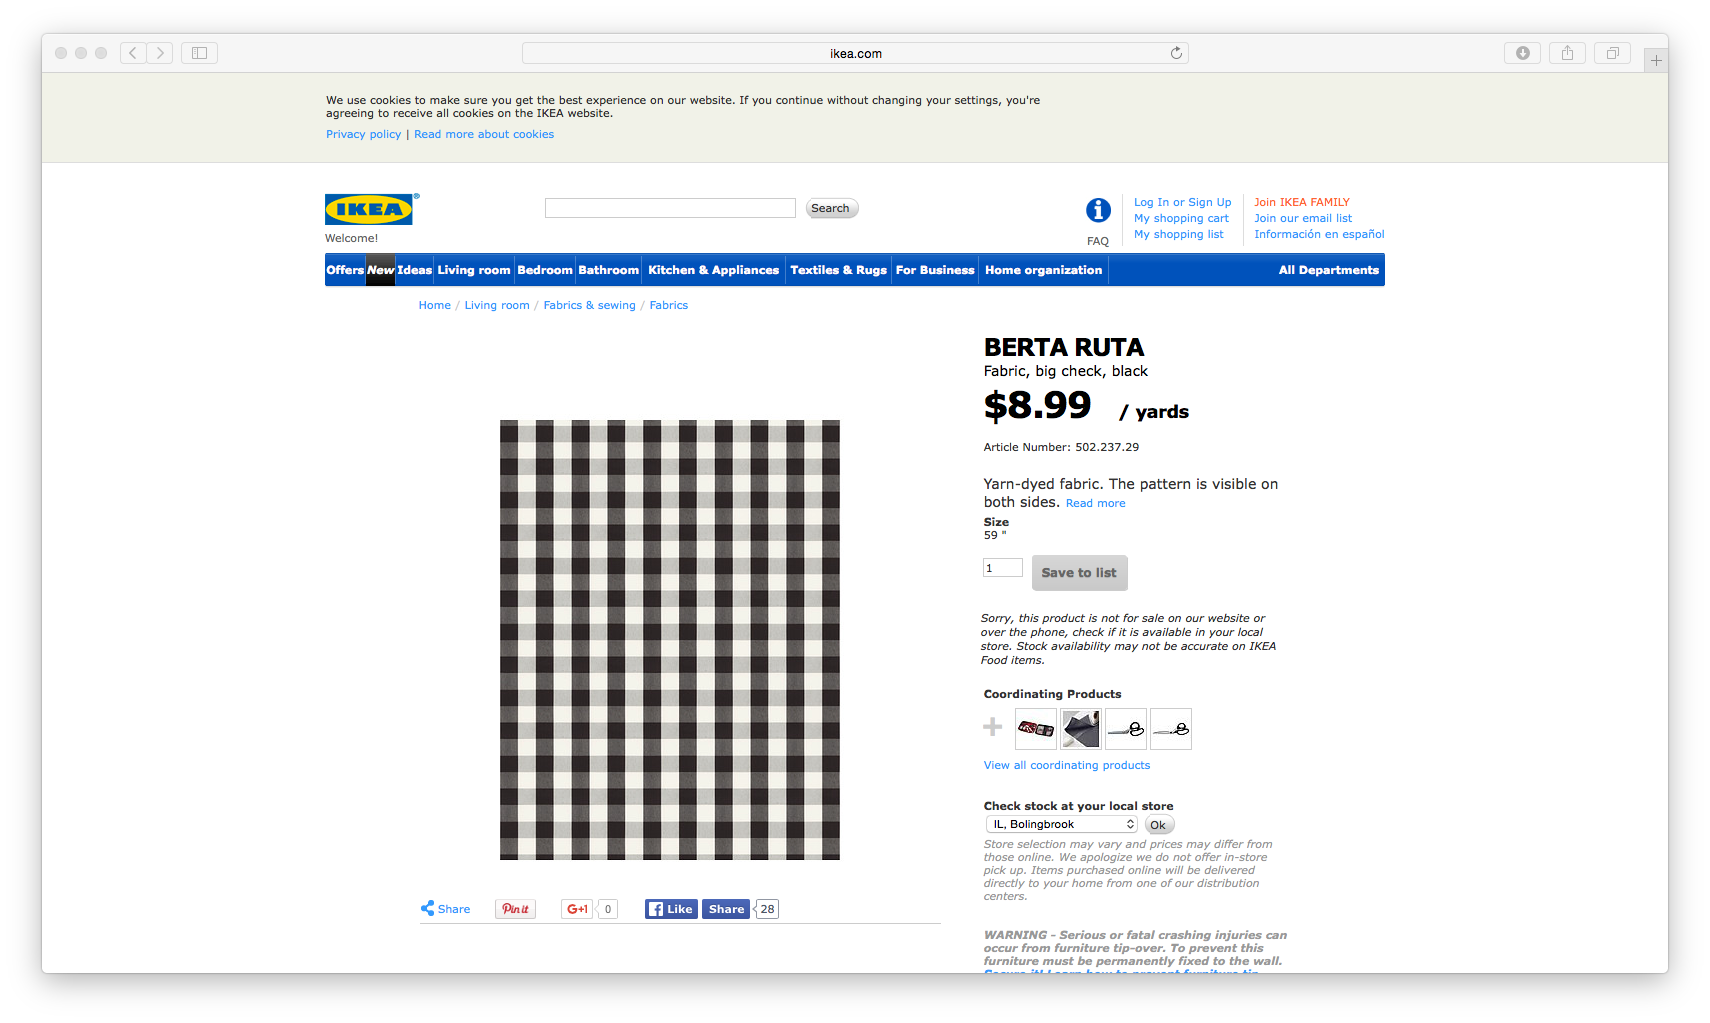
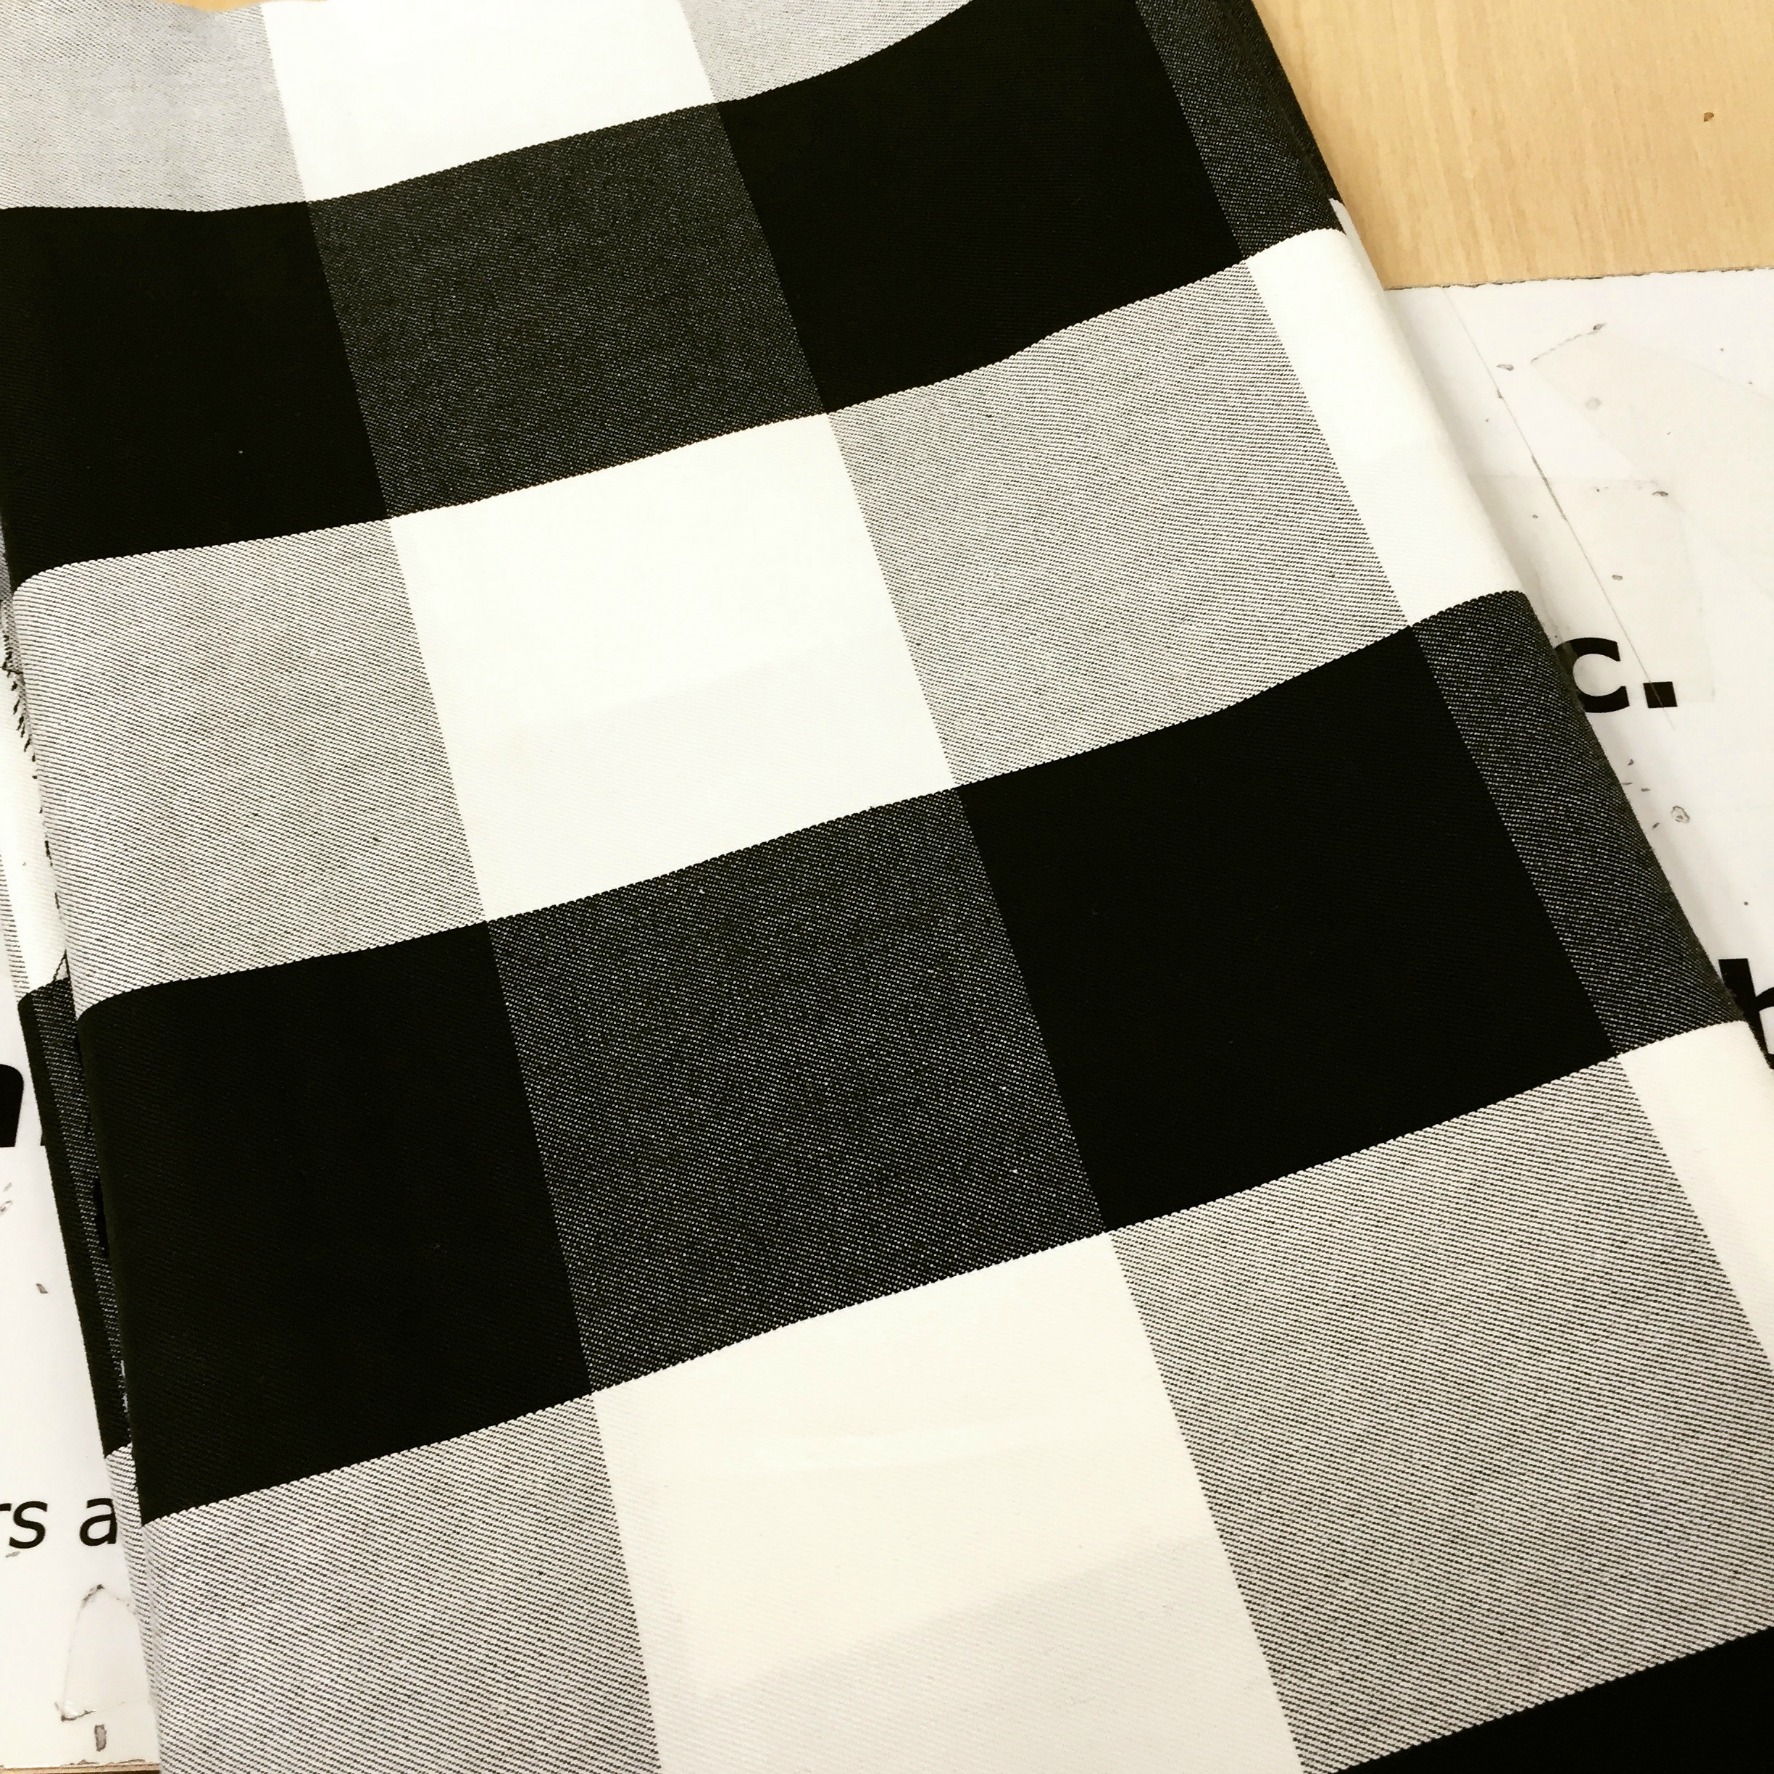
Ok, fine what really happened was that I saw this buffalo check fabric at IKEA, fell in love with it (and the price) and had to have it!

Kitchen Curtains Black and White 4

I thought of the “neutral theme” idea later when I realized that everything goes with black and white buffalo check.

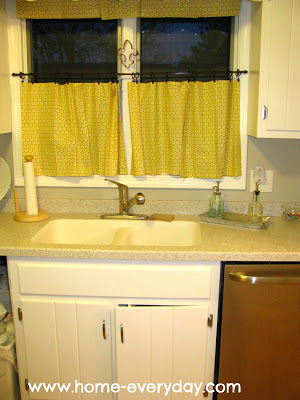
If you remember, my old cafe curtains were made from cloth napkins. Which is still an awesome idea and for a non-sewer (or someone who cannot make up her mind) and I highly recommend it to anyone wanting to have a quick, easy, and cheap window cover solution.

Kitchen-Progress-2


That buffalo check fabric though.

Kitchen Curtains Black and White 3

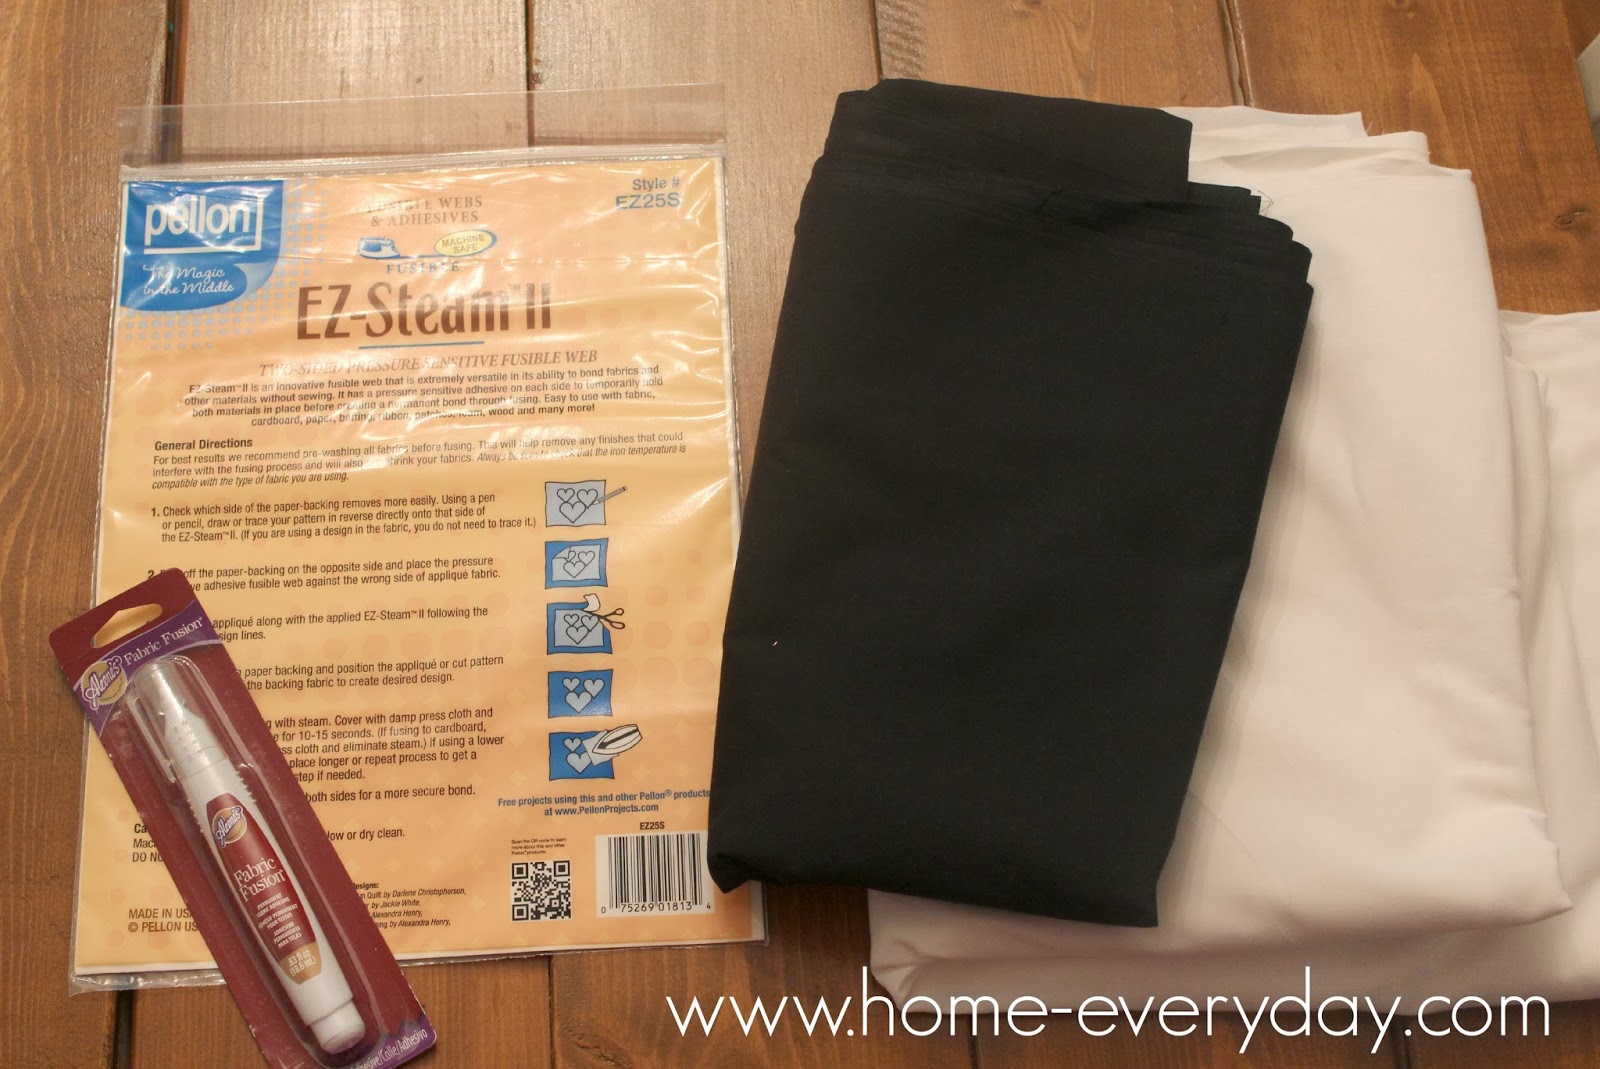
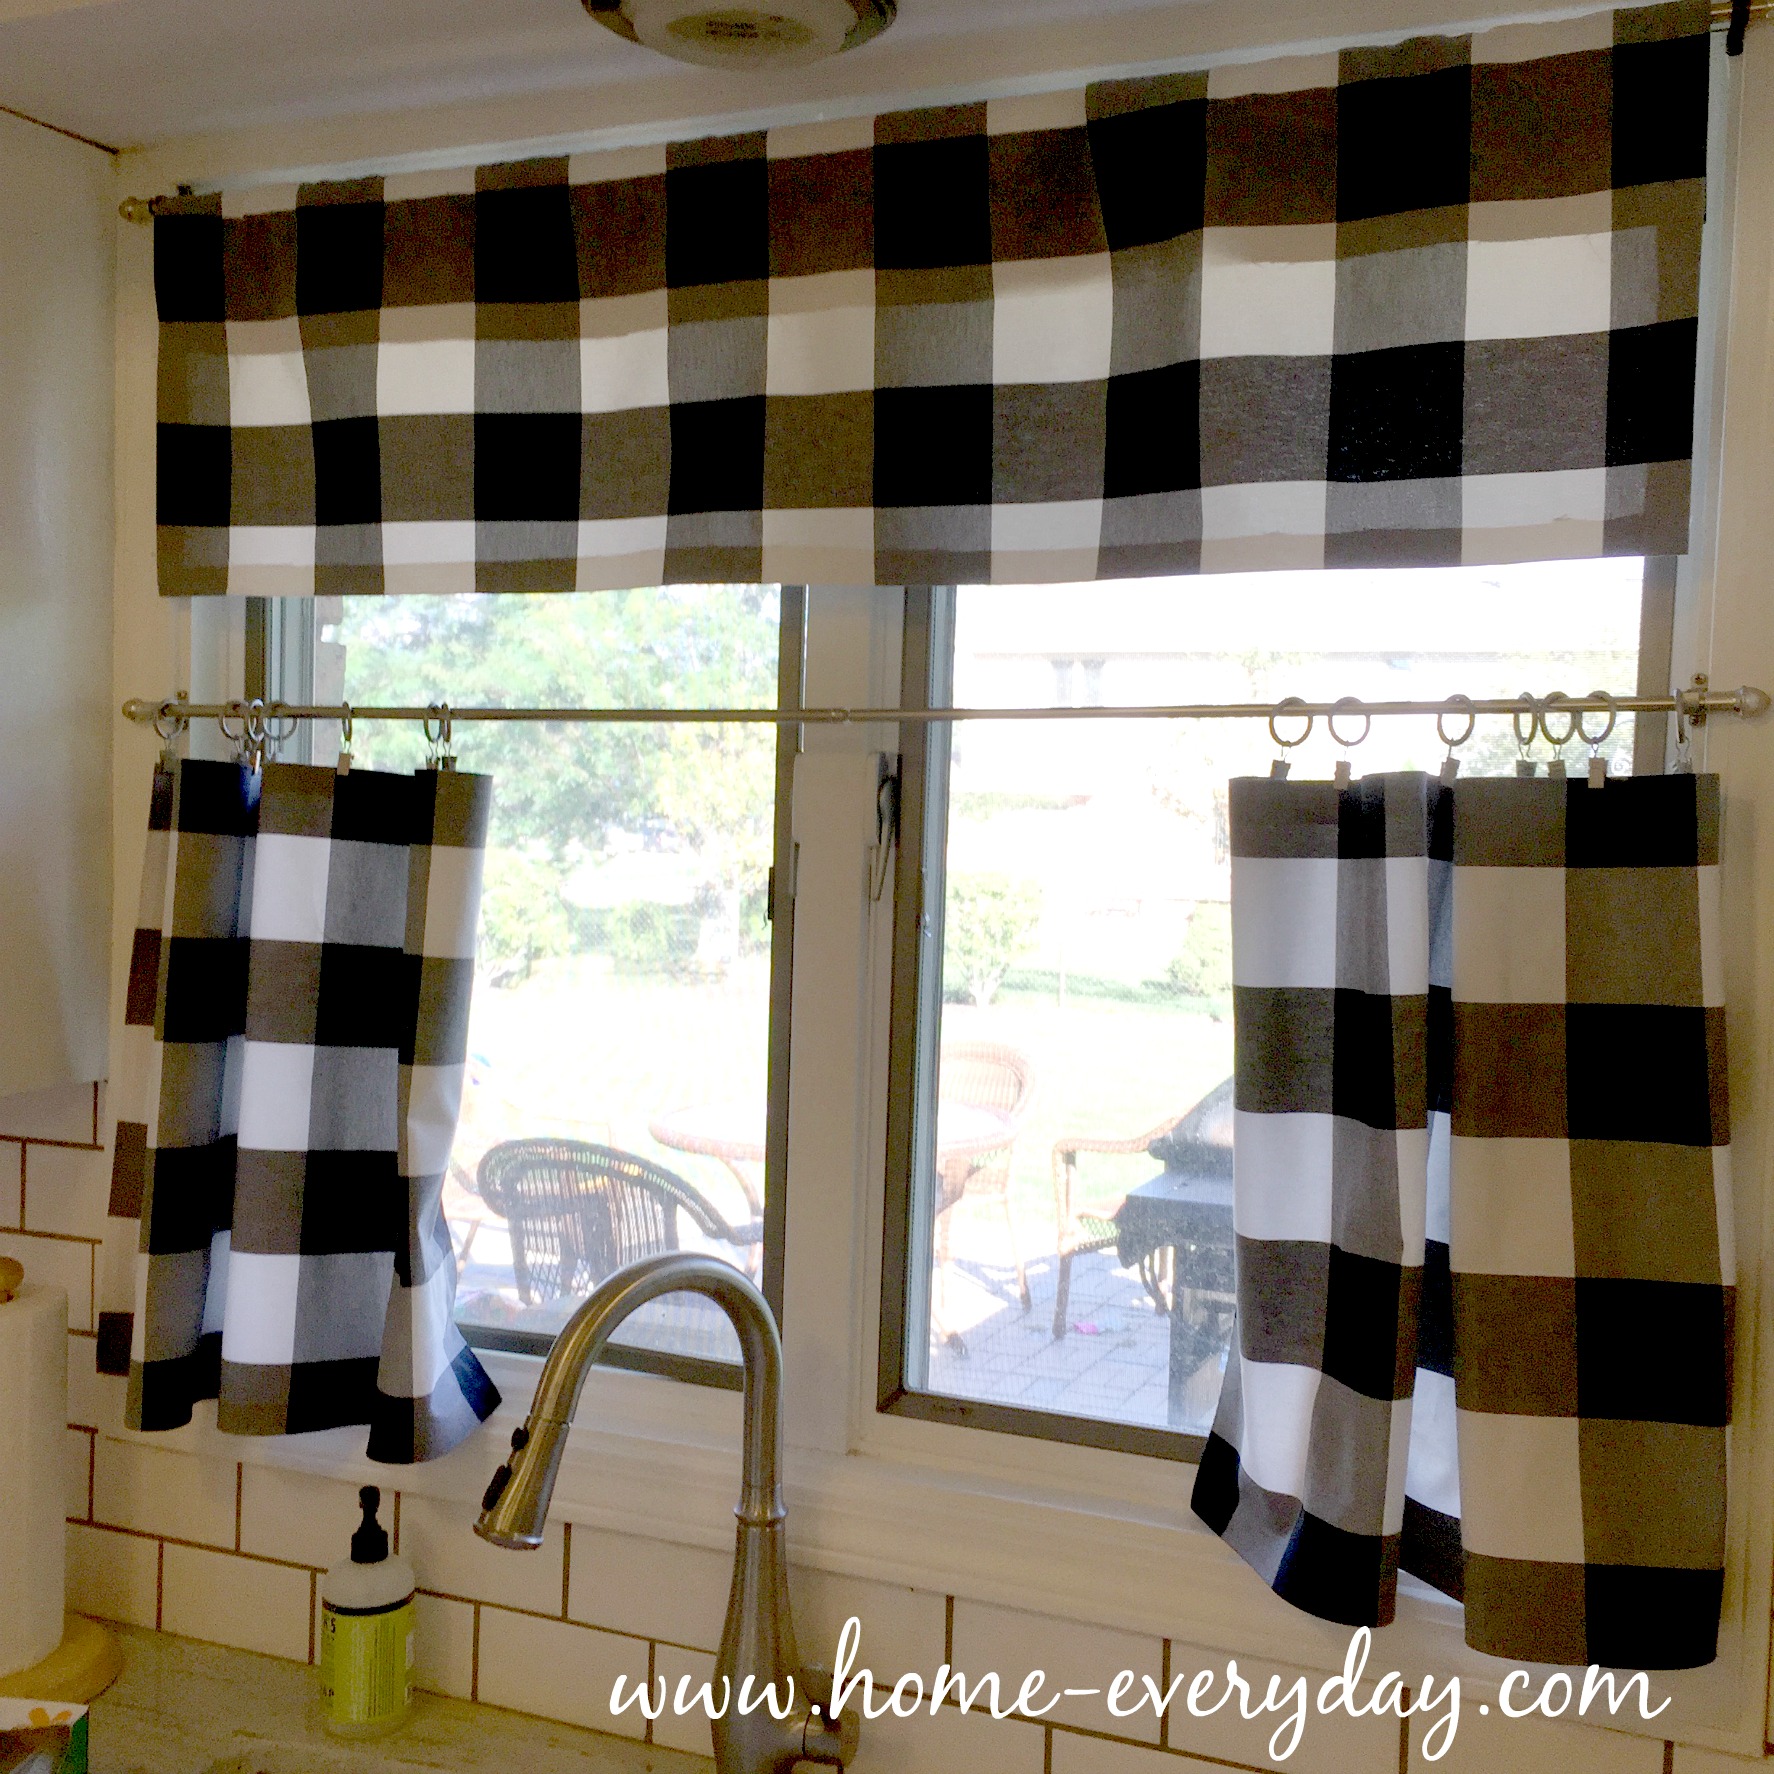
So, I pulled up my big girl pants, and got out the sewing machine iron and extra strength hem tape. I made the curtains similarly to when I made them for Coco’s room a few years back. However, I also got super fancy and made a valence too!

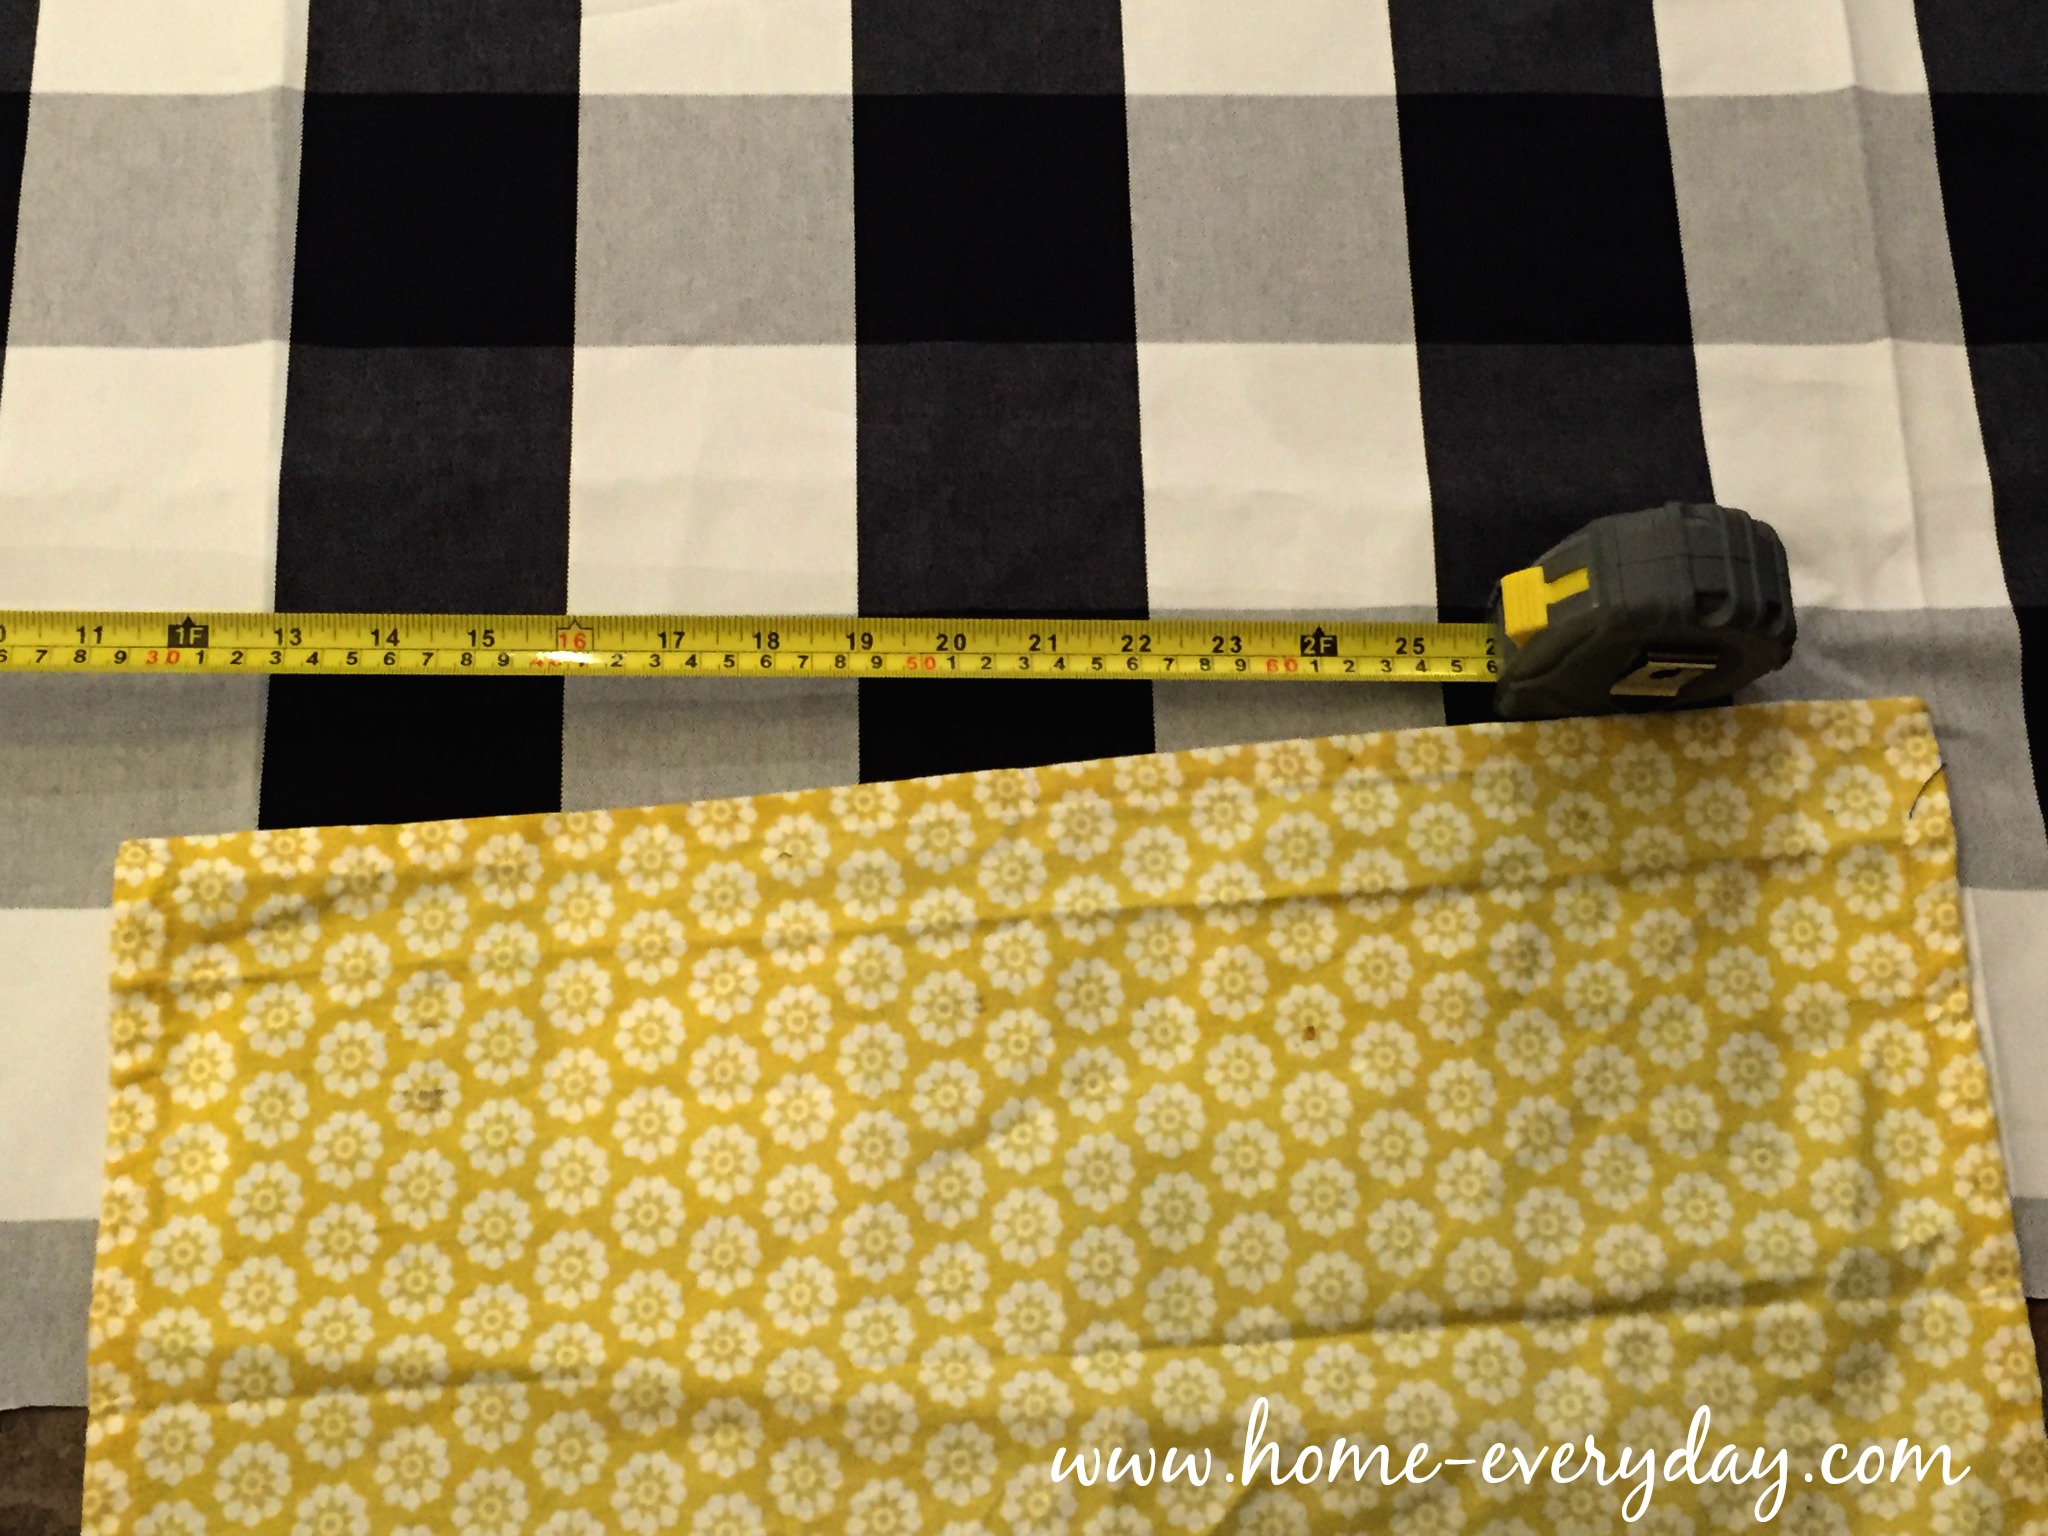
Using my previous cloth napkins curtains as a template, I measured.

Kitchen Curtains Black and White 5

I ironed while watching Brooklyn 99 (Captain Holt, am I right?)
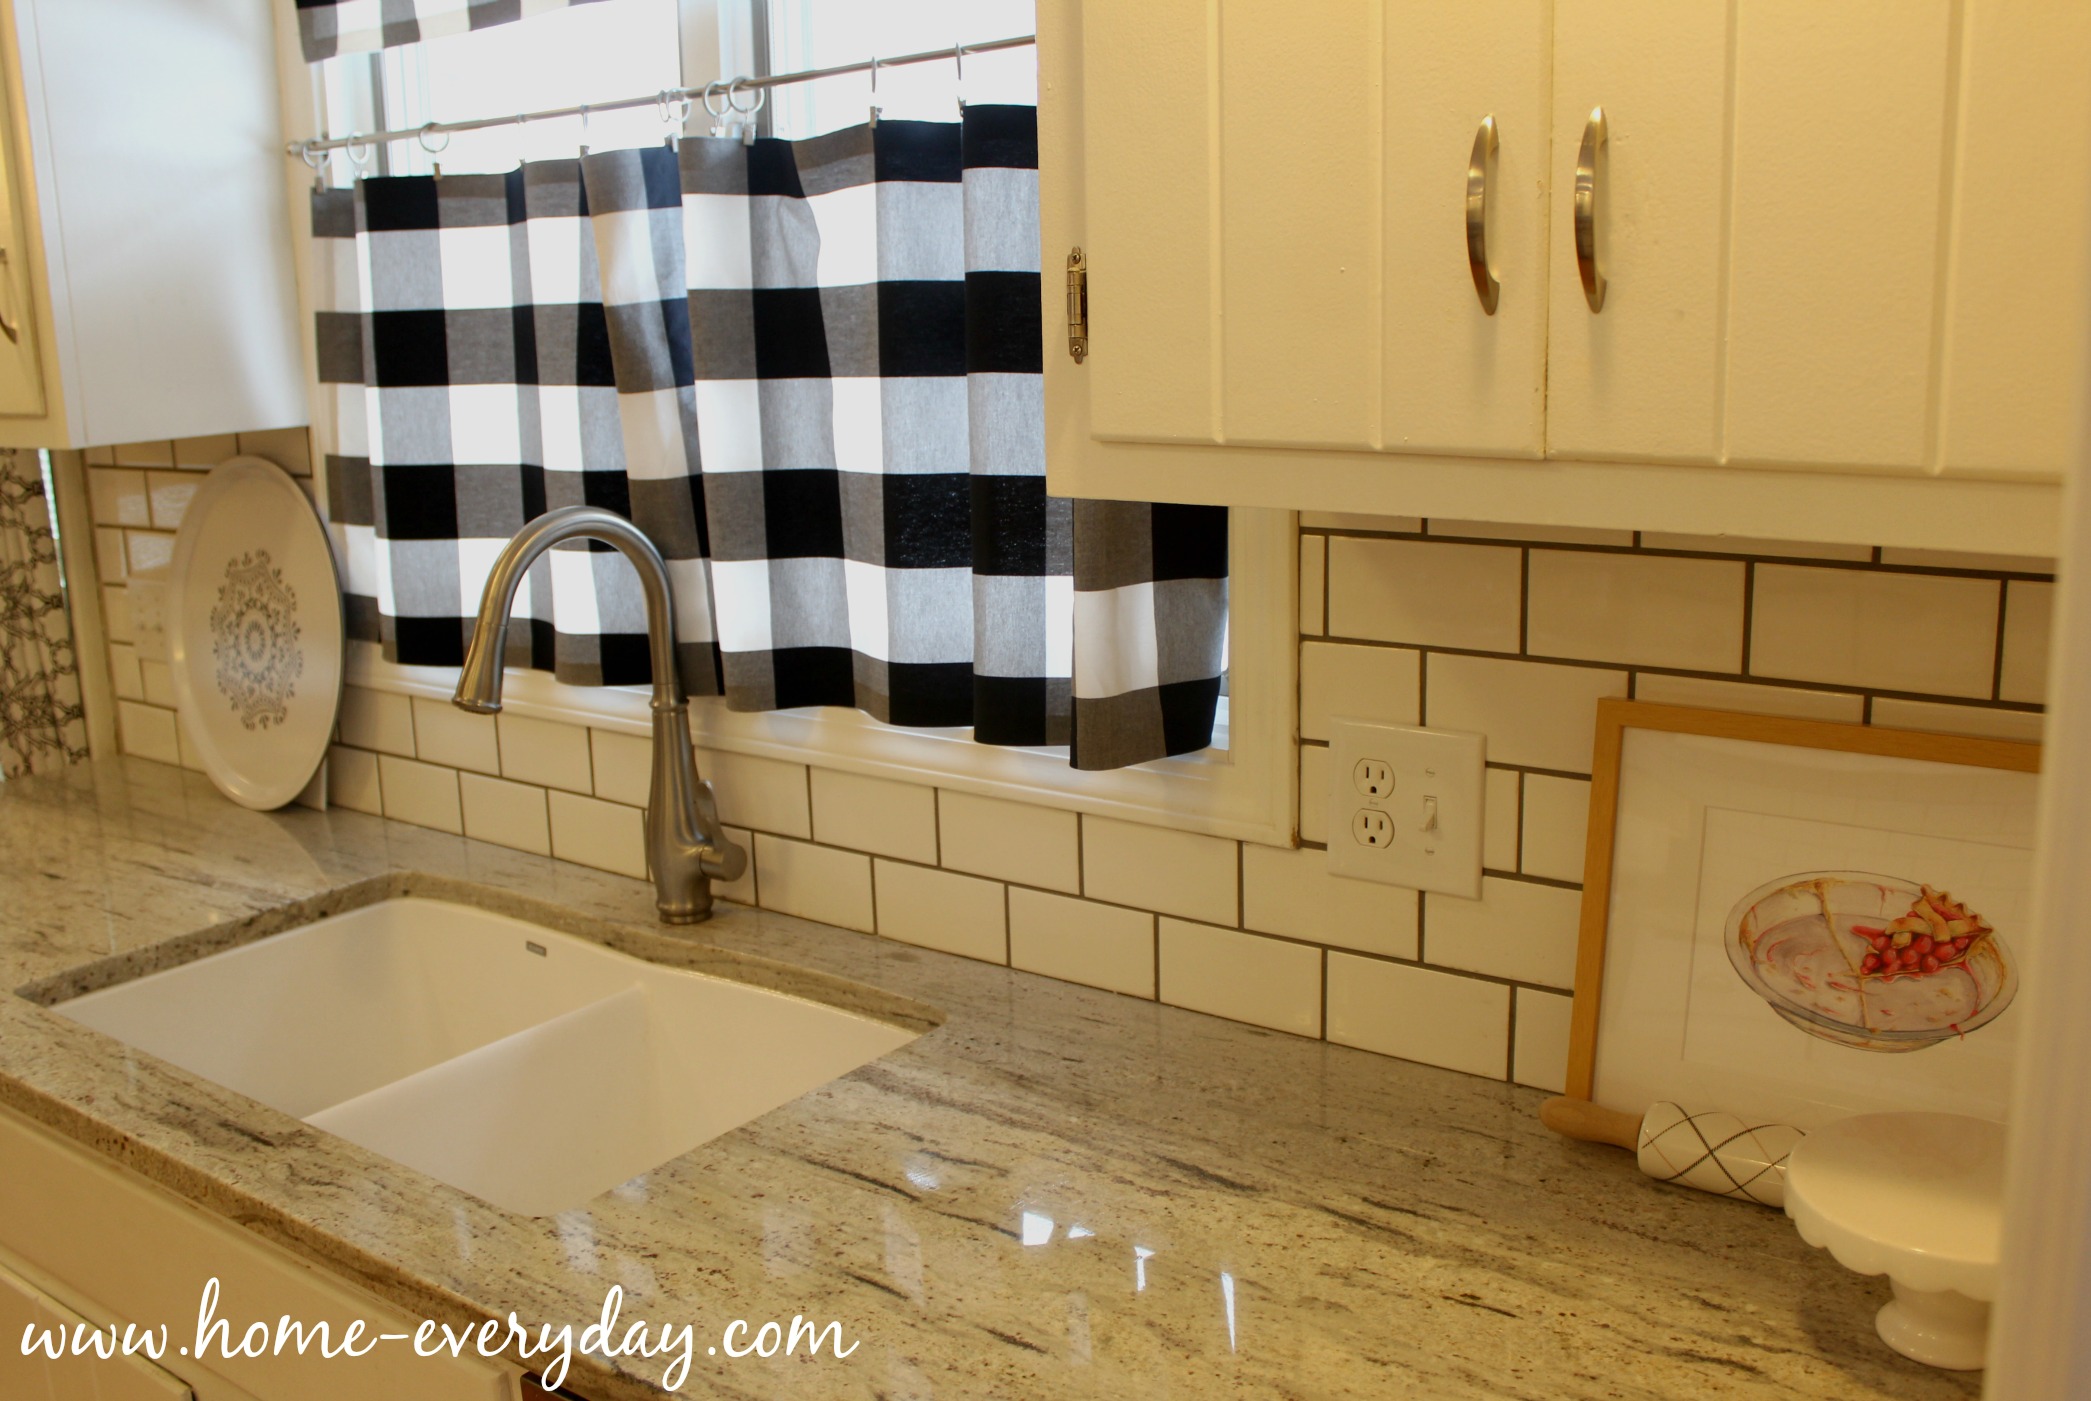
Kitchen Curtains Black and White 6

I hung them up.

Kitchen Curtains Black and White 7

Again, this is one of those projects I waited awhile to post as kind of a “time will tell” experiment. While I have made hem tape curtains in the past, they were decorative curtains that weren’t really open and closed very often and used more as a way to frame a window. These curtains, however, are actual real utility curtains. The kitchen is a high traffic area and the window over the sink is one that is open and closed a lot, which means these curtains would be pulled open and closed a lot. Also, over the sink means water splashing, steam from pasta water being drained, and other cooking shenanigans that happen near the sink. I wanted to make sure that these curtains would hold up to a wash, water, and heat, and some traffic before I posted a tutorial. 

Here they were the first week.

Kitchen Curtains Black and White 7

Here is picture of them yesterday (over three months of cooking, baking, washing dishes, splashing, and one run through the gentle cycle of the washing machine and hung to dry).

Kitchen Curtains Black and White 8


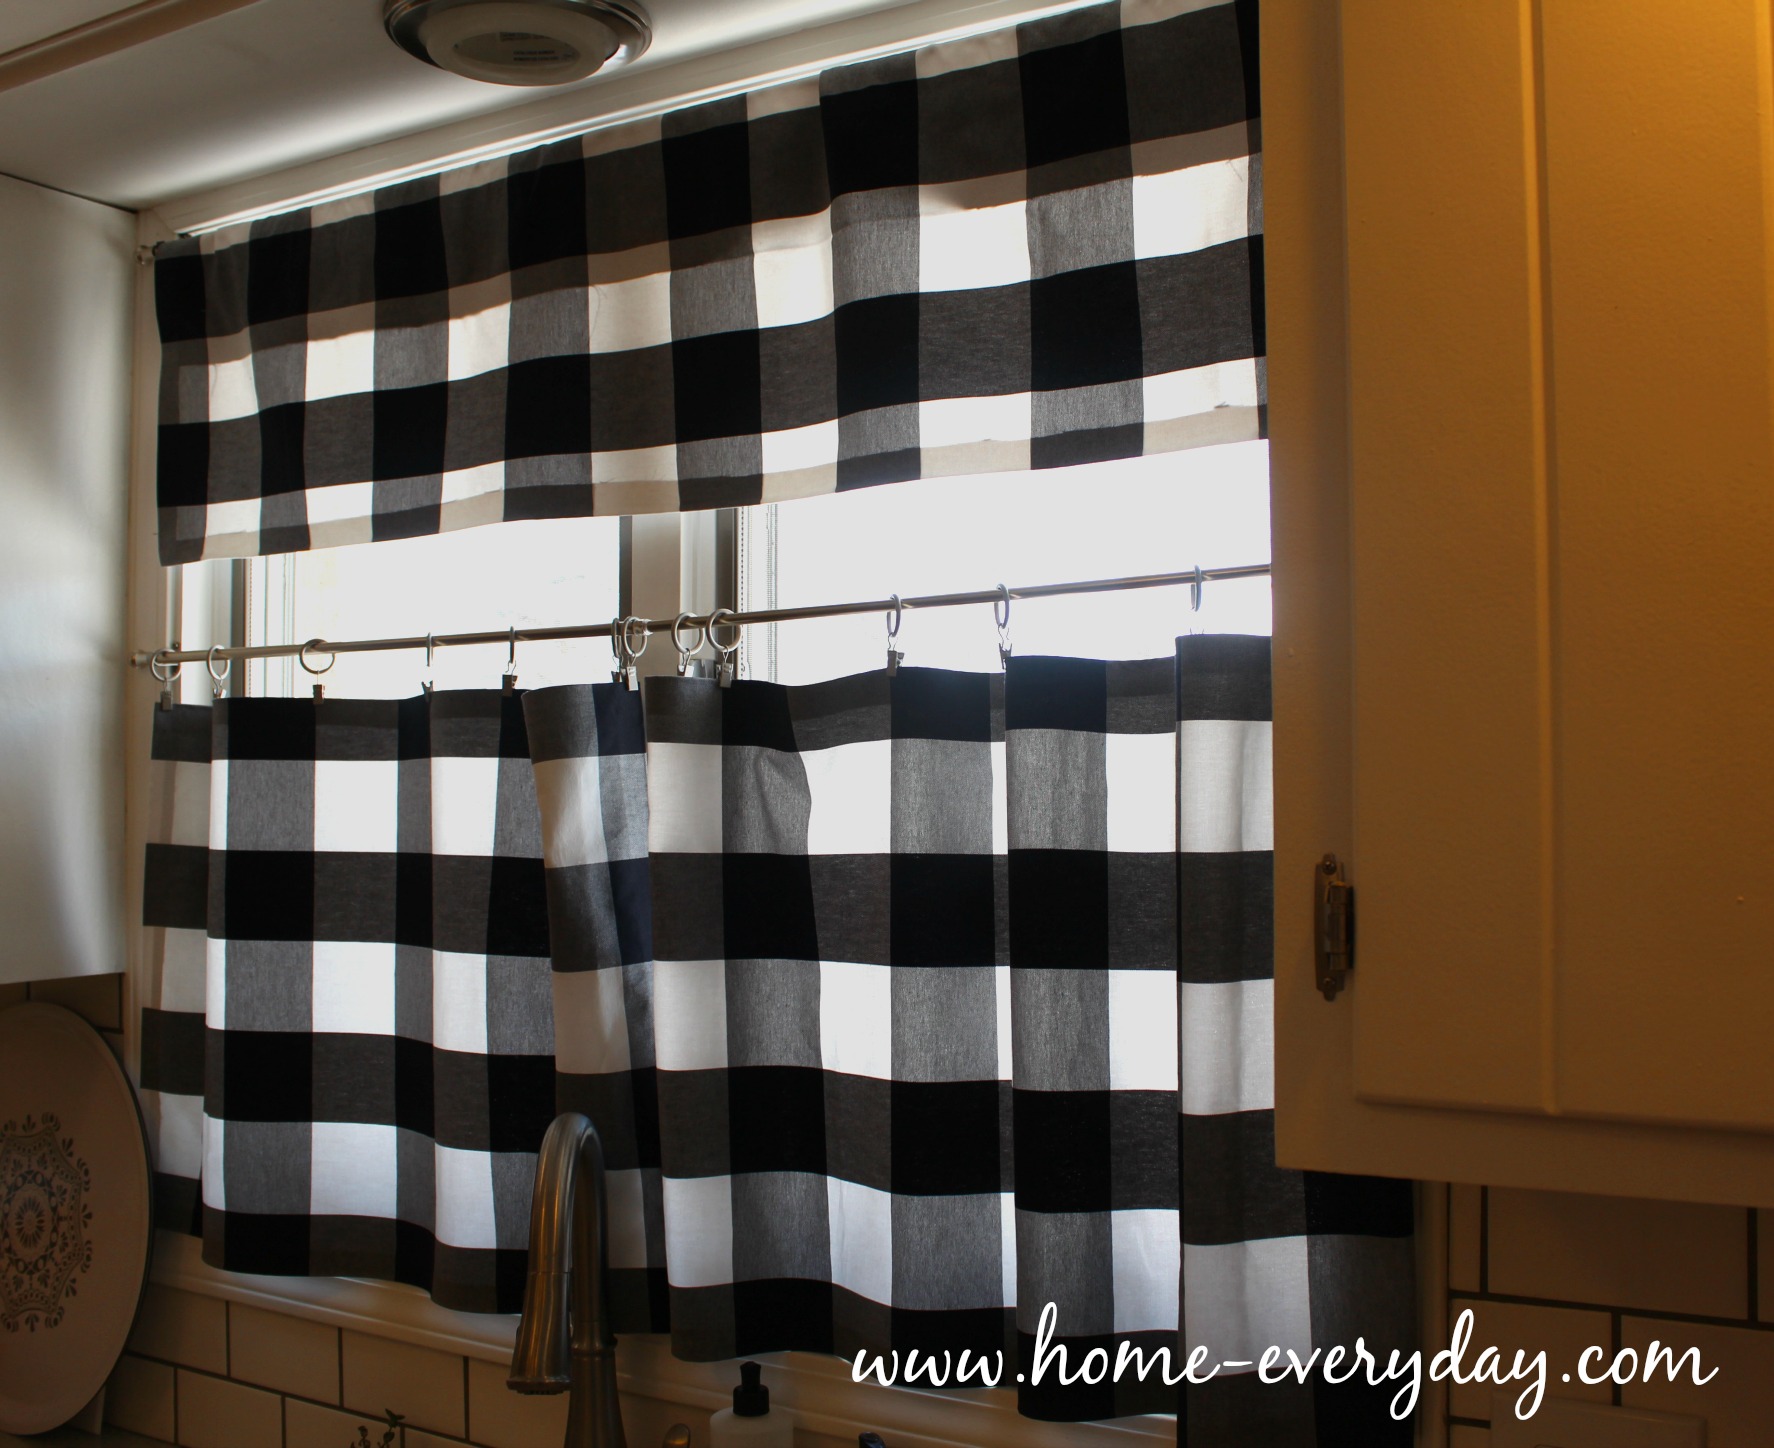
Also, because I don’t know if I mentioned earlier, but I really like this fabric from IKEA, I overbought, so I also had enough fabric to sew iron tie backs, and another valence for the patio door. 

Do you have any easy, quick, and foolproof DIY methods that lasted longer than you thought?


Spooky Silhouette Curtains Tutorial: A JoAnn Fabric Celebrate the Season Craft

I have been compensated for this project by JoAnn Fabrics, but all thoughts and opinions are my own.


When JoAnn Fabrics asked if I would like to participate in their Celebrate the Season Campaign, I jumped on this opportunity in a heart beat. I have always been a JoAnn shopper when it comes to crafts and DIY projects around the house.

For Halloween, the theme is Spooky Spaces. Nothing says spooky to me more than some creepy night time forest creatures. With all the windows we have in the front of our house I thought it would be spooky to have some creepy creature silhouettes hiding in the windows.


While I could have cut some shapes or painted some silhouettes onto some plain white paper, I really wanted these decorations to last from year to year. I decided to make them out of fabric and then I can hang them every year for Halloween as well as give them a quick wash in the washing machine if they happen to get a little dusty. We all know, that I don’t sew, so I had to think of another solution. When I was walking around JoAnn, I found sheets of iron on fabric adhesive. PERFECT!

Supplies:
White Muslin Fabric
Black Muslin Fabric
EZ Steam Fusible Web Adhesive Sheets
Stencils or Silhouette Pictures


Measure, then Measure Again (and then Maybe one more time for luck): I carefully measured each of the windows. In my case, I wanted to make sure that the white fabric completely covered the glass portion of the window. I, then, cut all my white fabric to size.

Create Some Stencils: While I can do some things free hand, I thought it would be better to trace out the creatures. I searched via Google Images and found a bat, a crow, an owl and a spider. I enlarged the photos and printed them on card stock, and then carefully cut them out. (The tree was too large to print, so I did draw that myself).


Stencil printed and cut out on card stock

Trace and Cut: Using my stencil, I traced my spooky creatures onto the paper side of the EZ Steam sheets in PENCIL. I did not want there to be any chance of marker on the fabric or blending through onto anything, so I thought that pencil was the safest way to go. (Note: Since I was doing silhouettes I did not really worry to much about which way they were facing, but keep in mind you want to trace your stencils right side down so that when you iron them on your fabric they are facing the correct way.) Next, I peeled the wax like backing off the EZ Steam sheets, and carefully pressed them onto my black fabric. Using the tracings as a guide, I carefully cut out the shapes.


Adhesive webbing with traced creatures affixed black fabric.

Heat it Up: Once all the shapes were cut out of the black fabric with webbing still affixed, I carefully arranged the shapes onto the white fabric. Once I was happy with their placement, I began ironing. I laid a cloth napkin over the black fabric cut out, and using a medium setting on my iron, I pressed the creature onto the white fabric for a few seconds. (Note: Different brands adhesive webbing have different instructions, please make sure to read carefully.)


Hang Them Up: There are several ways to hang these curtains in the window, but because the fabric is so light, I just used a bit of duct tape in the corners of the windows to hold the fabric in place.


Here are my creepy creatures hanging in the window. I think they are pretty spooky, and I am thrilled that I can use the decorations from year to year.

To see this craft again or more spooky spaces from other awesome bloggers, check out the JoAnn Fabric Creativity Made Simple site HERE!

If you like this post and would like to read more about DIY, gardening, cooking, baking or all other things domestic, become a Home Everyday follower! For blog updates or to see other places I write follow Home Everyday on Facebook here.

Follow on Bloglovin

Linking up at Hope Studios for Tutorial Tuesday.


Don’t forget, you can check out more creative inspiration here:  http://bit.ly/creativitymadesimple

Election Hangover: Quick Fix Curtains

I’m currently rocking an awesome Election Night hangover. Not the drinking kind, but the I went to bed way too late, and the kids got up way too early kind. Either way, hangovers stink. Good thing I planned ahead and have an awesome quick update for you today.

One of the first posts I ever wrote before taking a Home Everyday hiatus, was this post about my cloth napkin cafe curtains hanging in my kitchen (as you can see I’ve learned a lot about blogging since then, also, my pictures were of the iPhone variety).

Yes, you read that correctly. Cafe curtains from cloth napkins. I don’t have a sewing machine, hem tape is an option like these curtains I made for Coco, but to be honest, I really like if even the hemming is done already like my master bedroom curtains. So far, the best thing I have noticed about doing inexpensive curtains, drapes or window coverings is that, they are an easy switch when you need a bit of a change. Which is exactly what I did here:


I found some cute yellow cloth napkins at Target on clearance.


I had really been wanting to tie some yellow into the kitchen, so this was the perfect and cheap way. I just used the little clips to attach them to the curtain rod, and this time I even made a little valence by pinning some folded napkins to the top curtain rod (did I mention I don’t have a sewing machine.. yet? Christmas please hurry).

I cannot believe how much bigger the window looks with the valence now too.


There you have it! The quickest update so far. Anyone else jumping on the faux curtain bandwagon with me? Table clothes? Sheets? Shower Curtains? Hem taped fabric?


Oops… I did it again: Faux Curtains

Ok, now that I have got you singing some Brittany Spears circa 2000. I will explain how I did it again. Some people wanted to know where the curtains in our Master Bedroom came from. So I dug up some pictures on my iPhone from when we first moved in, and here is the very long story.See our hillbilly make shift curtain made of a sheet and duct tape. Classy. Can you believe at one time, this was my window treatment solution?


Awhile back, right before we had moved into our house, I ran out to Lowe’s and purchased three roller room darkening shades for the three bedrooms. We were doing so much work to the upstairs, we needed something since purging the previous owners disgusting filthy window treatments that probably hadn’t been dusted since 1975.  We were also in a hurry because we wanted to get in the house. So this was the solution. They were easy to install, and they were room darkening which is a bonus when you have three little ones who nap every day. I also figured they could be easily covered up with curtains, roman shades, balloon curtains, or valances which I was planning on putting in the rooms as a decorative treatment.  You know when I had nothing better to do. So for convenience sake, I got the inexpensive shades to hold us over until I could cover them all up with something more attractive. I only spent around $30 for each which is a small price to pay for privacy and room darkening.
So, our shades were purchased and with some help from our friend Scott were installed in no time. They worked beautifully, well, two of them worked. The ones in the kids’ rooms were fine, THANK GOODNESS, naptime was saved. However, in the master bedroom the darn thing wouldn’t snap back up in the morning, when we wanted that beautiful natural light that is so prevalant in our new home. We tinkered, we fiddled, we did everything including talking to the people at Lowe’s (who were very friendly) to try and figure out how to get it to work. Long story short… er long, it still didn’t work, so I had to exchange it.
I went back to Lowe’s, and the woman at the returns counter told me the only way I could “exchange” it would be to return the old shade, and purchase a new one. Since, the shades have to be trimmed to fit the window, so I figured it was no big deal. I returned the old shade, and then walked down the window treatment aisle and tried to find a replacement $30 shade, and much to my surprise, they were no longer $30, they were now $50! I know this sounds ridiculous (you know I’m thrifty right?), but I refuse to pay $50 for something that I could buy for $30 just three weeks ago. Especially something that I was planning on covering up with curtains anyway. So I came home shadeless, much to Brian’s annoyance.
It came to covering our window with something, and by something I mean a sheet and duct tape. Ugh. Martha Stewart would be again be appalled (just like this). So, the search for an inexpensive yet beautiful room darkening window treatment began. I had narrowed it down to curtains, as I think they have a more sophisticated look, and that is kind of the look we are going for. Because of this, I knew I would have to make them myself to save some money, and to look just right with our bedding, new headboard, and freshly painted room.
That’s when I remembered my cloth napkin cafe curtains, and voila, I did it again. I used something that isn’t supposed to be used for curtains, and I made it into curtains with those little ring clips. I found shower curtains on clearance at Target. They coordinated with our color scheme, they had a pattern that wasn’t too feminine, and did I mention they were on clearance? I bought some room darkening fabric at JoAnn Fabrics for about $2 a yard. I cut it to size. Then I clipped clipped room darkening fabric to the back of the shower curtains before hanging them. So, I did it again. Another set of no sew curtains. They are a little short, but you cannot even tell with the headboard and bedside tables. Jenky no more!


Thank goodness the sheet and duct tape are gone!

Fast, Easy, Cheap: No Sew Curtains

When we first moved into this house, we removed a lot of things, especially upstairs. One of the things we removed was all the window treatments. They were dusty and in various stages of disrepair. I figured I could do something on the cheap. The first step was to get everyone room darkening shades for privacy and for sleeping. This held us over until we could do something a little more decorative. I did a little research and found this tutorial on Young House Love. I’m going to share how I made these curtains, but the Young House Love tutorial is great for tips on how to hang curtains.


I don’t own a sewing machine (someday I hope to). So, the idea of doing something with just an iron made me so happy (my iron doesn’t get the workout it used to since my hubby has decided to outfit his entire work wardrobe with wrinkle free apparel).

Since Coco, already has a room darkening shade, and these curtains are purely decorative, there really is no need to open and shut them, therefore I only needed a few yards of fabric to make floor length curtains. Overall this project was quite inexpensive, especially if you have a 40% off coupon to JoAnn Fabrics, and a home sale at Target where I bought the hardware. After doing this project, I’m totally convinced I could make curtains for my whole house. It only took me about an hour and a half, which for me any project that can get finished during afternoon naps is a dream project (just like this sentiment art).

Supplies:
Fabric
Heat n Bond (it comes in different widths and strengths)
Fabric scissors
Iron
Ironing board
Curtain rod
Curtain ring clips

Measure, Measure, Measure!  I always follow the measure twice (three times), cut once  philosophy. Also, make sure you leave enough allowance for the width of the heat and bond. That will be how wide your hem is.

No, seriously, cut it out! Cut your fabric to length and width. Really, does there need to be more explanation?

Iron ’em out! Iron ’em out! Smooooooth! This step could not be any easier. All the directions are right on the back of the Heat n Bond. My only tip here, is just make sure you hold the iron in place for the correct amount of time while “hemming” otherwise if there is not enough heat, there will be no sticking. Keep in mind, if your fabric is thicker you may want to hold the iron in place for a few seconds longer.


Hang ’em up! This part I left mostly to the hubby, because the kids woke up, and he could hang the new curtain rod without having to use a step ladder. I clipped the curtain rings about every 6 inches, so that they would gather nicely.


So viola, there you have it! Fast, easy, cheap… curtains.
Linking up today at Serenity Now and Tater Tots & Jello. These are great places to check out anything from home projects to recipes, crafting to organization tips.