Category

Uncategorized

GIVEAWAY! Aquatic Experience Chicago

Yesterday was a glorious day! I am taking a mini hiatus from my Second City courses until after the holidays, so yesterday was pure family time. We were able to get some pumpkins, drink apple cider, spend some time in the crisp autumn weather, and do a few little projects around the house. To me, being able to have a day to just spend time together is nice.
After having some much needed family time, I am already looking at the calendar for some local activities to another day of uninterrupted time together before the holidays start up. That is when I put on our calendar the Chicago Aquatic Experience and I want you to put it on your calendar too! So much so that I am offering a GIVEAWAY of a FREE Daily Family Pass.
Chicago Aquatic Experience is the first of its kind and will be holding their inaugural event at the Renaissance Schaumburg Convention Center November 15th through the 17th. This amazing experience will have everything aquatic under one roof!

Photo courtesy of Chicago Aquatic Experience and the Silverman Group

Families will enjoy the floor show complete with colorful displays and creatures such as saltwater and freshwater fish as well as aquatic reptiles. (My kids are going to love it!)

Photo courtesy of Chicago Aquatic Experience and the Silverman Group

There will even be a Kid’s Aquarium Contest where children will be able to design their own aquarium (I may have to lie about my age because that sounds too much fun!)

Also, there will be plenty of speakers including Zeb Hogan host of National Geographic’s Monster Fish.

Photo courtesy of Chicago Aquatic Experience and the Silverman Group

My kids adore all things under the sea, and I cannot wait to surprise them with this amazing experience. For more information about the Chicago Aquatic Experience visit their website HERE!

If you would like some quality time with your family too and a FREE Daily Family Pass to Chicago Aquatic Experience, enter the giveaway below! Winner will be announced November 5.

a Rafflecopter giveaway

If you like this post and would like to read more about DIY, gardening, cooking, baking or all other things domestic, become a Home Everyday follower! For blog updates or to see other places I write follow Home Everyday on FacebookTwitter, or Pinterest.

Follow on Bloglovin

Oops, How could I forget about May?

At the end of every month, I do a little wrap up of sorts, and to be honest, June just kind of snuck up on me. I looked at the calendar and thought, now it’s already the 6th?! So, before we get any further into June, let’s wrap up May shall we?

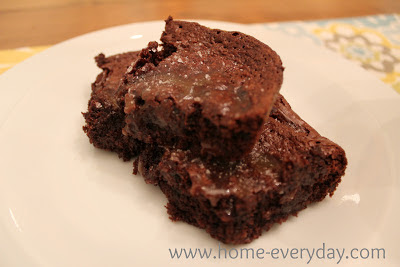
The kitchen was busy this past month. I started with salted caramel brownies. I know I’ve made some salted caramel deliciousness in the past with these truffles, but let’s face it when you find a good flavor combination it is hard to not want more.

Speaking of flavor combinations, I admitted that I probably have a caprese problem with these caprese sandwiches. Also, I put together some grilled steak fajitas, which have so far been a great and easy go to dinner for the summer. I also a made little treat to celebrate the end of the school year and celebrate summer: brownie pops.

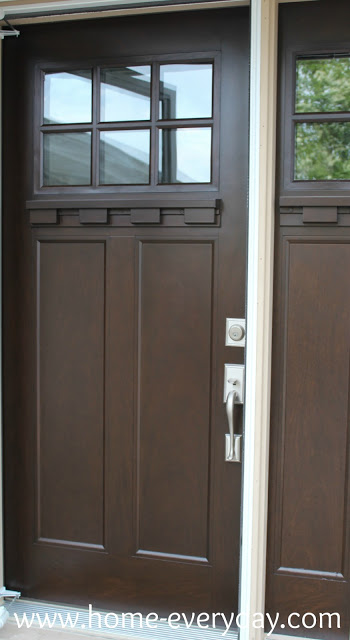
Many of the projects that have been taking place around here have involved some curb appeal and the great outdoors. Since we spend a great deal of time outside in the summer, it was important that we finish up a few projects. The first thing we did was work on was getting a new front door. Also, we finished up some projects in the backyard like removing some overgrowth and adding mulch and brick bullet edging. FInally, I planned and planted the seeds in our vegetable garden.

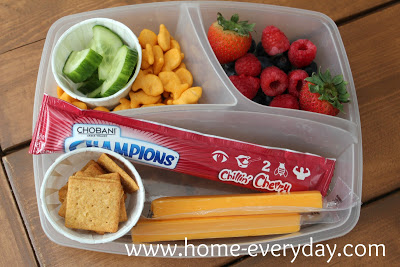
May was also busy with the end of the school year for the kids. Also, with all the outings we have been going on lately now that SCHOOL’S OUT FOR SUMMER (sung like Alice Cooper) I shared a few tips on packing meals on the go for summer picnicking. Also, I have been trying my best on working on some photography skills.

As you can see, it has been busy around here, but the highlight of this month was my performance in Chicago’s Second Annual Listen To Your Mother Show. I was honored to be a part of such a wonderful program and in the company of such talented ladies. To see my posts about LTYM you can click HERE, HERE, and HERE. If you would like to see what I wrote and performed you can click HERE!

Photo Courtesy of Sabrina Persico

Whew if you thought that was busy, check me out on Facebook or become a follower of Home Everyday here


Green Week and a Tray Bake

This week, I am dubbing GREEN WEEK! I am going to share any and all things Irish leading up to one of my favorite days spent with my family. 

Today, I am sharing a recipe that has many variations in the US, but in Ireland is known as tray bake. It is one of those thrown together desserts that requires very little mixing and measuring, and is very easily thrown together.

It is graham cracker crust with a a variety of toppings and drizzled with condensed milk.

Today, I will be making a version based on this recipe that I recently saw on a fabulous Irish Cooking Blog, called Wee Kitchen. This is one of those sites that imediately makes me want to hop a flight to the Emerald Isle and see the house where my Great Grandmother was born, drink tea, and have a bowl of Irish stew. If you think Irish Cuisine is all things boiled, take a look at this site and see how diverse and wonderful it is.

Cherry Almond, and Chocolate Tray Bake

1 1/2 cups graham crackers crushed into crumbs
1/2 cup butter melted and cooled
1/4 cup packed brown sugar
1 cup dark or milk chocolate chips
1/2 cup slivered almonds
1/2 cup dried cherries
1 14 oz can sweetened condensed milk

Preheat oven to 350 degrees.

Mix graham cracker crumbs, melted butter and brown sugar. Press the mixture into the bottom of a greased 9 x 13 baking dish. Evenly sprinkle the chocolate chips, almonds, and cherries in an even layer on top of graham cracker base. Finally, drizzle condensed milk over the top evenly.

Bake for 18 – 22 minutes or until edges are golden brown.

Cool, cut, and serve. If it is still a little warm it is good with a scoop of vanilla ice cream.

Snack Time: Cheesey Bread

Last week, I was in a cooking/baking frenzy. It was most likely due to the fact that I was procrastinating painting the family room. I knew that as soon as I started that project it was going to lead to a bunch of moving of furniture and our lives being topsy turvey for a week or so. We are in the middle of that project now, and I cannot wait to have a clutter free house.

With all the cooking and baking going on, I decided to make the kids a snack while they were helping me in the kitchen.
WARNING! This is one of those recipes that I threw together at the last minute, so I don’t have any accurate measurements for you.
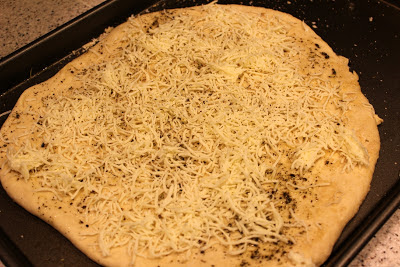
First, I made this recipe for pizza dough that I made a few weeks ago. I then, rolled it out, and brushed it with some olive oil. Then I sprinkled some of my favorite Italian seasoning on the top, and a little bit of shredded mozzerella and parmesan.

This was one of the easiest hot snacks I’ve made, and the kids loved it. By the time Brian got home from work, there wasn’t much to share, so I guess I will have to make it again soon. 
It would be a great recipe to experiment. Some great combos would be:
– Chives and cheddar cheese
– Fresh herbs and garlic oil
– Sundried tomatos, basil, and fresh mozzerella
– Olives, tomatoes, red onion, and feta.
– Ripe pears, arugula, and gruyere

Do you have any ideas?

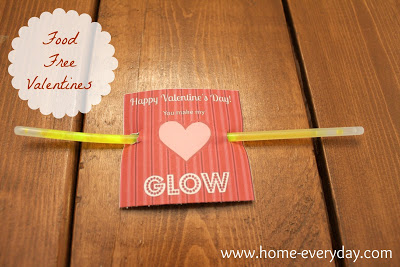
You Make My Heart Glow: Valentines

I’ve mentioned this before, but my kids have certain food allergies. Because of this, class parties can make me a bit nervous. However, my kids attend an allergy safe school, and a nut free school to boot. Now, I know there are several differing opinions on this, but honestly, I am ok with no food parties at schools. It gives us all a chance to be creative, and it also let’s us enjoy treats at home.

I saw some really cute Valentine ideas on Pinterest this year as well as a few other websites. My favorite were the ones with glow sticks. My kids love these things, and I always have them on hand for an impromptu dance party, fun in the bath tub, or for playing outside in the summer. I made a little Valentine using PicMonkey, and attached some glow sticks.

Ta Da. Easy, cheap, food free, and most importantly made with love.

What do you have planned for Valentine’s Day?

October Wrap Up

Yesterday was Home Everyday’s 100th Post! Can you believe that?! Time is flying here, and October seemed to go by in the blink of an eye. Before we know it, we will be holiday decorating. I am pretty Christmas crazy (as in I may have already listened to some Christmas music this morning) however I am not quite ready for that yet.

Before we move ahead too quickly, here is a wrap up of the last month.

This month, Meg Broderick from Upsy Daisy Cupcake Crazy, guest posted with her to die for recipe of S’mores Cupcakes.

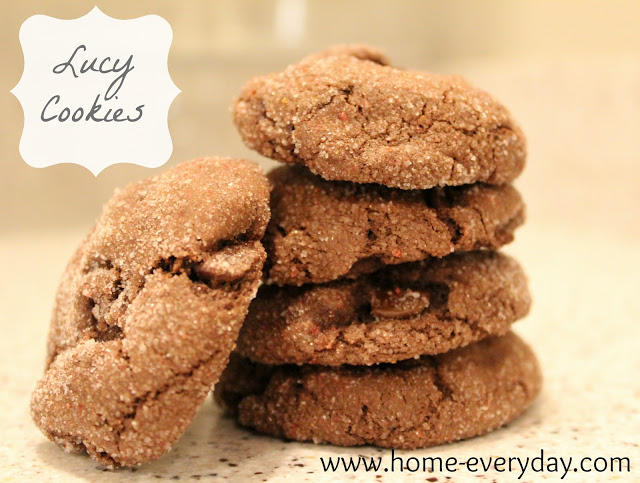
The kitchen was not as busy as it typically is, but I whipped up some really fun things. My favorite of all the recipes this month were the Lucy Cookies. In fact, I might have to make those again soon. A few other recipes I cooked up were: turkey pie, hummus veggie wraps, pumpkin pound cake, and brats with orchard salad.


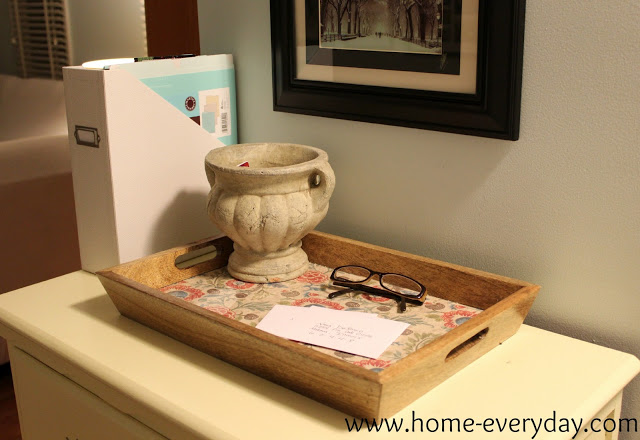
This month, I was also able to tackle some organizational projects with the help of Mom of 6’s Organize My Life Boot Camp. I was able to streamline our entry, stick with our family routines, keep up with our family calendar, and share our menu plan and grocery routine. I also shared my embarrassing secret, and finally organized my accessory drawer.
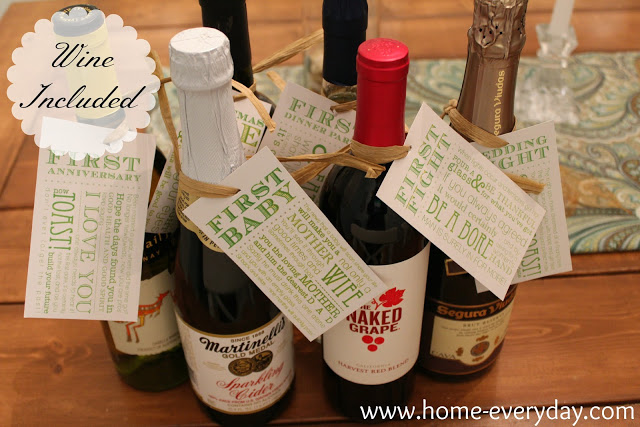
This month was also the month of some quick crafty projects that took hardly any time at all. Like the Olympic Torches I crafted for the boys for Halloween, the clever bridal shower gift I put together, the autumn fall tablescape, or the shower curtain drapes I made for the master bedroom.
The kids also had a TON of fun this month. We did some traditional fall trips like a nature walk, and a visit to the pumpkin patch. We headed out to watch the runners at the Chicago Marathon. We also had some fun at home with play dough and pumpkin carving. Finally, my munchkins showed me just how kind hearted they are even though they are only 4, 3, and 2.
Finally, I shared a little glimpse into my day when I shared my day in the life post. I know you are totally jealous… ok maybe not, but the s’mores break made up for it.
This is where I thank you! The readers! The feedback I have gotten has been nothing but positive, and I am so happy that there are people out there reading other than my sister. Coming soon are some more projects, holiday fun, great recipes, and with some help a design change! Thank you again for taking time out of your day to read.

Out of Ideas: Date Night Craft

Brian and I will be celebrating 6 years of marriage this weekend so I have declared this week Anniversary Week. Some blogs out there in the blogosphere like to have a wedding week detailing all aspects of their wedding, and while I loved our wedding day,  and will share some details with you later in the week, I thought it might be fun to talk about the last six years too. On Mondays, I typically blog about a craft or home improvement project, so here is a little sentimental craft project that I thought might be fun as our anniversary approaches.


No this is not a post about doing a craft on date night. I don’t think I could talk Brian into that. He is creative, but not crafty. Reminds me of that episode of Scrubs when Zach Braff takes Tara Reid to paint their own pottery and Tara Reid paints ‘This is so lame’ on a ceramic plate.

Brian and I try to make time for date night. Sometimes, we schedule it weeks in advance and get a babysitter, and other nights it is more of an impromptu stay at home kind of date. However, we run into the same problem, when it comes time for a date, we are sometimes stumped for something to do together. I know it sounds crazy, but I think we are so busy thinking about everything for the kids, our jobs, and the day to day grind of life, that when it comes time for date night all we can think of is the old standby of dinner and a movie. Granted, dinner out where no one has to cook or clean up is definitely a treat of us. However, sometimes it is nice to try something new.

So, here are some of the ideas I came up with:
Redbox Movie and Popcorn
Bowling
Mini Golf
Try a New Restaurant
Walk on Trail
Concert
Go Out for Dessert
Walk to Gelateria
Cocktails and Appetizers
Walk Around the Apple Store
Morton Arboretum
Go to a Museum
No Kid Zoo Day
Picnic Lunch
Exercise Date
OSP Speaker
Sushi Night
Sundaes and Sitcoms
Project Date
Walk Around the Mall
Sporting Event
Beer and a Game
Out for Breakfast

I saw this idea a few months ago. So, I thought I would put my own personal touch on it.


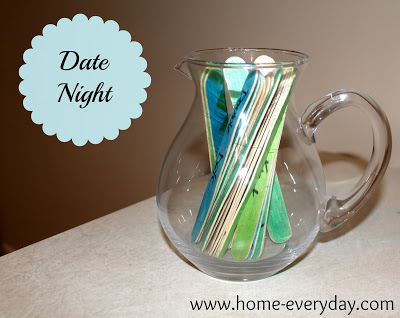
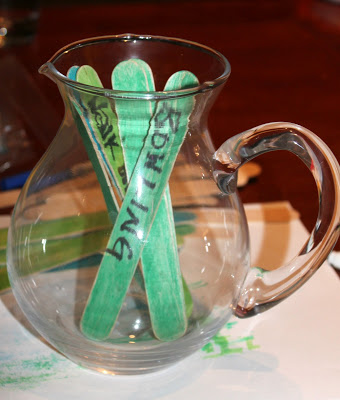
I found an adorable glass pitcher at Home Goods a few months ago on clearance, and thought it would the perfect place to house my version of date night popsicle sticks. I also had all the other supplies for the project on hand from my teacher days, so this whole project cost me $1.99

Supplies:
Popsicle Sticks
Markers
Clear Container

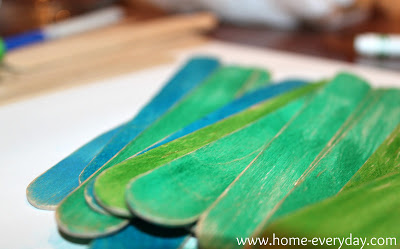
Color: You can skip this step, but I thought it would be cute to have the popsicle sticks match the color scheme of our recently updated master bedroom. I used plain Crayola markers to color the popsicle sticks in different shades of blue and green.


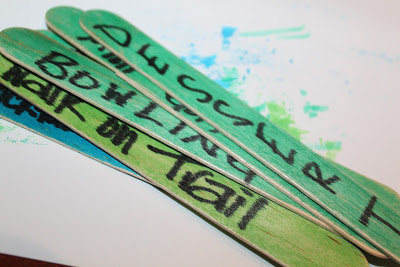
Write: Using a black marker I wrote all the date ideas on the popsicle sticks. I also left a few blank sticks to add to the jar in case we think of something along the way.


Go on a Date: Put the newly styled popsicle sticks in the container, pick one, and go on your next date night.


Now, we have 23 ideas for things to do, and we can spend less time thinking of things to do, and more time on our dates.

Finally… a headboard.

NOTE: Ok, so when I first started this Headboard project a month ago, I though hey no sweat, this will be done in an afternoon. When I thought that I obviously had brain damage, as I forgot that I have three children who are three and under, and that it might take me longer than that.

Brian and I inherited his grandfather’s bedroom set which consists of two dressers, a nightstand, and a headboard for a double bed. After about two weeks of being married and me getting elbowed in the face, we decided that if we wanted to be married for more than two weeks, we should get a queen sized bed. Since the headboard would not work with the bigger bed, we just went without one at the condo. Now that we are at the new place and I’m “decorating” I decided our bed needed a little presence in our room so I ventured to find an upholstered headboard. I went searching for inspiration and while shopping for couches I saw this headboard at Darvin Furniture for $1200… Ummmm, yeah no. I want my kids to go to college. After watching a ton of HGTV over the years I figured, hey I can do that myself.Do the math! First, I did some measuring to decide how big I wanted this baby. I measured the width of the bed, and I also decided how tall I wanted the headboard to be. I figured I wanted it to be tall enough for resting, so since Brian is taller than me I had him sit on the bed and lean against the wall and measured from the bottom of the mattress to about 3 inches above his head (scientific right?). This headboard will not touch the ground, but I wanted it to look like it does so I measured to the bottom of the mattress not the box spring so the headboard will sit behind the bed a bit.Shop til you drop! Secondly, I ran to a few different stores gathering up what I needed. This took some time, as I had to wait for some white foam to come in stock at my local JoAnn Fabrics. Looking back, this was my favorite part of the process. I bought the following supplies:- ½ inch plywood cut to size (if you don’t have a table saw or want to use it for fear of losing an appendage Lowe’s and Home Depot will cut it for you free of charge)- Fabric (enough yardage to cover the plywood, with about 6 to 10 inches extra on each side to wrap around the back.)- 2 inch thick foam that is the same exact size of the plywood. Just a couple of notes about the foam. It will be almost impossible to cover the plywood with one piece of foam because it only comes so wide, so just butt a couple of pieces up until you get it to fit. Also, if you are using a light colored fabric, try to find white foam instead of the green stuff that you might see underneath- Cotton batting cut to the same size as the fabric- Staple gun and staples- Buttons if you plan on tufting- Upholstery thread if you plan on tufting- Drill with a 5/32 bit if you plan on tufting – Upholstery needle if you plan on tuftingPlan ahead! If you plan on tufting with buttons, follow this step, otherwise skip ahead. The first thing I did was mark where I wanted to put the buttons on the headboard. So I drew lines along the width of the headboard eight inches apart. I did the same thing along the height of the plywood. Where the lines intersected I marked an X. Once this was done I took the drill and drilled a hole at each X. This way I can thread needle and thread to tuft the headboard later. Layer it up! Find nice clean spot on your floor and lay in this order: pre-cut fabric, pre-cut batting, then in the center lay your foam and lay the plywood on top. (remember you should have 3 – 6 inches of fabric and batting extra on all sides of plywood and foam.STOP, Staple time! Now it is time to staple. From all the suggestions that I read online, the rule of thumb is to start in the middle of one of the sides then staple to the right until you reach about six inches from the end then staple the other side leaving until you reach the other end of the ply wood with six inches remaining. I left my staples about 2 to 3 inches apart. Repeat this step on all four sides. You should have everything stapled except the corners.Wrap it up! For the corners I tucked and wrapped like a present and then stapled in place. VOILA! Untufted headboard. Cute right?Tuft Time! If you don’t want to tuft, go ahead and skip this part, but you’ll be missing a funny story. So, my original plan was to tuft my headboard with fabric covered buttons, but that didn’t work out so well as my fabric was too thick to make buttons with. Also, the tortoise shell ones that I thought would look pretty were five bucks each and I needed fifteen of them. Since, I’m cheap (which is why we started this project to begin with) I wasn’t about to spend $75 on buttons. So, I sacrificed a bit and went without the tufting. However, to tuft all you need to do, is thread your buttons and secure tightly in the back with your pre-drilled holes.Hang it up! I don’t have any pictures of this step, and I apologize. However, there are several ways to hang the headboard. Candice Olson from HGTV is a big Velcro lover, and all of her upholstered headboards are hung this way. Some people use a rail system. Others just screw it right into the wall. We did the rail system. We cut two pieces of 1 x 2 to the width of the headboard. Attached one to the wall in the studs, and the other to the back of the headboard and hung it like a picture with one rail on top of the other. So there you go, all finished. Finally!