Category

Tips

Baby Tips: Homemade Babyfood

When my kids were babies, I made home made baby food. I’m sure there are moms out there that want to roll their eyes, but honestly, it wasn’t that difficult.

There were a few reasons that prompted the whole thing, such as I like to save money, I like to cook, I like to know what my kids are eating, and we were already starting to see some food allergies developing in the kids.

While I do realize this is not the choice for everyone, I was happy that I did it, and I feel like my kids got to try some variety of food that they would not have otherwise gotten to taste until they were much older.


Here are some tips I learned along the way:

– Baby feeding is typically a hot topic, and pediatricians are sometimes changing their minds on when to start feeding purees and also, what types of with which to start. Also, every child is different, so please talk to your pediatrician before starting any type of pureed food.

– There are baby food cook books and awesome resources. Some books I read were: Top 100 Baby Purees by Annabel Karmel and Super Baby Food by Ruth Yaron.

– The best online resource I have found for homemade baby food and recipes is Wholesome Baby Food. It is like a one stop shop for all you need to know.

– The supplies I had on hand in addition to a regularly stocked kitchen were a food processor, a fine strainer, and ice cube trays with covers.


– When I cooked, I would make huge amounts, freeze it, and then store the cubes in freezer bags. I would only actually have to cook about once a month.

– Make sure you know all the rules regarding safe handling instructions for food. You can get a lot of information regarding food prep and storage from Wholesome Baby Food or Super Baby Food.

– There are several ways to cook baby foods, but certain methods help food retain their nutrients better. For example baking, steaming or boiling all have different advantages.


– The only thing I did not make myself were the cereals. I thought they would be too difficult to make, as well as there are several healthy and inexpensive brands. I bought the Earth’s Best brand.

If this is something you decide to do, I hope these tips are helpful. Happy Cooking!

P.S. Take a walk down memory lane with me today over at South of I-80. I’m talking my two favorite pizza places.

Pomegranate Practice

Over the holiday season, I made the most delicious salad with pomegranates, oranges, spinach, and red onion and a refreshing orange and rosemary dressing (I will be sharing soon). However, whileI was excited at the prospect of this salad, I had never peeled a pomegranate before. So I bought one, and practiced (I know I’m a nerd).

I read a few things online and then got to work. The kids were excited to join in on the fun and try something new.


Tips:
– Wear an apron. Pomegranate juice stains terribly.
– Use dishes that are dishwasher safe when cutting a pomegranate. The juice might stain wooden cutting boards.
– The finer the strainer or colander the better.

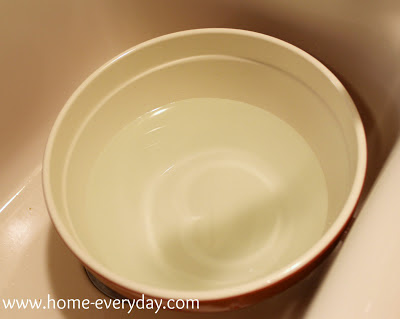
First, fill a large bowl with cold water and place it in the sink to capture any splatters.


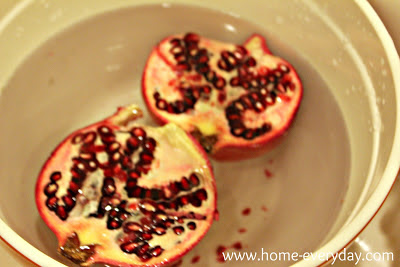
On a plate cut the pomegranate in half and then in fourths.


Put the sections of pomegranate in the bowl of water, then carefully start pulling out the seeds. The seeds will sink to the bottom and the white pith will float to the top.


Here is what the pomegranate looks like when seeds are removed.


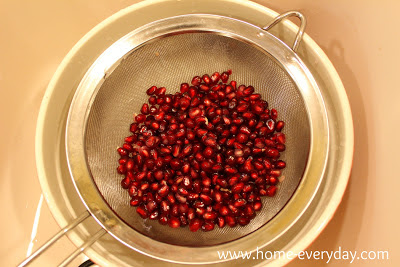
Then, skim the top of the water with the strainer and remove all the pith. Throw the pith away. Then strain the seeds through the strainer and give them a good rinse.


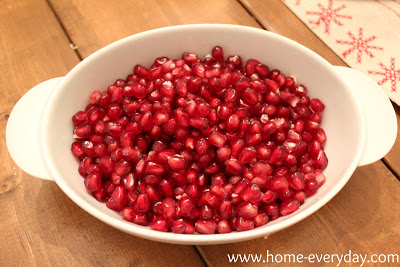
Finally, put in a bowl and serve.


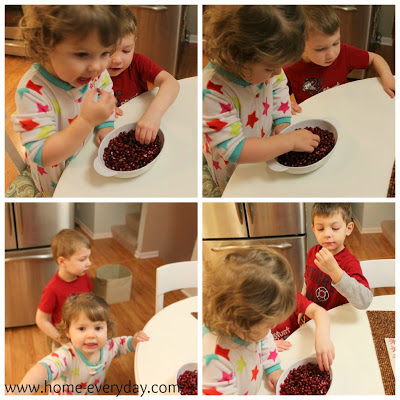
The kids enjoyed them for a little snack. When we were finished I covered them and refrigerated them.


Sweet Dreams: Baby Sleep

I recently got an email asking me questions about baby sleep, and I thought it would make a good post for any readers that have young ones. Again, I am in no way a sleep expert, but this is what worked for us.


When our oldest was born, we thought we had it covered. After 24 hours of being at home with our newborn, we realized we really did not have a clue about anything. I mean a person can dream about what parenthood is going to be like, she can read about it, and do all the babysitting of her friends kids she wants, but it is wildly different than anything you could imagine. Both the good and the bad.

With the help of my sister, sister-in-law, pediatrician, mom friends, a few books, and some good old fashioned motherly instinct, we were able to have kids that slept in their own beds through the night (and still do).


First let’s talk books:

On Becoming Baby Wise by Gary Ezzo and Robert Bucknam – This book is pretty hardcore with sleep training. It basically sticks to a pretty strict “cry it out” mentality. While we did like the idea of a self soothing, child the main thing we learned from this book was the beauty of routine. We learned that the order of events in the life of a baby is pretty important, and it helps to establish comfort for a baby. Routine (not schedule) with eating, bathing, play time etc, can really help establish a sleep routine as well.

The Sleep Lady’s Good Night Sleep Tight by Kim West – This woman is the sleep whisperer. She uses gentle very effective methods for getting a baby to sleep at night. Her approach also keeps in mind that babies go through growth spurts, developmental changes, and other things that will affect a baby’s sleep and offers coping with these scenarios. It is worth the read and also gives some perspective to how much a baby is going through developmentally. It also explains baby’s sleep needs and the importance of napping routines to help with night time sleep.
The Happiest Baby on the Block by Harvey Karp – This book (or DVD) and the methods proposed were extremely helpful. The key thing that we took away from this book was white noise. All three of our kids loved it, and Caroline still loves her white noise CD. For whatever reason, this totally worked for our kids. The day we don’t have white noise in our house, I am wondering if I will be able to sleep without it. (After 5 years of having it, my guess is not). 


Daily Routine (times were never set in stone… ever).
7:30 a.m. – Baby wakes, change diaper, nurse or bottle feed
8:00 a.m. – Get dressed, eat purees (if you have started that)
8:45 a.m. – Play time, stories
9:30 a.m. – A little bit of nurse or bottle. Morning Nap
11:30 a.m. – Wake up, change diaper, play time
12:15 p.m. – Eat purees, clean up
12:45 p.m. – Stories, nurse or bottle, afternoon nap
3:00  p.m. – Wake up, change diaper, nurse or bottle snack
3:30 p.m. – Play time, stories, walk or play outside
5:00 p.m. – Dinner purees (again if you are there), clean up, play with Dad
6:30 p.m. – Begin baths, jammies, dim lights, stories, nurse or bottle
7:30 p.m. – Bed

Tips:
– Swaddle! Swaddle! Swaddle! If your baby is less than 12 weeks old or cannot roll over on their own yet. Make the investment and get a Miracle Blanket. Young babies love it!
– Last Feeding: As you can see from the above routine, I pretty much would nurse or give my kids a bottle before nap/bed as part of the routine. When they stopped nursing or bottle feeding they would get a small sippy of milk. Here’s the deal, some people are really against nursing or bottle feeding before bed, but it really worked for us, and helps calm everyone down. We would try and coincide this time with a story as part of the bedtime routine. Also, babies love the close contact or snuggle time. If you’re at your wits end, give it a whirl, and see how it goes. If your child is done with bottle and nursing try a sippy cup of water while reading a story or snuggling.
– Darkness: When it was time for naps/bed, the shades would get closed, The darkness really helps as it helps release melatonin for easy sleep.
– Lovies: All three of my kids have lovies which we introduced around the age of 4-6 months old. Kids will start attaching to something around this age as part of their development. It helps them to sooth themselves and gives comfort. When they were really little I would make sure we had it for stories and snuggle time. I know this sounds weird, but kids are associate smell with comfort too. So, if you want to carry their lovie with you for a little while, the lovie will smell like mom’s shampoo, perfume, or dad’s after shave and kind of be a comfort to the baby.
– Soothies: My kids were all different. Russell didn’t like to suck anything, George had a paci til about 18 mos old (just for sleeping and he gave it up on his own) and Coco sucks her thumb. There are a lot of people who are against this type of soothing, but my theory is: if it makes them happy and they sleep through the night then it cannot be too bad of a thing. Also, no one will go to college (or Kindegarten for that matter) sucking their thumb.
– Getting Up: If we had a crabby baby in the middle of the night, we tried not to establish a “let’s get up at 2 a.m. every night for a snack” routine. Try everything you can just to make sure you’ve explored all your options: changed diaper, checked for fever, give some snuggles, read another story, make sure he/she isn’t too hot or too cold. However, if you have tried everything, kids go through growth spurts, and he/she really may be hungry, and you may have to nurse or give a small bottle or sippy cup of water.

Good Luck and Hopefully Sweet Dreams!

Spicey: Cabinet Organization

This time of year, I seem to do more cooking and baking so I thought one of my Pre-Thanksgiving organization frenzy days should be dedicated to kitchen organization. I also stocked up on a few things I know I need on hand like flour, sugar, chocolate chips, and poultry seasoning.


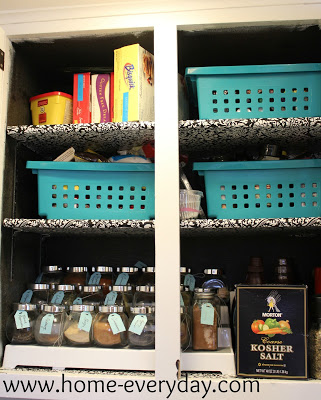
Here is the cabinet stocked up for the holiday season.


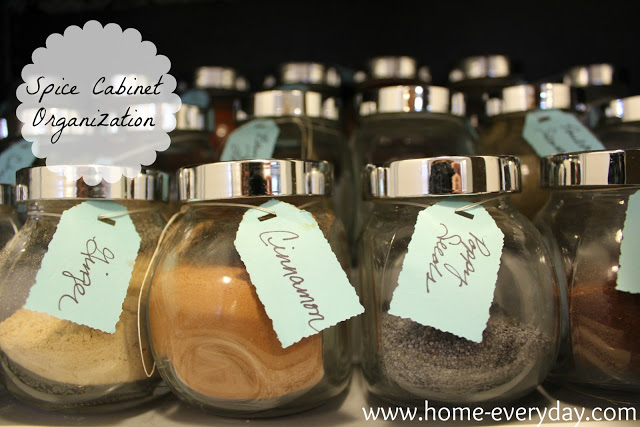
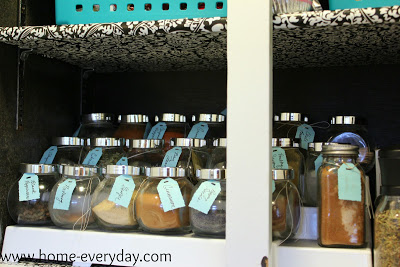
When we moved into this house, it came without a pantry so I had to get creative with how I used my cabinet space. I bought a plastic tiered spice rack, some Ikea spice jars, and used my scrapbook skills and tools to make little tags for labeling everything.


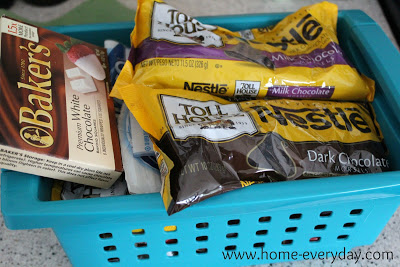
As for the other shelves, I bought some baskets for around $3 at Target to keep all my baking supplies organized.


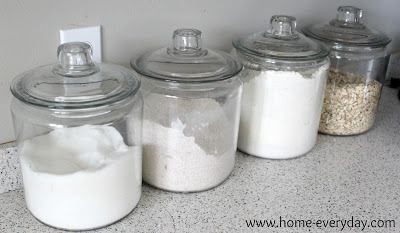
And let’s not forget the glass jars from Target that I keep on my counter.


I am officially ready for a season full of cooking and baking.

Anyone else stocked up for the season?

Linking up at Serenity Now.

“So, what’s for dinner?”: Weekly Menu Planning

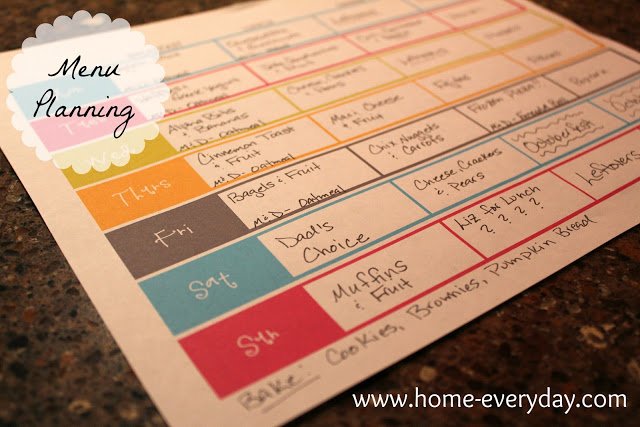
This is the last week of Mom of 6’s Organize Your Life Bootcamp. This week’s focus is getting ahead of the game with menu planning.

In the past, I would usually only plan for a week’s worth of dinners, but then as we had children and I started to make my own baby food, I realized that I might have to do more planning than that. So as time went on, I started to plan for every meal for the week. At first, I was writing my list of meals down in a notebook with a my grocery list, but I thought it would be nice to have something I could display on the side of the fridge.

A few months ago, I found this great FREE printable on Jenny Collier’s blog.


As I mentioned last week, Brian and I sit down on talk about what we have going on for the week and sync up our calendars. Once this is done, I turn on another sitcom and plan out our weekly menu. With the help of my cook books, Pinterest, and Brian letting me know what he has a taste for, I plan for every single meal including snacks.

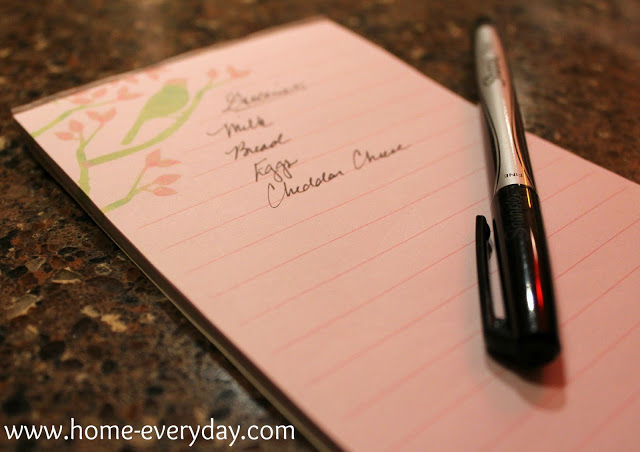
As I make the grocery list, I check the cabinets and fridge and make sure to jot down anything that we don’t already have. I typically try to go shopping when the boys are at school, and it is just me and Coco. Which usually ends up being in the middle of the week. I like this schedule as I don’t have to set foot in store on the weekends, and it is much quicker to only shop with one kid as opposed to three.


Some things worth mentioning:


  • Planning out a week or two in advance helps save money as I only buy what we need.
  • On the weekly menu planner, I plan which nights would be good for leftovers. I try to plan leftover nights for when Brian works late so that he can take extras with him for dinner.
  • When making my grocery list, I make sure I paper clip any coupons I have and need to use for my shopping trip.
  • Planning snacks helps to cut down on binge eating or eating unhealthy food.
  • When planning for the week, I have one alternate plan for something unexpected. For example, I know having pasta and jarred sauce on hand is something that is quick, easy, and everyone likes. This helps me have some sort of plan for when we are running late or have a sudden change of plans.
  • I know this seems a little time consuming, but honestly in the time it takes to watch a sitcom or one drama, Brian and I can go over the plan for the week, and I can plan out a menu.

What’s the Plan? Calendar Tips

This week marks Week 3 in Mom of 6’s Organize Your Life Boot Camp. This week, it is all about the calendar.


Call me old fashioned, but I have an old school calendar hanging on the side of the fridge. I used to teach technology, I am married to a tech director (who cannot wait for me to get back to iCal), and I am a blogger who uses a laptop and smart phone like it’s my job. So why the paper calendar?

Years ago, B.C. (before children), I used iCal. Just like Sharon at Mom of 6, I loved the functionality, the color coding, the ease of sharing with my husband. Then after my second child was born, and we made the decision for me to become a stay at home mom, I realized how little I was on the computer and was using my cell phone during the day. So, I started using a paper calendar and kept it in the kitchen.

When I was in high school, I remember a teacher saying “I don’t care where you write it down, as long as you write it down.” I myself was a notebook user, but I can remember kids using laptops, scrap paper, or their hands to take notes. This is kind of my mentality when it comes to planning or using a calendar. As long as you have a system that you will consistently use, that is all that matters.


I use the Sandra Boynton family calendar because it has spaces for each member of our family, it is large, and it comes with stickers which my kids like helping put on important dates. Below is a list of tips that help us stay organized when it comes to our calendar:
  • Ever since Brian and I have gotten married, Sunday has become a “plan out the week” day. We usually sit on the couch (while watching sitcoms), and plan out the week. Appointments, babysitters, school events, exercise schedules, work commitments, and activities are all planned out. Sometimes we even discuss cleaning responsibilities and house projects that need to get completed and try to plan time to do that. I mark the calendar, he makes notes in his iPhone, and then we are ready for the week.
  • While Brian and I are sorting out the week, we make our To Do lists and prioritize the To Do’s and try to decide when these chores can be done.
  • To cut down on excess paper, any time we receive an invitation, a note from school about an event, or any other piece of paper requesting our presence somewhere the date is marked on the calendar along with any other details surrounding the event and the paper is thrown away. This is also the time that I RSVP to the event.
  • I keep a magnetic clip next to the calendar with anything that we might need to bring to an event. For example, if Brian and I have tickets to a concert, the tickets are kept right by the calendar.
  • I also make a note on the calendar who is babysitting the kids for particular events.
  • Lastly, if you touch the pen I keep next to my calendar, you will feel my wrath.
There you have it! Now go check out all the other links at Mom of 6 for tips on calendaring and to do lists.

This is Embarrassing: Small Space Organization

Ok, admit it. Everyone has the space. The space that you cannot get a handle on. Right? Please tell me this is true. I cannot be the only one. I was almost too ashamed to post this, but then I realized I wanted to keep it real around here. Plus, you’ve seen a few of my other embarrassing moments here and here. So here goes… don’t judge.


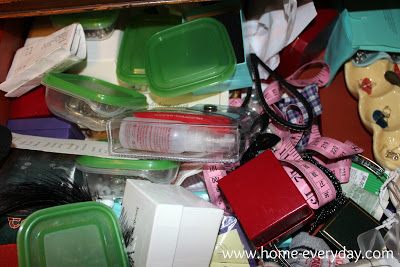
This is my top dresser drawer. This is the space for me. I can never seem to get a handle on it. You’ll notice everything is in tiny boxes to help minimize tangled jewelry etc. However, I would then have to look in every box to find something and then would end up just throwing the boxes back in the drawer. Totally inefficient, and basically a joke.

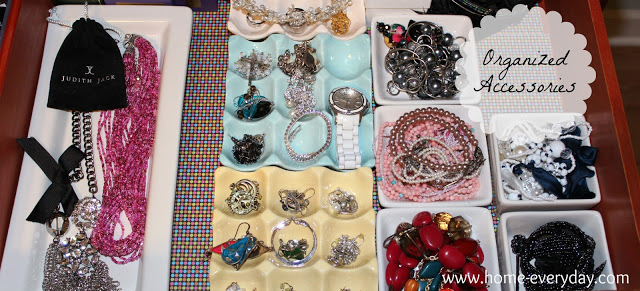
Then, (cue Alleluia Chorus) I saw a few ideas on Pinterest for how to organize jewelry and accessories. After about 30 minutes of organizing, here is what my drawer looks like now.


So much better. The first thing I did was take everything out of the drawer, and line it with some wrapping paper.


Then, with a little help from Coco…

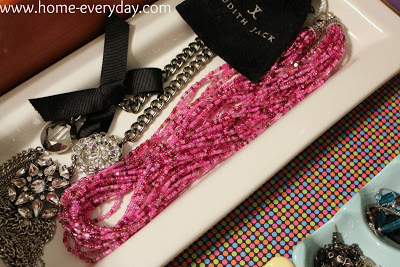
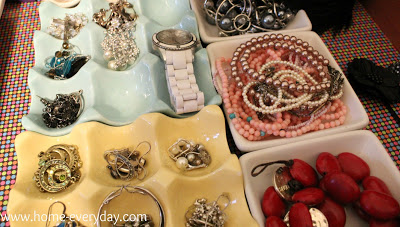
Ok, she wasn’t much help again. She has been more of a moral support system lately. Anyway, I sorted my accessories into some small ceramic dishes that I had. I was going to sell these dishes in our garage sale, but remembered I could use them to sort small things, and held on to them. Also, I bought some ceramic egg trays at JoAnn Fabrics awhile back on clearance to sort earrings. All of these dishes keep my accessories right where I can see them, and minimize things getting all jumbled up together.


Not bad for 30 minutes of my time, and less than a $5 investment. I cannot believe I didn’t do this sooner.
One last after photo, to get that awful first image out of your our brains.

Linking up with A Thoughtful Place for Keep C.A.L.M. and Organize On.

Finding My Stride: Establishing Routines

Today is the second week in the Mom of 6 Organize My Life Boot Camp. This week’s topic is establishing routines.

I am a creature of habit. I love routine. Repetition. Predictability. Don’t get me wrong, I love the spontaneous outing or change up to the every day norm, but I feel that change ups come much easier when there is some sort of normalcy.

You know I’m a dork already so I have no fear sharing this with you, but even when I was unemployed after college, I made up routines for myself to keep my sanity. Wake up, eat breakfast, go for a run, job search and set up interviews, eat lunch, more job searching, nap, even more job searching, dinner, IM friends, watch nightly sitcoms, Golden Girls reruns, read, bed. I felt that even in a time of no schedule and really nowhere to be, I had something to do.

Now that I am a Mom of three all born in a span of 33 months, I have figured out how to establish routine that works for our family. That my kids find helpful. That Brian helped to establish. That even allows me to still enjoy my sitcoms.

I just want everyone to know that in our house the schedule is loose. The time frame is not set in stone, however, the routine does not waiver. Schedules are good, they are helpful, but sometimes they are unrealistic and constrictive to follow. I feel that it is unrealistic for anyone to believe that they can get any kid to bed at 8:00 p.m. on the dot every single night. I think it is unrealistic to assume that you won’t get caught in a traffic jam, soccer practice will run late, or the check out at the supermarket will be packed. I mean, you might even burn dinner while on the phone, supervising kids and Play-Doh and folding laundry and might have to find a plan B for dinner before the husband gets home (true story). Time is sometimes unreliable. The routine, however, helps to give everyone some comfort.

For example, my kids don’t go to bed at the EXACT same time every night, but we do the same thing before bed every night, and end up in bed between 7:45 and 8:30 p.m. consistently.

All the routines in our house are this way. It started when they were babies. Nurse, play, change diaper, sleep. Nurse, play, change diaper, sleep. Then, as they would grow things would evolve. Naps got further apart. Play time got longer. Nursing turned into table food.

Right now, we have a few standard routines that keep us on task, and allow us to have flexibility when we need/want it.

So here is a little day in the life…

Morning
Alarm Goes off at 4:30, I hit snooze button and debate about working out and try to make a decision before next alarm goes off at 4:40. If I decide to work out, I hit the gym and shower and am back in time to take a power nap. Then 6:30 alarm goes off, and Brian gets up, showers, and starts getting ready for work. Kids hear Brian and proceed to wake me up. I get them something to drink, and flip on a show for them while I get breakfast ready. Kids and I eat, then head upstairs, get dressed, brush teeth, get shoes, glasses, socks, coats. Everyone heads out the door. Brian to work. Boys to school. Caroline and I to Mom and Me activities.


Afternoon
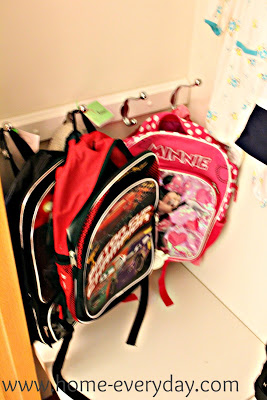
Coco and I pick up the boys, and since it is kind of a long commute, I try to pack a snack and something to drink for the way home. When we walk in the door, everyone removes shoes, empty and hang up back packs, and wash hands. I make lunch sometimes with a little help from the kids. We all eat together and talk about school. While they have a little down time, I go through school papers and mail and sort it out and look to see if there is homework that needs to be done after naps. Between 1:00 p.m. and 2:00 p.m. everyone (sometimes Mom too) takes a nap. My oldest really only needs a nap about 3 or 4 days a week, but he does have at least an hour of quiet time which includes looking at books while resting. This is my time that I do laundry, do some cleaning, catch up on a project, or blog. When everyone wakes up from naps between 3:00 and 4:00 p.m., I usually have a little snuggle time with everyone (while I still can) then, we grab a snack. Then it is homework time, (if there is any), play outside time, or park district activity time. Then dinner prep begins.
 

Evening
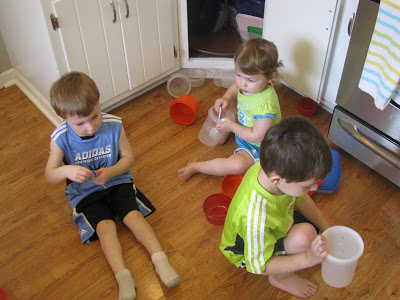
Kids will play independently, watch a show, or help me make dinner. Brian is usually walking in the door at this time, and changes clothes and will do a few things around the house like switch up laundry. Dinner is on the table between 5:30 p.m. and 6:30 p.m. Brian and I will sometimes clean up the kitchen together and do baths together or we will divide and conquer. Then it is finish up playing, pick up some toys, and pack backpacks. Next, we pick out clothes for the next day (sometimes this is when I pack my gym bag). Then, it is baths, jammies, brush teeth, find lovies, story time, prayers, kisses, and bed. Brian and I then collapse on the couch, do some work, blog, and watch sitcoms and try to be in bed no later than 11:00 p.m.


Then we start again.

Some notes:
– Times are not set in stone. These aren’t schedules, these are routines.
– My kids are amazing when we travel or do anything a little different, because they always have the comfort of the routine. No matter where we are we always have something to drink when we wake up. No matter where we are, we always wash hands before lunch. No matter where we are, we always have lovies and storytime before bed.
– Routines evolve as the kids grow.
– When someone is “not having” the routine, I let the kids make some decisions. Such as what kind of fruit we will have with breakfast. I will let someone pick what story we are reading at bedtime. Sometimes I will give special jobs like prayer leader, table clearer, or have them put toothpaste on everyones’ toothbrushes. Then, I give lots of praise. I have found my kids are much more cooperative when they feel they are part of the decision making and helping.
– Sometimes, we don’t follow everything perfect. We make mistakes. Sometimes, Brian and I leave the kitchen mess to play tag in the backyard instead. Sometimes, we skip baths to play Hi-Ho Cheerio. Sometimes, we put on Dolphin Tale and eat finger foods in front of the TV. Sometimes, everyone needs a break from the day to day, but I know that even though we have skipped a step or switched it up, the overall important parts of the routine have stayed the same.
– This is what works for US. I’m not saying that OUR routines will work for everyone, but I do advise having some sort of routine.


Staying on Track: Entry Organization

The school year is in full swing, and along with that comes schedules, sports, park district classes, and family events. Because of all the insanity fun, I have made it my mission to try and stay as organized as possible so that we can spend more time together, and less time looking through papers and tripping over shoes.

Sharon over at Mom of 6 has started a 4 week Organize Your Life Boot Camp, which I have decided to join in order to stay motivated, share some tips, and learn some new organizing techniques. The first week’s assignment is setting up stations around the house to keep things organized. I must say this Boot Camp has been way more fun than the kind at my gym.


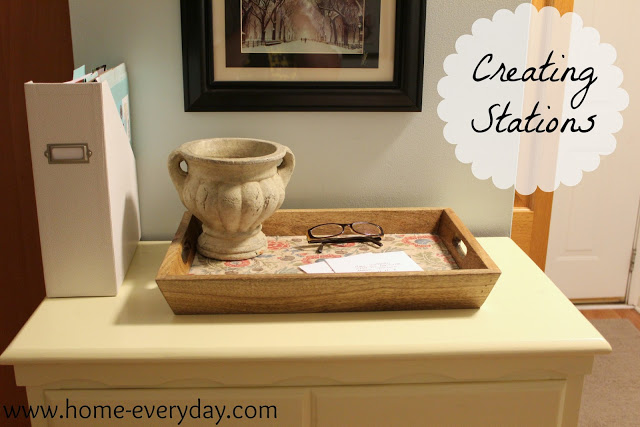
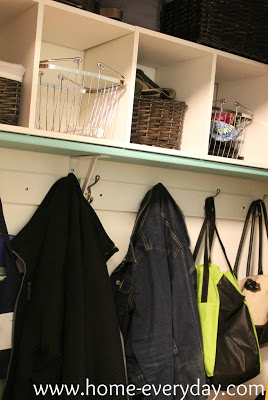
Our front hall closet makeover has come in so handy with this process. We all have a place to drop things when we walk in the door. No more tripping over backpacks, coats, shoes, and shin guards. These pictures show how well it has been working out so far.


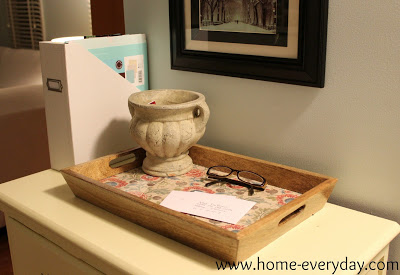
The dresser that I painted has become a place to drop mail, school papers, and keys. The white Martha Stewart magazine holder is filled with files marked: Bills, Short Term Business, Long Term Business, School, To File, and To Scrapbook. The tray from JoAnn fabrics is the perfect place to drop school papers and mail as soon as we walk in the door. We can sort into the files, when we have time.
 

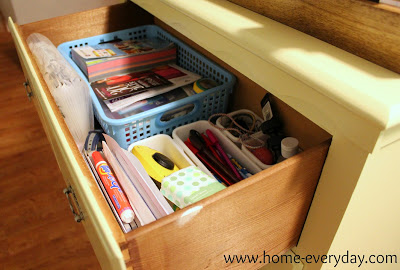
The drawers of the dresser also serve to store all things we need daily. The top drawer has pens, pencils, note pads, coupons, and some things that I grab as I walk out the door like hand sanitizer, a tape measure, Tide stain remover pen, and travel tissue.
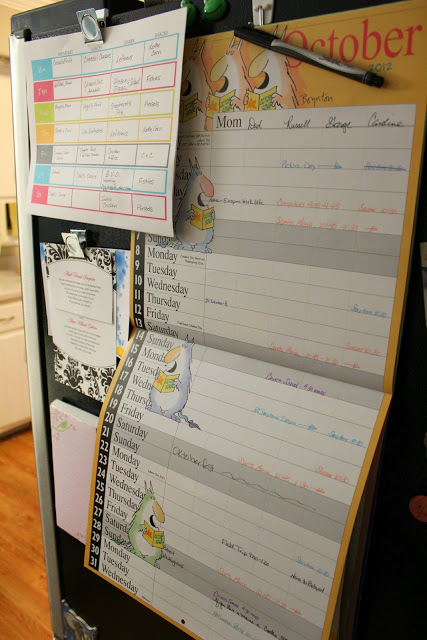
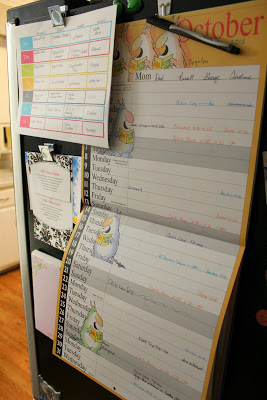
Finally, the side of the fridge, which is only a few feet from our front entry, has been a perfect place to put our family calendar, weekly food menu, and invitations to upcoming events.


Stay tuned next week for the next stage of Get your Life Organized Boot Camp, Establishing Routines. Again, way more fun than real boot camp.

Baby Tips: Cloth Diapering

Since I was one of the first people out of my group of gal pals to have babies, a lot of them ask me for advice regarding all things baby. A few weeks ago, I posted my list of baby must haves, and a lot of my soon to be and new mommy friends thought it was helpful, so here I am again to share a little knowledge. Recently, a friend wrote me and wanted to know about Cloth Diapering. I have cloth diapered three kids, and remember a time when I was cloth diapering three at the same time (my kids are pretty close in age), I thought I would fill her in, and anyone else that needs some advice in this department.

Ok, I admit, I had to be sold on cloth diapering. I try to be green whenever possible, but this seemed… well frankly gross, but after a little coaxing from my friend, Colleen, doing some research, and Brian sharing with me how much money we would save cloth diapering, I jumped with both feet and actually liked it a lot.

Here’s my step by step guide to Cloth Diapering. Don’t let this intimidate you, I am just over sharing. As usual.


1.) Do some research and choose a brand and kind. The brand we chose is called BumGenius. BumGenius has a few different kinds of cloth diapers, but we chose the One Size 3.0 and later the One Size 4.0. One size diapers, are just that, ONE SIZE. This is nice as you can use the same diapers for the entire time your child is in diapers without having to spend more money every time your kid grows. The diapers have snaps to adjust the size. Also, these diapers come with an option of velcro closures or button closures. In the beginning, we used the velcro closures with the boys, but as time went on and we had washed them a few hundred times, the velcro closures lost their stickiness. The BumGenius website has all kinds of tips on how to regain velcro stickiness, but to be honest I had two kids in diapers, was pregnant with a third, and didn’t really have time to worry about velcro stickiness, so when my daughter came along, we bought the button closures for her and they worked out wonderfully. She is two and the snaps are still working great. I strongly recommend using One Size diapers if you can as they are the most cost effective option.


2.) Buy all the accessories. Ok, I know when you have a baby, there are countless expenses, and the last thing you want to do is drop about $300 or more on cloth diapers and THEN purchase everything that comes along with cloth diapering, but honestly, you WILL save money in the long run. Here are some things you will need: wet bags, diaper pail, pail liners, BacOut, detergent, and a diaper sprayer. What are all these things, you ask. Here is the breakdown: Wet Bags – they are zippered waterproof bags to keep in your diaper bag. They are where you put your dirty diapers when you are away from home. Several places sell them, and you can even get them on Etsy. Diaper Pail – There are specially made diaper pails for cloth diapers, but honestly I just use a Rubbermaid tall trash can with a lid. Pail Liners – these are reusable bags to put in your diaper pail. It was always nice to dump the diapers in the washing machine and then throw the pail liner right in with the diapers (this can be done with the wet bags as well). BacOut – This is a specially made all natural stain remover and the only one that is safe to use on cloth diapers. Detergent – depending on the type of cloth diaper you buy, you will have to purchase the detergent that is safe for that particular diaper. BumGenius makes their own detergent so that helped narrow down what we should use. Diaper Sprayer – this is a little contraption that you attach to your toilet tank to spray any waste into the toilet.


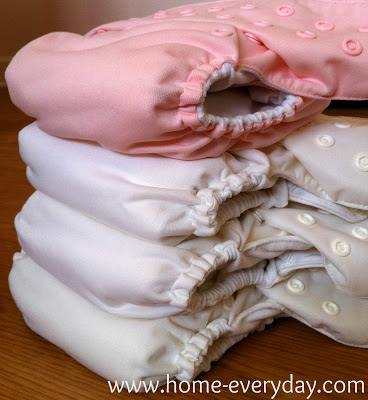
3.) Come up with a system. I will be the first to admit that using cloth diapers seemed really scary to me at first, but I honestly it isn’t that hard. Here is what we did for a streamlined cloth diapering system in our house. We had about 20 diapers on hand, and because of my crazy personality, I have 16 white and 4 in a color (I will explain why). When I wash and dry the diapers, I always put them together right out of the dryer, just like I do when I fold clothes. Putting diapers together means adjusting the size of the diaper cover and the insert and putting the insert in the diaper. Also, the color diapers always would receive an extra liner and I would designate those to be “overnight” diapers. After changing the baby, I empty any mess into the toilet using the diaper sprayer, spray any stains with BacOut, remove the liner and throw everything into the diaper lined diaper pail. When, it comes time to wash (which you should do every other day or every two days) I dump the whole pail liner into the wash and just throw the pail liner in the wash too.


Some things worth mentioning
– If you decide to use cloth diapers, it is probably best to use reusable wipes too. This helps cut down on waste, and you can just throw everything into one pail.
– Some great places to buy cloth diapers and accessories are Cotton Babies, Diaper Daisy, or Buy Buy Baby.
– Cloth diapers help save money, are good for the environment, help prevent diaper rash, and help with potty training. For more information on the benefits of cloth diapering click here.
– If your child needs to use diaper rash cream, you might want to switch to disposable as creams can harm the absorbency of the diapers. Also, you can put a small piece of fabric between baby and diaper at this time too.
– Some brands or cloth diaper stores offer trial packages where you can try out cloth diapers to see if it is for you.

I hope this helps to answer any questions or concerns regarding cloth diapers.