Category

Tips

I Do: Our Wedding

When Brian and I were planning our wedding day, we tried to think of all the weddings we had been to, and the best wedding receptions were the ones that had the best food. I know it sounds ridiculous, but good food can go a long way to your guests enjoyment of the reception. Once we knew the food would be fabulous, we tried to focus on lots of sentimental and personal touches.

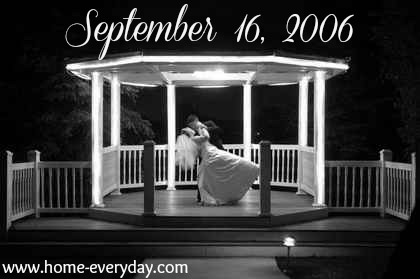
The Date: After the proposal, it was kind of a whirlwind of telling people and picking a date for our big day. We knew we wanted an autumn wedding. We love cool weather, the colors, and we met in the fall, so we thought it was appropriate. We finally came around to picking September 16th. It was the only date that both the church and our banquet hall had at the same time, but it was totally meant to be. You see, this is also my parents’ anniversary. My parents were married for almost 34 years before my Dad passed away so we figured it was  a nice tribute to my Dad, and almost like a lucky day since my parents had such a happy a loving marriage.


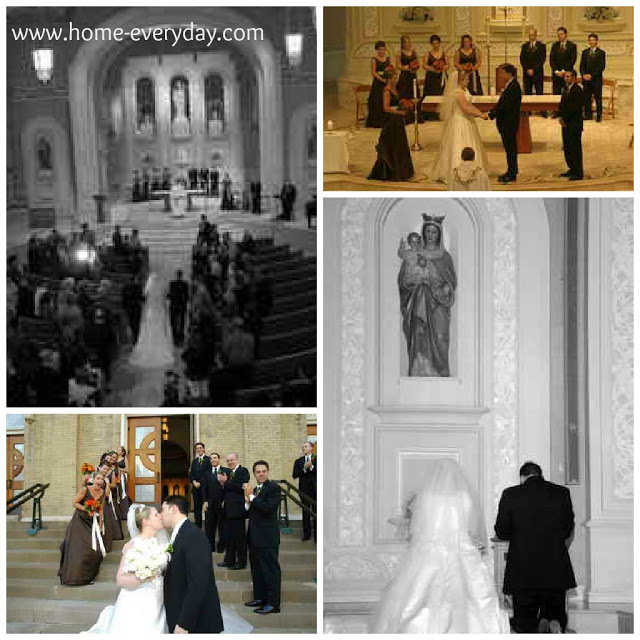
The Church: Old St. Pat’s is an important place to us. We spent a lot of time there when we were dating. We attended mass there, volunteered there, and met life long friends there. Brian popped the question there. It remains a very special place to us as it is still our parish and the parish where our children were baptized.


The Band: Brian and I LOVE music (mentioned here). We spent a lot of time at concerts (Guster is still one of our favorites), listening to music, downloading our favorite songs, and researching new bands together. One of our first trips together was to Graceland and then to Nashville where we saw Josh Turner before anyone knew who he was. A monthly tradition of ours was to see a band called Tributosaurus. They are a band that each month has one concert and picks a different artist or band to cover. We saw them become Chicago, Stevie Wonder, Pink Floyd, The Smiths, Paul McCartny just to name a few. It was/is still one of our favorite things to do. Anyway, we explained to the band how we are die hard fans, and would you please play for our reception. They agreed and played a mix of all of our favorites. Everyone enjoyed because it was good oldie type music perfect for dancing, but they also played some newer music for the young ones.

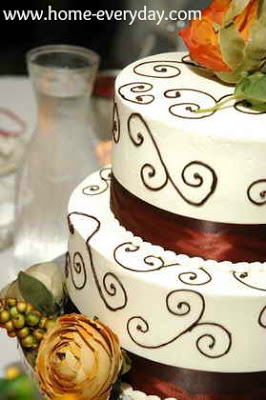
The Sweet Table: Brian and I didn’t have a traditional dessert of wedding cake at our wedding. In Brian’s family, it is tradition to offer an entire table of sweets and treats after dinner. Ours was piled high with tiny creme puffs, eclairs, small pieces of cake, chocolate covered strawberries, and other sweet treats. To keep with tradition, we had a very small two tiered cake  to cut. Our baker actually made us a replica of the cake for our first anniversary for FREE.


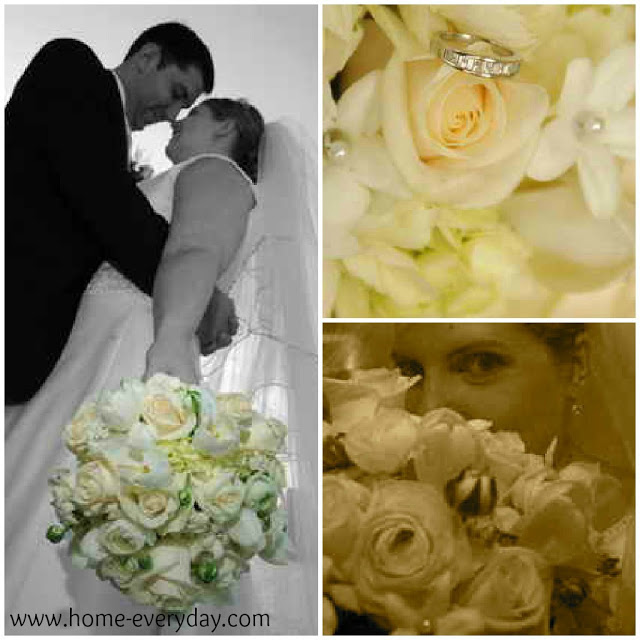
The Bouquet: My bouquet was a place that I found it easy to add personal touches. It contained lots of sentimental flowers. My Dad’s family is Dutch so even though it was fall I included ivory tulips. My Mom loves hydrangeas so I made sure I had a few of those. My grandmother had gardenia in her wedding bouquet so I included those, and my sister had roses in her bouquet so I included those as well. I also added a few of my favorites like ranunculus and stephanotis with pearl centers.

The Shoes: Another very personal touch was to honor my Dad. My Dad passed away when I was only 19. Him and I were extremely close, and one of our favorite things to do together was run (I still run today). Our favorite brand of running shoes was New Balance, so I found a pair of all white New Balance shoes and my friend and bridesmaid, Sara, bedazzled them for me with crystals and pearls. My brothers and my “Dad’s shoes” walked me down the aisle on my wedding day.


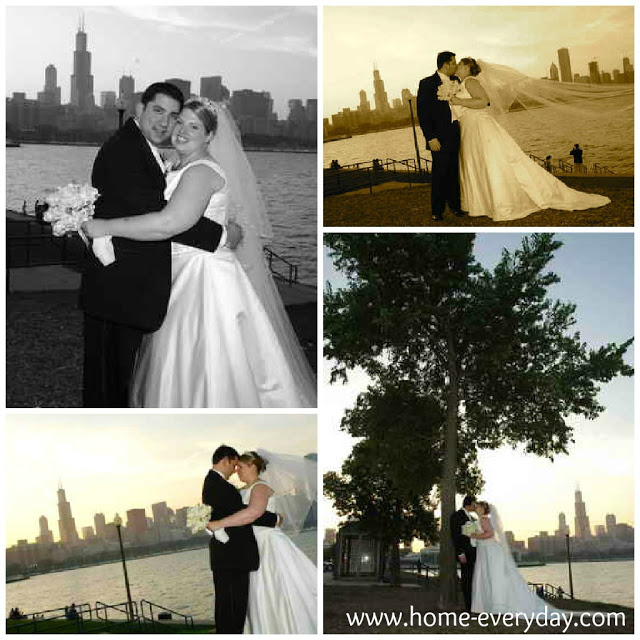
The Photos: We wanted to make sure we got some pictures with the Chicago skyline behind us. Brian and I feel like it is “our” city so that was important to us.


The Little Things: Instead of table numbers we labeled the tables with all of our favorite Chicago date spots. For favors, we are big believers sending people off with a little snack for the car ride home or something to share the next day. Our favorite fall treat is a carmel apple, so everyone got a carmel apple from Affy Tapple (pretty much an institution in Chicago). Our programs contained pictures of the stained glass windows of Old St. Pat’s.

I’m not an expert wedding planner, but I will say this. It is very similar to hosting any party. The food should be great but there should be a few personal and sentimental touches that help to make it personal and special to you and your guests.

Crazy Crap on the Walls: Our Photo Gallery

*Normally on Friday, I do a series called Flashback Friday where I feature a different area of the house and the improvements we have made since moving here, like our kitchen update, our bathroom spruce up, and our living room/dining room improvements. Flashback Friday will be back next week with the bedrooms.

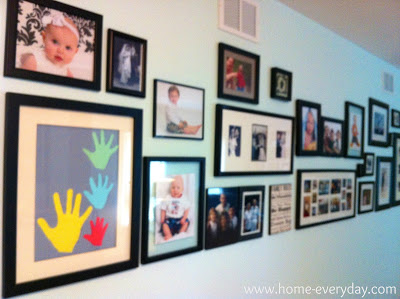
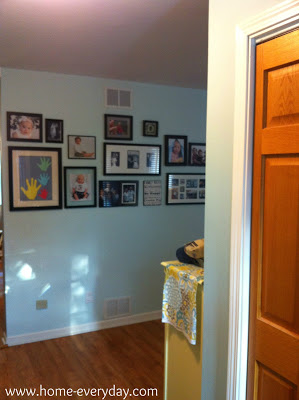
After talking about our living room improvements last week, someone asked me how I went about creating our photo gallery. Creating a photo gallery was a must for Brian and I. We love family photos and wanted to have a place where we could place them all together. This was one of the first projects I did after painting the living room, so there aren’t a ton of pictures (again, this blogging thing is new to me), but I will try to explain as best I can.


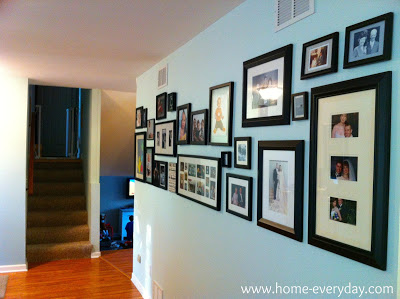
Location, Location, Location: When we bought this house, we had quite a few ideas of where we could put a huge photo gallery. After some discussion, we decided the living room. The wall we chose is one that you see right as you enter our front door, but can also be seen from every angle of the living room. Also, this wall is twelve feet long. We figured that this is enough space to add a number of photos as well as have room to grow.


Gather ’em up: The next thing I did, was gather up all the black frames that we owned. A photo gallery doesn’t have to have to have all the same type or color of frame, but Brian and I like uniformity. Even in our previous home we typically only bought black frames so that if we ever wanted to move pictures around the house, nothing would ever look out of place. There are a few exceptions to this rule, but for the most part every picture frame in our home is black.

Shape Up or Ship Out: Once all the frames were gathered up, and I saw what I had to work with, I measured off a twelve foot area of our living room floor and I started laying the frames in that space. I tried arrangements, and I even tried putting them into some kind of shape, but then I tried to think of what kind of furniture might be near the gallery, and the hope is to someday put a long desk there. In the end, I decided that the best arrangement would be to line up the bottoms of all the photo frames in the bottom row and work my way up from there.

Hang ’em Up: Once I decided on an arrangement, I took a picture of the arrangement, and then Brian recreated what I did on the floor up on the wall. He used simple picture hangers, and sometimes would measure the distance between frames to make sure they would all fit. He also used a laser level to line up all the pictures on the bottom.

There you have it. Our family picture gallery.


Top Five Go To Dinners

As I try to get ready for the impending school year (no worries, this is not a school post, I am so not there mentally yet as I try to enjoy the last of summer), I was thinking of some “go to” dinners that I go to when the weather gets cool, and the time to actually cook gets shorter.

I decided to come up with a criteria for a “go to” dinner. A “go to” dinner should be able to be prepared in a short amount of time or can be put in a slow cooker, requires not a lot of clean up, has great leftovers, and has an easy vegetarian option. I asked Brian some of his favorites, and he was pretty quick to rattle them off (apparently these are his favorites), and I didn’t have to go digging through my recipes.

Here is my list of TOP 5 GO TO DINNERS

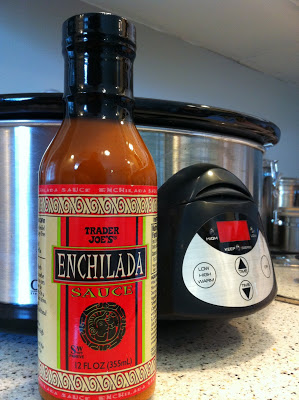
1.) Enchiladas: The recipe I use for chicken enchiladas is easy and the leftovers are amazing, and I think is Brian’s absolute favorite so that is why they made it to the number one spot. For a vegetarian option, you could just do beans and cheese.


2.) Chili: I use a Rachael Ray recipe for chili which I sometimes doctor up with a few additions and serve with corn bread. A double batch can be made and frozen for a night when you have no time to cook. For vegetarians, I’ll use meatless crumbles (I did this once and Brian didn’t know the difference).

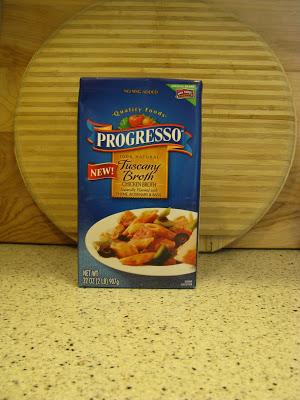
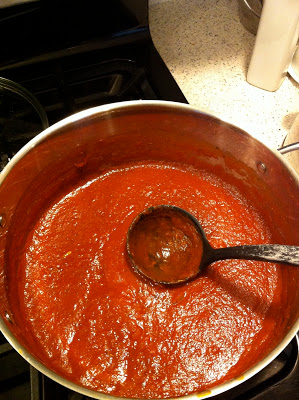
3.) Minestrone Soup: Again, this recipe is versatile and can be served with bread or even sandwiches for a quick weeknight dinner. Brian’s favorite thing is to bring the leftovers for lunch. (Someday I will post my recipe for minestrone soup, the key is the broth shown below). *Update: Here is the link for the Minstrone Soup recipe


4.) Spaghetti and Meatballs needs no explanation.


5.) Frittata: Zucchini Frittata is awesome for a quick weeknight dinner, and also can be adapted with any veggies and cheese. 


So there you have it, 5 Go To Dinners. Maybe some of these will make it into your cooking rotation.

*Update: I linked this post up with Mom of 6 and Moments that Define Life. Both feature a listable life series each week. 

Our Garage Sale: Also Known As a Horders’ Heaven

Having a garage sale is no small feat. It does takes some work and some planning, but after hosting our first garage sale a few weeks ago, I would definitely do it again. We made some extra cash AND we have the added bonus of having more room in closets, drawers, garage, and sub-basement.

Brian and I had never hosted a garage sale before, and we weren’t sure where to start, but we knew we had plenty of useless crap great treasures to sell. Usually, when we are purging, these things make their way to our local GoodWill or to a local charity, but we decided a few months ago that we would start a “sale pile” in the basement. As we did our purging we would save it for the garage sale instead of donating it. Before we knew it, we had a pretty large pile going (it was about to topple over), and it was time to set the date and register.


Brian and I looked in our local newspaper to see if there were any town events coming up. We thought that if we picked a weekend that more people would be visiting our neighborhood, maybe more people would stop by our garage sale. The weekend we hosted our garage sale was the weekend of our town’s art festival as well as a huge charity benefit at the church across the street from our house. This kind of planning really paid off, as a lot of people would wander over from across the street or on their way to the art fest.

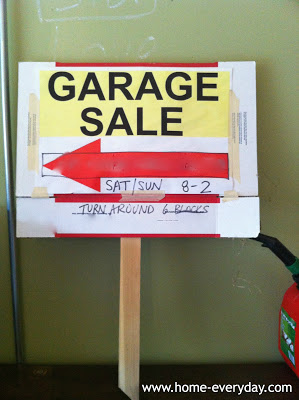
Once we set the date and our registration was complete the REAL work began. The week before our garage sale, we did some advertising. We advertised on craigslist and by placing signs all over our neighborhood. Both of these forms of advertising were free!(TIP: If you are having a garage sale, please make sure your signs are large, legible, sturdy, and have all information. Also, include pictures and details about what is for sale in your craigslist posting).


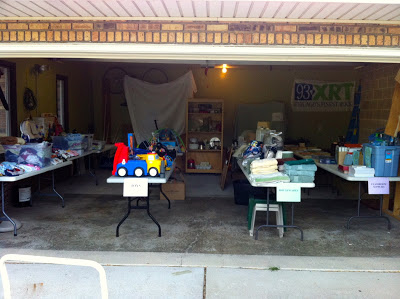
Next, I got rid of everything in the garage that wasn’t for sale. I made sure to put our lawn mower, snow blower, wagon and kids’ bikes in our shed.  Also, anything that could be hung from the walls or ceiling, I hung up and then draped with sheets. This helped make room, and discourage potential buyers from asking me about things that were not for sale.

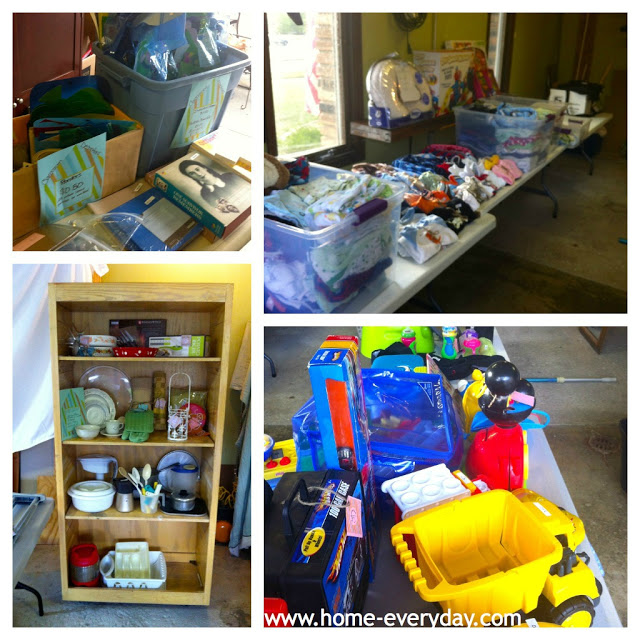
Once the garage was clear I put in several long banquet tables (we borrowed about 9) so I would have plenty of room to display items, and then labeled each banquet table with a sign signifying what kind of items would be on the table. The categories of items I had were: Baby Clothes (sizes 0-3, 3-6, 6-9, 9-12, 12-24), Toys, Baby Gear, Kitchen Supplies, Housewares, Teaching Materials, School/Office Supplies, Books and Media, Clothes and Jewelry.


The next thing I did, was create a “one touch policy” on all items to save time. Basically, what this means is: when I brought an item up from the sub-basement, I packaged it, priced it, and put it exactly where I wanted it to be the day of the sale. This saved a bunch of steps. I didn’t have to sort all the items into groups, then go back and package or group the item, and then go back again and price the item, and then re-sort the items for display in the garage.

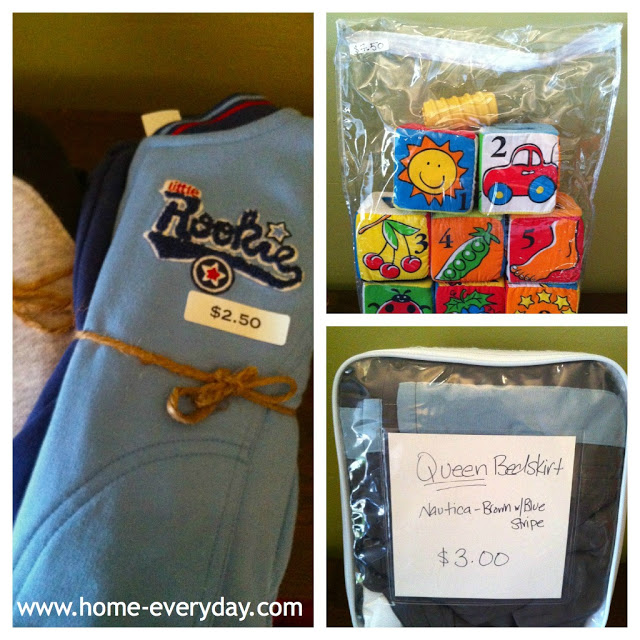
I know it sounds weird to “package” items, but this is where my Type A personality was brought to light. I tried to pretend I was the customer. If I had a baby outfit that included pants and a shirt, I would fold the item, tie it together with twine, and then put a price tag on it. With sheet sets I would fold the fitted sheet, flat sheet, and shams all together and put in a large ziplock bag. Then, I would label the bag with the sheet set size, what was included, and the price. I also tied together place mats, cloth napkins, toys, earrings, silverware sets, and dish sets. All of these items were labeled in detail. Long story short, if it is a set or is supposed to be together, keep it together. (TIP: The cleaner and prettier items are displayed the more likely people will want to buy what you are selling. I got several compliments from buyers on the cleanliness, and organization of the items I was selling. Also, price your items fairly based on condition, cleanliness, and if you have a complete set).


The last thing I did was to move any furniture I was going to sell to our driveway. Brian and I thought if some of the big ticket items were on the driveway, it might catch the eye of people walking past our house.
Finally, garage sale day was here! Brian and I went into the day with the mindset that our stuff is not gold. To us, these items were something we don’t need or want anymore, and if we weren’t really willing to haggle, then we shouldn’t be selling the item at a garage sale. Because of this mentality, we did a little bit of haggling, but most people thought our prices didn’t really need any adjustment, and were willing to pay the price that was on the item. I did however offer a few deals. For example, if someone bought 5 baby outfits, I would tell them to go pick out another one for free. That was my way of saying, thank you for taking our old stuff away.  A new teacher asked if she could buy all of my old classroom decorations at one price for the whole bin, and since she was taking the whole bin off my hands, I gave her about two dollars off each item in the bin. (TIP: How you price items at a garage sale does help people buy more, so do your research ahead of time).
All of the organizing and research had completely paid off. For a little bit of work we walked away with a pretty hefty sum and a ton of compliments. One woman even came back three separate times with different friends every time, AND she bought something every time. I really believe that a garage sale is one of those things that you get out of it, what you put into it.


Baby Must Haves

In the past year or so, I feel like there has been a HUGE baby boom. Maybe it’s Fifty Shades of Grey or maybe there is a lack of good television, but I know so many ladies who are planning to start a family,who are pregnant or who have just had babies. All these moms, always have the same question for me: “What do I need? What should be on my registry?”


After rewriting the same email to my family and friends at least ten times, I decided to post here our (Brian has had some serious input), favorite things and must haves for baby. Now keep in mind, I am not an expert, I just know what worked for us.So here goes, our favorite baby must haves:

1.) Carseat and Stroller (also known as a travel system): For obvious reasons, we absolutely knew we needed a carseat. We registered for both the carrier carseat with base and the carseat that is for older children. While we wouldn’t need the larger one until much later, we figured it was an expense that would be nice not to have down the road. We personally have a Chicco carrier carseat and stroller for our infants. We love it and installation is easy. We actually started out with a Graco carrier carseat, but because our oldest was very small, his head was always falling forward so we switched to a Chicco. However, both have extremely high safety ratings, and I have never heard anyone complain about either brand. For the larger size up carseat, we did a Britax. They are highest rated in safety and easy to install. They can also serve as rear facing and forward facing which in some states the law requires  kids stay rear facing until age two, and there is no way any kid can stay in those carrier things past 10 months because they are just too heavy to carry around. Also, the Britax models are a bit pricey, but there are ways to find bargains. As far as strollers go, this is basically personal preference. Some people like jog strollers, while others like more basic models. Some decisions are based on ease of pushing or how high the handle is for taller parents. When we registered for a stroller, the best advice we got was to make sure that whatever carrier carseat we purchased could fit into or be adapted to fit into the stroller. When babies are really little (younger than six months) it is safest for them to be in the carrier carseat even in the stroller. Most sales people at stores like Babies R Us and Buy Buy Baby will know what works. Also, we tried to consider quantity here. It is nice to not have to move carseats around to different cars. For the carrier carseat we just registered for a second base which is cheaper than buying a whole carseat. (Whew, overwhelmed yet?) 


2.) Crib/Bassinet/Play-yard: I don’t know if a crib is something that parents will register for, but in some cases a bunch of family members will go in on a big purchase like a crib. Cribs are kind of tricky because there are a lot of safety things associated with them for obvious reasons. Our theory with the crib was as long as it is safe, pretty, and can be used for a long time and multple kids we were good. We actually went with a model that Babies R Us sells, and I think they still carry. It is also a convertible crib, which means it can be converted to a toddler bed, and then later can serve and a head/footboard for a double sized bed (talk about bang for your buck). As for bassinets, we thought this was not a good idea as they can only be used for a short period of time, also bassinets require different sized sheets and bedding. We have a play-yard (Graco Pack and Play the bare bones basic model) that has a bassinet feature, and we just put that in our room for the first few weeks. I know Moms that kept the play-yard set up on a lower level of the house as they weren’t able to walk stairs after a c-section. After the bassinet phase, it is nice to have a “travel bed” for Nana’s and trips and such. This is another quantity item. Some people like to keep one at Nana’s or in the car and keep one at home especially if you use it every day in your house (however they are easy to fold up, and we got buy with only one). 
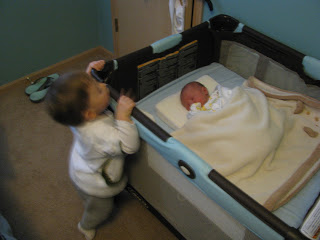
 

3.) KCU: This is my own little term I made up. I call it a Kid Containment Unit (KCU). Things that fall under this category are swings, bouncey seats, exersaucers, play mats, jumperoo’s, Bumbo’s etc. We narrowed it down to two or three of these things, as they take up so much space and honestly, our kids liked roll around on the floor. I used them mostly when I needed to fold laundry or cook dinner. I knew the baby was safe, contained, and occupied. We did end up with all of these things, but people gave them to us as hand me downs. The two things we used the most were the bouncey seat and the exersaucer. Also, any time we could register for a travel one of these things we did (we were living in a condo at the time). They are smaller, can be folded, easy to hide, and do the same thing as the “bells and whistles” models. When we had babies, we only had one level, but I know Mom’s who have two or three levels in their house that liked to have a KCU on each level. 


4.) Change Table: We didn’t register for those old school ones like we had growing up. Ours was just a dresser with one of those pads on top. It was nice to have a designated space for baby supplies and clothes, and later we used it as an actual dresser (some play-yard models have change tables built in).

5.) Breastfeeding Supplies: This depends on if you plan to breastfeed, if not skip ahead. Boppy Pillow: (some Moms like the My Breast Friend) either way, I honestly could not have lived without this. It made nursing so much easier, and came in handy when I needed to answer the phone or change the channel on the TV for a 3 a.m. feeding. Breast pump: I had a Medela Pump in Style. Again, I know its pricey, but was so worth it, and for as much as I used it, it had paid for itself 3 times over. Another thing I thought was so convenient were the Slimlines freezer trays. They are freezer trays for breast milk, but they freeze the milk in one ounce sticks so they can fit in the bottle and since they are each one ounce you know EXACTLY how much milk you’re putting in the bottle.


6.) Baby Carrier: I liked our Baby Bjorn. It was so nice to sometimes just be able to use that instead of packing a bulky stroller. I liked it for the grocery store, church, walks outside, and doing some things around the house. A lot of moms swear by Moby wraps or baby slings, but I could never get it to work right, and I didn’t feel like the baby was in there safely (again, personal preference). Also, the weight limit on a Bjorn is nice. They also make carriers that you can use for kids up to 45 pounds and go on your back. We considered this, but our kids were happy in the stroller, and once they started walking, they didn’t want to stop. (Almost done, I promise).

7.) High Chair: We had an old school model. The separate high chair with a tray. We liked it a lot and we liked having something that we could save for grandkids. However, some moms find the ones that attach to your kitchen chairs much more convenient. They are smaller, don’t take up floor space in the kitchen, and can later be used as a booster seat without the tray. We did not register for the travel ones that attach to counters or tables, they did not seem safe to us at the time.


8.) Baby Tub: We had a baby tub, and used it. We also liked it because it was nice to have even when our kids were older. We put the little tub inside our bath tub, and just filled the baby tub. It saved water, and it helped with a transition to the big tub.


9.) Linens: Crib sheets are specially made to only fit a crib mattress (I would say to have 3 or 4 on hand, it’s always nice to have a lot of these in case there is a middle of the night diaper leak or something). Hooded towels are not a necessity, but I liked having designated baby towels (three is enough, when they are little babies, they only bathe every few days as to not dry out their skin. Also, it is nice to keep one in your diaper bag in case you have to do an impromptu bath at Nana’s after messy cake. True story). Baby washcloths are just softer and I like them better (we had at least 6 of these, as I used these all the time and even kept one in my diaper bag for emergency nose wipes and spit ups). Play-yard sheets are for the pack and play (I had two in case of an accident). Change pad covers are covers for the pad that goes on the change table (two or three are nice for laundry rotation). Burp cloths are nice to have all over the house (I had about 8 and kept 2 in the diaper bag). Lap pads or multi purpose pads are not a necessity, but my trick for these was I put one in the boucey seat,  and one in the carseat so if there is a diaper leak you don’t have to wash the WHOLE seat cover, as they are kind of a pain to wash). I also had an extra Boppy Pillow cover in case of an accident. 


10.) Miracle Blanket: You’ll see on my list below of things to not register for, and you’ll see I put blankets, however, we absolutely loved our Miracle Blankets. This was my Mommy secret for getting the kids to sleep through the night, and fall asleep on their own. If you want more information on Miracle Blankets click here. Seriously, they are a Miracle and really work. I used them with all three kids, and they were all sleeping through the night pretty early on, and even now they all older I can just put them in their beds and they fall asleep on their own. Brian and I owe the Miracle Blanket for not only how well rested our kids are, but how well rested we are. 


11.) Bottles: I know this seems like a common sense thing, so I just want to share our experience here. We liked Breastflow bottles. My kids never experienced nipple confusion with them, and they are BPA free to boot. I know Moms that like Avent, Dr. Brown’s and lots of other brands. The advice I got here was to ask the baby’s pediatrician, lactation specialist, other Moms, or labor and delivery nurses for suggestions.12.) Diaper Bag: I actually just have a nice backpack that I love, but they have some really nice diaper bags out there now that I wish they had when I was registering. Some things I would would have done is get one that comes with a change pad, as well as get one that has insulated pockets for bottles and sippy cups. Early on, we learned it is sometimes a pain to bring a large diaper bag if we were just running out for a little bit, so I also have a small one that I keep a few diapers, some wipes, and an extra outfit. It is nice for church or quick runs to the store.

13.) A nice thermometer. We have a Summer Three in One Family Thermometer. We like it and know other Moms that love it. It is easy to use, which is nice in the middle of the night.
14.) Grooming Supplies: Tiny nail clippers, soft bristle brush, and a little comb.
15.) Feeding Supplies are something we didn’t need until the kids were a little older, but we were happy to receive at our baby shower.  Little bowls, spoons, forks, and plates. I registered for bowls that came with lids which were awesome for traveling or refrigerating leftovers. There are different sized spoons for different ages too, so we made sure to order a few of each size. Also, I made my own baby food so there are all kinds of contraptions for this, but my favorite is the OXO Ice Trays for storing an freezing all the purees. (No really, almost done this time). 


Below is a list of things I didn’t add to our registry. I had heard from friends people often like to give these kinds of things once the baby comes.

– Outfits (the only exception here is I personally picked out two or three outfits and purchased them myself for coming home from the hospital and the first couple days home.)
– Onesies
– Pajamas
– Socks, Hats
– Blankets
– Books and Toys (this is a personal preference of course, but some parents prefer no plastic or only toys made in the USA)
– Sippy cups (this was tricky for us because our kids had preference with them so I just returned any we received and then bought ones that our kids liked).
– Pacifiers (we delivered in a hospital so we asked our nurse at the hospital for a few extra just in case and we were good to go).
I know it doesn’t seem like a lot (or it does and you are totally overwhelmed) in comparison to the registry sample lists they give you at Babies R Us and Buy Buy Baby, but honestly, these are the things we used EVERY single day. When I registered, I tried to think of what my parents, grandparents, etc. had access too, and honestly all the baby needs is love, food and diapers.