Month

July 2012

Math Club Masterpiece: How to Hang Your Children’s Artwork

When I was in high school, yes, I was a member of the Math Club. Yes, I went to Math Competitions (my specialty was Algebra II, Geometry, and Trigonometry), and yes, I know you’re jealous.

I also know what you are thinking, “how can someone so obviously cool, have been a part of the Math Club?” Well, I will tell you, there were cool kids in the Math Club too (ok, maybe not, but in my case there were some pretty cute nerdy boys that I thought would be impressed with my mad Math skills).

Anyway, those math skills came in pretty handy for this project: 

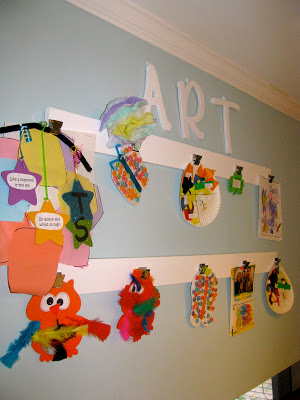
I spent more time measuring out where the clips should be and measuring to make sure it was exactly centered on the wall, than I did putting it together. It was a very simple and inexpensive project, and it has come in very handy to hold all the kids’ beautiful masterpieces. I only had to buy the wooden board, clips, and letters. Everything else I had on hand.

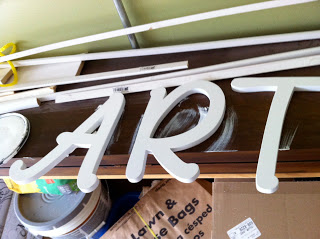
I started out at Home Depot and purchased a piece of pre-primed board (this could easily be done with scrap wood), and had the nice people at Home Depot cut it in half (in case you didn’t know Home Depot will cut wood for you). Then, I bought some letters to spell out ART at JoAnne Fabric, and got some heavy duty metal clips at Staples.

After all the shopping, I was ready for a little bit of painting and assembly. I painted the planks and letters with some leftover Behr Decorator White Paint that I had just used on some other projects like the chairs and bookcase I had just painted. I let all this dry for about 24 hours.


Then, the next day during naps, I started to assemble. I first measured the back of the planks of wood and the letters, and attached a hanging hook on each end of the plank and one on the back of each letter. I made sure to measure the exactly equidistant from each end of the plank so they would be easier to hang.

Then, I flipped the boards over and measured where I wanted to put the clips. This was hard because I wanted them to be evenly spaced, but I also wanted to leave enough room so that I could hang different sized papers or projects. Once I decided where I wanted the clips, I hot glued them to the planks.


Hanging time = more measuring. I first measured and hung the boards then measured and hung the letters. My tape measure got quite the workout with this project, but it was totally worth it.

Look at all the awesome artwork the kids hang from the wall.


It is in the kitchen right above where we eat breakfast and lunch so it makes for a great discussion piece as well as a great way to show the kids we are proud of the work they are doing.

Splish Splash

As I mentioned yesterday (here), we took a day trip out to see my Aunt, Uncle, Cousin, and her new baby. My Aunt and Uncle have a gorgeous home which they have completely renovated themselves! It is on a beautiful lake, and the weather was perfect, so there was plenty to do. The kids had a ton of first time experiences, and are still talking about all they got to do.

First, we took a boat ride.


Then, the boys went tubing.


After getting off the boat…


…it was time to play in the water.


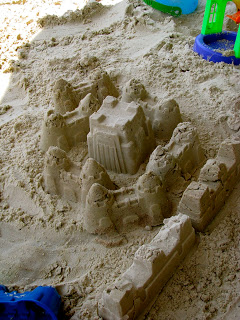
I made a sandcastle.
Then it was time for little ride on the swing.
After a perfect day spent with family, we made our way home. Thanks Aunt and Uncle for the food, hospitality, catching up, boat ride, and most of all for an awesome night’s sleep.


Paula Deen has a recipe without butter: Chocolate Chip Zucchini Bread

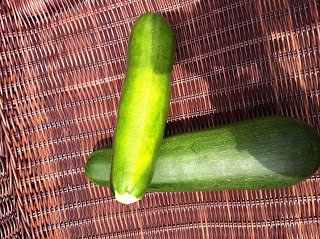
Over the past two weeks, I have been harvesting lots of zucchini from our vegetable garden, which you can read about here and here.

Zucchini is one of those vegetables that I have very little experience. I am used to sautéing it or using it as part of a crudite (boring), but about a year ago (cue the Alleluia chorus), I found the most amazing recipe for zucchini bread. Paula Deen’s Chocolate Chip Zucchini Bread is wonderful as a breakfast treat or a great dessert. It is one of my favorite recipes to share. In fact, I just made some for my Aunt, Uncle and Cousin as a thank you gift. They hosted us for the day at their amazing home on a beautiful lake. The kids had an amazing time swimming and going out on the boat. (Look for more pictures of our trip later this week). 

The recipe doesn’t have any butter, but it does have a bit of orange zest, which totally makes the recipe. It is my absolute favorite zucchini recipe, and I have experimented a little bit with it over the past year, and have found a way to make muffins too. The muffins are more portable, and they bake faster than the conventional bread recipe, which means we get to enjoy them sooner.

To make Chocolate Chip Zucchini Muffins, mix all the ingredients according to the recipe. Prepare two 12 cup muffin tins by spraying with cooking spray. Bake in a 350 degree oven for 20-30 minutes or until an inserted toothpick comes out clean. Cool for 10 minutes in the muffin tin then remove and cool to room temperature on a cooling rack.

And Oldie but a Goodie: Refinishing a Painted Bookshelf

This bookshelf is an Oldie but a Goodie. My Dad built this bookshelf for my oldest brother’s bedroom when he was a little kid, then it got passed around to all of the siblings and even a few of the grandchildren. Growing up, I can remember my Dad building a few sets of bookshelves as well as other furniture and tackling a lot of DIY home improvement projects.

Anyway, his love for doing projects has been handed down to me, and when my sister said I could have one of the bookcases Dad built, I of course said yes. This particular bookcase has been passed around and repainted so many times it looked pretty
shabby (as in it needed some serious TLC).
The original paint color was red, then yellow, then pink,
then white. I decided to bring it into the boys room for their toys, money
banks, and books, and paint it a fresh coat of white with a different color on
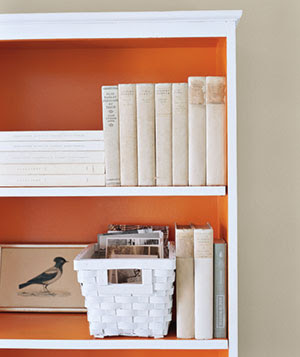
the back part of the shelves. Similar to this photo I found in my favorite magazine, Real Simple.

I loved the orange, and thought it would be ok to tie that
into the boys room because their room has become hodge podge of a bunch of
different colors to accommodate their likes.

So here’s how I freshened up this old bookcase, built by my
Dad probably 40 or more years ago.
Supplies:
Paint Stripper (Citristrip)
Putty knife
Mineral Spirits
Steel Wool
Electric Sander (Black and Decker)
Sand Paper (course and fine grit)
Primer (Behr)
Painter’s Tape (Froggy Green Tape)
Behr Decorator White in Semi-Gloss (leftover gallon)
Behr Orange Peel in Semi-Gloss (I bought 1 quart)
Gloves
Face Mask
Safety Glasses
Shop Vac
Sponge
Bucket of Water
Paint Brushes
Small Roller
Painter’s Trays.
Strip, Ooo la la: I decided to strip the bookcase simply because of the
number of layers of paint it had. I used a very gentle paint stripper I
found at Home Depot called Citristrip (I’m starting to see an orange citrisy theme here), and followed the directions to a T. Which, I know is so
un-Erin like, but since I’ve never used paint stripper before, I figured this
was the best way to go. Depending on the kind of paint stripper you use, you
may or may not need the steel wool and mineral spirits. I liked this step as it
removed any paint stripper residue and got rid of all the yucky leftover layers
of paint. I made sure I wore gloves and my face mask for this step. 


Getting Sandy: I put
on my mask and safety goggles, and got sandy. Using my electric sander, I first used the course grit
sand paper to try and remove any paint that the stripper couldn’t get. I also
tried to sand away as many knicks in the surface as possible. Then, I used the
finer grit sandpaper and sanded until the surface was smooth to the touch.
There was still some paint on the surface but if I closed my eyes and ran my
hand over the surface I couldn’t even tell. Also, to get in the corners I couldn’t use the electric sander, so I just used some pieces of sandpaper.So fresh and so clean: For this step, I used my shop vac to suck up all the dust from
stripping and sanding. Then, I used a damp sponge to wipe away all excess dirt
and dust from the surface and in the corners to get it ready for priming. After all this prep work
I’m finally ready to break out some paint brushes.

Prime: This step
was very easy. I used Behr Primer. I find it easy to use, and it goes on and
dries quickly. To get in all the corners I used my favorite paint brush, and
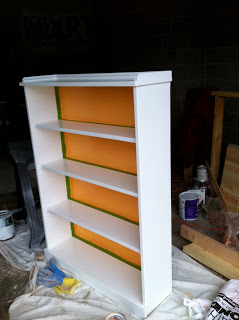
then on all the flat surfaces I rolled using a small roller. The picture below is after a coat of primer. 


Sticky Situation:
I went back and forth on where I wanted to tape off the bookcase to do the two
colors. I finally settled on only painting the back the bright orange color.
Once, the primer had time to cure, I taped off the the back of the bookshelf
and painted the back portion using the same mehod as the primer. I used a paint
brush to paint in the corners and then used a roller for the flat surface. This
required two coats. Before the second coat was too dry,  I peeled of the tape and was
ready for the last step.
Last but not least: The
last step was to paint the outside of the bookcase as well as the shelves a
good clean white. Once the orange paint was dry (about 24 hours), I taped the orange corners to
help prevent any white paint getting on the orange back. Then using the same
method with a paintbrush and roller, I painted the bookshelf white.
Here is the finished product: The boys love it and enjoy
putting their book, toys, and money banks on it.

Captain Vegetable Part Deux: Planting a Vegetable Garden

As I said in this post, planning the vegetable garden took
a little bit of preparation. After building the raised beds, putting them in the
right part of the yard, and filling them with the right material (in our case peat moss and mushroom compost as suggested by the Home Depot gardening expert), it was time to plant.
This garden, I knew would be a trial and error process as I am not known for my green thumb. I looked around the internet, Pinterest, and talked to family and friends about what vegetables work well for them, and decided to do a large variety of vegetables. My thinking was that if I tried a little of everything, I would have a better idea of what works in our yard, and only plant the successful plants next year.
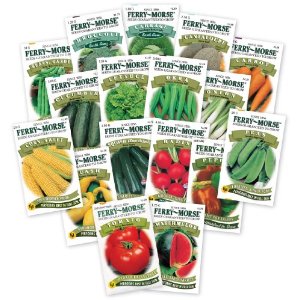
After doing more research, and talking to a few more people, I decided to buy my seeds on Amazon. I bought this seed kit. For $12.41 plus free
shipping, I couldn’t beat the price. These are all vegetables that we like, so if they were all successful, nothing would go to waste.
To plant the seeds, all I did was follow the directions on
the back of each seed packet. On the back it gives suggestions for when, where,
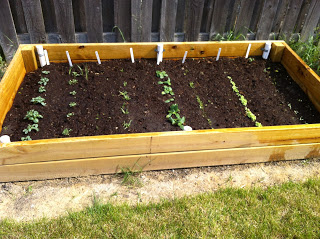
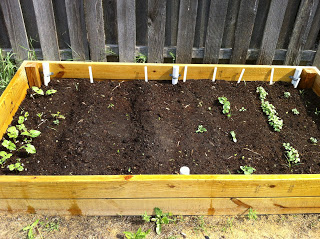
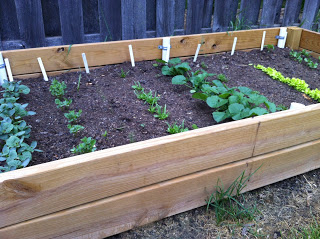
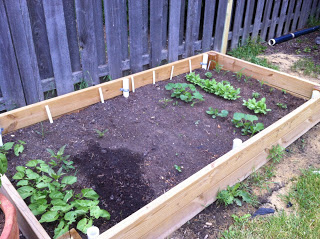
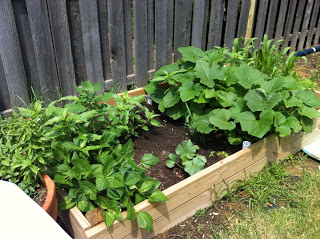
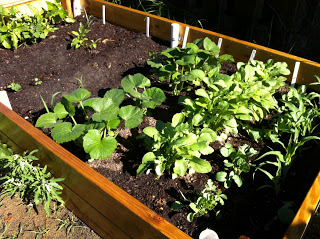
and how to plant the seeds. Once planted, this is how the garden progressed.
Planting Day!
 Week 1
Week 2


Week 3


Week 4
Week 5


Week 6
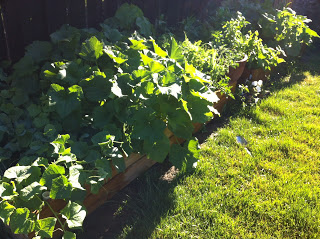
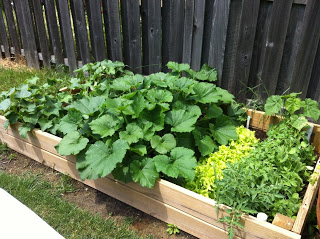
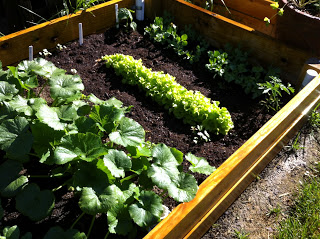
So far, I have been amazed at how it has been growing. My expectations weren’t too high, as I have killed many house plants in the past, and we have not had much rain here. Take it from me (former black thumb), with a lot planning, regular watering, and weeding, this isn’t impossible.
We have already been reaping the benefits of this garden with some salad and a few recipes that I will be sharing soon.

In The Hot Seat: Painting and Recovering Old Chairs

As in, check out this HOTNESS!
Pretty cute right? Especially considering this is what they looked like when I got them. The eighties called, and they want their powder blue back.
Why three new chairs? Well, once a month, I host my whole family for a Sunday Dinner. My
grandma used to host people EVERY Sunday. After Grandma Nano passed away, my
sister kept it going for awhile, and since moving to our “new” house (I guess
its time I stop saying new), I decided have everyone over once a month for good
food and to catch up.
When everyone is here, it is over 20 people, so I was
constantly using folding chairs, and even running out of those. That is when my
Mom said I could have her old kitchen chairs. It is an incomplete set, but any
extra chairs would work, so she sent over three sturdy chairs.
According to my Mom, these chairs were hand me downs from a
neighbor when her and my Dad were first married. And once I removed the layers
of paint and seat coverings, it was apparent these chairs were OLD.
Here is how I refinished these chairs from luke warm to HOT,
and had them done in time for Sunday Dinner!
Supplies:
Electric Sander
Sandpaper
Paint brushes
Primer
Behr Decorator White Paint
Batting
Fabric
Drop clothes
Staple gun and staples
Flat head screwdriver
Phillips head screwdriver
Take it off: Using a Phillips head screwdriver, I removed
the seats and set aside.
Rough it up: The chairs had a few layers of paint, but not
enough layers that I felt I had to strip them with paint stripper. I just
sanded them using my electric sander, and roughed them up everywhere. This was
an important step, as the last layer of paint used seemed pretty glossy, and I
knew the new coat of primer and paint wouldn’t stick to that. These chairs have
a lot of different surfaces and corners, so on the areas that I couldn’t reach
with the sander, I just ripped a few pieces of sandpaper and did it by hand.
Prime Time: I cleaned the chairs up with a damp cloth to
remove all the dust from sanding. Once completely dry, it was time to put on a layer
of primer.
Thinner the Better: I used Behr’s Decorator White Paint in
Semi-Gloss. Using a pant brush, I painted using an almost a dry brush. What this
means is, I didn’t slap too much paint on the chairs, as this causes a lot of
dripping which you then later have to sand and also causes there to be lots of
visible brush strokes. Once finished, I let the chair dry for a few hours
before doing the next coat. I did a total of three coats, which while I know
this can be a pain, and time consuming, but I wanted them to look sleek.
That’s a Wrap: The last few steps involve recovering the seats. I
found this awesome paisley fabric at JoAnn Fabrics that had a lot of the
colors I’m hoping to incorporate in our house. This is where the fun part comes
in. Using a flathead screwdriver to remove the staples, I first removed all the layers of old wallpaper that the chairs had been
covered in. I took pictures of each layer. Uncovering each layer felt like I was uncovering a decade.
80’s powder blue:
70’s Brady Bunch plaid:
60’s Jimmy Hendrix floral
 50’s burnt Orange (which you can see a tiny corner of underneath the floral).
I, next, measured the seat and cut my batting and fabric to
size with about 4 or 5 inches extra on each side to allow for wrapping around
the seat. Then, pulling tightly, I stapled the fabric in place (for another
look at how to upholster check out my post on making a headboard HERE). Once the seats were recovered, and I had the chairs cure up for a few days, I reattached the seats.
VOILA! Three extra comfy, sturdy, and cute chairs for Sunday Dinner.

Pinteresting: Microwave Mug Cookies


So, I have three things to say:
1.)
I know millions of people have said this, so add me to the
list. I LOVE PINTEREST!
2.)
We were jonesing for some chocolate chip cookies.
3.)
With how hot it is here, the last thing I want to do is turn
on the oven. I made cookies last week for Brian, but that isn’t happening again
for a while.
Last night, my friend pinned this on Pinterest, and bless
her for doing so.
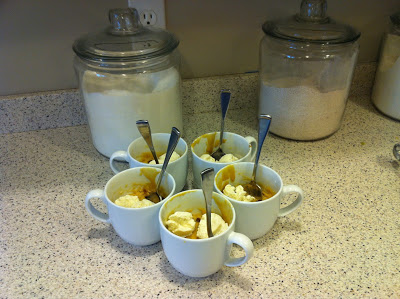
I whipped up these bad boys up so fast. I even made five of
them at one time in our microwave, and it totally worked.
In true Erin fashion, made a few additions. The first
addition is I put a drop (I used a kids medicine dropper) of  pure vanilla extract in each cup at the
same time I added the egg yolk. When the cookies were finished, I scooped a
little vanilla ice cream on top.
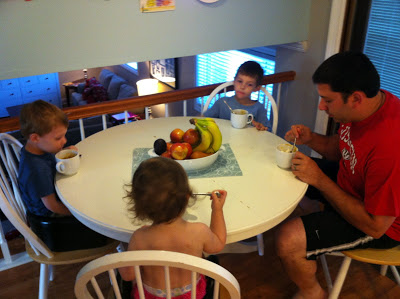
 Everyone liked. Can you tell?
 Thanks to number-2-pencil.com, Pinterest, and my friend who pinned.

Something Seems Fishy Around Here


We have lived in this town for seventeen months, and we
could not be happier with everything here. We love the small downtown area, the businesses (Mariano’s Fall 2013 WOOT!), the
park district, and the library. We enjoy the Sunday Farmers’ Market, concerts
on the town green, and summer movie series.  So far, we have been a part of several events too, such as
the 5K Run and the huge end of summer fest. I used to joke that I wish I could
find a town like Stars Hollow in Gilmore Girls, and I think I found it.
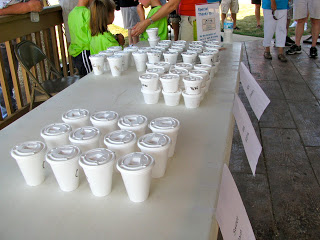
One of the events that we took part in this past weekend,
was the Youth Fishing Derby. Brian has always wanted to teach the kids how to
fish, and this was the perfect event for them to learn. It was totally geared
toward kids, and the volunteers were extremely helpful. For a small fee, the
park district provided each participant with a t-shirt and bait, and for 45
minutes the kids, with the help of an adult could cast their line as many times
at they wanted. When a child caught a fish, a volunteer would measure the fish,
take the hook out (which is the part I’m always squeamish about) and throw the
fish back. At the end of the 45 minutes, there was an award ceremony with
snacks (Goldfish crackers of course) and juice for the kids. Prizes were given to the participant who caught
the biggest fish, and the participant who caught the most fish.
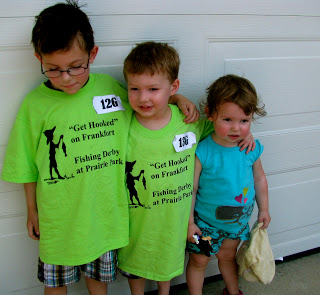
The boys (all three) had a ball! Caroline was too young to
register this year, but she had a great time watching. Russell and George with
the help of Daddy and Peepa EACH caught six fish. Pretty impressive for the
first time out.
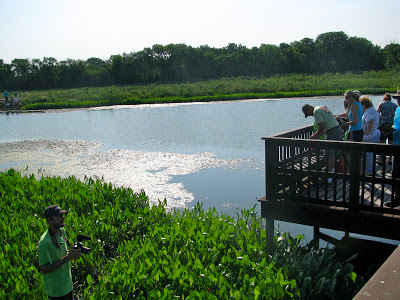
Bait ready.
What a beautiful (and hot) morning!
Running to get more bait!
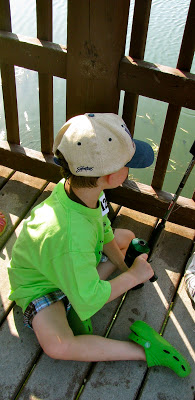
Russell thought it was too hot to stand.
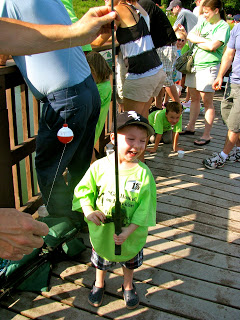
George smiling ear to ear after his first catch.
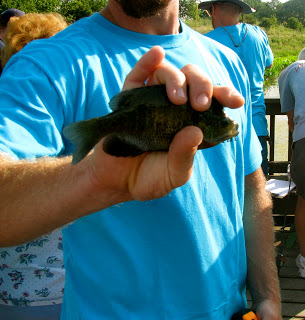
Russell’s 7 1/2 inch catch.


Caroline waiting in the shade.
Time to go in and cool off!
What is your favorite thing/event/business in your town?

He’s One Smart Cookie: Dark Chocolate, Cherry, and Oatmeal Cookies

So,  Brian has been so amazing helping me with a TON of
summer projects such as our garage sale, building me a farmhouse plank table, and
digging up some of our overgrown weeds, all while working long hours and being
a co-chair for our church’s annual block party.

I decided to make his absolute favorite cookies. I created
this recipe especially for Brian. I’m still thinking of a name for them. Right
now I’ve been calling them Smart Cookies. Everyone in my family loves them too, and I don’t know what it is about the
flavor combination, but they are these cookies are very addictive. I swear
there is no nicotine in them, but honestly you cannot just stop at one, or two,
or seven. 

2 Sticks unsalted butter softened to room temperature

¾ Cup Packed Brown Sugar (light or dark whichever you prefer)
½ Cup Granulated Sugar
2 eggs
2 tsp. PURE vanilla extract
1 ½ Cups All Purpose Flour
1 tsp. Baking Soda
1 tsp. Ground Cinnemon
¼ tsp. Ground Nutmeg
½ tsp. Salt
3 Cups Old Fashioned Oats
1-11 oz package of Milk or Dark Chocolate Morsels
1 Cup dried cherries

Preheat oven to 350° F

Line cookie sheets with parchment paper.
In large bowl, sift together flour, baking soda, cinnamon,
nutmeg and salt, and set aside.
Cream together butter, brown sugar, and granulated sugar
until well incorporated. Add eggs and vanilla and mix until combined. Then add
flour mixture slowly and combine until just incorporated (DO NOT OVERMIX). Stop
the mixer and add the oatmeal, chocolate morsels, and cherries. Turn mixer on
low and mix for a few seconds until all ingredients are well incorporated.
Scoop about 1 tablespoon of cookie dough onto parchment lined baking sheets
about 2 inches apart. Bake for 10-11 minutes. Remove from oven and transfer
carefully to cooling rack. The recipe makes about
5 dozen cookies. ENJOY!

Just Call me Captain Vegetable: Building a Raised Garden Bed


Remember this? Anyway, for years, I have always
had a fascination with people who grow their own food. To me it is amazing,
plant seeds… wait… pick food… bring to kitchen. I have always been so envious
of people like Martha Stewart and Ina Garten, walking out their patio door
and cutting veggies and herbs, and bringing them in to use in their recipes.
Brian and I come from a long line of vegetable growers, so we thought that if
we ran into trouble we have plenty of family members to ask. So, we started
with a plan back in February. And now the dream has come to fruition. Check
this out!

How did we go from two boxes in the ground to a full vegetable garden?

Well at the risk of this
being a million word post, I’ve decided to break this up in sections for you.
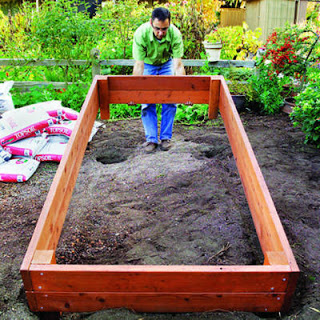
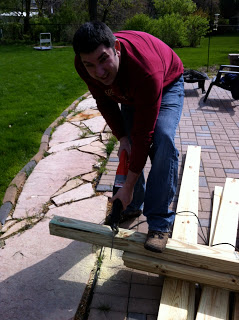
Today we are going to talk about building a raised bed. This was a very simple project with the help of a little planning and some internet research. Brian was very excited to be using power tools!

Back in February, I
started to pin some raised bed ideas on Pinterest, as well as try and scope out
some sunny places in our yard.

http://www.verduragardens.com
http://www.sunset.com/garden/backyard-projects/ultimate-raised-bed-how-to-00400000011938/page3.html


After some debating we used the plan from www.sunset.com. It seemed simple and versatile. We did, however, make a few minor changes. First,
we used pressure treated lumber instead of cedar to save some money. Also, we
did not buy the wire mesh to line the beds. We talked to our landscaper, and
after years of growing vegetables, he has never had any animals dig from
underneath to swipe vegetables.Here are some pictures of the building process. (Sorry about the iPhone pictures)


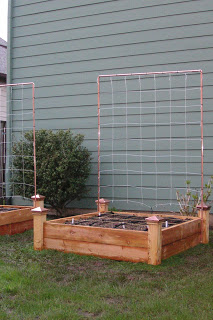
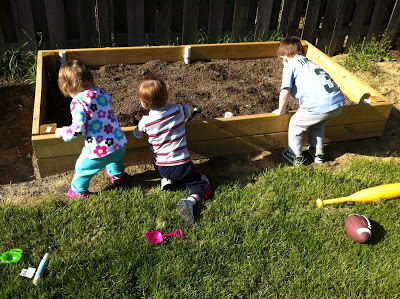
Here are the finished raised beds waiting to be transported
to their designated location.
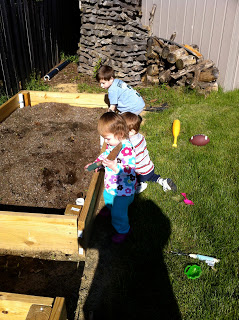
And here they are just before planting filled with lots of
peet moss and mushroom compost.


Anyone else have a vegetable garden? What vegetables are you growing?