Tag

furniture

Oops: Painting a Dresser

I don’t know if you could tell yet, but I like hand me down furniture. We do have a lot of new furniture in our home, but I do like to collect old pieces and give them some new life. So far, our house has become a hodge podge of the old and new, and I thought this would bother me, but I like how nothing in our house is too matchy.

My sister gave me my nephew’s old dresser, which actually belonged to my brother-in-law as a kid. I originally thought it might be nice as some extra storage in the boys’ room, but then I realized I needed some extra storage in our living room. For awhile, it acted as  place for all of my table and kitchen linens, but now it serves as a drop zone near the front door.


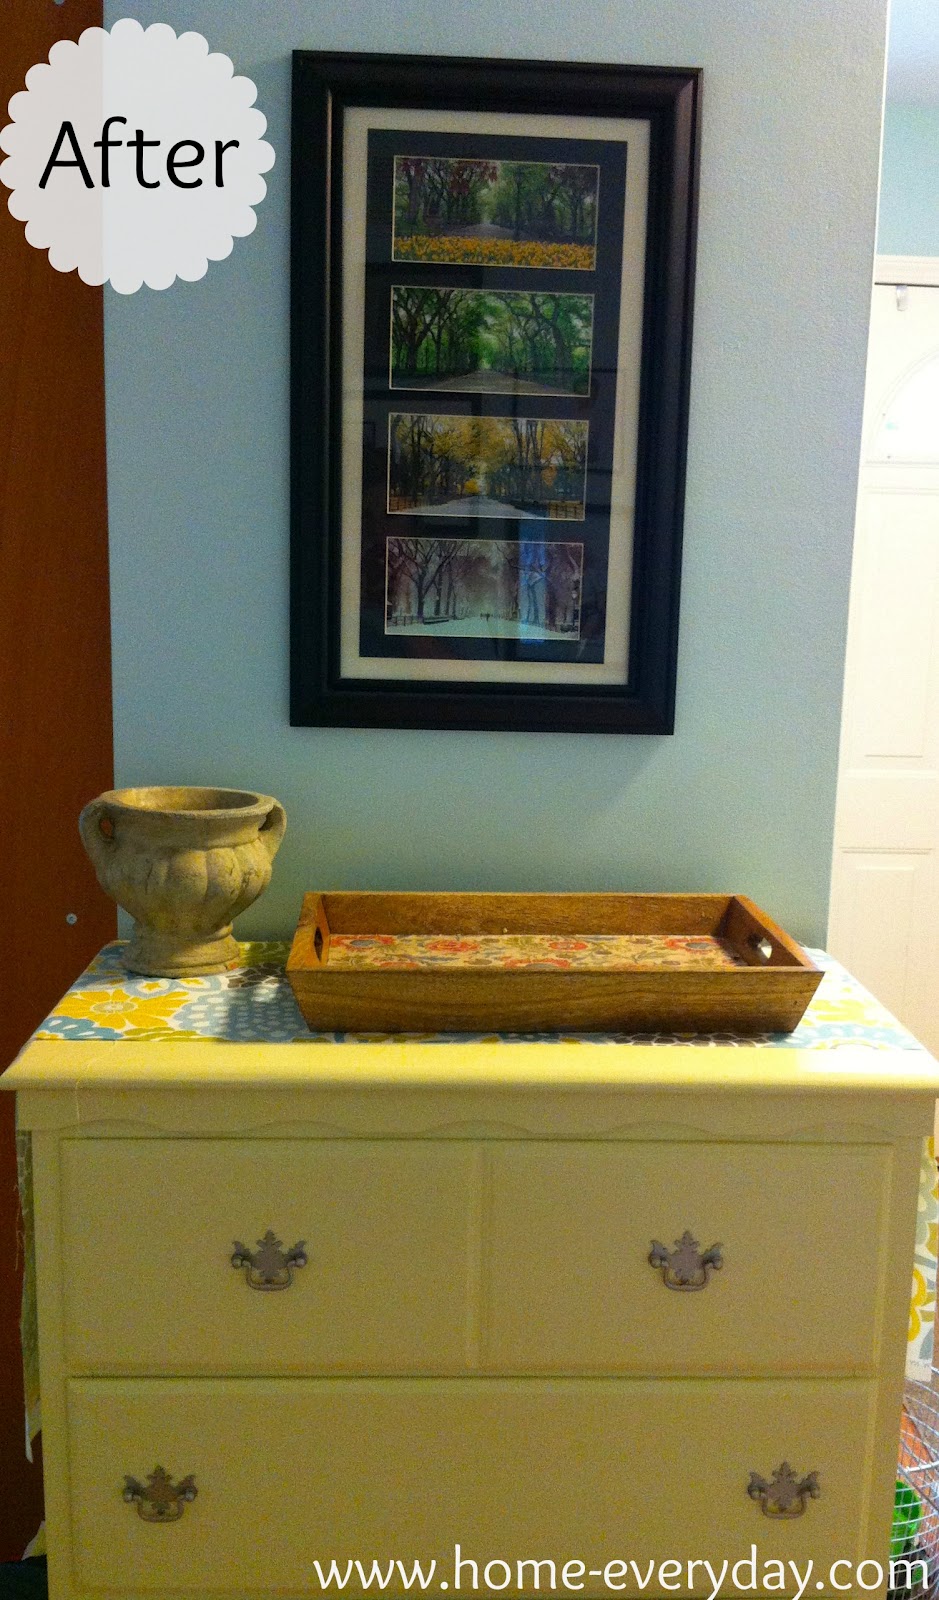
The original color was a medium toned, very shiny, stain. I knew eventually I would want to paint it, but I could not decide on the color. I knew I wanted something different, and perhaps a stand out color. So, I went to my home away from home. Home Depot. I decided that rather than make the difficult decision myself, I would look at the Oops paint section. I found a gallon of this Glidden light yellow color in semi-gloss (which is my favorite finish for painting furniture) for $3. For three measly bucks, I found my new paint color, and there wasn’t a lot of thinking involved.

I have painted a lot of furniture using a few different techniques, but for this project I used the same plan as the dining room chairs. (I didn’t have to strip paint like the bookcase, nor did I use spray paint like my new bedside tables).

After removing the drawers and hardware, I just did a little sanding, priming, and painting.


Then, while I was waiting for the second coat of paint to dry, I spray painted the hardware using some Krylon Metallic Spray Paint in Brushed Nickel.


Once everything was dry, I put everything back together, and plopped by the front hall. We drop our mail in the tray and put our keys in the stone urn that was used for floral arrangements at our wedding. The drawers hold all kinds of things that we need to grab as we are heading out the door.


For three dollars of oops paint and some spray paint I already had on hand, I am happy with the results.

In The Hot Seat: Painting and Recovering Old Chairs

As in, check out this HOTNESS!
Pretty cute right? Especially considering this is what they looked like when I got them. The eighties called, and they want their powder blue back.
Why three new chairs? Well, once a month, I host my whole family for a Sunday Dinner. My
grandma used to host people EVERY Sunday. After Grandma Nano passed away, my
sister kept it going for awhile, and since moving to our “new” house (I guess
its time I stop saying new), I decided have everyone over once a month for good
food and to catch up.
When everyone is here, it is over 20 people, so I was
constantly using folding chairs, and even running out of those. That is when my
Mom said I could have her old kitchen chairs. It is an incomplete set, but any
extra chairs would work, so she sent over three sturdy chairs.
According to my Mom, these chairs were hand me downs from a
neighbor when her and my Dad were first married. And once I removed the layers
of paint and seat coverings, it was apparent these chairs were OLD.
Here is how I refinished these chairs from luke warm to HOT,
and had them done in time for Sunday Dinner!
Supplies:
Electric Sander
Sandpaper
Paint brushes
Primer
Behr Decorator White Paint
Batting
Fabric
Drop clothes
Staple gun and staples
Flat head screwdriver
Phillips head screwdriver
Take it off: Using a Phillips head screwdriver, I removed
the seats and set aside.
Rough it up: The chairs had a few layers of paint, but not
enough layers that I felt I had to strip them with paint stripper. I just
sanded them using my electric sander, and roughed them up everywhere. This was
an important step, as the last layer of paint used seemed pretty glossy, and I
knew the new coat of primer and paint wouldn’t stick to that. These chairs have
a lot of different surfaces and corners, so on the areas that I couldn’t reach
with the sander, I just ripped a few pieces of sandpaper and did it by hand.
Prime Time: I cleaned the chairs up with a damp cloth to
remove all the dust from sanding. Once completely dry, it was time to put on a layer
of primer.
Thinner the Better: I used Behr’s Decorator White Paint in
Semi-Gloss. Using a pant brush, I painted using an almost a dry brush. What this
means is, I didn’t slap too much paint on the chairs, as this causes a lot of
dripping which you then later have to sand and also causes there to be lots of
visible brush strokes. Once finished, I let the chair dry for a few hours
before doing the next coat. I did a total of three coats, which while I know
this can be a pain, and time consuming, but I wanted them to look sleek.
That’s a Wrap: The last few steps involve recovering the seats. I
found this awesome paisley fabric at JoAnn Fabrics that had a lot of the
colors I’m hoping to incorporate in our house. This is where the fun part comes
in. Using a flathead screwdriver to remove the staples, I first removed all the layers of old wallpaper that the chairs had been
covered in. I took pictures of each layer. Uncovering each layer felt like I was uncovering a decade.
80’s powder blue:
70’s Brady Bunch plaid:
60’s Jimmy Hendrix floral
 50’s burnt Orange (which you can see a tiny corner of underneath the floral).
I, next, measured the seat and cut my batting and fabric to
size with about 4 or 5 inches extra on each side to allow for wrapping around
the seat. Then, pulling tightly, I stapled the fabric in place (for another
look at how to upholster check out my post on making a headboard HERE). Once the seats were recovered, and I had the chairs cure up for a few days, I reattached the seats.
VOILA! Three extra comfy, sturdy, and cute chairs for Sunday Dinner.