Category

DIY

Filling Nail Holes and Painting Trim

About a year ago, we got a new front door. We absolutely love it, but in that time we had to replace it and get a repair because there was a nick in it upon delivery. By the time that was all said and done, many more months went by.

Now, that everything is installed properly and finally ready to go, I was able to fill in the nail holes and paint the trim around the door to make everything seem more finished. This seems like a project that would take awhile, but honestly I was able to do it in two nap times.
Ah! That’s better!
To fill the nail holes, I used Elmer’s Wood Filler. There are several different kinds, but this one a.) seemed easiest to use and b.) changed color when it was completely dry. Both of these features seemed like it would cause less issues when it came to user error.
Using some gloves, I actually used my fingers to filled the holes with the wood filler. I started by using a putty knife, but found I wasn’t truly filling some of the deeper nail holes. Also, knowing I would be sanding everything smooth once it was dry, I was ok if things were a little messy.
In the past, when filling nail holes, I would wait 24 hours before painting anything to make sure it was dry. However, this product lets you know it is try by turning from purple to white. However, just to be safe, I waited another hour before I began sanding.
Once all the nail holes were filled with wood filler and sanded smooth. I was ready to paint. I used the same white semi-gloss paint that I have been using for all the other trim in the house so I was happy to have some on hand. Armed with my angled short handled brush I got to work. I carefully painted the trim, and then let it try over night, and gave it a second coat the next day at nap time.
I am so happy this little project is finally finished, because now that the paint supplies are out, I can begin another paint project soon.
If you like this post and would like to read more about all things domestic with a touch of humor, become a Home Everyday follower! For blog updates or to see other places I write such as ChicagoNow or Chicago Parent follow Home Everyday on FacebookTwitter, and Pinterest.

Follow on Bloglovin

Friday Fails: A Job a Anyone Can Do

Since I have
started Home Everyday, I have had my share of fails. Let’s face it, failing is
not exclusive to DIY or blogging. Since I love a good theme, everyone loves a
funny story, and we can all learn from failing, I thought I would start another
series here at Home Everyday called Friday Fails.
Like Thirsty
Thursday, this was an idea of my sister, Beth. Like the good older sister she
is, Beth has been threatening to start her own blog telling “the rest of the story”
explaining all of my fails to everyone. She does have a point though. As a
student of comedy, and one who loves a good lesson I thought I would beat her
to the punch and just bust myself.  After
all, Tragedy + Time = Comedy, and now that I have had a bit of time to process
these things, I am able to laugh about them, and now share them with you.
So welcome
to the first of what I am sure are many many Friday Fails.


For those
that don’t have the pleasure of living in the Midwest, you had to hear about
the horrendous winter we had second hand. As sorry as I am for the people who
had to live through the winter, I also feel sorry for the people who lived
somewhere much more mild but had to hear our constant whining about how cold it was here. It is
like when someone orders a spciey tuna roll at a sushi restaurant knowing it is going to be spicy and then all you hear for the rest
of the meal is how hot it is. We get it, its spicy, you knew it was going to be.
In our
defense, though, I am 33 years old, I have lived in the Midwest my entire life, and I
have never experienced anything like the winter we just had. Also, considering
we are just coming off the first nice week we have had since September 2013, I
think we have some room to complain. 

Finally the trees are blooming in my yard!


When there
is a winter like the one we had complete with tons of ice, snow, and bitter
cold, it has potential to do some structural damage. Our house experienced what is known as an
ice dam. This is when ice actually gets so heavy and thick and gets trapped
UNDERNEATH the shingles on a roof. When the ice melts, the water has only one
place to go and that is into your house. So the ice was melting underneath the
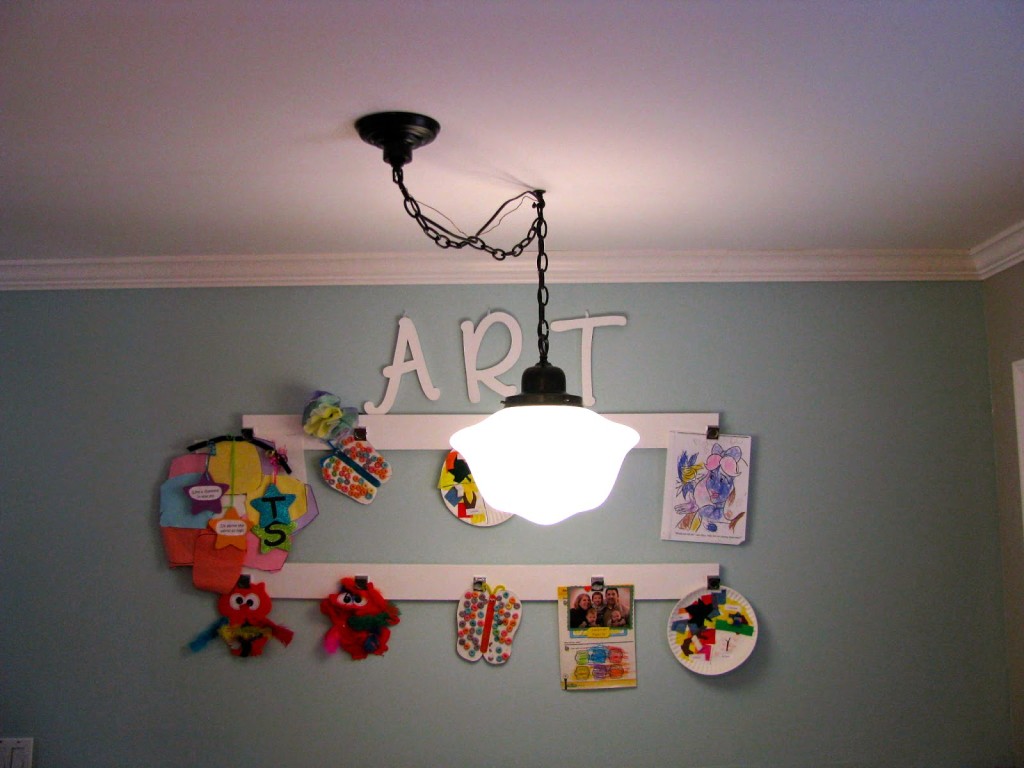
shingles, through the plywood, into the attic and into our our kitchen ceiling. There was water coming in through where our light fixture attaches to the ceiling. Fun, right? 


It was only
a small section, and compared to most people, we considered ourselves pretty
lucky. We had the roof repaired, our gutter rerouted so water will no longer
collect on the roof, and the ceiling damage is scheduled to be repaired soon. Everything is fine. Almost.
We
noticed that the light fixture in our kitchen didn’t seem to be working correctly. When the light was on for even a few
minutes it would begin to flicker. This made Brian and I nervous. We thought
that perhaps there could be water in the light fixture some how.
Brian and I
like to consider ourselves pretty handy people. Whenever we are questioning our
“handiness” or DIY capabilities we say, “But we built our dining room table for
pete’s sake. We can figure it out.” However, when it comes to electrical and
plumbing. We don’t’ like to mess around. Sure we can put in a light fixture,
fix a clogged toilet, but we are not equipped to handle a water damaged
electrical line.
So, we called
our electrician.
When our
electrician arrived, this is the conversation that transpired.
Me: Hi,
Carol. Thanks for coming!
Carol: No
problem. What’s going on?
Me: Well,
Brian said he told you about our ice dam and our leak. The water was
coming right from where that light fixture is, and now the light flickers, and
we are just worried there could be some kind of water damage and we don’t want
to mess with that.
Carol: Ok,
well let me just turn the light on. Oh, so I see you use compact flourescents.
Me: Yep.
Carol: Well,
have you thought about changing the light bulb in this light fixture.
Me: (Blank
stare.)
Carol: I
mean you have changed it since the water?
Me: Well,
no. We didn’t want to use this light because there’s water damage.
Carol: Let
me just take a look at the light bulb here. (takes glass off light fixture,  unscrews light bulb) Yep, look at that. This
is a bad light bulb. Sometimes they flicker right before they are about to go
out.
Me: (fumbling like an idiot) The
light bulb?
Carol: Sure,
just go get me a new one, and I’ll switch it out for you and we can keep and
eye on it for a minute, just to make sure there’s no more flickering.
Me: (heat
rising in my cheeks) Ummm, ok.
Carol: Is
that all you had for me today?
Me: Well,
Brian will be home any minute, let me grab that lightbulb and he can tell you
when he gets here.
Carol: Sure,
no problem. That’ll be $150.
Me: (shocked
face)
Carol: Just
kidding!
I was
mortified.
But this
story only gets better (or worse depending on who you are). You see, not only did Brian and I call an electrician
out to change a light bulb, but we had just done some rearranging in the
basement and I couldn’t find a damn light bulb!
I was
frantically searching/stalling in the basement, knowing Brian would be home any
minute to rescue me. Fortunately he did and found a lightbulb for Carol.
Thankfully, he also had another teensy question for Carol to help me save (my very red) face.
In the end,
Carol didn’t charge us (she’s an awesome electrician). Also, she probably figured she has an excellent story to tell at
parties for the rest of her life.
You may want Brian and I to relinquish our DIY cards right here right now. I don’t blame
you. I mean we called a liscensed professional electrician to change a
lightbulb. This is clearly a job a monkey could do. Well, maybe not a wild
money, but maybe a trained one.
Regardless, we
did learn that it IS to be better to be safe than sorry. Oh and change the
light bulb and give it a go before you call an electrician. 


If you like this post and would like to read more about all things domestic with a touch of humor, become a Home Everyday follower! For blog updates or to see other places I write such as ChicagoNow or Chicago Parent follow Home Everyday on FacebookTwitter, and Pinterest.

Follow on Bloglovin

Beaded Bracelets and Just Us Girls

When Coco was born I was bleary eyed for most of her babyhood. I’m not going to lie, there was a guilt that washed over me the minute she was born that I didn’t feel with my older boys. I knew I would be chasing those boys around when I got home, stopping occasionally to nurse Caroline. I knew there would be plenty of love to go around, but would there be enough time? After all, Russell was not yet three, George was a baby himself, and we were living with my Mom and looking for our home. Bringing home a newborn is hectic under any circumstances, but bringing home our baby girl was a whirlwind.

It was as if I blinked and she turned ONE.

In the beginning, I was kind of sad that she had missed the cut off for beginning school. At least then she would be in on the fun with the boys. I saw them bonding in preschool and making the same friends and looking on as they were achieving milestones together because they were back to back in school, and I wanted Coco to share in that fun with them. My three stair step kids are all very close in age, but I couldn’t help but feel that the one year gap in school would kind of make Coco feel left out. Not to mention there is a gender difference, boys share a room, and this was just another thing that would just kind of leave her out of the mix. As a youngest child myself, I know that feeling all too well.

It is no fun to be left behind.


However, when the boys were at school, I noticed all the little things my girl and I were getting to do together. Just us. We had time to eat breakfast together, run errands, go to the park and make play dates. Just us. It was as if I was getting the chance to spend extra minutes with her that were missed when she was a wee one.

It then occurred to me that I had another lady in the house with me, and I had extra time just with her. So, while the boys are in school, and for the next two years while they are in “big kid” school and she is only attending half day preschool, her and I have plenty of time for fun girly activities. Activities like afternoon tea, painting our nails, playing dollies, and making beaded bracelets.

A few months ago, I found a huge bag of larger beads on sale and I thought they would be fun for stringing. After a few attempts at stringing them with yarn, I realized that for Coco’s age, it was too hard, so we started stringing the beads onto pipe cleaners and making bracelets, necklaces, tiaras, whatever struck our fancy. This is one of those activities that is cheap, age appropriate, and is conducive to girl chat.


Sometimes, I know Coco squeezes the boys extra tight in the morning before they leave for school because she misses her playmates, and I cannot help but feel a little sad of her. However, I get out the beads, and I know that I am thankful for this time that we have together.


If you like this post and would like to read more about all things domestic with a touch of humor, become a Home Everyday follower! For blog updates or to see other places I write such as ChicagoNow or Chicago Parent follow Home Everyday on FacebookTwitter, and Pinterest.

Follow on Bloglovin


Resting My Feet: A National Craft Month Craft

While I was compensated for this post by JoAnn Fabric and Craft Stores the ideas, thoughts, and opinions in this post are my own.

I recently decided that Mr. Home-Everyday and I needed a comfy place to rest our feet other than our coffee table. While I know there are lots of ottomans out there, I was pretty sure that I could make one myself for a pretty reasonable cost. Mr. Home-Everyday had given me some pallets to use for some projects around the house, so I had a base. Now, to find some fabric to upholster it.


When JoAnn Fabric and Crafts asked me to participate in National Craft Month, I knew I would be able to find the perfect fabric. There are so many great trends to take advantage of this season, but my favorite lately are all the great floral fabrics available.

I found this great floral fabric by KAS from Australia, that I love. The colors are saturated, which will match all the color going on in our family room, and it seemed durable enough for us to rest our feet.


Supplies:
1 pallet
4 table feet
4 feet attachment brackets
white foam cut to size (same size as top of pallet)
batting cut to size (able to be wrapped around pallet on all sides with 2 inch allowance)
fabric cut to size (able to be wrapped around pallet on all sides with 2 inch allowance)
staple gun with heavy duty staples
fabric scissors
paint
paintbrush
drill

Paint and Dry: First, I painted the feet of the ottoman. I thought it best to get this step out of the way as then I could let the feet dry while I completed the other steps.

Stack It Up: After the foam, batting and fabric are cut to the correct size, place the fabric face down on a flat clean surface. Then place the batting on top of that. In the center of the batting, add the foam. Finally, place the pallet on top of the foam.


Staple, Staple, Staple: Starting in the center of one of the sides of the pallet, pull the fabric and batting tight and staple. Continue to staple from the center toward the corner, (about every 3 or 4 inches apart)  but DO NOT staple the corner. Do this on each side. Finally, fold the corners in as if you are wrapping a package, hold them tightly and staple them.


Give It a Leg Up: Finally, using a drill, screw the attachment brackets to the underside corners of the pallet. Screw in the feet to the attachment brackets.


Finally, put your feet up and relax.


Unless, of course, some little people get there to relax before you do!


Linking up at Serenity Now


If you like this post and would like to read more about DIY, gardening, cooking, baking or all other things domestic, become a Home Everyday follower! For blog updates or to see other places I write follow Home Everyday on Facebook here.

Follow on Bloglovin

One Kid’s Trash…

My kids are still fairly young, but I cannot believe the things that we have accumulated over that time. Every once in awhile, I step on one too many Legos while barefoot decide it is time for some decluttering, and the kids and I go through their toys and get rid of what they don’t play with anymore.

One day, when declutttering, I found this amazing box that used to house some sort of puzzle. The puzzle got moved to a more appropriate container with a lid (who would give a kid a puzzle box with no lid, don’t they know how frustrating it would be to lose a puzzle piece?).

I immediately decided that this box, would make an awesome tray for storing all kinds of things around the house. One kid’s trash is this mom’s treasure. So, using some paints, I already had on hand, I had a free craft project.


The sides of the tray I painted with chalkboard paint to indicate what I would be using the tray for at any given time. The inside of the tray, I thought it would be fun to use several different colors and possibly a pattern.


Using the light blue paint, I painted the entire inside of the tray with two thin coats. Then, when it was completely dry, I used Frog Tape, and taped a chevron pattern. I thought about using directions like this, but ended up eyeballing it myself.


Next, using the yellow and turquoise colors, I painted in between the taped off sections.


I let the paint dry over night, and removed the tape.


Now, I have a fun little storage box or tray I can use for all kinds of fun things, and I can label it for whatever I happen to be using it for at the time.


And it didn’t cost me anything but some time.


Linking up at Serenity Now


If you like this post and would like to read more about DIY, gardening, cooking, baking or all other things domestic, become a Home Everyday follower! For blog updates or to see other places I write follow Home Everyday on Facebook here.


Follow on Bloglovin

We Three Trees

While I was compensated by JoAnn Fabrics and Crafts, the thoughts and opinions expressed in this post are my own.

Nothing says #FABULOUSFESTIVE like lots of lights and sparkle! Christmas at our house contains both, but this year we upped the ante a little bit (by three to be exact). You see, I have always been a stickler for symmetry and the three windows in the front of our house looked like they could each use a little Christmas tree all their own! YES, THREE Christmas Trees in my living room (plus the one in the family room so I guess four)!


When I had decided to put up a tree in each window, I was nervous about taking on this project because I know that outfitting ONE tree can be pricey but between Black Friday sales, JoAnn Fabric and Crafts coupons (there’s one for all my readers too), and making a few of the elements myself, I was able to save a ton of money. In fact, I created my own tree toppers and tree skirts.

I first mentioned the idea of THREE (well, actually four) trees to Brian, and he was a little skeptical. “Three trees! Plus the one in the family room?!” However, after a few minutes of thinking he had the brilliant idea of each of our children to have their “own” tree. He suggested we decorate the trees in each of their favorite colors (green, blue, and pink) and use shatterproof ornaments (thanks to JoAnn Fabrics and Crafts) and have the kids decorate. What a great idea! The kids loved it! In fact my daughter said, “This is fabulous!”


So, for JoAnn Fabrics and Crafts #FabulouslyFestive holiday crafts, I decided to share three tree toppers and three tree skirt ideas.

Tree Toppers
We have always put stars as tree toppers, but I wanted each of the kids’ trees to be unique, so here are three clever and inexpensive star tree toppers.


Mod Metal
For the first tree toppers, I formed some pink 12 gauge craft wire that I found in the floral department at JoAnn, into two stars that are the same size (I printed out a picture of a star and used it as my guide for forming the star).


Then, using wire cutters I clipped some small pieces and used the small pieces to connect the stars together like a 3D frame.


Firework
Using silver pipe cleaners, which happened to be on sale, I overlapped them on a flat surface and formed a star pattern.


I did this three times, and then using another pipe cleaner I tied the three flat stars together and adjusted the pip cleaners to form a 3D shape that almost looks like a firework.


Painted Star
At JoAnn Fabric and Crafts I saw a cardboard box shaped like a star.


I painted the top of the box with both satin and glitter Martha Stewart acrylic paint. Once dry, I cut a tiny hole in the bottom to put on the tree.


Tree Skirts
To make the tree skirts I used, the same pattern cut into 1 yard of white felt and then used different embellishment to make each of them unique.


First, I cut the white felt I found at JoAnn Fabric and Crafts into a perfect square (3′ x 3′).


I then folded the felt in half, and then folded it in half again to form a smaller square.


Next, I folded it in half on an angle to form a triangle (just like making a paper snowflake).


Then, I cut the corner with no open ends. I cut straight across about 2 inches from the corner. This creates the hole for the tree.


Then, on the other end, I carefully cut rounded edges.


Finally, I opened the skirt, and cut a straight line from the edge to the hole to create and opening for to wrap around the tree.


Once all of the skirts were cut, I got out my hot glue gun, and got to work.

Pretty Trim
The trim I found was almost like a felt ribbon, but you could use any ribbon you like. I made sure that it wasn’t very stiff so that I could easily fold it to follow the circle pattern of the skirt.


Pom Palms
This is my absolute favorite tree skirt. Who knew a bag of pom poms from JoAnn glued to the edge would be so adorable?


Snowflakes
I actually found these felt snowflakes already made, but you could cut your own out of felt from JoAnn too. I glued them around the edge of the skirt.


These THREE (actually four) Christmas Trees are such a wonderful addition to our home, and I’m wondering if someday the kids will take these trees to decorate their own homes someday.


HOPE YOUR HOLIDAYS ARE #FABULOUSLYFESTIVE!
(Hopefully the coupon will help!)
Keep reading this week and next for the Home Everyday Holiday MiniSeries for more ideas on decor, cooking, baking and last minute gift ideas. Speaking of ideas, check out the JoAnn Fabrics and Crafts catalogue HERE!Linking up at Honey We’re Home for Holiday Cheer in the Blogosphere!

For more about DIY, gardening, cooking, baking or all other things domestic, become a Home Everyday follower! For blog updates or to see other places I write follow Home Everyday on FacebookTwitter, or Pinterest.

Follow on Bloglovin


Hanging Holiday Cards

As part of the Home Everyday holiday Mini Series, I have another awesome holiday craft for you!

Every year I have the same dilemma. We receive so many wonderful holiday cards from friends and family every year, I always want to make sure they are displayed somewhere that we can admire them. Since I spend many hours in the kitchen I thought it would be nice to have them there. Also, the kitchen is always lacking in holiday decor, so I thought it was the perfect place to display them.

Last year, I used some green ribbon and clips to hang them from the cabinets, but this year I decided to go with something a little more neutral so that the stars were the holiday cards and not the ribbon.

I used burlap ribbon and some cute clips.


I measured the cabinets and adding about 6 inches cut the ribbon to length. I then affixed the burlap to the inside portion of the cabinet using some tape, but you could use 3M Hooks as well.


Finally, I used the put the clips on the burlap so that they are ready and waiting for all the gorgeous holiday cards we receive this year. This craft is practical and simple, and cost about $4.99 for the ribbon and about $2.99 for the clips.

Now, I can admire our gorgeous holiday cards while I am baking cookies.

Speaking of cookies…

For more about DIY, gardening, cooking, baking or all other things domestic, become a Home Everyday follower! For blog updates or to see other places I write follow Home Everyday on FacebookTwitter, or Pinterest.

Follow on Bloglovin

A Miniseries and Chalkboard Ornaments

HAPPY HOLIDAYS, Readers! The house is almost completely decorated, we had our family photo taken for Christmas cards, the baking has begun, and I’ve made my list and checking it twice!

Over the next three weeks, there will be holiday crafts, fun Thirsty Thursday recipes, holiday cooking, and baking, and some great ideas for gifts. I am calling it my Holiday Miniseries, and I am kicking off this week with a great ornament idea!

Chalkboard art is becoming increasingly popular and I noticed a few weeks ago that Martha Stewart makes a chalkboard paint. I wanted to desperately to try it out and see how it works. So rather than painting a whole piece of furniture in chalkboard paint (which I think would be neat), I thought it best to start small.


Supplies:
Wooden Shapes or Ornaments
Chalkboard Paint
Plastic Bag
Paper Plate
Paint brush or sponge
Ribbon or string
Stapler or Glue


I first made sure to remove any labels from the wooden shapes. Then using just a little bit of chalkboard paint, I started painting very thin coats of paint on the shapes. According to the directions, it is important to use at least two coats.


According to the paint directions, it is important to wait an hour between coats of the paint. However, because of painting in thinner coats I only had to wait about 20 minutes between coats of paint. When it was all said and done, I painted four thin coats of chalkboard paint for good coverage.


I let them cure for about 12 hours. Then, they were ready for Holiday messages and hanging on the tree. I didn’t attach any ribbon or string to all of the ornaments because they fit nicely tucked between the branches on the tree.


I did staple some ribbon on the back of a few. You could clue or use other adhesives too. I saw the stapler though and the wood was thin enough not to bend the staples, but not so thin that the staples pushed through the other side.

Now, these ornaments look adorable hanging all over the house with little messages. Perhaps I will keep them out all year long.


Make sure to keep checking back for holiday decorating ideas, Christmas baking and cooking, and gift suggestions.

Linking up at Hi Sugarplum for Holiday Cheer in the Blogsphere!


For more about DIY, gardening, cooking, baking or all other things domestic, become a Home Everyday follower! For blog updates or to see other places I write follow Home Everyday on FacebookTwitter, or Pinterest.

Follow on Bloglovin

Pretty Storage: Painted Baskets

As the holiday season approaches, I encourage the kids to take an inventory of their toys. We donate what they do not play with anymore, recycle what is broken, and try and make room for anything that Santa brings.

This yearly toy overhaul helps teach the kids how blessed they are, encourages them to help others who have less, and I think helps them make decisions. However, when we are doing the yearly toy overhaul, I get a little organizationally crazy and being thinking about different storage solutions for all of these things.

Some of our storage baskets were a bit, well, boring.


These baskets have been around since before Brian and I were married and have been rotated for all kind of use, but are currently in the family room housing doll house furniture and people and some other smaller toys.

As I try to add more color to the family room, I thought of a great idea. I decided to paint these boring baskets. I got out my acrylic paints, a paint brush and turned on the movie Rushmore during nap time.


VOILA!

After two hours of some creative painting, and a night of letting them dry, they were a more colorful way to store some of the kids’ favorite toys.


Seeing how adorable these baskets turned out has me itching to paint some more things.

For more about DIY, gardening, cooking, baking or all other things domestic, become a Home Everyday follower! For blog updates or to see other places I write follow Home Everyday on FacebookTwitter, or Pinterest.

Follow on Bloglovin


Give Thanks Place Mats: A JoAnn Fabric Celebrate the Season Craft

While I have been compensated for this post by Jo-Ann 
Fabrics and Crafts, the thoughts and opinions are my own.
 

Thanksgiving is right around the corner and I thought it might be fun to have a week of preparing for one of my favorite days of the year. I know that there has already been a lot of talk about that holiday in the winter with the trees, wreaths, and cards and such, but around here I do like to celebrate Thanksgiving with a little something (speaking of a little something, at the bottom of the post is a coupon to Jo-Ann Fabrics and Crafts just for you).


Since so much time will be spend in the dining room for Thanksgiving, I decided to make some Thanksgiving placemats using some supplies from my favorite craft store Jo-Ann Fabrics and Crafts. These were extremely inexpensive and simple to make. They only took me about an hour to create.

Supplies.
2 yards of burlap
Stencils
Black Acrylic Paint
Pain Brush or Paint Sponge
Scissors
Measuring Tape
Scrap Paper


Tricky Measuring: Burlap is a fabric that frays very easily, so in order to cut down on having a huge mess of threads, it is important to cut it in a straight line. To do that, I measured my fabric and marked on the fabric how big I wanted each placemat. Then, at the edge of the fabric, I very carefully tugged the thread closest to my mark and gently pulled it all the way through to the end of the fabric.


You will notice a gap in the fabric where there used to be a thread. I did this wherever I had marked my fabric and then I was ready to cut.

Careful Cutting: When all the threads had been pulled, I cut in all the places where there was a gap in the thread. I was very careful to stay within the gap as I was cutting. When I was finished, I had eight placemats.


Clever Stenciling: I thought of a few of my favorite words when it comes to Thanksgiving, and using a paint sponge, black paint and some letter stencils I carefully painted the words in the bottom right hand corner of the placemats (NOTE: Make sure to place scrap paper or cardboard underneath your placemat as you paint as you don’t want to paint on your table or flat surface).


Let the placemats dry over night or for a few hours before using them.


I am so happy how they turned out. They are the perfect addition to our table for Thanksgiving.


To see this craft or to browse other Thanksgiving craft ideas visit the Jo-Ann Fabrics and  Crafts catalogue HERE.

Also, as a THANK YOU, Jo-Ann Fabrics and Crafts is offering my readers a coupon to create your own #TurkeyTablescape.


Happy Thanksgiving, and stay tuned the rest of this week for other Thanksgiving ideas and recipes.

If you like this post and would like to read more about DIY, gardening, cooking, baking or all other things domestic, become a Home Everyday follower! For blog updates or to see other places I write follow Home Everyday on FacebookTwitter, or Pinterest.

Follow on Bloglovin