Category

DIY

A Not so Crafty Craft: Good News Jar

My friend, Heather, a teacher, always has awesome parties, as well as little crafts, do dads, and thingamabobs for kids. She is one of the most generous people and one of my most favorite people.

For New Year’s she gave each child a plastic container with stickers. She told them to decorate it, and it could be their “Good News” Jar for the year.

Every time they had good news, something they want to remember, something they were thankful for, anything, they could write it down on a slip of paper and put it in their good news jar.

On New Year’s Eve of 2015, we will read them.

I loved this! I wanted to do it too. So, I did. It isn’t as elaborate, but I am proud of myself for putting some good news in our jar already.


I didn’t care so much what the jar looked like. I did however have a few criteria.

1. The slips of paper were scrapbook paper quality so that if someday I did want to put them in a book I could.
2. There were pens available at all times for writing the good news, memories, moments of gratitude down.
3. Everyone could reach in case they wanted to write.

First, I put some Becky Higgins Project Life card stock rectangles I found on sale at Michaels in a vase with a few Sharpie Pens (you guys these are my favorite pens, they are like Sharpies but they are pens and don’t bleed through paper.)


Grabbed an empty jar that I was no longer using to put our memories into.


Then, put it all on my desk.


Now, anytime Brian or I have a memory, good news, something to be grateful for, or anything we just think is special (like someone pulling out his own wiggly tooth last night) we have a place to put it all.


Thank you, Heather for your great idea! I know mine isn’t as crafty, but at least now all the memories are safe.

What is some good news that would go in your jar?

If you like this post and would like to read more about all things domestic with a touch of humor, become a Home Everyday follower! For blog updates or to see other places I write such as ChicagoNow or Chicago Parent follow Home Everyday on FacebookTwitter, and Pinterest.

Losing Teeth: Tooth Fairy Pillows

The parents of older children like Tweens who are in the aloof stage of life asserting independence and start to pull away probably don’t want to commiserate with me. The Teen parents probably whose kids apply to colleges and DRIVE around from place to place (by the way you’re saints) will most likely think I am absolutely ridiculous. These parents have bigger problems than to talk to a Mom who is clearly unstable about a stage of life that is seemingly normal, and passes so quickly.

The losing of the baby teeth is emotional for me. With every one that falls out, and with every visit from the Tooth Fairy I am reminded of how close these little people are to not being so little anymore.


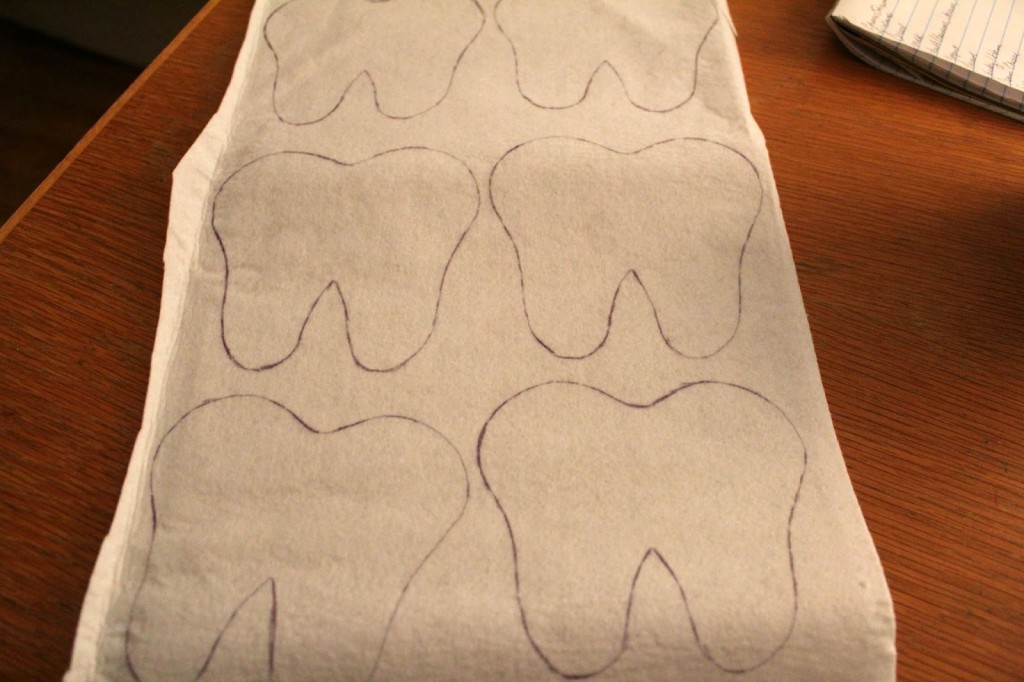
Look at them, they’re huge!

I remember when these kids had no teeth and I was lovingly nursing, making bottles, and pureeing baby food. Now, they are eating like horses and the amount of pancakes I flip in the morning would be enough to give anyone carpal tunnel. I remember waking up with teething little babies in the night to comfort them and give them something cool to gnaw on while they settled in to my shoulder to be rocked to sleep. Now, my darlings take up more room in the bed in my husband. I remember when they would stick their chubby little fingers in their mouths when those back molars would be coming in. Now, they are wiggling those teeth free or to point to an adult tooth coming in.


The only team we all agree on is the Blackhawks.

AN ADULT TOOTH. There is no way the boys kids in my house playing Playmobile Soccer and helping their baby sister put clothes on her baby dolls are ready for adult teeth.

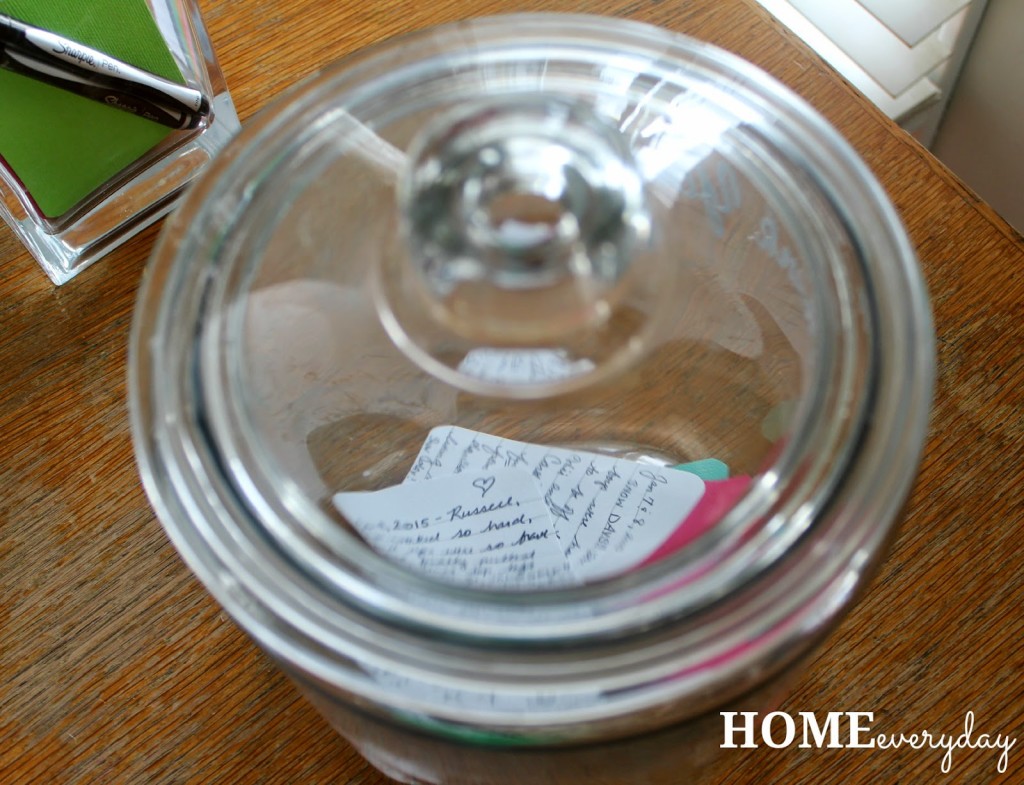
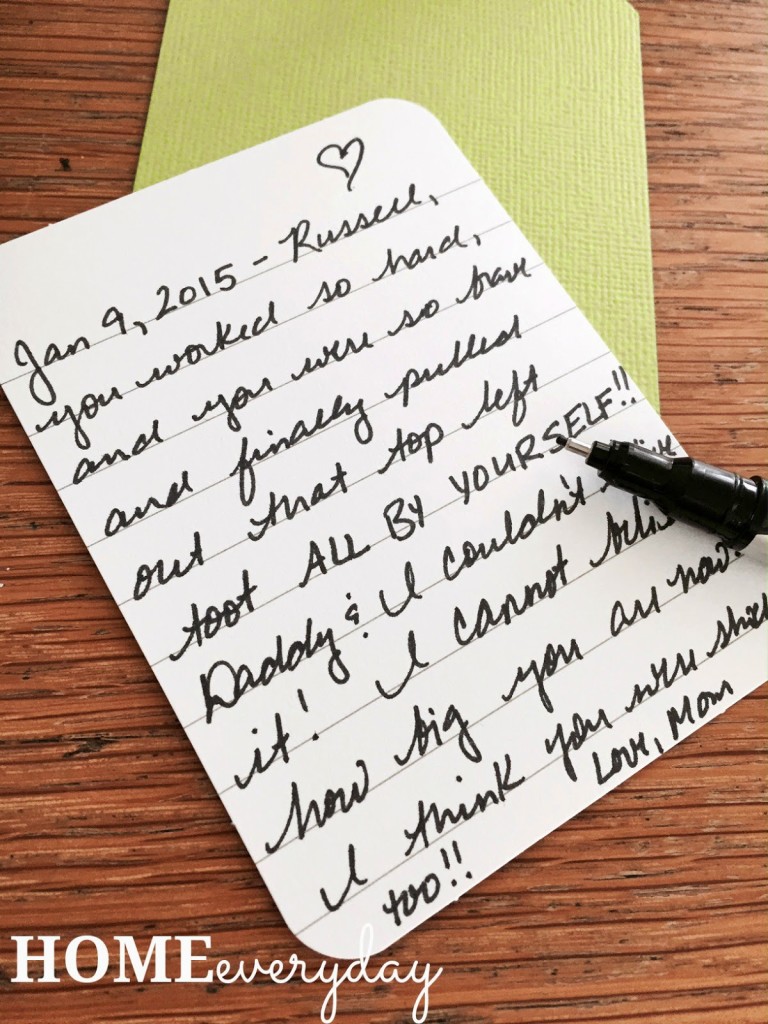
When the first tooth was lost by oldest son, I kind of shrugged it off. However, now with my kids being so close in age, they are popping out all over the place. Sometimes, I think the Tooth Fairy is going to forget whose pillow to put money under.

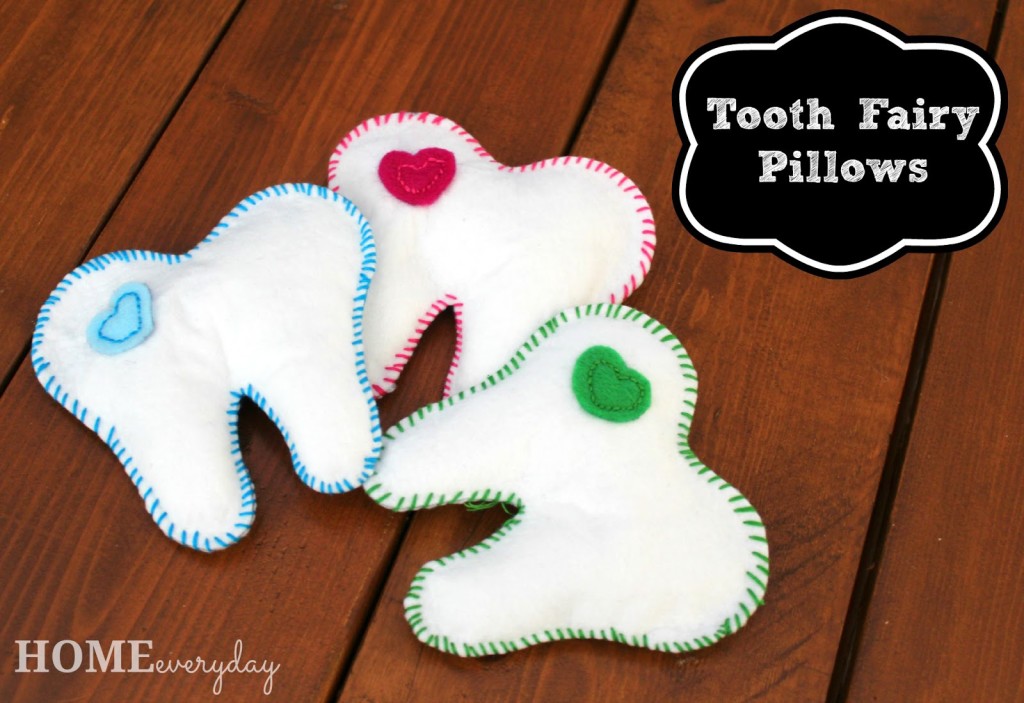
To mark this milestone, to keep things organized, and as a little therapy for myself, I made the kids Tooth Fairy Pillows.


As my regular readers know, I don’t have a sewing machine, so I had to do this the old fashioned way, but honestly, I was able to do them while watching Netflix. Let’s not pretend I wasn’t going to be watching a show anyway. I got them done in about 2 – 2 hour sessions this includes tracing, cutting, and sewing. (Remember I did THREE and I stop to take pictures for my lovely Readers.)
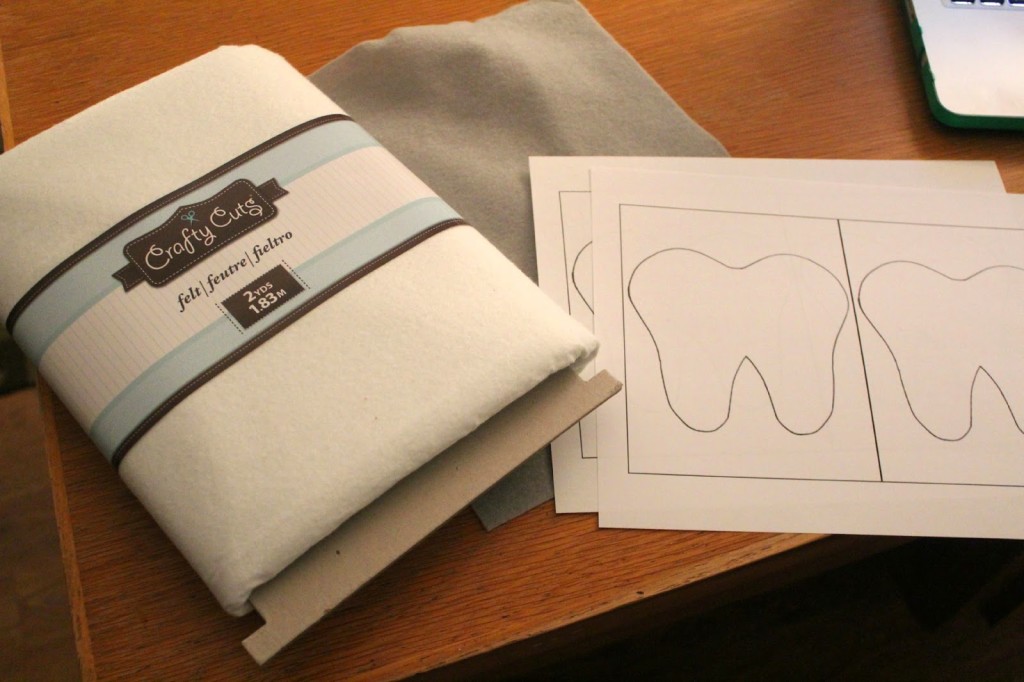
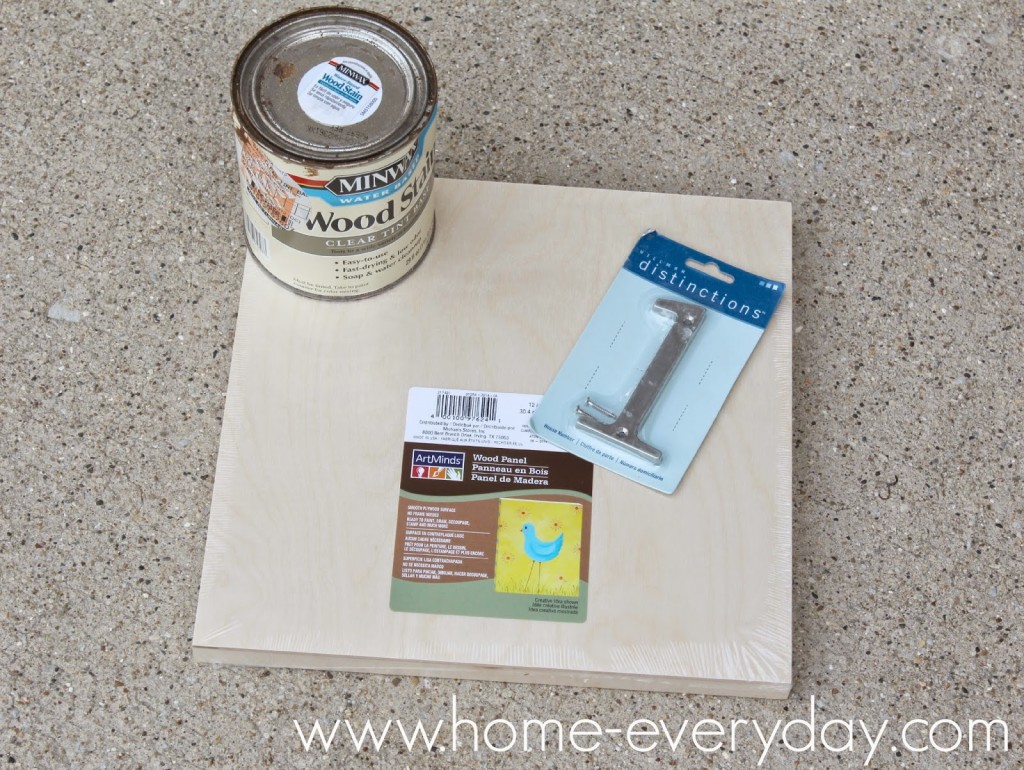
Supplies:
White Felt (for tooth shaped pillow)
Color Felt for Heart and Pocket
Scissors
Needle
Embroidery Floss
Pillow fill cotton balls
Pen

Full Disclosure: I don’t have measurements or amounts of felt or thread used as I wasn’t sure what size my pillows would be. Please note that these can be any size you want and you can always return any unused and UNCUT felt.


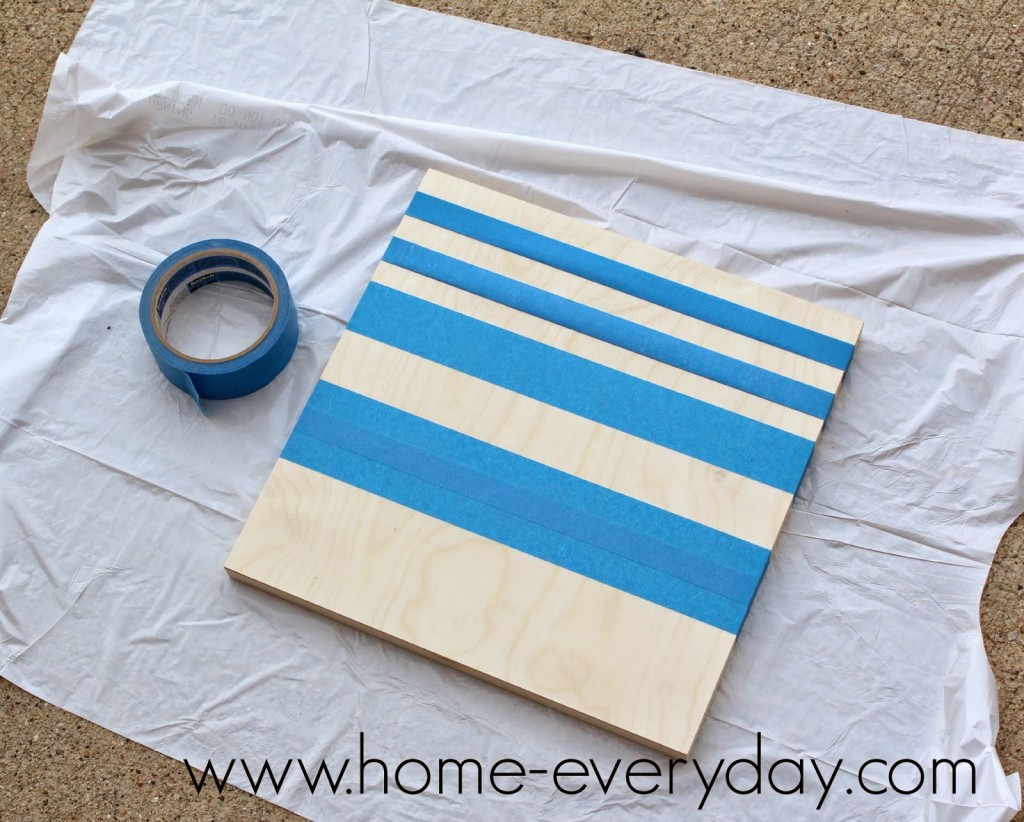
Trace or Draw: I am not good at anything free hand, so I printed out  a picture of a tooth, a square, and a heart and traced each of these on the the felt. (Yes, I even traced the square.) Remember, you are making a pillow, so you will need two EXACT tracings of the teeth to sew together.


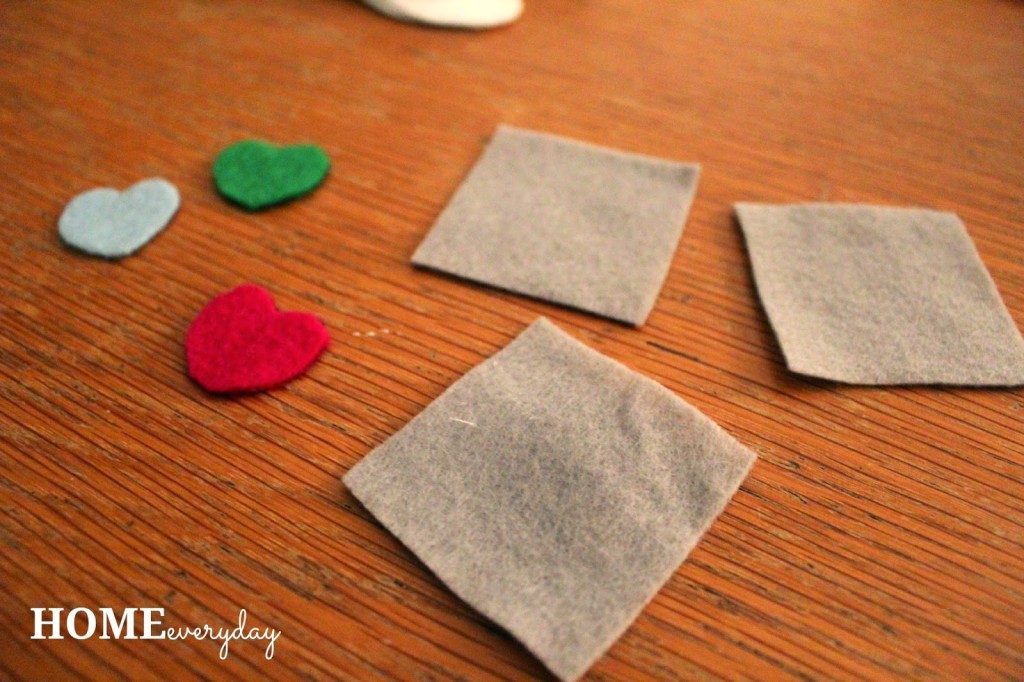
Cut: I, then, cut out all the teeth, squares and hearts.


Find your a show: I would suggest something that isn’t too deep, like a comedy. Maybe even a movie you have watched before as you will have to kind of pay attention to the hand sewing until you get hang of it. Unless of course you have a sewing machine, then you can ignore this entirely.

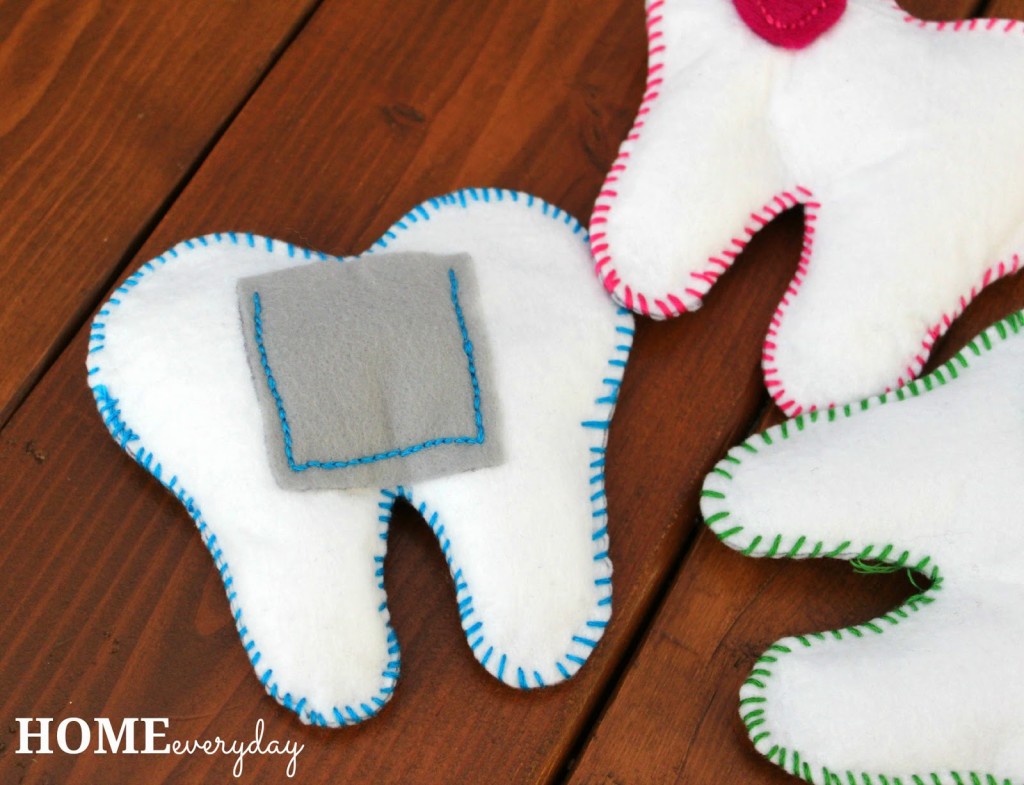
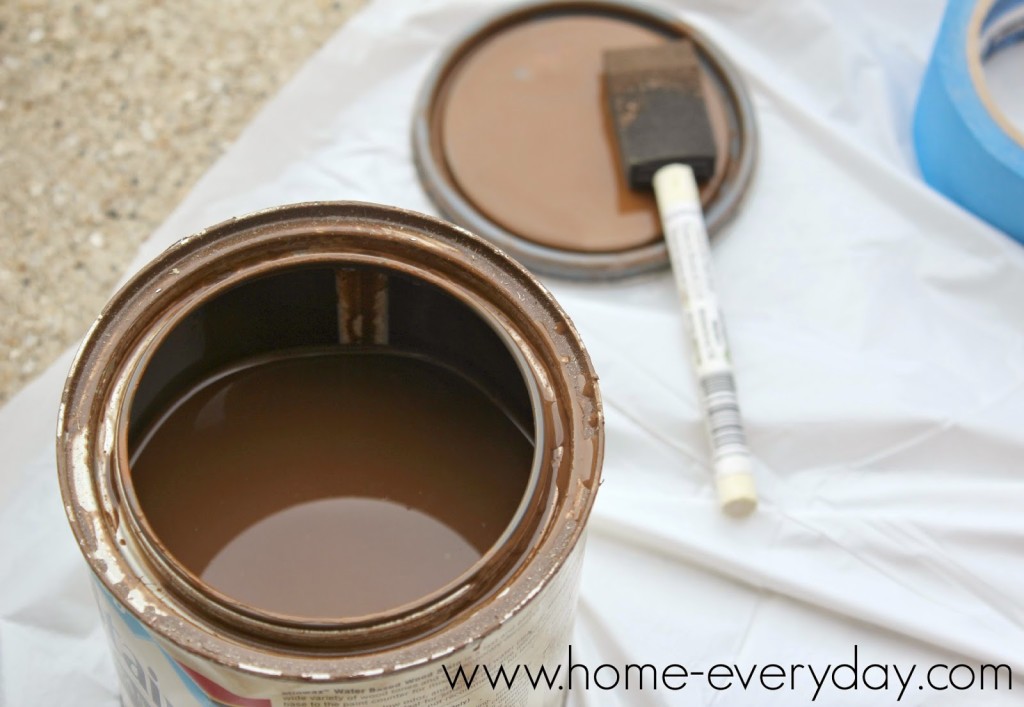
Sew: First, using the embroidery floss, sew a square onto the center of one of the teeth. This will serve as the pocket so you will only want to sew the bottom, and two sides. I used a straight stitch.


Then, on the other tooth cutout sew your heart using the same stitch.

Next, putting the wrong sides together (meaning the heart and the pocket facing out, begin sewing the two tooth pieces together using a whipstich. NOTE: Make sure not to stitch the entire way around because you still need to fill the pillow. 

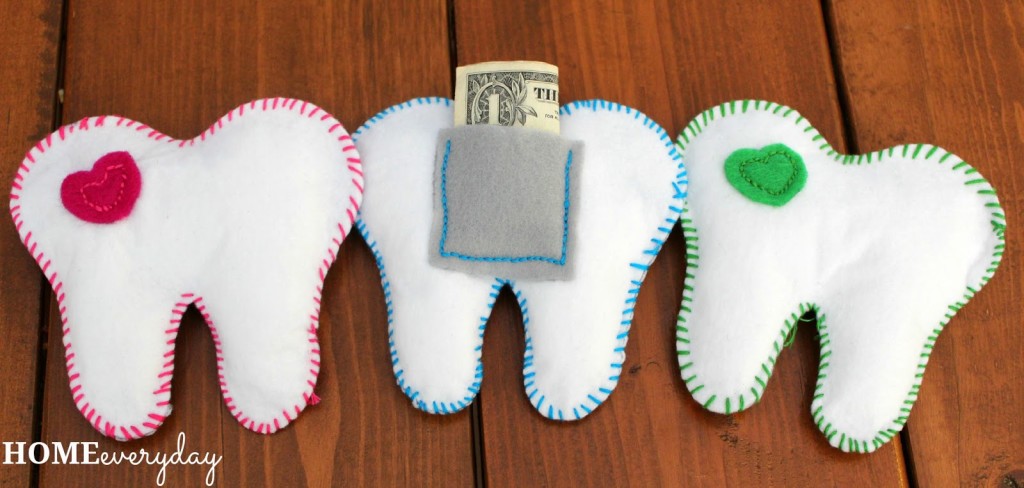
Fill: After the pillow is stitched about 3/4 of the way around, using your pillow fill or some cotton balls go ahead and fill the pillow just an tiny bit. NOTE: If you stuff the pillow too much it will be difficult to get teeth and treasures out of the pocket.


Finish it Up: Finish sewing using the whipstitch.

Voila!


What milestones of your children are making you sentimental? Any of them inspire a craft?

If you like this post and would like to read more about all things domestic with a touch of humor, become a Home Everyday follower! For blog updates or to see other places I write such as ChicagoNow or Chicago Parent follow Home Everyday on FacebookTwitter, and Pinterest.

I Love Them Because You Love Them: Taking Care of Those Lovies

All three of my kids have lovies. Special friends with special names with whom they sleep, snuggle, and must have for events like shots, first haircuts, and all other things scary. They have each had their lovies for as long as they can remember. Even their baby books include photos of them with their special buddies. I had a feeling from the beginning I would need to take care of these buddies for a long time. Maybe until they head off to college (or head to their first job, apartment, walk down the aisle, or have kids of their own).


Because of the kids attachment to their special friends, it is sometimes like I have SIX kids to take care of rather than THREE. In fact, it is joked about that I sometimes worry about some of same things I would with the kids. (Let’s face it if these buddies get lost or ruined it would break my kids’ little hearts.) Hence: I worry about their location, safety, and cleanliness.

So, here are some tips that we follow to keep our lovies safe and clean.

1.) Safe Place: After too many nights searching for friends at bedtime, we have decided to keep them in their beds. This way the kids know where their buddies are all the time. The only time they are allowed to take their lovie out of bed is for an extenuating circumstances like watching a movie on the couch when sick or going to the doctor for a blood draw.

2.) Sewing Skills: When these little buddies are so loved they are bound to have a rip or tear here or there. I have learned to keep some thread on hand for such an occasion. I have also learned that small curved upholstery needled works best for mending stuffed buddies.

3.) Freeze ’em Clean: I know this may sound strange, but when the kids have been sick my first line of defense is to put their buddies in a plastic freezer bag and put them in the freezer for 48 hours. This is a tip we got from our pediatrician. Doing this will kill any germs and will also kill dust mites. It does take some explaining to the kids, but I tell them that just like they need medicine to get better, their buddies need to get well too.

4.) Machine or Surface Clean: After our trip to the freezer, it is time to wash. For those friends where it is safe to wash them in the washing machine, I always make sure to put them in a lingerie bag or even in a pillowcase. I then wash in cold on a gentle cycle with mild soap. Then, I keep the buddy in the bag and put it in air cycle in the dryer. For those friends that can only be surface cleaned, I follow the directions on the label.

5.) When All Else Fails: This may sound terrible, but when our kids started to develop an attachment to a certain lovie, we hit the internet hard and actually bought a backup. The kids know about their backups, and my youngest even keeps her backups with her. My oldest has his hidden away just in case. The kids are old enough to know that if (it hasn’t come to this yet) ever have to replace their lovies with a backup it won’t be the same as the original, but at least they will still have something similar with memories of their first buddy.

If you like this post and would like to read more about all things domestic with a touch of humor, become a Home Everyday follower! For blog updates or to see other places I write such as ChicagoNow or Chicago Parent follow Home Everyday on FacebookTwitter, and Pinterest.

Fall Decor: Better Late Than Never

It’s Fall Ya’ll, and about time I got my act together with some seasonal decor don’t you think? Sure, I have some Halloween decorations, but mostly I like to put up Autumnal decorations that can last through Thanksgiving. So, it’s ok that I didn’t put up anything until last week. That’s what I keep telling myself anyway.

Rather than trying to rush through each holiday and looking forward to the next, I have found myself enjoying the process much more this way too. We took our time putting out decorations, putting the summer stuff away, and I feel like we are living more in the present this way. That’s what I keep telling myself anyway.

My favorite space so far is the dining room. 


When I started to take everything out, I thought, “What is with all the pumpkins?” Apparently, I have a pumpkin problem. Rather than scatter them all over the house, I thought it would be nice to put them all together in one space to create kind of a centerpiece.  (My mom has since baked us some cookies to fill the pumpkin jars, thanks Mom.) 

The wreath is something I have had forever, but decided to hang with some leftover burlap to dress up the window.


In the living room, I created a couple little Fall inspired vignettes. 


The rest of the house I have kept pretty much the same, as the kids love the candles on the mantle, and the curtain sillouettes in the window I made last year.

And let’s not forget the best part of putting Autumn decor up, I finally got some new slipcovers for the living room couches, and a few new pillows. Which means our house is ready for lounging now that the weather is getting chilly.


Now, I can relax for a few weeks before I even have to think about Christmas, right? That’s what I’m going to keep telling myself, anyway.


If you like this post and would like to read more about all things domestic with a touch of humor, become a Home Everyday follower! For blog updates or to see other places I write such as ChicagoNow or Chicago Parent follow Home Everyday on FacebookTwitter, and Pinterest.

Free Friday: Teal Pumpkin Project

If you love someone with food allergies as I do, you might also experience the same anxiety with holidays, birthdays, occasions, and other special events. I have a confession to make. When my little ones were old enough to start reaching the tops of tables, we took a hiatus from such occasions for awhile (hangs head in shame). I hosted a lot of things, but was afraid to attend functions at other people’s houses (except family) because I was so afraid of what my kids might accidentally consume.

We have talked with our kids about how knowledge is power, and in their case knowledge means safety, but there is only so much a 2 year old can absorb. The point being: the village surrounding my kids had to be on board with helping to keep them safe, because at one point my kids were just too little to help themselves.


Now, that they are older, I am a little better about letting them out into the big wide world because they are starting to become more knowledgable about protecting themselves when it comes to what they can eat. My oldest can read labels, my middle know which adults to ask, and everyone knows to refrain from having a snack unless they are absolutely sure it is safe for them to eat when they are out and about.

However, we are coming on the scariest time of year, and it has nothing to do with terrifying costumes or spooky decorations. Halloween for people with food allergies and those that love them, can be more frightening than The Ring (seriously that movie is THE WORST).

Halloween for allergy kids often meant Trick or Treating and giving all your candy away. Attending parties and not being able to eat anything there. Bringing your own special treats to functions. It even meant being a social outcast at some schools because of certain allergy policies.

That is why when I found out about the Teal Pumpkin Project being sponsored by Food Allergy Research and Education, I was so excited! This is a chance for every single kid to enjoy Halloween. FARE is being fair. (Plus, anytime we get to do a craft project, I’m a happy camper).


The Teal Pumpkin Project operates as follows. You can download a sign here OR paint a pumpkin teal. Place the sign or pumpkin in a visible place on Halloween night. This will indicate that not only do you have traditional Halloween treats for Trick or Treaters, but you have a NON FOOD treat to hand out for allergy kids too. Some sample treats include: stickers, faux tattoos, mini bottles of bubbles, wrist bands, pencils, erasers, tiny yo-yos, super balls, or any other kind of small toy or treat you might put in a treat bag for a birthday party.

When I told the kids about this, they were so excited, and we got to painting right away.


We decided to paint one big pumpkin (this is a faux pumpkin because I thought it would be nice to have from year to year) and the kids each painted their own small one (these are real).


I found acrylic teal paint at Michael’s, and we used sponge brushes to paint. Keep in mind because of the pumpkins sheen, it is actually easier to dab the paint on rather than brush it on.


While painting we thought of good ideas for treats to hand out on Halloween night.


So, what say you? Instead of buying 5 bags of candy, will you buy 4 bags of candy and one bag of non food treats? Will you put out a sign or a teal pumpkin? Will you make Halloween a fun for everyone?

If you want to know more about the Teal Pumpkin Project you can read my post about it on Chicago ParentThis article in the where I was interviewed for Chicago Tribune. Or here, here, or here.

If you like this post and would like to read more about all things domestic with a touch of humor, become a Home Everyday follower! For blog updates or to see other places I write such as ChicagoNow or Chicago Parent follow Home Everyday on FacebookTwitter, and Pinterest.


Venturing into the Sub Basement: Planning a Man Cave for My Man

We are in the very beginning stages of thinking of what to do with our sub basement. That’s right! I bet you didn’t know that we had a sub-basement.


It is because, since we have moved into this house, it literally has been our dirty little secret. When we moved in, the previous owners had divided up this space into bedrooms. However, we started tearing down walls in the hopes of creating another living space or perhaps office space for me and Brian.


Upon tearing down walls, we found one of the most awful things you can find in an older home: 

BLACK MOLD!


Obviously, rather than do the pretty upgrades and make a cool space, we had professional mold remediation done immediately before moving in. That pretty much sucked up any money we had to do anything cosmetically to the space. So, it has sat empty with a concrete floor and partially demo’d for the past few years while we figured out what to do.


Now, that the trauma is over time has passed we are starting to figure out what we want to do down there again, and we are kind of toying with the idea of an adult space. Maybe even a Man Cave.
Brian has never been one to actually ask for such a space. He deserves it though, and if I could do this for him I definitely would in a heartbeat. I know a lot of men work hard for their families, but I was thinking about my man, and he really loves his job. He works trying to make technology better for school districts every single day. He wants kids, teachers, and administrators to have a better and easier time with technology. He hopes they can have the best possible equipment they can afford and to use it in a way that will better the educational experience. When he isn’t working his day job, he is helping other schools in need by consulting or helping on committees to make them better too. He knows his own kids are blessed, and wants other kids to have the same opportunities too.
This year he coached soccer for both boys, meaning some Saturdays he was running form one game to the other. He dubbed himself the CEO (Chief Encouragement Officer), and was the loudest cheerer for Kindergarten and First Grade soccer teams. He came home with a scratchy voice almost every Saturday. He volunteers in our church, and despite the fact he is a Green Bay fan spends a fair amount of time helping with laundry, cutting the lawn, and helping me with my little (ok sometimes big) projects. 

And he’s handsome too!


If you walk into any room in the house you’ll see it definitely has the Erin Thumbprint, so I was thinking of things that would be awesome to incorporate into the new room that would make it seem more Brian.Man Crates Gifts for Men the very manly gift baskets you have to open with a crow bar, recently reached out, and wanted to know what I would include in a space for Brian. Man Crates is trying to class up the traditional Man Cave, and thank goodness! I am so over the futons!!

Since it has been on my mind lately, I thought I would make up a mood board.


Brian's Man Cave


Brian’s Man Cave by erin-debruin-skibinski featuring graphic wall art

First up, practicality is huge for Brian, so the space would need to have all the things that Brian would use.
Desk: A nice industrial spirited desk for him to work from home. The sub basement has a closet for him to store all of his tech gear, but the desk would give him a place to spread out and work in peace (or with some hockey on in the background.)
A treadmill: This is something Brian has been toying with for awhile, and it would be great for him to have a place to when we have brutally cold winters.
Couch, Chairs, Rustic Coffee table, and TV: These things are where he can escape and watch the Packers, Blackhawks, or his favorite funny movies with the kids or when his friends come over.  The extra large coffee table is great too for all the times he likes to play cards or board games.
The outlets with USB portals: These are perfect when his friends want to plug in their phones and check in on their fantasy teams.
A Mini Fridge: This is great for all the cold beverages he want to have on hand for after a workout or while watching a game.
I chose a green and yellow color scheme with the rug and chairs as a nod to his beloved Green Bay, and left everything extremely rustic as he loves doing wood work. I’m thinking we could even make the desk and coffee table ourselves. As for decor, I thought it might be fun to find some vintage movie posters or even put up his Vince Lombardi poster.
This is a man cave, I don’t think I would mind hanging out in, what about you?If you like this post and would like to read more about all things domestic with a touch of humor, become a Home Everyday follower! For blog updates or to see other places I write such as ChicagoNow or Chicago Parent follow Home Everyday on FacebookTwitter, and Pinterest.

Fire Prevention Week: MORE Safety Tips to Make your Home a Haven

Yesterday, I shared some tips on how to maintain the fire safety equipment in your home. While I wish every home came with a one size fits all manual, they don’t, but we all have our stories. Today, I am going to share some tips we have learned living in an older home, and things we have learned from friends along the way. These tips have kept our home and the people in it safe. Hopefully, this can help you too.

After all, knowledge is power, or in this case… safety.

In The Kitchen


Keep it Clean: While this seems like common sense, keeping your oven, stop top, and grill clean can help prevent kitchen cooking fires. Make sure that you also keep the surrounding areas (counters, backsplashes, inlets) around your cooking area free of decor, electrical appliances, or anything else that could catch fire. Heat radiates off the surfaces.

Scrub, Scrub, Scrub: Regulary clean your stove, oven, microwave, toaster, toaster oven, grill, deep fryer, or any appliance that uses heat for cooking. Any scraps, oil, leftover food, or crumbs, can easily catch fire.


Get Out: When we were kids, the advice regarding kitchen fires was to assess the kind of fire (grease or other) then put out the fire with the appropriate tool (lid, baking soda, water, fire extinguisher). According to the National Fire Protection Association, the solution is now if there is a fire in your kitchen, the solution is to immediately GET EVERYONE OUT! CALL 911! The fear is the fire can spread quickly and noxious fumes can hurt you.


Electrical


Basics: When we moved into this home, we had the home inspected by a licensed electrician. It is a good idea when moving (even if the home is newer) to have an electrician take a look at all the outlets, light fixtures, and existing appliances. It is also good to know information like where your electrical panel is, and how full it is. Before making any home improvements, this is excellent information to have. You don’t want to overload your electrical panel.

Outlets: Our home is almost 40 years old and many of the outlets were original to the home. Also, outlets in the kitchen, bathrooms, and outside where not GFI (ground fault circuit interrupters). In order to be safe, we had all the outlets replaced. This has helped give us piece of mind.

Appliances: The big ticket appliances like washer, dryer, and refrigerator are all plugged directly into the wall. NEVER use an extension cord to bring power to your large appliances. Also, this is another area where keeping clean is important. Make sure to vacuum out the vents of your refrigerator regularly  to prevent dust to prevent overhearing. With all appliances (lamps, hair dryers, fans etc) even small ones make sure that the cord is in tact, there is no burning smell when in use.

A Special Note About Your Dryer: We all know to clean our lint trap every use to prevent a fire, but did you know you should also clean your dryer vent regularly to prevent fires too. Check out this great tutorial from Pretty Handy Girl.

Prevention


Garbage: Proper disposal of certain items can help save your entire home from a potential disaster. Did you know that 9Volt Batteries tossed together in the trash can cause a fire? According the to NFPA, THIS is the proper way to dispose of them: In addition, make sure other flammable items like rags with stain or varnish used from DIY projects or perhaps leftover paint cans, are disposed of safely.

Chimney: Make sure your fireplace and chimney are inspected and cleaned regularly to help prevent chimney fires.

Does anyone else have any other safety tips they would like to share?

If you like this post and would like to read more about all things domestic with a touch of humor, become a Home Everyday follower! For blog updates or to see other places I write such as ChicagoNow or Chicago Parent follow Home Everyday on FacebookTwitter, and Pinterest.


Fire Prevention Week: Tips for Making Your Home a Haven

Here at Home Everyday, I love to talk crafts, cooking, baking, and decor, those are only a few things that make a house a home. When we bought this older home a few years ago, the first things we did, were to fix many of the safety concerns we had. First, we replaced the 35 year old furnace, outsourced a complete mold remediation, ripped up every ounce of old carpeting, had the chimney rebuilt, replaced and repaired the dryer vent, and took care of any part of the house that could be deemed unsafe.

We also replaced all the smoke detectors, carbon monoxide detectors.

While these things aren’t the most fun of things to do, when it comes to a home, it is SAFETY FIRST.  After all, you keep your most precious thing in your home: your family. 

Home is a haven, and every part of is should be safe.

So, since it is FIRE PREVENTION WEEK, I thought I would share some great tips for keeping your home safe all week long.

Today, we are going to be talking equipment. There are things in your home that you must have in order to keep your family safe from fire. Here are some tips for how to use and maintain these things in case of an emergency.

Brian’s little helper. This was over three years ago!


Smoke Detectors


Where: The best plan of action for smoke detectors is to have one on every level of your home, and one in every bedroom.


Batteries: we all know the old adage about changing the batteries when we change the clocks, which is twice a year. If they are hard wired, make sure you test them to make sure they are working.

Replace: Did you know smoke detectors are only guaranteed to work for ten years? That’s right! I couldn’t believe it either. If you know that your smoke detectors are at least that old it is time to replace them. (NOTE: If you’ve recently moved into a home that is at least ten year old, chances are they haven’t been replaced. It is time to get new ones too.)


Wireless: If you don’t have hardwired electric smoke detectors, meaning that they will all go off when one goes off, look into the new wireless battery models. These are battery operated smoke alarms that have a wireless mechanism that will sense when another smoke alarm in the house is going off and will in turn alert if there is a fire in the the house. Home Depot has them.

Practice: If you are living with little ones, let them hear the sound of the smoke alarm, and do a few fire drills to practice. Small children can be startled by the piercing sound of the smoke alarm and often hide in the event of a fire. Teach them that this loud noise is not to be afraid of, but it is a sign to get out of the house. The more they hear it and practice, the more prepared they will be if the unfortunate does occur.

Fire Extinguishers


Where: Knowing where to keep fire extinguishers is extremely important in helping to prevent a fire spreading in your home. In our home, we have one in the kitchen, one in the garage, and I am thinking of putting one in the basement where we have the laundry room.

Replace: Every fire extinguisher is different, but make sure you replace according to the manufacturer’s expiration dates. Why take the chance in a last minute situation, when you could prevent a fire from spreading further?

Used: Also, if you’ve used an extinguisher, it needs to be replaced. They cannot be re used as the pressure goes down in the extinguisher can.

Carbon Monoxide Detectors:


Where: The same rules  smoke detector apply for carbon monoxide detectors. There should be one on every level of the home as well as outside the sleeping area. Many people only have one carbon monoxide detector in their home. This is dangerous as by the time the sleeping area detector has detected the colorless, odorless, and tasteless gas, the lower levels could be filled with it. Your house needs more than one!

Batteries: Check the batteries at the same time you check the batteries in your smoke detectors.

Interconnected: Just like smoke detectors you can find carbon monoxide detectors that will are wireless or interconnected so that when one sounds, all of them will sound. This is especially helpful for multilevel houses.

What safety tips do you have for your home?


If you like this post and would like to read more about all things domestic with a touch of humor, become a Home Everyday follower! For blog updates or to see other places I write such as ChicagoNow or Chicago Parent follow Home Everyday on FacebookTwitter, and Pinterest.


In Case of Emergency: DIY Address Plaque

We are already getting flyers about fire prevention week coming up in October. Which in addition to making sure the smoke detectors are checked, the fire extinguishers are up to date, making sure we reinforce fire safety with the kids like how to get out of the house and where to meet, I was also thinking I should probably knock something off my to do list that has been on there forever.

We need an address plaque on our house, and of course I wanted to make it myself.


We have our address on our mailbox, but I have always thought it would be a good idea to label the house too. It is better to be safe than sorry.

So, I went to my favorite place for inspiration. Pinterest.

I found a few ideas, and then decided to come up with a cost effective idea of my own, using a wooden canvas I was able to get on sale at Michael’s, leftover stain from the dining room table project, and stainless steal numbers from Home Depot.

I created a two tone address plaque that is good for any season. A DIY project and something that makes my family safe?! Awesome!


Supplies
12″ x 12″ wooden canvas
Acrylyic Wood Stain (Minwax Clear Base)
Painter’s Tape
Paint Brush or Old Rag
Metal Numbers with Screws (I used 4″ numbers that could be seen from the street.)
Hardware to Attach Plaque to House
Screwdriver
Drill
Drop Cloth


Step 1: Wipe off any dust or debris that might be on the wooden canvas. You want the surface completely clean for taping and staining.

Step 2: Tape off the pattern that you would like on your canvas. I did a random stripe pattern, but chevron or diagonal stripes would be fun too. NOTE: Make sure that you press the tape firmly into place as stain is watery and can seep under painters tape if not adhered firmly.


Step 3: Using a sponge brush or rag, gently apply stain according to manufacturers instructions. NOTE: The more coats of stain applied the richer and darker the color. I applied three coats, making sure to allow ample drying time between each coat.


Coat 1:


Coat 2:


Coat 3:


Step 4: After the stain has dried remove painters tape. Using a screwdriver drill carefully attach letters where you would like them using predrilled holes.

Step 5: Hang on your house in a place that is easily visible from the street. We hung ours near the front door.


What will you be doing to get ready for fire prevention week?

If you like this post and would like to read more about all things domestic with a touch of humor, become a Home Everyday follower! For blog updates or to see other places I write such as ChicagoNow or Chicago Parent follow Home Everyday on FacebookTwitter, and Pinterest.

Follow on Bloglovin

Linking up at Serenity Now (http://www.serenitynowblog.com) for Weekend Blog Reading and Home Stories A to Z (http://www.homestoriesatoz.com)

ChicagonistaLIVE and Floor & Decor: Great Design and Conversation

I have been compensated for this post, but the thoughts and opinions are my own.

Last week, I had the pleasure of joining the women of ChicagonistaLIVE as they broadcasted live from Floor and Decor in Skokie. There is nothing more wonderful for me than when you combine home decor and good conversation so I was thrilled to be a part of this experience.

Floor and Decor was not only filled with every kind of flooring option possible, but also has everything you need for tiling your bathroom, shower, kitchen backsplashes, mudrooms, stones for outdoor spaces and fireplaces, laminate, and hardwood, but also Floor and Decor also has everything you would need to install it. From the saws to thinset, backer board to waterproofing materials, Floor and Decor has everything. Well, almost everything. For running water, I’d have to head back home.


Thanks to Maria Ramos of A Savings Wow for taking this photo.

Everything that Floor and Decor has can be overwhelming, but that is why there are designers on staff to help you with every decision that needs to be made as well as help you find the materials that will fit your lifestyle and budget. We were able to take a tour of the the store with the designer, who taught us a great deal about design and installation, and perhaps gave me a little confidence to try a backsplash on my own (don’t worry Brian, I won’t do it just yet).


Also, my favorite part of the day was when the wonderful women of ChicagonistaLive allowed me to be a guest on their show and ask for some advice. I was looking for a way to incorporate marble tile into a kitchen or bath without breaking the bank, and Floor and Decor had just the right solution. Long story short: less is more.


I was so excited to be a part of this experience, and hoping that I will be able to do it again in the near future! For more information about ChicagonistaLIVE LIKE them on Facebook or follow them on Twitter. To learn more about Floor and Decor LIKE them on Facebook or follow them Twitter.


If you like this post and would like to read more about all things domestic with a touch of humor, become a Home Everyday follower! For blog updates or to see other places I write such as ChicagoNow or Chicago Parent follow Home Everyday on FacebookTwitter, and Pinterest.

Follow on Bloglovin