Month

October 2012

What’s the Plan? Calendar Tips

This week marks Week 3 in Mom of 6’s Organize Your Life Boot Camp. This week, it is all about the calendar.


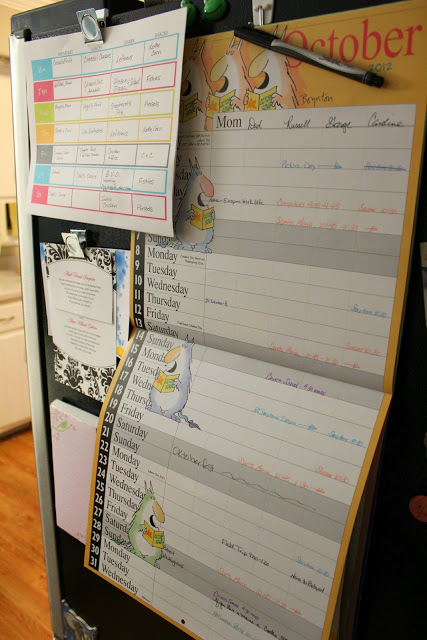
Call me old fashioned, but I have an old school calendar hanging on the side of the fridge. I used to teach technology, I am married to a tech director (who cannot wait for me to get back to iCal), and I am a blogger who uses a laptop and smart phone like it’s my job. So why the paper calendar?

Years ago, B.C. (before children), I used iCal. Just like Sharon at Mom of 6, I loved the functionality, the color coding, the ease of sharing with my husband. Then after my second child was born, and we made the decision for me to become a stay at home mom, I realized how little I was on the computer and was using my cell phone during the day. So, I started using a paper calendar and kept it in the kitchen.

When I was in high school, I remember a teacher saying “I don’t care where you write it down, as long as you write it down.” I myself was a notebook user, but I can remember kids using laptops, scrap paper, or their hands to take notes. This is kind of my mentality when it comes to planning or using a calendar. As long as you have a system that you will consistently use, that is all that matters.


I use the Sandra Boynton family calendar because it has spaces for each member of our family, it is large, and it comes with stickers which my kids like helping put on important dates. Below is a list of tips that help us stay organized when it comes to our calendar:
  • Ever since Brian and I have gotten married, Sunday has become a “plan out the week” day. We usually sit on the couch (while watching sitcoms), and plan out the week. Appointments, babysitters, school events, exercise schedules, work commitments, and activities are all planned out. Sometimes we even discuss cleaning responsibilities and house projects that need to get completed and try to plan time to do that. I mark the calendar, he makes notes in his iPhone, and then we are ready for the week.
  • While Brian and I are sorting out the week, we make our To Do lists and prioritize the To Do’s and try to decide when these chores can be done.
  • To cut down on excess paper, any time we receive an invitation, a note from school about an event, or any other piece of paper requesting our presence somewhere the date is marked on the calendar along with any other details surrounding the event and the paper is thrown away. This is also the time that I RSVP to the event.
  • I keep a magnetic clip next to the calendar with anything that we might need to bring to an event. For example, if Brian and I have tickets to a concert, the tickets are kept right by the calendar.
  • I also make a note on the calendar who is babysitting the kids for particular events.
  • Lastly, if you touch the pen I keep next to my calendar, you will feel my wrath.
There you have it! Now go check out all the other links at Mom of 6 for tips on calendaring and to do lists.

Autumn Comfort Food: Pumpkin Pound Cake

This past weekend my sister, Beth, hosted Sunday Dinner for everyone. I thought it might be nice to make a dessert with some autumnal flavors, but I also wanted to steer clear of the traditional apple or pumpkin pie. I didn’t want us to be burnt out on pie before Thanksgiving is even here.

After a little internet searching, I found a recipe for Pumpkin Pound Cake with Cinnamon Glaze. There is just something about the combination of pumpkin and cinnamon that says comfort. It was absolutely delicious!


There are two things I wanted to note, the original recipe calls for the use of a bunt pan. I do not have one, so I just used my spring form pan that I make cheesecakes in, and it worked perfectly fine. I even used the same baking time and temperature as the recipe.


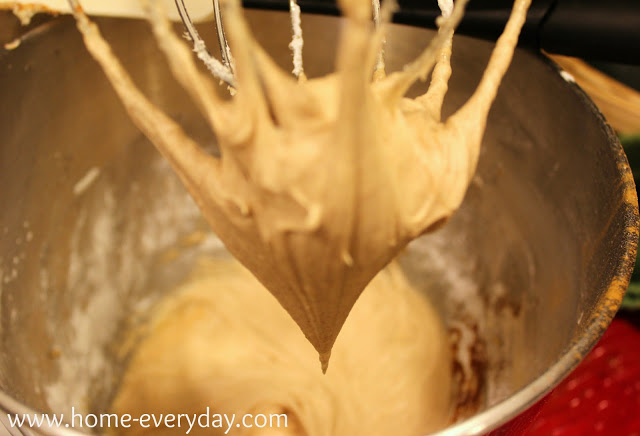
Also, just a note about the glaze. You can see from the picture below it is more of a frosting. Is there anyone that doesn’t like frosting? (crickets chirping) Didn’t think so.


This was a perfect addition to our Sunday dinner, and I am thinking of making it again for another fall gathering coming up.

Linking up at Centsational Girl today with a bunch of other comfort food recipes. Check it out for some great comfort food recipes to add to your autumn menu.

This is Embarrassing: Small Space Organization

Ok, admit it. Everyone has the space. The space that you cannot get a handle on. Right? Please tell me this is true. I cannot be the only one. I was almost too ashamed to post this, but then I realized I wanted to keep it real around here. Plus, you’ve seen a few of my other embarrassing moments here and here. So here goes… don’t judge.


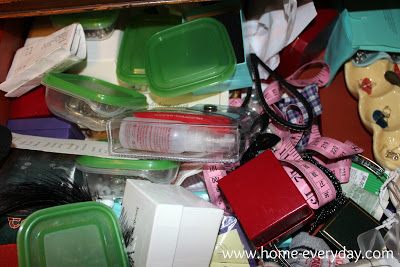
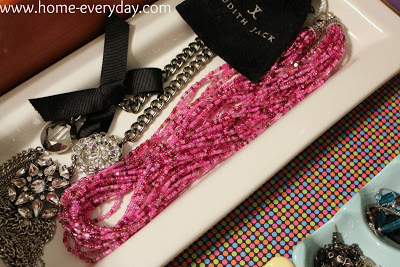
This is my top dresser drawer. This is the space for me. I can never seem to get a handle on it. You’ll notice everything is in tiny boxes to help minimize tangled jewelry etc. However, I would then have to look in every box to find something and then would end up just throwing the boxes back in the drawer. Totally inefficient, and basically a joke.

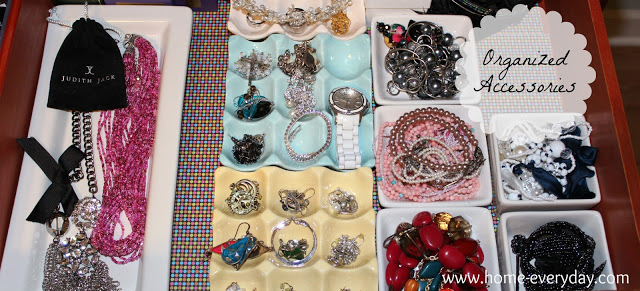
Then, (cue Alleluia Chorus) I saw a few ideas on Pinterest for how to organize jewelry and accessories. After about 30 minutes of organizing, here is what my drawer looks like now.


So much better. The first thing I did was take everything out of the drawer, and line it with some wrapping paper.


Then, with a little help from Coco…

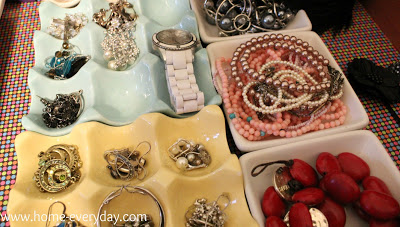
Ok, she wasn’t much help again. She has been more of a moral support system lately. Anyway, I sorted my accessories into some small ceramic dishes that I had. I was going to sell these dishes in our garage sale, but remembered I could use them to sort small things, and held on to them. Also, I bought some ceramic egg trays at JoAnn Fabrics awhile back on clearance to sort earrings. All of these dishes keep my accessories right where I can see them, and minimize things getting all jumbled up together.


Not bad for 30 minutes of my time, and less than a $5 investment. I cannot believe I didn’t do this sooner.
One last after photo, to get that awful first image out of your our brains.

Linking up with A Thoughtful Place for Keep C.A.L.M. and Organize On.

No More Lunch Ruts: Hummus Veggie Wrap

Lately, I have been in a lunch rut. I was getting sick of soup and salads and was looking for something healthy, easy to make, and something that could easily be altered. This is what I came up with.


Now let me start out by saying, I used to really hate hummus. I don’t know if it was a texture thing or just taste. It is super healthy, and I always wanted to like it. I even made my own a few times, and I didn’t even like that. I was at the super market this week, and I found Garlic, Tomato and Basil Hummus. Tomato basil anything is perfection in my book. Also, I totally fell victim to advertising. It was on sale, it looked delicious, it was on an end cap. So of course, even though I don’t like hummus, I decided to try it.

I brought it home and tried it on some red peppers, and loved it! Now that I knew I liked this particular kind of hummus, I was trying to think of all kinds of ways to use it. With that, It has become the perfect solution to my lunch rut.

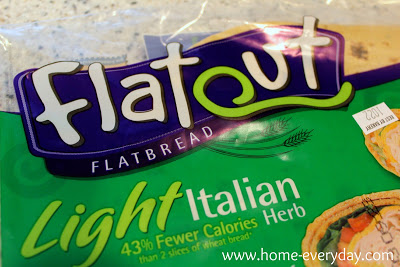
I used some wraps that I always have on hand.


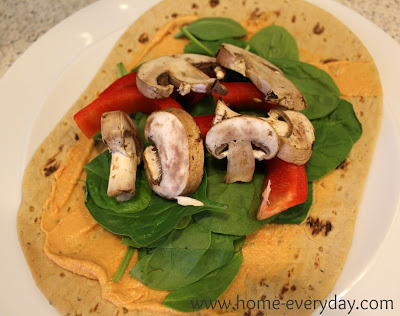
Layered up hummus, spinach, red peppers and mushrooms.
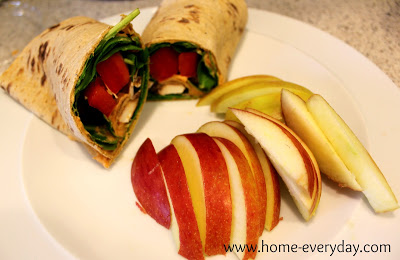
Rolled it up, and cut some apple slices. This is now my new favorite lunch.
Lunch has been saved!


Oops… I did it again: Faux Curtains

Ok, now that I have got you singing some Brittany Spears circa 2000. I will explain how I did it again. Some people wanted to know where the curtains in our Master Bedroom came from. So I dug up some pictures on my iPhone from when we first moved in, and here is the very long story.See our hillbilly make shift curtain made of a sheet and duct tape. Classy. Can you believe at one time, this was my window treatment solution?


Awhile back, right before we had moved into our house, I ran out to Lowe’s and purchased three roller room darkening shades for the three bedrooms. We were doing so much work to the upstairs, we needed something since purging the previous owners disgusting filthy window treatments that probably hadn’t been dusted since 1975.  We were also in a hurry because we wanted to get in the house. So this was the solution. They were easy to install, and they were room darkening which is a bonus when you have three little ones who nap every day. I also figured they could be easily covered up with curtains, roman shades, balloon curtains, or valances which I was planning on putting in the rooms as a decorative treatment.  You know when I had nothing better to do. So for convenience sake, I got the inexpensive shades to hold us over until I could cover them all up with something more attractive. I only spent around $30 for each which is a small price to pay for privacy and room darkening.
So, our shades were purchased and with some help from our friend Scott were installed in no time. They worked beautifully, well, two of them worked. The ones in the kids’ rooms were fine, THANK GOODNESS, naptime was saved. However, in the master bedroom the darn thing wouldn’t snap back up in the morning, when we wanted that beautiful natural light that is so prevalant in our new home. We tinkered, we fiddled, we did everything including talking to the people at Lowe’s (who were very friendly) to try and figure out how to get it to work. Long story short… er long, it still didn’t work, so I had to exchange it.
I went back to Lowe’s, and the woman at the returns counter told me the only way I could “exchange” it would be to return the old shade, and purchase a new one. Since, the shades have to be trimmed to fit the window, so I figured it was no big deal. I returned the old shade, and then walked down the window treatment aisle and tried to find a replacement $30 shade, and much to my surprise, they were no longer $30, they were now $50! I know this sounds ridiculous (you know I’m thrifty right?), but I refuse to pay $50 for something that I could buy for $30 just three weeks ago. Especially something that I was planning on covering up with curtains anyway. So I came home shadeless, much to Brian’s annoyance.
It came to covering our window with something, and by something I mean a sheet and duct tape. Ugh. Martha Stewart would be again be appalled (just like this). So, the search for an inexpensive yet beautiful room darkening window treatment began. I had narrowed it down to curtains, as I think they have a more sophisticated look, and that is kind of the look we are going for. Because of this, I knew I would have to make them myself to save some money, and to look just right with our bedding, new headboard, and freshly painted room.
That’s when I remembered my cloth napkin cafe curtains, and voila, I did it again. I used something that isn’t supposed to be used for curtains, and I made it into curtains with those little ring clips. I found shower curtains on clearance at Target. They coordinated with our color scheme, they had a pattern that wasn’t too feminine, and did I mention they were on clearance? I bought some room darkening fabric at JoAnn Fabrics for about $2 a yard. I cut it to size. Then I clipped clipped room darkening fabric to the back of the shower curtains before hanging them. So, I did it again. Another set of no sew curtains. They are a little short, but you cannot even tell with the headboard and bedside tables. Jenky no more!


Thank goodness the sheet and duct tape are gone!

Finding My Stride: Establishing Routines

Today is the second week in the Mom of 6 Organize My Life Boot Camp. This week’s topic is establishing routines.

I am a creature of habit. I love routine. Repetition. Predictability. Don’t get me wrong, I love the spontaneous outing or change up to the every day norm, but I feel that change ups come much easier when there is some sort of normalcy.

You know I’m a dork already so I have no fear sharing this with you, but even when I was unemployed after college, I made up routines for myself to keep my sanity. Wake up, eat breakfast, go for a run, job search and set up interviews, eat lunch, more job searching, nap, even more job searching, dinner, IM friends, watch nightly sitcoms, Golden Girls reruns, read, bed. I felt that even in a time of no schedule and really nowhere to be, I had something to do.

Now that I am a Mom of three all born in a span of 33 months, I have figured out how to establish routine that works for our family. That my kids find helpful. That Brian helped to establish. That even allows me to still enjoy my sitcoms.

I just want everyone to know that in our house the schedule is loose. The time frame is not set in stone, however, the routine does not waiver. Schedules are good, they are helpful, but sometimes they are unrealistic and constrictive to follow. I feel that it is unrealistic for anyone to believe that they can get any kid to bed at 8:00 p.m. on the dot every single night. I think it is unrealistic to assume that you won’t get caught in a traffic jam, soccer practice will run late, or the check out at the supermarket will be packed. I mean, you might even burn dinner while on the phone, supervising kids and Play-Doh and folding laundry and might have to find a plan B for dinner before the husband gets home (true story). Time is sometimes unreliable. The routine, however, helps to give everyone some comfort.

For example, my kids don’t go to bed at the EXACT same time every night, but we do the same thing before bed every night, and end up in bed between 7:45 and 8:30 p.m. consistently.

All the routines in our house are this way. It started when they were babies. Nurse, play, change diaper, sleep. Nurse, play, change diaper, sleep. Then, as they would grow things would evolve. Naps got further apart. Play time got longer. Nursing turned into table food.

Right now, we have a few standard routines that keep us on task, and allow us to have flexibility when we need/want it.

So here is a little day in the life…

Morning
Alarm Goes off at 4:30, I hit snooze button and debate about working out and try to make a decision before next alarm goes off at 4:40. If I decide to work out, I hit the gym and shower and am back in time to take a power nap. Then 6:30 alarm goes off, and Brian gets up, showers, and starts getting ready for work. Kids hear Brian and proceed to wake me up. I get them something to drink, and flip on a show for them while I get breakfast ready. Kids and I eat, then head upstairs, get dressed, brush teeth, get shoes, glasses, socks, coats. Everyone heads out the door. Brian to work. Boys to school. Caroline and I to Mom and Me activities.


Afternoon
Coco and I pick up the boys, and since it is kind of a long commute, I try to pack a snack and something to drink for the way home. When we walk in the door, everyone removes shoes, empty and hang up back packs, and wash hands. I make lunch sometimes with a little help from the kids. We all eat together and talk about school. While they have a little down time, I go through school papers and mail and sort it out and look to see if there is homework that needs to be done after naps. Between 1:00 p.m. and 2:00 p.m. everyone (sometimes Mom too) takes a nap. My oldest really only needs a nap about 3 or 4 days a week, but he does have at least an hour of quiet time which includes looking at books while resting. This is my time that I do laundry, do some cleaning, catch up on a project, or blog. When everyone wakes up from naps between 3:00 and 4:00 p.m., I usually have a little snuggle time with everyone (while I still can) then, we grab a snack. Then it is homework time, (if there is any), play outside time, or park district activity time. Then dinner prep begins.
 

Evening
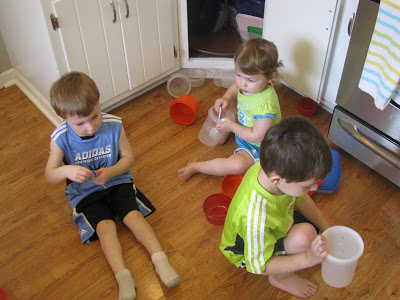
Kids will play independently, watch a show, or help me make dinner. Brian is usually walking in the door at this time, and changes clothes and will do a few things around the house like switch up laundry. Dinner is on the table between 5:30 p.m. and 6:30 p.m. Brian and I will sometimes clean up the kitchen together and do baths together or we will divide and conquer. Then it is finish up playing, pick up some toys, and pack backpacks. Next, we pick out clothes for the next day (sometimes this is when I pack my gym bag). Then, it is baths, jammies, brush teeth, find lovies, story time, prayers, kisses, and bed. Brian and I then collapse on the couch, do some work, blog, and watch sitcoms and try to be in bed no later than 11:00 p.m.


Then we start again.

Some notes:
– Times are not set in stone. These aren’t schedules, these are routines.
– My kids are amazing when we travel or do anything a little different, because they always have the comfort of the routine. No matter where we are we always have something to drink when we wake up. No matter where we are, we always wash hands before lunch. No matter where we are, we always have lovies and storytime before bed.
– Routines evolve as the kids grow.
– When someone is “not having” the routine, I let the kids make some decisions. Such as what kind of fruit we will have with breakfast. I will let someone pick what story we are reading at bedtime. Sometimes I will give special jobs like prayer leader, table clearer, or have them put toothpaste on everyones’ toothbrushes. Then, I give lots of praise. I have found my kids are much more cooperative when they feel they are part of the decision making and helping.
– Sometimes, we don’t follow everything perfect. We make mistakes. Sometimes, Brian and I leave the kitchen mess to play tag in the backyard instead. Sometimes, we skip baths to play Hi-Ho Cheerio. Sometimes, we put on Dolphin Tale and eat finger foods in front of the TV. Sometimes, everyone needs a break from the day to day, but I know that even though we have skipped a step or switched it up, the overall important parts of the routine have stayed the same.
– This is what works for US. I’m not saying that OUR routines will work for everyone, but I do advise having some sort of routine.


Upsy Daisy Cupcake Crazy: S’more Cupcake


Meg Broderick, baker extraordinaire, and founder of Upsy Daisy Cupcake Crazy is a friend from way back. We went to elementary school together as well as were in the same Girl Scout Troop for many years. She is another amazing woman, and I am so happy that she is here today so share this amazing recipe for S’mores Cupcakes. I cannot wait to make these! For more information, you can contact Meg via her Facebook fan page.


I’m so excited to share this fabulous
fall recipe with you, but first I want to tell you a little bit about me (and my
‘cakes).  I’m not one of those girls who
has been baking her entire life.  I
didn’t learn to bake from my mom or even my grandmother.  I learned to bake by being bored and having
nothing better to do.  I really first
started baking about 4 years ago.  I
found myself hanging out at home on a Friday night and wanted something to bide
my time.
I started testing out my skills on my
family who soon told me I needed to stop bringing cupcakes over! (they were
cupcaked-out!).  It soon evolved into
baking for my niece’s   1st birthday to
baking for a friend’s bridal shower and the rest is history!  It truly brings me joy to be that sweet part
of a baby’s 1st birthday or the added touch to the bridal shower.  That being said, I’ve done everything from
baby showers, kids birthdays, bridal showers, bachelorette parties and even
weddings! (though weddings are not my target market, I’ve done one!)
So when I got the call from my good
friend, Amy Waligora (nee Bogatto), about doing some ‘cakes for her wedding, I
was ECSTATIC at the opportunity!  Amy and
Eric’s wedding was on September 23, 2012 and Amy really wanted to incorporate
fall flavors for their rustic themed wedding.
We sat on the phone for about an hour and came up with 6 different
‘cakes: Pumpkin cupcake with whipped cream frosting, white cupcake with Nutella
frosting, carrot cake with cream cheese frosting, apple cider cupcake with
salted caramel frosting, pound cake with brown butter glaze (YUM!), and finally
(my personal favorite) the S’More cupcake!
I wish I had the time to tell you all
about every single cupcake I did for Amy however, I chose to share my favorite
cupcake of them all….the S’More cupcake.
Amy had pinned a S’More recipe that
she liked and so I first studied that recipe before modifying it to my
own.  See the original recipe here.
If you read the recipe, it says you
should melt chocolate in a double boiler to put atop your chocolate
cupcake.  And if you know me, you know
that me + melting chocolate = disaster.
So I opted to switch up the recipe.
This recipe also does chocolate cake from scratch but I highly recommend
using store bought chocolate cake to make your life easier if you’re not an
avid baker (saves you money too!).  I’d
recommend Betty Crocker’s Supreme Moist with a cup of pudding.  Ok so here we go….
Start with making the graham cracker
bottom to your cupcake.  Melt some butter
in the microwave (I used about a stick of unsalted butter, I always bake with
unsalted butter).  Take your graham
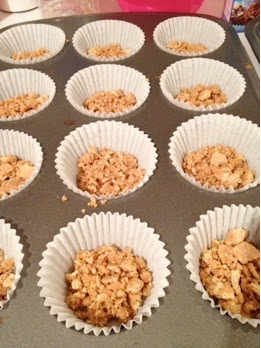
crackers and smash them up into very small pieces.  I used about 8 “bars” of graham
crackers.  Combine the graham cracker
crumbs, butter and 2 tbsps of sugar in a bowl.
Using a teaspoon, scoop the mixture into the bottom of your cupcake
liners.
You can see I didn’t smash my graham
crackers too small….do whatever you prefer!
The recipe says you should bake your graham cracker crust for about 5
mins before adding your chocolate cake but I didn’t and I think mine turned out
fabulous. Again, whatever you prefer.
So I then scooped my chocolate cake mix
over the crust.  Evenly scoop your batter
over the crust so each ‘cake has about the same amount of batter (I use a
little less than 1/4 cup of batter per ‘cake).
Bake for approximately 15-18 minutes.
It really depends on your oven; I use the “Rule of Nose”…when you can
smell the cupcakes, they are just about ready.
Pop those suckers out of the oven when
your toothpick comes out of the ‘cake clean as a whistle.  While your ‘cakes are cooling, it’s time to
make the marshmallow frosting.
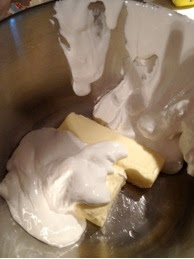
Start with 1 & 1/2 sticks of
unsalted butter at room temperature.  Add
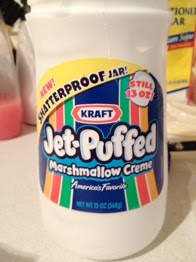
12 oz of marshmallow fluff.  The
container I found was 13 oz so I just used the entire container.  A little extra fluff never hurt, right?!
Cream the butter and fluff together in
your mixer until evenly combined.  This
is the point in the wedding ‘cakes process where my mixer was not too happy
with me so I had to call in the troops: A.K.A a glass of red wine.

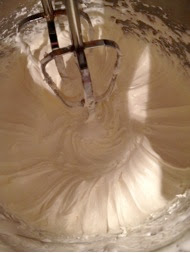
Stay patient….the fluff/butter
mixture eventually will look like this:
The recipe calls for 3 cups of “icing
sugar” which translates to powdered sugar.
I’ve always found that no matter how much the recipe calls for, I always
have to use more; I can tell based on the consistency in the mixture.  Too soft? Add more powdered sugar.  Too dry? add a little milk.  If you can see the butter separating from the
mixture, add more powdered sugar.
It’s an art, not a science!
Once you’ve got the perfect
consistency in the frosting, you’ve probably got some time to make the chocolate
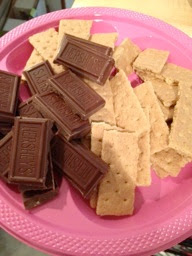
& graham cracker toppers.  I just
broke apart leftover graham crackers into individual pieces and did the same
with a couple of large Hershey bars.
Pipe your marshmallow frosting onto
your cooled chocolate cupcakes  and add
your chocolate & graham cracker toppers almost immediately.
Like so:
I found that the marshmallow frosting
was a little soft for my liking so I popped the ‘cakes in the fridge for a
couple of minutes to set and they turned out perfect.
Before I got to the wedding (I was
also a guest at this shin-dig), I had my eye on one of these.  Thankfully, I snagged one and it was OH SO
GOOD.
These would be perfect for any fall
occasion; from a girl scout over night trip to a family bonfire in the
backyard.
I hope you enjoy this recipe as much
as we all did at Amy’s wedding!
Linking up at Serenity Now.

Takin’ it Easy: Columbus Day

Since it is Columbus Day, and this kids and Brian have the day off. I’m taking a little blog break to spend some time with the family.

I wil be back with plenty of new ideas.

Teachable Moments

A few weeks back, I was at the super market with all three kids. Which as many with kids know can be a hellish interesting experience. While zipping through the store, with my half written list, one child eating Goldfish crackers and the other two letting go of the cart to give me their “sales pitch” on on various unhealthy foods that we must purchase for the mere fact that Lightening McQueen is on the box, I make my way to the frozen foods.

I stop.

There is a woman standing right in front of the frozen waffles. I excuse myself to grab a box, and she says, “Can you help me? My hands are so sore.” I nod my head, and get a box of waffles for her. I notice her hands are resting backside up on the handle of her grocery cart, too weak to grip. I then say, “Miss (I’m not a fan of calling someone Ma’am, as I was near tears when a teenager did it to me once) is everything ok?”

She begins to cry, telling me that she just finished her last round of chemo that morning. That she has a cab waiting outside. That she hopes the cancer is gone. That her grandkids are coming for the weekend and she needs food in the house. That her daughter was supposed to help her at the store today and couldn’t make it. That she thought she could do it herself. That she thinks she is going to just go home.

I reply, “No, we will help you.” The kids by now are listening. Russell and George IMMEDIATELY get to work, when I say the word help. Russell asks the woman, “What else are you going to buy? I will get it.” George says, “Can I push your cart, please?”

We follow the woman around getting our groceries and her groceries, putting anything in her cart that she needs. The boys talking to her, asking her such important questions as “Do you like the Chicago Bears?” and “What’s your favorite color?”

We get to the checkout. The woman thanks us, and tells us that the cab driver can help her from here.

The kids and I checkout. We get to the car. Load everything in. Put everyone in carseats. Buckle up.

I stop.

Russell says, “Mommy, that woman was a stranger.”

“Yes, Russell, she was, but Mommy is here to keep you safe.”

“I don’t like seeing people that are sad. Why was she sad?”

“Because she is sick.”

“I don’t like being sick. I’m glad we helped her.”

George chimes in, “Being sad is not fun.”

I reply, “No, George, being sad is no fun. Thank you for helping.”

That night as I had just told all three munchkins to put their clothes in the hamper for the millionth time.

I stop. I smile. I tear up.

It dawns on me. Even though these kids can drive me insane, they are starting to catch on to the important things in life. Brian and I have done something right. Today my kids helped someone in need. They understand kindness.

As a mother of young kids, it is hard to see the payoff from your labors. Months of, “Say please and thank you.” Hours of setting the timer so they can see the concept of “turn for turn”. Years of trying to lead by example. I finally am getting to see that my kids understand. Even though they are so young, they are starting to understand.


Now, excuse me while I go break up a three way screaming match over Secretariat our rocking horse (hey, no one is perfect all the time).

Linking up at Mom of 6 Share Your Life.

The REAL Debate: Shepherd’s Pie or Cottage Pie?

In the wake of last night’s presidential debate I thought I would make a controversial dish around here. For dinner, I made Rachael Ray’s Smokey Turkey Shepherd’s Pie. There has been some speculation, however, if it technically shepherd’s pie or is it cottage pie.

According to Food.com, Shepherd’s Pie is an English dish that is typically made with a layer of minced lamb, vegetables, and gravy and then topped with mashed potatoes sometimes topped with cheese. Cottage Pie is made the same way, but with minced beef. So, now that you have the facts, technically a “pie” made with ground turkey is neither. I thought it might be fun to call it Fowl Pie, but that doesn’t sound good at all. So, for now I will refer to it as Turkey Pie.


This is another Rachael Ray recipe that is an Autumn staple in our home. The kids like the mashed potato top, and Brian likes everything else. The only change I have made is that I added a little shredded cheese to the top of the mashed potatoes because my kids love cheese.

Here is the recipe I retyped from the Food Network Website.


  • 3 large Idaho potatoes, peeled and cubed
  • Coarse salt
  • 2 tablespoons extra-virgin olive oil
  • 1 1/3 pound ground turkey breast
  • 1 tablespoon smoked paprika, available in small cans on spice aisle of market
  • Coarse black pepper
  • 2 tablespoons, 5 or 6 sprigs, fresh thyme leaves
  • 1 medium onion, chopped
  • 2 carrots, peeled and diced
  • 3 ribs celery from the heart, chopped
  • 1 small red bell pepper, seeded and chopped
  • 2 cups frozen peas
  • 2 tablespoons all-purpose flour
  • 2 cups chicken broth
  • 1 cup sour cream, divided
  • 3 tablespoons butter
  • 1 large egg, beaten
  • 10 to 12 blades fresh chives, chopped or snipped
Bring a medium pot of water to a boil, salt it, and cook the potatoes until tender, 12 to 15 minutes.
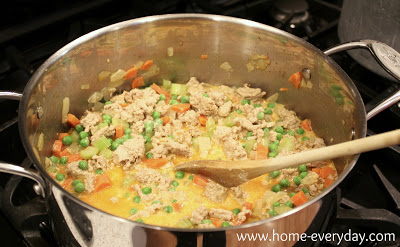
Heat a deep, large skillet over medium-high heat. Add olive oil, then add ground turkey to the pan and break it up. Season the turkey with smoked paprika, salt and pepper, and thyme. When turkey browns up, add: onions, carrots, celery. Season the veggies with salt and pepper. Cook 5 minutes, then add red pepper and peas cook another 2 minutes. Stir in flour and cook flour 2 minutes. Whisk in broth and combine. Add 1/2 cup of sour cream and combine. Simmer mixture over low heat.
Preheat your broiler to high.
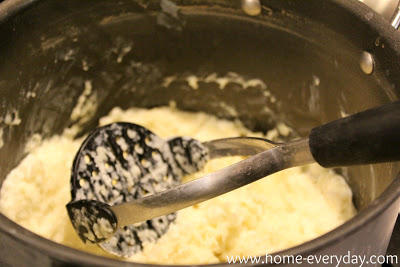
When potatoes are tender, add a ladle of cooking water to the egg. Drain potatoes and return to the warm pot to dry them out a little. Add remaining 1/2 cup sour cream, butter, half of the chives, and salt and pepper. Smash and mash the potatoes, mashing in the beaten, tempered egg. If the potatoes are too tight, mix in a splash of milk.
Pour turkey mixture into a medium casserole dish. Top turkey with an even layer of smashed potatoes and place casserole 5 inches from hot broiler. Broil the potatoes until golden at edges and remove the casserole from the oven. Garnish the casserole with the remaining chives and a sprinkle of smoked paprika.
I hope you enjoy it no matter what you call it.