Tag

easy

A Little More Classy: Fabric Lined Cabinets

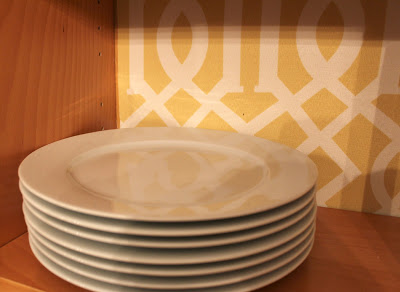
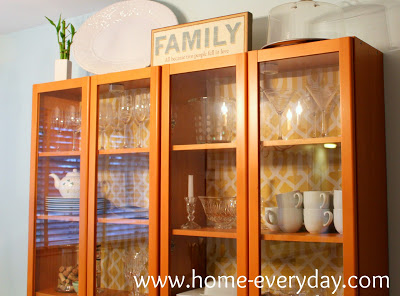
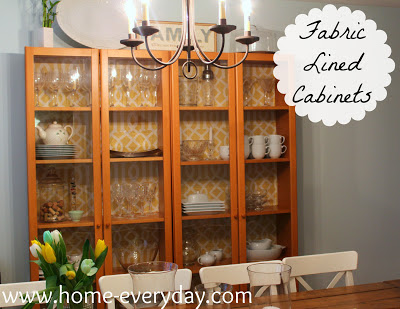
Yesterday, I showed off our living room and dining room, and revealed at how moving a little bit of furniture can transform a room. In the dining room, you may have noticed that  our Ikea hand me down cabinets looked a little more classy. That is because I lined the back of them with some fabric I found at JoAnn Fabrics for 40% off!

This is a project that I wanted to do for ages, and while I knew it would be a transformation, I cannot believe how much better these cabinets look.

I got a little help from A Thoughtful Place, and the quick tutorial on how to line cabinets with fabric. Now that I kind of had an idea of how to do this, I got to work.

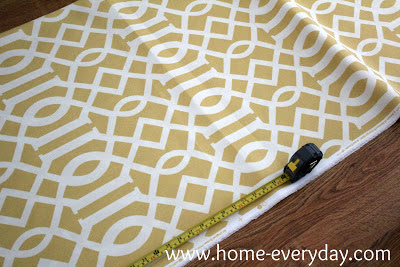
First, I did the hardest part of the project, and measured the fabric to fit exactly to the back of the shelves. I did have a bit of an allowance because I thought it would be better to finish the edges to avoid fraying and also to make the edges perfectly straight.

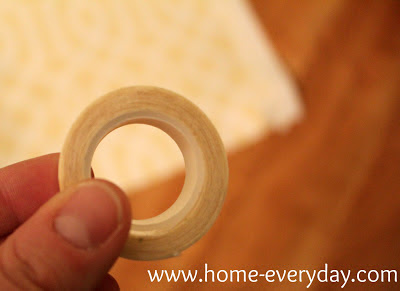
As most of you know, I do not own a sewing machine, so it was time for Hem Tape again. Although, this time,  I had to use the non iron hem tape. The fabric I used is indoor outdoor fabric, and I knew I wouldn’t be able to iron it.

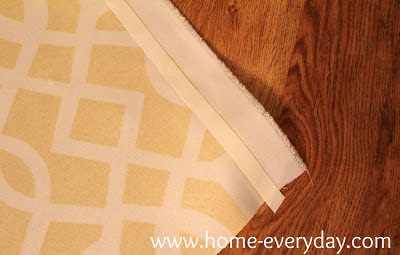
There are several no iron hem tapes out there (Fix it Fast). They work just like a double stick tape. First, you lay the tape where you want it on the fabric. Remove the backing. Then, fold over. It is very similar to iron tape, except NO IRON.

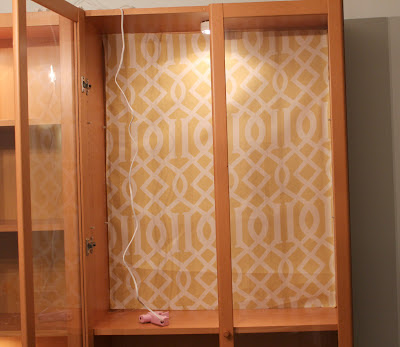
Once everything was measured and straight, I lined the fabric up, and hot glued it to the back of the cabinet with a large dot of hot glue in each corner.

NOTE: I could only do half of each cabinet at a time because of the shelf being in the way, so I only needed four large dots of glue. However, if you were using more fabric, or lining the back of an entire shelf, I would use more glue around the perimeter to make sure it stays in place.

Finally, I loaded the shelves back up.


I am so happy with this transformation! It was easy, inexpensive, and really made a big difference.

Breakfast for One: Banana, Berry, and Almond Oatmeal

Out of the five of us, only two of us like oatmeal. Russell and I sometimes enjoy it together in the morning, but when given the option of yogurt or oatmeal, Russell usually picks yogurt. This means I am often enjoying oatmeal alone, and because of this, I am experimenting with very healthy and tasty variations.

As I have mentioned before, when I cook I kind of throw things together. Then, I often have to make the dish again to factor in measurements so that I can share it with you. This is one of those recipes that was so easy and so delicious, I didn’t mind making it over again. In fact, I have eaten it for breakfast the past few mornings after workouts. It is so healthy, but you won’t even know it. It is that delicious!


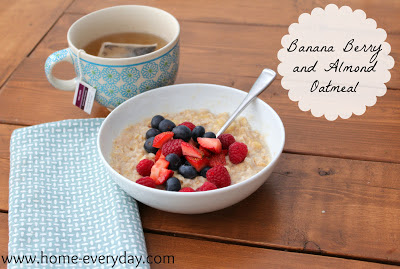
Banana Berry and Almond Oatmeal

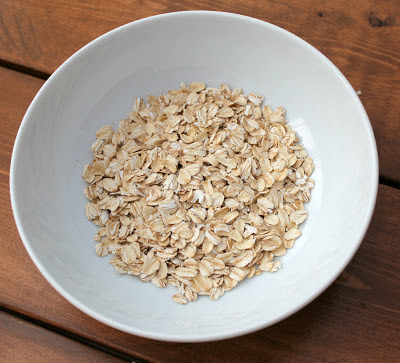
1/2 cup Quaker Old Fashioned Oatmeal
1 cup water
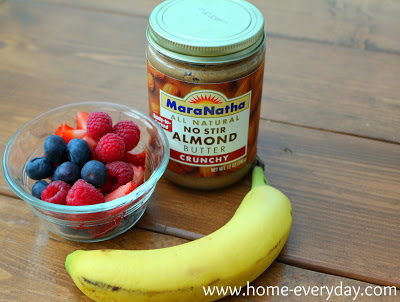
1 Tbs almond butter
1 small banana mashed
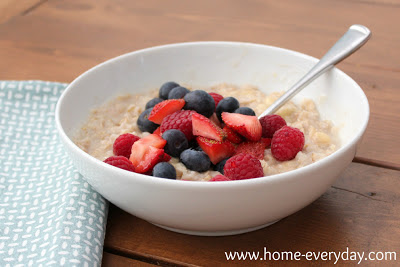
1/2 cup various berries (I used strawberries, raspberries, and blueberries)
Pinch of salt


In a microwave safe bowl, combine oats, water, and salt.


Microwave on high for 2 minutes. Carefully remove oatmeal from microwave and stir in almond butter and banana. Finally, top with berries.


What is your favorite quick cooking breakfast?

Linking up at Serenity Now for Weekend Bloggy Reading.

Stripes: Bathroom Reveal

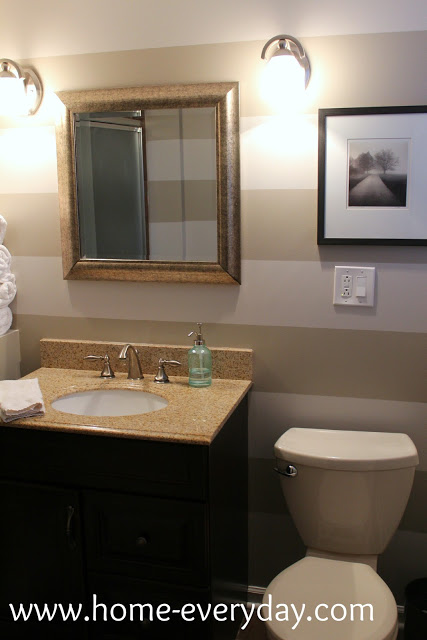
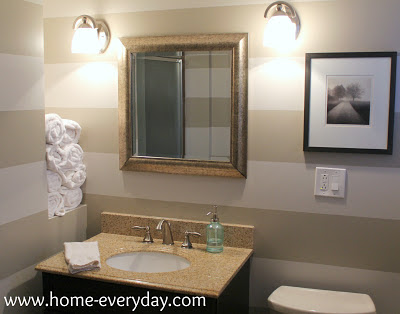
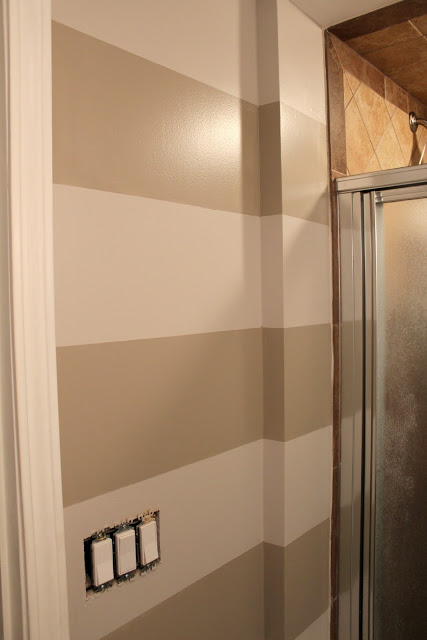
On Tuesday,  I told you I started striping the bathroom. Well, I think I have a problem. Now that I am finished, and it is functional again, I am already thinking of other places I can paint stripes. So far… it is everywhere. I know I cannot/should not do that, but the technique was so easy and it created such an awesome effect. Let’s get to the pictures shall we?

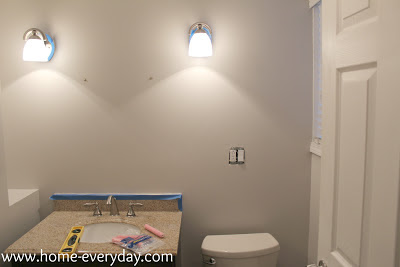
Before:


After:


I also repainted the trim in Behr’s ultra white in semi-gloss since the previous paint job wasn’t so good. Now everything looks crisp and clean.


As I said on Monday, I used these directions for measuring and painting from Skinny Boppy’s tutorial which can be found here. She took a lot of the guesswork out of painting the stripes.

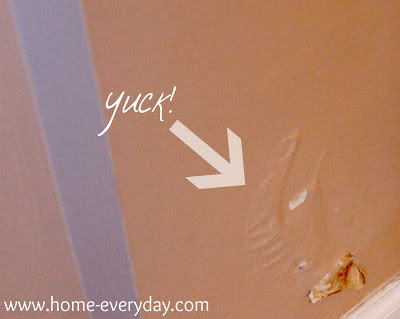
I first, patched up any holes left behind from the water damage we had. Then I sanded any uneven parts, and painted the entire bathroom a base coat of Behr’s Barnished Clay in satin (I typically love flat paint with glossy trim, but in the bathroom is just makes sense to use satin). I actually did two coats of this color to help fully cover the peachy tan that was in the bathroom before.


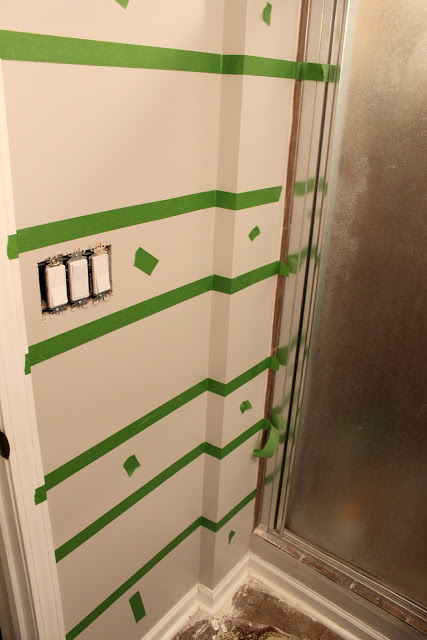
Once I was sure that was dry, I began measuring. When you paint stripes, you want to keep cutting in again at a minimum. Therefore your bottom stripe and top stripe should be your base coat color. In order to make sure this happens, I measured from where the top of the wall meets the ceiling to the top of the baseboards. Then, I took that measurement and divided by an ODD number. Most people when painting stripes divide by seven, but that is typically for a larger room. This bathroom is so small that stripes that wide I thought would be a bit much, so I divided by nine. For example: 83″/9 = 9.222222 inches. That is not an even number of inches, but I started from the top of wall and measured 9″ from the ceiling and using a laser level I began taping. Then I repeated the process for each stripe measuring 9″ from the previous stripe. This causes the bottom stripe to be a little larger than the other, but it is barely noticeable with the toilet, vanity, shower,  and door in the way. When taping I also made sure that I noted which stripes would be the base color and which stripes would be the darker color. This helped me determine in which side of the level line I would put the tape. You always put the tape on the BASE COAT side of the stripe. Also, I put tiny pieces of tape on the base color stripes to remind me not to paint there.


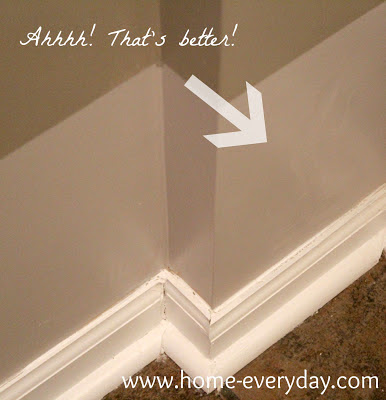
After everything was all taped up, I cut in around windows, doors, shower, and corners, and then rolled on on the stripes with Behr’s Perfect Taupe also in satin. Finally, I carefully peeled the painter’s tape right away (while the paint is still a little wet) to get a perfectly clean line.


TA DA! I love it! Now to convince Brian we need stripes in the family room.


P.S. Today, I am Linking up at Serenity Now for Weekend Bloggy Reading! Check out all the awesome recipes and projects. It is a Pinner’s paradise.


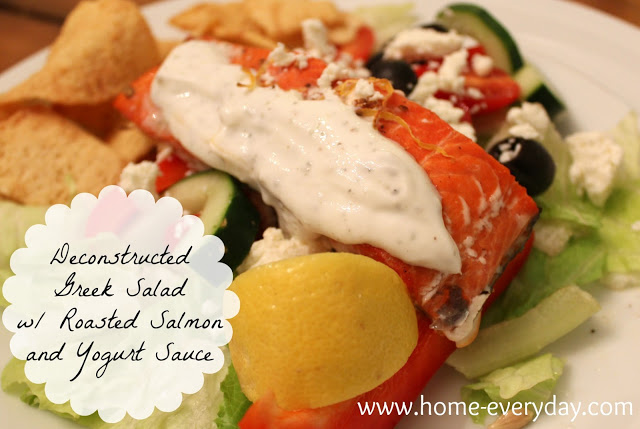
Super Easy Dinner: Deconstructed Greek Salad with Roasted Salmon and Yogurt Sauce

Yesterday, I shared my goals for 2013. Like most people, eating healthier is at the top of the list. I think it is hard to not want to eat healthier after a season of indulging in home made treats and butter laden food.

When I think healthy food, two things that always come to mind are fish and salads. With both of these things I am kind of a novice, but I was able to adapt a recipe I saw on Ten Dollar Dinners with Melissa D’Arabian. She made a Greek Salad with roasted salmon. While I was watching her I couldn’t help but think that she just paired my two favorite healthy things.


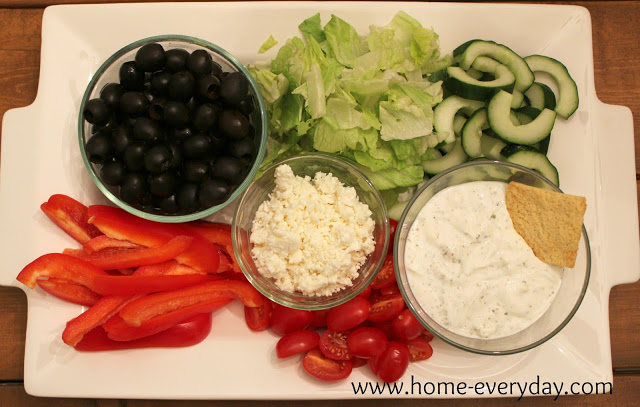
My version turned into a Deconstructed Greek Salad with Roasted Salmon and some Yogurt Sauce, and here’s why. Everyone in my family is so picky when it comes to their salads. My husband doesn’t like tomatoes, the boys don’t like peppers, Coco doesn’t like olives, and none of the kids like are that crazy about a lot of lettuce. So I cut everything up that I normally would, but displayed it in a way that everyone could just take what they wanted for their salad. I have decided that this is how we are going to do salads from now on. The kids loved all the veggies and feta cheese, and spent a lot of time dipping pita chips in the yogurt sauce.
The best part of this dish is it is a “throw together meal” as it doesn’t require a lot of actual cooking and it takes about 15 minutes to prepare. By the time you put the salmon in the oven, you can mix up the sauce and cut the veggies. Then dinner is served. No more excuses for an unhealthy meal due to lack of time around here.
Deconstructed Greek Salad, Roasted Salmon and Yogurt Sauce
12 oz of fresh Salmon sliced into 3 oz pieces
1 lemon zested and cut into wedges
1 head romaine lettuce washed and cut into bite sized pieces
1 package of grape tomatoes cut in half
1 cucumber seeded and chopped
2 bell peppers cut into strips
1 14 oz can black or Kalmata olives
1 very small red onion cut into thin slices
1 6 oz package of feta cheese crumbles
1 bag of plain pita chips
Salt and Pepper to taste.
Yogurt Sauce
1 1/2 cups plain Greek yogurt
1 lemon zested and juiced
1 clove of garlic finely minced
1 tsp dried oregano
Salt and Pepper to taste.
Preheat oven to 400 degrees.
In small baking dish sprayed with cooking spray place salmon. On top of each salmon filet put a pinch of salt, black pepper, and some lemon zest. Put in the oven and roast for 15 minutes.
While the salmon cooks, place vegetables and feta cheese on a large platter. Then, make the yogurt sauce by mixing together the yogurt, lemon zest, lemon juice, garlic, oregano, salt and pepper. Put in a small serving bowl.
Remove the salmon from oven and squeeze a little lemon juice on top. Then serve with vegetable platter, yogurt sauce and pita chips and let everyone construct their own salads.
*Side note. I also had some balsamic vingegrette on the table in case no one likes the yogurt sauce.
I hope you enjoy this dinner as much as we did. Brian is still talking about it.
Linking up at Serenity Now for Weekend Bloggy Reading.

What’s in the Fridge Guacamole

Sometimes I am stumped for lunch ideas for the kids. Even though I meal plan, sometimes the kids are not up for what is planned, so I try to improvise. Last week, the kids said they had a taste for some guacamole. Luckily I had some essential ingredients on hand from Chili night.

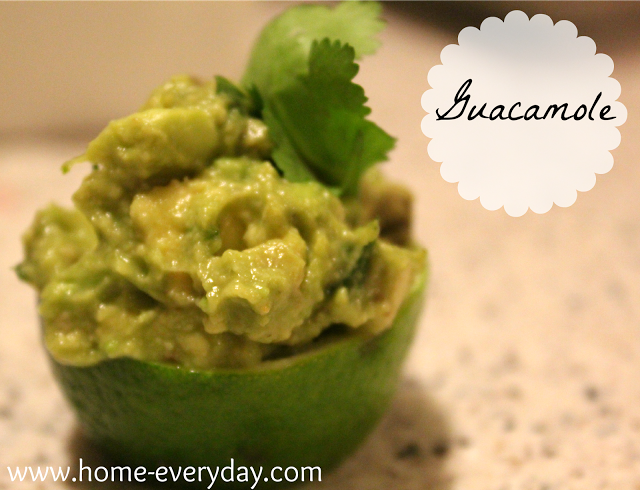
This is one of those recipes where, I kind of threw everything together, and it was awesome. The kids gobbled it up with some quesadillas. I even got a little fancy and served it in little bowls made out of limes. Nothing like classing it up for preschoolers.

What’s in the Fridge Guacamole
3 large or 4 medium avocadoes peeled, pitted, and chopped into small chunks
zest of 1 lime
juice of 2 or 3 limes
1/4 red onion minced
1 clove garlic finely minced
1 large bunch cilantro chopped
Salt and Pepper to taste

Lightly mash avocados with a fork while still leaving some chunks of avocado for texture. Stir in the rest of the ingredients and mix until well combined. Enjoy with tortilla chips, quesadillas, tacos, or as George likes it with a spoon.


It’s All About the Toppings: Homemade Chili

Am I the only one who loves toppings, garnishes, sauces, etc.? I just love how they can take something that is kind of a cookie cutter recipe, and make it personal for everyone. My family is big on these types of dishes. When you have three little ones with various allergies and aversions it helps to not be a short order cook for everyone, but still give everyone some choices.

Chili is one of those dishes in our house. I make a pretty basic chili, but it is all about everything that goes along with it. My kids like the cornbread, rice, guacamole, avacados, cheese, tortilla chips etc. Which is fine, they are so consumed with their favorite toppings they don’t even realize they are eating chili sometimes. Brian and I have our favorite toppings too.

Brian likes his kind of old school. He likes it poured over home made cornbread with a little sharp cheddar on top.


Me on the other hand, I like a little squirt of lime, cilantro, and avacado slices. I also have some tortilla chips on the side for dipping.


Erin’s Chili
2 Tbs. olive oil
1 lb ground beef or ground turkey
3 ribs of celery chopped
1 bell pepper chopped
1 medium yellow onion chopped
2 cloves of garlic minced
1 to 2 Tbs. chili powder
1 Tbs. cumin
1 tsp Tobasco (a few shakes)
Salt and Pepper to taste
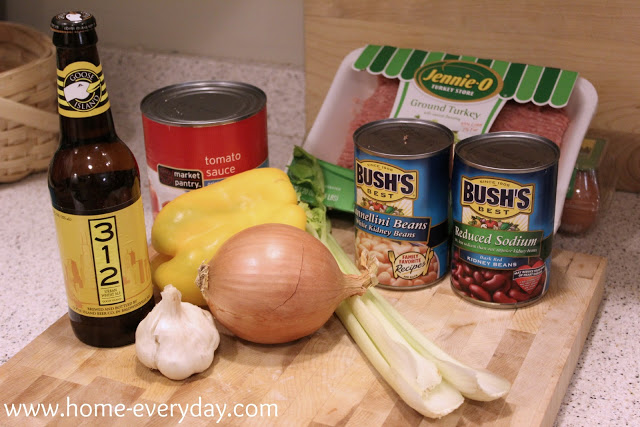
1 bottle of your favorite beer (I use Goose Island 312)
1 14 oz can white cannelini beans drained and rinsed
1 14 oz can red kidney beans drained and rinsed
1 28 oz can tomato sauce or crushed tomatoes


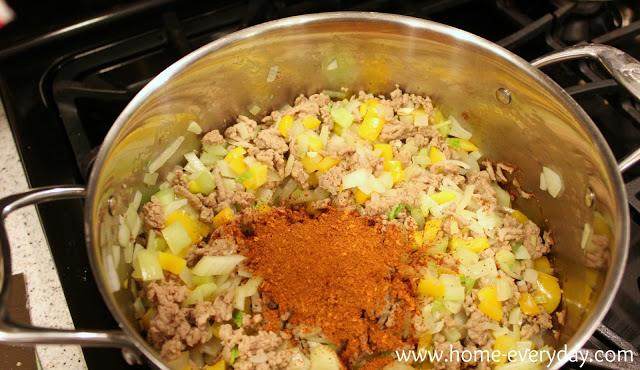
In a large pot over medium to medium high heat, pour olive oil. When the oil is rippling hot, add ground beef or turkey and crumble. When ground meat is thoroughly cooked, about 3 – 5 minutes later, add celery, bell pepper, onion, and garlic stirring occasionally. Cook for another 3-5 minutes or until vegetables are just soft. Then add chili powder, cumin, hot sauce, salt and pepper and stir until spices coat meat and vegetables.


Add beer and stir for about one minute scraping the bottom of the pot to deglaze. Then, add beans and tomato sauce and stir. Cover the pot and lower heat. Let cook for about 5 minutes or until chili is heated through.


What will you top yours with?

Suggestions for toppings
Cheddar Cheese
Chihuahua Cheese
Cornbread Crumbles
Sour Cream
Crumbled Tortilla Chips
Avocado Slices
Lime Juice
Cilantro
Green Onions
Guacamole
(Note: Some people like to serve chili over rice or pasta too!)

Paula Deen Saved the Day: Mini Quiches

The holidays are usually a time when people drop by our house. There are some family birthdays this time of year as well as people just popping by to say hello. Personally, I love when people stop by (yay adult interaction), but sometimes I feel like a little treat or snack is always nice to serve our guests especially if they are bearing gifts. Also, I figure if someone stops over, a little bribe of food so they don’t tell everyone there are toys all over our house never hurts, right?
via

A nice cheese and some crackers with a bit of fruit was always nice with a beer or a glass of wine, but honestly it was getting a little blah, and sometimes we have visitors in the middle of the day who aren’t up for a cocktail.

So, I began the search for something I could serve in the evening with cocktails or in the afternoon with tea. It had to be easy and something that contains ingredients I always have in the house. So, I searched and who came to the rescue?

Paula Deen (of course) and her amazing mini quiches.


Who doesn’t have crackers, eggs, milk, butter, and cheese in the house (especially this time of year with all the baking)? Also, this recipe is very versatile as you can put just about any combination of cheese or herbs. Also, while they are in the oven, you can straighten in the house!

Paula Deen Mini Onion Quiches (I made a few changes but for the original recipe click here)

3/4 cup Saltine crackers crushed (I used Club crackers because that is what I had on hand)
1/2 stick of butter melted
Nonstick Cooking Spray
1 cup green onions chopped including green tops (you could sub. chives or any herb)
2 Tbs butter
2 large or 3 small eggs
1 cup milk
1/2 tsp salt
1/4 tsp pepper
1 cup Swiss cheese grated (you could sub cheddar, gruyere, or any other cheese too)

Preheat oven to 300 degrees. Spray mini muffin pan with non stick cooking spray.

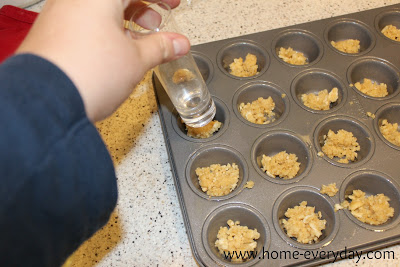
Combine cracker crumbs and melted butter. Divide this mixture among mini muffin cups and pat down with you fingers or with the bottom of a shot glass (not just for cocktails anymore).


Divide onions or herbs among muffin cups reserving a tiny bit for garnish. Then, in a bowl with a spout, beat eggs with milk, salt and pepper until well combined. Pour this mixture into muffin cups about 1/2 to 3/4 full (don’t over fill or they will run over when baking). Then sprinkle the tops with cheese. Put muffin tin on top of larger cookie sheet in case of run over and place in oven.

Bake for 15 to 20 minutes or until set. Remove from oven and cool slightly before removing from pan. Use a small pairing knife run around the edge of the quiche for any that stick to the pan. Garnish with remaining onions or herbs.

These can be served immediately or put in the refrigerator and reheated the next day.


What combination of herbs and cheese will you use?

Election Hangover: Quick Fix Curtains

I’m currently rocking an awesome Election Night hangover. Not the drinking kind, but the I went to bed way too late, and the kids got up way too early kind. Either way, hangovers stink. Good thing I planned ahead and have an awesome quick update for you today.

One of the first posts I ever wrote before taking a Home Everyday hiatus, was this post about my cloth napkin cafe curtains hanging in my kitchen (as you can see I’ve learned a lot about blogging since then, also, my pictures were of the iPhone variety).

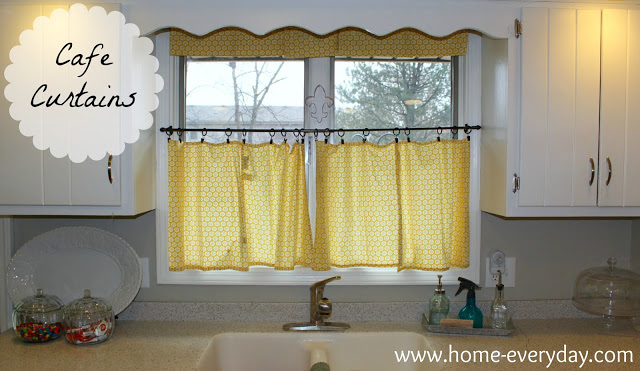
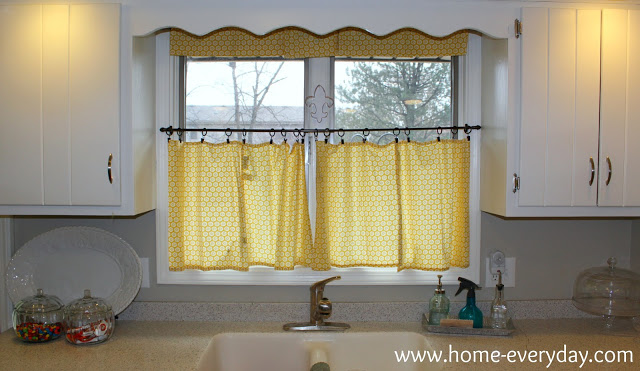
Yes, you read that correctly. Cafe curtains from cloth napkins. I don’t have a sewing machine, hem tape is an option like these curtains I made for Coco, but to be honest, I really like if even the hemming is done already like my master bedroom curtains. So far, the best thing I have noticed about doing inexpensive curtains, drapes or window coverings is that, they are an easy switch when you need a bit of a change. Which is exactly what I did here:


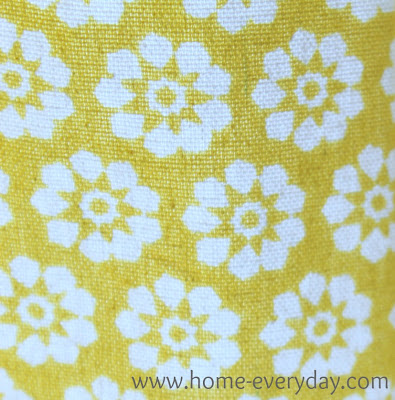
I found some cute yellow cloth napkins at Target on clearance.
 

I had really been wanting to tie some yellow into the kitchen, so this was the perfect and cheap way. I just used the little clips to attach them to the curtain rod, and this time I even made a little valence by pinning some folded napkins to the top curtain rod (did I mention I don’t have a sewing machine.. yet? Christmas please hurry).

I cannot believe how much bigger the window looks with the valence now too.


There you have it! The quickest update so far. Anyone else jumping on the faux curtain bandwagon with me? Table clothes? Sheets? Shower Curtains? Hem taped fabric?


Passing the Torch: Halloween Props

Back in July, the boys were adamant that they be Olympians for Halloween. To be honest, I thought it might be something they would forget about, but when the discussion came up again about a month ago, they remembered that they wanted to be just like the Olympians they saw on TV. I’m also glad they didn’t necessarily mean Michael Phelps, as the weather here is too cold for speedos.

I was thrilled that they still wanted to be Olympians because I knew that it wouldn’t be a hard costume to put together. Also, I was happy that the costume would include sweats to keep them warm.

My brother and sister in law, sent some official team USA shirts and got them gold medals for their costume. They only thing they needed were some olympic torches. I looked on Pinterest for some inspiration here, here and here. Then, I came up with my own version for my little Olympians.

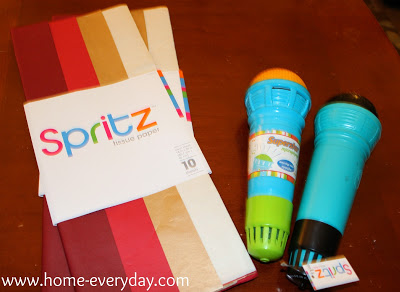
I found the perfect pack of tissue paper at Target that had some red and metallic gold tissue. My original plan was to use paper towel tubes, but realized those my not be sturdy enough for a night of gripping. So I found these pretend microphones that were only $1. I brought everything home and got to work.


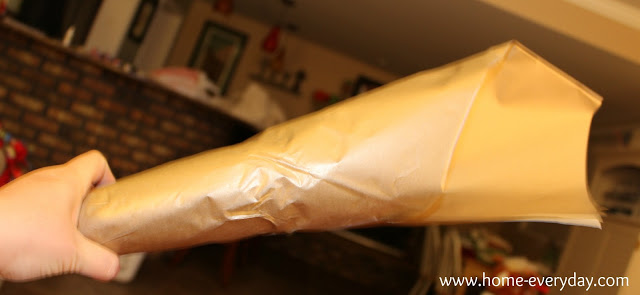
I first very carefully wrapped the microphones with the gold tissue by rolling the microphone and then taping with scotch tape. I left the top open to make room for the flame.

Then, I used two shades of red tissue to make the flame. I carefully taped the tissue to the top of the microphone using some stronger masking tape (sorry for the blurry picture).


This project took about 5 minutes for each one, and cost me a total of $5. The kids have the perfect prop for their Olympian costumes, and are ready for trick or treating!

Here’s one more shot the boys. I don’t know what’s cuter the boys or the torches… ok the boys.


Linking up with the Pinterest Challenge on Young House Love and Serenity Now.

This is Embarrassing: Small Space Organization

Ok, admit it. Everyone has the space. The space that you cannot get a handle on. Right? Please tell me this is true. I cannot be the only one. I was almost too ashamed to post this, but then I realized I wanted to keep it real around here. Plus, you’ve seen a few of my other embarrassing moments here and here. So here goes… don’t judge.


 

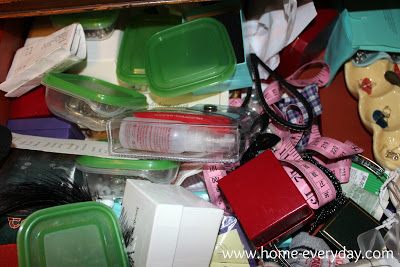
This is my top dresser drawer. This is the space for me. I can never seem to get a handle on it. You’ll notice everything is in tiny boxes to help minimize tangled jewelry etc. However, I would then have to look in every box to find something and then would end up just throwing the boxes back in the drawer. Totally inefficient, and basically a joke.

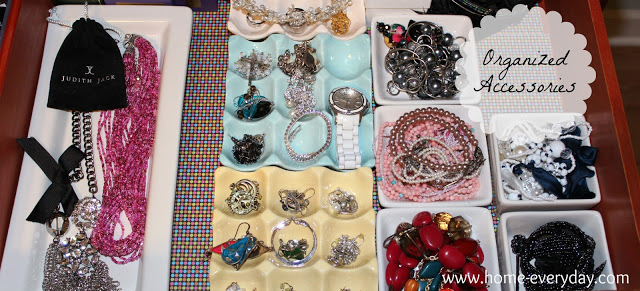
Then, (cue Alleluia Chorus) I saw a few ideas on Pinterest for how to organize jewelry and accessories. After about 30 minutes of organizing, here is what my drawer looks like now.


So much better. The first thing I did was take everything out of the drawer, and line it with some wrapping paper.


Then, with a little help from Coco…

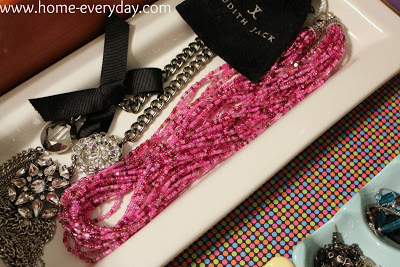
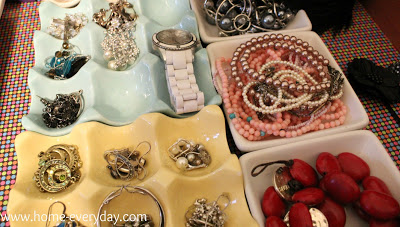
Ok, she wasn’t much help again. She has been more of a moral support system lately. Anyway, I sorted my accessories into some small ceramic dishes that I had. I was going to sell these dishes in our garage sale, but remembered I could use them to sort small things, and held on to them. Also, I bought some ceramic egg trays at JoAnn Fabrics awhile back on clearance to sort earrings. All of these dishes keep my accessories right where I can see them, and minimize things getting all jumbled up together.


Not bad for 30 minutes of my time, and less than a $5 investment. I cannot believe I didn’t do this sooner.
One last after photo, to get that awful first image out of your our brains.

Linking up with A Thoughtful Place for Keep C.A.L.M. and Organize On.