Category

Home Decor

Resting My Feet: A National Craft Month Craft

While I was compensated for this post by JoAnn Fabric and Craft Stores the ideas, thoughts, and opinions in this post are my own.

I recently decided that Mr. Home-Everyday and I needed a comfy place to rest our feet other than our coffee table. While I know there are lots of ottomans out there, I was pretty sure that I could make one myself for a pretty reasonable cost. Mr. Home-Everyday had given me some pallets to use for some projects around the house, so I had a base. Now, to find some fabric to upholster it.


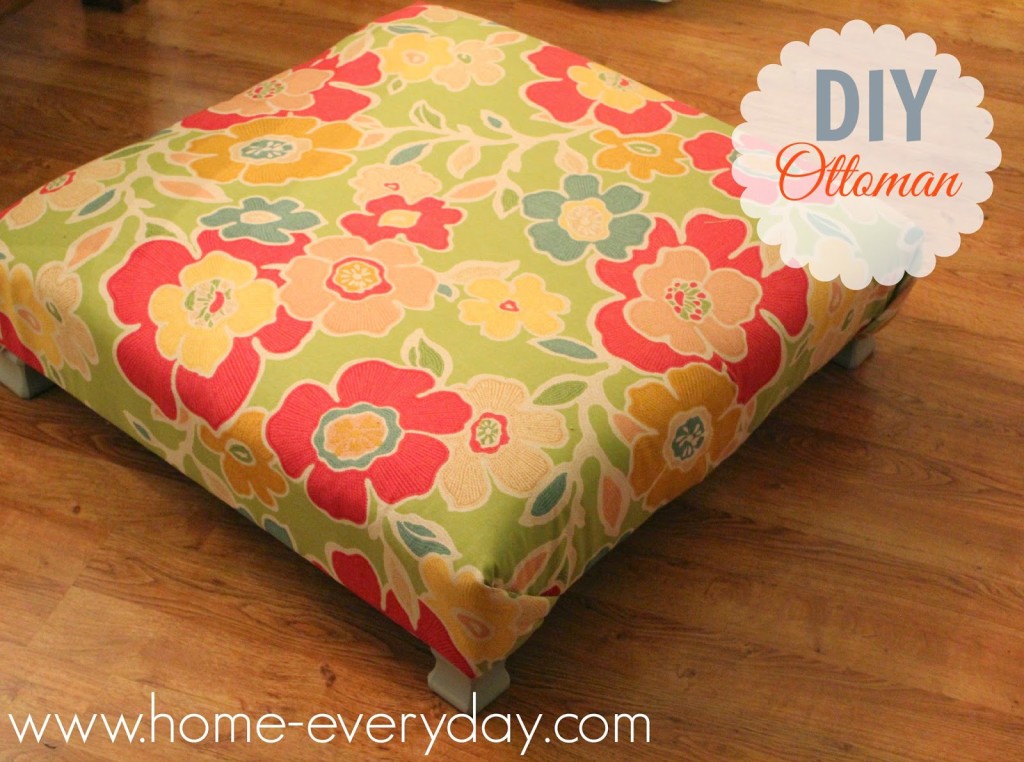
When JoAnn Fabric and Crafts asked me to participate in National Craft Month, I knew I would be able to find the perfect fabric. There are so many great trends to take advantage of this season, but my favorite lately are all the great floral fabrics available.

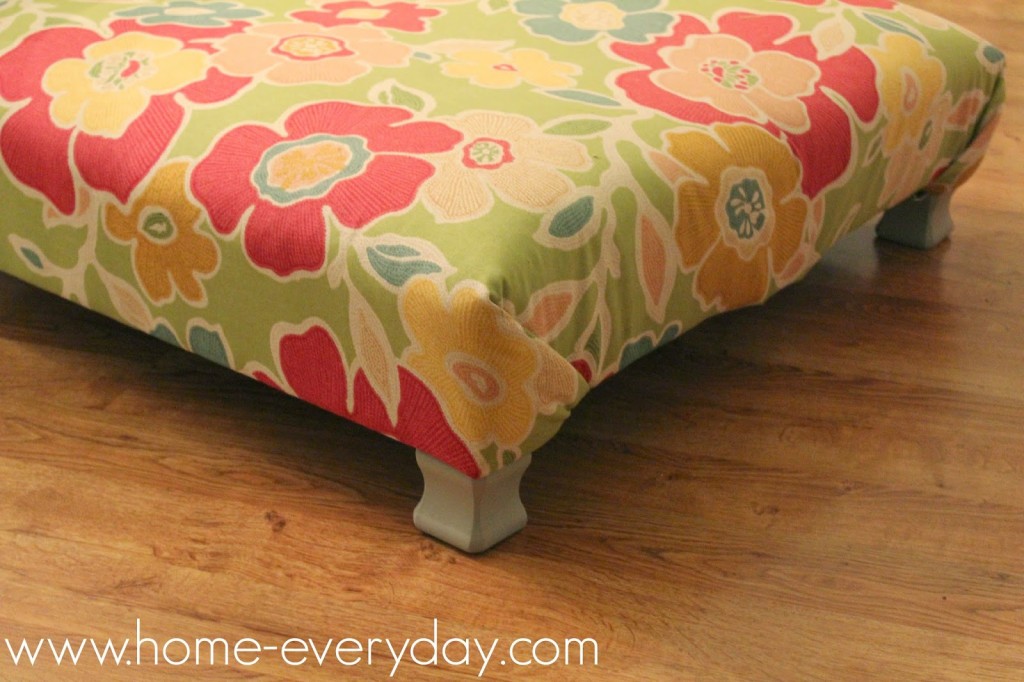
I found this great floral fabric by KAS from Australia, that I love. The colors are saturated, which will match all the color going on in our family room, and it seemed durable enough for us to rest our feet.
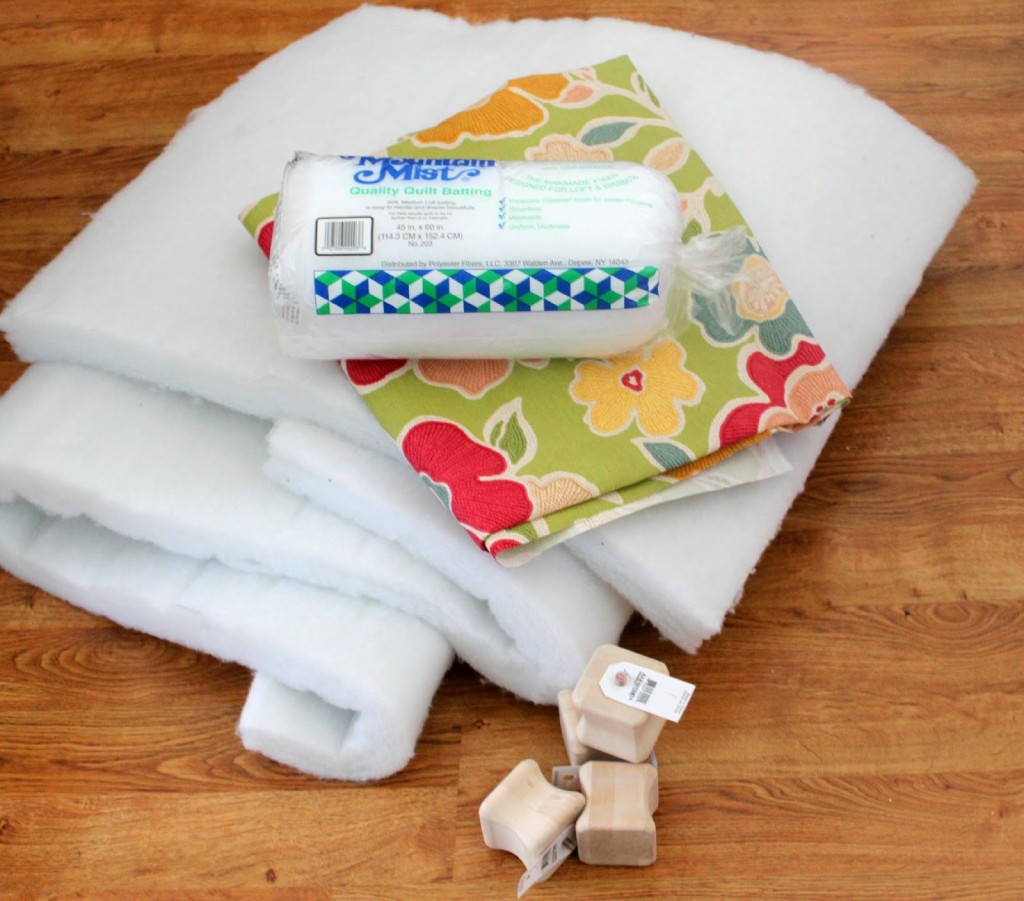
 

Supplies:
1 pallet
4 table feet
4 feet attachment brackets
white foam cut to size (same size as top of pallet)
batting cut to size (able to be wrapped around pallet on all sides with 2 inch allowance)
fabric cut to size (able to be wrapped around pallet on all sides with 2 inch allowance)
staple gun with heavy duty staples
fabric scissors
paint
paintbrush
drill

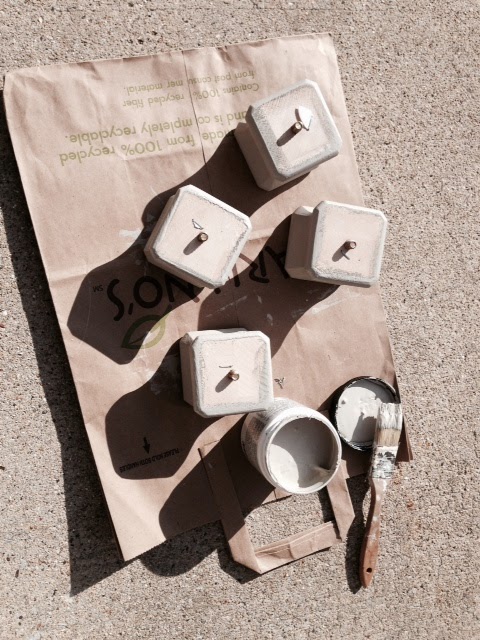
Paint and Dry: First, I painted the feet of the ottoman. I thought it best to get this step out of the way as then I could let the feet dry while I completed the other steps.

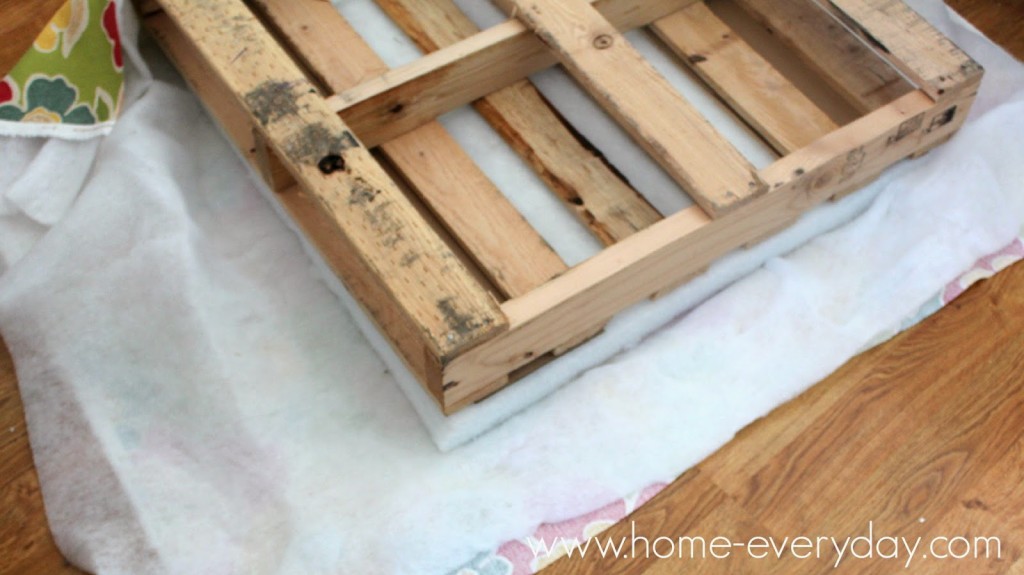
Stack It Up: After the foam, batting and fabric are cut to the correct size, place the fabric face down on a flat clean surface. Then place the batting on top of that. In the center of the batting, add the foam. Finally, place the pallet on top of the foam.


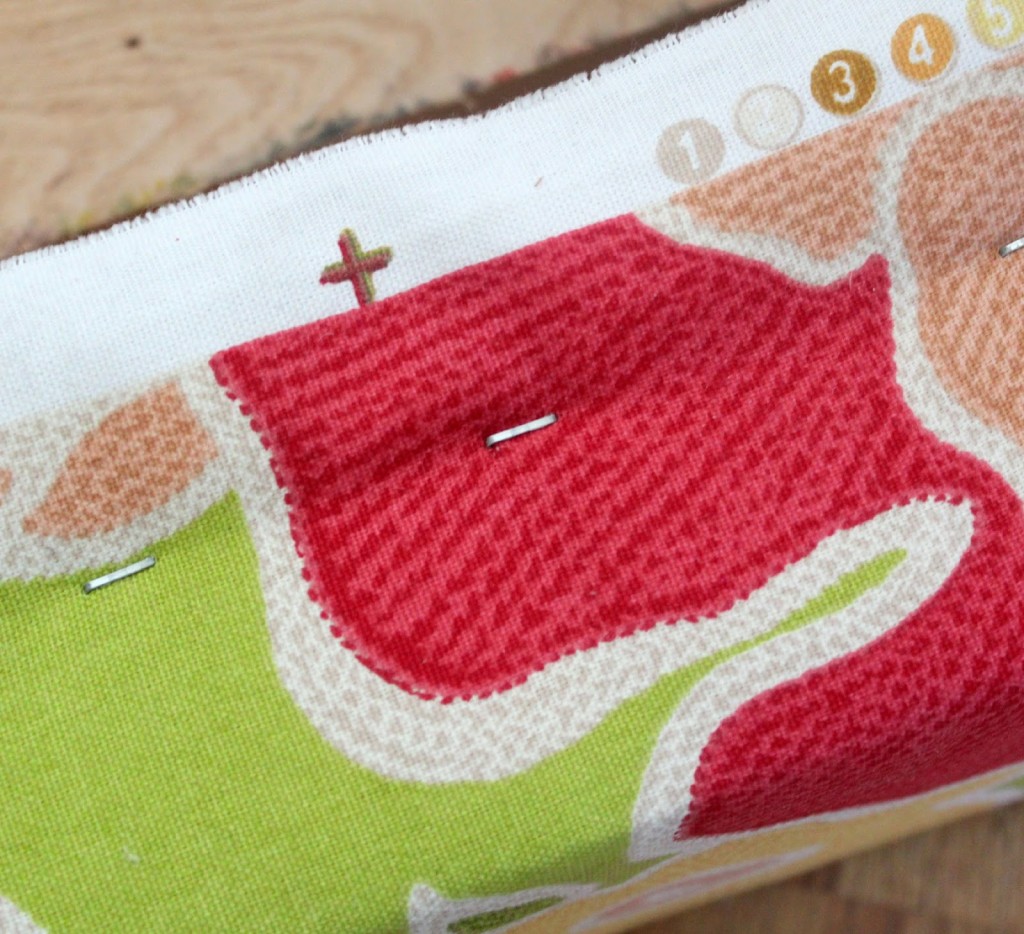
Staple, Staple, Staple: Starting in the center of one of the sides of the pallet, pull the fabric and batting tight and staple. Continue to staple from the center toward the corner, (about every 3 or 4 inches apart)  but DO NOT staple the corner. Do this on each side. Finally, fold the corners in as if you are wrapping a package, hold them tightly and staple them.


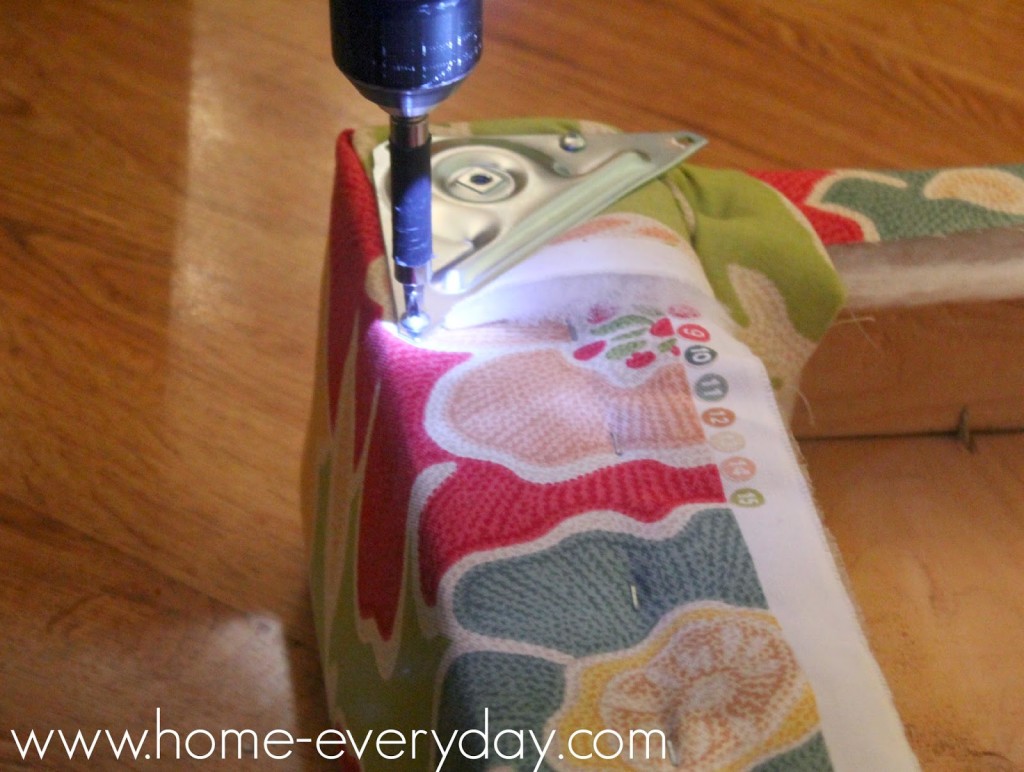
Give It a Leg Up: Finally, using a drill, screw the attachment brackets to the underside corners of the pallet. Screw in the feet to the attachment brackets.


Finally, put your feet up and relax.


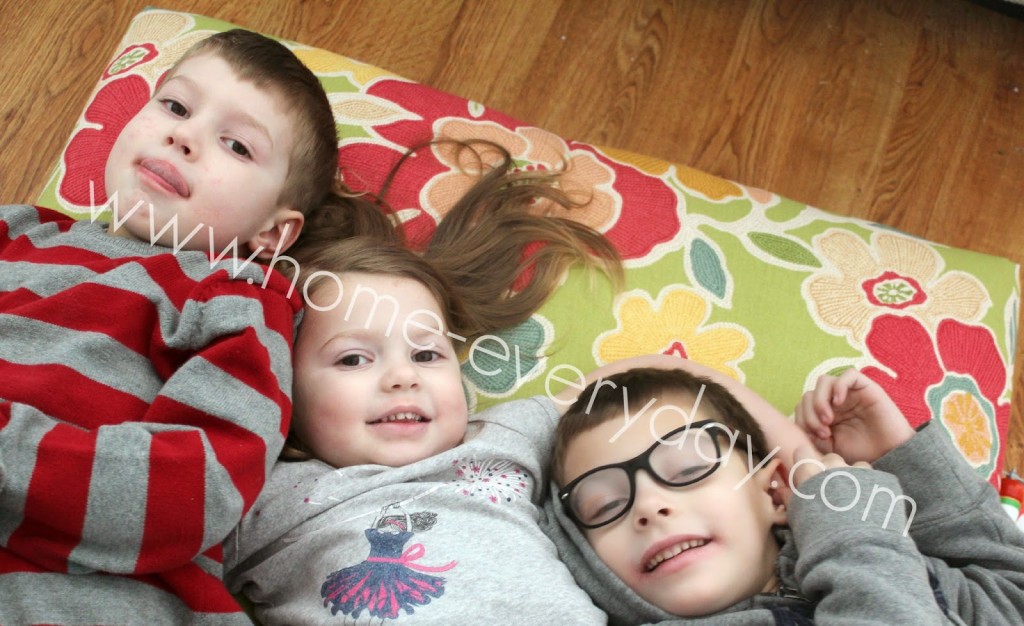
Unless, of course, some little people get there to relax before you do!


Linking up at Serenity Now


If you like this post and would like to read more about DIY, gardening, cooking, baking or all other things domestic, become a Home Everyday follower! For blog updates or to see other places I write follow Home Everyday on Facebook here.

Follow on Bloglovin

Pretty Storage: Painted Baskets

As the holiday season approaches, I encourage the kids to take an inventory of their toys. We donate what they do not play with anymore, recycle what is broken, and try and make room for anything that Santa brings.

This yearly toy overhaul helps teach the kids how blessed they are, encourages them to help others who have less, and I think helps them make decisions. However, when we are doing the yearly toy overhaul, I get a little organizationally crazy and being thinking about different storage solutions for all of these things.

Some of our storage baskets were a bit, well, boring.


These baskets have been around since before Brian and I were married and have been rotated for all kind of use, but are currently in the family room housing doll house furniture and people and some other smaller toys.

As I try to add more color to the family room, I thought of a great idea. I decided to paint these boring baskets. I got out my acrylic paints, a paint brush and turned on the movie Rushmore during nap time.


VOILA!

After two hours of some creative painting, and a night of letting them dry, they were a more colorful way to store some of the kids’ favorite toys.


Seeing how adorable these baskets turned out has me itching to paint some more things.

For more about DIY, gardening, cooking, baking or all other things domestic, become a Home Everyday follower! For blog updates or to see other places I write follow Home Everyday on FacebookTwitter, or Pinterest.

Follow on Bloglovin


Gradient Dresser: You’d Never Guess its Garbage

A few weeks ago on the way home from dropping off one of my children at school, I saw this fantastic dresser sitting on the curb. I circled the block a few times trying to take a closer look, and finally parked and gave it a full inspection.


I pretended I was at a furniture store instead of someone’s driveway, and gave the dresser a full look over. It seemed solid, and I opened and closed all the drawers. There were even dovetail joints on the drawers (a tip from my favorite designer Sarah Richardson), and even though there was some hardware missing and the top drawer stuck a teeny bit, I thought I could give this dresser a new life in our home.


Another Mom who happened to see me stopped, and offered to help me put the dresser in the back of my car. So I moved aside all the sporting equipment and stuff, and we put the dresser in the back.

After a couple of weeks of mulling it over, I decided that I would do a gradient style dresser. Ever since I saw this one on Young House Love.


And this one on Red Hen Home.


And this one that I pinned a million years ago on Pinterest.


I have wanted one of my own.

I made a quick trip to Home Depot, and picked up a gray toned color card with four colors (Sparrow, Anonymous, Dark Granite, and Stealth Jet) like the one below and had a color sample made for each color. (Note: Behr can only create color samples for flat paint, so I made sure to pick up some water based Polycrylic to apply over the flat paint for extra protection and easy cleaning).


After taking off the hardware, giving the dresser a good sanding and wipe down, I painted the dresser two very thin coats of glossy white. Then, going from lightest (top drawer) to darkest (bottom drawer), I painted the drawers a few thin coats and let it dry for two days.

After the dresser and drawers were fully dry, I put three coats of water based Polycrylic on the drawers according to the manufacturers instructions and let everything dry for a few more days.

Once I thought the dresser was ready to be moved inside, I added some new pretty hardware that I had also bought at Home Depot.


Here is my new (to me) Gradient Dresser.


I have to say, I a thrilled with the results, and I cannot wait to find the perfect place for it in my house. I bet you’d never guess this was once garbage.


You ever do any garbage picking?

If you like this post and would like to read more about DIY, gardening, cooking, baking or all other things domestic, become a Home Everyday follower! For blog updates or to see other places I write follow Home Everyday on Facebook, Twitter, or Pinterest.

Follow on Bloglovin

It’s Easy Being Green

When we moved into this house, the previous owners had left behind a TON of stuff. I don’t think they were trying to make life difficult for us, I just think that there was only so much they could do. Regardless, there were a few things we ended up having to throw out, and a few things we were happy to score.

For example, we got some awesome patio furniture, box fans, and an assortment of nice ceramic planting pots. However, we also received some other not so useful things.

There was also this little guy waiting in the garden.

He has sat there now for the past three years, and he is sort of cute, but I thought he would be even cuter in a nice shade of green. Especially since we did some backyard updates, I decided this guy needed a makeover too. Kermit says it’s not easy being green, but honestly this project took maybe 10 minutes of my time. Therefore, EASY!

This past weekend, I grabbed a glossy can of leafy green spray paint, and I did a few coats. I made sure to protect the grass with some boxes and garbage bags. I also wore some gloves, my paint clothes, and sprayed him in the middle of the backyard with no chance of getting paint anywhere near the house, patio, or fence. I also made sure to let the paint dry for about an hour before I moved him.

I think Russell was the happiest about the transformation as green is his favorite color, AND frogs are his favorite animal. I know you shouldn’t judge a book by its cover, but let’s face it, the guy doesn’t have much else going on in the way of personality. Our old friend is new, and looks so much better.

If you liked this quick update and would like to read more about DIY, Cooking, Baking and all other things domestic you can check me out on Facebook or become a follower of Home Everyday here

Brand New Door

A few months ago, Brian and I made the decision that we needed a new front door. Even though, I had painted the door to “help” it cosmetically, it never seemed to work right. It would stick, the deadbolt never seemed to work exactly right, and few weeks ago, the frame of the door pretty much started falling apart.

When it comes to holding a door together like this, it is time to get a new door.

We shopped around at a few different places in our area for front doors. We had an idea of what we liked and about what we would like to spend. We ended up getting a craftsman style door by a brand sold at Home Depot called Feather River.

The biggest decision for us was color. While we liked the idea of a bright colored door, our house faces directly west. In the afternoon we get tons of sunlight, and we new a painted door would fade fast, where a wood stained door would need much less maintenance over time.

We also opted for a new storm door, which is much quieter and looks a lot better than our old one.

Since Brian and I are newbies to DIY, we figured that having the door installed by professionals was the way to go. It added to the final cost of the door, but our theory was that a door is only as good as is installation. We are glad we did.

Here are some before photos:


Bye bye, Old Door!

Why, hello there!


There is a slight flaw in the door, but the Home Depot installers noticed immediately and have will be bringing us a new door sans flaw as soon as possible. Since our old door situation was horrible, we are keeping the new door with the flaw until the new one arrives. This should only take a few weeks.

So far, we are loving the new door. It is adding a lot to the curb appeal of our home.

Anyone else out there working on their curb appeal?

Family Room Reveal

Last month, I finished painting and organizing the family room. Since finishing this project, I have taken on a few other things, and completely forgot to post photos for you to see our freshly painted room.

The original color was a very peachy tan as you can see here:

After painting some swatches of a few variations of soft gray on the walls, we made the decision and went with Behr’s Barnished Clay in a flat finish. It is soft, neutral, and is almost warm. This is a color that we used in both bathrooms, and while I did want to try something different, sometimes you have to stick with what you know you like.


Here is another before:


Here is the after:


Once we finished painting, we completed the furniture switch, we sorted the toys, and created a better play area for the kids.


I also moved the craft table. Having it near the ledge near the stairs allows us to store buckets of crayons, coloring books and supplies.

Finally I created little area near the fire place for reading stories and set up Coco’s dollhouse for her to have a separate place for her to play on her own.


I am really loving it! Now that my family room is less peach and more gray, I can focus on doing a teeny bit more sprucing. I’m hoping to add a extra large ottomon for kicking up and watching movies, hiding the cords for the TV, and perhaps slipcovering the couch near the fire place.Anyone else finish a paint project or move around some furniture?

Living Room/Dining Room Updates

A few weeks ago, I announced that I was planning on painting the family room. Then, I talked about moving around some furniture, pretty much all of our living room and family room furniture.

Well… its done. All done. Whew.

Today, I’m going to be showing off the living room and dining room spaces.

Just as a reminder, here is what things used to look like.


Here is what everything looks like now.


The book shelves are where the kids toys used to be.


This is the dresser that we used as an entertainment center downstairs, but now it is perfect in the living room and holds all my table linens and extra serveware.


We rearranged the furniture a tad.


Then, I brought the desk back upstairs too. I finally have a place to sit and do a project, and then close the doors when I have to walk away.

Then we moved the glass cabinets into the dining room. If you look closely, I also added a little something (I will show you how I did it tomorrow).

I could not believe the transformation with just moving some furniture to different rooms. I feel like there is much more room, and better storage solutions for the space. My dream would be to have better seating and some more artwork, which pretty much means more projects 🙂

Have you every moved furniture and noticed a total transformation?

Reminders: Irish Wall

Last week, we finished painting the family room (will be sharing pictures soon), and I was putting back all the things on my Irish wall, and thought you’d all like to see a few of the beautiful things that remind me of my family.

What is an Irish wall you ask? When we were kids, my Mom put together a collection of all of the things people had brought her back from Ireland, her own travels there, and things she had collected over time. She put it all together and displayed it on the wall right near the front door. When I moved into this house, I really wanted to do the same thing, so I gathered up all my Celtic crosses, a map of Ireland, a few things from my Grandma, and a beautiful print of Old St. Patrick’s Church in Chicago that my sister gave Brian and I for our wedding (we were married there) and put together my own Irish Wall.

I have a few crosses that have been collected over time, the one on the far left is made of peat. My Mom bought it for me as a Thank You for house sitting while she was touring Ireland a few years ago. The one in the middle is made of Connemara marble. Friends of our bought it for us when they were in Ireland on their honeymoon.

This metal shamrock is something that my Grandmother had hanging in her house, and all my aunts and uncles have hanging in their house too. When I see it, I am instantly reminded of all the times we spent at her house.

I also have a map of Ireland that Brian and I bought in Savannah, GA a few years ago. This is kind of a little known fact, but there is a HUGE Irish population in Savannah, and the city has one of the largest St. Patrick’s Day parades in the country.

There are lots more trinkets, and reminders of family and travels. As I put these things back up on the wall, I day dream about when I get to Ireland someday. Hopefully soon.

What sentimental items do you have around your house? Do they have a theme?

Time to get back to work hanging all these things back up. Hopefully, I can have shots of the room for you next week.

The Furniture Shuffle: Family Room/Living Room Edition

I was going to write about something else today, but I am so excited about some changes happening here, I thought I would share.

First up, we have decided to paint the family room. This room had gotten a small paint job on an accent wall when we moved in, but other than that it really hasn’t been touched. The color isn’t that bad, it is just with the amount of natural light we get in this room, the paint sometimes looks a little peachy, salmony, pinky. After two years of living in this house, we think it is time. Right now, we have some samples on the wall.

That brings us to the furniture. The family room needs storage, this is essentially our play room so we are always looking for places to stash toys in this room. We’ve decided to do the old switcheroo, and move some of the living room furniture, which is much more storage friendly and a lot bigger downstairs, and move some of the family room furniture which is kind of dwarfed by the size of the room to the upstairs to the living room.

This all came about when I was picking up toys with the kids for the one millionth time, and realized that while we just got rid of a bunch of toys the kids don’t play with anymore, there are still some things that just don’t have homes. I then walked upstairs and kept wondering how I was going to style the cubbies upstairs, then I had the lightbulb moment. I will style them with toys of course!

Brian and I are extremely happy to find a solution to this problem, without having to buy more furniture. We are happy to use what we have in a different way.

Anyone else move around furniture in their house? Did you find that certain pieces just don’t flow well in certain rooms? How do you feel about peachy tan? (yeah I don’t like it either).


Finally: Upstairs Bathroom

A few weeks ago, after painting stripes in the downstairs bathroom, I thought since everything is already out I would paint the upstairs bathroom as well. We had lots of paint leftover from the downstairs bathroom (Behr Barnished Clay in Satin and Behr Perfect Taupe in Satin) we thought it would be nice to give the upstairs bathroom a little spruce up.

Let’s get to the pictures shall we?
The Before:
The After:
I painted most of the walls Barnished Clay. Here is a picture against something white for you to see the actual color.


Here is the artwork I created.


I painted the walls surrounding the sink Behr’s Perfect Taupe for a bit of contrast.