Since having kids, Valentine’s Day is one of those days that is really about us as a family. We like to do special things for each other and for the kids. For example, Brian is taking the boys out to breakfast today on the way to school. Coco and I have a Mom and Me Date at the Children’s Museum. Tonight the kids and I are preparing Brian’s absolute favorite dinner complete with garlic smashed potatoes.
Month
February 2013
Laissez les bons temps rouler: Jambalaya
When I hear people speak French, I should be thinking of something much more refined like a great French artist or writer. Unfortunately, there is an inner comedian, and my mind goes to this old clip from Friends.
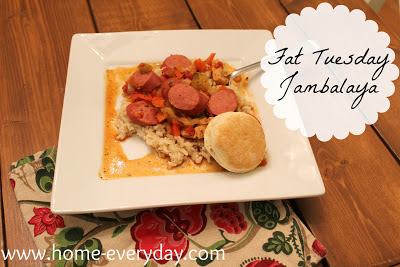
On another note, yesterday, we celebrated Fat Tuesday complete with Jambalaya and Paczki. The jambalaya was homemade, the paczki were not. The kids were so cute talking about their Lenten promises.
This recipe for jambalaya is easy, quick, and a little spicy. Brian did mention that he thought it could be a little hotter (in spice not temperature). So, I adjusted the Tobasco to be as much or as little as you want. Remember though, you can always get hotter but you cannot get cooler, so use with caution.
Also, when I do recipes with rice or pasta, I often make the rice and pasta separately. I have two reasons for this: 1.) It makes it more suitable to reheat leftovers. There is nothing worse than gummy pasta or rice. 2.) My kids will often eat rice with chicken but not a big bowl of jambalaya. So I just separate it for my own sanity.
Finally, I know biscuits are not a traditional accompaniment to jambalaya, but my friend Jocelyn shared this recipe and video on her blog, Grandbaby Cakes, this week and I could not help but try it. As you can see, the biscuits came out beautifully!
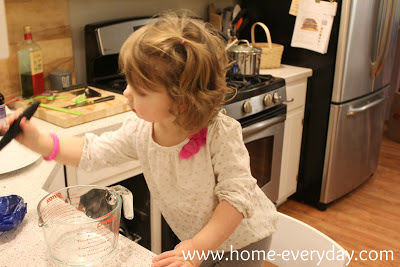
Don’t forget to grab a helper.
Fat Tuesday Jambalaya
1/2 lb boneless skinless chicken breasts cut into bite sized pieces
1/2 lb smoked turkey sausage cut into 1/2 inch thick slices
1/2 lb large shrimp peeled and deveined
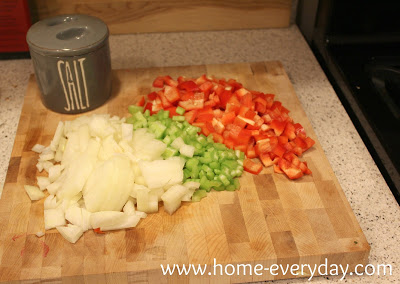
1 large bell pepper (I used red) diced
2 or 3 ribs of celery diced
1 large onion diced
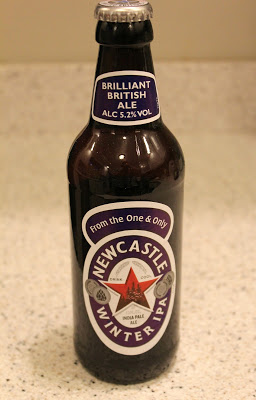
1 bottle of your favorite beer
1 14 oz can of diced tomatoes drained
1 Tbs olive oil
1 Tbs butter
1 package McCormick Gourmet Creole Jambalaya Spice Mix (or your favorite)
Tobasco sauce to taste
Salt and Pepper to taste
1 cup prepared white or brown rice
In a large pot over medium to medium high heat add butter and oil. When the butter is melted add pepper, celery, and onion to the pot.
Let cook stirring occasionally for 3 or 4 minutes. Then add chicken and sausage to the pot. Cook until the chicken is cooked through about 5-7 mins. Stirring occasionally. Add the spice mixture and Tobasco sauce and stir until well incorporated. Next, add the beer and deglaze the pot.
When the beer is bubbling which might take 5 or so minutes add the tomatoes. Finally, add the shrimp and cook for another 5 minutes until the shrimp is just pink.
Serve over rice and if you want with homemade warm biscuits.
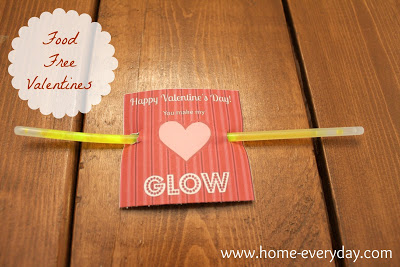
You Make My Heart Glow: Valentines
I’ve mentioned this before, but my kids have certain food allergies. Because of this, class parties can make me a bit nervous. However, my kids attend an allergy safe school, and a nut free school to boot. Now, I know there are several differing opinions on this, but honestly, I am ok with no food parties at schools. It gives us all a chance to be creative, and it also let’s us enjoy treats at home.
I saw some really cute Valentine ideas on Pinterest this year as well as a few other websites. My favorite were the ones with glow sticks. My kids love these things, and I always have them on hand for an impromptu dance party, fun in the bath tub, or for playing outside in the summer. I made a little Valentine using PicMonkey, and attached some glow sticks.
Ta Da. Easy, cheap, food free, and most importantly made with love.
What do you have planned for Valentine’s Day?
Cha… Cha… Changes
Good Morning! Welcome to the new Home Everyday. What do you think?
The 2013 Homies
For those that read Apartment Therapy, you know it is Homie time. This is one of my favorite times of year, as it is a perfect way to discover amazing blogs and incredible inspiration. I was nominated this year, which that alone is a great honor. I know that few weeks ago, I expressed how much I appreciate my readers, but I just wanted to say THANK YOU again.
If you still would like a chance to vote, click here. Thank you for supporting Home Everyday.
Also, back in September Jocelyn Delk Adams of Grandbaby Cakes was a guest blogger here and shared her awesome recipe for Lazy Chai Cinnamon Rolls. She is currently in the top six for Best Recipe Blog. Let’s show her some support. Click here.
PS I wrote a little something on South of I-80 today too!
Goodbye Green: Another Bathroom Update
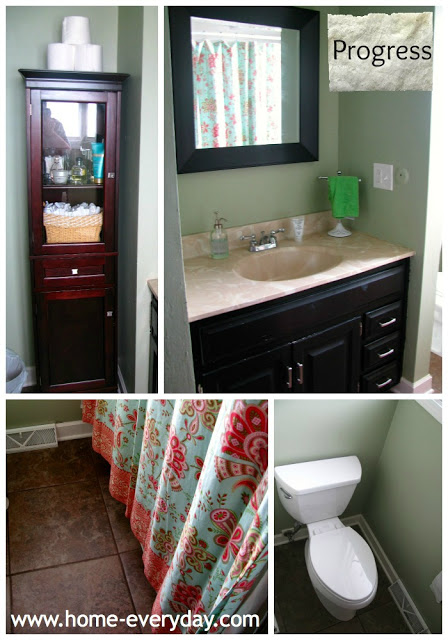
When I start a painting project, I typically like to paint a bunch of other things in the house too since all of the stuff is out. Since I just painted some stripes in the downstairs bathroom, I decided I could do a little facelift in the upstairs bathroom too.
The upstairs bathroom had a floral border and faux finish when we moved in along with a bunch of other dated things. We did a small upgrade back then with a new toilet, some new tile, painting the vanity, and removing the faux finish and floral border. You can read about the updates we have made so far here.
However, I never really liked the color we painted it. I love green, but this was too saturated, and seemed to suck out a lot of the natural light we had in the bathroom. Also, it was too olivey, and made the bathroom seem a little dingy. I would have repainted it sooner, but there was so much else going on in the house at the time (furnace replacement, painting kitchen cabinets, painting every room in the house, new flooring, new trim, new doors, tearing down sub basement, mold removal, tuck pointing, etc.) that I finished painting and moved on. There was just too much else to do, and we really wanted to move into our first house.
After painting the downstairs bath, I could not believe the change it made and decided to paint the upstairs bath too. Since everything was out, Brian agreed it was the way to go. He too liked the change downstairs, and thought upstairs could use a little sprucing. Also, I could sand a little more and try and remove any remnants of faux finish that were still a little visible.
In the coming days, I will have a reveal for you. So far, the bathroom is so much brighter. Stay tuned!
Anyone else out there have paint on their favorite yoga pants and in their hair? No? Just me?
Don’t forget to vote for Home Everyday in this year’s Homie Awards 🙂 Click here and show your support! Also, my good friend Jocelyn and her blog Grandbaby Cakes was nominated in the Best Recipe category.
A Novice Blogger’s Guide to PicMonkey
A few weeks ago, a blogger friend, Nikki (More for Four) asked me how I get labels and things on my photos. I told her I could do a quick tutorial of PicMonkey to show how I use it to quick edit my photos, add labels and make collages. The features I use most are cropping, exposure, labels, and text. In this tutorial, I will show you the steps I use most often when editing a picture. I will then show you a few tricks to creating a collage.
Editing
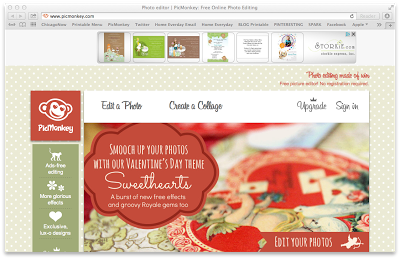
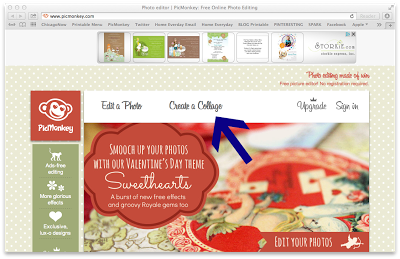
1.) Open your internet browser, and go to www.pickmonkey.com (it is free and there is no registration). The main page looks like this:
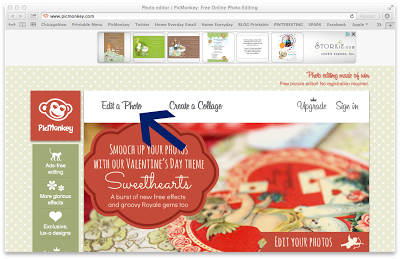
2.) Click on Edit Photo. A window will open asking you to choose the photo you would like to edit. Choose the photo, and click Choose.
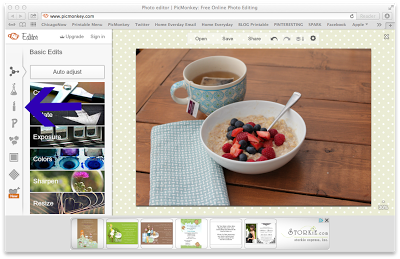
3.) Once you have chosen your photo, on the left hand side of the screen, there is a list of editing options on the far left indicated by pictures. They are Basic Edits, Effects, Touch Up, Text, Overlays, Frames, Textures, and Themes. The three I use are Basic Edits, Overlays, and Text.
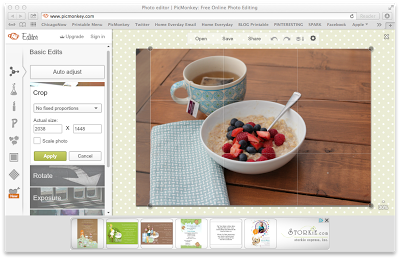
4.) The first thing I do, is crop my photo.
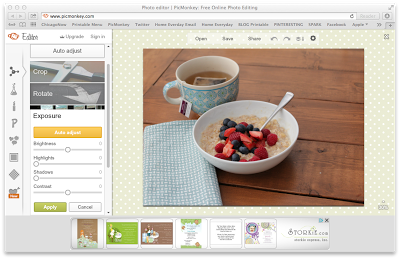
5.) I then adjust the exposure.
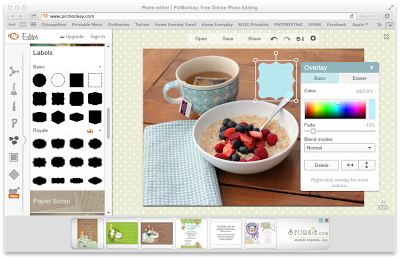
6.) Next I click on the Overlays button on the left, and choose my overlay, as well as color. (once you choose an overlay a window opens allowing you to adjust color and if you would like it to fade). You can adjust size just like you would adjust the size by clicking, holding, and dragging the dots around the edges of your overlay. You can position your overlay, by clicking it and dragging it to its location.
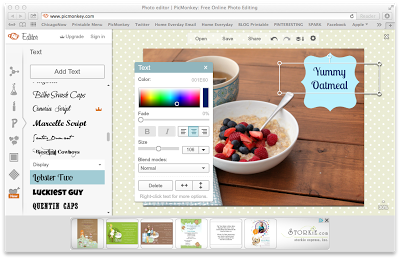
7.) I then add text. If you would like your text to appear inside an overlay, you must do the overlay part first. Then you can position text on top. This process is similar to the overlay. You can choose a font, and then click add Add Text. A window will appear so that you can adjust color, fade, bold, center, etc.
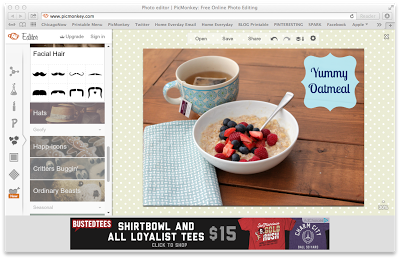
8.) Once you are done making all your adjustments. You can click Save at the top of the page. Choose where you would like to save it, and give your photo a name.
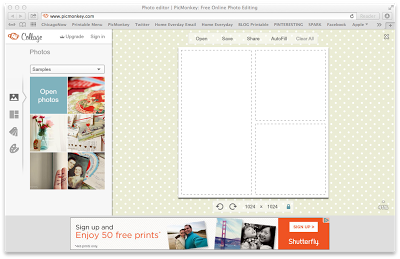
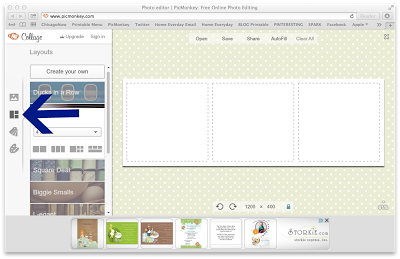
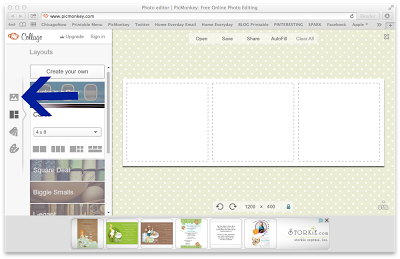
Making a Collage
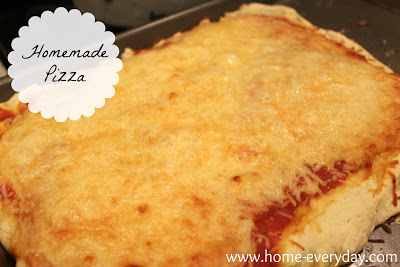
Dinner and an Injury: Homemade Pizza
Typically we do dinner and a movie on Friday nights. A few weeks ago, that was the plan, but as anyone with kids knows, spontaneity is the name of the game. The boys were playing in the living room while the pizzas were in the oven, and Russell hit his head. Brian and I were a worried, so we made a quick trip to the ER. He is/was perfectly fine, but we were glad to get him checked out.
Russell kept telling all the nurses he couldn’t wait to get home and eat the pizza he had made. Also, we had left in such a hurry that I just left the pizzas on the counter, and they were still delicious when we got home. Russell had 2 1/2 pieces!
Russell’s Smack Your Head Good Pizza
3 cups all purpose flour (or 1 cup whole wheat flour plus 2 cups all purpose flour)
1 package active dry yeast
2 Tbs vegetable or olive oil
1 tsp salt
1 Tbs granulated sugar
1 cup warm water (110 degrees F measure with a thermometer)
Preheat oven to 375 degrees.
In a mixer bowl, mix flour, yeast, salt, and sugar until well combined. Then slowly add warm water and oil. When dough is formed spread out into either a cookie sheet or pizza pan.
Top as desired.
Bake for 20-25 minutes.
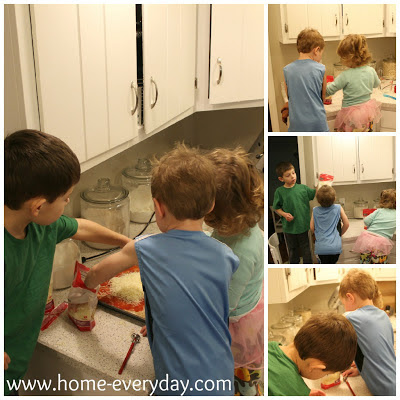
You don’t have to have lots of little hands helping, but if you do have little helpers in your house, they will love smoothing the dough into the pan and sprinkling ingredients on the pizza.
Also, you don’t have to smack your head enjoy it!
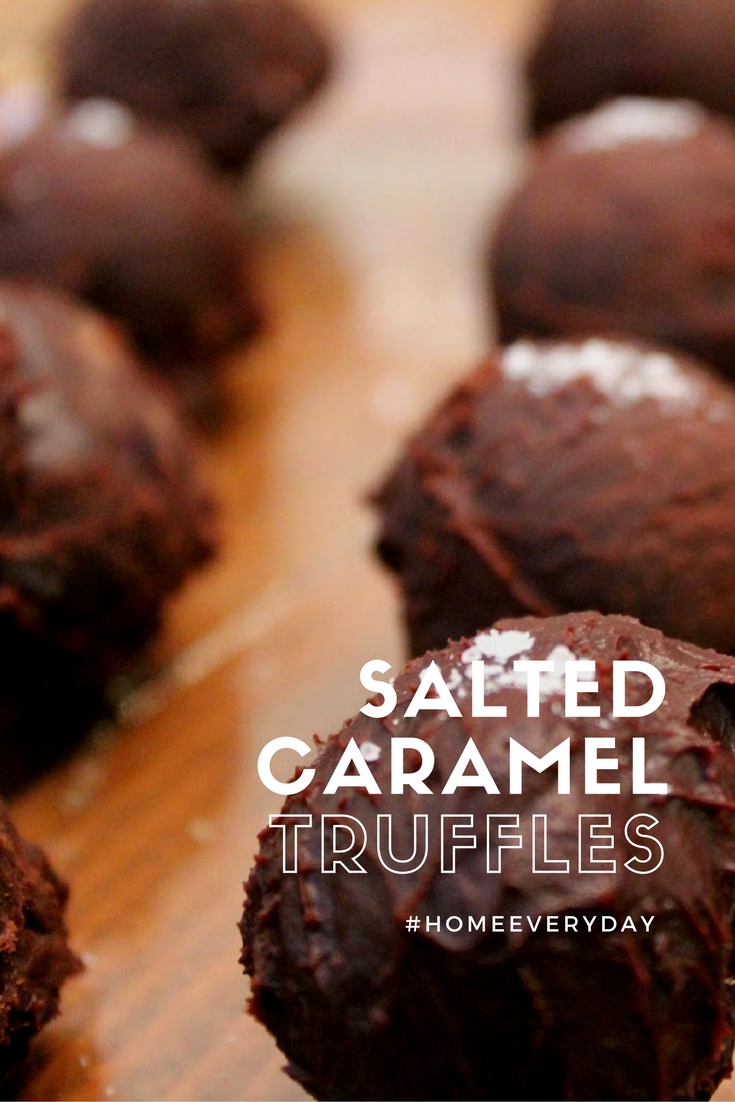
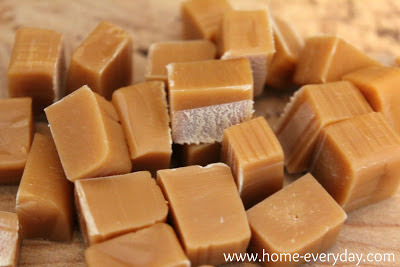
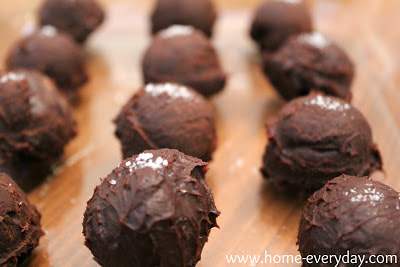
Salted Carmel and Dark Chocolate Truffles
It is Smart Cookie time! When Valentine’s Day is on its way, I of course think of chocolates so I thought instead of a cookies, it might be fun to make a chocolate candy treat. A few weekends ago, I had a salted carmel chocolate cake for dessert at a restaurant, and the combination of salted carmel and rich dark chocolate was so awesome that it inspired this recipe. Also, as my friend, Mary, pointed out dark chocolate is heart healthy. This is perfect for American Heart Association’s Heart Health Month.
This recipe seemed a little intimidating at first, but I found this great recipe as a base, and made a few small changes. They are a hit, as in they are gone.
Salted Carmel and Dark Chocolate Truffles
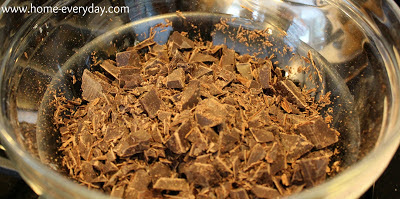
12 oz semisweet or dark baking chocolate chopped
1/2 cup heavy cream
12 carmel candies cut in half
1-2 Tbs Fine Sea Salt
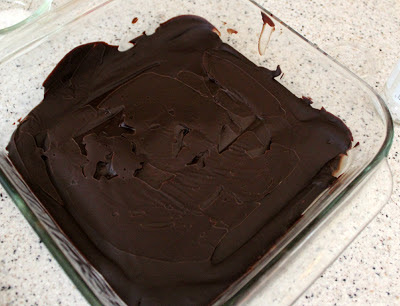
Place chopped chocolate in a large heat safe bowl, and place on top of a sauce pan filled with and inch or two of water to act as a double boiler. Turn on the heat to medium low. Next, in a second sauce pan over low heat add the cream. When the cream is heated through or when there are small bubbles around the edge of the pan, add the cream to the melting chocolate and gently whisk together. When the chocolate is thoroughly melted and incorporated with cream, add the mixture to a shallow baking dish. Cover with plastic wrap and put in the refrigerator for one hour.
While the chocolate is cooling, dredge carmel pieces in sea salt.
Remove chocolate from refrigerator.
Using a small cookie scoop (1 Tbs size) and scoop chocolate and insert salted carmel piece into the center of chocolate. Then gently roll into a ball and place on a refrigerator safe dish.
When all the truffles are made, sprinkle with the tiniest bit of sea salt. Refrigerate until ready to serve.
I have to make more to mail out. I think these are my new favorite chocolate treat.
For more information about Smart Cookies click here. You can also see past Smart Cookie recipes below: Oatmeal Dark Chocolate and Dried Cherry Cookies, Lucy Cookies, White Chocolate and Cranberry Blondies, Chocolate Dipped Vanilla Biscotti, and Italian Butter Cookies with Lemon Glaze.
Gray Days: January Wrap Up
While we have had a pretty warm winter so far (I just realized I probably jinxed all of Chicago by even saying this), it has still been pretty gray. Fortunately, I have done some cooking and a few projects to help get us through until we get some real snow to play in (again, jinx. Sorry).
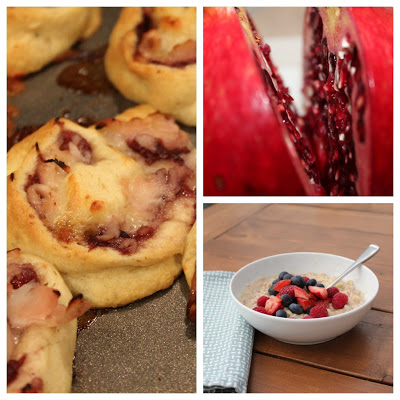
In January, I tried a few new recipes and was thrilled wit the results. I was very happy to add some healthy new recipes to our meal rotation like Deconstructed Greek Salad with Roasted Salmon, Dr. Oz Raspberry Smoothie, and Banana Berry and Almond Oatmeal. The Beef Bourguignon in the slow cooker was so easy and simple and perfect for these cold days. I also made Cranberry and Turkey Roll-Ups and will again this weekend for the Super Bowl. The Smart Cookie Recipe this month was Brian’s Grandmother’s recipe for Italian Butter Cookies with Lemon Glaze. Finally, I offered up some tips on Cutting Pomegranates as well as creating Homemade Baby Food.
Whew, tired yet? I am.
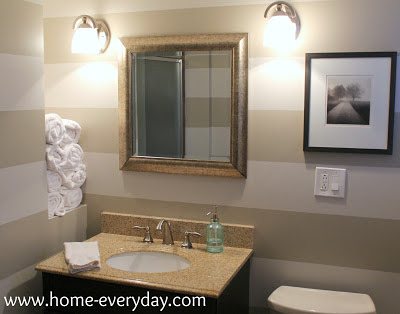
Around the house, I got a few things done that I had been wanting to do as soon as we took the tree down. First, I classed up our dining room with Valentine’s Candy. Then, I went on an organizing frenzy in the kitchen and Cleared some Cluttered Cabinets (say that ten times fast). I did some overwhelming Fabric Shopping for a few projects. Finally, I repainted our downstairs bathroom complete with some Snazzy Stripes.
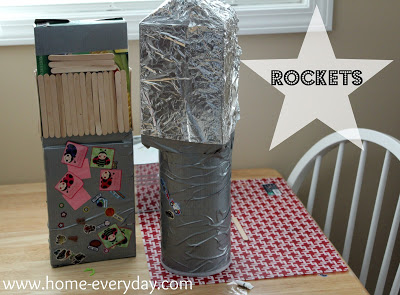
Winter can be hard for everyone, but when you have kids who like to be outside and active, it can be hard to find things for them to do. Fortunately, my kids have a pretty active imagination, and were able to create their own Rocket Ships out of some old boxes. Also, they have been able to play with all their Christmas Gifts.
While I have wrote a big THANK YOU to my readers here, I just wanted to say THANK YOU all again for keeping up with Home Everyday. I cannot wait to share what we have planned for February! There will definitely be more painting, and perhaps some salted carmel.
Take care!


