Tag

pictures

Not Just a Hobby

I have always enjoyed crafting and DIY, but I can actually pin point the exact moment that it became an almost obsession. I was 18 and got invited to my first Creative Memories scrapbooking party. As part of my graduation gift, my Dad bought me my first starter kit of pages and tools and paper.

I was bitten by the scrapbooking bug, and I loved it.


Sometimes I got made fun of a little bit for being an 18 year old girl that would prefer scrapbooking over chillaxing. However, Scrapbooking was a wonderful hobby for me. I loved that I could kind of go to a cathartic creative place and cut and paste and journal to my heart’s content and kind of forget about the problems of the day.

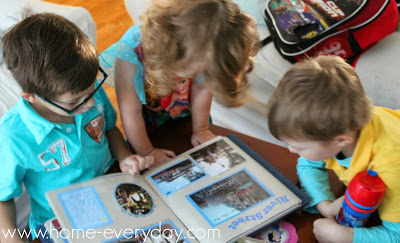
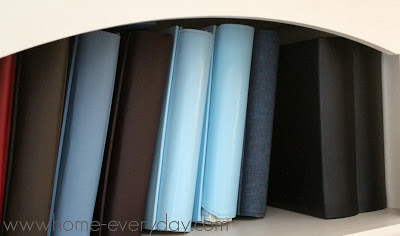
I recently sat down with my kids and we looked through some of the albums and we giggled and talked. Then, they asked me to break out the baby books (Caroline’s still in progress) and they asked all sorts of questions about what each of them was like when they were babies.

In that moment, I was incredibly happy for having taken some time to document a time that was incredibly chaotic. There is no other way to describe having three kids in 33 months except chaotic. But, I was thankful that I stayed up late some nights to write stories in those books for them to recount forever, perhaps someday with their own children.

In that moment, I realized that my scrapbooking was not just about buying fancy paper and cutting and taping, but it had a real purpose of preserving our memories.


As my kids get older, it is getting harder and harder to find the time to scrapbook, but I still write everything down and save tons of pictures and ticket stubs and their drawings for the days that I will have time to scrapbook again.

No matter your creative hobby, stick with it. I am sure that you will find that it has real purpose. I’m sure every quilt you sew, photo you take, scarf you knit, piece of furniture you build, cake you bake, card you stamp, or album you make will just be a wonderful reminder of a period of time in your life that you don’t want to forget.

If you like this post and would like to read more about DIY, gardening, cooking, baking or all other things domestic, become a Home Everyday follower! For blog updates or to see other places I write follow Home Everyday on Facebook here.

Follow on Bloglovin

Crazy Crap on the Walls: Our Photo Gallery

*Normally on Friday, I do a series called Flashback Friday where I feature a different area of the house and the improvements we have made since moving here, like our kitchen update, our bathroom spruce up, and our living room/dining room improvements. Flashback Friday will be back next week with the bedrooms.

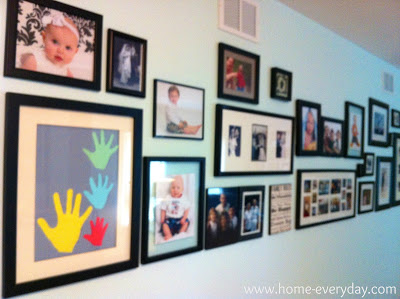
After talking about our living room improvements last week, someone asked me how I went about creating our photo gallery. Creating a photo gallery was a must for Brian and I. We love family photos and wanted to have a place where we could place them all together. This was one of the first projects I did after painting the living room, so there aren’t a ton of pictures (again, this blogging thing is new to me), but I will try to explain as best I can.


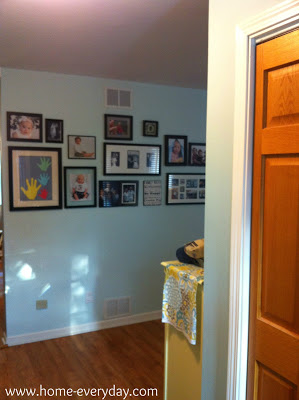
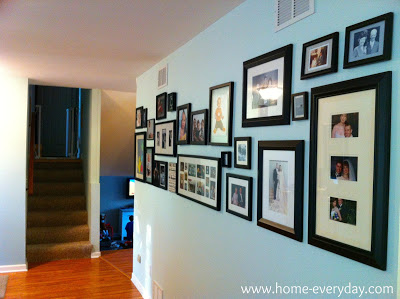
Location, Location, Location: When we bought this house, we had quite a few ideas of where we could put a huge photo gallery. After some discussion, we decided the living room. The wall we chose is one that you see right as you enter our front door, but can also be seen from every angle of the living room. Also, this wall is twelve feet long. We figured that this is enough space to add a number of photos as well as have room to grow.


Gather ’em up: The next thing I did, was gather up all the black frames that we owned. A photo gallery doesn’t have to have to have all the same type or color of frame, but Brian and I like uniformity. Even in our previous home we typically only bought black frames so that if we ever wanted to move pictures around the house, nothing would ever look out of place. There are a few exceptions to this rule, but for the most part every picture frame in our home is black.

Shape Up or Ship Out: Once all the frames were gathered up, and I saw what I had to work with, I measured off a twelve foot area of our living room floor and I started laying the frames in that space. I tried arrangements, and I even tried putting them into some kind of shape, but then I tried to think of what kind of furniture might be near the gallery, and the hope is to someday put a long desk there. In the end, I decided that the best arrangement would be to line up the bottoms of all the photo frames in the bottom row and work my way up from there.

Hang ’em Up: Once I decided on an arrangement, I took a picture of the arrangement, and then Brian recreated what I did on the floor up on the wall. He used simple picture hangers, and sometimes would measure the distance between frames to make sure they would all fit. He also used a laser level to line up all the pictures on the bottom.

There you have it. Our family picture gallery.