Category

Home Improvement

Building Built In Storage: Part Two

If you follow me on Instagram, you know that I have been done with the built ins for about two weeks. However, writing about them took longer. 


I will probably keep rearranging these forever. #DIY #honedecorprobs

A photo posted by Erin Skibinski (@eskibs) on

I’m not going to lie, this was the more difficult part of the building as there was more measuring and cutting and painting involved. Hence, the longer gap in between posts. I am thrilled with how this project turned out, and happy to say it was worth the wait.

BUILT INS FINAL 2

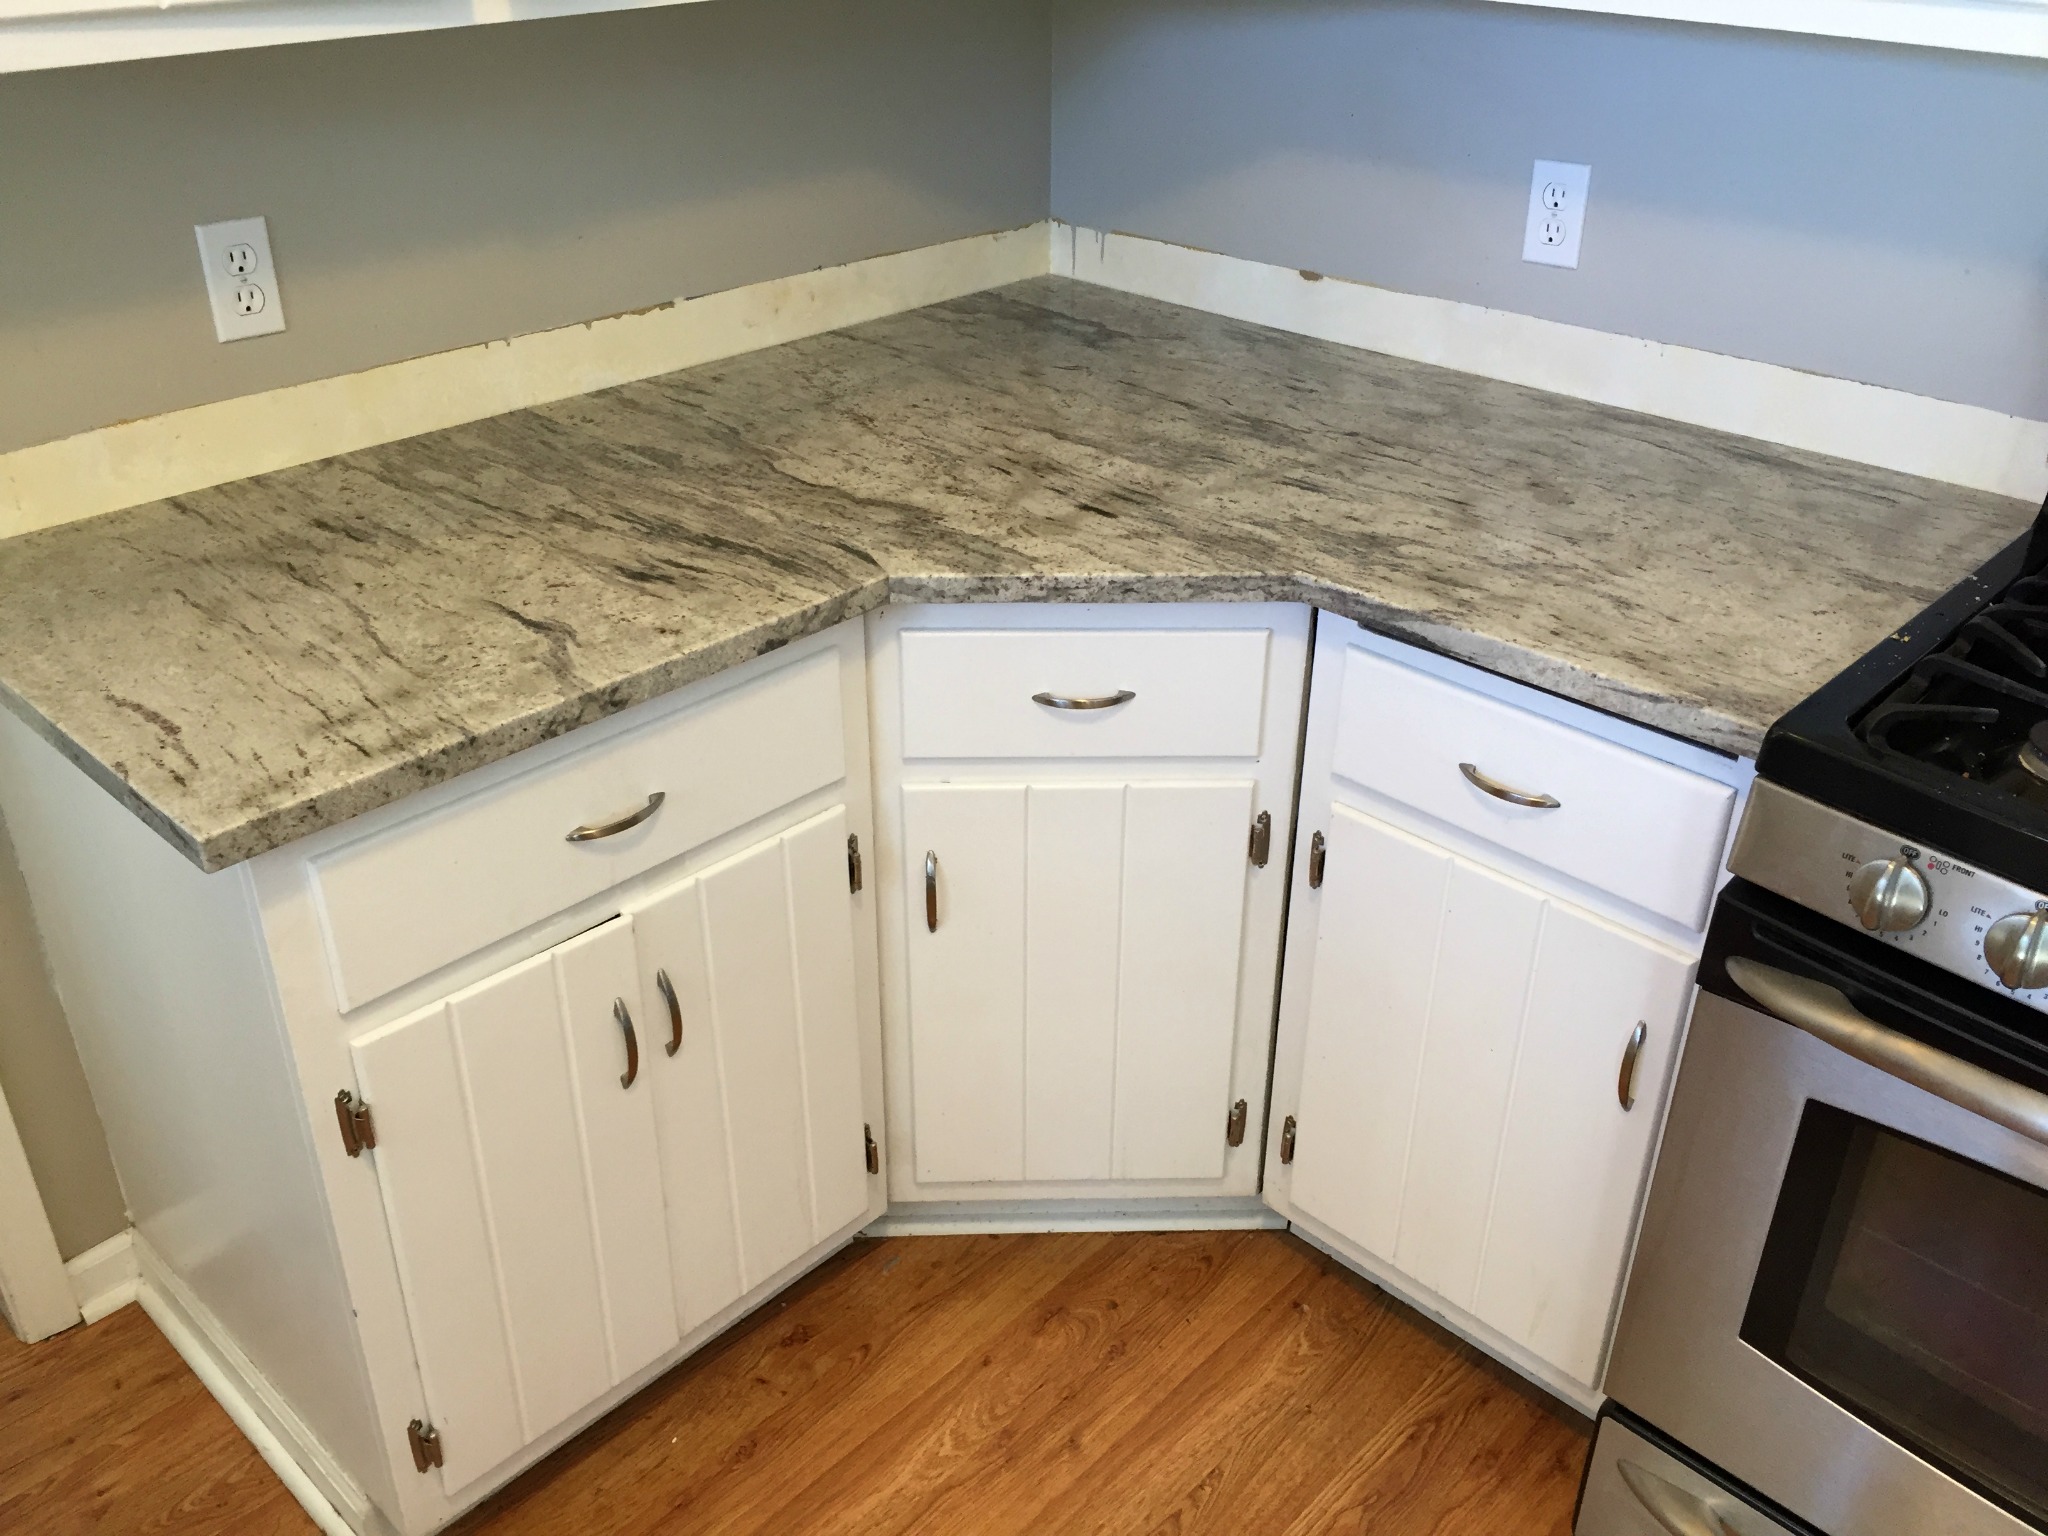
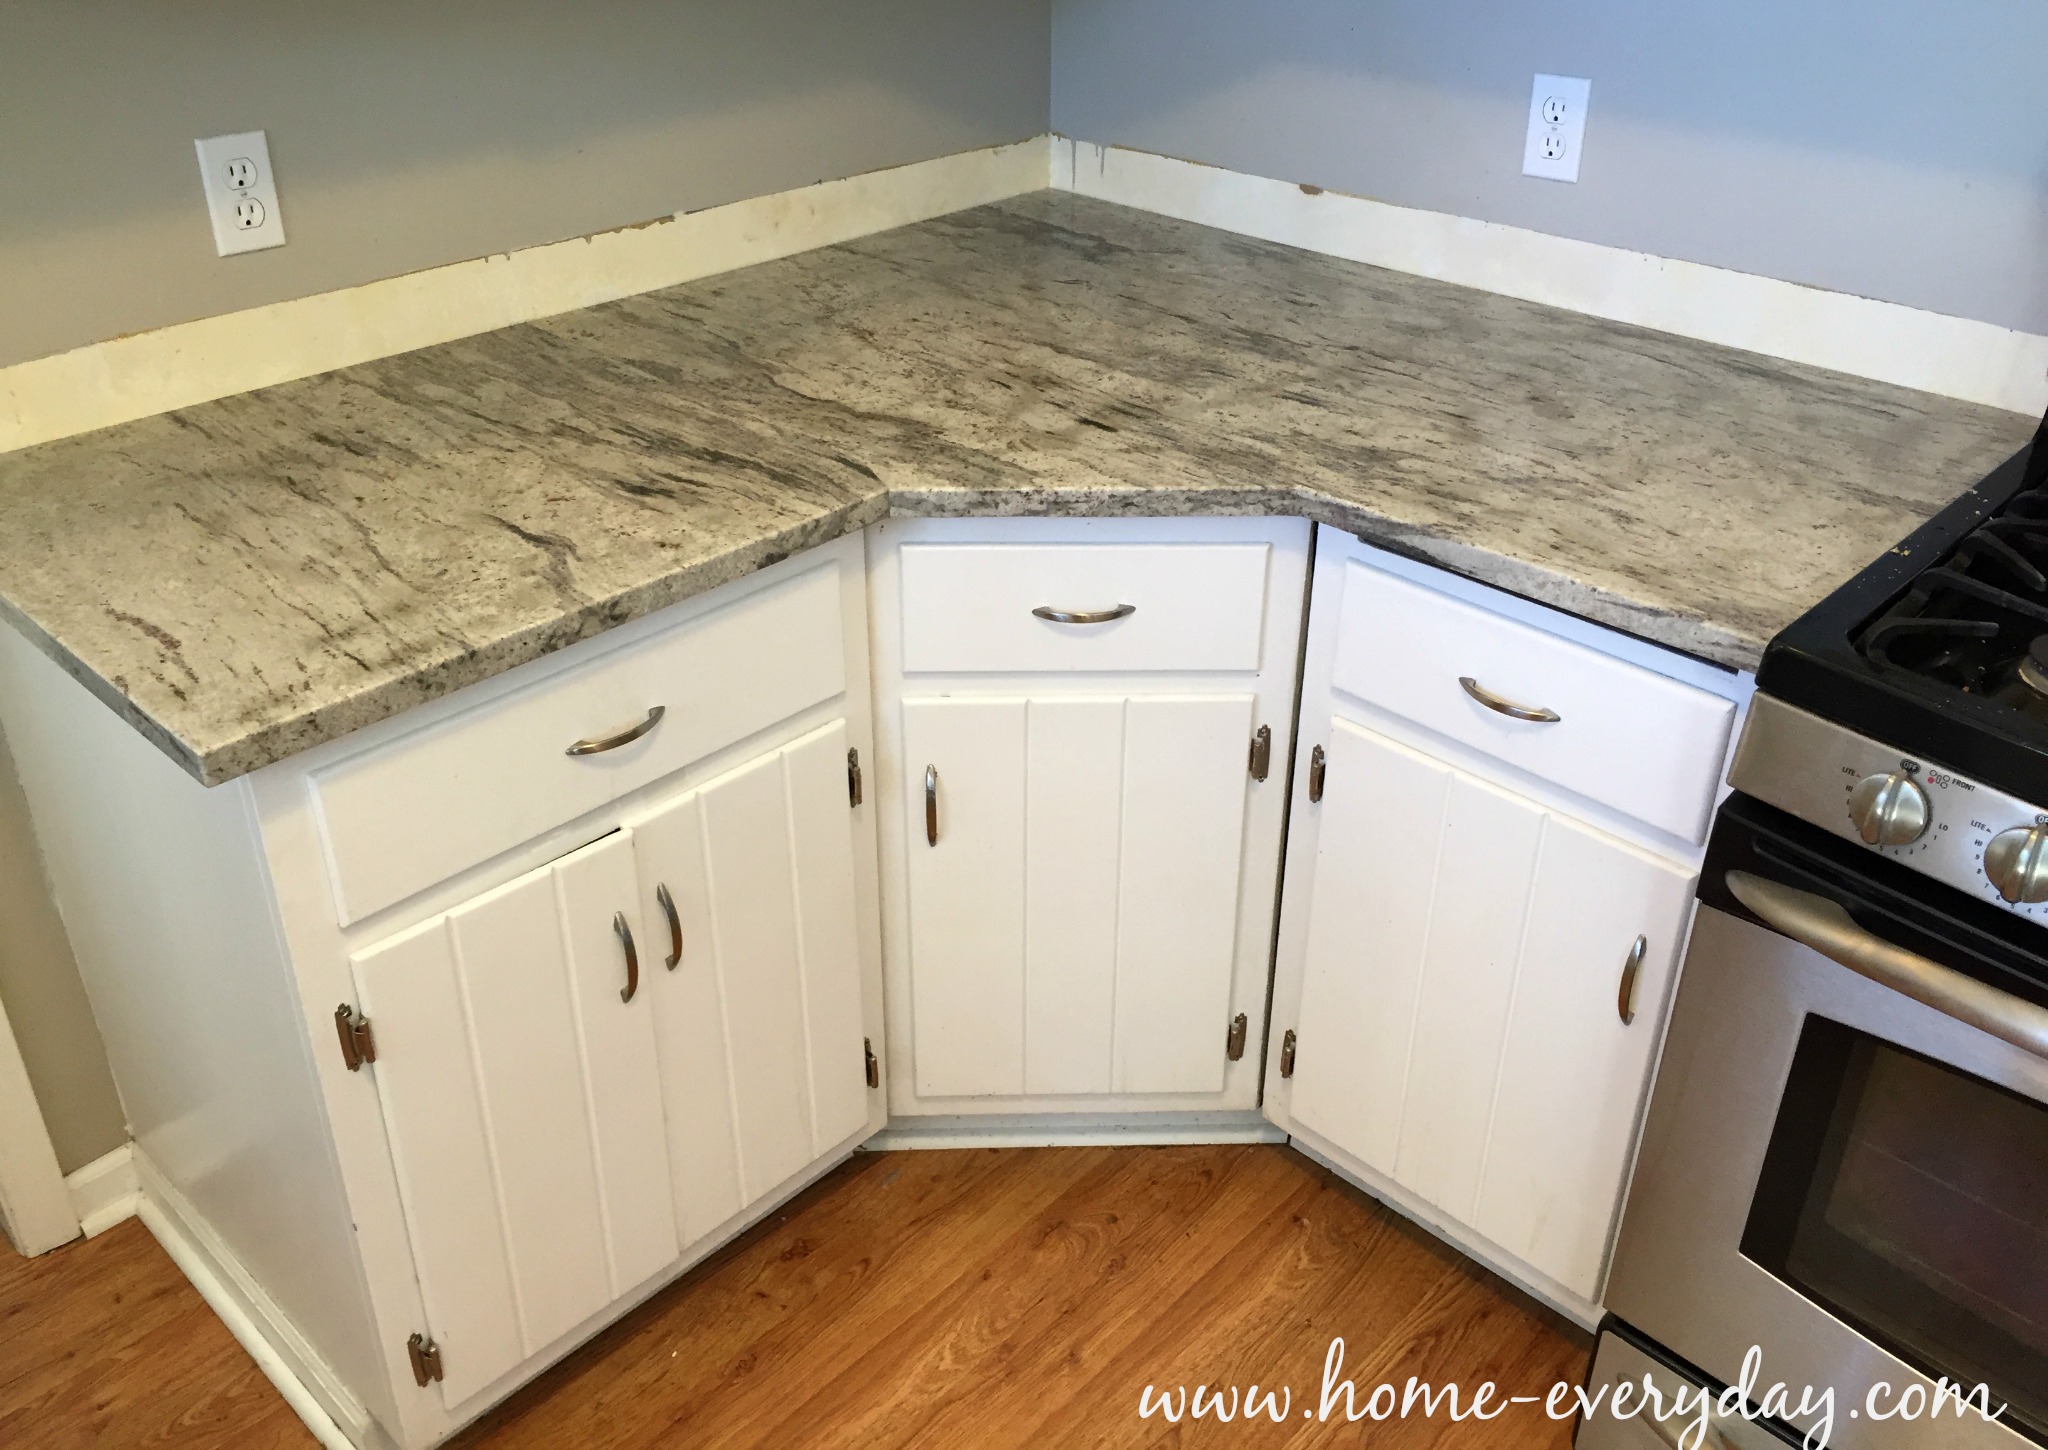
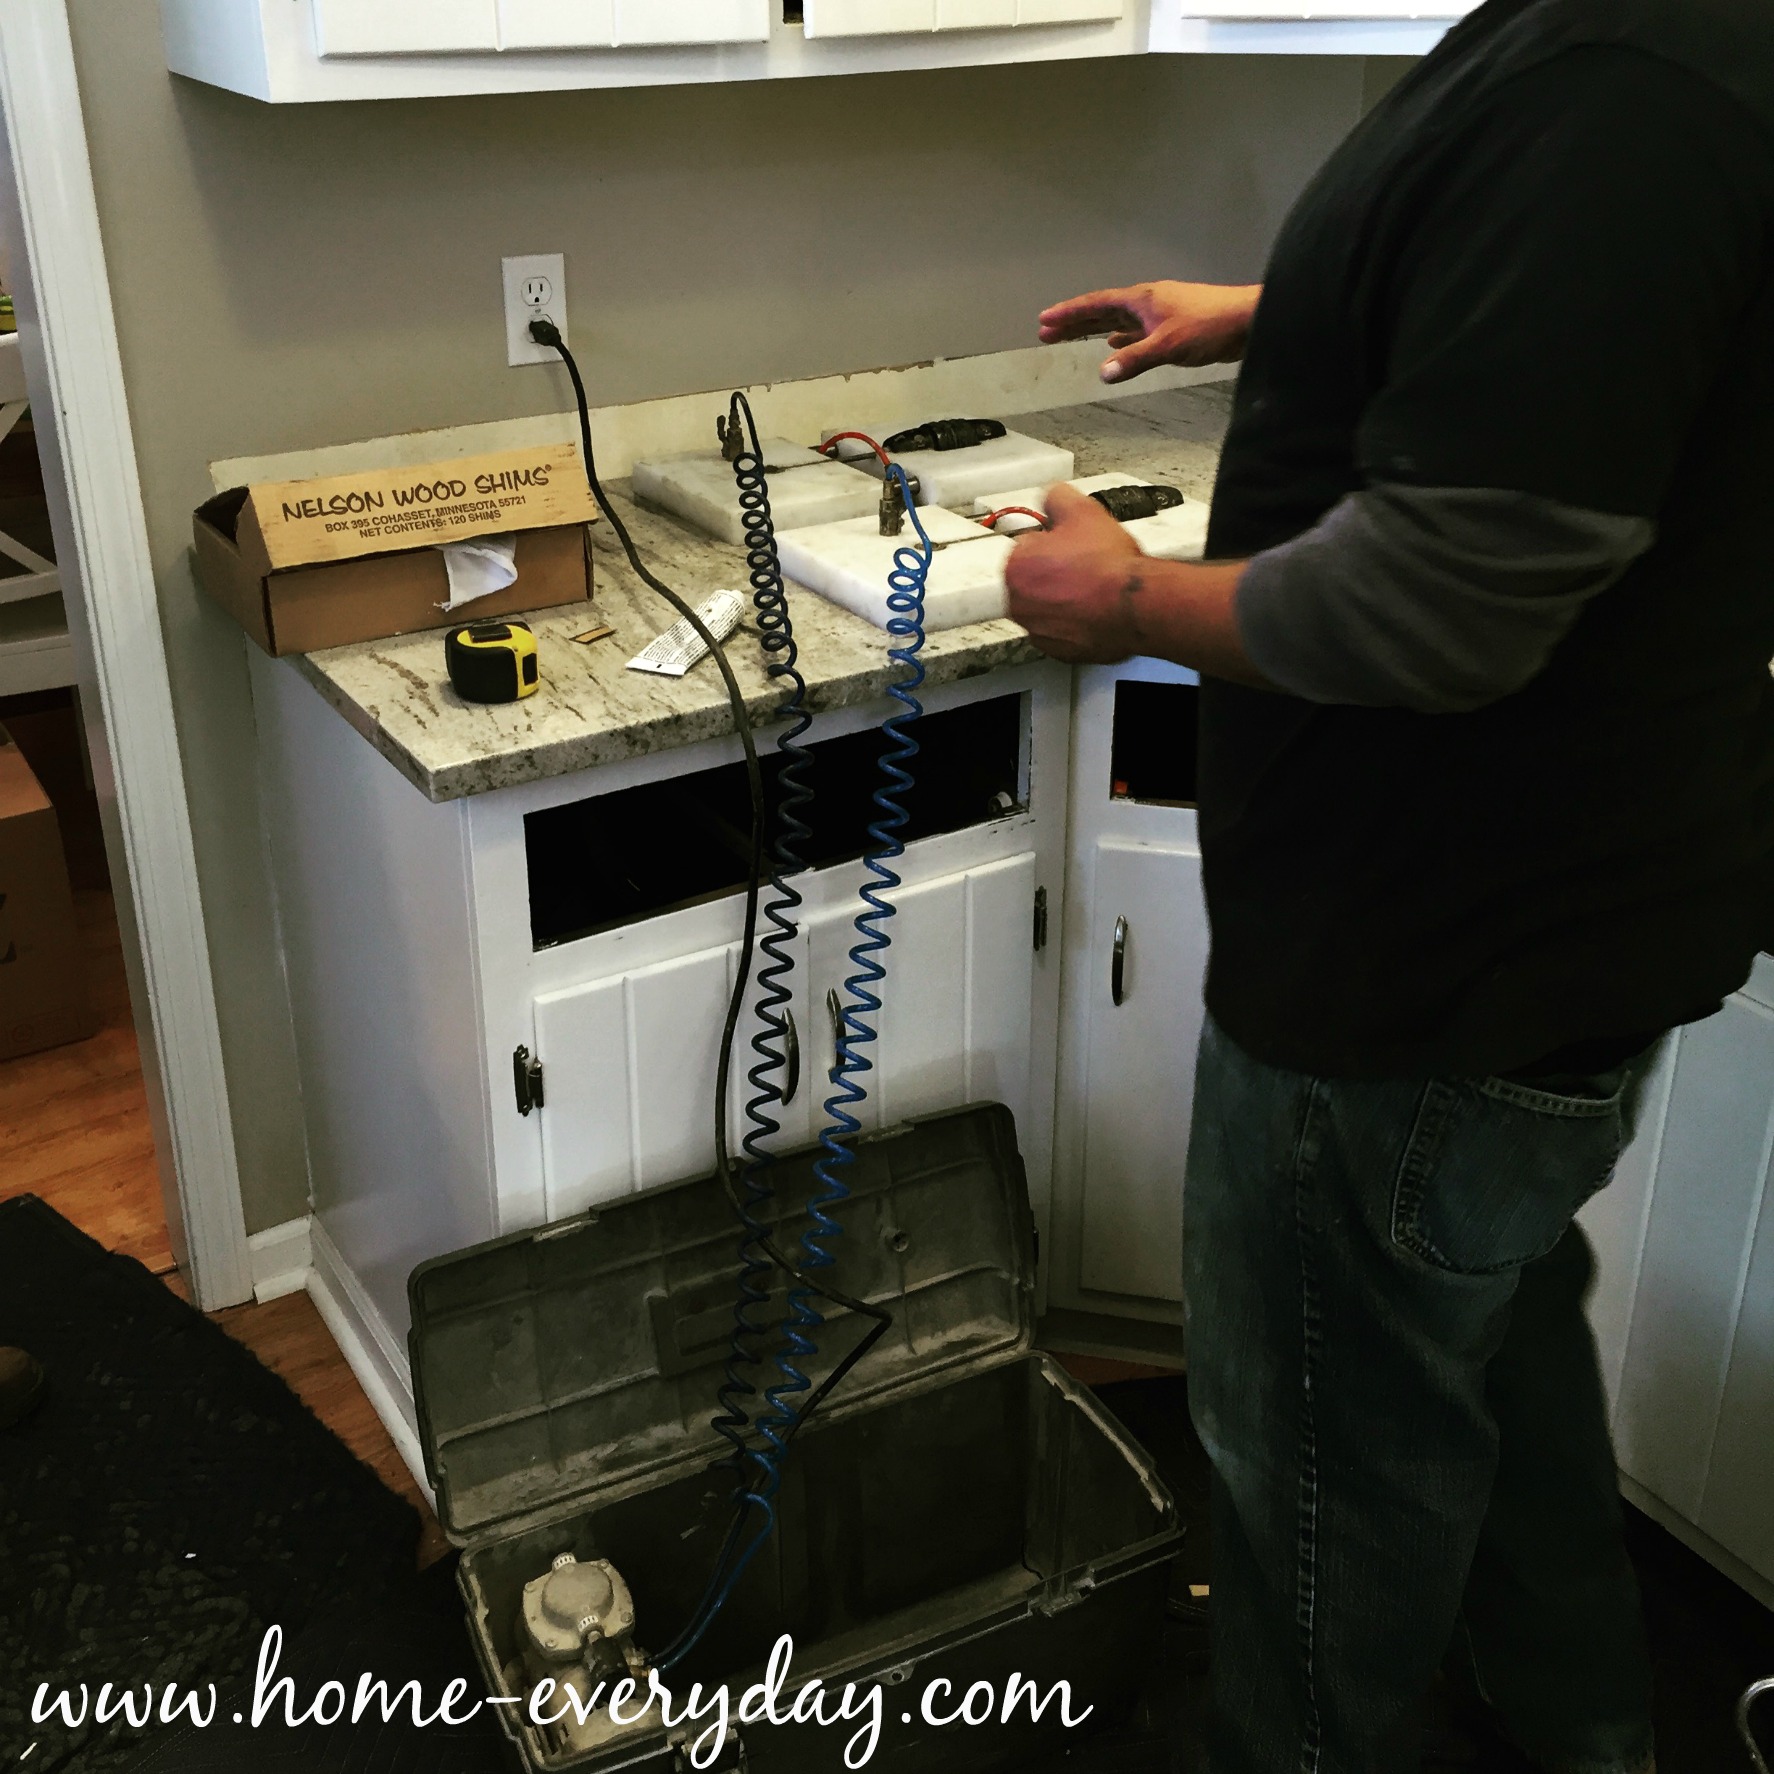
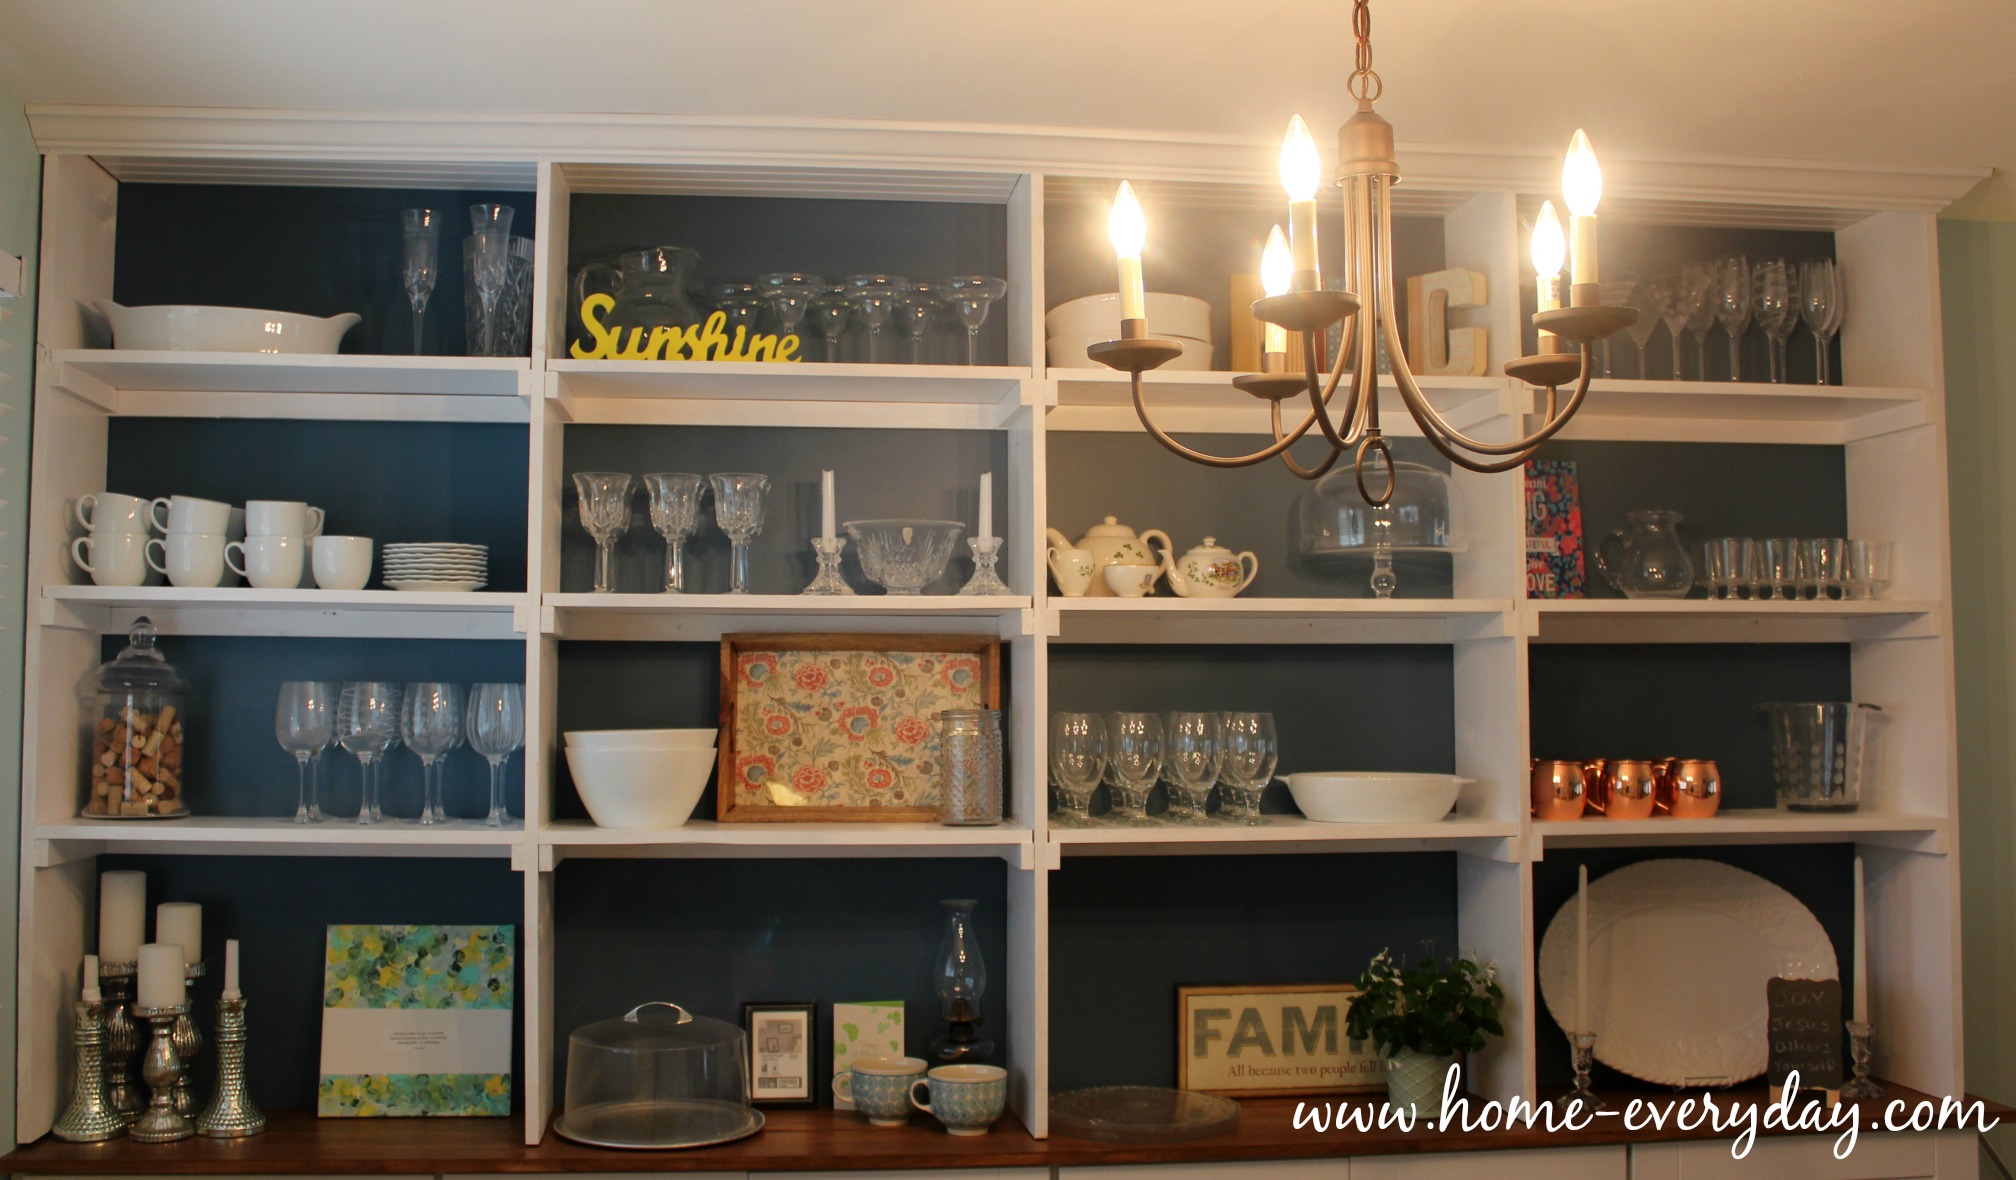
We left off PART 1 at the installation of the countertop on top of the cabinets and painting the wood that was going to be the upper shelving.

Built In Cabinets Phase One 14

I felt that it was easier to paint as much of wood first and then touch up things later because A) I could paint on a flat surface and my arms wouldn’t get sore B) I’m not stinking up the house with paint C) I wouldn’t have to tape up the blue wall I just painted or counter top I had just stained.

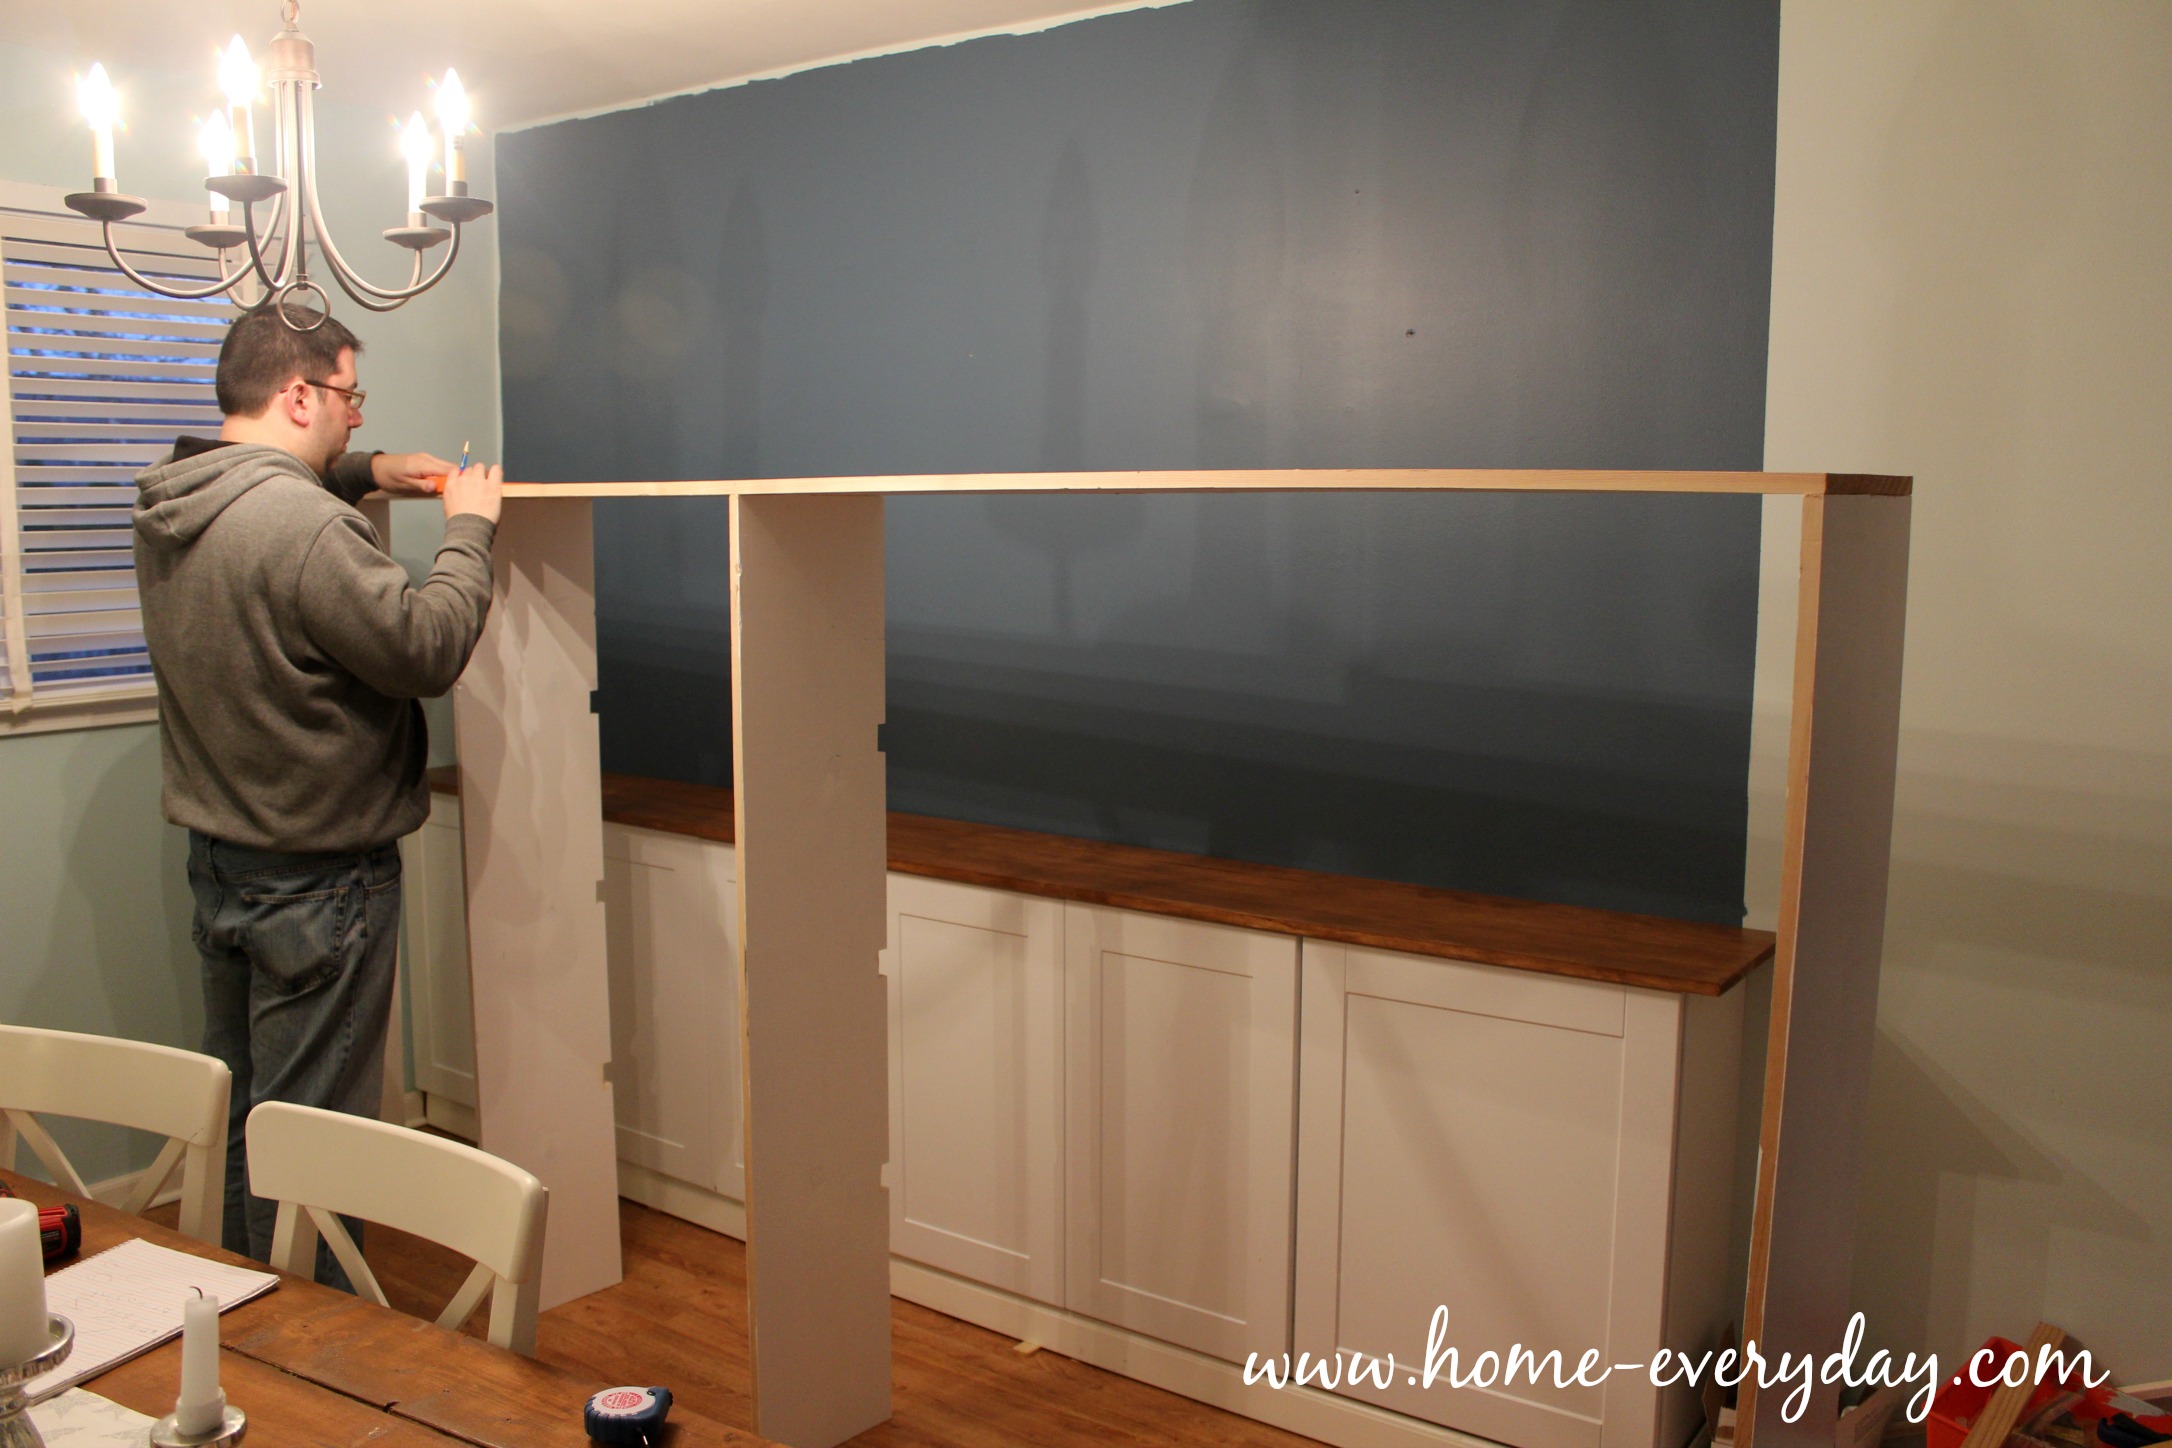
For the upper shelving we used 1″ x 12″ common board. and cut a 10′ foot header and 5 -5′ vertical supports. 

Then after we had determined the height of each of our shelves (three not including the counter shelf), we marked on 3 of the vertical supports where those shelves would be and clamped them together. Pro Tip: If you know you will be making the same cuts at the same points on same pieces of wood. Try to clamp them together and do it at the same time to save time, and ensure accuracy.

Built Ins Part 2 - 1


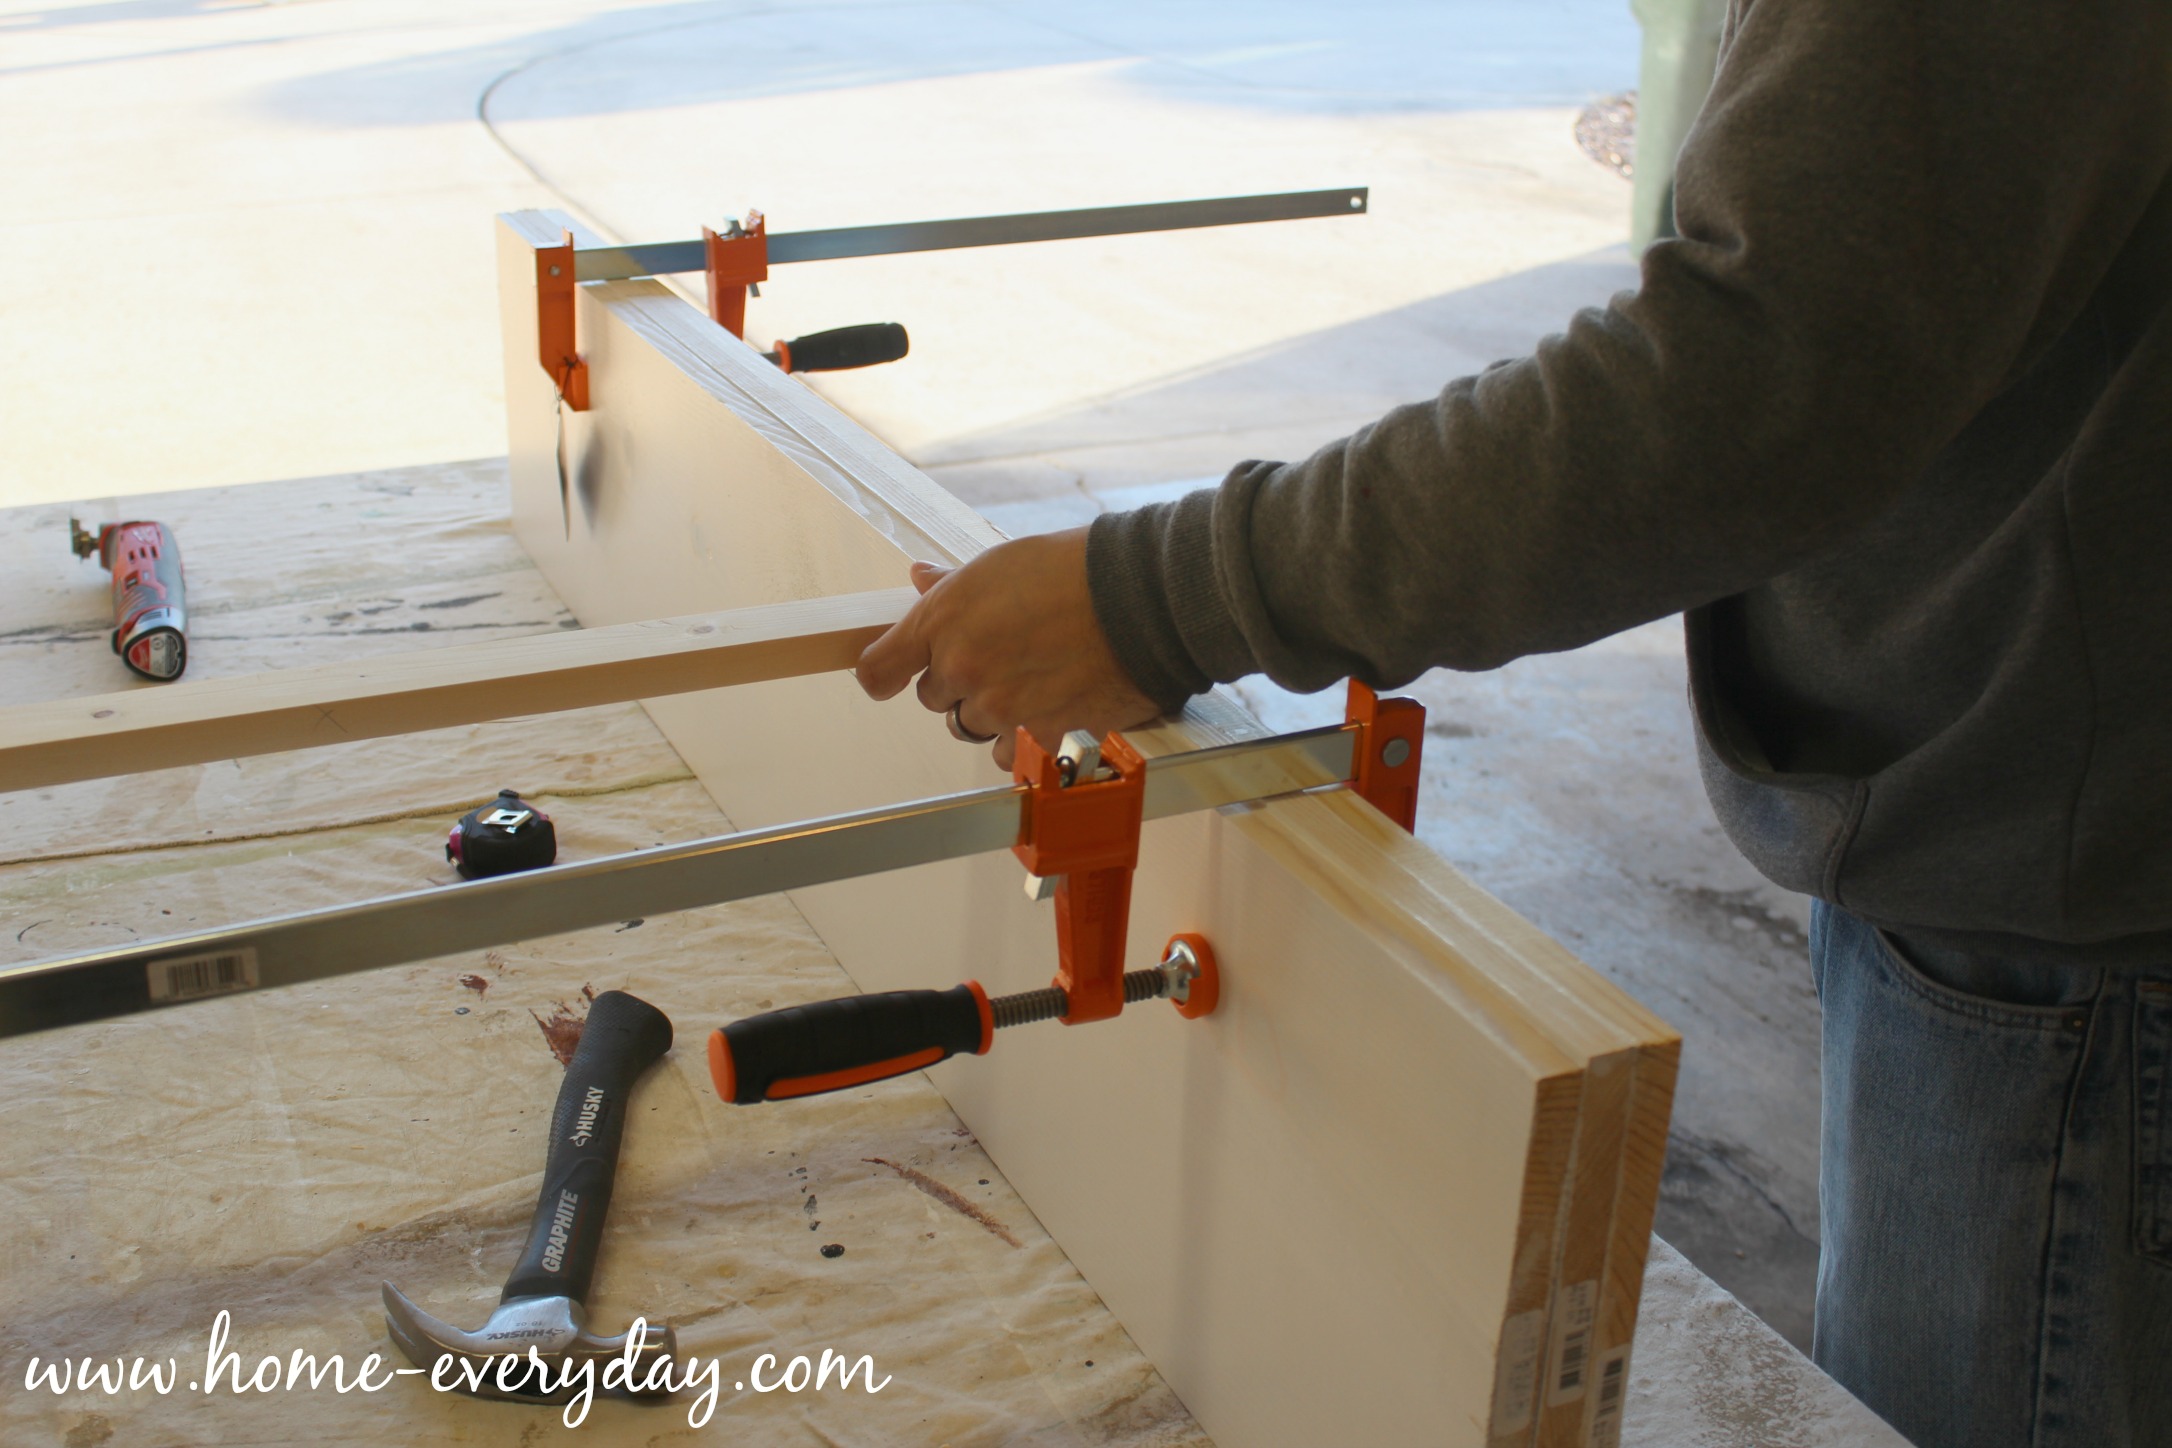
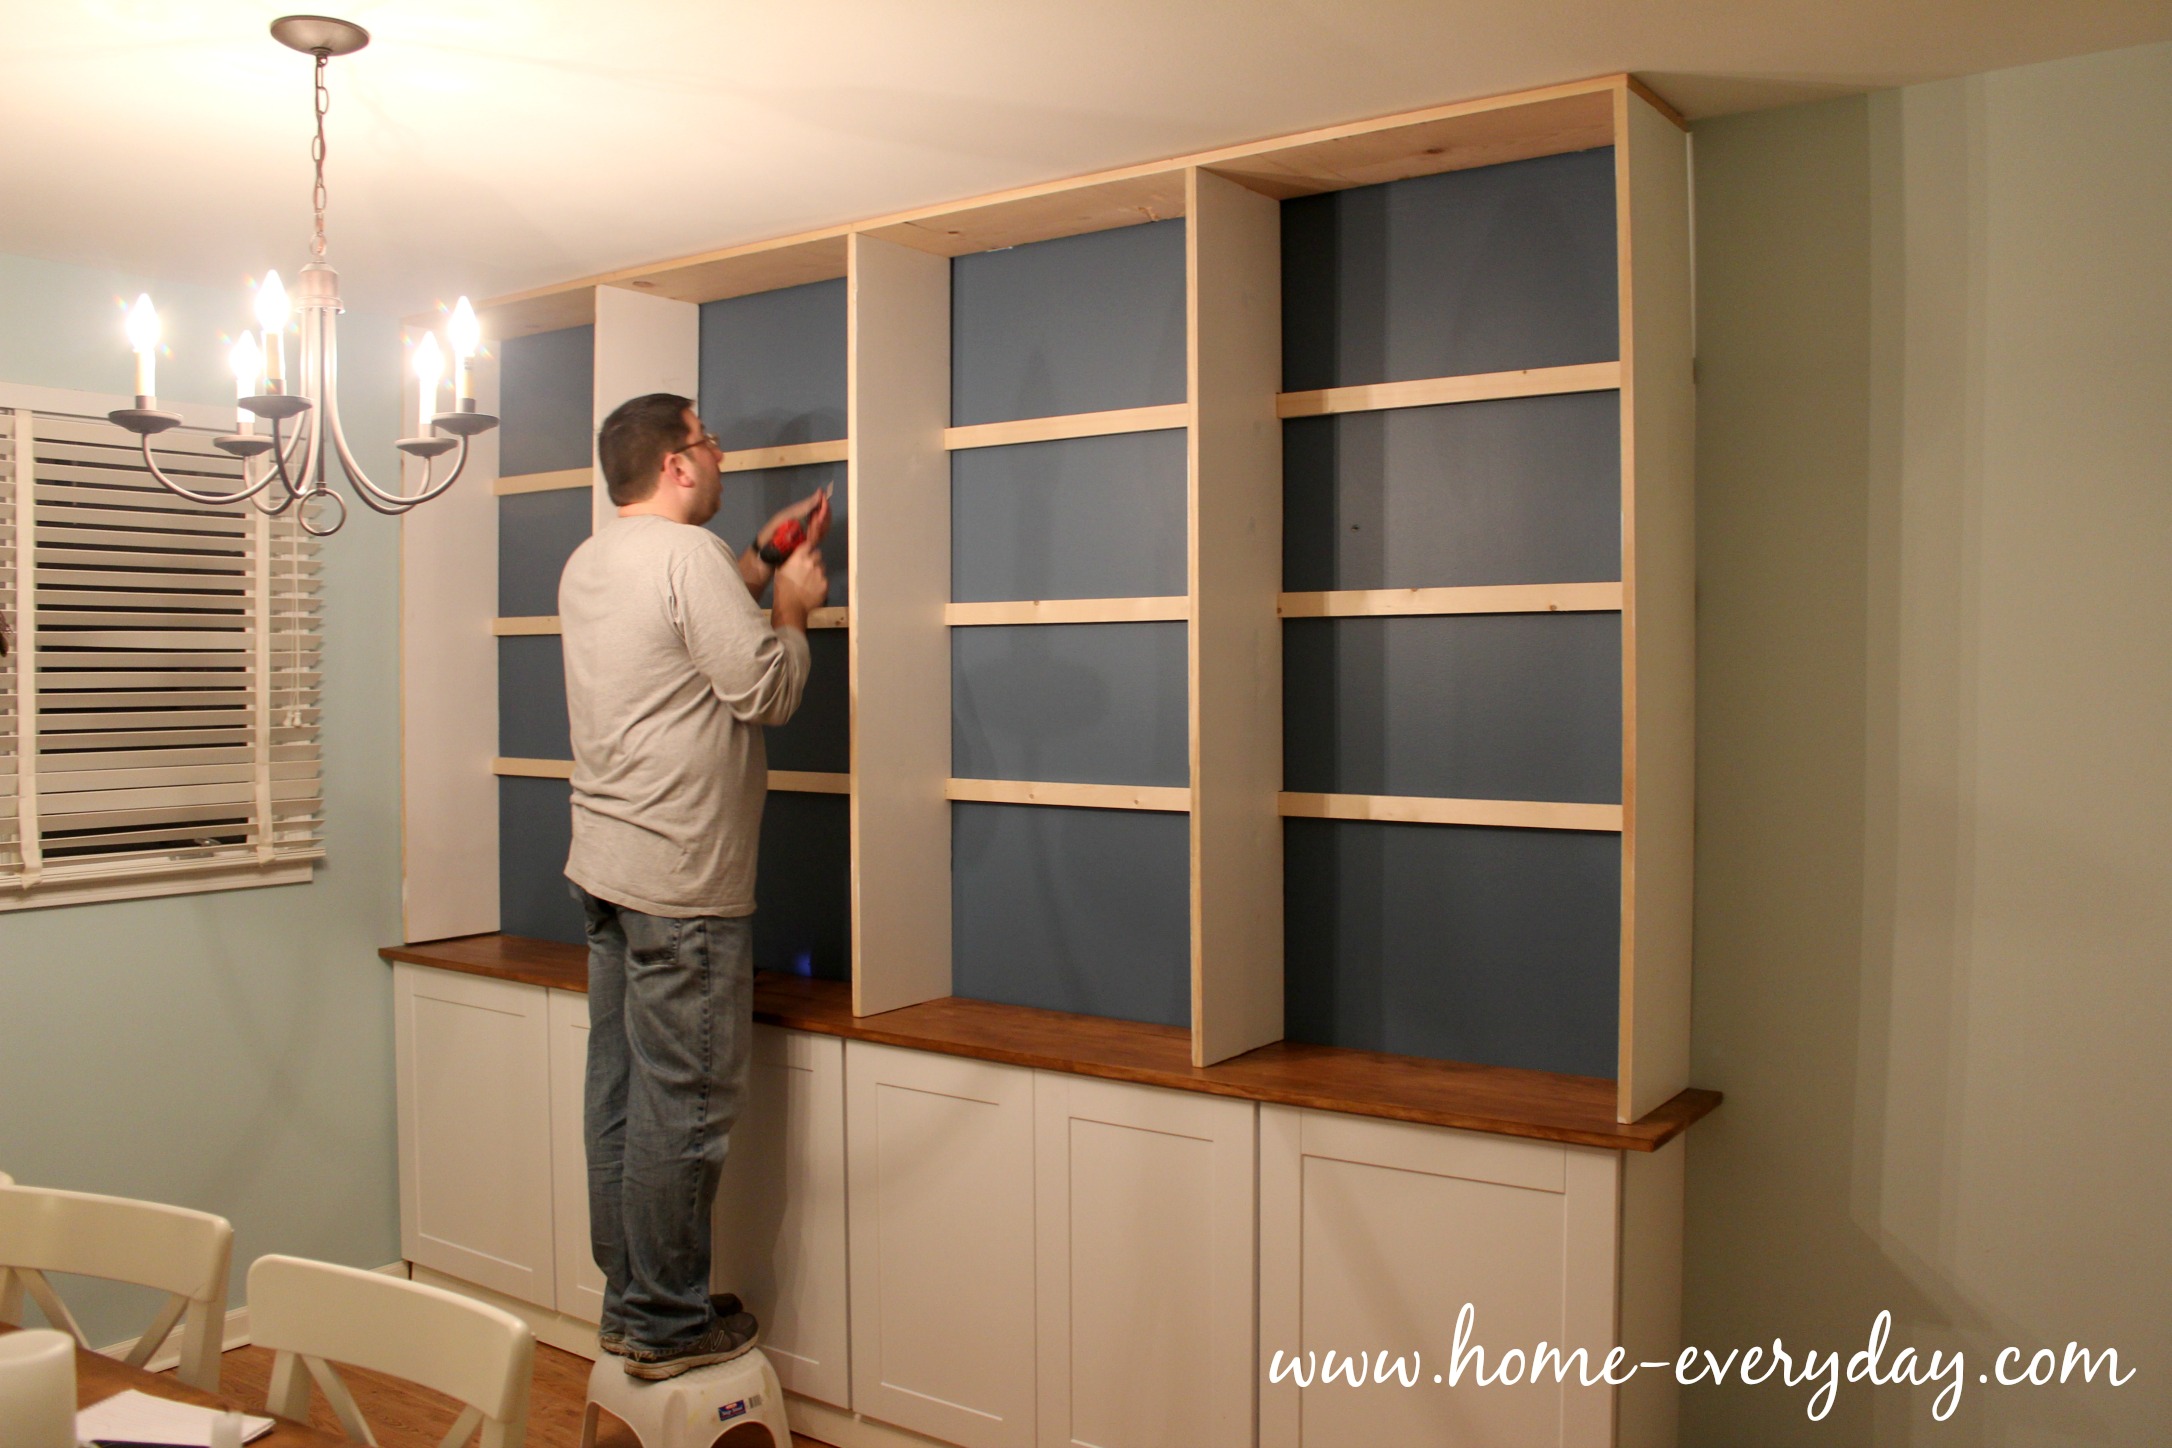
Next, using a multi-tool, Brian notched out a 1″ deep by 2″ width piece into the three center vertical supports. Notching this piece of wood on the back of each of these vertical supports at each of the heights of the shelves served several purposes. 1) It allowed us to screw 3 1″ x  2″ x 10′ rails into the back of the shelves for extra sturdiness. 2) These rails were flush against the vertical supports allowing the shelving unit to be flush against the wall. 3) It gave us another place to secure the shelving unit other than the ceiling for extra support. 4) Having rails that run the length of the back of later installed shelves will help to prevent bowing in the future.

Built Ins Part 2 - 2

Once the vertical supports, header, and rails were ready to go, we brought everything in the house to put together. We screwed the vertical supports from the top of the header at equal intervals allowing us to have 30″ wide shelves.

Built Ins Part 2 - 4

Then we attached the rails.

Built Ins Part 2 - 6

Then we lifted it up on top of the counter. Perfect fit (thank goodness)! Brian screwed the this shelving unit into the ceiling wherever there were studs. and again into the side wall by the window. He also secured a few screws into the rails we had just constructed where ever there was a stud. This baby isn’t going anywhere.

Built Ins Part 2 - 7

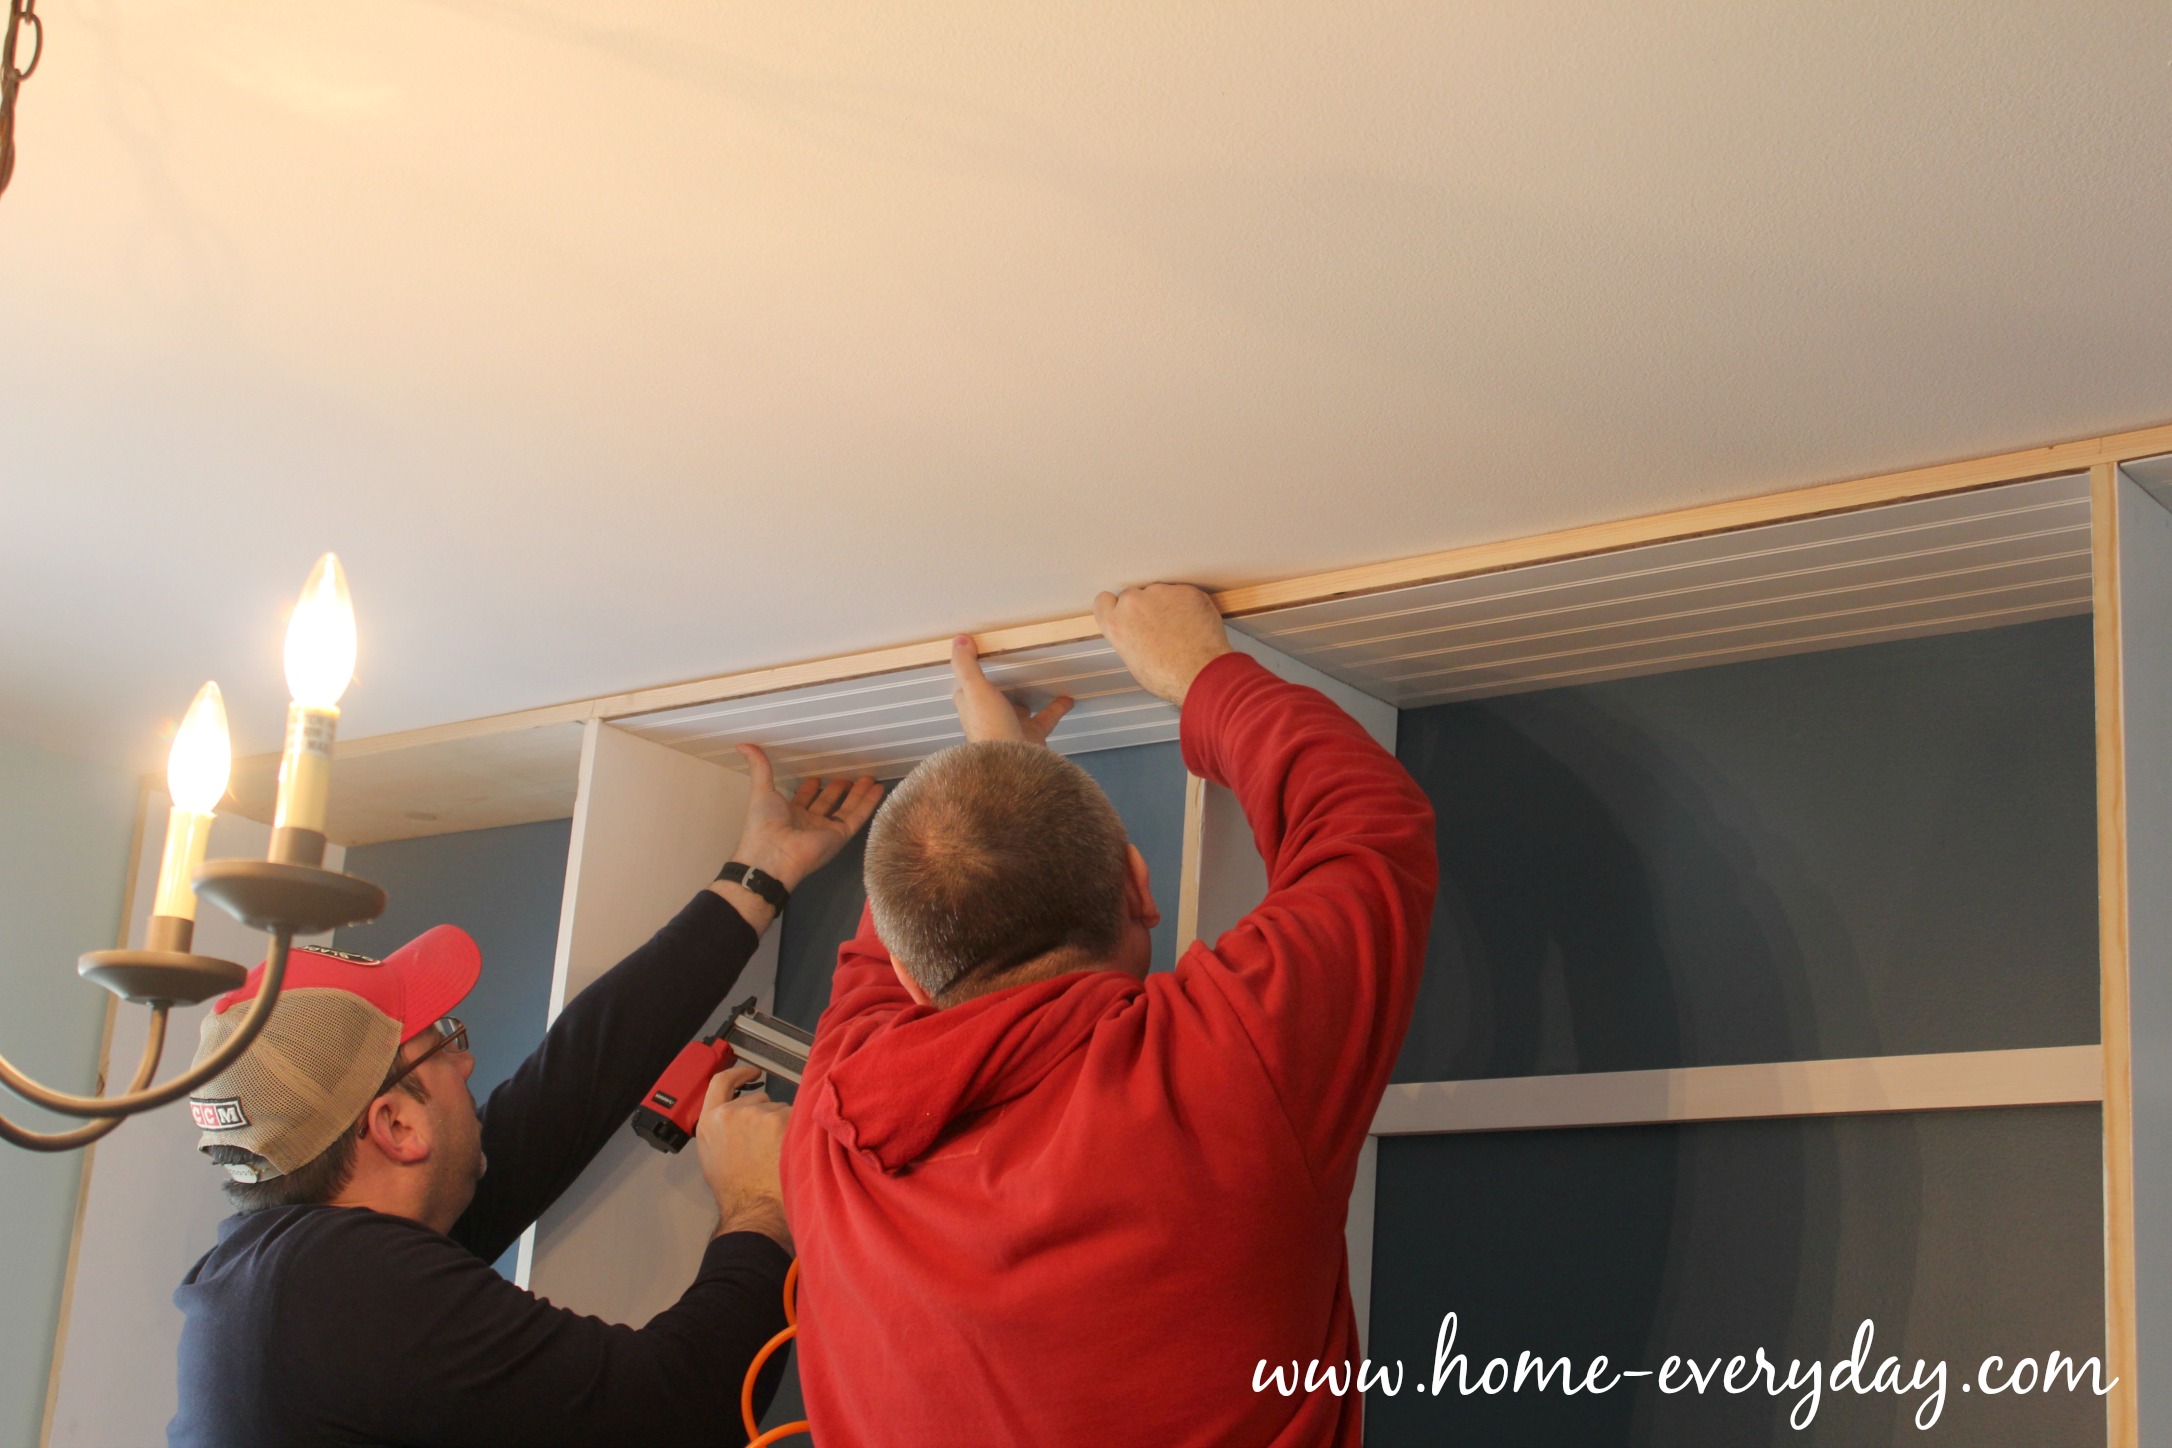
In the ceiling of the unit, instead of painting and trying to find cover the heavier duty screws we used to attach the header. With the help of our handy friend, Scott, we cut some pre-finished bead-board to size, and nail gunned that into the the unit.

Built Ins Part 2 - 9

Next, we took the same pieces of 1″ x 2″ and cut them into approximately 11″ pieces to make the side rails for the shelves. Brian then used a nail gun to attach these rails.

Built Ins Part 2 - 8

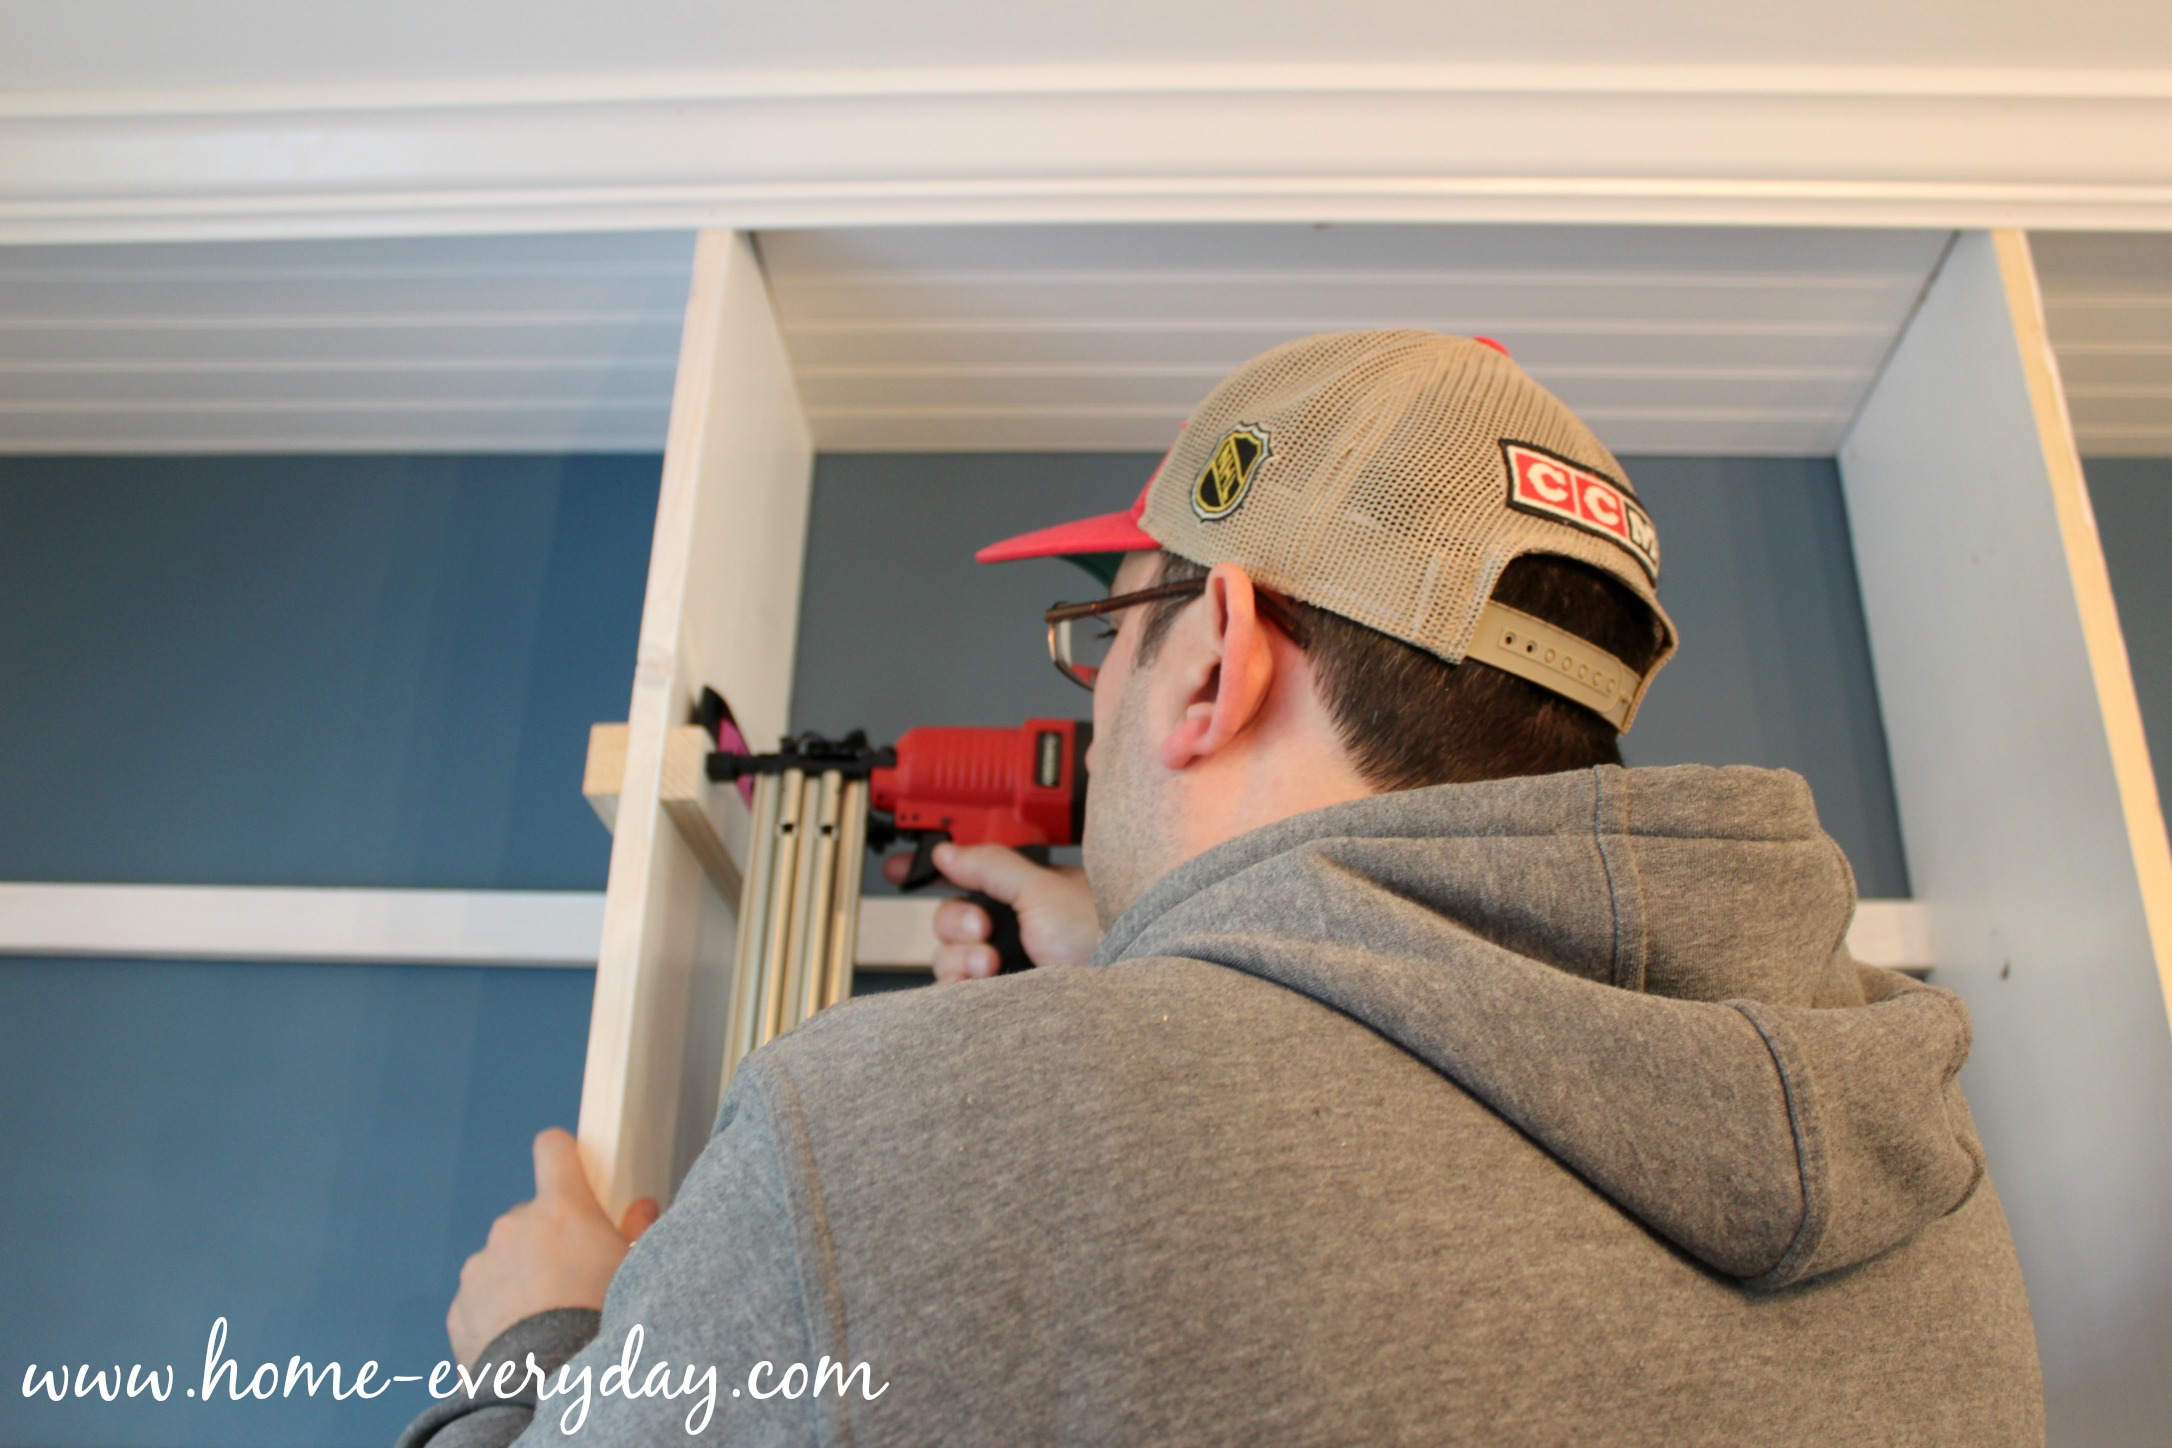
Using the same 1″ x 12″ common board we cut the shelves to size, slid them into place, and we nailed those in too.

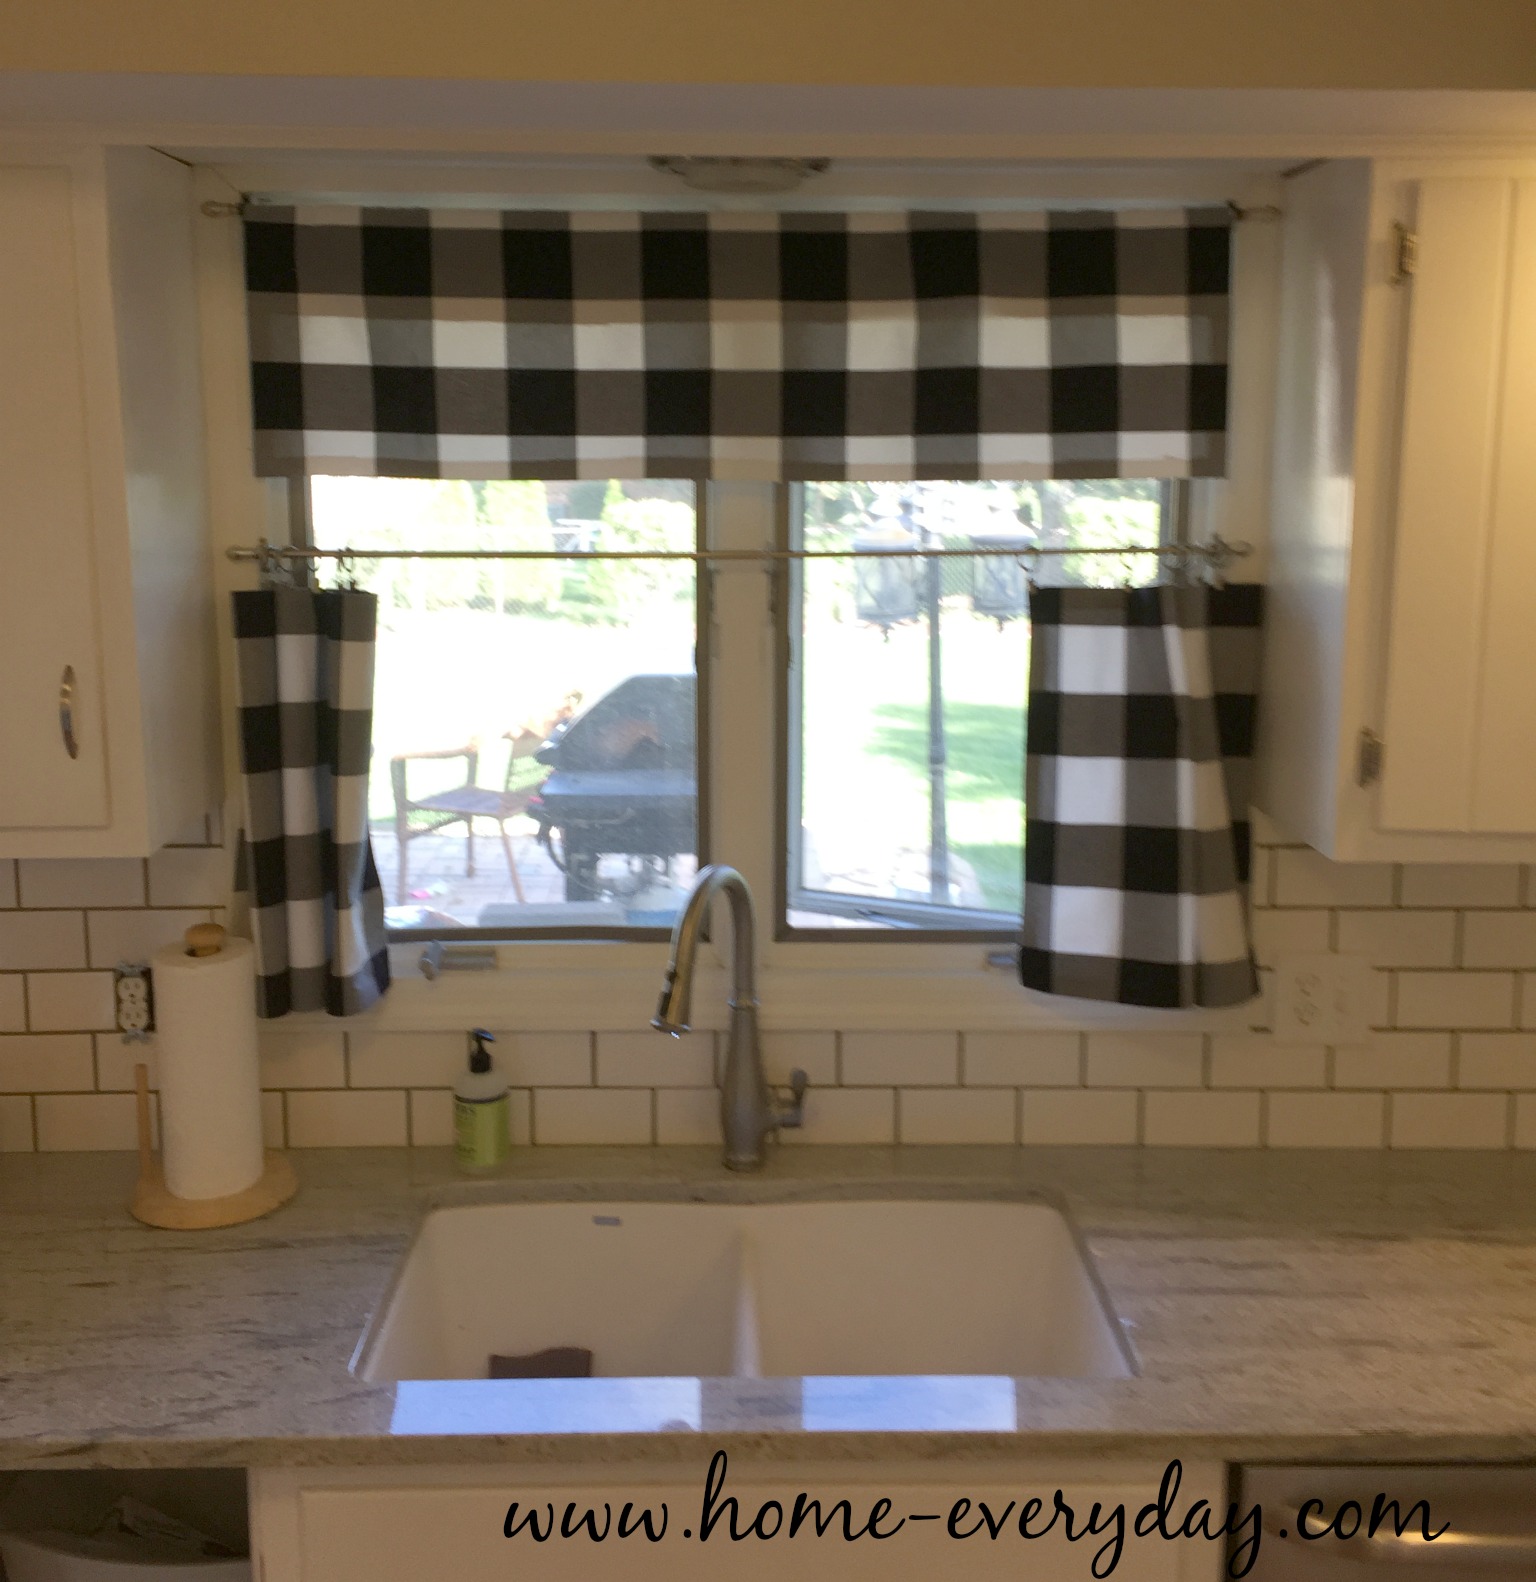
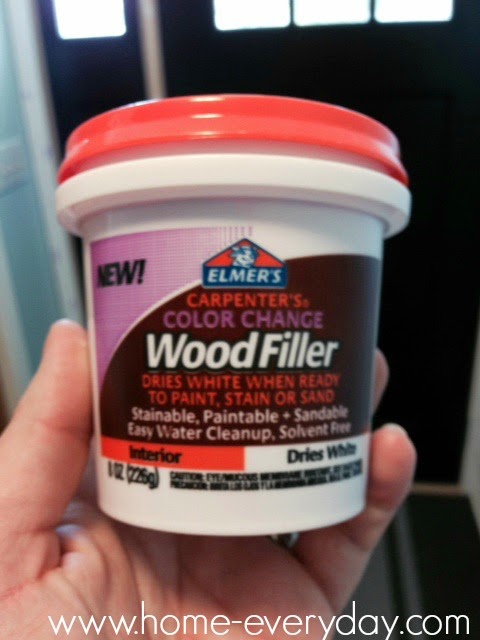
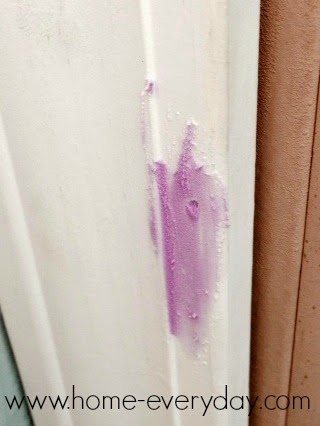
Then, it was crown moulding time. We used pre-finshed moulding to save us another step, because this was where we needed the most instruction. We had no idea what we were doing. We called in reinforcements with the help of our handy friend, Scott and a ASK This Old House Video. We figured out how to cut the moulding for an outside corner using our chop saw. After a few test pieces, we got the hang of it, and using the nail gun, we got it up there. Pro Tip: We did have a slight gap, however white painters caulk can fill any gaps, or nail holes in your finished product.

Built Ins Part 2 - 13

I touched up any paint that needed to be done.

Wiped everything down. 

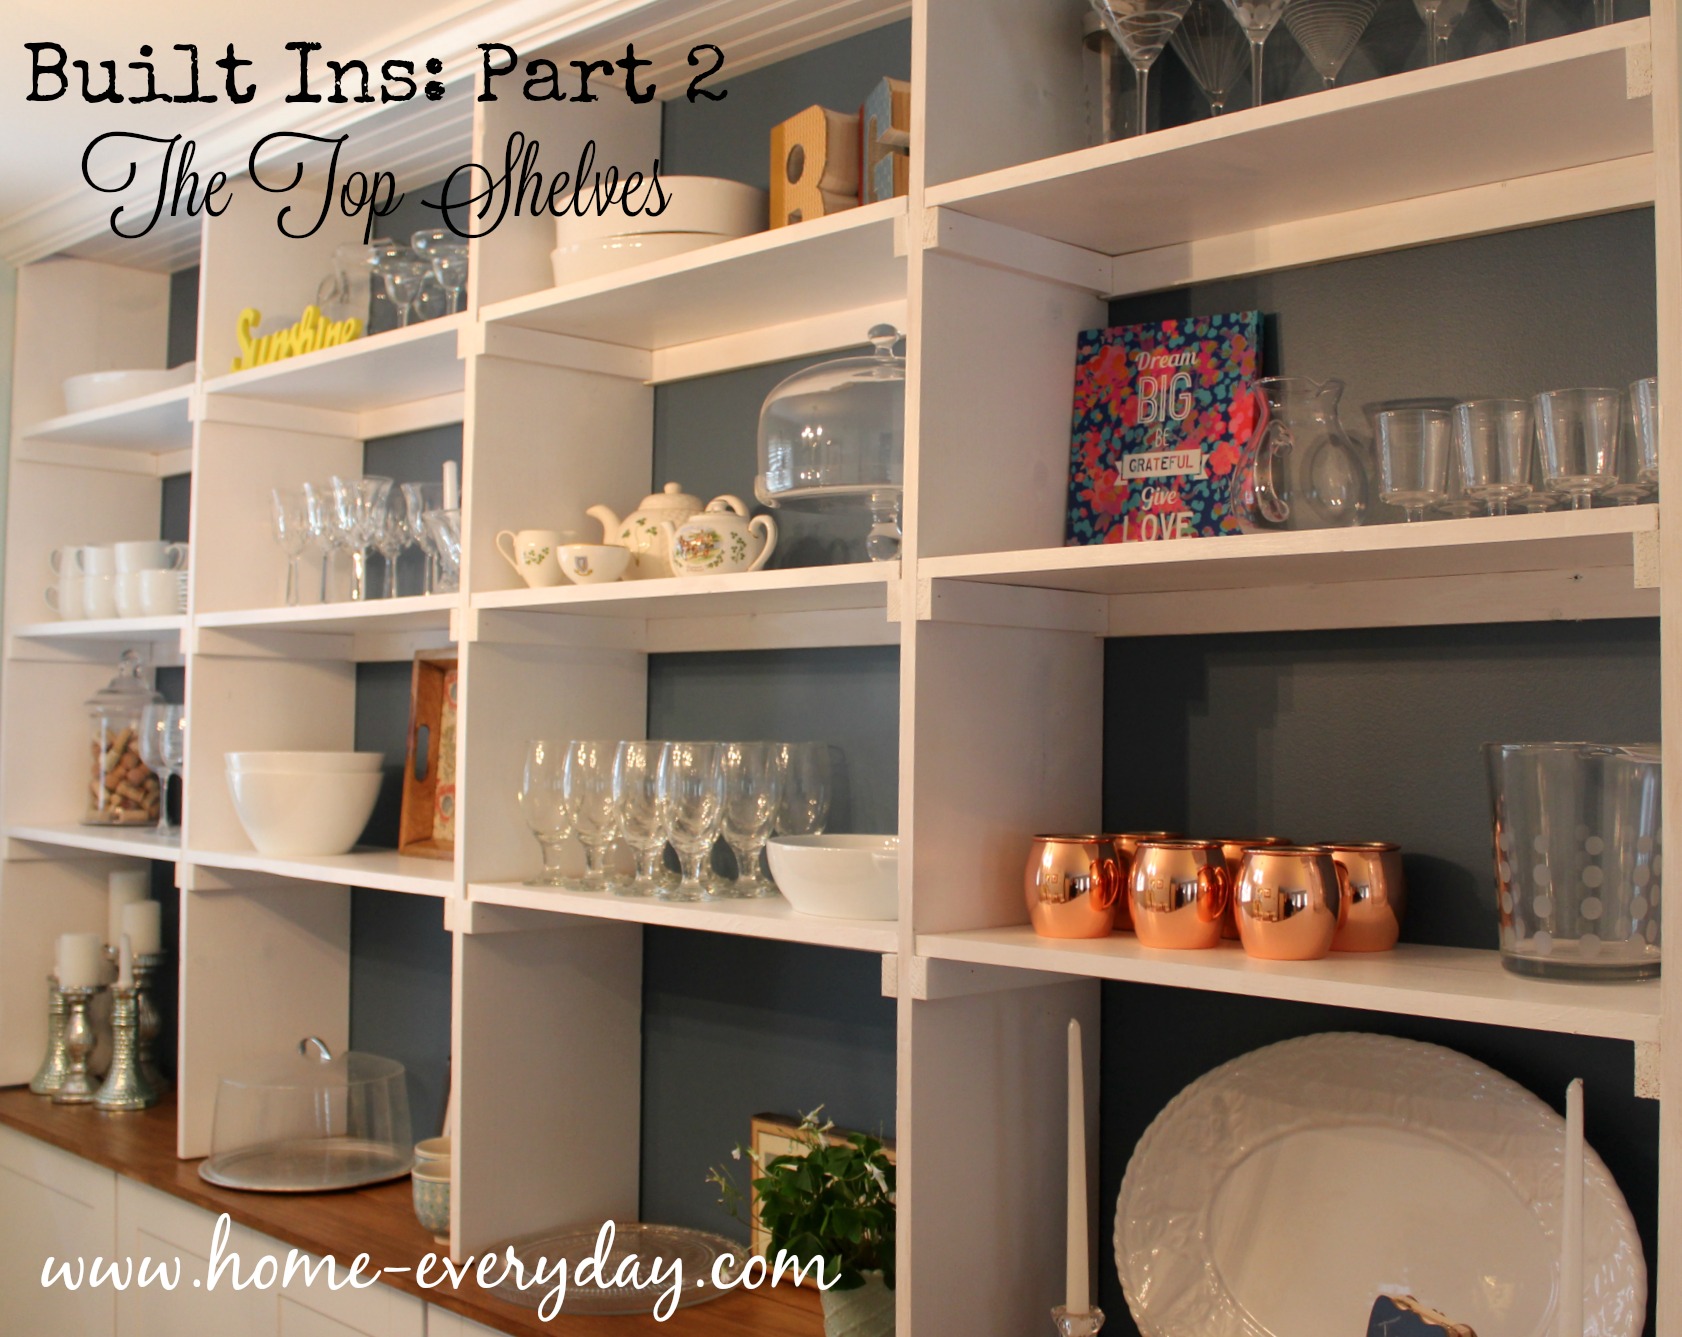
It took a few days, but I think I have them styled how I want them. 

Built Ins Part 2 - 14


For now.

BUILT INS FINAL 1


Kitchen Refresh: Countertop Installation

I’m sure you all remember my warning awhile back about being sure to say no to crack (especially in your countertops). The countertops were installed awhile ago, however, because our kitchen is easily the most used room in the house and we also installed a backsplash, a new microwave, a cabinet, did a little painting, and I made some curtains the kitchen was a mess. Then, I immediately started using my new kitchen for cooking and baking out of sheer excitement. Thus, the actual writing about my kitchen got put on the back burner (no pun intended).

I decided to write about the kitchen in stages though as to not overwhelm, otherwise it would be the longest post in the history of the blogosphere, so today we are just starting out with the countertops.

So, here they are! Don’t they look fabulous!?

Countertop Installation 10

Countertop Installation 12

When we finally decided on granite, the installers came out and did a precise measure of our space to let us know exactly how much countertop we would need and to also assist us with what kind of sink would fit best into our base cabinet. We decided on a granite composite sink.

This was my third choice. I wanted a farmhouse sink, but that wouldn’t fit our cabinets (sad), then I wanted a Kohler ceramic sink and that was on a 12 week backorder (I cried), so I did a little research, and this Blanco Granite Composite seemed like a good option. It was large and deep and white. So far I like it.

Once all that drama was done, a schematic drawing of the kitchen was made.

Countertop Installation 6

Next, were given the all clear to pick out two slabs of granite at a granite distributer. We had decided on a color and kind when we purchased our countertops, but since granite is a natural stone taken from the earth there is often many variances. Therefore, the fabricator often will let you pick a specific slab that appeals to you.

Countertop Installation 2

PRO TIP: You can sign off and allow your fabricator to pick out your slab(s) too, but we thought it might be fun to do it ourself AND also see a granite warehouse. Just remember that the slab you see is going to be slightly darker in your home after sealing and will be cut to fit your space.

This was my favorite part of the process. Look at all that natural stone!

Countertop Installation 3

Even though our granite is called River White, we picked a slab that had a lot of gray running through it with a lot of variances. We liked that natural and rustic feel.

Countertop Installation 4

After we picked our slabs, it was a few weeks before the countertops were cut and installed. To prep the kitchen I just had to make sure that everything was off the current counters and remove the drawers.

Countertop Installation 1

The installers removed our old countertops.

Countertop Installation 7

The installers also made sure to shim any areas that were not level due to the house settling too.

Countertop Installation 8

Then carefully installed the new granite countertops.

Countertop Installation 11

We did have to have one awkward area that had a seam, but it is perfectly sealed, and that process was awesome to watch. You can’t even tell where it is now.

Countertop Installation 9

Finally, the sink was installed. PRO TIP: Make sure that the sink you pick out is on site and removed from the box and checked for cracks or imperfections before your installation date. This gives you time to get is exchanged in time for installation day.

When everything was installed, the countertops were sealed and the sink was caulked. PRO TIP: Wait about 24 hours before hooking up the faucet, plumbing, and using your countertops. This gives everything time to dry and settle up. There will be a lot of dust and a slight film on the countertops. When ready for use wipe everything down with a mild soap and water.

Countertop Installation 11 Countertop Installation 12

Next up: Backsplash installation.


What Not to Do at a Home and Garden Show

Spring is almost here, which means Home and Garden Show time! Over the weekend, I attended my first Home and Garden Show and I learned a lot.

I saw some innovative home products, took a look at some cool home services, took home some cool tote bags, and best of all ran into an old friend.


However, I am the absolute worst at trade shows. I have a guilt complex. I feel horrible for these people standing there at their little constructed booths waiting or asking kindly for someone to talk to them. I hate that they are constantly getting rejected. Their products are getting rejected. They came all this way after all. Who could stand all that drive by rejection?

As a writer who has suffered more rejection than I care to admit, I feel for these booth people. I know that rejection. So, I will talk to them for a little while. (We have no intention of getting a hot tub, bathroom renovation, pergola, etc.)

I know, I’m the worst.

However, I always say, you can never be overdressed or overeducated. I did learn a great deal about some of the products and services I don’t need such as bathroom remodels so there’s that. Let’s pretend I did this in the name of education.

I also say, there is no such thing as a free lunch. In other words there is a cost to all of this education: I will be deleting emails from people providing products and services I don’t need for the foreseeable future.

When going to a Home and Garden Show or any trade show for that matter, here is a list of DON’TS (you don’t want to be getting emails for the next month because you couldn’t say no at a trade show.)

1. Don’t go in without a plan: if you are going to just look around, want to see bathrooms, kitchens, gutters, pools. Make a mental note of what you are there to see.

2. Don’t forget what household projects are coming up: many vendors offer coupons, discounts, and even raffles for prizes for patrons attending the trade show. Make sure you visit the booths of any current or impending home projects. For example, new countertops, and a basement remodel are in our future. I made sure to hit up any booth I could that might have discounts or promotions to help us with these projects.

3. Don’t talk to anyone you don’t want to: people at trade shows are there to try and gain your business, but they also want to talk to people who are seriously considering their products or services. If you live in a condo, don’t get sucked into talking to a landscaper for an hour. A polite “no thanks” will do the trick and move on.

4. Don’t go in clueless: get a map of the convention center area or talk to someone running the trade show and get a lay of the land. This will help you find where specific booths are so that you can plan your time accordingly.

5. Don’t give out your information unless your’e ok with people contacting you: this is a no brainer, but unless you want to set up an appointment for an estimate for new gutters go ahead and take their card or pamphlet and tell them you’ll give them a call when you’re ready to do business.

6. Don’t go to a trade show without having a little fun and getting a little swag: When going to a trade show, I always leave some time at the end for visiting a few booths that look interesting or have cool demonstrations or let’s face it neat swag. I usually will hit up those booths last if I have time.

7. Don’t wear heels: Just don’t, unless they are the most comfortable shoes you own. Trade shows are for walking and gathering information and collecting tote bags, save the good shoes for date night.

Now, that you know what not to do at your next Home and Garden or trade show you should go online and see when the next one in your area is. Spring is almost here after all!

If you like this post and would like to read more about all things domestic with a touch of humor, become a Home Everyday follower! For blog updates or to see other places I write such as ChicagoNow or Chicago Parent follow Home Everyday on FacebookTwitter, and Pinterest.

Venturing into the Sub Basement: Planning a Man Cave for My Man

We are in the very beginning stages of thinking of what to do with our sub basement. That’s right! I bet you didn’t know that we had a sub-basement.


It is because, since we have moved into this house, it literally has been our dirty little secret. When we moved in, the previous owners had divided up this space into bedrooms. However, we started tearing down walls in the hopes of creating another living space or perhaps office space for me and Brian.


Upon tearing down walls, we found one of the most awful things you can find in an older home: 

BLACK MOLD!


Obviously, rather than do the pretty upgrades and make a cool space, we had professional mold remediation done immediately before moving in. That pretty much sucked up any money we had to do anything cosmetically to the space. So, it has sat empty with a concrete floor and partially demo’d for the past few years while we figured out what to do.


Now, that the trauma is over time has passed we are starting to figure out what we want to do down there again, and we are kind of toying with the idea of an adult space. Maybe even a Man Cave.
Brian has never been one to actually ask for such a space. He deserves it though, and if I could do this for him I definitely would in a heartbeat. I know a lot of men work hard for their families, but I was thinking about my man, and he really loves his job. He works trying to make technology better for school districts every single day. He wants kids, teachers, and administrators to have a better and easier time with technology. He hopes they can have the best possible equipment they can afford and to use it in a way that will better the educational experience. When he isn’t working his day job, he is helping other schools in need by consulting or helping on committees to make them better too. He knows his own kids are blessed, and wants other kids to have the same opportunities too.
This year he coached soccer for both boys, meaning some Saturdays he was running form one game to the other. He dubbed himself the CEO (Chief Encouragement Officer), and was the loudest cheerer for Kindergarten and First Grade soccer teams. He came home with a scratchy voice almost every Saturday. He volunteers in our church, and despite the fact he is a Green Bay fan spends a fair amount of time helping with laundry, cutting the lawn, and helping me with my little (ok sometimes big) projects. 

And he’s handsome too!


If you walk into any room in the house you’ll see it definitely has the Erin Thumbprint, so I was thinking of things that would be awesome to incorporate into the new room that would make it seem more Brian.Man Crates Gifts for Men the very manly gift baskets you have to open with a crow bar, recently reached out, and wanted to know what I would include in a space for Brian. Man Crates is trying to class up the traditional Man Cave, and thank goodness! I am so over the futons!!

Since it has been on my mind lately, I thought I would make up a mood board.


Brian's Man Cave


Brian’s Man Cave by erin-debruin-skibinski featuring graphic wall art

First up, practicality is huge for Brian, so the space would need to have all the things that Brian would use.
Desk: A nice industrial spirited desk for him to work from home. The sub basement has a closet for him to store all of his tech gear, but the desk would give him a place to spread out and work in peace (or with some hockey on in the background.)
A treadmill: This is something Brian has been toying with for awhile, and it would be great for him to have a place to when we have brutally cold winters.
Couch, Chairs, Rustic Coffee table, and TV: These things are where he can escape and watch the Packers, Blackhawks, or his favorite funny movies with the kids or when his friends come over.  The extra large coffee table is great too for all the times he likes to play cards or board games.
The outlets with USB portals: These are perfect when his friends want to plug in their phones and check in on their fantasy teams.
A Mini Fridge: This is great for all the cold beverages he want to have on hand for after a workout or while watching a game.
I chose a green and yellow color scheme with the rug and chairs as a nod to his beloved Green Bay, and left everything extremely rustic as he loves doing wood work. I’m thinking we could even make the desk and coffee table ourselves. As for decor, I thought it might be fun to find some vintage movie posters or even put up his Vince Lombardi poster.
This is a man cave, I don’t think I would mind hanging out in, what about you?If you like this post and would like to read more about all things domestic with a touch of humor, become a Home Everyday follower! For blog updates or to see other places I write such as ChicagoNow or Chicago Parent follow Home Everyday on FacebookTwitter, and Pinterest.

ChicagonistaLIVE and Floor & Decor: Great Design and Conversation

I have been compensated for this post, but the thoughts and opinions are my own.

Last week, I had the pleasure of joining the women of ChicagonistaLIVE as they broadcasted live from Floor and Decor in Skokie. There is nothing more wonderful for me than when you combine home decor and good conversation so I was thrilled to be a part of this experience.

Floor and Decor was not only filled with every kind of flooring option possible, but also has everything you need for tiling your bathroom, shower, kitchen backsplashes, mudrooms, stones for outdoor spaces and fireplaces, laminate, and hardwood, but also Floor and Decor also has everything you would need to install it. From the saws to thinset, backer board to waterproofing materials, Floor and Decor has everything. Well, almost everything. For running water, I’d have to head back home.


Thanks to Maria Ramos of A Savings Wow for taking this photo.

Everything that Floor and Decor has can be overwhelming, but that is why there are designers on staff to help you with every decision that needs to be made as well as help you find the materials that will fit your lifestyle and budget. We were able to take a tour of the the store with the designer, who taught us a great deal about design and installation, and perhaps gave me a little confidence to try a backsplash on my own (don’t worry Brian, I won’t do it just yet).


Also, my favorite part of the day was when the wonderful women of ChicagonistaLive allowed me to be a guest on their show and ask for some advice. I was looking for a way to incorporate marble tile into a kitchen or bath without breaking the bank, and Floor and Decor had just the right solution. Long story short: less is more.


I was so excited to be a part of this experience, and hoping that I will be able to do it again in the near future! For more information about ChicagonistaLIVE LIKE them on Facebook or follow them on Twitter. To learn more about Floor and Decor LIKE them on Facebook or follow them Twitter.


If you like this post and would like to read more about all things domestic with a touch of humor, become a Home Everyday follower! For blog updates or to see other places I write such as ChicagoNow or Chicago Parent follow Home Everyday on FacebookTwitter, and Pinterest.

Follow on Bloglovin


Ease and Comfort in Your Home with ChicagonistaLive & Floor and Decor

I have been compensated for this post, but the thoughts and opinions are my own.


When you think of the word HOME, what are some words that come to mind? Some people might prefer a cozy and warm space, where others prefer one that is light and airy. Home might convey a place of serenity or for others might be a place of productivity. For all of us, home is different, but I would be willing to bet that we can all agree that that two words we all want to associate with our home are ease and comfort.

From top to bottom, every part of our home should be easy to take care of and make us comfortable. That is why I am so excited to be working with Chicagonista Live and Floor and Decor in Skokie to talk one of the most essential parts but often overlooked parts of our home: our floors.


On Tuesday, September 16 from 2:00 pm until 3:00 pm CST you will be able to watch the wonderful and savvy women of Chicagonista Live discuss all things flooring at the new Floor and Decor opening in Skokie, IL! If you want to chat with them or me who will be touring the new Skokie store (and gazing longingly at the rectangular Teak Stone Gray porcelain tile or array of hardwoods), you can join us on Twitter using the hashtag #ChicagonistaLIVE.

Let’s face it, floors are where it’s at when it comes to establish both ease and comfort in any home, and Floor and Decor has every kind of flooring option to help. With 4 Chicagoland locations and the lowest prices in flooring (we are talking no middle man), it is easy to consider Floor and Decor if you’re in the market for new flooring. You can look at stones like travertine and marble, hardwoods, laminates, vinyls, porcelains, ceramics, and even decorative tiles (travertine, people!).

Like many homes, ours is a busy place with so many high traffic areas. I have found over the years that maintaining a clean home is as much about maintaining my sanity as it is about about anything else, and it starts with the flooring. However, I also want our floors to be comfortable for our little ones. Kids want a place they can run in bare feet and play.


I am so excited about heading to Floor and Decor to talk flooring with Chicagonista Live and get some advice about different types of flooring options for different areas of our home. As you know, we did a great deal of work to our home when we moved in, and we are always looking to upgrade when we can. A few projects on our “to do list” are to finish our basement and to replace the flooring in our kitchen to make it a little easier to clean and a little more inviting. I cannot wait to see what Floor and Decor suggests!

Do you have any flooring dilemmas? What about any flooring suggestions? Visit http://chicagonistalive.com on Tuesday, September 16, from 2:00 until 3:00 p.m. CST to learn about ways to add ease and comfort to your home, and you might even see me!

If you like this post and would like to read more about all things domestic with a touch of humor, become a Home Everyday follower! For blog updates or to see other places I write such as ChicagoNow or Chicago Parent follow Home Everyday on FacebookTwitter, and Pinterest.

Follow on Bloglovin

Filling Nail Holes and Painting Trim

About a year ago, we got a new front door. We absolutely love it, but in that time we had to replace it and get a repair because there was a nick in it upon delivery. By the time that was all said and done, many more months went by.

Now, that everything is installed properly and finally ready to go, I was able to fill in the nail holes and paint the trim around the door to make everything seem more finished. This seems like a project that would take awhile, but honestly I was able to do it in two nap times.
Ah! That’s better!
To fill the nail holes, I used Elmer’s Wood Filler. There are several different kinds, but this one a.) seemed easiest to use and b.) changed color when it was completely dry. Both of these features seemed like it would cause less issues when it came to user error.
Using some gloves, I actually used my fingers to filled the holes with the wood filler. I started by using a putty knife, but found I wasn’t truly filling some of the deeper nail holes. Also, knowing I would be sanding everything smooth once it was dry, I was ok if things were a little messy.
In the past, when filling nail holes, I would wait 24 hours before painting anything to make sure it was dry. However, this product lets you know it is try by turning from purple to white. However, just to be safe, I waited another hour before I began sanding.
Once all the nail holes were filled with wood filler and sanded smooth. I was ready to paint. I used the same white semi-gloss paint that I have been using for all the other trim in the house so I was happy to have some on hand. Armed with my angled short handled brush I got to work. I carefully painted the trim, and then let it try over night, and gave it a second coat the next day at nap time.
I am so happy this little project is finally finished, because now that the paint supplies are out, I can begin another paint project soon.
If you like this post and would like to read more about all things domestic with a touch of humor, become a Home Everyday follower! For blog updates or to see other places I write such as ChicagoNow or Chicago Parent follow Home Everyday on FacebookTwitter, and Pinterest.

Follow on Bloglovin

A Happy Home and a GIVEAWAY from hhGregg

When I think of a happy home, I think of one that not only contains my most favorite people, but I think of one that functions and has synergy.

When Brian and I lived in our 2 bedroom condo, we loved it because that was our first home and where we brought home our oldest kids, but we always knew that it was a temporary place. It wasn’t long before we were outgrowing that space. When things seemed backwards or when we used our dining room as an office or a bedroom closet as holiday storage, we never really thought too much about it. It wasn’t perfect synergy, but it worked at the time because it was temporary.
When we moved into our current home, it was all about happy function. We wanted to make things our own in the sense we wanted it to be personal to our not only our style but also what worked for us as far as function goes. Using a painted dresser as our command central is a perfect example of our home’s synergy. We like to repurpose old pieces that have meaning and we find beautiful, but these pieces also need to have some serious purpose in our home.
Sure, there is junk in my home, but for the most part everything in my home has a purpose. Whether the purpose is for business or pleasure, I try to strike a balance that creates a happy space.
Some fellow bloggers and I had the pleasure of attending the Happy Home event at my local hhGregg recently, and was so happy to see that I am not the only one striving to strike a balance between functionality and decor in my home. hhGregg is trying to do that as well! From large appliances to furniture, technology to kitchen gadgets hhGregg has everything you need to create the happy home you want.
One area that we are currently looking to improve in our home is our laundry room. Brian and I have been in the process of demoing our sub-basement and know that once that space is finished the laundry room isn’t going to be far behind. Just like a good washer and dryer, hhGregg and Maytag are a perfect pair and helping families follow the latest trends in laundry rooms. Whether you like top loaders or front loaders, or just need to spruce up your laundry room with some storage or drying racks hhGregg are here to help. Just check out some of these amazing laundry spaces on the hhGregg Pinterest page.
Gorgeous right? hhGregg is having a $25 gift card GIVEAWAY for Home Everyday readers to get you started on the journey to a happier home!
To enter, leave a comment telling me about what your favorite space in your home is, and then let me know in the form below that you left a comment. You can also get two additional entries by following my Home Everyday’s Facebook fan page and following me on Twitter.
a Rafflecopter giveawayIf you like this post and would like to read more about all things domestic with a touch of humor, become a Home Everyday follower! For blog updates or to see other places I write such as ChicagoNow or Chicago Parent follow Home Everyday on FacebookTwitter, and Pinterest.

Follow on Bloglovin

Friday Fails: A Job a Anyone Can Do

Since I have
started Home Everyday, I have had my share of fails. Let’s face it, failing is
not exclusive to DIY or blogging. Since I love a good theme, everyone loves a
funny story, and we can all learn from failing, I thought I would start another
series here at Home Everyday called Friday Fails.
Like Thirsty
Thursday, this was an idea of my sister, Beth. Like the good older sister she
is, Beth has been threatening to start her own blog telling “the rest of the story”
explaining all of my fails to everyone. She does have a point though. As a
student of comedy, and one who loves a good lesson I thought I would beat her
to the punch and just bust myself.  After
all, Tragedy + Time = Comedy, and now that I have had a bit of time to process
these things, I am able to laugh about them, and now share them with you.
So welcome
to the first of what I am sure are many many Friday Fails.


For those
that don’t have the pleasure of living in the Midwest, you had to hear about
the horrendous winter we had second hand. As sorry as I am for the people who
had to live through the winter, I also feel sorry for the people who lived
somewhere much more mild but had to hear our constant whining about how cold it was here. It is
like when someone orders a spciey tuna roll at a sushi restaurant knowing it is going to be spicy and then all you hear for the rest
of the meal is how hot it is. We get it, its spicy, you knew it was going to be.
In our
defense, though, I am 33 years old, I have lived in the Midwest my entire life, and I
have never experienced anything like the winter we just had. Also, considering
we are just coming off the first nice week we have had since September 2013, I
think we have some room to complain. 

Finally the trees are blooming in my yard!


When there
is a winter like the one we had complete with tons of ice, snow, and bitter
cold, it has potential to do some structural damage. Our house experienced what is known as an
ice dam. This is when ice actually gets so heavy and thick and gets trapped
UNDERNEATH the shingles on a roof. When the ice melts, the water has only one
place to go and that is into your house. So the ice was melting underneath the
shingles, through the plywood, into the attic and into our our kitchen ceiling. There was water coming in through where our light fixture attaches to the ceiling. Fun, right? 


It was only
a small section, and compared to most people, we considered ourselves pretty
lucky. We had the roof repaired, our gutter rerouted so water will no longer
collect on the roof, and the ceiling damage is scheduled to be repaired soon. Everything is fine. Almost.
We
noticed that the light fixture in our kitchen didn’t seem to be working correctly. When the light was on for even a few
minutes it would begin to flicker. This made Brian and I nervous. We thought
that perhaps there could be water in the light fixture some how.
Brian and I
like to consider ourselves pretty handy people. Whenever we are questioning our
“handiness” or DIY capabilities we say, “But we built our dining room table for
pete’s sake. We can figure it out.” However, when it comes to electrical and
plumbing. We don’t’ like to mess around. Sure we can put in a light fixture,
fix a clogged toilet, but we are not equipped to handle a water damaged
electrical line.
So, we called
our electrician.
When our
electrician arrived, this is the conversation that transpired.
Me: Hi,
Carol. Thanks for coming!
Carol: No
problem. What’s going on?
Me: Well,
Brian said he told you about our ice dam and our leak. The water was
coming right from where that light fixture is, and now the light flickers, and
we are just worried there could be some kind of water damage and we don’t want
to mess with that.
Carol: Ok,
well let me just turn the light on. Oh, so I see you use compact flourescents.
Me: Yep.
Carol: Well,
have you thought about changing the light bulb in this light fixture.
Me: (Blank
stare.)
Carol: I
mean you have changed it since the water?
Me: Well,
no. We didn’t want to use this light because there’s water damage.
Carol: Let
me just take a look at the light bulb here. (takes glass off light fixture,  unscrews light bulb) Yep, look at that. This
is a bad light bulb. Sometimes they flicker right before they are about to go
out.
Me: (fumbling like an idiot) The
light bulb?
Carol: Sure,
just go get me a new one, and I’ll switch it out for you and we can keep and
eye on it for a minute, just to make sure there’s no more flickering.
Me: (heat
rising in my cheeks) Ummm, ok.
Carol: Is
that all you had for me today?
Me: Well,
Brian will be home any minute, let me grab that lightbulb and he can tell you
when he gets here.
Carol: Sure,
no problem. That’ll be $150.
Me: (shocked
face)
Carol: Just
kidding!
I was
mortified.
But this
story only gets better (or worse depending on who you are). You see, not only did Brian and I call an electrician
out to change a light bulb, but we had just done some rearranging in the
basement and I couldn’t find a damn light bulb!
I was
frantically searching/stalling in the basement, knowing Brian would be home any
minute to rescue me. Fortunately he did and found a lightbulb for Carol.
Thankfully, he also had another teensy question for Carol to help me save (my very red) face.
In the end,
Carol didn’t charge us (she’s an awesome electrician). Also, she probably figured she has an excellent story to tell at
parties for the rest of her life.
You may want Brian and I to relinquish our DIY cards right here right now. I don’t blame
you. I mean we called a liscensed professional electrician to change a
lightbulb. This is clearly a job a monkey could do. Well, maybe not a wild
money, but maybe a trained one.
Regardless, we
did learn that it IS to be better to be safe than sorry. Oh and change the
light bulb and give it a go before you call an electrician. 


If you like this post and would like to read more about all things domestic with a touch of humor, become a Home Everyday follower! For blog updates or to see other places I write such as ChicagoNow or Chicago Parent follow Home Everyday on FacebookTwitter, and Pinterest.

Follow on Bloglovin

Brushed Nickel Linings Playbook to Faucet Repair

Last week, I shared that we had a bit of stress around here regarding some home repairs. As any homeowner knows, sometimes one thing leads to another when it comes to fixes.
In our case, a new hot water heater, in a kind of distant way led to the installation of a new kitchen faucet. The story kind of has a “Brushed Nickel Lining.”

After attempting with failure a few different options (new hoses, and a sprayer) on the old kitchen faucet, we decided it was time for a new one. We shopped around at Home Depot knowing that they carried Kohler fixtures, and we had a coupon and some gift cards.

While I would like to be upset (because of the time, money, and aggravation) this is now in my kitchen.

As Sarah Richardson always says, “fixtures are like the jewelry to any kitchen or bath.”

The reason we chose Kohler is because in our condo we had tried other brands of kitchen faucets. Also, the fact that we even had to replace a faucet after only living in a house for two years kind of made us feel like it was time for an upgrade. In addition, we read lots of online reviews and talked to people we trust about the brand. We knew this was kind of an expensive purchase, but to be honest, it is probably saving us money in the long run.

We decided on the Kohler Cruette. I liked the high curved neck for filling and washing big pots. Brian liked the built in spray hose that extends from the faucet as opposed to a separate one, and we both have an affinity for brushed nickel.


This decision was made as quickly as most of our major purchases due to A.) When you have 3 kids with you at any store there is a need for urgency B.) Brian and I have similar taste and C.) We typically go for price and practicality.

We brought home our new faucet, and then we sat on it for a day. We were operating without a kitchen sink ok, and Brian wanted to read up and watch a few tutorials on faucet installation and make sure we read through the instructions a few times. He also wanted to make sure we had everything we needed to do this job ourselves.

After living a few days without a kitchen faucet, we decided it was time. Brian was able to do this a few hours with the assistance of our littles ones.


Our kitchen sink went from this:


To this:


Brian and I are in no way plumbers, and I am sure that all faucets might have their own quirks and be installed their own way, so make sure you read the directions for your faucet carefully, watch a few tutorials of your own, or call a professional to install.


With that being said, we did learn a little bit. For example, the hole in our countertop was not large enough to accommodate the new faucet. It was literally millimeters off. So, we sanded the inside of the hole a bit and that allowed enough room for the new faucet while still being a snug fit.

We are so happy with our new faucet, partly because it is so gorgeous but mostly because it isn’t leaking into our sub basement anymore.

If you would like to read more about the home projects that happens here, or enjoy gardening, DIY, Cooking, Baking or all other things domestic you can check me out on Facebook or become a follower of Home Everyday here


Follow on Bloglovin