Month

May 2013

The Backyard in All Its Glory

I will never forget the day we first toured this house. We were so excited to see this house as it was in our “dream neighborhood”. It was a beautiful crisp autumn day. The trees lining the street to our house were every shade of orange, red, and yellow. The house next door had kids jumping in piles of leaves. The sun was shining.

When we first walked into the house, we knew we liked it, but after living in a two bedroom condo for the last few years a large backyard was a big priority for us. We saw the living room and the kitchen, but immediately asked our realtor if we could see the backyard. They opened the patio doors and the boys ran out into the sunshine in the backyard, and started kicking around a soccer ball they had brought. They were in love.
After looking at the rest of the house. So were Brian and I.
The backyard (as well as other landscaped areas of surrounding our house) has undergone some huge transformations since we have moved in two years ago.
When we moved in, we really like the brick paver patio, however there was a huge above ground pool with a rickety deck. Also, there were some trees and shrubs, but there were definitely some areas that were overgrown and needed some TLC.
Brian and I decided to just tackle the yard a little bit at a time.
The first order of business was to remove the pool and deck. Neither were kept up very well, and were not safe. So, Brian tore down the deck and pool.
Next, we had some landscapers come and remove any dead overgrowth as well as sod the area where the pool used to be. They added a little mulch area to add some plants.


Finally, Brian and I also built two raised beds for our vegetable garden. You can read more about how we built them HERE.


We were happy that the pool was gone and that there was plenty of room for the kids to run around, but the yard seemed unfinished.
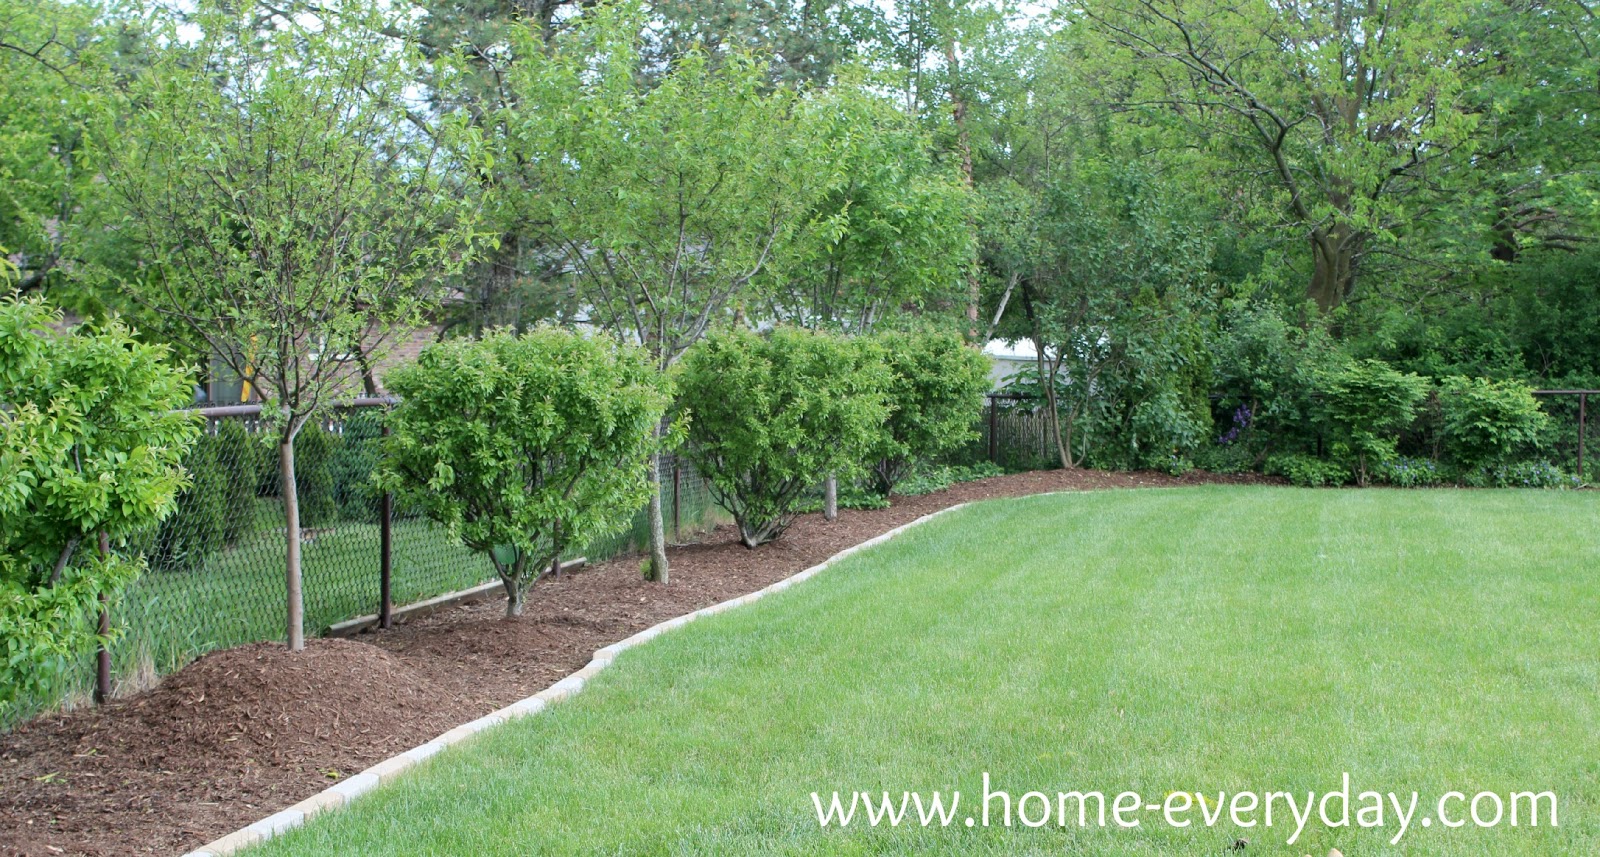
This year, we decided to add a little more dimension to the backyard and asked landscapers to come back this spring to add some bullet edging and mulch to the entire perimeter of the backyard. Also, they removed some other dead bushes and trees, and added a few other elements such as a two more crab apple trees.


Also, on the side of the house was a huge island that was filled with nothing but some dead bushes and overgrowth.
The landscapers removed everything that was dead, kept the nice flowering tree, and surrounded that area with rocks and bullet edging that is consistent with the landscaping in the front of the house.
There are some other things in years to come that we would like to do, but for now we are happy that we have wide open spaces, a healthy lawn, and some mulched areas to add some flowers.
We’ve come a long way from this:
To this:


I think this weekend, we will celebrate with some s’mores in the fire pit!

A Little Treat: Brownie Pops

Cake Pops seem to be all the rage right now. In fact, all portable or teeny tiny desserts seem to be quite popular. My friend Jocelyn over at Grandbaby Cakes recently made two different kinds of pie pops (here and here).

I get the appeal. They are cute and usually decorated adorably. Also, miniature desserts also play into what I like to call “the fun size logic.” This is the logic that because something is smaller, you can eat more of them without any guilt. Kind of like fun size candy bars.
Don’t act like you don’t know what I’m talking about.
Anyway, I thought I would try my hand at these teeny tiny desserts, and I made brownie pops.
For this recipe, I used my favorite Betty Crocker box brownie mix and baked them according to the directions. Typically, I like scratch brownies best (like these), but I was afraid they would fall apart too easily. You can bake any kind of brownies you like.
Once the brownies were baked and cooled completely. I put them in the refrigerator for about two hours just to harden them a little more. The last thing I wanted was for them to be falling apart.
While the brownies were in the fridge I gathered up the rest of what I would need.
1 package lollipop sticks
1 package Wilton Candy Melts in white.
and rainbow sprinkles.
I cut the brownies into 1/2 inch by 1 1/2 inch rectangles. I found that this size worked well.
I then inserted a lollipop stick into each brownie like so.
Next, I melted the candy melts in my double boiler. Once they were a smooth consistency I tipped the brownies in the mixture and then immediately in the sprinkles.
Ta Da!
A pretty and portable sweet treat. Maybe I will let the kids have two, you know because they are fun size.

Last Day of School is Drawing Near…

… and to be honest I have mixed emotions. They boys absolutely loved school, their teachers, their friends, and everything that comes along with it. I am of course a little sad because it means my munchkins will not be little for much longer, but I am also excited for the carefree days of summer ahead.

We do have a few activities planned for the summer such as soccer camp, t-ball, swim lessons, and intro to ballet, but for the most part we will probably spend most of our time out in the sprinkler or coloring pictures.
On the first day of school, I of course took photos galore, and I didn’t want the last week of school to be any different. I even let Caroline in on the fun. As a little tribute to this school year, I added my favorite quotes from the kids.
This is one of those things that Caroline says that I will have to remind her of when she is in her teens.
Russell’s teacher informed us that a few weeks ago in some frustration, asked if he could make an announcement to the class. He really wanted to go outside and everyone seemed to be acting up. He gave everyone a little pep talk.
George said this to me a few months ago, and my heart just melted.


HAPPY HAPPY SUMMER!

Lunch on the Go: Summer Picnic Tips

With the Memorial Day being the unofficial start to summer and kids getting out of school, it means that it is time for family vacations, camps, plenty of time outdoors, and day trips. With us out an about much more, many times meals and snacks need to be eaten on the go. While I do pull into the Culver’s drive through occasionally, this is not a regular occurrence. Also, I realize that packing lunches isn’t much different than the school year except I thought about it a little more and realized that kids at school are eating lunch sitting at a table, indoors, and come home right after school to a snack. Also, when you have picky eaters and kids with allergies, nothing ruins what is supposed to be a fun time like a hungry or sick child.

In the summertime, day trips often call for multiple meals on the road as well as sometimes eating on a blanket outside or if it is raining in the back of the car. With that said, planning for meals away from home takes a little bit more planning.


Here are a few tips I’ve learned:

– When I’m meal planning for the week (you can read more about that here), I make sure to plan portable meals for the days we plan to be out of the house and make sure to add portable foods to our grocery list.
– I think finger foods are the way to go, the less utensils you need for the day the better.
– I hardly ever bring napkins when picnicking anymore. I bring an extra container of wipes. They clean sticky hands and faces better, and they can be used to wipe down picnic tables before eating.
– Some things are better prepackaged like yogurt tubes, applesauce cups, or juice boxes. Typically, I don’t like the extra expense and waste of pre-packaged foods, but when you are on the go, it really is easier to just throw things away than have a bunch of dirty tiny containers or sippy cups to clean when you get home.
– I always pack for the meals we will be out for plus one extra snack. You never know when you are going to get stuck in traffic, make a pit stop, or decide to stay where you are a little longer.
– For long trips, we have invested in an electric cooler like this. We bought it five years ago, and I have to say it was one of the best purchases we have ever made. It was perfect for pre made bottles, storing milk when I was breastfeeding, keeps drinks cold, allows us to pack things like yogurt and cheese, and holds more than a regular cooler because we don’t need ice. Ours comes with an AC adapter for the car. We plug it in the car and we are on our way. When we get to our destination, we use an outlet there.
– I always make sure to pack everyone’s water bottles, and periodically refill them throughout the day. Hydrated kids (and parents) are happy kids (and parents).
– I often free grapes, berries, and yogurt tubes. I put them in the cooler and they are a great cold treat for a hot day frozen or thawed.
– Everyone at our house has their own “picnic” container. I found them at Target last year. They are just divided reusable plastic container with lids. Sometimes, I even divide them further using paper muffin cups. This is perfect because everyone gets the meal or snack made to their needs or wants.


This past week, the weather was perfect for spending the day at the zoo. I packed up lunches, snacks, blankets, and sunscreen, and we headed out for the day. For the kids I packed some assorted berries, cut up cucumbers, cheese sticks, crackers, yogurt tubes, and Goldfish crackers.


For myself, I packed some berries, some Mexican Quinoa Salad I had made the night before, and some tortilla chips.


We had a wonderful day, and got stuck in traffic on the way home. Thank goodness I had snacks and water bottles to hold everyone over until we got home.

What is your favorite picnic food?

It’ll Take Longer Than You Think: Yarn Letters

I like to keep it real at Home Everyday. I don’t give any false impressions that everything around here is perfect, or that I spend my days in an apron cooking, remodeling, baking and gardening. My house does indeed get messy, currently we have laundry stacked to the rafters, and I should probably wash the kitchen floor.

There are also some projects that I start with the best of intentions, and they kind of become well a fail. Similar to this recipe post of yore.

Recently, I started a project with the kids that I thought would be a ton of fun, and be a cute addition to their bedrooms.

I saw these cardboard letters at JoAnn’s for less than $3 a piece.

Then I found this yarn in the clearance bin.

I thought we could wrap the letters in yarn, and the kids could have little monograms hanging on their doors or over their beds.

The idea of this project was adorable. I couldn’t wait to do it. My kids on the other hand, lost patience with wrapping the string in about ten minutes. I realized that this is a project that would have to be done a little bit at a time, and I also thought maybe it was something we could do on a rainy day or watching a movie or something.

Nope.

Every time I ask the kids if they want to work on their letters, the answer is a resounding, “NO!”

So, we play outside instead.

That is ok, I will finish them eventually, maybe after I put all the laundry away.

I’ve Got Mad Skills: Photography Skills

I don’t really have mad skills, but I have to say, I am getting much better at using my Canon Rebel. We purchased this bad boy back in the fall, and I have been playing around with it a little bit.

One thing I know about myself is what kind of learner I am. I have to say that instruction manuals and tutorials online can be helpful, but I do much better with YouTube videos, someone explaining something to me, or fiddling with a gadget.

Sometimes, I will just take the camera outside, and play with the different settings. I also have learned how to take photos from different angles.

Since the weather has been much warmer we have been spending more time outside and making more trips to the zoo and other outdoor locales. Here are some favorite shots so far.

This is my absolute favorite. I may frame it. I actually turned the camera to be underneath the tree to get blue sky as the background.

I love how the bubble is in the foreground of this picture. Bubbles move quickly and sometimes can’t be captured, but I finally got one complete with my little one chasing it.

This one is of our first day to the zoo when the weather broke.

This is an Okapi. The kids love this animal, and always ask to see it when we go to the zoo. They are very shy though and kind of stay in the trees and are hard to see. I finally snapped a picture of one at just the right time.

Any pictures of flowers this time of year, make me happy.

Has anyone else been honing their photography skills?

Vegetable Garden 2013

Over the weekend, Brian and his Dad were able to get a lot of yard work done, and even helped to till the vegetable garden and add a few bags of mushroom compost to the beds. This was a wonderful help as then all the kids and I had to do was plant the seeds.

On Friday, I mentioned that we were going to plant a great deal less this year to help avoid crowding. So, with the help of the kids, we planted broccoli, carrots, lettuce, peas, peppers, cucumbers, zucchini, and watermelon.


I know most people start with small plants, or they start their seeds indoors, and then plant outdoors. Last summer, I started from seeds outdoors, and everything grew very well.
The plants that do not grow as high I kept close to each other to help avoid any chance of bigger plants blocking out any sun. Here is what everything looks like now. Hopefully, in about a week, we will start seeing some sprouts.
Now that the veggies are planted, it is time to get some herbs and flowers going!
If you would like to week to week progress on the vegetable garden, follow me on Facebook here!

Garden Planning 2013

This weekend at our house is known as planting weekend! Last year, when we were first planning our vegetable garden I did a TON of research and talked to a lot of seasoned gardeners about when the best time to plant would be. The consensus for our area is the weekend after Mother’s Day. Our garden last year (you can check out posts here and here), was pretty successful, so I am sticking with that plan.

There were a few mistakes with last year’s garden, that hopefully I will not make this year to ensure we get a bigger crop of veggies.

The biggest mistake last year was overcrowding. This year, I am really limiting what we are planting to what we will really use a lot of. For example, last year the peas and lettuce were the biggest hit, and we wish we would have had more off those, and less of the radishes.

Here is what we have planned for this year:

As you can see, I have my work cut out for me this weekend.

It won’t be long though before I will be enjoying some zucchini bread, a caprese salad or sandwich, or a veggie frittata right from our garden.

What do you have planned for this weekend?

Delayed Steak Fajitas

This is the infamous recipe that I was working on the day I cut my finger. Now, that I am over the trauma (it wan’t the bad, unless you’re a baby, which I am), I think it is ok for me to share the recipe finally.

Fajitas are a family favorite here because I always have guacamole with them. While the kids aren’t that crazy about the actual fajitas, they do love guacamole. If they really aren’t having the fajitas, I will grill up some quesadillas (cheese between two tortillas thrown on a low grill for less then a minute on each side) for them to dip in the guacamole too.

I personally like this recipe because it is quick, and Brian likes it because well, he likes steak and Mexican food, so for him it is the best of both worlds.

Steak Fajitas
1 lb flank or skirt steak
3 limes zested and juiced
1 Tbs extra virgin olive oil plus 1 tsp for cooking.
1 pinch of Cayenne pepper
1 large sweet onion thinly sliced
2 mediums sized bell peppers thinly sliced (I used yellow)
I bunch of Cilantro
Flour Tortillas shells
Salt and Pepper to taste

In refrigerator safe dish add lime zest, lime juice, 1 Tbs of olive oil, cayenne pepper, and salt and pepper and whisk together. Add steak, cover and refrigerate to marinate for about 4 to 6 hours.

Preheat grill (around 400 to 425 degrees).

In a large skillet over medium high heat, add 1 tsp olive oil, sliced onions and peppers. Stir occasionally and cook until tender by still crispy, about 7 minutes. Keep warm.

Put the marinated steak on the grill, and cook for about 12-15 minutes flipping about halfway through. When the steak is finished, tent with aluminum foil, and let rest for about 10 minutes.

While the steak rests warm tortillas shells (I usually heat them in a dry skillet on medium low heat).

Slice the steak against the grain and at an angle in VERY thin slices. Assemble fajitas with pepper and onion mixture, steak, and a few sprigs on cilantro.

Enjoy, just please don’t cut your finger!

Brand New Door

A few months ago, Brian and I made the decision that we needed a new front door. Even though, I had painted the door to “help” it cosmetically, it never seemed to work right. It would stick, the deadbolt never seemed to work exactly right, and few weeks ago, the frame of the door pretty much started falling apart.

When it comes to holding a door together like this, it is time to get a new door.

We shopped around at a few different places in our area for front doors. We had an idea of what we liked and about what we would like to spend. We ended up getting a craftsman style door by a brand sold at Home Depot called Feather River.

The biggest decision for us was color. While we liked the idea of a bright colored door, our house faces directly west. In the afternoon we get tons of sunlight, and we new a painted door would fade fast, where a wood stained door would need much less maintenance over time.

We also opted for a new storm door, which is much quieter and looks a lot better than our old one.

Since Brian and I are newbies to DIY, we figured that having the door installed by professionals was the way to go. It added to the final cost of the door, but our theory was that a door is only as good as is installation. We are glad we did.

Here are some before photos:


Bye bye, Old Door!

Why, hello there!


There is a slight flaw in the door, but the Home Depot installers noticed immediately and have will be bringing us a new door sans flaw as soon as possible. Since our old door situation was horrible, we are keeping the new door with the flaw until the new one arrives. This should only take a few weeks.

So far, we are loving the new door. It is adding a lot to the curb appeal of our home.

Anyone else out there working on their curb appeal?