Tag

photos

Not Just a Hobby

I have always enjoyed crafting and DIY, but I can actually pin point the exact moment that it became an almost obsession. I was 18 and got invited to my first Creative Memories scrapbooking party. As part of my graduation gift, my Dad bought me my first starter kit of pages and tools and paper.

I was bitten by the scrapbooking bug, and I loved it.


Sometimes I got made fun of a little bit for being an 18 year old girl that would prefer scrapbooking over chillaxing. However, Scrapbooking was a wonderful hobby for me. I loved that I could kind of go to a cathartic creative place and cut and paste and journal to my heart’s content and kind of forget about the problems of the day.

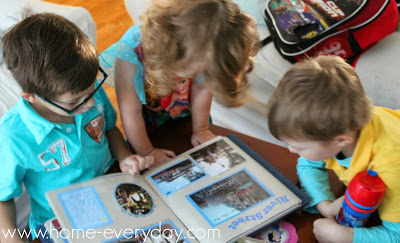
I recently sat down with my kids and we looked through some of the albums and we giggled and talked. Then, they asked me to break out the baby books (Caroline’s still in progress) and they asked all sorts of questions about what each of them was like when they were babies.

In that moment, I was incredibly happy for having taken some time to document a time that was incredibly chaotic. There is no other way to describe having three kids in 33 months except chaotic. But, I was thankful that I stayed up late some nights to write stories in those books for them to recount forever, perhaps someday with their own children.

In that moment, I realized that my scrapbooking was not just about buying fancy paper and cutting and taping, but it had a real purpose of preserving our memories.


As my kids get older, it is getting harder and harder to find the time to scrapbook, but I still write everything down and save tons of pictures and ticket stubs and their drawings for the days that I will have time to scrapbook again.

No matter your creative hobby, stick with it. I am sure that you will find that it has real purpose. I’m sure every quilt you sew, photo you take, scarf you knit, piece of furniture you build, cake you bake, card you stamp, or album you make will just be a wonderful reminder of a period of time in your life that you don’t want to forget.

If you like this post and would like to read more about DIY, gardening, cooking, baking or all other things domestic, become a Home Everyday follower! For blog updates or to see other places I write follow Home Everyday on Facebook here.

Follow on Bloglovin

I’ve Got Mad Skills: Photography Skills

I don’t really have mad skills, but I have to say, I am getting much better at using my Canon Rebel. We purchased this bad boy back in the fall, and I have been playing around with it a little bit.

One thing I know about myself is what kind of learner I am. I have to say that instruction manuals and tutorials online can be helpful, but I do much better with YouTube videos, someone explaining something to me, or fiddling with a gadget.

Sometimes, I will just take the camera outside, and play with the different settings. I also have learned how to take photos from different angles.

Since the weather has been much warmer we have been spending more time outside and making more trips to the zoo and other outdoor locales. Here are some favorite shots so far.

This is my absolute favorite. I may frame it. I actually turned the camera to be underneath the tree to get blue sky as the background.

I love how the bubble is in the foreground of this picture. Bubbles move quickly and sometimes can’t be captured, but I finally got one complete with my little one chasing it.

This one is of our first day to the zoo when the weather broke.

This is an Okapi. The kids love this animal, and always ask to see it when we go to the zoo. They are very shy though and kind of stay in the trees and are hard to see. I finally snapped a picture of one at just the right time.

Any pictures of flowers this time of year, make me happy.

Has anyone else been honing their photography skills?

Reminders: Irish Wall

Last week, we finished painting the family room (will be sharing pictures soon), and I was putting back all the things on my Irish wall, and thought you’d all like to see a few of the beautiful things that remind me of my family.

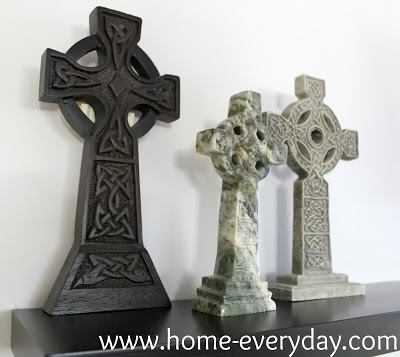
What is an Irish wall you ask? When we were kids, my Mom put together a collection of all of the things people had brought her back from Ireland, her own travels there, and things she had collected over time. She put it all together and displayed it on the wall right near the front door. When I moved into this house, I really wanted to do the same thing, so I gathered up all my Celtic crosses, a map of Ireland, a few things from my Grandma, and a beautiful print of Old St. Patrick’s Church in Chicago that my sister gave Brian and I for our wedding (we were married there) and put together my own Irish Wall.

I have a few crosses that have been collected over time, the one on the far left is made of peat. My Mom bought it for me as a Thank You for house sitting while she was touring Ireland a few years ago. The one in the middle is made of Connemara marble. Friends of our bought it for us when they were in Ireland on their honeymoon.

This metal shamrock is something that my Grandmother had hanging in her house, and all my aunts and uncles have hanging in their house too. When I see it, I am instantly reminded of all the times we spent at her house.

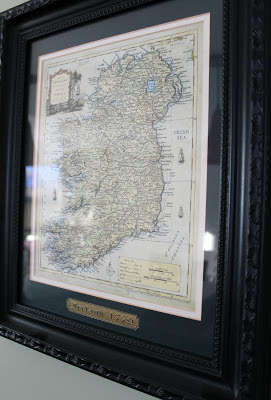
I also have a map of Ireland that Brian and I bought in Savannah, GA a few years ago. This is kind of a little known fact, but there is a HUGE Irish population in Savannah, and the city has one of the largest St. Patrick’s Day parades in the country.

There are lots more trinkets, and reminders of family and travels. As I put these things back up on the wall, I day dream about when I get to Ireland someday. Hopefully soon.

What sentimental items do you have around your house? Do they have a theme?

Time to get back to work hanging all these things back up. Hopefully, I can have shots of the room for you next week.

A Novice Blogger’s Guide to PicMonkey

If you like reading Home Everyday, you can vote for me to win The Best Home Projects and DIY Blog at Apartment Therapy’s 2013 Homie Awards here
Thank you so much!


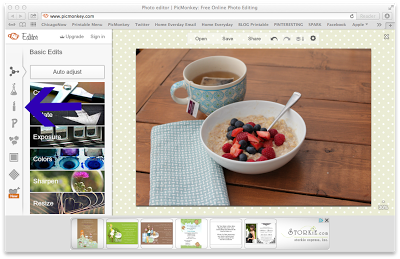
A few weeks ago, a blogger friend, Nikki (More for Four) asked me how I get labels and things on my photos. I told her I could do a quick tutorial of PicMonkey to show how I use it to quick edit my photos, add labels and make collages. The features I use most are cropping, exposure, labels, and text. In this tutorial, I will show you the steps I use most often when editing a picture. I will then show you a few tricks to creating a collage.


Editing


1.) Open your internet browser, and go to www.pickmonkey.com (it is free and there is no registration). The main page looks like this:


2.) Click on Edit Photo. A window will open asking you to choose the photo you would like to edit. Choose the photo, and click Choose.


3.) Once you have chosen your photo, on the left hand side of the screen, there is a list of editing options on the far left indicated by pictures. They are Basic Edits, Effects, Touch Up, Text, Overlays, Frames, Textures, and Themes. The three I use are Basic Edits, Overlays, and Text.


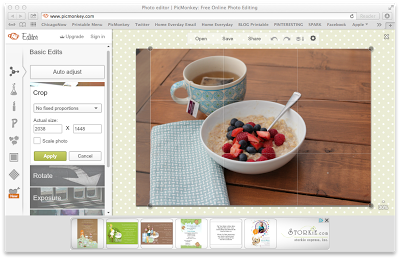
4.) The first thing I do, is crop my photo.


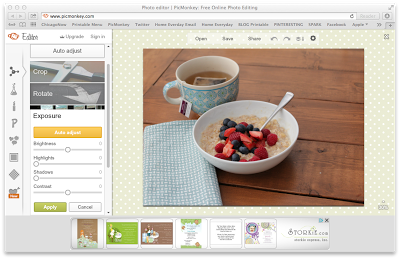
5.) I then adjust the exposure.


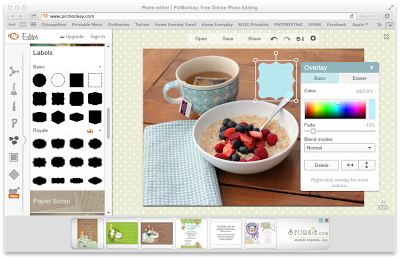
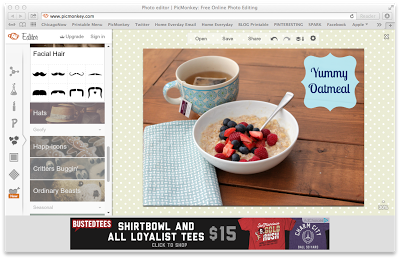
6.) Next I click on the Overlays button on the left, and choose my overlay, as well as color. (once you choose an overlay a window opens allowing you to adjust color and if you would like it to fade). You can adjust size just like you would adjust the size by clicking, holding, and dragging the dots around the edges of your overlay. You can position your overlay, by clicking it and dragging it to its location.


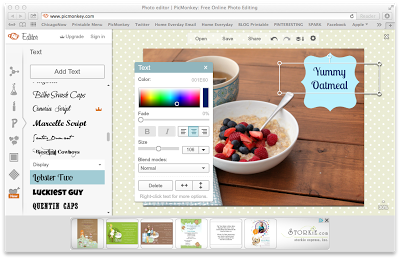
7.) I then add text. If you would like your text to appear inside an overlay, you must do the overlay part first. Then you can position text on top. This process is similar to the overlay. You can choose a font, and then click add Add Text. A window will appear so that you can adjust color, fade, bold, center, etc.


8.) Once you are done making all your adjustments. You can click Save at the top of the page. Choose where you would like to save it, and give your photo a name.


Making a Collage

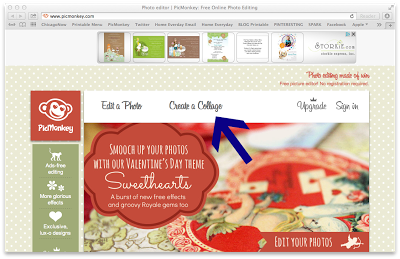
1.) Open your internet browser and go to www.picmonkey.com
2.) Click on Create a Collage
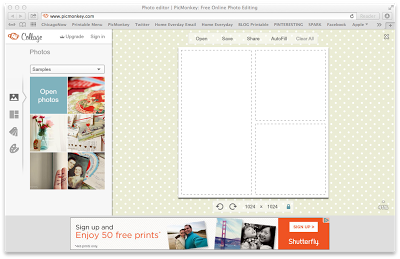
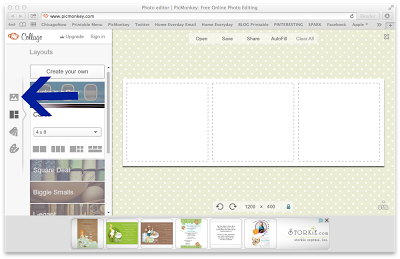
3.) On the left hand side, click Open Photos. This will allow you to choose any photos you would like included in the collage. (NOTE: For ease, I suggest first editing any photos before making the collage.)
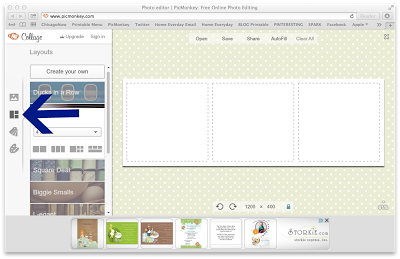
3.) Once you have chosen your photos, you can now choose a layout.
4.) Once you have chosen your layout, you may now click back to
5.) Finally, you can drag and drop your photos where you would like them. If you want to remove a photo or move it location, you may click the small gray X in the corner of each photo and drag and drop again.
6.) Save just as you would when editing.
There you have it. My novice blogger’s uses for PicMonkey. I know it isn’t nearly elaborate as using PhotoShop, but it works for now, it is easy, it is free, and I have been happy with how the pictures have turned out thus far.
Hope this helps!
Linking up today at Serenity Now for Weekend Bloggy Reading!


Helping… sort of: Impromptu Photo Shoot

Last week, I told you of the adventures of buying our first DSLR camera. I know there is a lot to learn. The word on the street is shooting in manual allows more freedom and has so many more benefits to the photographer, but so far I’m taking it one day at a time.

I also mentioned yesterday how things have been busy around here. Over the weekend, we winterized the yard. At our house this means, cut the lawn one more time, make sure all dead annuals are dug up, put all the patio furniture and ceramic pots in the shed, and put the snow blower in the garage. While Brian and I were doing a few tasks the kids played in the back yard, and instead of helping Brian finish, I ran and grabbed the camera to take a few pictures of the kids playing.
Look at that smile!


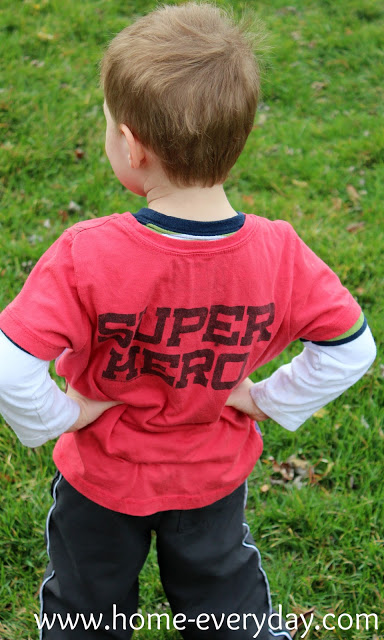
My super hero has no problem posing.


She let me interrupt her leaf collecting.


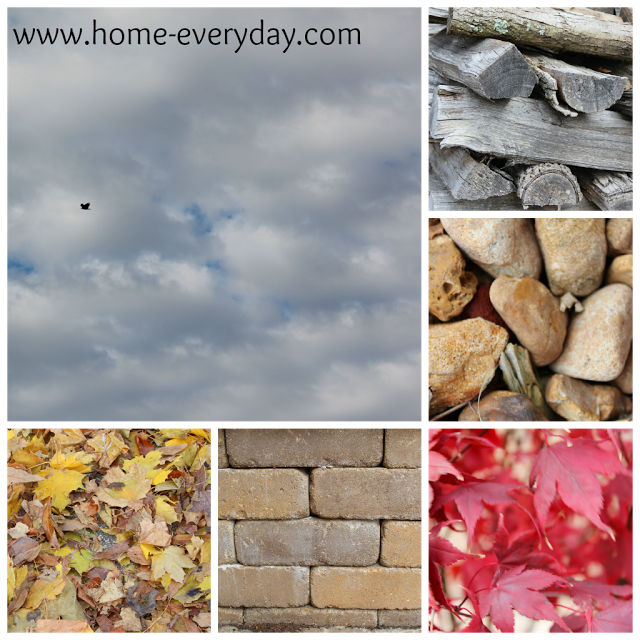
Then I walked around the yard and just shot some pictures of randomness.


Not all the pictures I take are winners, but it is definitely playing with the camera, and getting some cute photos of the kids.

My Family thinks I’m the Paparazzi Now: Cannon Rebel

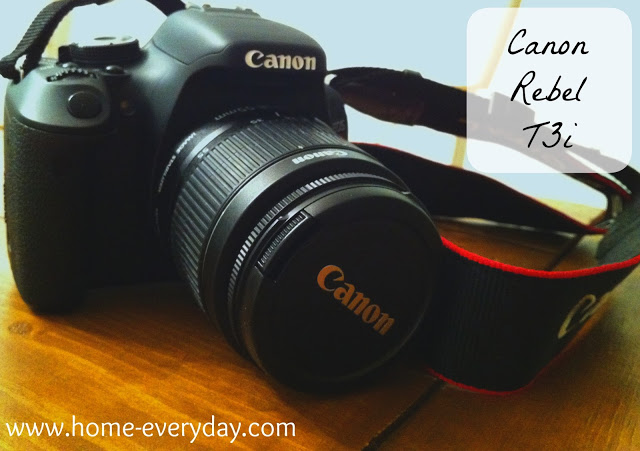
Awhile back was Brian and I’s 6 Year Anniversary, and I celebrated with a week of going down memory lane (here, here, here, here, and here). What I forgot to tell you, though, was the awesome gift we gave to each other. You ready? Here she is:


Gorgeous no? Weird taking a picture of a camera… I had to take this on my iPhone so it didn’t come out as lovely.

This decision was a long time coming. When Brian and I are about to plunk down a significant amount of money, we do a TON of research. Here is our little adventure of buying our awesome new camera, and just thank your lucky stars that I’m not letting you in on our car buying experiences (you’d be reading for days).

When we found out we were pregnant with my oldest 5 years ago (has it been that long?!) we got a Canon PowerShot. It served us well. In fact, it lasted through three kids, two moves, and plenty of trips and special events. We used it so much, it was starting to see better days. Also, taking pictures of an unmoving newborn is way easier than three rambunctious tots. You can see the blur here:


Then in July, I started blogging. We weren’t sure how often I was going to blog, but it was pretty clear that iPhone photos and the PowerShot weren’t going to cut it. If you want evidence of jenky photos please refer to my first two months of blogging.

With all of that said. The research began. We first took some advice from a good friend who loves photography, Melissa. She has her own blog called Jamrockstar which showcases some of her photography skills as well as her musings about life. Hopefully soon, she will do a guest post for me (hint, hint).

Melissa gave us the best suggestion. She said we should look at all options, hold them, see how they feel in our hands, practice switching lenses, and play with some of the different settings. So we did. We walked around Target, Wal-Mart, Best Buy, and our local camera shop, and we just held cameras and tried shooting a few photos. This really helped us narrow things down, and I am so happy that I didn’t make a decision without seeing and trying one out.

Speaking of trying out a camera, our friends Lisa and Bill (who also have three amazing kids), own a Canon DSLR that they loaned us for a few weeks to make our final decision.

So, after checking things out, we decided that we wanted a Cannon Rebel T3i. The added bonus of wanting a Canon was that we still had Brian’s automatic zoom lens and removable flash from his days taking and developing film photos for the Purdue Exponent.   

We had a very strict budget in mind, and were even willing to wait until Black Friday to score a deal. The long search began. While we were searching, Canon had just released the T4i model, which was good for us. Stores wanted to get rid of T3i’s to make room for the new model. WOOHOO! Savings galore. For a few weeks, we scoured the internet, store flyers, and eBay. Then one night we happened to go right to the Canon Direct website, and noticed they have a refurbished store, and they had a GREAT deal on the Rebel T3i. It was no tax, free shipping, and was the cheapest deal we’ve seen. It also came with a 90 day warranty AND Brian found an online promo code. While it wasn’t the full year warranty on a brand new Canon, we read some online reviews, and there were nothing but good things to say about refurbished Canon products.

Long story short… well long. We bit the bullet, and bought it.

Now, look at all these beautiful photos that our new Canon has taken. While I still have lots to learn about the camera (I read the booklet nightly and research tons of internet resources on photo editing), I cannot believe that even a novice like me has taken some of these awesome photos.


Also, I’ve been able to practice my photography skills with the November Challenge.

Linking up today at Serenity Now for Weekend Bloggy Reading. Check out everyone else’s amazing projects!

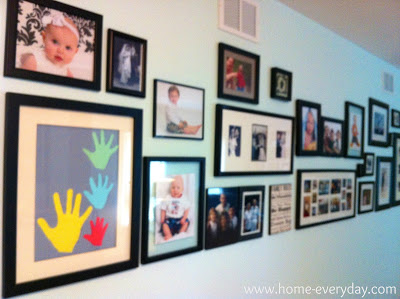
Crazy Crap on the Walls: Our Photo Gallery

*Normally on Friday, I do a series called Flashback Friday where I feature a different area of the house and the improvements we have made since moving here, like our kitchen update, our bathroom spruce up, and our living room/dining room improvements. Flashback Friday will be back next week with the bedrooms.

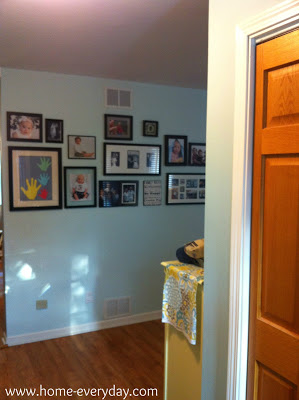
After talking about our living room improvements last week, someone asked me how I went about creating our photo gallery. Creating a photo gallery was a must for Brian and I. We love family photos and wanted to have a place where we could place them all together. This was one of the first projects I did after painting the living room, so there aren’t a ton of pictures (again, this blogging thing is new to me), but I will try to explain as best I can.


Location, Location, Location: When we bought this house, we had quite a few ideas of where we could put a huge photo gallery. After some discussion, we decided the living room. The wall we chose is one that you see right as you enter our front door, but can also be seen from every angle of the living room. Also, this wall is twelve feet long. We figured that this is enough space to add a number of photos as well as have room to grow.


Gather ’em up: The next thing I did, was gather up all the black frames that we owned. A photo gallery doesn’t have to have to have all the same type or color of frame, but Brian and I like uniformity. Even in our previous home we typically only bought black frames so that if we ever wanted to move pictures around the house, nothing would ever look out of place. There are a few exceptions to this rule, but for the most part every picture frame in our home is black.

Shape Up or Ship Out: Once all the frames were gathered up, and I saw what I had to work with, I measured off a twelve foot area of our living room floor and I started laying the frames in that space. I tried arrangements, and I even tried putting them into some kind of shape, but then I tried to think of what kind of furniture might be near the gallery, and the hope is to someday put a long desk there. In the end, I decided that the best arrangement would be to line up the bottoms of all the photo frames in the bottom row and work my way up from there.
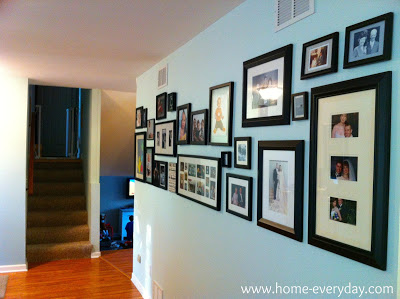
Hang ’em Up: Once I decided on an arrangement, I took a picture of the arrangement, and then Brian recreated what I did on the floor up on the wall. He used simple picture hangers, and sometimes would measure the distance between frames to make sure they would all fit. He also used a laser level to line up all the pictures on the bottom.

There you have it. Our family picture gallery.