Tag

DIY

Building Built In Storage: Part One

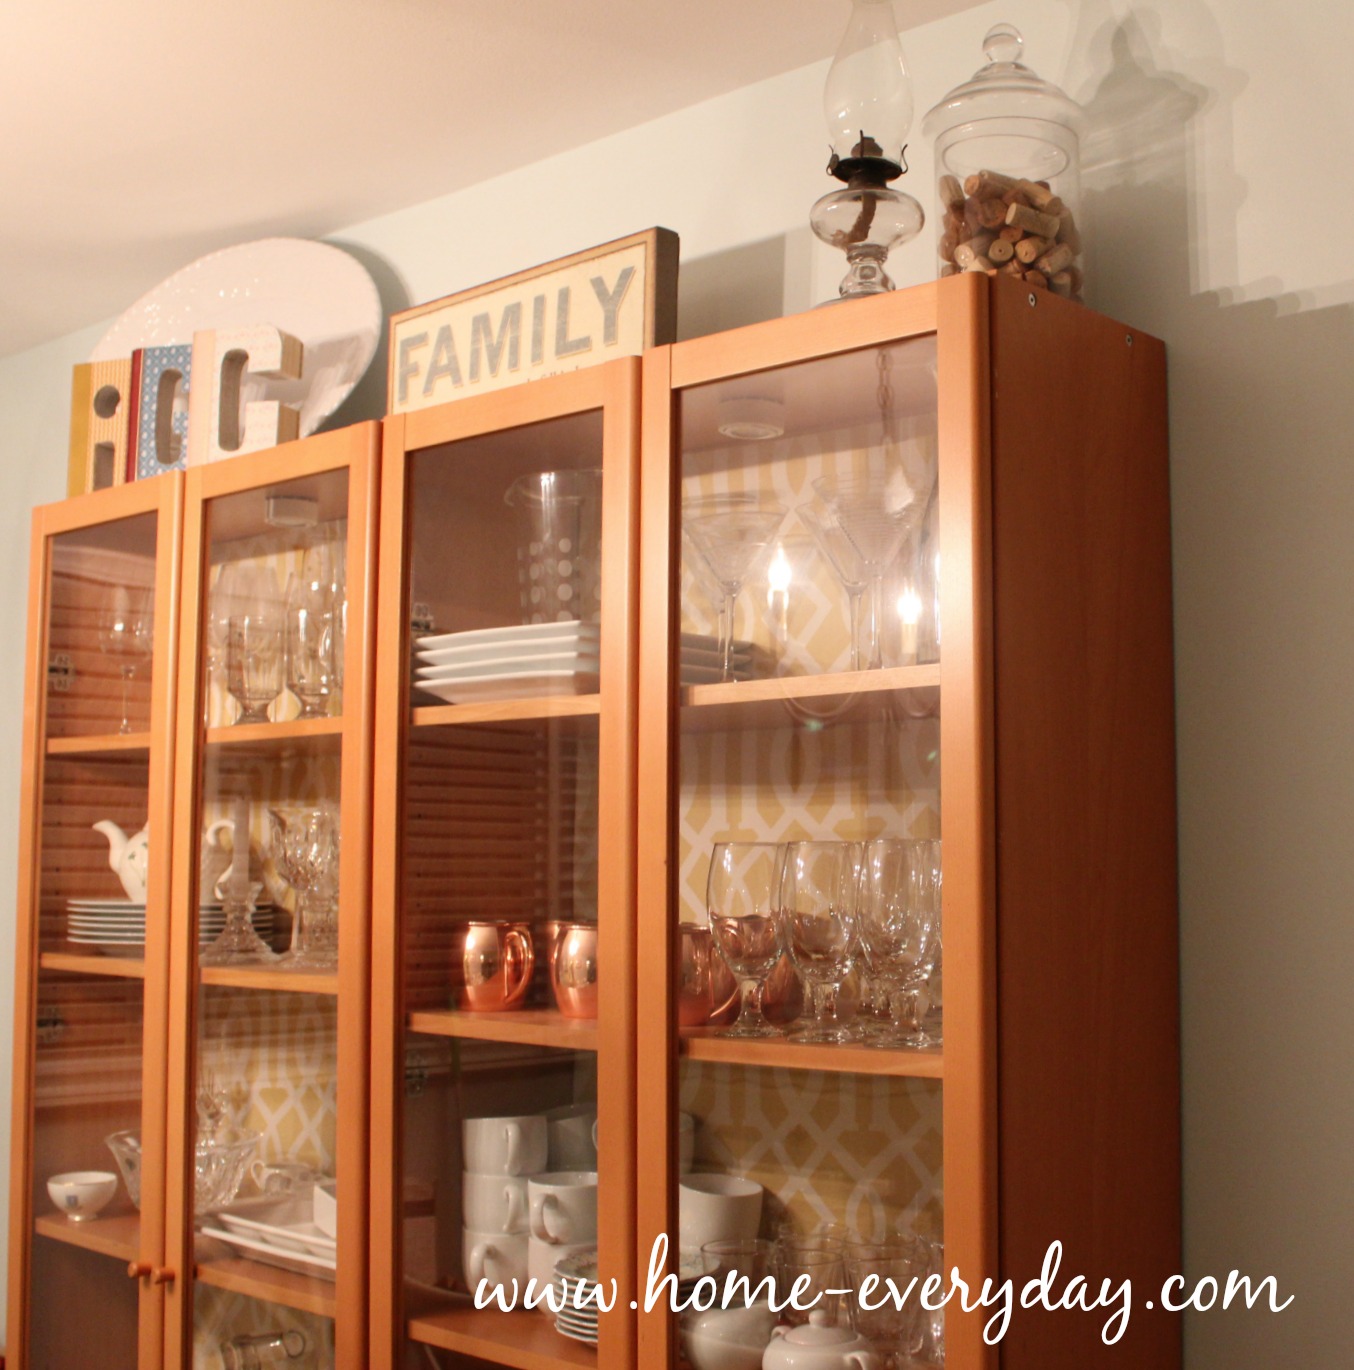
This project started out as me reorganizing the cabinets in my dining room to create some more space.

Built In Cabinets Phase One 3

To Brian saying, “Sweetie, you need more storage. Let’s not buy anything, let’s build something. That way it is exactly what we need.”

Built In Cabinets Phase One 15

I went from a simple reorganizing project to prepping the dining room for built-ins. As Ron Burgundy would say.

As we sat together at the kitchen table scrolling through blogs for inspiration like Thrify Decor Chick’s gorgeous built ins and Addicted to Decorating awesome built in entertainment center.  We knew we wanted some open and closed storage. We also knew that to maximize storage, we should probably try and use the entire length of the wall in the dining room. Finally, we wanted to add some cool style elements to the bookshelf to kind of mimc some other elements in the house like stain the countertop the same color as the dining room table we built and maybe paint the wall behind the shelves a different color like when I put  fabric in the cabinets before to help make the dishes pop.

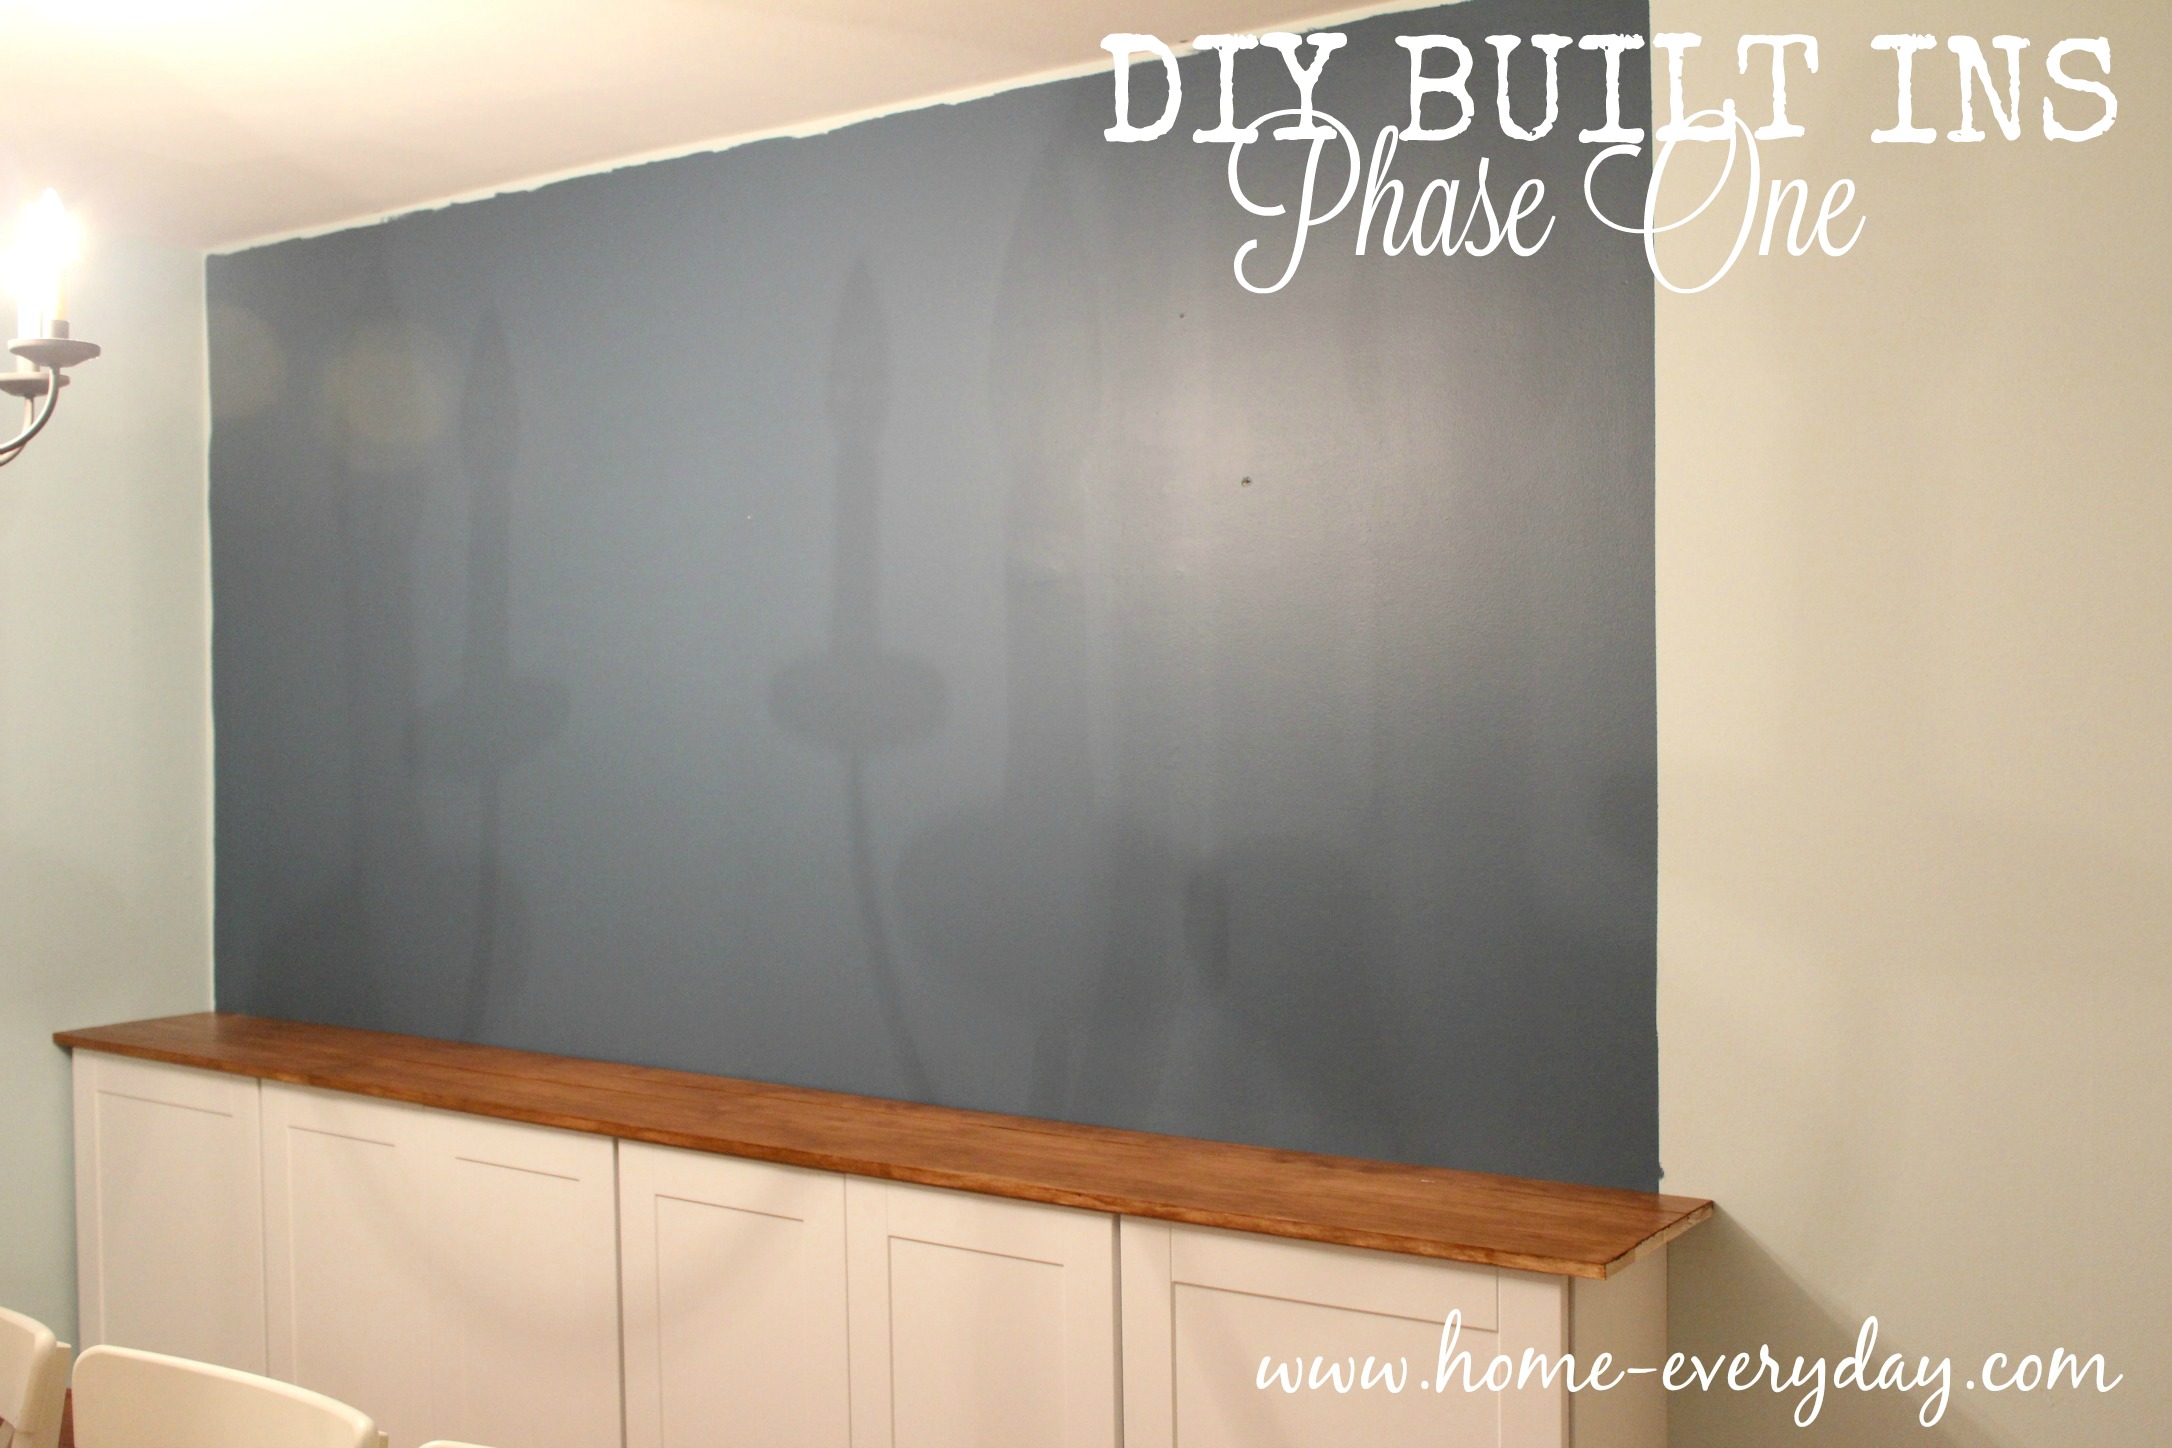
This is as far as we have gotten in the last 10 days. 

Built In Cabinets Phase One 13

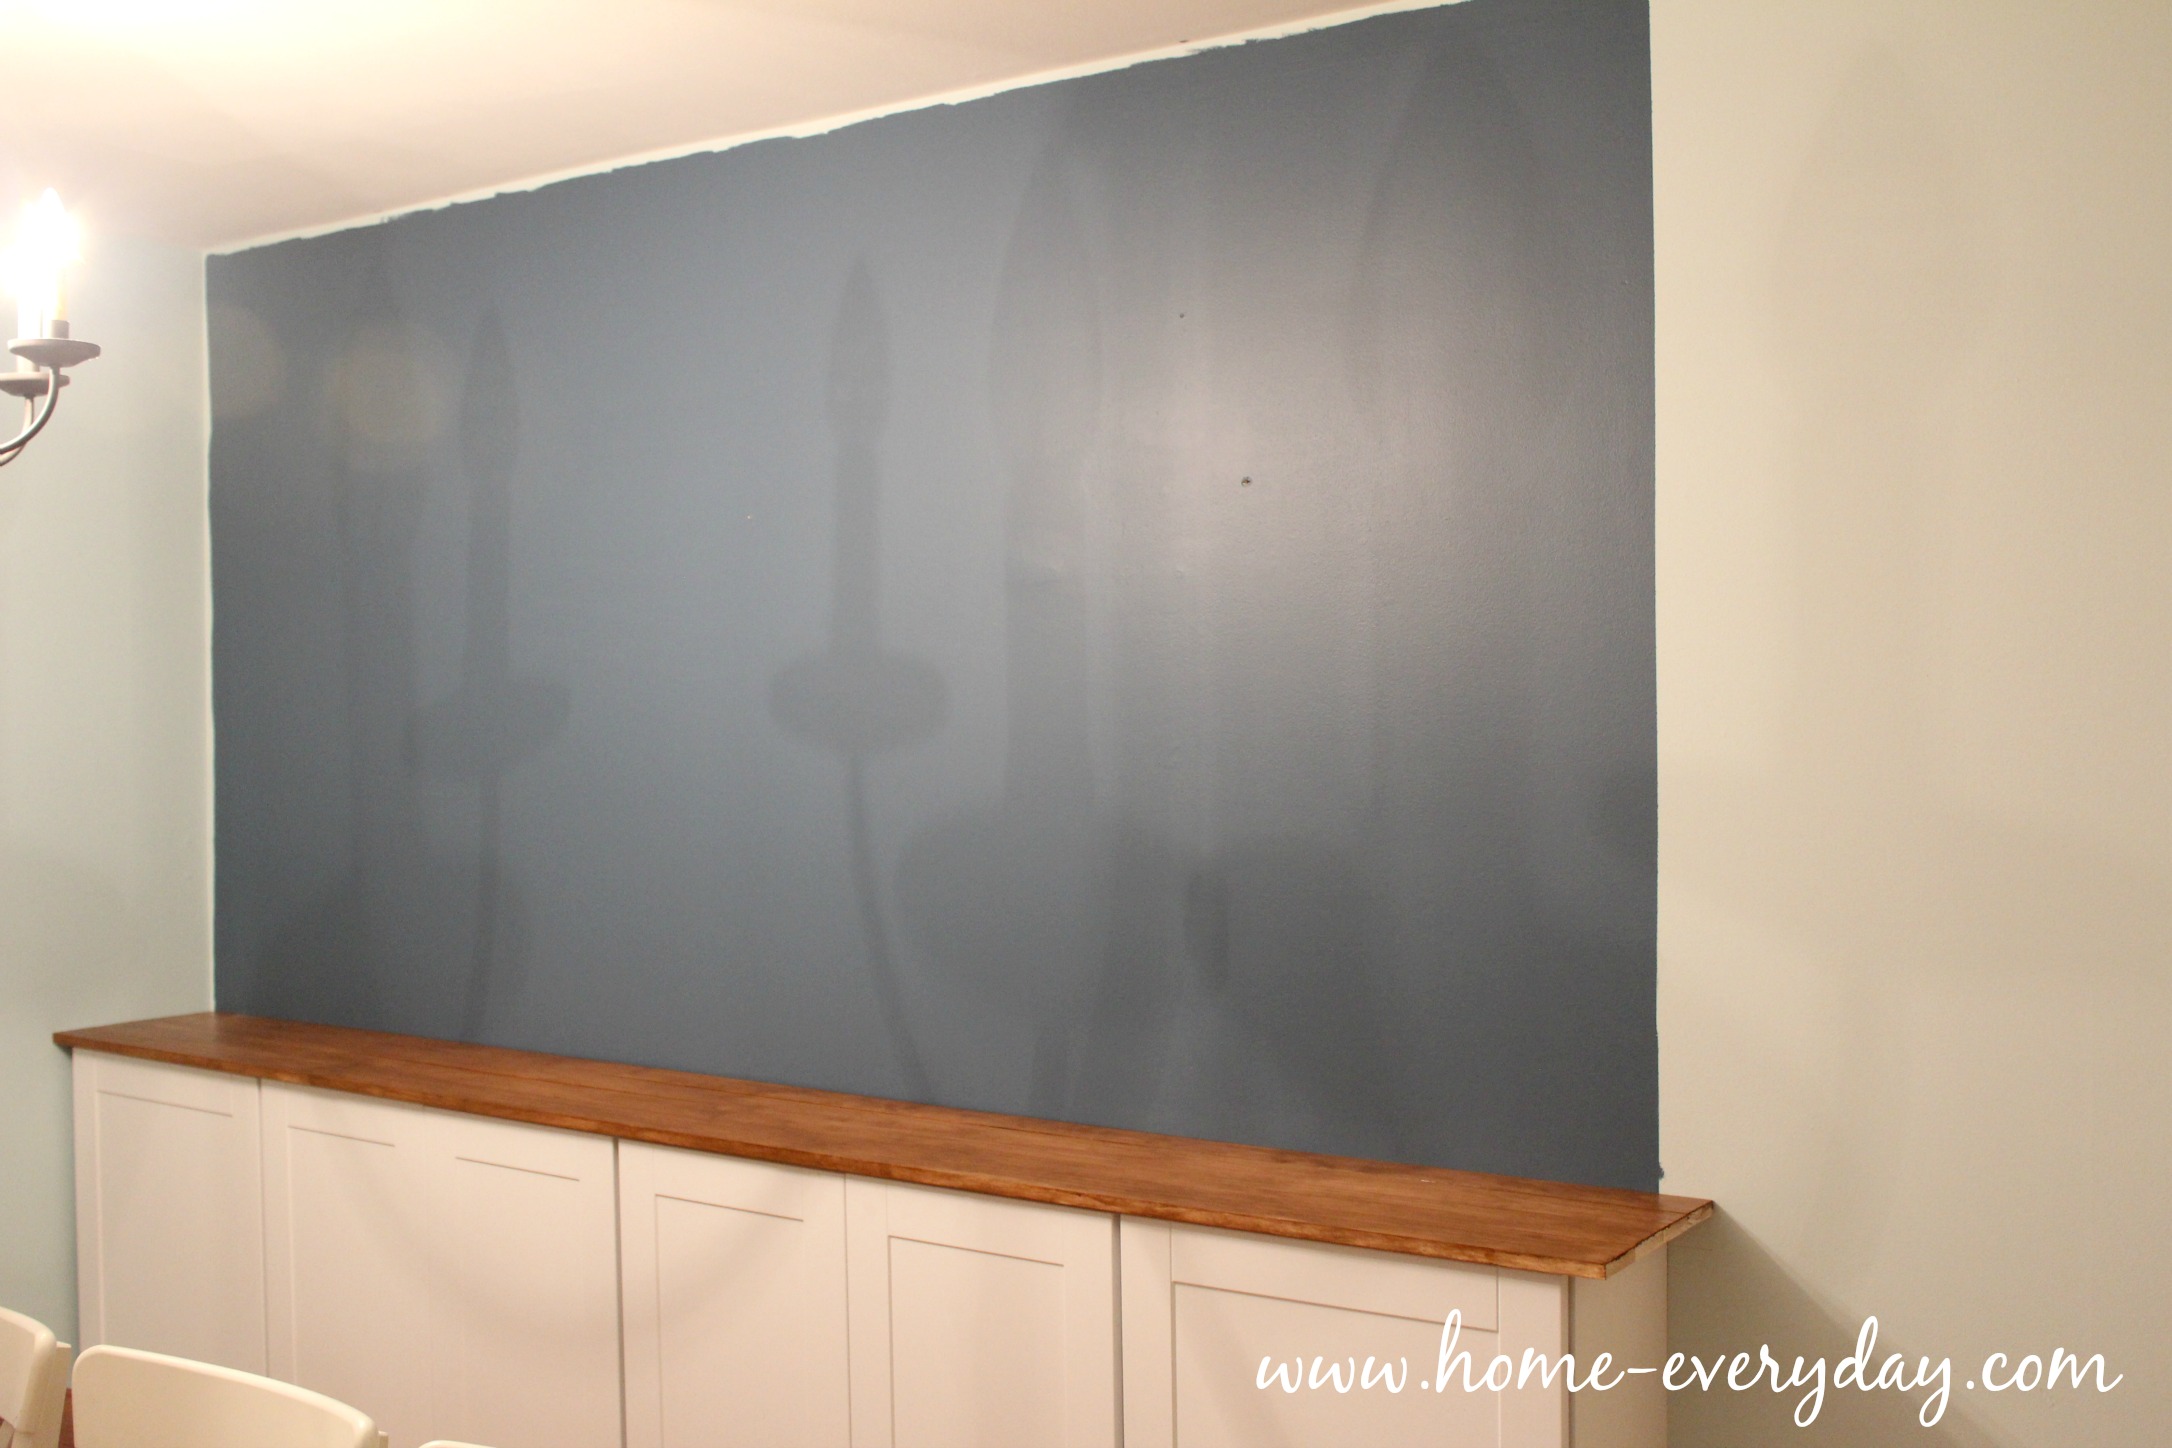
Considering it took me an entire day to carefully empty and move the cabinets that were sitting there, I will take that as a win.


I think it is safe to say, things have gotten out of hand. #diyproblems

A photo posted by Erin Skibinski (@eskibs) on

Also, life is still going on which means school, soccer, ballet, tap, school functions, homework, library volunteering, library board, work meetings, and a sinus infection. 

The first step was to decide how big we wanted to create the built in unit. We knew we were going to use stock UPPER cabinets as our base. Stock cabinets come in only a few standard sizes, so we just had to figure out the correct combination of cabinets that would fit into the dining room and look good. We used painter’s tape as a guide. For us, we decided ten linear feet of cabinets (two 36″ cabinets and two 24″ cabinets). This was just short of the opposite wall in the dining room, and we figured just short was better than two feet too long.

Built In Cabinets Phase One 1

Then, we drew out a plan. Twice. Actually, three times.

Built In Cabinets Phase One 2

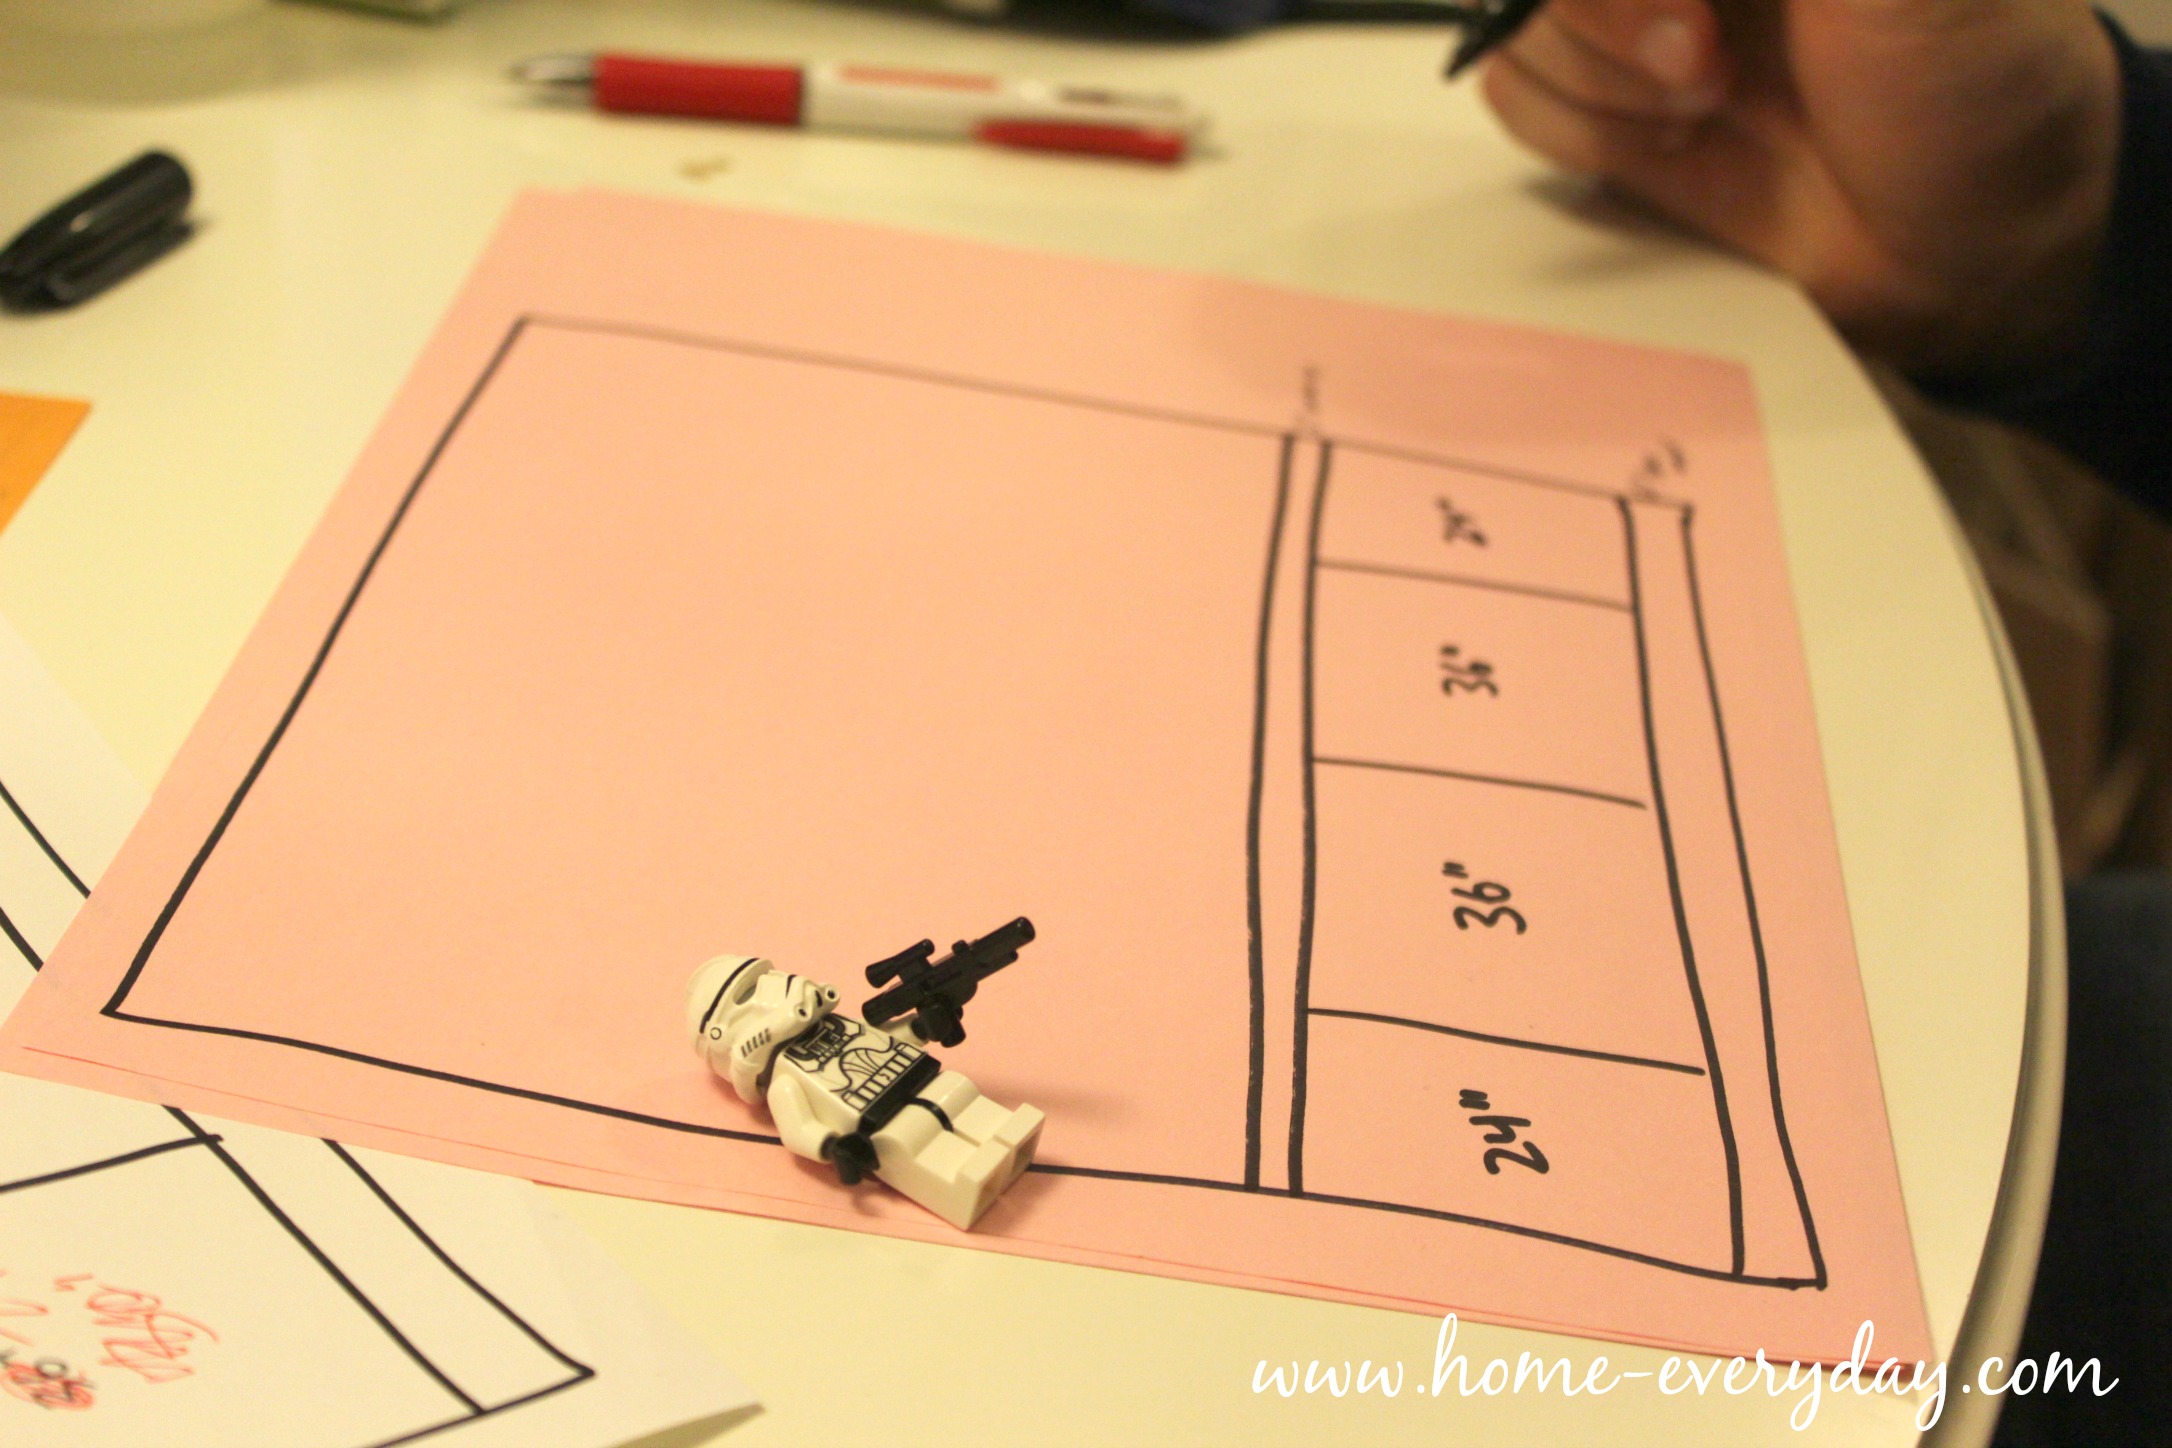
Using Addicted to Decorating and Thrifty Decor Chick as a template we drew out how to create our built ins. We did this a few times measuring a few times, and getting out our calculators just to be sure everything would be right. Pro Tip: Remember when following directions from another site, Pinterest, or blog, make sure to keep in mind that YOUR house is different. Measure your space a few times. Things to consider: What is the height of your ceiling? What kind of trim do you have, how big is it? What kind of flooring do you have carpet, wood, tile? Are there walls on each side of the built ins for support? Where are the studs? Are you going to be covering one or multiple outlets and do you need to call an electrician to move them before you get started? Are you insane to try something like this on your own?

Then, we made our supply list of everything we needed. To do this, we literally talked through every step a few times together out loud down to the finishing nails. This helped us make a good an thorough list. Pro Tip: You might want to check online or give a call to your hardware store just to make sure they have everything you need ahead of time. (We had to go to two Home Depots BLERG).

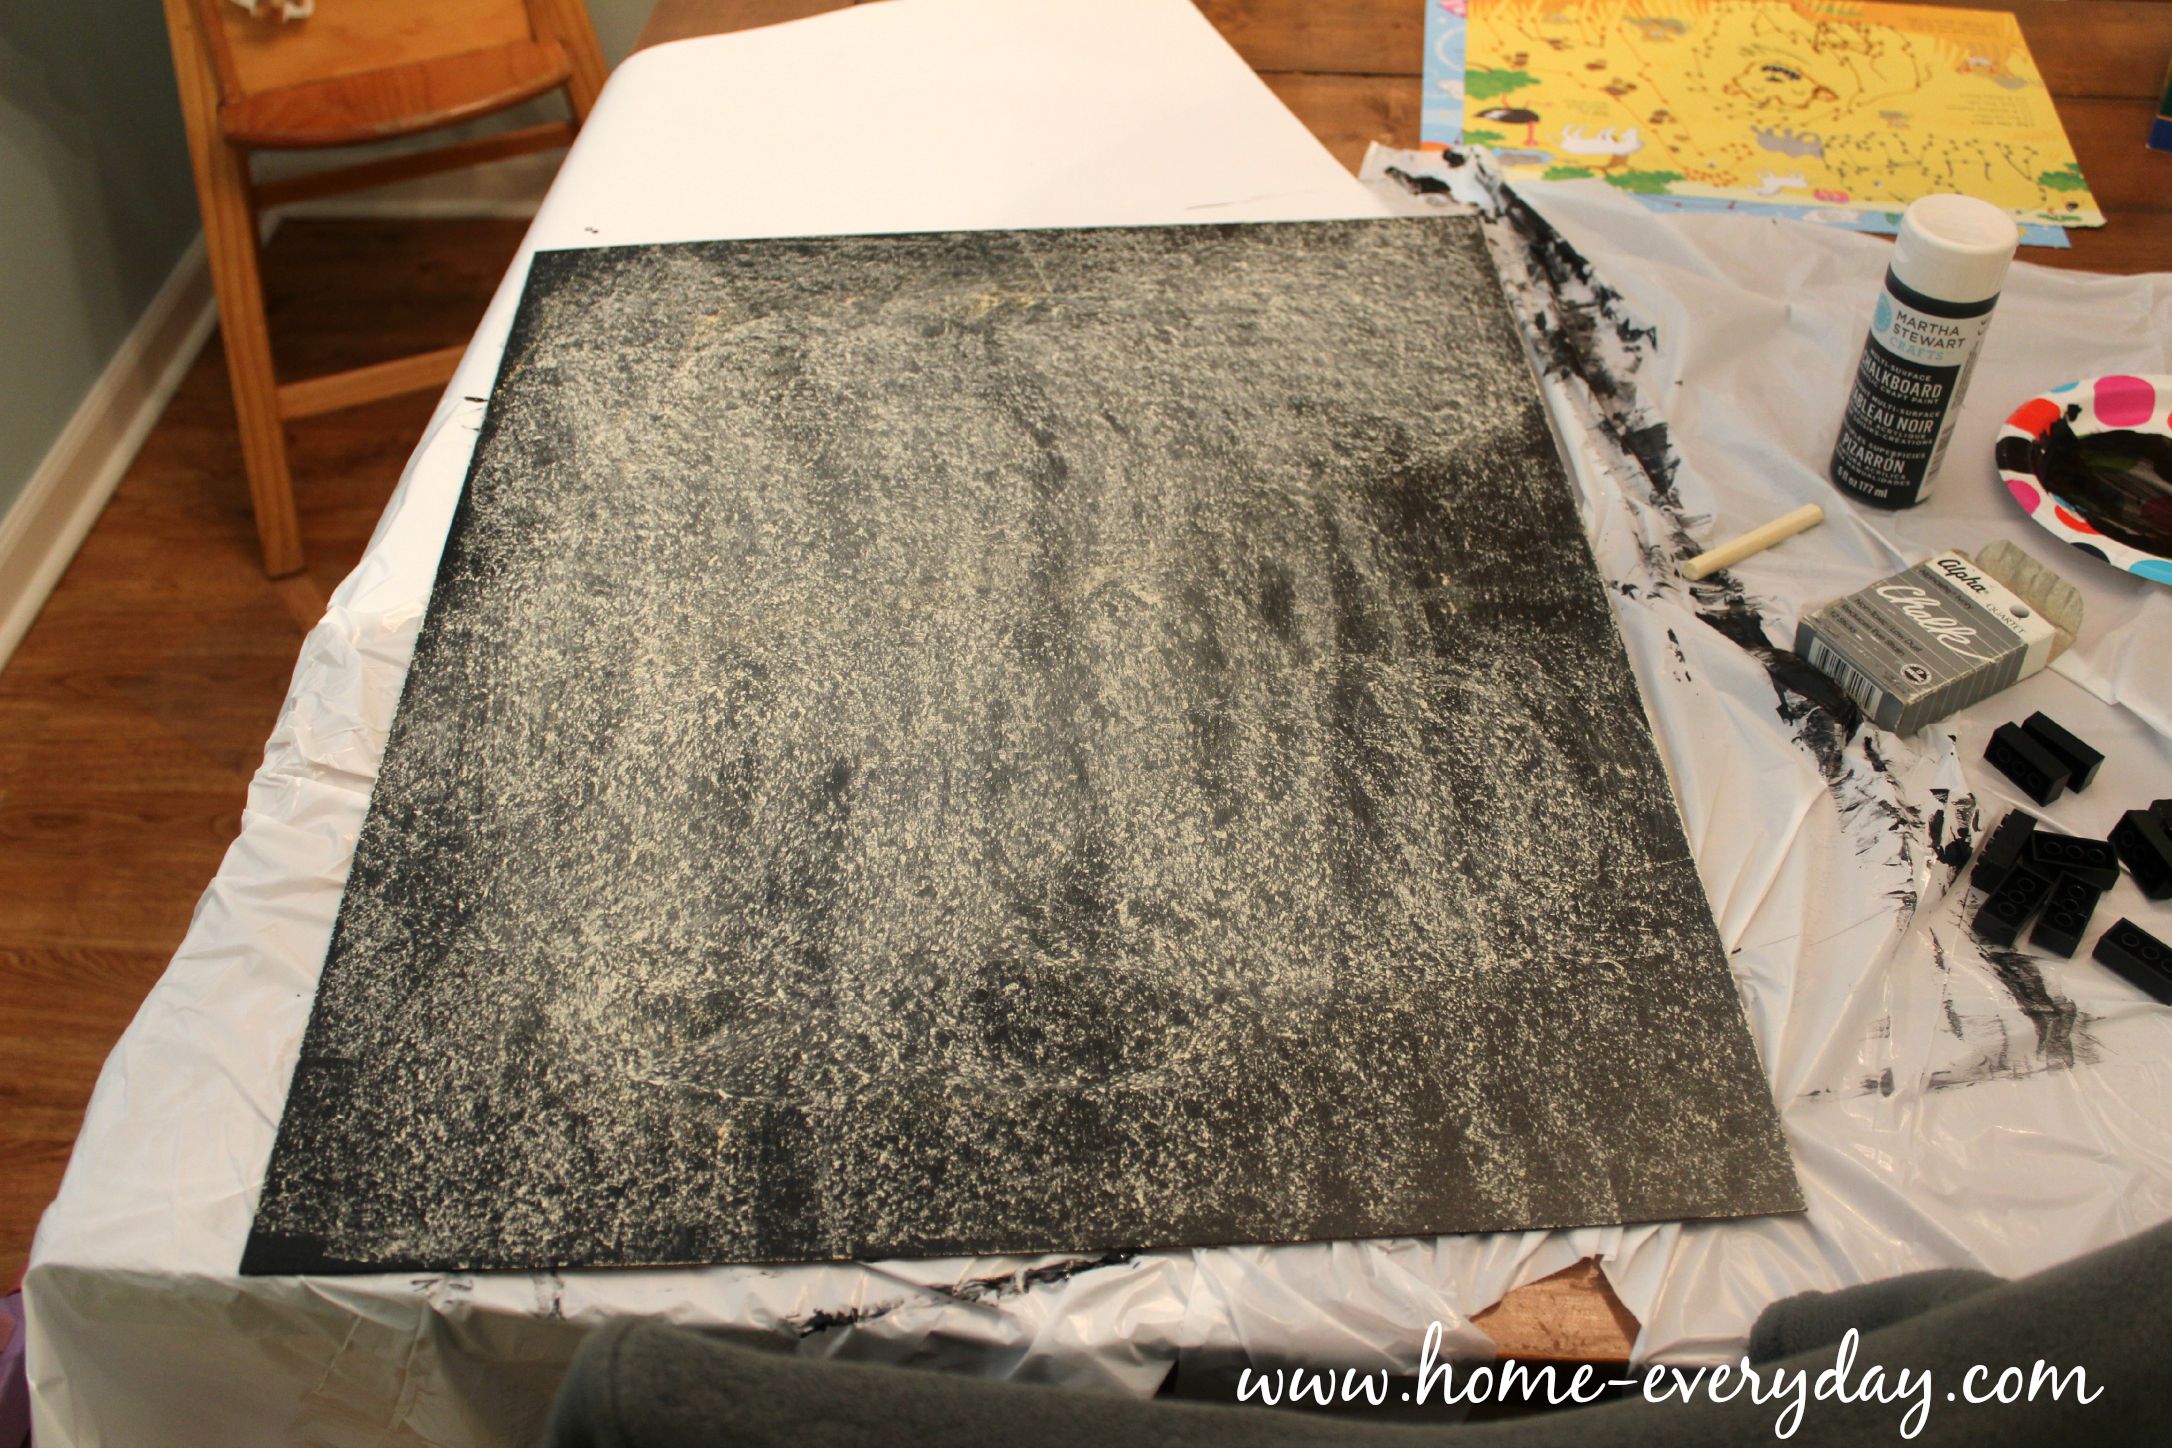
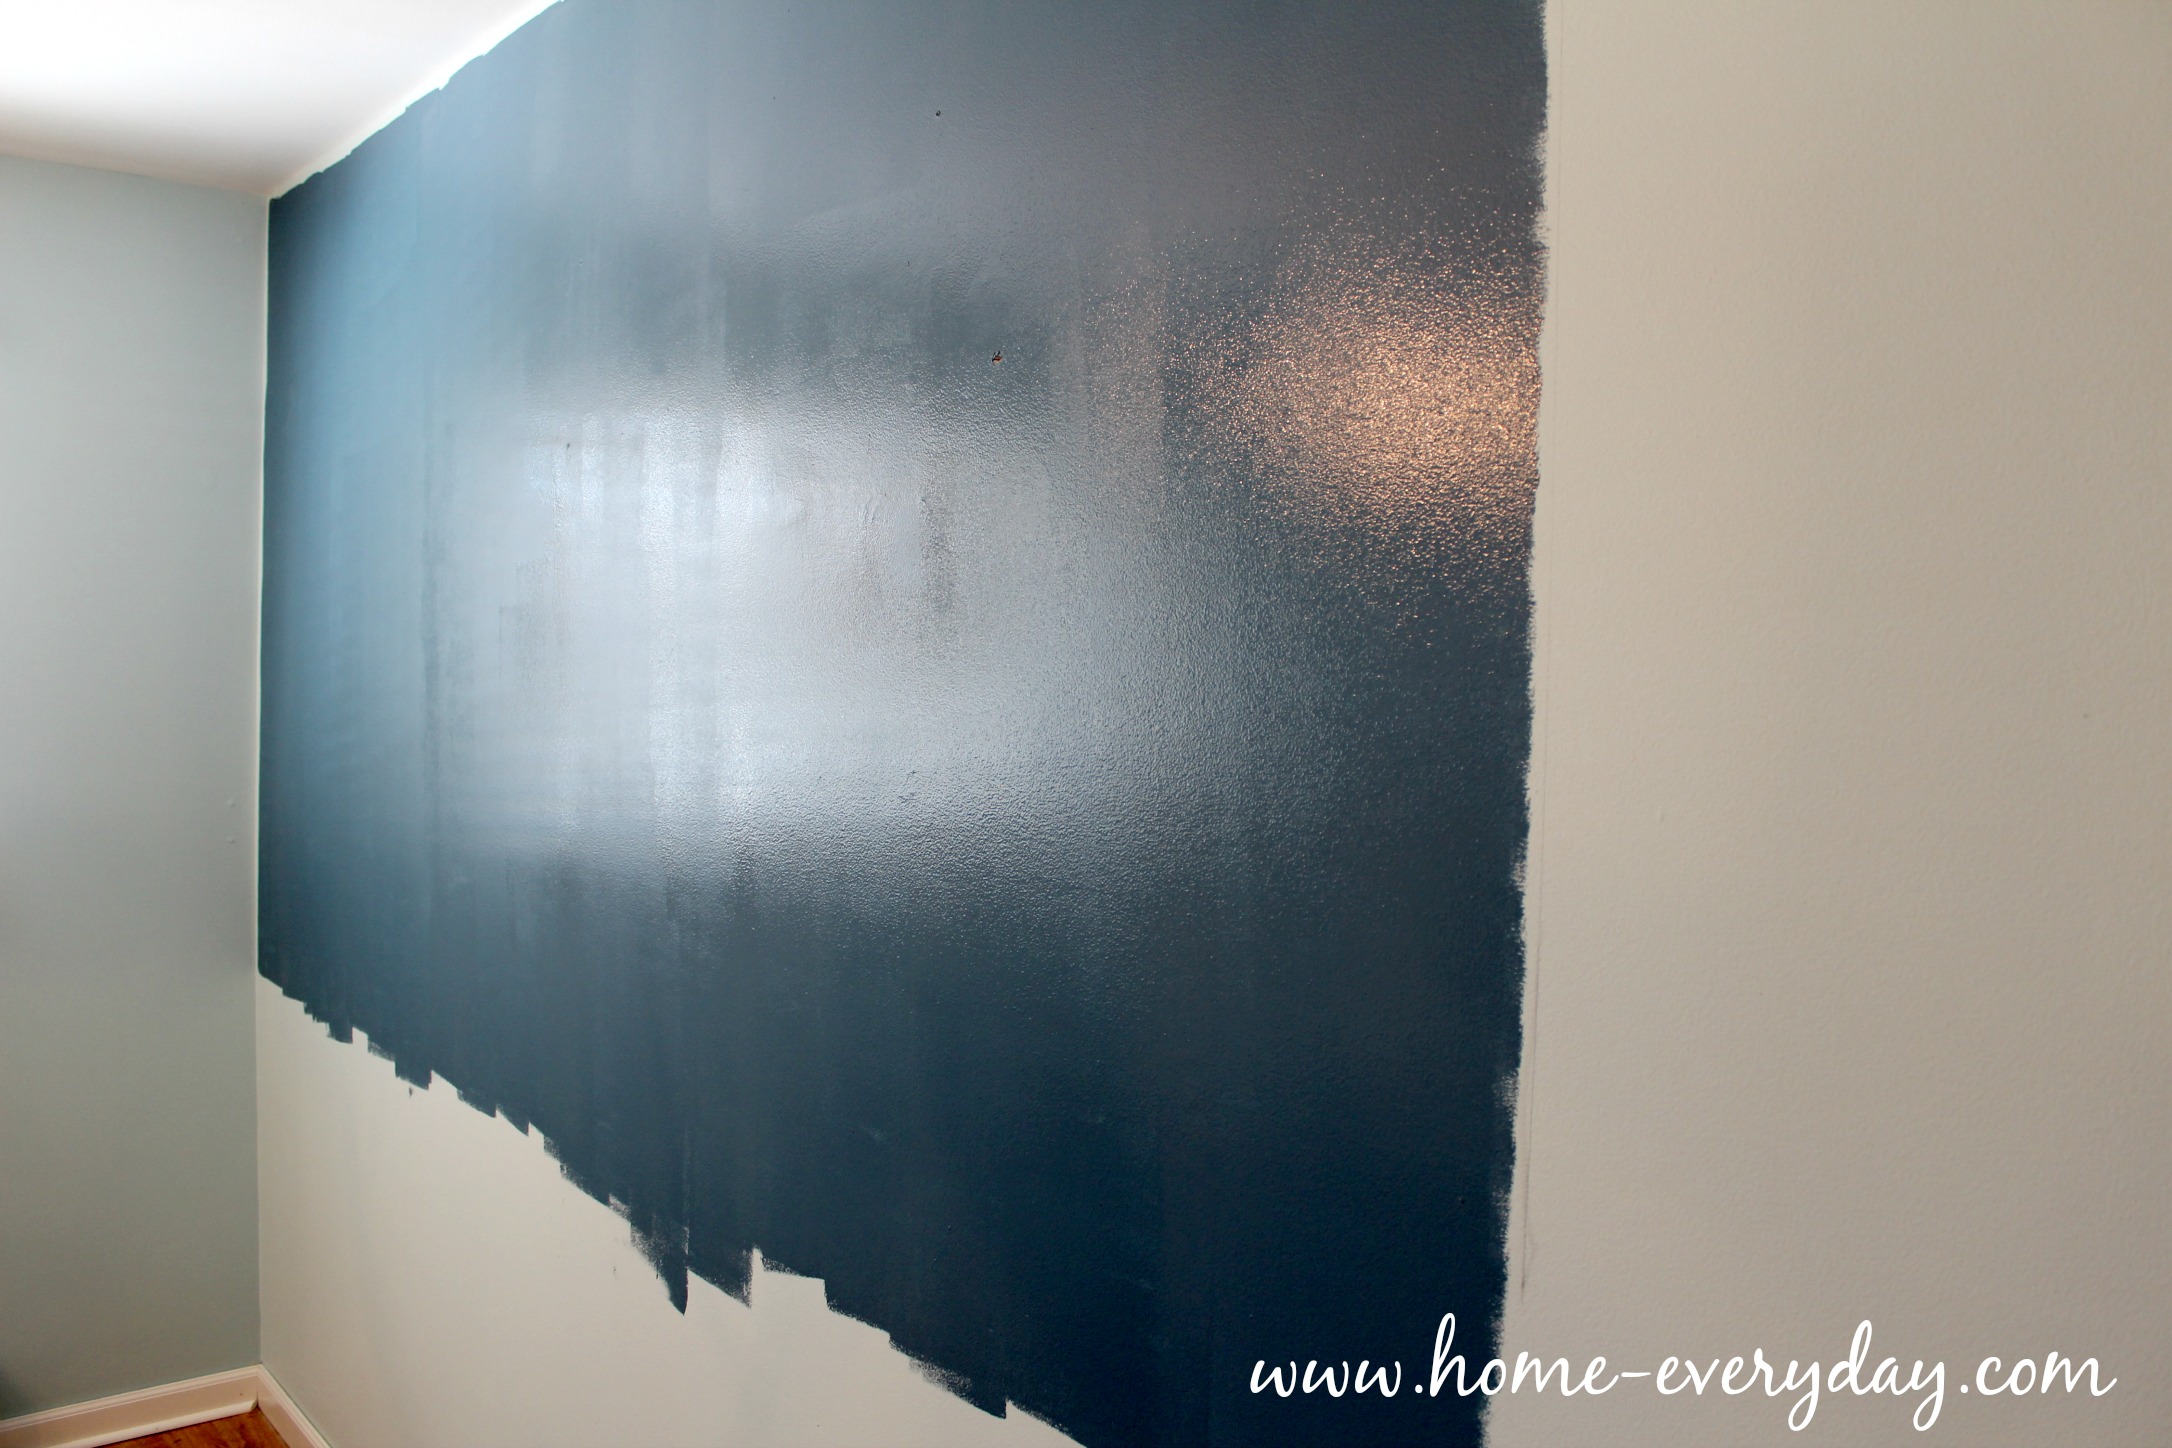
Next, I painted. This step is not necessary, but if you want to make your life a little easier and you also want to have a pop of color behind your built ins this is the time to do it. I measured out where the bookshelves were going to be, and I rolled on a dark blue I already had on hand (and luckily compliments my existing scheme). My sister, Beth, had given me a whole gallon to me when she had it mixed up for her dining room and it didn’t work out. I tried a swatch and love it. It is Valspar’s Victory Blue.

Built In Cabinets Phase One 4

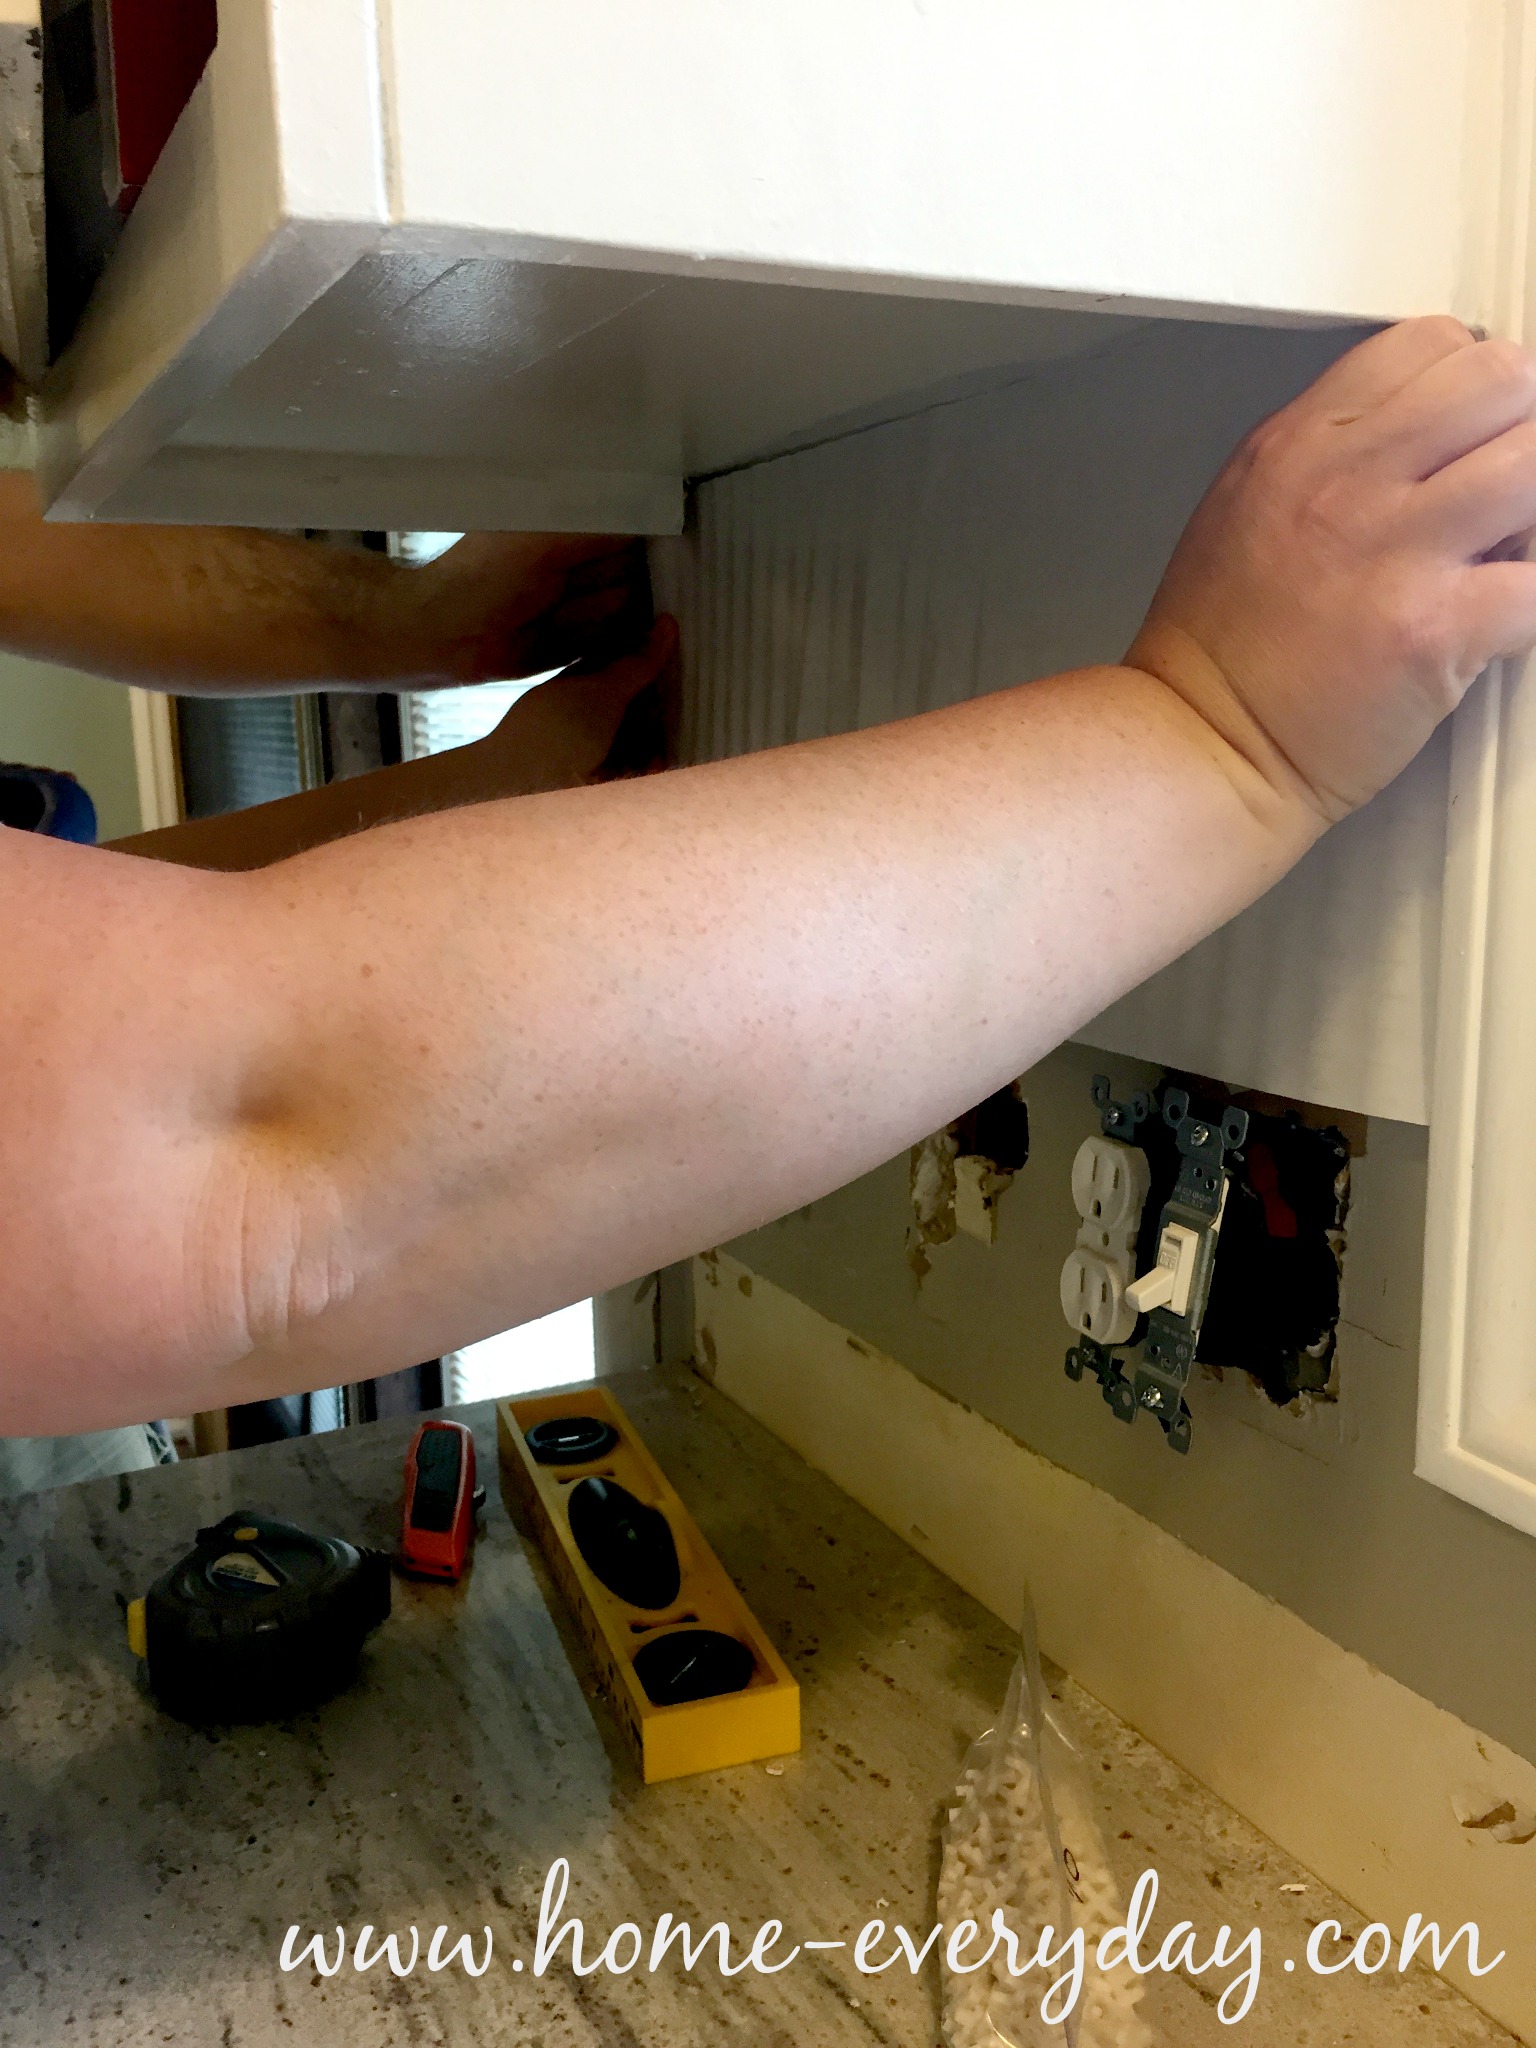
Then, Brian measured (you see a theme here, right?) the trim and shoe along the wall and marked where the new built ins would be, and cut that portion of the trim out. This way, the built in cabinets and shelves would be right next to the wall without any gaps, would be more easily affixed to the wall, and we wouldn’t have to cut into the cabinets.

Built In Cabinets Phase One 6


Built In Cabinets Phase One 7

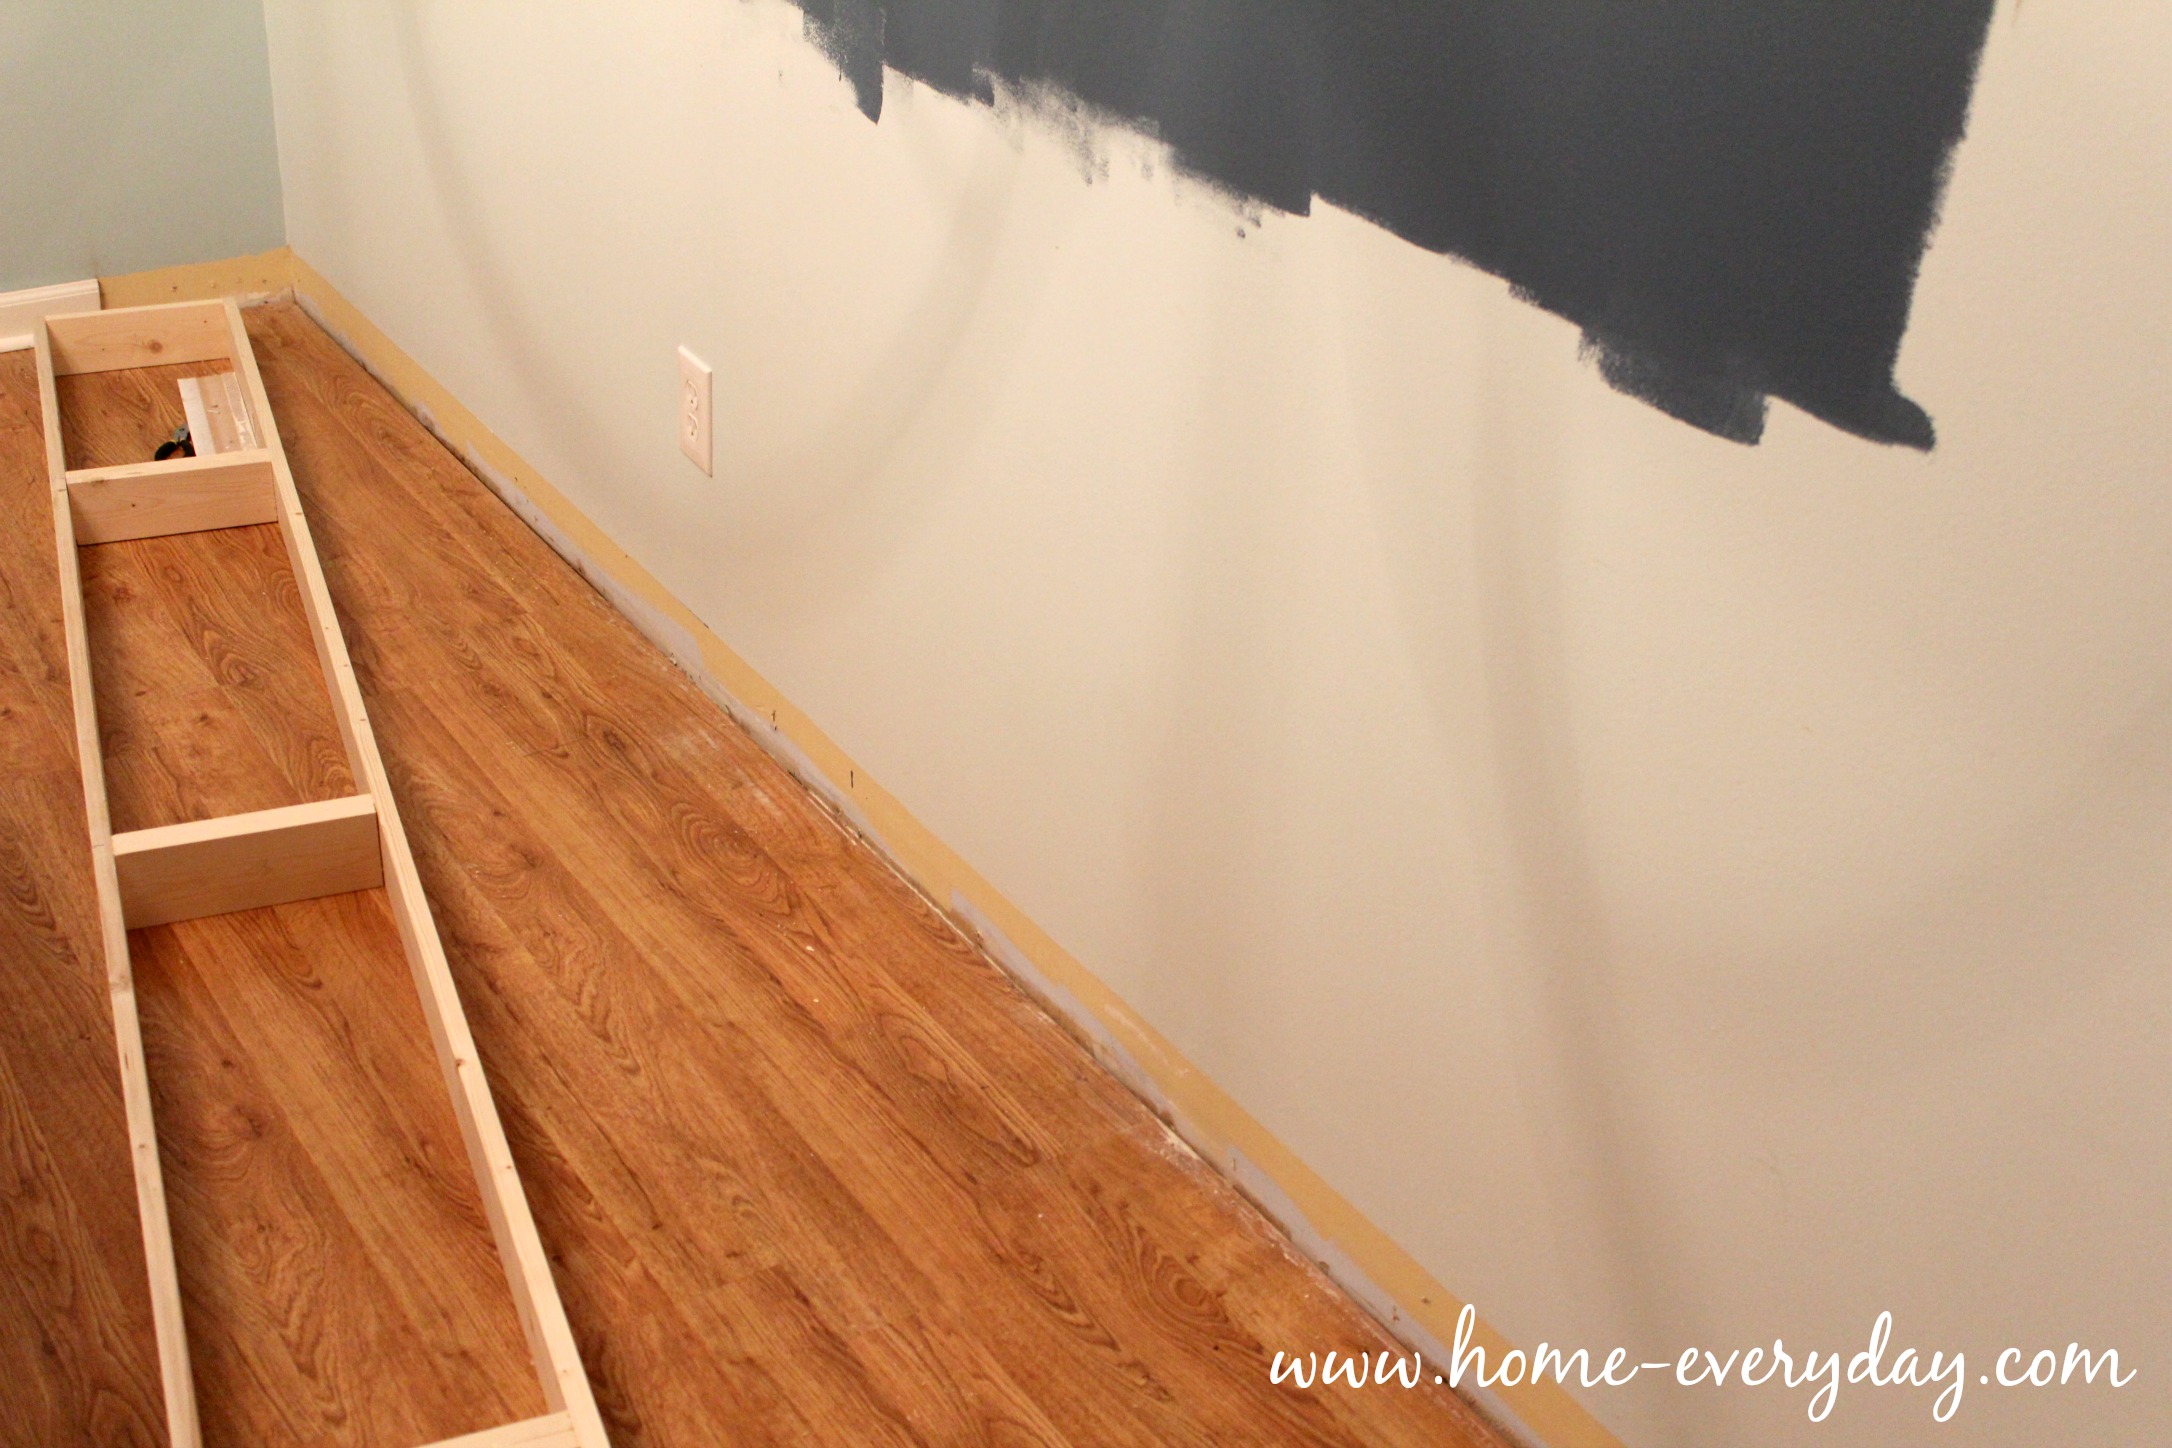
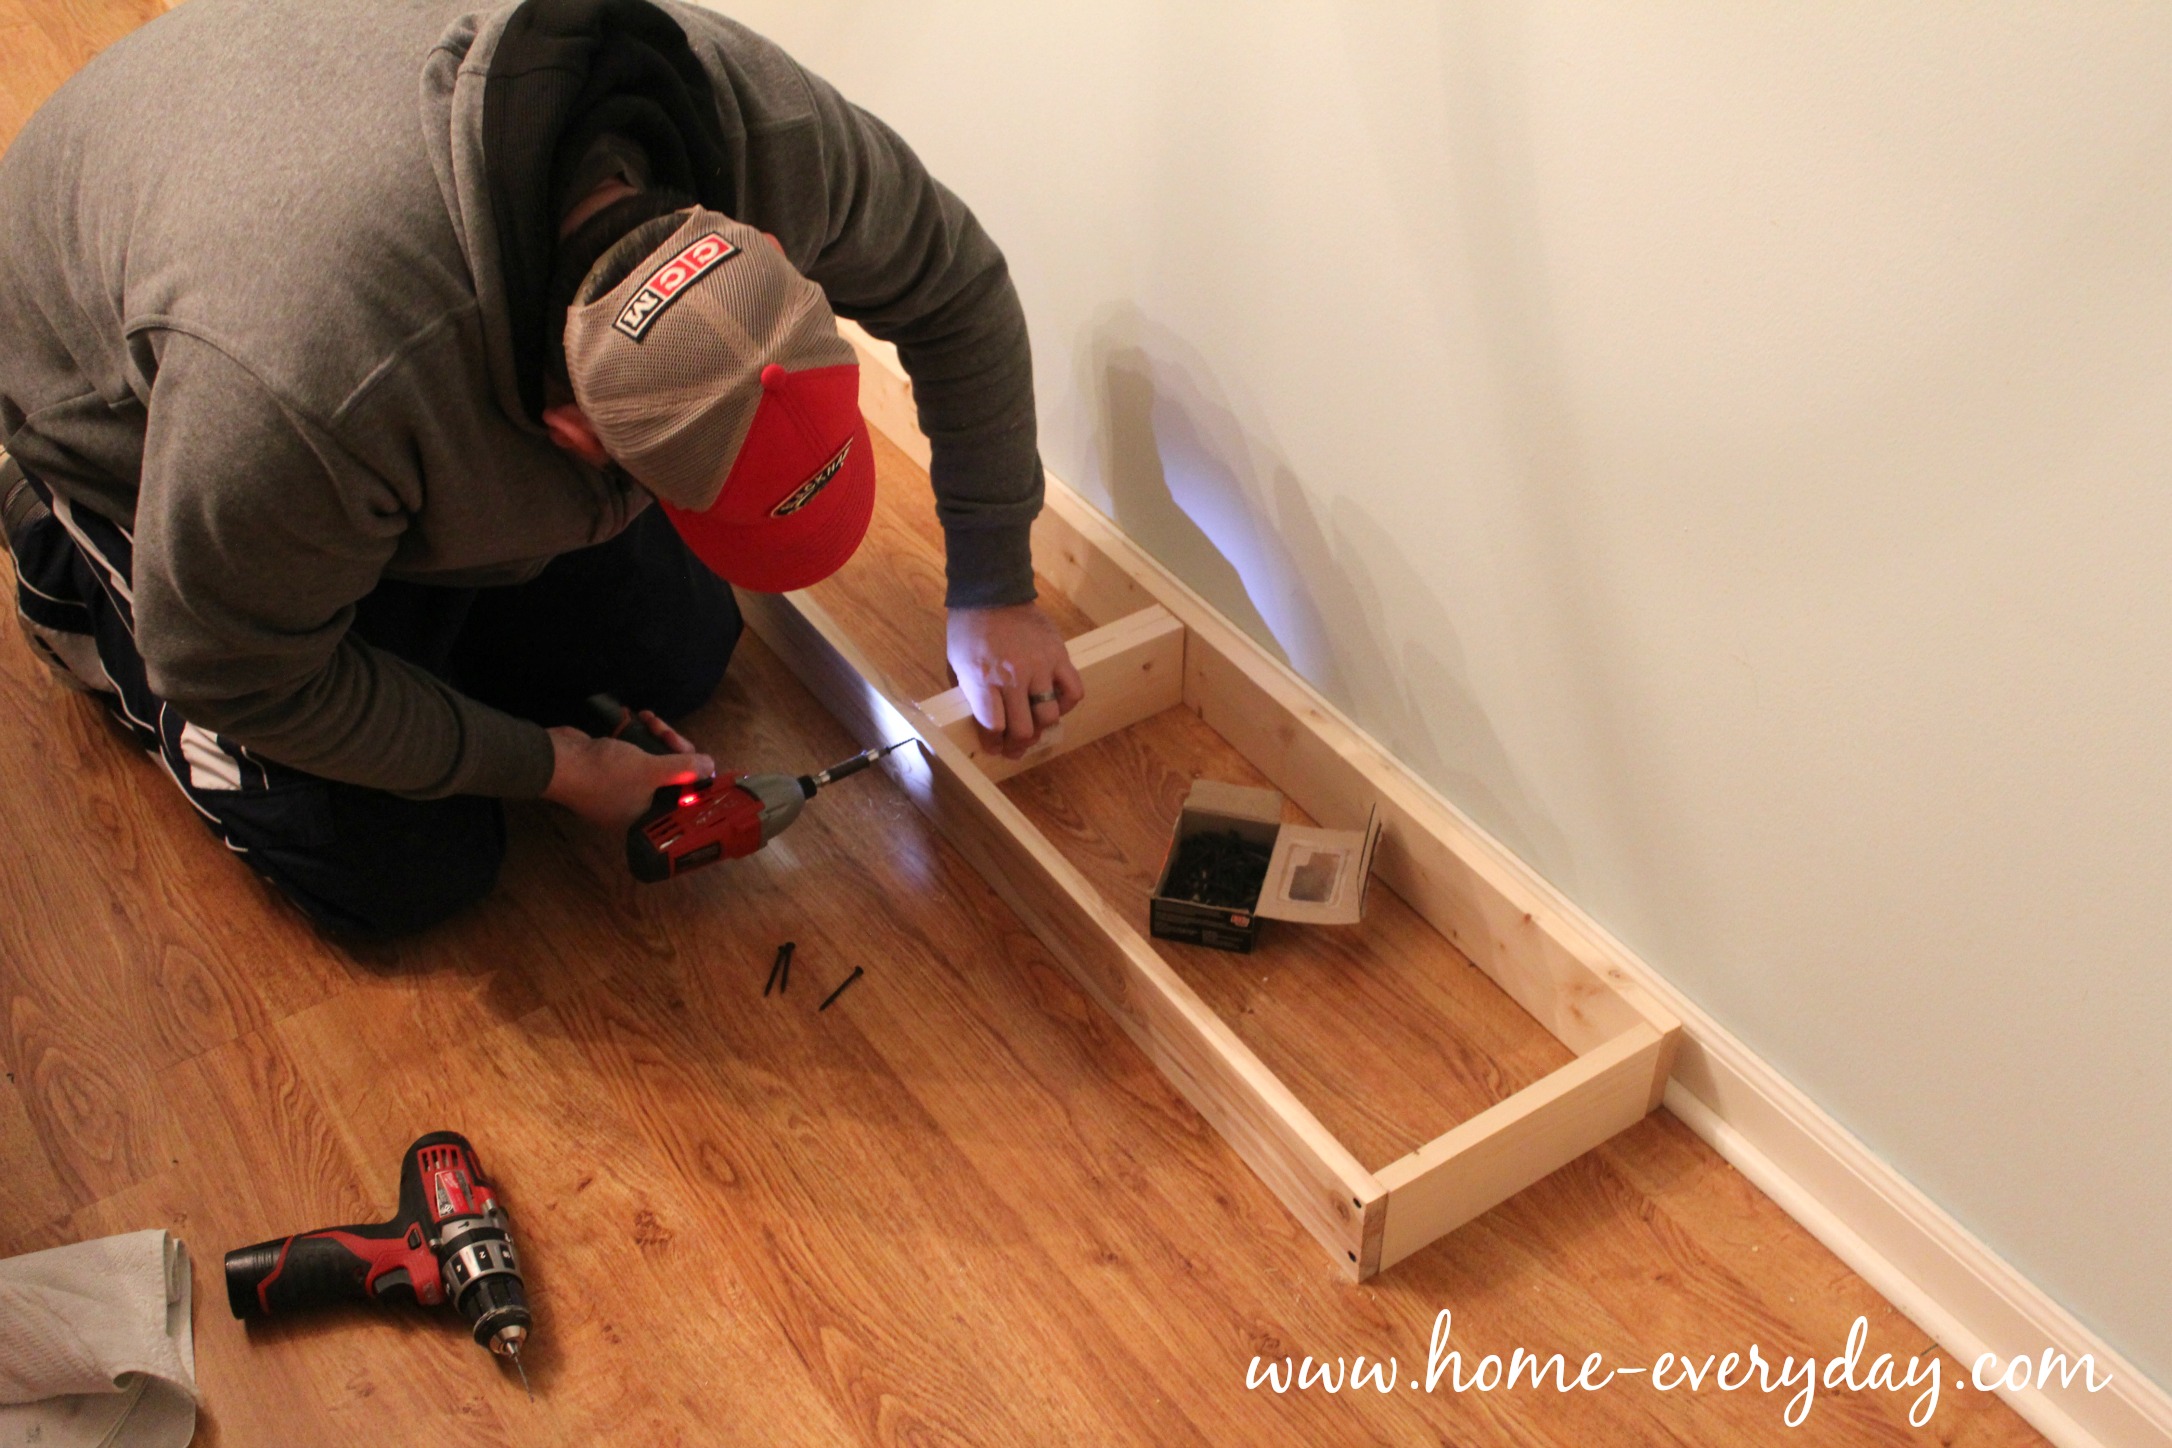
Next, Brian built a base for the cabinets to sit on. The reason for the base was that we used UPPER stock cabinets the closed bottom storage for our built ins. This was because, uppers are only 12 inches deep, and don’t have built in drawers. This way they would take up less space in our already narrow dining room. If we would have set the uppers right on the floor, the cabinet doors would have dragged right along the floor, and also they would have have been has sturdy. To create the base, Brian used 1″ x  4″ common board and created a 10′ x 1′ rectangle that fit perfectly along the wall into the gap created by the cut out trim. Then he reinforced the base by screwing in 1 foot boards to line up where edges of the cabinets would sit. Finally, we affixed the base to the wall.

Built In Cabinets Phase One 5

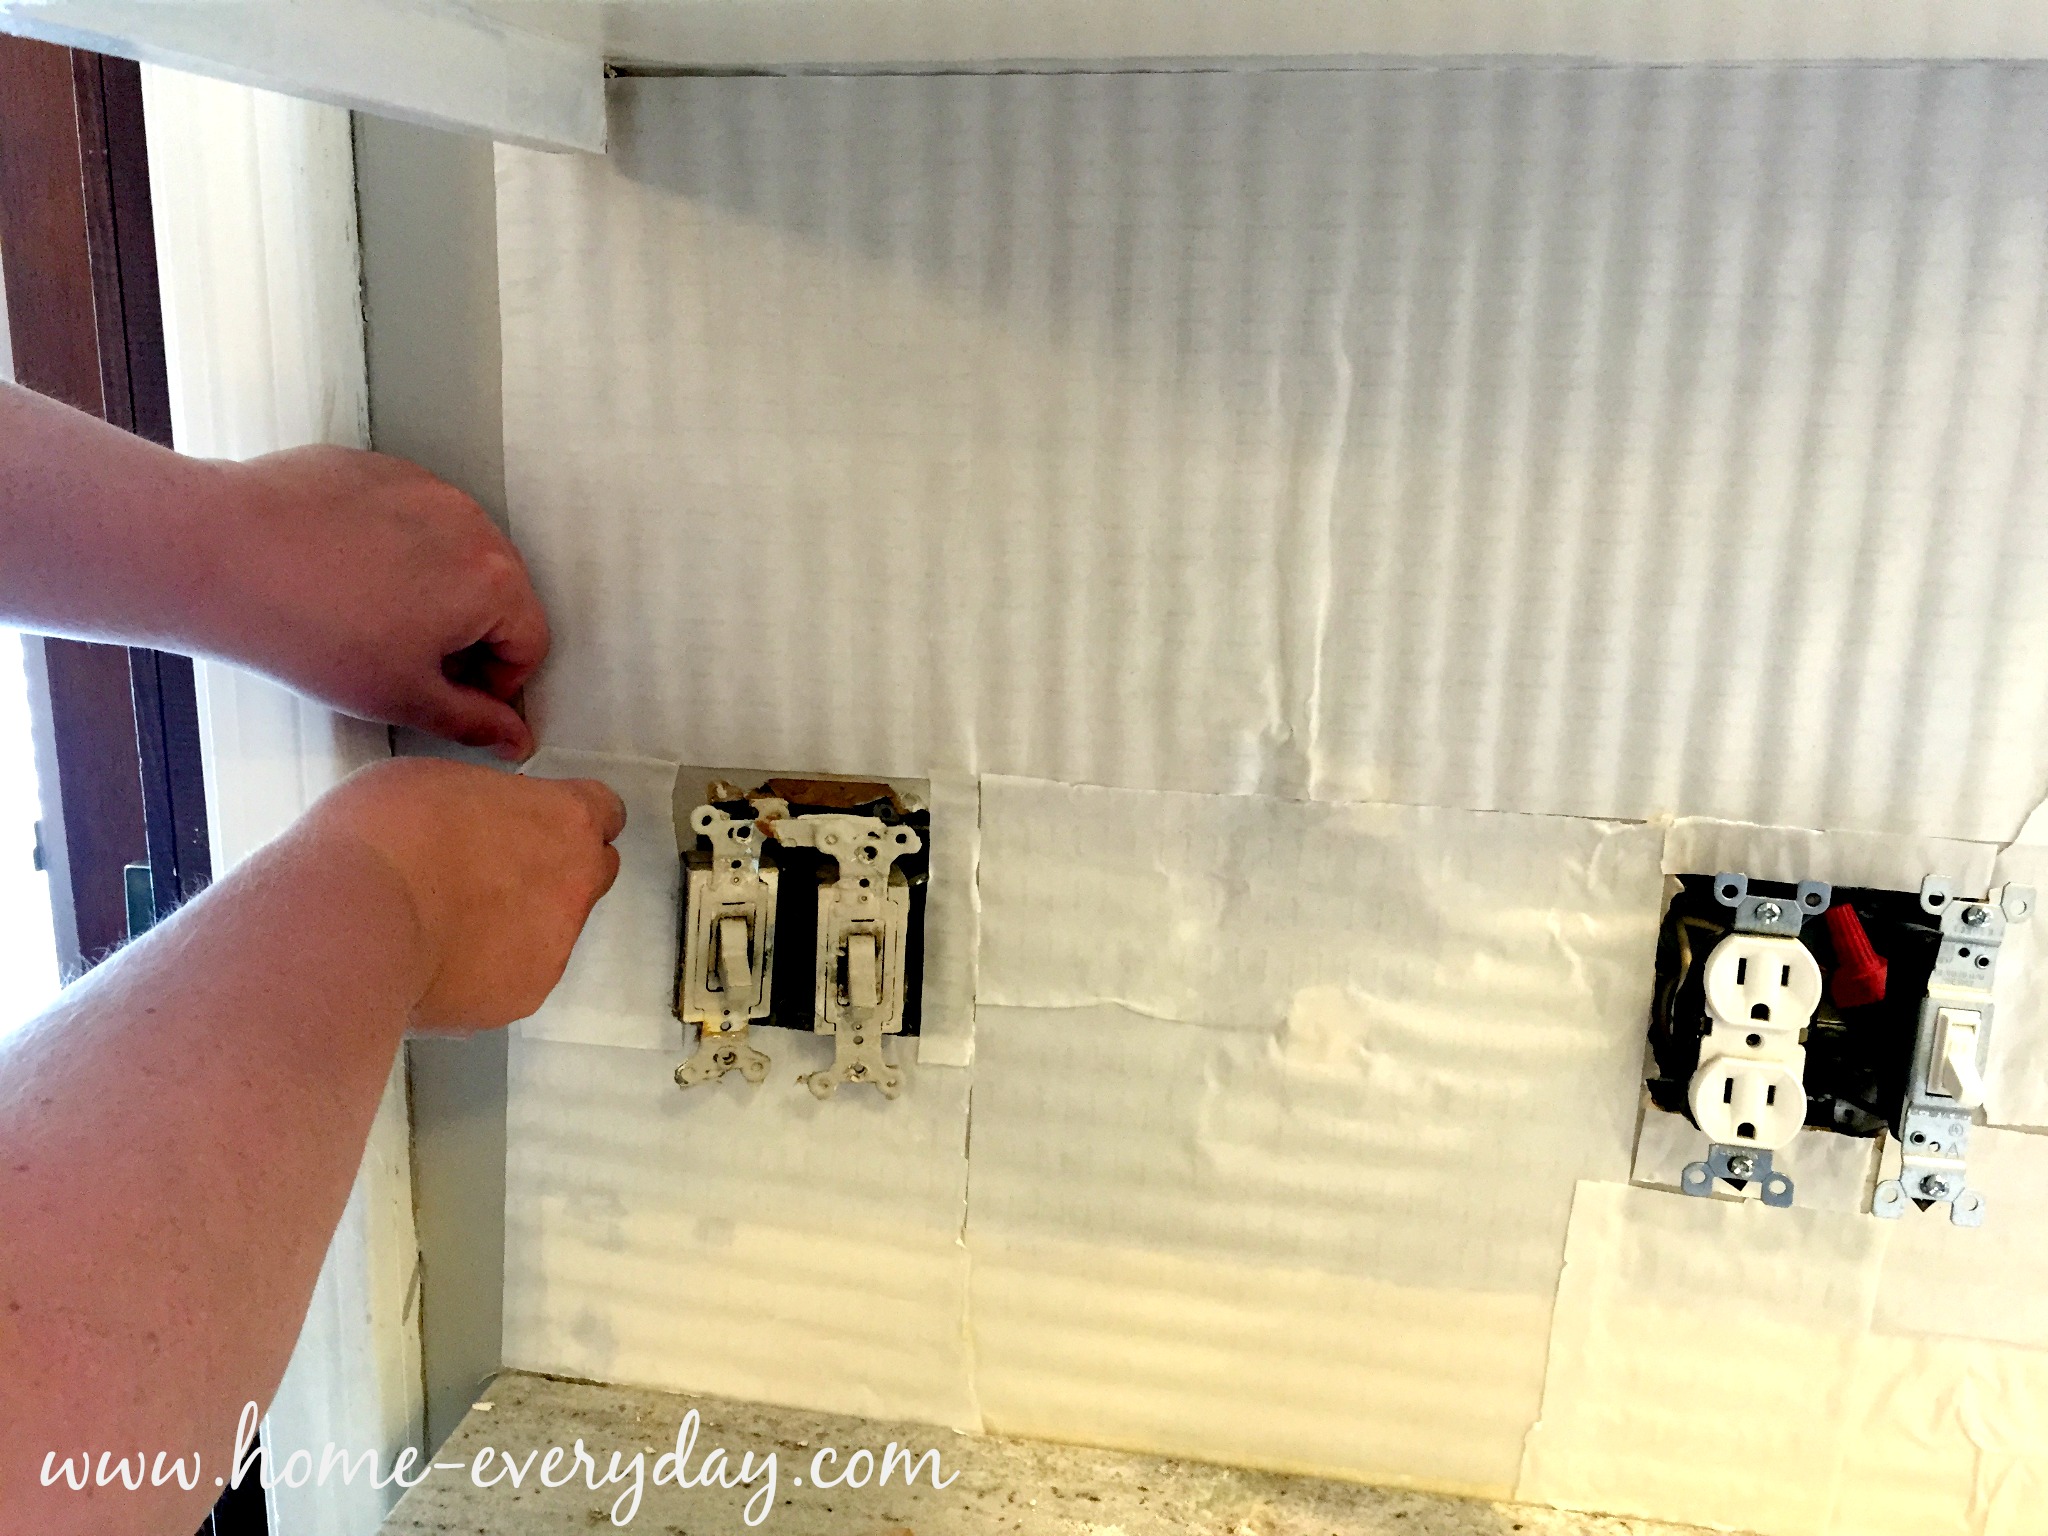
Then, made a teeny mistake. We have an outlet on the wall that we don’t entirely want to cover up because we I think it might be cute to have a lamp sit on the open shelves. So, Brian had to cut a hole in the back of one of the cabinets, in order to have access to the outlet. We messed up a little with our measurements, and ended up cutting a much bigger hole than necessary. Hey, at least we knew to keep access to the outlet.

Next, we set the cabinets on the base. Starting with the outside edge (not against the corner wall because it is not plum or level in our 1975 settled house) we set each cabinet in place.

Built In Cabinets Phase One 9

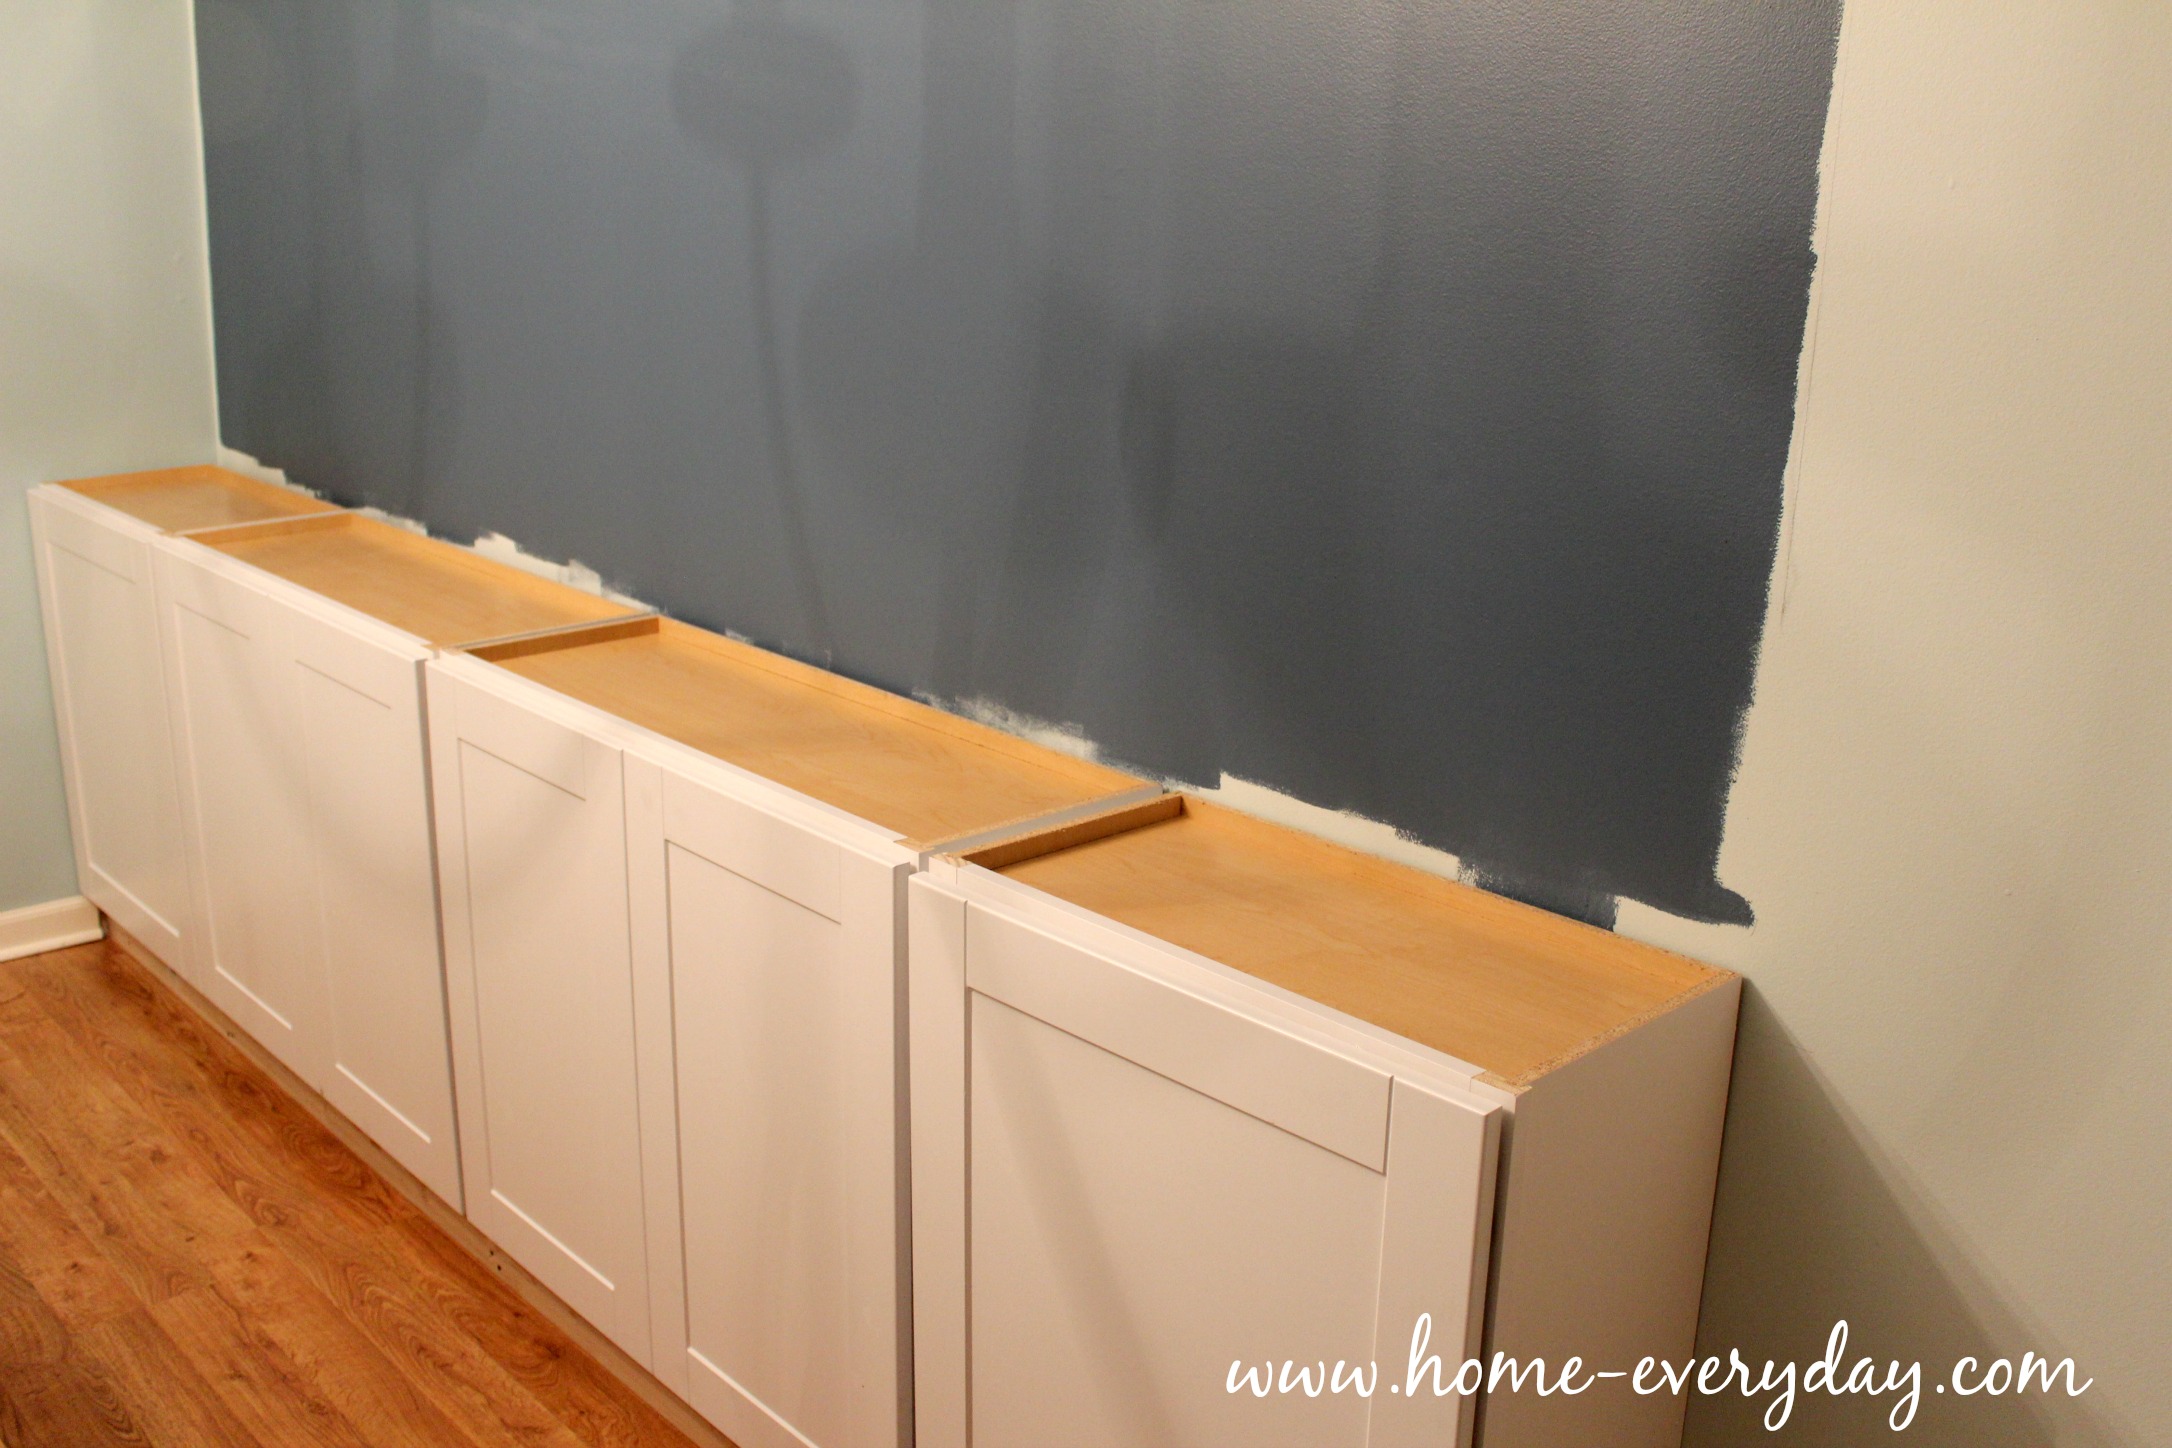
Then, we clamped the cabinets together. and predrilled holes in the base of the cabinets and screwed the cabinets together.

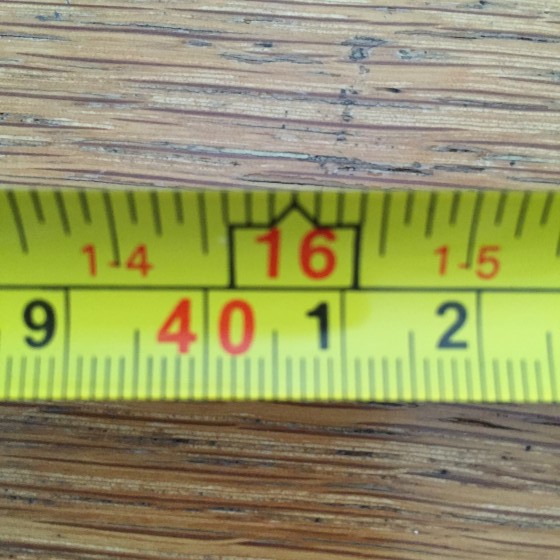
Then, using a level, and many many shims. We made sure all the cabinets were perfectly level. We screwed the cabinets to the wall using shims for support, and making sure that we were screwing the cabinets into studs. Pro Tip: If you are unsure where studs are, you can use a stud finder. To double check, using a measuring tape and a pencil, from the corner of a room or an outlet (outlets and switches are often affixed to studs) and measure every 16 inches (or the red numbers in house on your tape measure) and mark the wall with a pencil. When you drill and the screw pulls tight and doesn’t keep spinning you have hit a stud. 

IMG_3725


After the cabinets were in securely in the wall, it was time to put together the “counter”.  Rather than buy a piece of butcher block, we wanted the counter to mimic the dining table Brian had built a few year ago, but on a smaller scale. Using four 1″ x 3 1/2″ pieces of pine, we created a similar look. Since, we could only buy these boards in 12′ pieces, we ended up cutting them to the length we needed, and made a countertop for the top of the cabinets.

Next, as a recommendation from the handy helpers at Home Depot, using Liquid Nails and clamps.  Pro Tip: It never hurts to tell the people at Home Depot or your hardware store what you’re up to. Often times, they have lots of tips and tricks to help you with your project and are willing to help.

Built In Cabinets Phase One 10

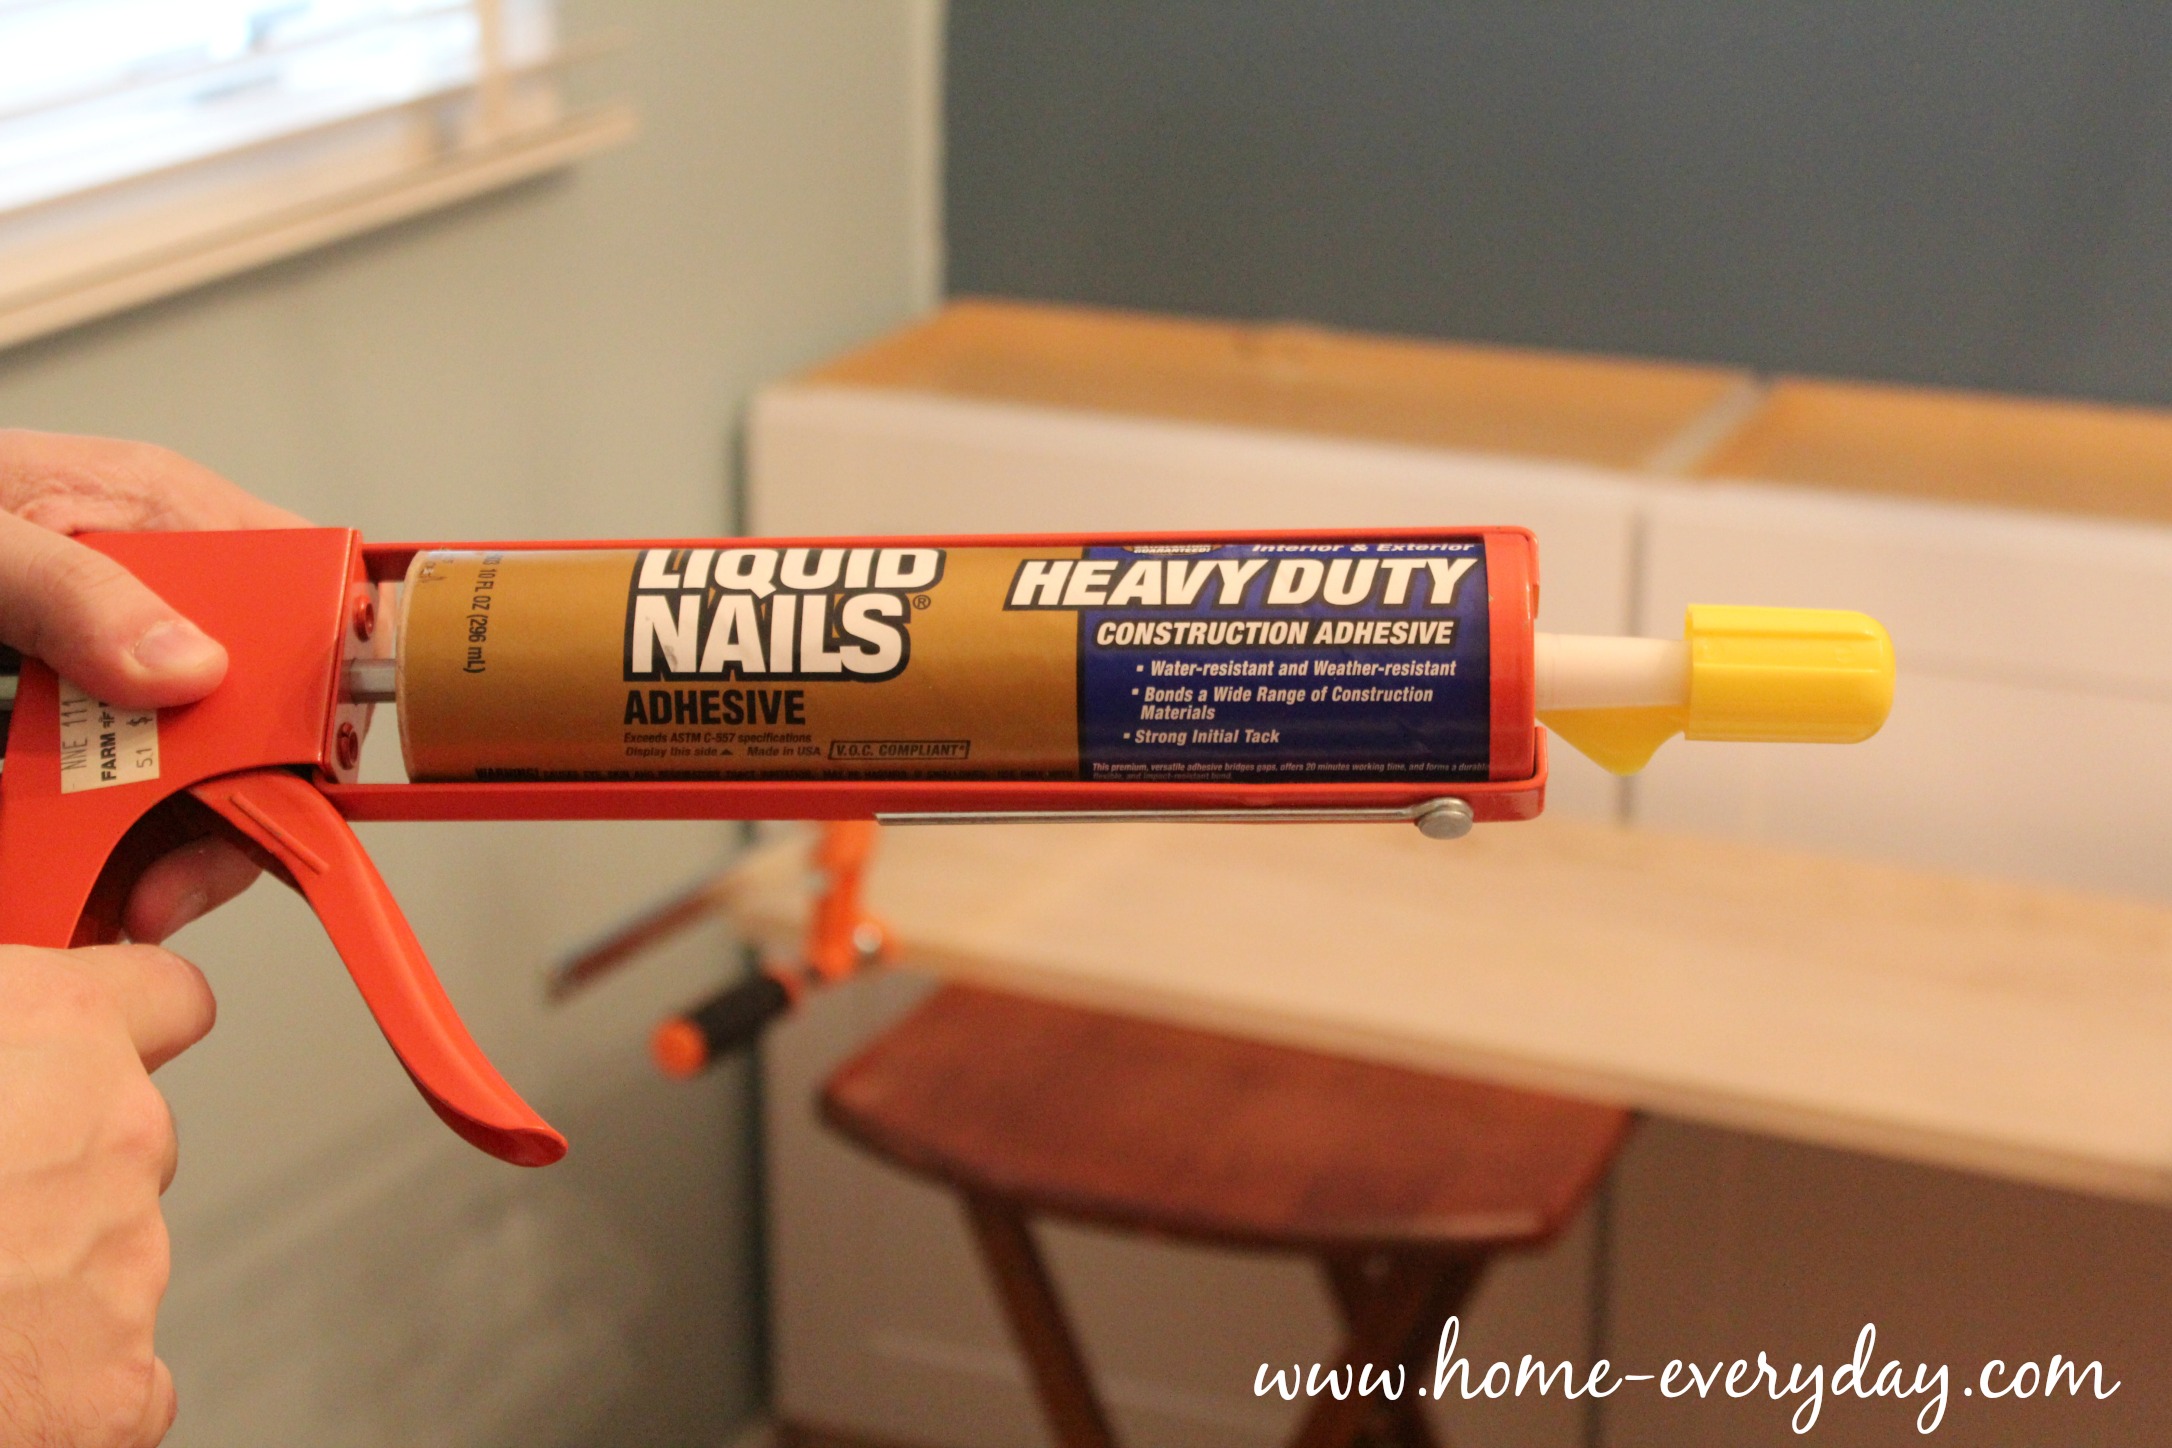
We glued the boards together lengthwise, and used clamps to hold them together. We let the boards dry longer than the recommended time. Pro Tip: Make sure to wipe any excess Liquid Nails that oozes out between seams with a wet cloth right away. It is easier to remove when wet than dry, and will help with a smooth finish.

Built In Cabinets Phase One 12

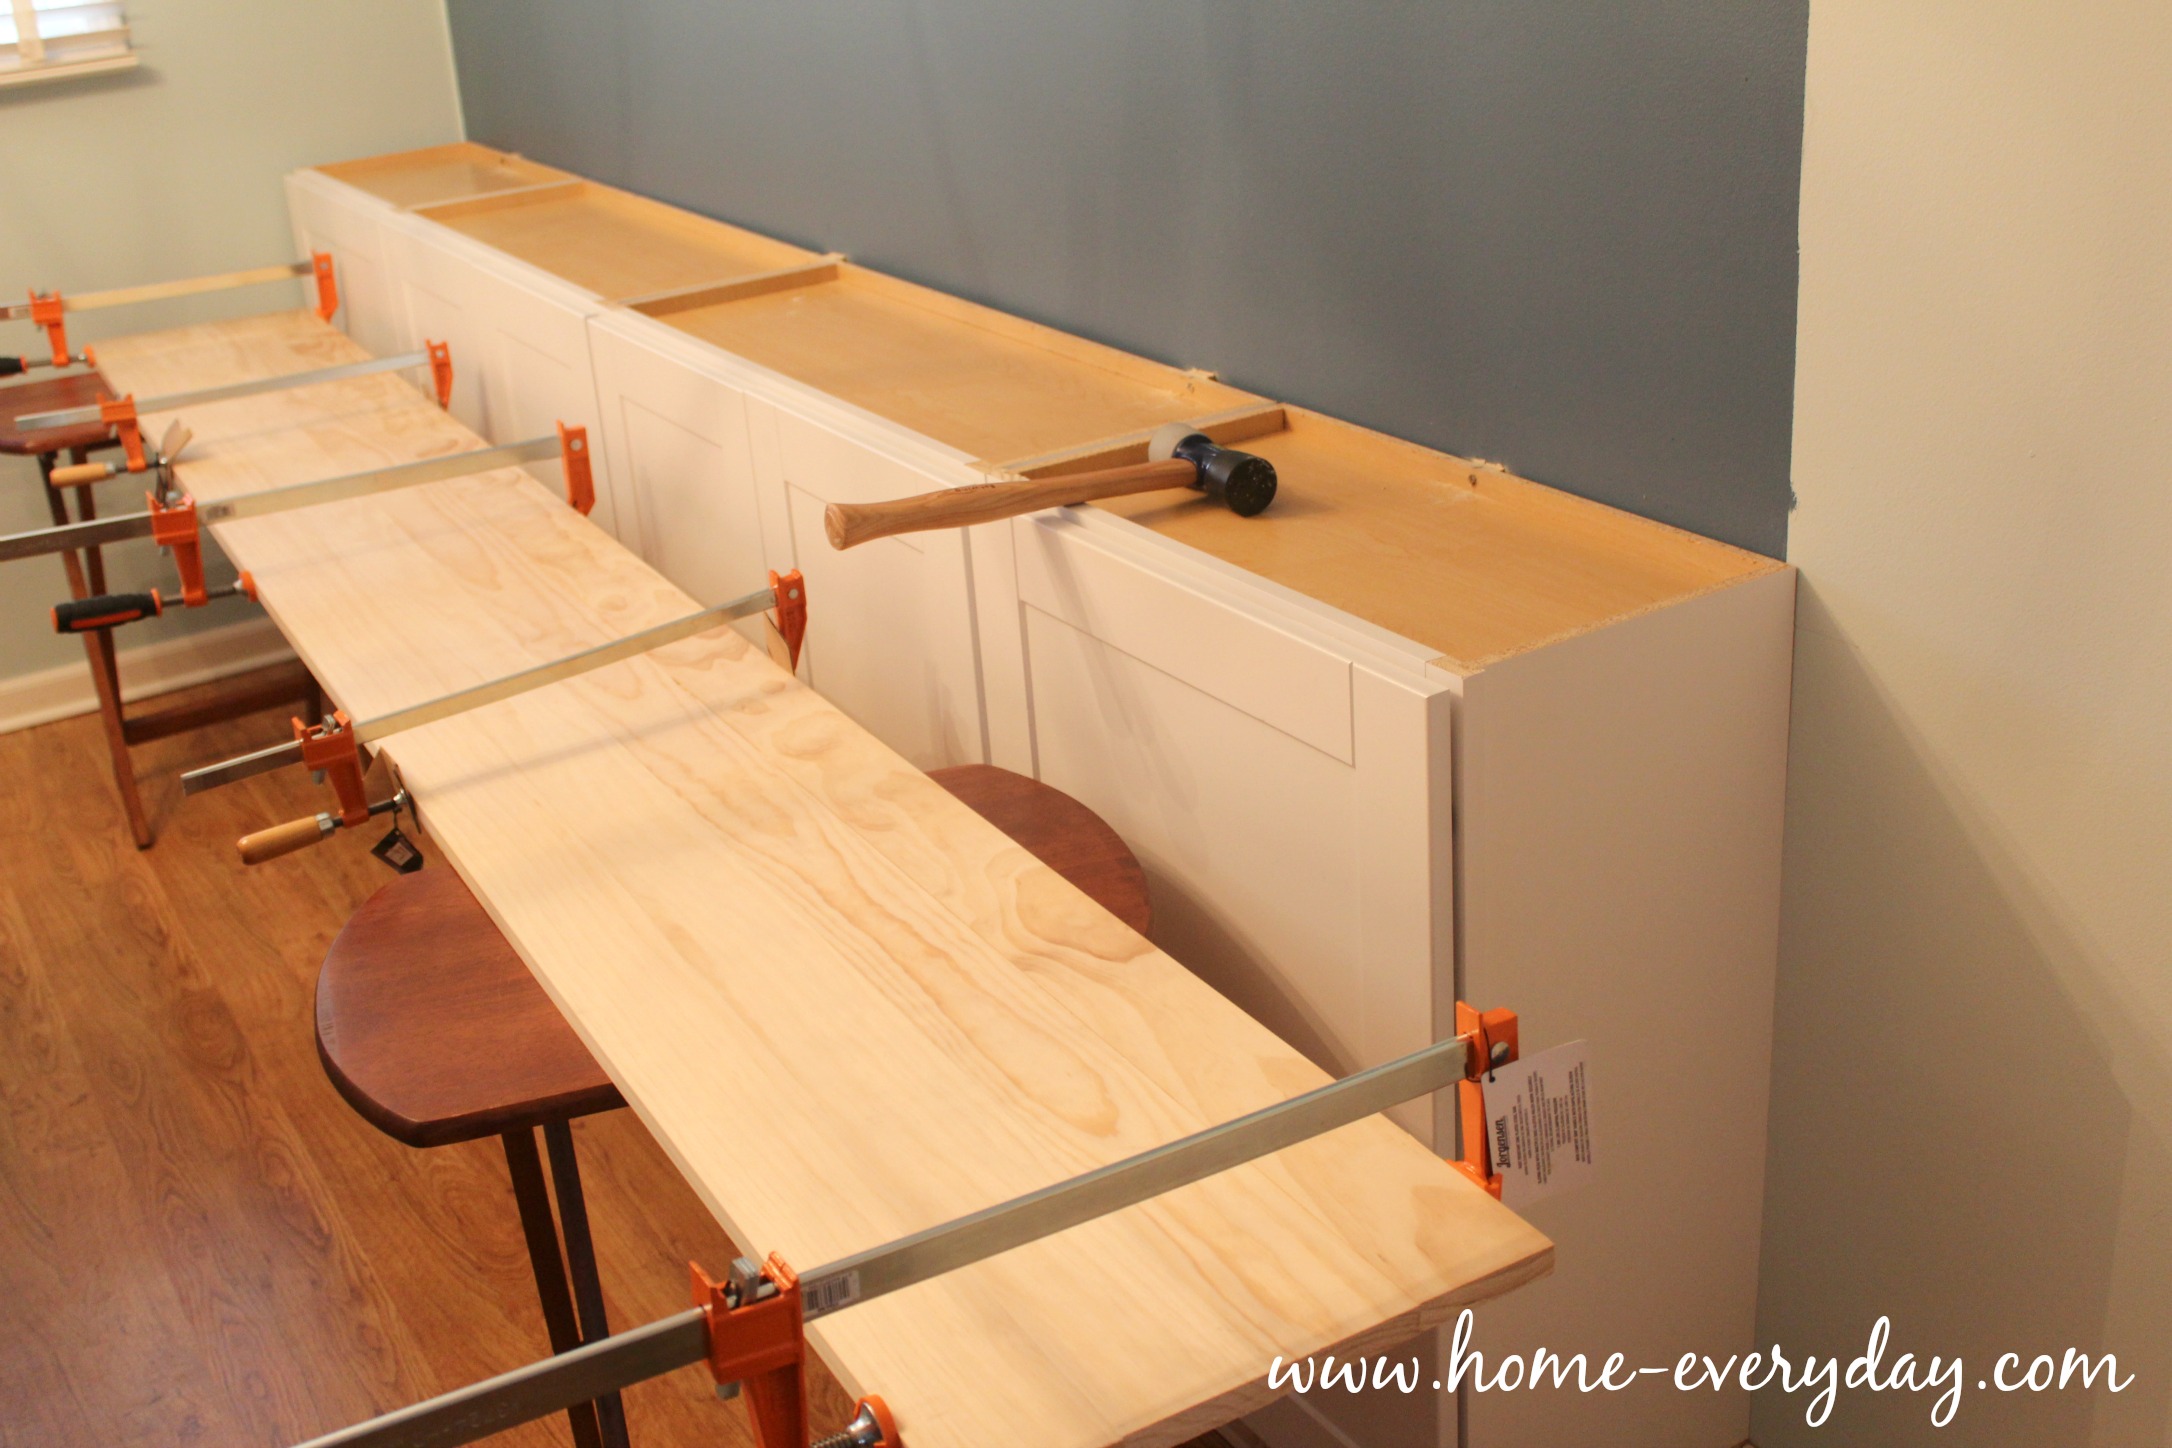
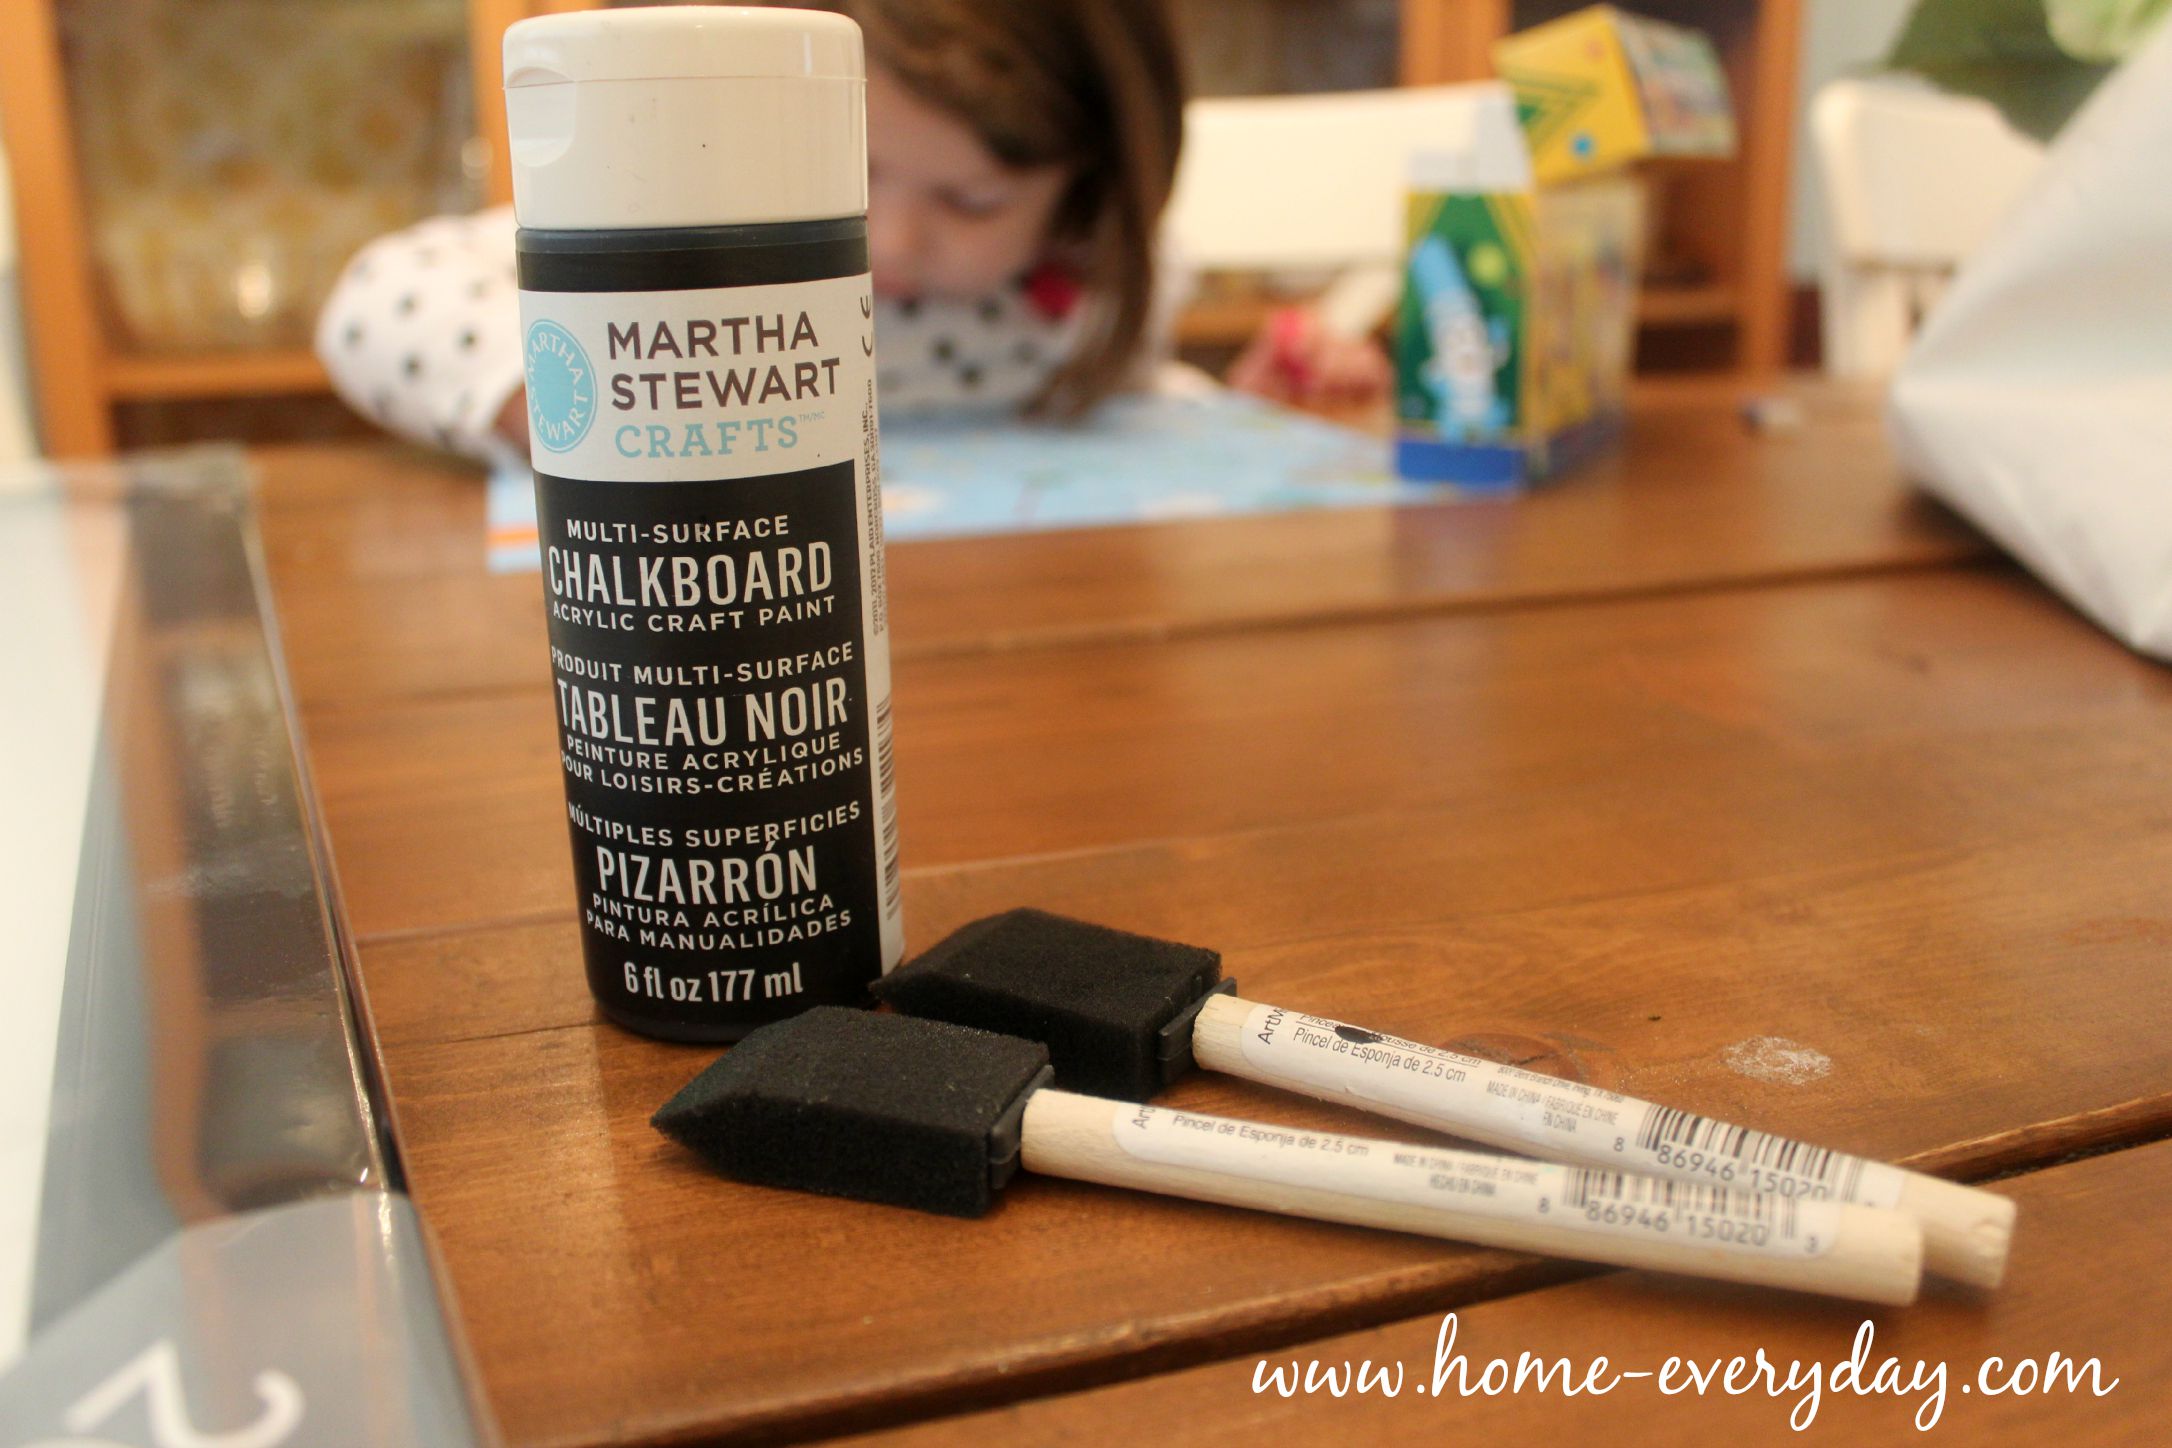
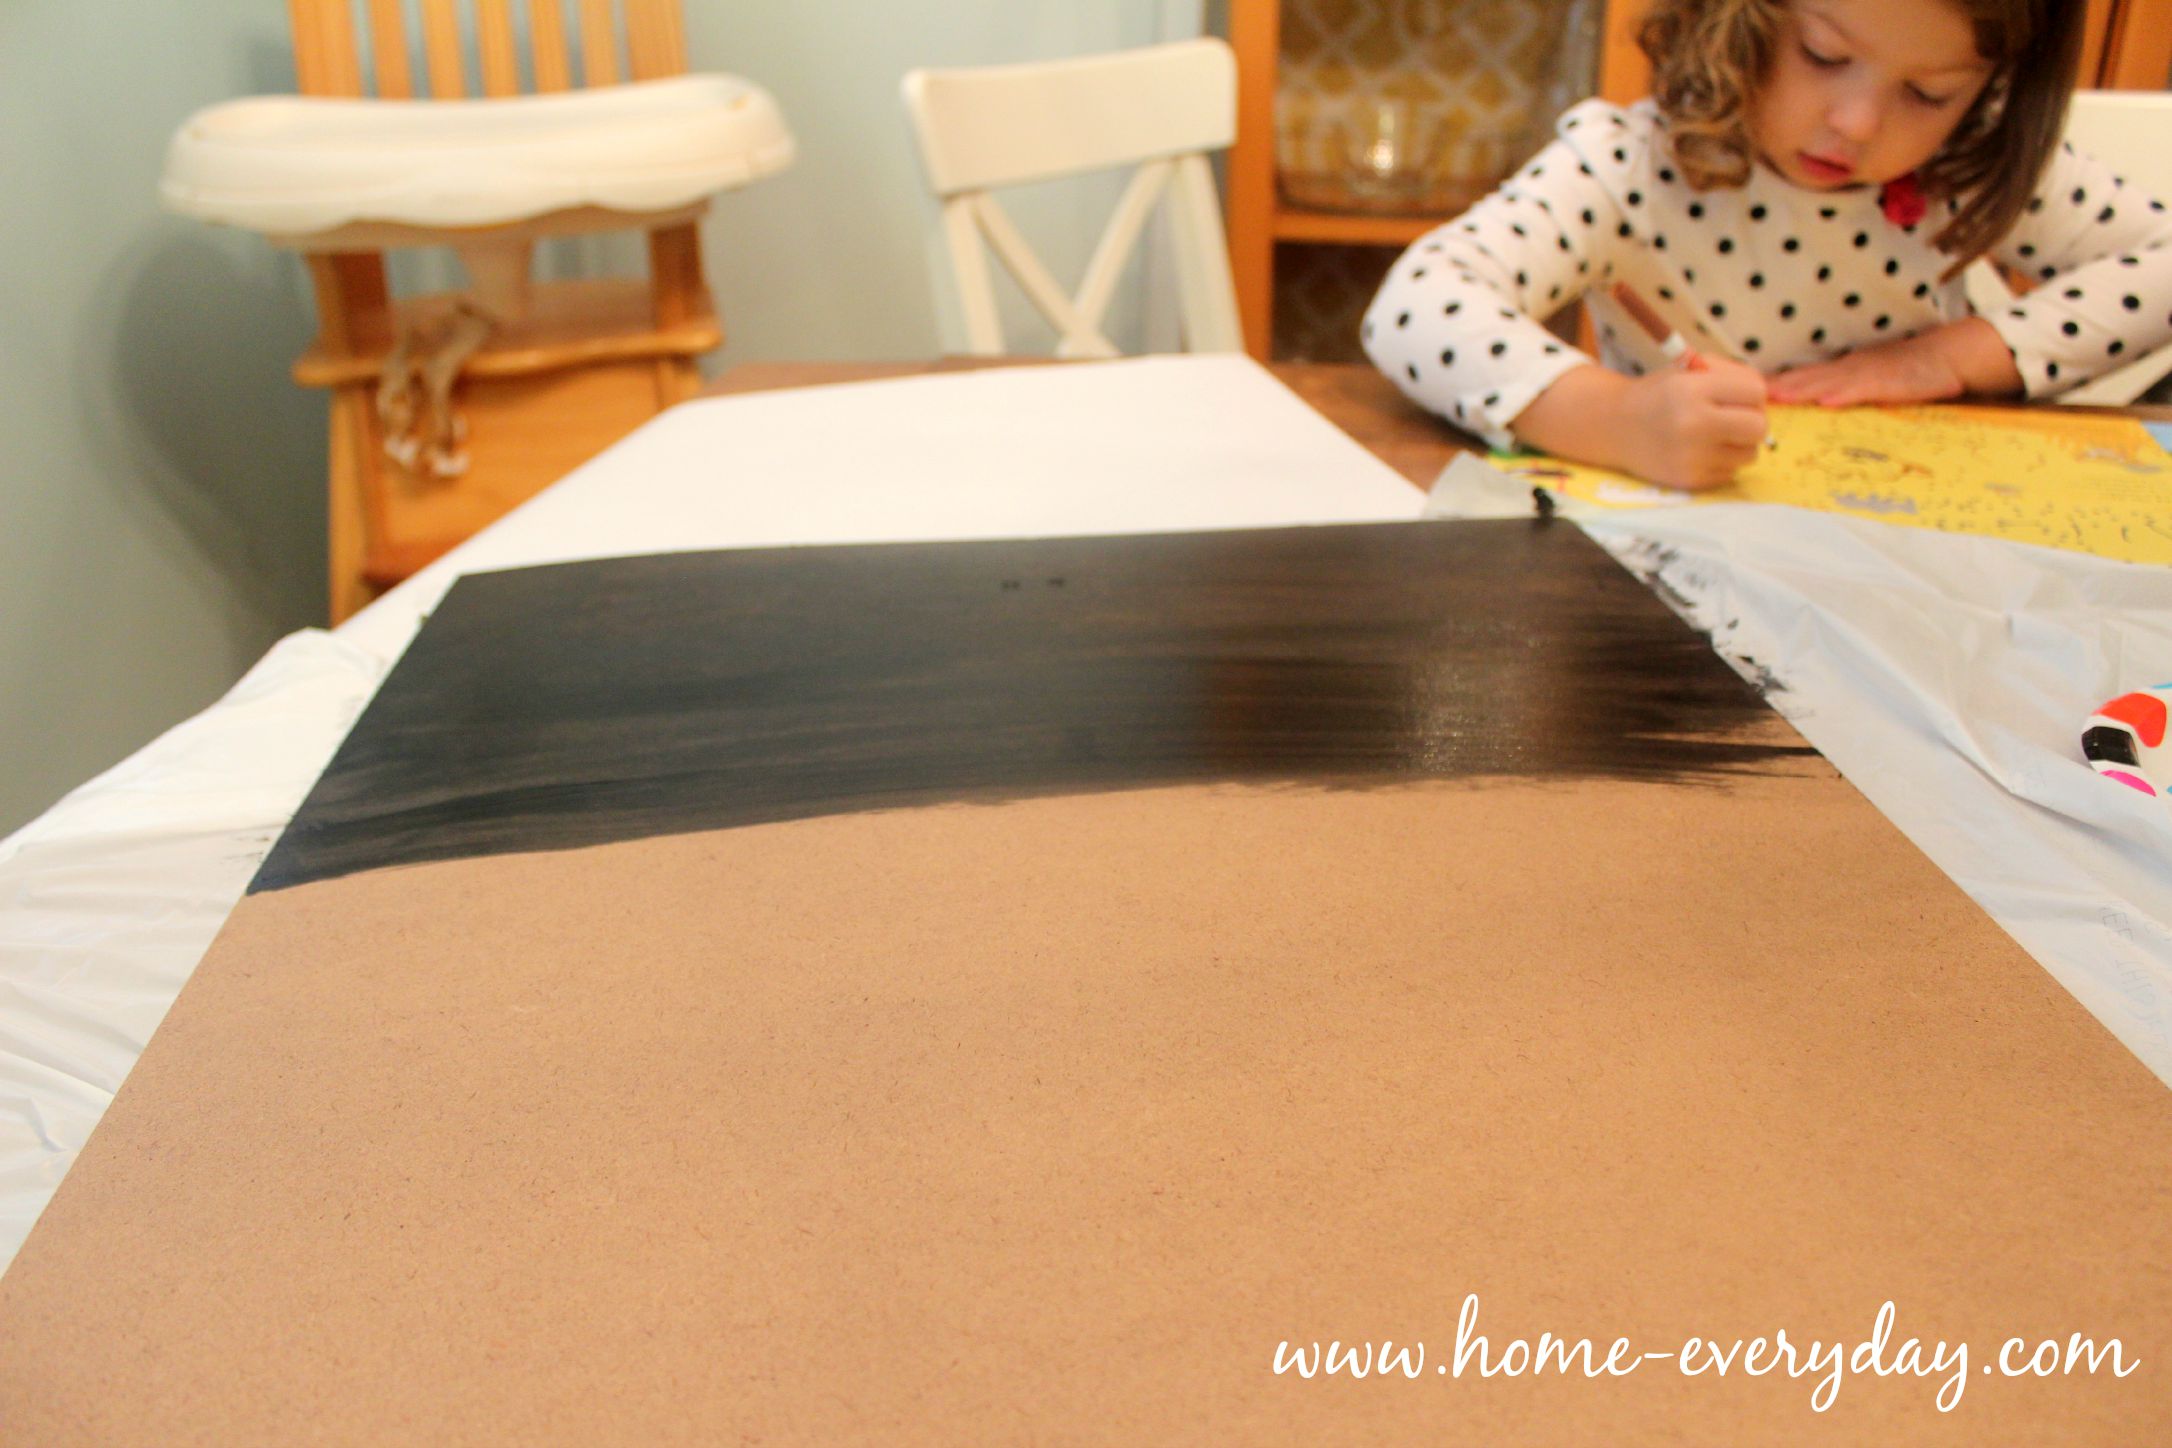
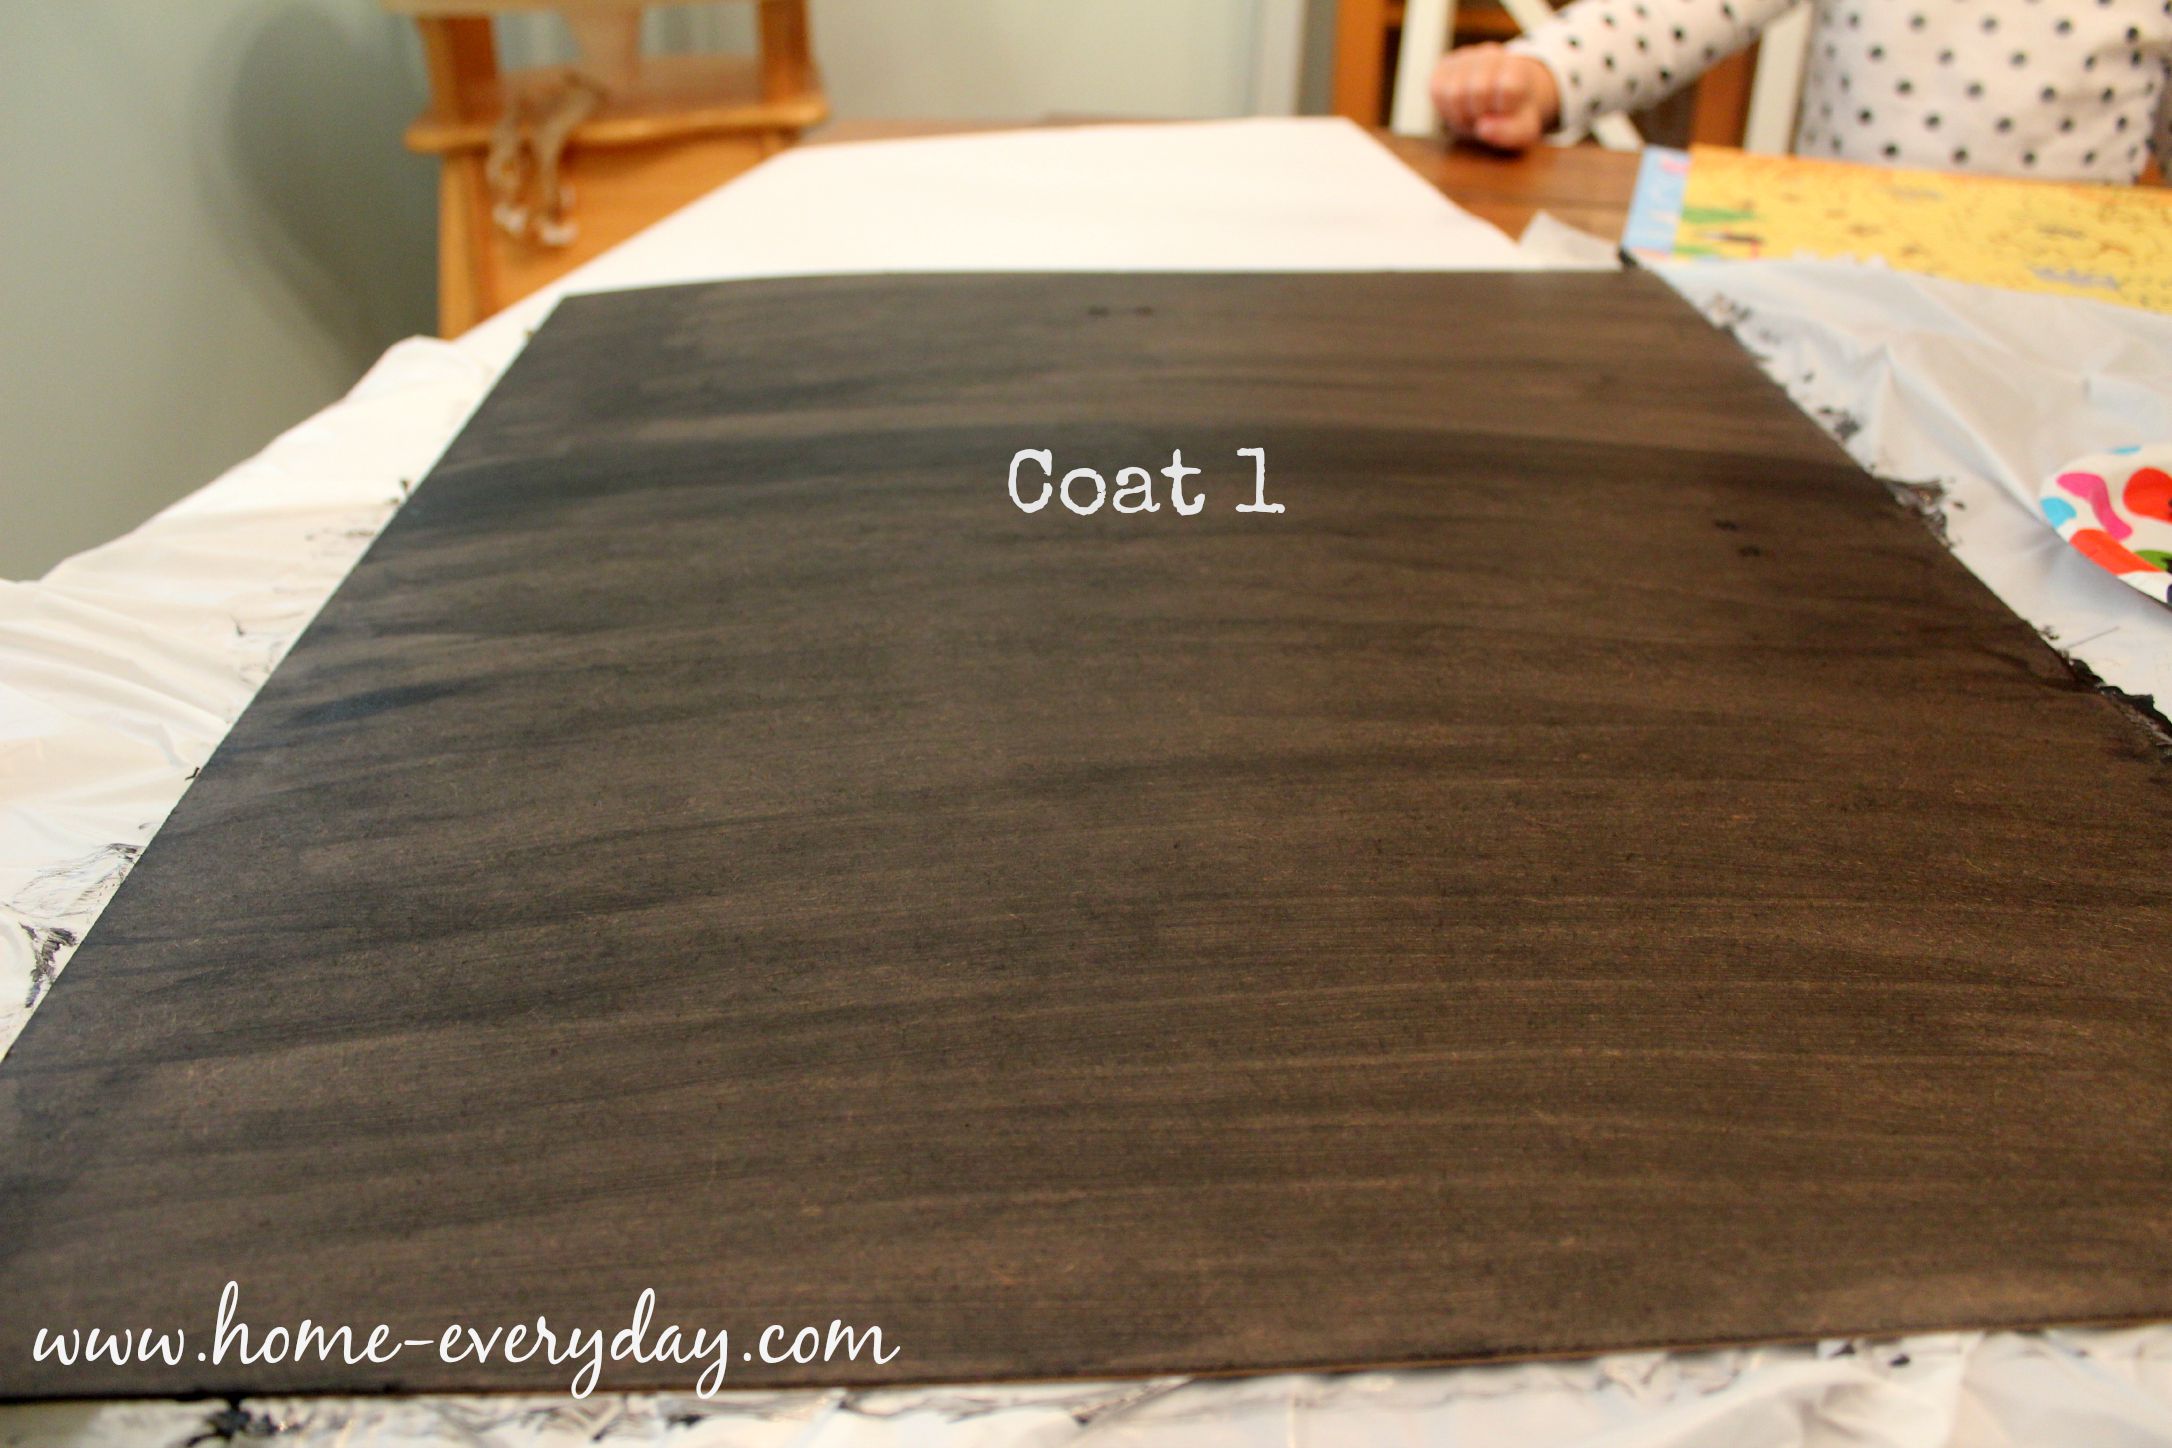
After it dried, we removed the clamps. Then, I sanded, stained (three coats just like the table), and poly-ed it.

Built In Cabinets Phase One 13

Which brings us to today. 

Exhausted, and looking forward to/prepping for Phase 2, the upper open shelves. 

Built In Cabinets Phase One 14

Did you ever have a project that got out of hand quickly? Share in the comments.


How To Install a Tile Backsplash Without Thinset or Mastic

If you read Home Everyday on any regular basis, you know that the kitchen is where I can be found most of the time. I am usually cooking or baking, or crafting at the kitchen table, helping someone with homework at the kitchen table, or cleaning up a ginormous mess I just made. Since updating our kitchen with new countertops, you may have also noticed that we have updated our backsplash too. I love our kitchen even more because the space has become more practical (no more cracked countertops),  but also because of a few more useful and beautiful additions we have made to my most used room: a deeper more functional sink, an extra cabinet, a new microwave (that works correctly), some new curtains, a little paint, and a few new pieces of hardware, and most of all: a gorgeous wipeable subway tile backsplash. 

Ta Da!

Backsplash without Thinset 1

Backsplash without Thinset 2

When the old countertops were removed, with them came a small backsplash that was made of the same material. When the countertops were removed, this was left behind.

Backsplash without Thinset 9

We could have had a small granite backsplash cut and attached to the wall, but there’s a few reasons we didn’t do this. 

  1. I don’t think they are practical for cleaning. Why only cover part of a space that is going to get splashed on. Then I have to tile it anyway? No.
  2. Mo granite means mo money.
  3. I think that tiling all the way to the countertop would create a modern cleaner line.

So, we decided to tile.

Ourselves.

With a method that requires no mastic or thinset.

Backsplash without Thinset FINAL

Before this project, I had never tiled anything before. However because I like to watch HGTV, and Ask This Old House like it’s my job, lay in bed and look at Pinterest boards and Instagram accounts of DIY bloggers, take free classes for projects that might happen some day at Home Depot, and talk with anyone I can about DIY, I felt that I could handle tiling a backsplash. Ok, I also asked our awesome friend Scott who has remodeled two houses of his own from top to bottom to lend a hand. 

For this project, we were able to do the entire backsplash including grout in one day! I know what you’re thinking. Whoa, whoa, whoa, Erin. You cannot tile anything in one day. You have to wait for the thinset to dry. Nope. We used SimpleMat. It is like double sided tape for tile that is perfect for basksplashes or other tiling projects that won’t get super wet (think a decorative table, countertop, or behind a wet bar or decorative wall). If you follow this easy tutorial, you can have a gorgeous backsplash, in a day too! (I was not paid or perked in anyway, I just adored this product).

Backsplash without Thinset 20


And if you’re worried, I waited three months before sharing this tutorial to make sure we didn’t have any problems. Even through a busy cooking season of Christmas where I wiped down the backsplash almost daily. So far, so good!

Supplies

SimpleMat

Tile

Tile Cutter or Wet Saw (You should talk to a pro about what you’ll need to rent or purchase depending on what kind of tile you’re using and what you think you’ll be using in the future.)

Scissors (good strong utility scissors, don’t skimp, you’ll thank me)

Simple Grout (This is a premixed grout with a sealer already built into the grout. I used this to cut out the steps of having to mix my own grout and to have to seal it later)

Tile Spacers

Float

Sponges

Buckets

Lots and lots of Paper Towel

Drop Clothes

Waterproof caulk

Getting Started

  1. The first thing I did was decide on a tile and a grout color. I chose white ceramic subway tile and a gray grout. I chose this combo for many reasons.
  • I liked how it looked with our new countertops. It was fresh and clean, and with grey grout would be divine.
  • Gray grout would not yellow over time and look new for years to come.
  • Gray grout would also help show off the brick pattern I wanted to do with the subway tile.
  • I knew it this look would stand the test of time. There’s a reason you still see subway tile in houses built forever ago. It never goes out of style.
  • It is easy to work with for a beginner tiler. It is light for those not using thinnest (us), easy to cut with a simple tile cutter or nippers (us).
  • It was cheap and in stock. There was no ordering required in case I miscalculated how much I needed, and everyone has ceramic subway tile. EVERYONE!
  • Did I mention how adorable it looked with our countertops?


Decisions are being made. #HomeEveryday #SkibsSummer

A photo posted by Erin Skibinski (@eskibs) on

2.  I measured, and then I measured again (then again). I wanted to make sure I had enough SimpleMat, tile, grout, and anything else I may need to complete the project. There’s nothing worse that running to Home Depot again in the middle of a project.

3. Buy what you need and a little more. It is recommended that you purchase about 10% more tile than you will actually need for a project to make up for any cuts made, broken tiles, or any mishaps. We did a little more than that. Just in case. Pro Tip: Make sure you factor extra tile, supplies, and any equipment purchase or rentals into your budget for a project. 

3. I turned off the power to the area, and then removed all the all outlet covers, and unscrewed the outlets from the wall. Pro Tip: You want to be able to get tiles as close to the outlets cut outs as possible for a cleaner more professional look, but to also make sure there’s no gaps when doing replacing outlet covers.

4. I also then prepped the surface by  gently sanding the backsplash area with a low grit sandpaper. Then, I wiped the surface down with a wet cloth and let it dry. This helped the SimpleMat adhere better.

Backsplash without Thinset 10

5. We laid out the tile in a dry run on the countertop. ProTip: I know you want to get started, but don’t skip this step. Make sure to use your spacers just as you would on the wall. This will help you predict where cuts will be, how your pattern will work, and how to end the tile in each row. There is nothing worse than a teeny tiny piece of tile at the end of a row, which is a terrible hard cut to make and looks silly, when you could have lined everything up a little bit different and get a whole tile instead. Also, this helps you decide where you want to stop and start your tile. I put tile wherever there was countertop, meaning a had to tile into a corner (I did this for practicality and easy cleaning but love the look too). 

Backsplash without Thinset 8


Tiling

  1. Since I had lots of people helping me, I knew we would be able to get this project done quickly, and we had laid out the tile ahead of time, we cut all of the SimpleMat and adhered it to the wall in one giant step. Pro Tip: We made sure to use the float to press the SimpleMat to the wall to get good adhesion. Also, we made sure to cover every area with Simple Mat where there would be tile.

Backsplash without Thinset 12


Backsplash without Thinset 13

2. Next, we peeled back the paper on the other side. Pro Tip: It should be noted that after you remove the paper, you should start adhering tiles immediately for the best possible security.

Backsplash without Thinset 14

3. Time to tile! Scott would keep laying out tile and show Brian where cuts would need to be made. I would stick the tile to the wall, using tile spacers lay another tile.  Pro Tip: After adhering a few tiles, I would press with a float to make sure the tile was secure.

We had an awesome system going.

Backsplash without Thinset 17

Backsplash without Thinset 15


4. For around the outlets, we would use outlet covers and the previous row as a guide to measuring where to cut the tile to keep the brick pattern going. For corner cuts, we made sure to leave a bit of room in the corner for grout.

Backsplash without Thinset 19


Backsplash without Thinset 3

Grouting

ProTip: Before you start remember these three things about grout. Work fast but careful. Wetter is better. Paper Towels are your friend. Now, you may begin. (Also, cameras and grouting do not mix, so sorry for so few pictures.)

1. Once every tile was in place, we removed all the spacers, and made sure that all the surfaces were covered with drop clothes.

2. Next, we filled two buckets with warm water and a sponge. One bucket is your yucky bucket, the other bucket is your not so yucky bucket (technical terms, be careful). 

3. Then, in very small sections, using a float we added grout into all the spaces of the tiles. Make sure that you press the grout into the crevices. Pro Tip: Many people like to use a diagonal stroke with the float to fill the spaces with grout. I found using a rainbow like pattern worked best. Using small strokes from the bottom left, working up and around and back down to the bottom right in a small semi-circle pattern seemed to fill the most spaces with grout.

Backsplash without Thinset 22


Backsplash without Thinset 23

4. Even though we only did small sections of grout at a time, we would wash the float between each section, and close the grout container. Remember, grout is easier to work with when it is wet. Then, we would take a sponge from the yucky bucket, wring it out, and wipe the the section we had just grouted with a VERY light touch. Careful not to removed any grout from the crevices or spaces. Do this step again.

5. Then, wringing a sponge from the not so yucky bucket, we lightly wiped the tiles again. You’ll probably notice drips of cloudy water falling on the tiles, this is fine as long as you notice the water get “cleaner” with every pass. Pro Tip: Keep switching the water in the buckets to help keep haze at bay.

6. Finally, using a bunch of paper tiles, again with a light touch we would wipe the section again a few times until we noticed the tiles were starting to shine up, but also not so hard that the grout was starting to be removed from the crevices. Again, this is a very light touch. You may even want to wipe each individual tile. Pro Tip: While you may feel like you are using a lot of paper towel, this may save time and money later from having to use a tile haze remover. 

7. Repeat these steps until everything is grouted.

Finish it up

  1. Each grout has different rules about dry times. I didn’t wipe or do really anything in the kitchen for about 48-72 hours after we finished tiling and grouting, which I realize may be overkill, but oh well.

2. Once everything was dry, we put the outlet covers back on. 

3. Then we caulked the edges for a finished look.


Here are the after photos again. 

Backsplash without Thinset 2


Backsplash without Thinset 1

I would say for the beginner DIYer this project this project is definitely doable especially if you have the right tools and perhaps you practice grouting at a tile class first. While I realize not everyone has a friend like Scott with all kinds of experience, I would recommend asking  someone who has a little bit of experience using a tile cutter to help out with the first few tile cuts. Even if that means asking the rental facility or someone at your local Home Depot.

Backsplash without Thinset Pinterest Collage


Organizing Legos: A Lego Figure Display

“If I step on one more Lego!!!!!”

This is a phrase often uttered in my house. The kids have all reached the age when Legos are the primary toy. This of course means they are EVERYWHERE. On the floor. In the couch. On the table. In the kitchen. In the car.

While I love that my kids play with Legos (I mean hello hours of entertainment, education, and did I mention silence), I had to think of a a way to organize this insanity.

IMG_9852

The first thing I did was to get some sets of clear plastic drawers, and I sorted all the Legos out by color. I figured this would kind of help with finding certain pieces, and when putting things away, everything would have a place. I even had a couple leftover drawers for instruction booklets, Bionicle pieces, and Lego Figure (known at our house as Lego Guys) pieces and accessories.

Lego Organization 1

After everything was sorted, I thought it might be nice for the kids to have a place to display the things they had built. Normally, they don’t mind displaying something for a few days on the craft table, but then taking it apart to build something else. However, when it comes to their Lego Guys, they really like to keep them together for some reason.

I pinned a few projects, and decided to create a display for their Lego Guys. It was simple and fairly inexpensive as I used up a few things I had on hand.

DIY Chalkboard “Lego Guy” Display

1 picture frame (I chose a large poster size frame)

Chalkboard paint (I used Martha Stewart brand found at Michael’s)

12 – 36 (2 x 3) Lego bricks depending on size of display you want to create

super glue (I used Gorilla Glue Super Glue as I know it adheres to plastic)

chalk

Paint brush

drop cloth or trash bags

Lego Guy Frame 1

Lego Guy Frame 2

Step 1: Disassemble Frame. Take apart the frame by removing the glass or plastic, and any paper. Set aside the frame. Then place the cardboard or wooden backing on the drop cloth to prepare to paint.

Lego Guy Frame 3

Step 2: Paint. Paint. Paint again. Paint the front side (the part of the frame without the hooks to use for hanging) with chalkboard paint. Be sure to use smooth strokes and watch for drips. I ended up painting three coats of chalkboard paint making sure to wait at least an hour between coats.

Lego Guy Frame 4

Lego Guy Frame 5

Lego Guy Frame 6

Lego Guy Frame 7

Step 3: Scribble. Most chalkboard paints require you to cure the chalkboard paint with chalk before moving on with anymore steps. To do this you must draw on the chalk paint after it is completely dry (12-24 hours) and wipe clean.

Lego Guy Frame 8

Step 4: Measure. I placed the board back in the frame without the glass. Then, using a measuring tape, a level, and some chalk I marked out some lines to help me determine exactly where I wanted to clue my Lego Bricks.

Lego Guy Frame 11

Step 5: Glue. Using the super glue, carefully put a dab of glue on the side of the Lego brick and placed the brick on the markings on the board. (I didn’t photograph this step as it made me nervous to have my camera or phone around super glue).

Step 6: Wait. It is important to wait a few hours to make sure that all the Lego bricks are secure with the super glue and are completely dry before attaching your Lego Guys.

Lego Guy Frame 13

Now, you and your kids can enjoy an awesome display of Lego Guys (and label them) and you won’t be stepping on them anymore.

Lego Guy Frame 12


Brick Paver for Beginners

As I mentioned yesterday, the previous owners of this house left a lot of things behind for us. Some were annoyances that had to be thrown away, but other thing turned out to be some pretty nice gifts.

We have a beautiful and very spacious brick paver patio on the back of the house. It was here when we moved in and it was one of the only parts of the backyard that didn’t need some TLC. As a result of the brick paver installation, the previous owners had a lot of pavers left over, and left them on the side of the house.

Brian and I have been trying to think of a wonderful way to use them, and last weekend on a whim, we came up with the perfect plan.

Between my two raised beds it is a veritable weed trap. It is annoying. Also, after watering it becomes pretty muddy in there, and my shoes are a mess after trying to weed.

This is when we (For the record this is one of those times, when I say “we” I mean I came up with the idea and Brian executed it.) decided to put a small section of brick pavers between the garden beds to cut down on the weeds, and help save my cute new summer kicks.

First, Brian removed any weeds and raked up the soil. He then flattened everything out as best he could by hand. He also put down a good layer of weed killer to help prevent any weeds from growing in between the crevices.

We then started laying bricks in kind of a pattern between the beds. there is only room for 5 bricks between the garden beds so it was not hard to come up with a pattern. Starting from left to right. We started with placing two bricks vertically. Then we placed two horizonally, and then one vertically again.

The next row kind of alternated. We placed two horizontally, one vertically and two horizontally again.

Finally, the third row is one brick vertically, two horizontally, and two vertically.

Once we had a pattern we only had to repeat it one more time to reach the end of the small “walkway.” Also, we tried to mix up the colors a bit for some variety.

I know they don’t seem level in these pictures, but once the pavers were placed I had to put down the camera and start gently tapping them into place.

Once that was done, Brian took the leftover bullet edging from the mulch project a few weeks back and continued it in front of the garden beds.

The whole project only took about an hour, oh and did I mention it was FREE? Thank you previous owners, for leaving some of the things you did.

Voila! No more weeds (hopefully), and no more importantly, no more muddy shoes. I could have gotten a pair of gardening shoes, but I like the pavers better. The little walkway is also a nice place for my pots of herbs.

Also, from these pictures, you can see the vegetable garden is doing pretty well this year. I better get out there and weed the INSIDE of the beds now.

If you liked this project, and would like to read more about DIY, Cooking, Baking and all other things domestic you can check me out on Facebook or become a follower of Home Everyday here

Garden Planning 2013

This weekend at our house is known as planting weekend! Last year, when we were first planning our vegetable garden I did a TON of research and talked to a lot of seasoned gardeners about when the best time to plant would be. The consensus for our area is the weekend after Mother’s Day. Our garden last year (you can check out posts here and here), was pretty successful, so I am sticking with that plan.

There were a few mistakes with last year’s garden, that hopefully I will not make this year to ensure we get a bigger crop of veggies.

The biggest mistake last year was overcrowding. This year, I am really limiting what we are planting to what we will really use a lot of. For example, last year the peas and lettuce were the biggest hit, and we wish we would have had more off those, and less of the radishes.

Here is what we have planned for this year:

As you can see, I have my work cut out for me this weekend.

It won’t be long though before I will be enjoying some zucchini bread, a caprese salad or sandwich, or a veggie frittata right from our garden.

What do you have planned for this weekend?

It Isn’t Much, but It’ll Do: Christmas Tablescape

I’m Christmas crazy. I admit I have an almost unacceptable amount of Christmas cheer this time of year. Because of this, we have a fair amount of Christmas decorations. I have a Christmas village that my parents started for me when I was young, two Christmas trees, stockings hung with care, outdoor lights, my Grandma’s natvity, a small collection of snowmen, so by the time I get to the dining room I’m tired. The dining room needs something though, we are in there every single day.

Here is what I was able to do with what was leftover.

I used my favorite table runner found last year at Target on after Christmas clearance. I love the snowflakes stitched on it.

Then, I filled hurricanes with sparkly pear ornaments found at Home Goods last year and berries from Michael’s.

Finally, I added these felt snowflakes from the chandelier.

Not too shabby for leftovers. What do you do with extra holiday decorations?

Check back soon for a full scale tour of our house decorated for Christmas!

Something Wonderful is Happening

We put up two trees in our house every year. One is a big traditional tree with ornaments collected over time. The second tree is a small one my Mom gave us last year. We put it in the corner of our family room since the kids spend most of their time there.

The kids yesterday were a bit antsy with some of the boxes being out so I broke my usual rule of no decorations before Thanksgiving. We put up the small tree in the family room.
Here is how it turned out.
Last year, I bought a package of coordinating ornaments at Lowe’s on sale which is just enough to fill the tree. I love the chocolate brown sparkly ones best. I put a string of red shiny beads that I had on hand from years past and a small star ornament on the top. I set it on an end table covered with a table cloth and made a tree skirt out of some white fabric I had on hand.
We have a teeny bit of Christmas in our house this week. Anyone else started decorating yet?

Privacy Please: Frosted Windows

Here is the deal. Sometimes, I don’t want to answer the door for solicitors. I know, its mean. However, hear me out. Sometimes, they just catch me at a bad time. As in, I’m still in my PJ’s, the kids are still in their PJ’s, I’m trying to make lunch, someone spills apple juice, the phone is ringing… oh and did I mention I’m still in my PJ’s? There are just times when it isn’t possible.

Even though all this is happening, and I cannot get to the door, there is still a straight shot visual to the kitchen from the front door because of these windows.
Basically, even if I want to hide or take a peek in the peep hole the solicitor sees me (still in my PJ’s) and I feel obligated to answer the door, engage in the few minute conversation, and lie about my political affiliation as to not disappoint and send this person on his/her merry way.Brian really wants me to put up a no soliciting sign, but I don’t want to miss out on Girl Scout cookies.

That’s when I decided to “frost” the windows. I did this in the upstairs bathroom for privacy and I still had some of the materials left over to do these windows. I used Gila Privacy Control Frosted Paper with the Gila application kit. The whole job took about twenty five minutes and another thirty minutes of dry time. (apologies for the photos the lighting was weird shooting right into the window and I took pictures with one hand while doing this with the other).
First, I cleaned the windows and dried them thoroughly.
Next, I cut the window film to size (actually a little bigger for a perfect fit). This way I could trim off excess. 


Then I removed the backing to the window film. 

I thoroughly sprayed both the window and the sticky side of the film with the solution that comes in the application kit.


I, then, applied the film, and used the squeegee like tool to work out any air bubbles. In the corners, there seemed to be a build up of the solution so I would gently pull back a corner, dab the with some paper towel to remove excess solution and then smooth out again with the squeegee tool.


I did this to all three window panes, and then let them sit for about 30 minutes before trimming the excess film with the cutting tool provided. 


Hooray! Now, I can stay in my jammies forever! 


Wine Included: Clever Shower Gift

This past weekend was a bridal shower for my soon to be cousin, Lindsey. I have always been a big believer in adhering strictly to bridal registries, but this time I couldn’t resist adding a little something extra.

They couple has asked for a small wine fridge, but when I saw this on the side of the box…


I realized I needed to remedy that situation as soon as possible.

So, of course I started brainstorming ideas for how to fill the wine fridge creatively. After some searching, I found these FREE printable tags on Libby James’ Blog. The tags mark certain milestones in the first year or two of marriage, including first fight, wedding night, Christmas Eve, first baby, first dinner party, and the couple’s first anniversary. On the blog, there are also instructions on what kinds of wine to buy. After printing the tags, I cut them out and tied them to the bottles using a little twine I had on hand.


I then put them in a box with a little tissue paper and wrapped the wine fridge in coordinating paper.


Thank goodness I solved the empty wine fridge dilemma! I hope the Bride and Groom commemorate all the important moments of their first year of marriage.


Kid Craft Time: Canvas Art

As the weather begins to get cooler, more time is spent indoors with the kids. While the boys are in school now, it is only for a few mornings a week, so sometimes I am trying to find something to do indoors other than bringing out the Play-Doh again (ugh, someday I will talk about my love hate relationship with Play-Doh).

A few months ago, I pinned a few awesome craft ideas for the kids, so I thought it was time to break one out. My kids really like crafting and they also like when we display their work. Armed with a 40% off coupon and a sale on canvas I hit up JoAnn Fabrics, and got some supplies.
Here’s what we created: 


Here is how we did it: 


Supplies:
Canvas
Froggy Tape
Acrylic Paint
Stencil Sponge Brushes
Paint Smocks
Plastic Bags 

Prep the Site: First, I covered my children with smocks (basically Brian’s old shirts), and covered my table and floor with plastic bags. This made for easy cleanup.


Tape it Up: Then, I taped off a small section of the canvas with Froggy Tape. 


Pour it Out: I put a small dot of each color paint on a take out container top. I deginated one sponge brush per color to help keep things a little cleaner and help the colors not bleed into each other so much. 


Let Them Create: The kids started blotting the entire canvas with dots of paint. 


Dry: I let the paint dry for a few hours, and then VERY carefully removed the Froggy Tape. Then, in the empty space I added a sticker I found at Archiver’s with one of my favorite quotes. 


The total cost for this project was under $20. The kids got to participate, and we made some awesome sentimental art for our living room gallery.What a perfect way to spend a cool afternoon indoors. The only thing that would make this better is some cookies.


LInking up at Hi Sugarplum. Everyone there is posting ideas for crafts that can be done in about an hour. Check it out!

 
Also, linking up at Serenity Now for plenty of quick and easy weekend project ideas.