Tag

crafting

I Kept a New Year’s Resolution: A Good News Jar Recap

I recently told a friend how sometimes I feel like my memory fails me. I can remember obscure Smiths lyrics, or I can remember my grammar school friends old home telephone numbers, and yet, there are things that I cannot recall. For example, every morning when I leave the house, in a hurry, carrying a million things, shouting to someone, “Ok, I’m walking out the door!” I try to plow through the storm door. However, the door is always locked. Then, under my breath, I utter, “What the…?” in complete shock that the door is locked and I cannot just go careening through it at full speed. I am often the one that locked the door the night before. Every. single. morning. this. happens. We will have lived in this house for 5 years in February.

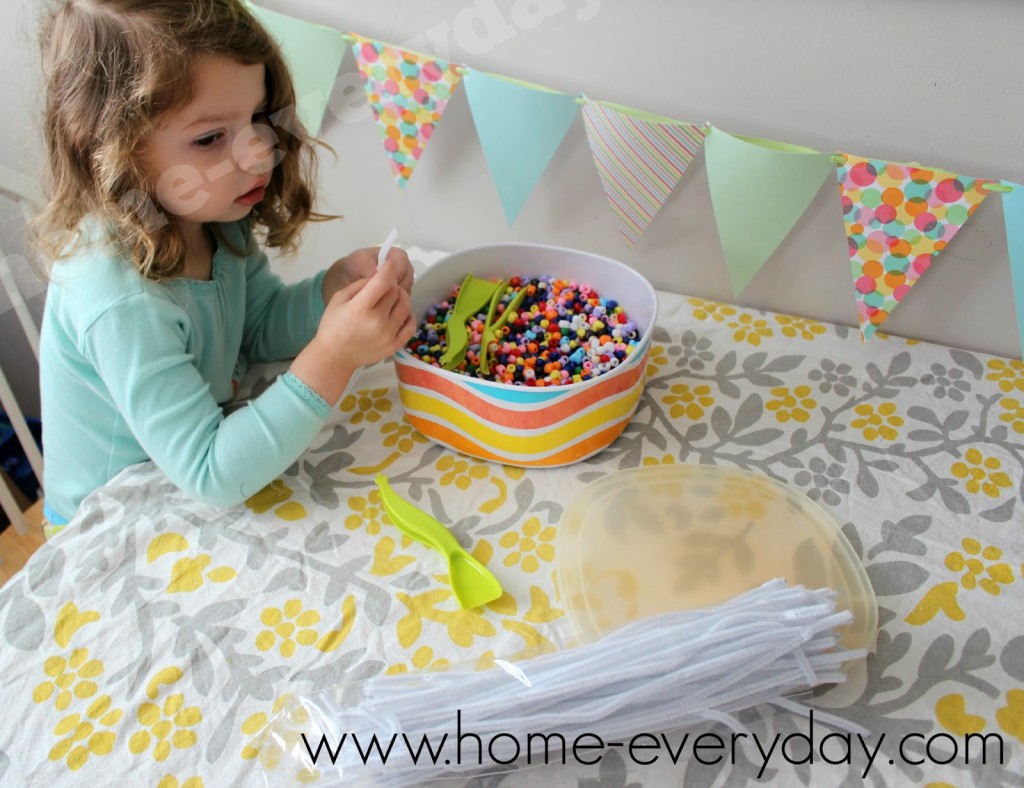
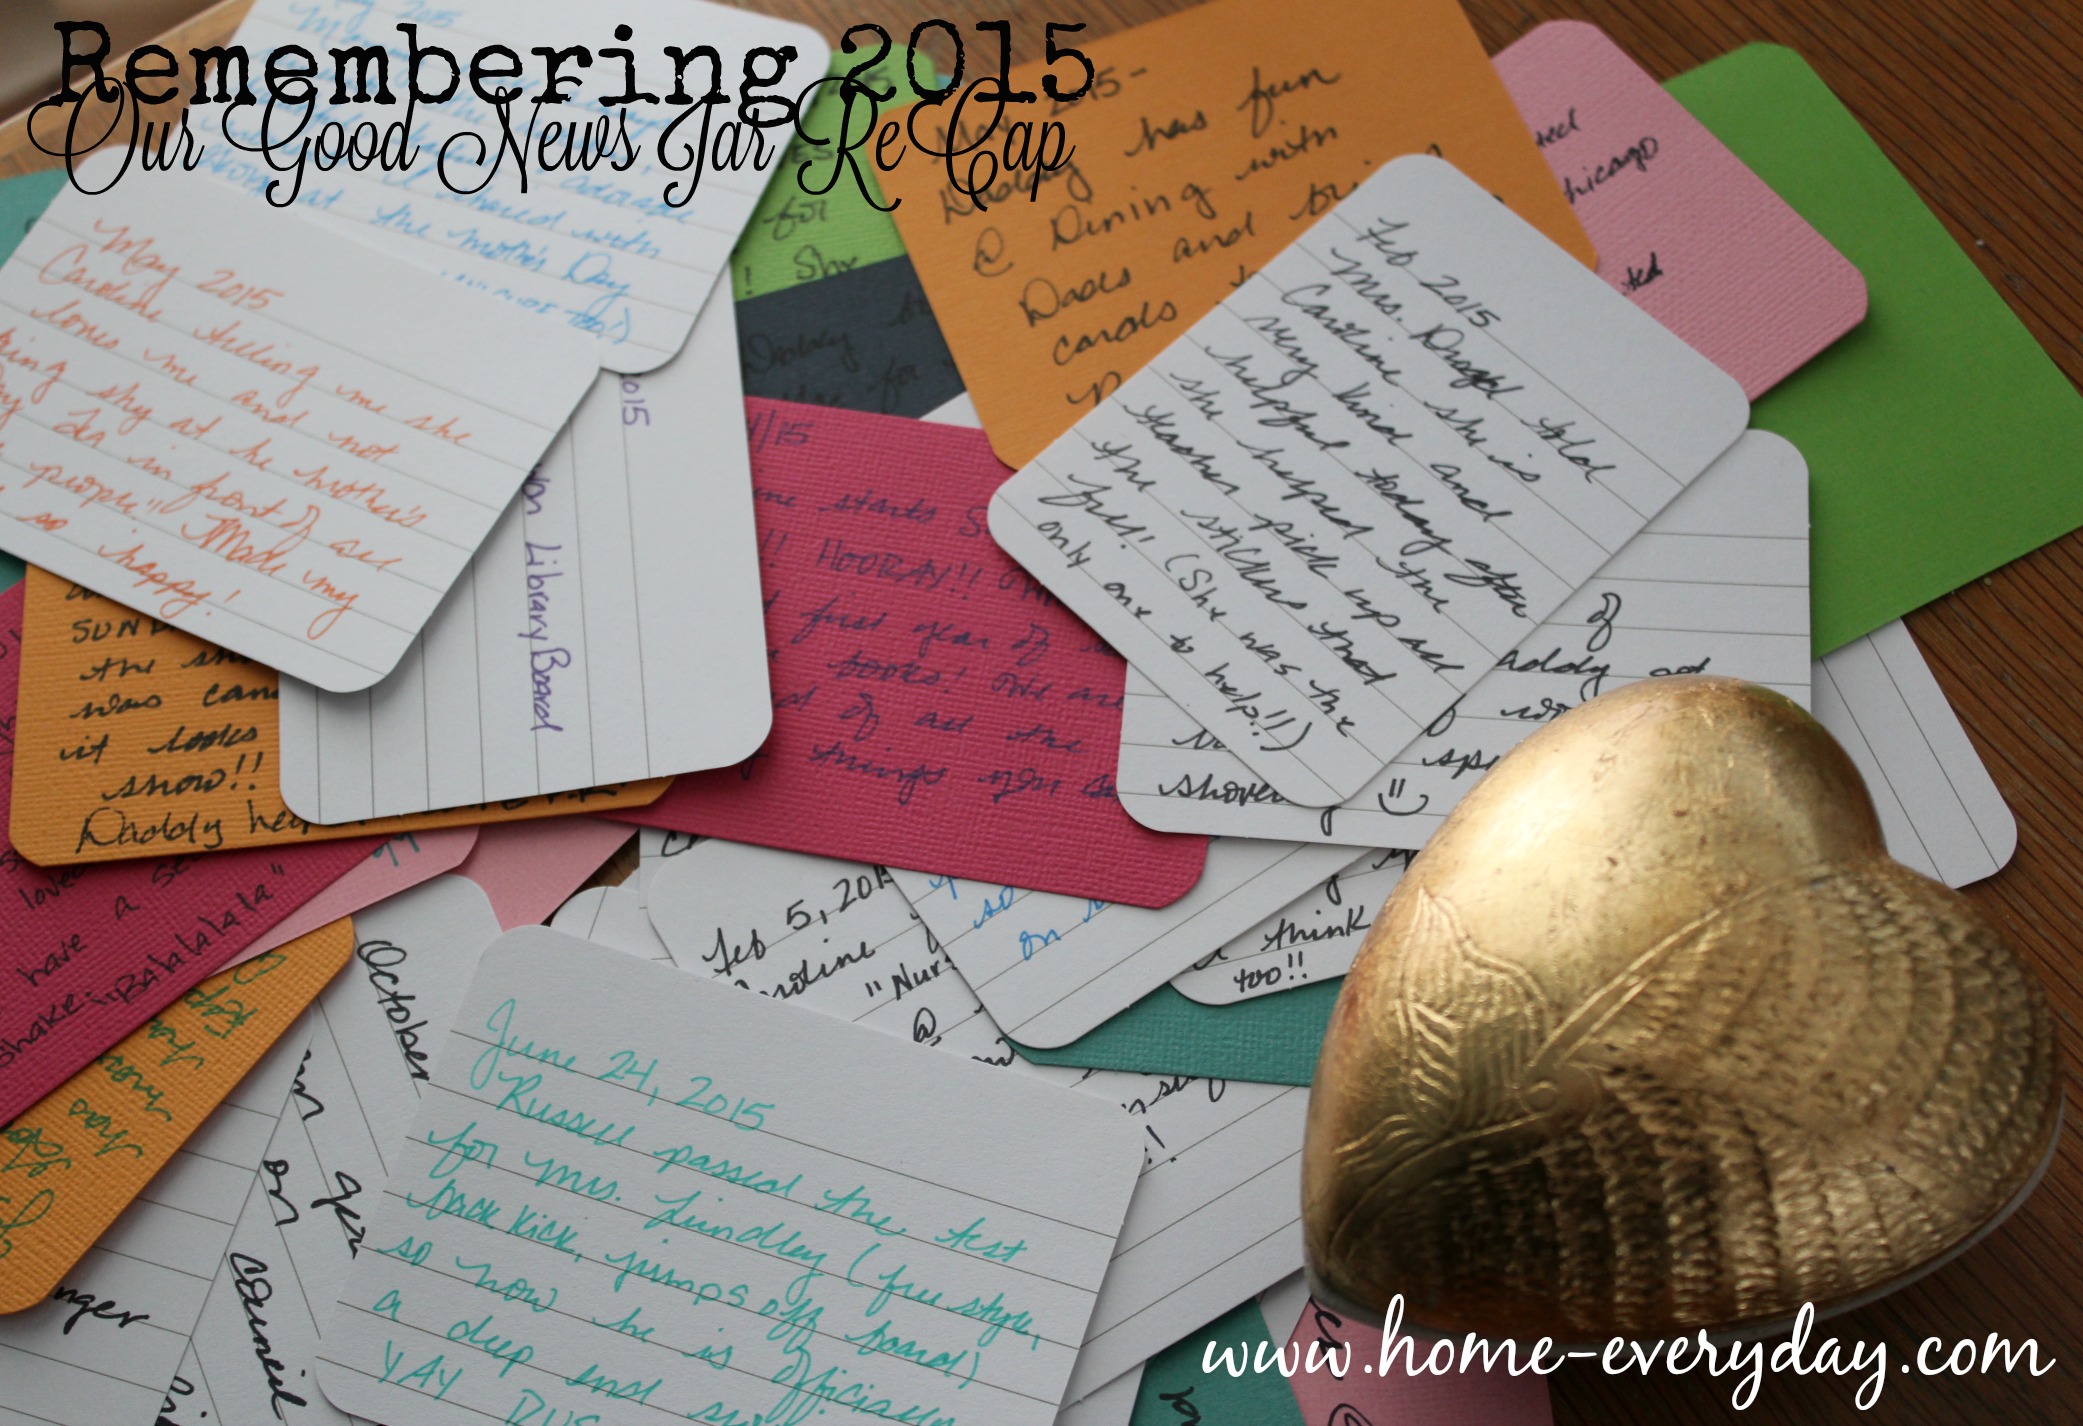
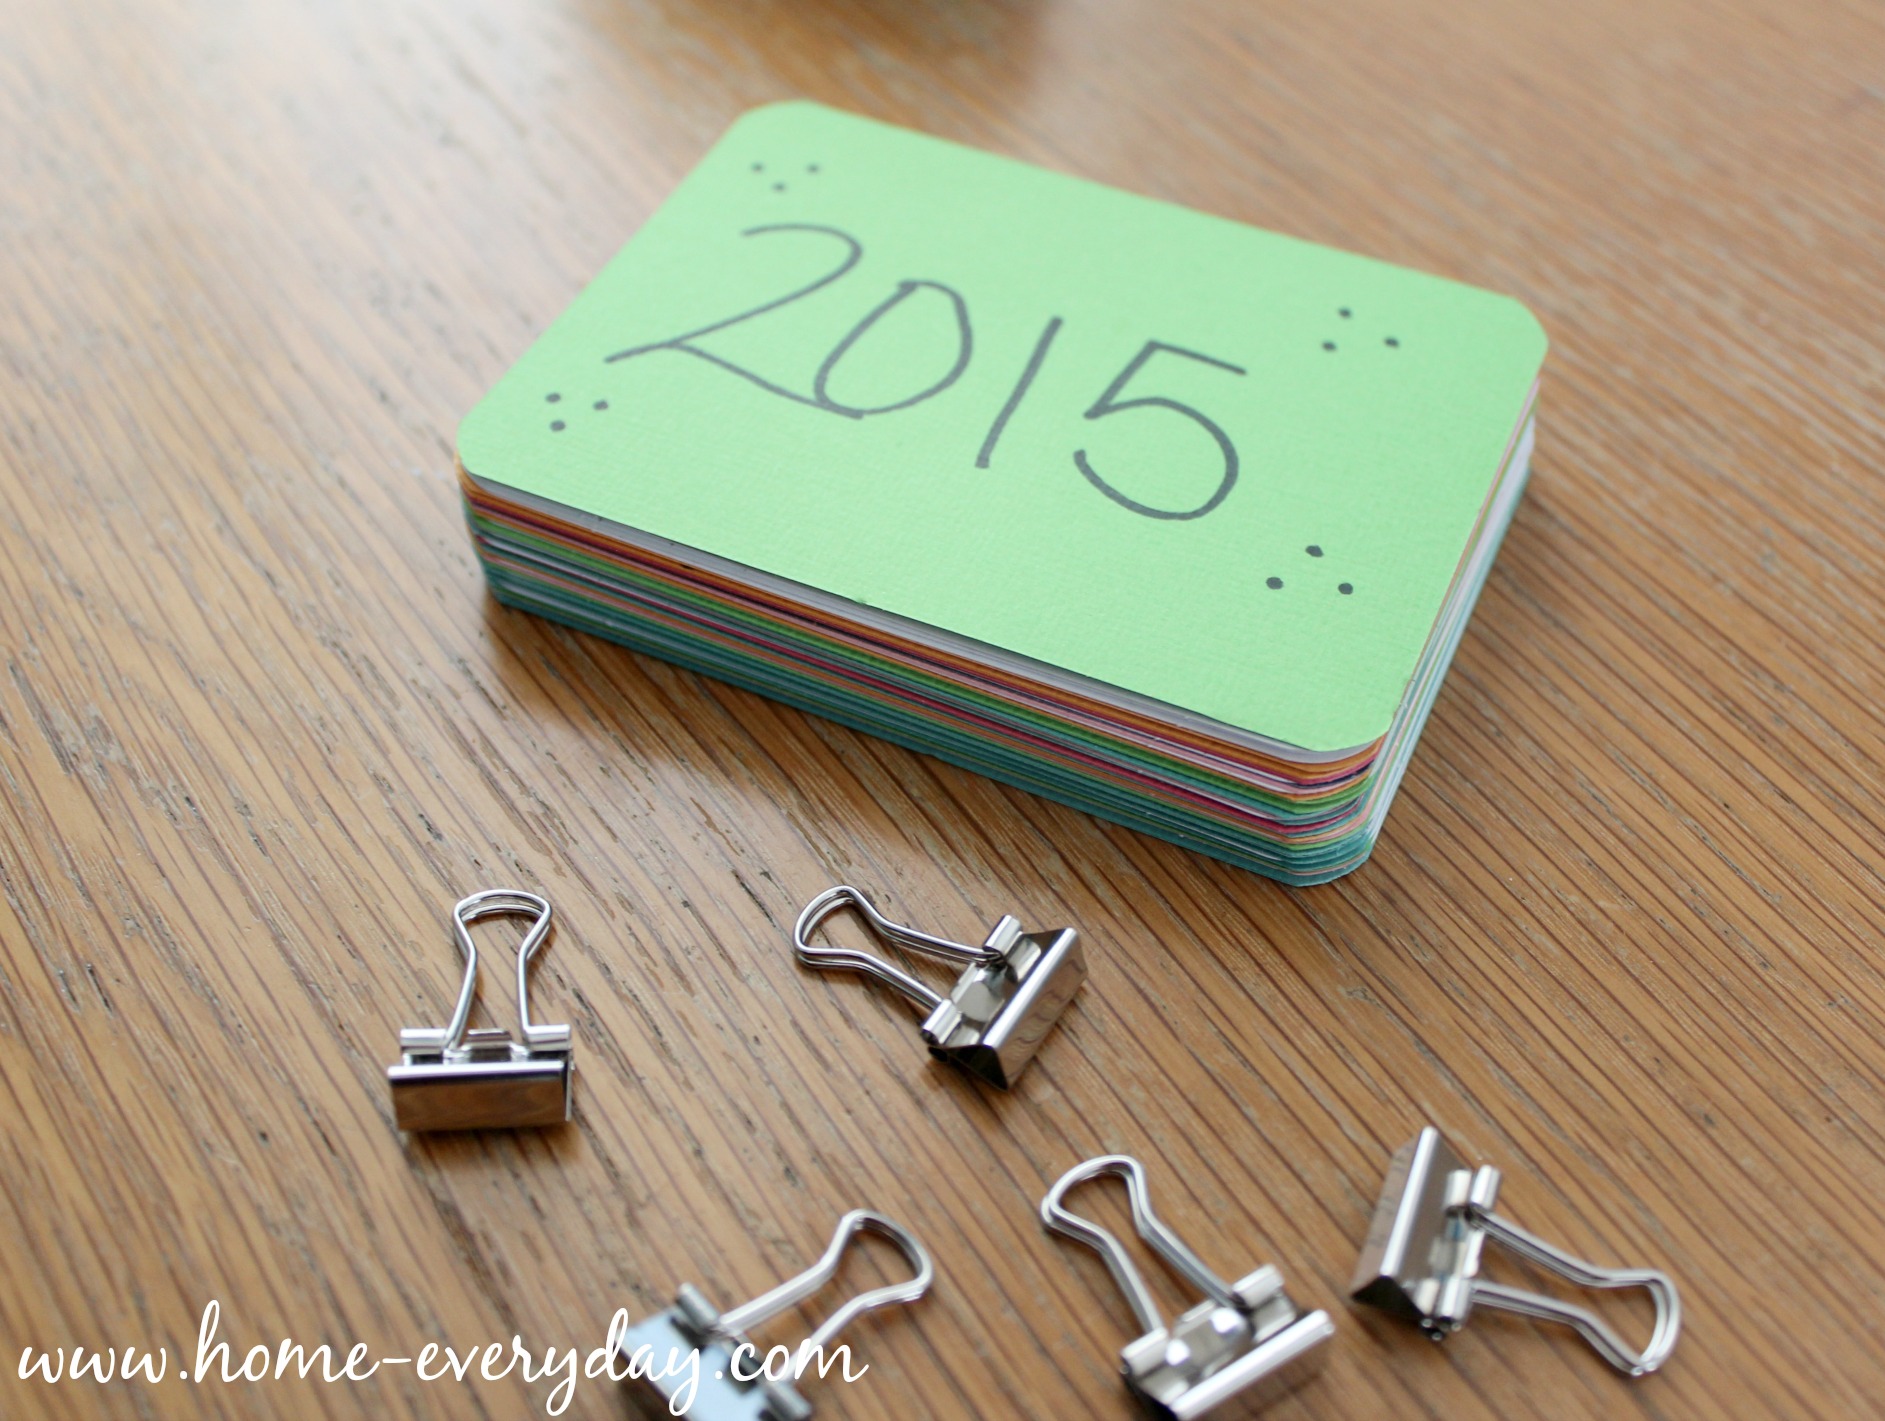
The fact that this happens to me every morning scares me. Which is why, in addition to using my phone, a DSLR, writing kids’ quotes in the notes section of my smart phone, scrapbooking, creating a photo gallery, and keeping both a digital and written calendar to capture events and milestones, I decided to write some memories down when I remembered and placed them in our 2015 Good News Jar.

I have found over the course of the year that writing these things down has served three purposes:

  1. I am infinitely more grateful for what I have.
  2. I am able to recall smaller things.
  3. I have a year’s worth of notes to put in a scrapbook some day.

Good News Jar ReCap 2

Some memories are pretty significant and might have been remembered anyway because of their significance or  the photos we took or because it was something that was all over the news:

Blackhawks win the Stanley Cup! Celebrating with our friends has been our favorite part! WOOHOO!

But most of my favorite memories that were written down were things that I probably would not have remembered otherwise.

It has snowed all last night and today. Sunday School has been cancelled and it looks like school tomorrow will be cancelled too. Time to play in the snow while Daddy snow blows the driveway and Mommy makes snacks for the Super Bowl.

To be honest, I was pretty surprised at how often I found myself writing down little tidbits about our lives. Often times the moments I chose to write down were small every day occurrences that would not have been captured on a camera:

After some hard practice, George moved to the next level of sight words at school. He learned that hard work does indeed pay off. Good boy, Big G. We love you!


Good News Jar 4

And while they might not be captured on digital film or be considered conventional milestones:

Family Date Night: We went and saw Big Hero 6 and we all loved it. Now we have a secret family handshake. Ba la la la la.

These are definitely moments that are worth remembering:

Russell lost a tooth at school.

I am grateful I kept this resolution, because now I have all these memories written down where I can remember them. Memories that might have otherwise been forgotten. I am so grateful I kept this resolution, that I think I will begin calling this our Gratitude Jar as we head into 2016. It has meant so much more to me than a few extra pounds shed or an organized closet. I cannot wait to read all the cards we write in 2016.

Good News Jar 3

Readers, talk to me! What are some events, moments, things you are grateful for in 2015? What are some goals in 2016? Is one of them to just write some memories down on index cards?


DIY Halloween Bat Tree

This shop has been compensated by Collective Bias and its advertiser. All opinions are mine alone. #TrickOrSweet #CollectiveBias

As soon as the first day of Autumn strikes, I make the kids finalize Halloween costume decisions, I start to hang a few spooky decorations, and I buy some candy. I try and rationalize it by telling myself that it is because I want to make sure I have enough for all of the Trick or Treaters on Halloween and as my kids cannot partake in the candy part because of their allergies, I am always afraid I will run out. However, we all know it is for me.

Also, there is nothing like a giant bowl of Hershey’s Candy by the front door to let everyone know Halloween is on the way. The kids and I adore sharing treats with anyone who stops by before the big day to get everyone in the mood for Halloween. With Hershey’s giant bags there is enough candy to get our  friends and family in the Halloween spirit before the big day, and plenty left for Halloween too. Just take a look at all the kinds you can buy HERE.

Hershey 10

This year, I decided to decorate the dresser that sits near our front entryway with a giant bowl of candy filled with the Hershey’s Trunk or Treat Variety Bag found at Walmart. These awesome variety bags can be found right in the seasonal holiday section, where all the Halloween accouterment resides.

Hershey STORE SHOT

While at Walmart, I found some awesome white sticks in the floral department, and that gave me the perfect idea for a great entryway decoration. With some supplies I had on hand, I created some flying bats to greet us and our guests every time we enter the house. They are cute, simple, and festive and look adorable next to our giant bowl of Hershey’s Candy that we are sharing with our friends and family.

To make these Flying Bats you will need:

black paper

string

hole punch

scissors

pencil

bat silhouette (you can print one from the internet and cut out)

floral sticks

a vase or bucket

tape

Hershey 3

Trace the bat silhouette onto the black paper.

Hershey 4

Following the pattern, you traced cut the bat out.

Hershey 5

Using the hole punch punch two holes in the wings of the bat.

Hershey 6

Tie string through the holes.

Hershey 7

Put the floral sticks in bucket.

Hershey Sticks

Hang bats from sticks like ornaments (tape sometimes helps keep them in place).

Hershey 8

For a quicker version of my directions, here is a video.

Head out and buy your giant bag of Hershey’s Candy and Walmart (you can check decide right here), then decorate your entryway to greet your Trick or Treaters (or yourself)!


DIY Glitter Converse All Stars or There’s No Place Like Home

When it comes to my wardrobe there are a few staples for which I always rely. A-line dresses, statement necklaces, a good pair of jeans, brightly colored pants, a few nice blouses, cardigans, and Converse All Stars. I know it seems weird that with my preppy style, I love these shoes so much, but I will find any excuse to wear them. Even a fancy occasion. Like performing in front of hundreds of people.


Photo courtesy of Elizabeth Rago

About a month ago, I had the pleasure of participating in Listen to Your Mother Chicago for the second time (Squeee! Videos will be released soon). This year a portion of the show’s proceeds were given to the Red Pump Project, and while the cast wasn’t required to wear red shoes, I love a theme.

Also, I love crafts.


And glitter.


And I wanted to make a pair for my stage partner, Samantha Schultz.


Photo courtesy of Balee Images

Also, fellow cast mate (and comedian) David Slattery loves All Stars as much as me.


Photo courtesy of Balee Images

However, when you have some butterflies about a performance I find it best to do what makes you comfortable or at home. And nothing says home to me like a good pair of Chuck Taylors on my feet and friends and family by my side.

I have since worn my glittery shoes out and about, and people have asked how they can make their own. Luckily, I took a few pictures on my iPhone of the process.

Supplies:
Converse All Stars
fabric glue
glitter
paint brush
spray clear glaze (I used Dresden gloss I found at JoAnn Fabric)
trash bags


First, protect the area in which you will be working. I used trash bags. Also, remove the shoe laces from the shoes.


Using a small paint brush and working in small areas of the shoe, paint glue on the shoe. Then carefully sprinkle glitter on the shoe where you applied paint.


NOTE: I used a paint brush to spread the glue evenly onto the fabric and to also keep the glue exactly where I wanted it avoiding rubber sides and souls, and metal lace holes. I only did the sides of the shoes, and avoided the tongue as I thought the rubbing of laces would eventually rub the glitter off.


Once I covered the areas I wanted with glitter, making sure to fill any areas that were missing. I let the shoes dry for about 12 hours.

Next, I put plastic bags in the shoes, and took them outside. I also put the All Stars on a brown paper bag. This made them ready for spraying the glaze. This helps to minimize the amount of glitter falls of the shoes.


I sprayed three coats of glaze on the shoes waiting about 30 minutes between coats, and letting the shoes dry outside.

NOTE: It is extremely important to do this step outdoors as the glaze is extremely toxic.


I re-laced the shoes and they were ready for show day.


Here are some photos from the big day, so you can see how they turned out.


Photo courtesy of Elizabeth Rago

So, I am pretty sure that this is what I am going to do to all my Converse now.


If you like this post and would like to read more about all things domestic with a touch of humor, become a Home Everyday follower! For blog updates or to see other places I write such as ChicagoNow or Chicago Parent follow Home Everyday on FacebookTwitter, and Pinterest.

DIY Felt Bloom Wreath

My Mom always used to say that with little kids, “the days can drag, but the years fly.” I am starting to know what she means because lately, I cannot believe how quickly time is passing us by. In fact, I am flabbergasted that it is nearly May.

With that being said, I am finding it harder and harder to decorate my house for every single holiday that comes our way, so I have decided to kind of go with the seasons to save my sanity on time (and money.)
We are now in the midst of Spring and looking forward to Summer and this time of year, I think flowers. So, with a little help from Pinterest. I made my own felt blooms and created a wreath that should last me throughout the summer.
Using Pinterest for some tutorials, I decided to create a few different blooms in some various colors.
 
Materials
Grapevine Wreath (From the $1/$3 Spot at Target)
Various colors of felt (Hand Made Modern Multi Color Pack from Target)
Hot Glue Gun
Fabric Scissors


Making the Blooms: Most of the blooms can be made using a simple rolling technique. As you can see from my wreath, I have several “roses”, but because of the way I cut the felt, and the variation in color, they seem different.
     Simple Rose: Cut a circle of fabric. For smaller buds I traced around a CD, for larger buds I traced the lid of a Pyrex container. Then, cut the circle into a spiral (see below)
Starting on the outside of the circle, roll inwards toward the center of the circle.

Using your hot glue gun, carefully glue the middle to the bottom of your bloom.

Wavy Rose: You can find templates online, but I drew a wavy pattern like I would have for a plain rose. Then I cut it out.
I followed the same rolling style as I did above.
Pom Pom Flower: Cut a 3″ x 10″ strip of felt. Fold the strip in half length wise.


Fold the strip in half lengthwise. Then, very carefully, cutting from the folded edge to the open edge of the fold being sure not to cut all the way through, cut every 1/4″ or so.
Then roll this flower carefully, gluing along the way.
Petal Flowers: Trace and cut a flower shape.
Next, using hot glue in the center, pinch the center of the flower together.
I put a small piece of yellow felt in the center to help make it look more flower like.
 
Wreath Time: Once I had all the blooms I wanted, I decided how I wanted to place them on the wreath without glue. Then, using hot glue I carefully placed each flower on the wreath.
I cannot wait to hang this in my dining room for a little Spring/Summer color.
If you like this post and would like to read more about all things domestic with a touch of humor, become a Home Everyday follower! For blog updates or to see other places I write such as ChicagoNow or Chicago Parent follow Home Everyday on FacebookTwitter, and Pinterest.

Beaded Bracelets and Just Us Girls

When Coco was born I was bleary eyed for most of her babyhood. I’m not going to lie, there was a guilt that washed over me the minute she was born that I didn’t feel with my older boys. I knew I would be chasing those boys around when I got home, stopping occasionally to nurse Caroline. I knew there would be plenty of love to go around, but would there be enough time? After all, Russell was not yet three, George was a baby himself, and we were living with my Mom and looking for our home. Bringing home a newborn is hectic under any circumstances, but bringing home our baby girl was a whirlwind.

It was as if I blinked and she turned ONE.

In the beginning, I was kind of sad that she had missed the cut off for beginning school. At least then she would be in on the fun with the boys. I saw them bonding in preschool and making the same friends and looking on as they were achieving milestones together because they were back to back in school, and I wanted Coco to share in that fun with them. My three stair step kids are all very close in age, but I couldn’t help but feel that the one year gap in school would kind of make Coco feel left out. Not to mention there is a gender difference, boys share a room, and this was just another thing that would just kind of leave her out of the mix. As a youngest child myself, I know that feeling all too well.

It is no fun to be left behind.


However, when the boys were at school, I noticed all the little things my girl and I were getting to do together. Just us. We had time to eat breakfast together, run errands, go to the park and make play dates. Just us. It was as if I was getting the chance to spend extra minutes with her that were missed when she was a wee one.

It then occurred to me that I had another lady in the house with me, and I had extra time just with her. So, while the boys are in school, and for the next two years while they are in “big kid” school and she is only attending half day preschool, her and I have plenty of time for fun girly activities. Activities like afternoon tea, painting our nails, playing dollies, and making beaded bracelets.

A few months ago, I found a huge bag of larger beads on sale and I thought they would be fun for stringing. After a few attempts at stringing them with yarn, I realized that for Coco’s age, it was too hard, so we started stringing the beads onto pipe cleaners and making bracelets, necklaces, tiaras, whatever struck our fancy. This is one of those activities that is cheap, age appropriate, and is conducive to girl chat.


Sometimes, I know Coco squeezes the boys extra tight in the morning before they leave for school because she misses her playmates, and I cannot help but feel a little sad of her. However, I get out the beads, and I know that I am thankful for this time that we have together.


If you like this post and would like to read more about all things domestic with a touch of humor, become a Home Everyday follower! For blog updates or to see other places I write such as ChicagoNow or Chicago Parent follow Home Everyday on FacebookTwitter, and Pinterest.

Follow on Bloglovin


One Kid’s Trash…

My kids are still fairly young, but I cannot believe the things that we have accumulated over that time. Every once in awhile, I step on one too many Legos while barefoot decide it is time for some decluttering, and the kids and I go through their toys and get rid of what they don’t play with anymore.

One day, when declutttering, I found this amazing box that used to house some sort of puzzle. The puzzle got moved to a more appropriate container with a lid (who would give a kid a puzzle box with no lid, don’t they know how frustrating it would be to lose a puzzle piece?).

I immediately decided that this box, would make an awesome tray for storing all kinds of things around the house. One kid’s trash is this mom’s treasure. So, using some paints, I already had on hand, I had a free craft project.


The sides of the tray I painted with chalkboard paint to indicate what I would be using the tray for at any given time. The inside of the tray, I thought it would be fun to use several different colors and possibly a pattern.


Using the light blue paint, I painted the entire inside of the tray with two thin coats. Then, when it was completely dry, I used Frog Tape, and taped a chevron pattern. I thought about using directions like this, but ended up eyeballing it myself.


Next, using the yellow and turquoise colors, I painted in between the taped off sections.


I let the paint dry over night, and removed the tape.


Now, I have a fun little storage box or tray I can use for all kinds of fun things, and I can label it for whatever I happen to be using it for at the time.


And it didn’t cost me anything but some time.


Linking up at Serenity Now


If you like this post and would like to read more about DIY, gardening, cooking, baking or all other things domestic, become a Home Everyday follower! For blog updates or to see other places I write follow Home Everyday on Facebook here.


Follow on Bloglovin

We Three Trees

While I was compensated by JoAnn Fabrics and Crafts, the thoughts and opinions expressed in this post are my own.

Nothing says #FABULOUSFESTIVE like lots of lights and sparkle! Christmas at our house contains both, but this year we upped the ante a little bit (by three to be exact). You see, I have always been a stickler for symmetry and the three windows in the front of our house looked like they could each use a little Christmas tree all their own! YES, THREE Christmas Trees in my living room (plus the one in the family room so I guess four)!


When I had decided to put up a tree in each window, I was nervous about taking on this project because I know that outfitting ONE tree can be pricey but between Black Friday sales, JoAnn Fabric and Crafts coupons (there’s one for all my readers too), and making a few of the elements myself, I was able to save a ton of money. In fact, I created my own tree toppers and tree skirts.

I first mentioned the idea of THREE (well, actually four) trees to Brian, and he was a little skeptical. “Three trees! Plus the one in the family room?!” However, after a few minutes of thinking he had the brilliant idea of each of our children to have their “own” tree. He suggested we decorate the trees in each of their favorite colors (green, blue, and pink) and use shatterproof ornaments (thanks to JoAnn Fabrics and Crafts) and have the kids decorate. What a great idea! The kids loved it! In fact my daughter said, “This is fabulous!”


So, for JoAnn Fabrics and Crafts #FabulouslyFestive holiday crafts, I decided to share three tree toppers and three tree skirt ideas.

Tree Toppers
We have always put stars as tree toppers, but I wanted each of the kids’ trees to be unique, so here are three clever and inexpensive star tree toppers.


Mod Metal
For the first tree toppers, I formed some pink 12 gauge craft wire that I found in the floral department at JoAnn, into two stars that are the same size (I printed out a picture of a star and used it as my guide for forming the star).


Then, using wire cutters I clipped some small pieces and used the small pieces to connect the stars together like a 3D frame.


Firework
Using silver pipe cleaners, which happened to be on sale, I overlapped them on a flat surface and formed a star pattern.


I did this three times, and then using another pipe cleaner I tied the three flat stars together and adjusted the pip cleaners to form a 3D shape that almost looks like a firework.


Painted Star
At JoAnn Fabric and Crafts I saw a cardboard box shaped like a star.


I painted the top of the box with both satin and glitter Martha Stewart acrylic paint. Once dry, I cut a tiny hole in the bottom to put on the tree.


Tree Skirts
To make the tree skirts I used, the same pattern cut into 1 yard of white felt and then used different embellishment to make each of them unique.


First, I cut the white felt I found at JoAnn Fabric and Crafts into a perfect square (3′ x 3′).


I then folded the felt in half, and then folded it in half again to form a smaller square.


Next, I folded it in half on an angle to form a triangle (just like making a paper snowflake).


Then, I cut the corner with no open ends. I cut straight across about 2 inches from the corner. This creates the hole for the tree.


Then, on the other end, I carefully cut rounded edges.


Finally, I opened the skirt, and cut a straight line from the edge to the hole to create and opening for to wrap around the tree.


Once all of the skirts were cut, I got out my hot glue gun, and got to work.

Pretty Trim
The trim I found was almost like a felt ribbon, but you could use any ribbon you like. I made sure that it wasn’t very stiff so that I could easily fold it to follow the circle pattern of the skirt.


Pom Palms
This is my absolute favorite tree skirt. Who knew a bag of pom poms from JoAnn glued to the edge would be so adorable?


Snowflakes
I actually found these felt snowflakes already made, but you could cut your own out of felt from JoAnn too. I glued them around the edge of the skirt.


These THREE (actually four) Christmas Trees are such a wonderful addition to our home, and I’m wondering if someday the kids will take these trees to decorate their own homes someday.


HOPE YOUR HOLIDAYS ARE #FABULOUSLYFESTIVE!
(Hopefully the coupon will help!)
Keep reading this week and next for the Home Everyday Holiday MiniSeries for more ideas on decor, cooking, baking and last minute gift ideas. Speaking of ideas, check out the JoAnn Fabrics and Crafts catalogue HERE!Linking up at Honey We’re Home for Holiday Cheer in the Blogosphere!

For more about DIY, gardening, cooking, baking or all other things domestic, become a Home Everyday follower! For blog updates or to see other places I write follow Home Everyday on FacebookTwitter, or Pinterest.

Follow on Bloglovin


Hanging Holiday Cards

As part of the Home Everyday holiday Mini Series, I have another awesome holiday craft for you!

Every year I have the same dilemma. We receive so many wonderful holiday cards from friends and family every year, I always want to make sure they are displayed somewhere that we can admire them. Since I spend many hours in the kitchen I thought it would be nice to have them there. Also, the kitchen is always lacking in holiday decor, so I thought it was the perfect place to display them.

Last year, I used some green ribbon and clips to hang them from the cabinets, but this year I decided to go with something a little more neutral so that the stars were the holiday cards and not the ribbon.

I used burlap ribbon and some cute clips.


I measured the cabinets and adding about 6 inches cut the ribbon to length. I then affixed the burlap to the inside portion of the cabinet using some tape, but you could use 3M Hooks as well.


Finally, I used the put the clips on the burlap so that they are ready and waiting for all the gorgeous holiday cards we receive this year. This craft is practical and simple, and cost about $4.99 for the ribbon and about $2.99 for the clips.

Now, I can admire our gorgeous holiday cards while I am baking cookies.

Speaking of cookies…

For more about DIY, gardening, cooking, baking or all other things domestic, become a Home Everyday follower! For blog updates or to see other places I write follow Home Everyday on FacebookTwitter, or Pinterest.

Follow on Bloglovin

A Miniseries and Chalkboard Ornaments

HAPPY HOLIDAYS, Readers! The house is almost completely decorated, we had our family photo taken for Christmas cards, the baking has begun, and I’ve made my list and checking it twice!

Over the next three weeks, there will be holiday crafts, fun Thirsty Thursday recipes, holiday cooking, and baking, and some great ideas for gifts. I am calling it my Holiday Miniseries, and I am kicking off this week with a great ornament idea!

Chalkboard art is becoming increasingly popular and I noticed a few weeks ago that Martha Stewart makes a chalkboard paint. I wanted to desperately to try it out and see how it works. So rather than painting a whole piece of furniture in chalkboard paint (which I think would be neat), I thought it best to start small.


Supplies:
Wooden Shapes or Ornaments
Chalkboard Paint
Plastic Bag
Paper Plate
Paint brush or sponge
Ribbon or string
Stapler or Glue


I first made sure to remove any labels from the wooden shapes. Then using just a little bit of chalkboard paint, I started painting very thin coats of paint on the shapes. According to the directions, it is important to use at least two coats.


According to the paint directions, it is important to wait an hour between coats of the paint. However, because of painting in thinner coats I only had to wait about 20 minutes between coats of paint. When it was all said and done, I painted four thin coats of chalkboard paint for good coverage.


I let them cure for about 12 hours. Then, they were ready for Holiday messages and hanging on the tree. I didn’t attach any ribbon or string to all of the ornaments because they fit nicely tucked between the branches on the tree.


I did staple some ribbon on the back of a few. You could clue or use other adhesives too. I saw the stapler though and the wood was thin enough not to bend the staples, but not so thin that the staples pushed through the other side.

Now, these ornaments look adorable hanging all over the house with little messages. Perhaps I will keep them out all year long.


Make sure to keep checking back for holiday decorating ideas, Christmas baking and cooking, and gift suggestions.

Linking up at Hi Sugarplum for Holiday Cheer in the Blogsphere!


For more about DIY, gardening, cooking, baking or all other things domestic, become a Home Everyday follower! For blog updates or to see other places I write follow Home Everyday on FacebookTwitter, or Pinterest.

Follow on Bloglovin

Pretty Storage: Painted Baskets

As the holiday season approaches, I encourage the kids to take an inventory of their toys. We donate what they do not play with anymore, recycle what is broken, and try and make room for anything that Santa brings.

This yearly toy overhaul helps teach the kids how blessed they are, encourages them to help others who have less, and I think helps them make decisions. However, when we are doing the yearly toy overhaul, I get a little organizationally crazy and being thinking about different storage solutions for all of these things.

Some of our storage baskets were a bit, well, boring.


These baskets have been around since before Brian and I were married and have been rotated for all kind of use, but are currently in the family room housing doll house furniture and people and some other smaller toys.

As I try to add more color to the family room, I thought of a great idea. I decided to paint these boring baskets. I got out my acrylic paints, a paint brush and turned on the movie Rushmore during nap time.


VOILA!

After two hours of some creative painting, and a night of letting them dry, they were a more colorful way to store some of the kids’ favorite toys.


Seeing how adorable these baskets turned out has me itching to paint some more things.

For more about DIY, gardening, cooking, baking or all other things domestic, become a Home Everyday follower! For blog updates or to see other places I write follow Home Everyday on FacebookTwitter, or Pinterest.

Follow on Bloglovin