Tag

baking

Smart Cookies: Italian Butter Cookies with Lemon Glaze

Every Christmas, I make Italian Butter Cookies with Lemon Glaze. Brian’s grandmother, Grandma Yo, made them for most celebrations, but always had them at Christmas time. They are light and almost refreshing, and perfect with a cup of tea. Since most people are looking for a little something lighter this time of year, I thought they would be a perfect Smart Cookie recipe for the month of January. Technically they are still cookies, but they are not as heavy, and may serve as a small reward for all the time put in at the gym.

The recipe is fairly straight forward, but they do require a little bit of effort to create the little doughnut like shapes.


Grandma Yo’s Italian Butter Cookies with Lemon Glaze

2 1/2 cups all purpose flour
2 tsp baking powder
Pinch of salt
2/3 cup granulated sugar
3 eggs
1 stick butter melted and cooled slightly
1 tsp pure vanilla extract

Glaze
3/4 cup powdered sugar
2 tsp pure lemon extract
1 – 3 Tbs milk

Preheat oven to 350 degrees.

Prepare two cookie sheets with parchment paper.

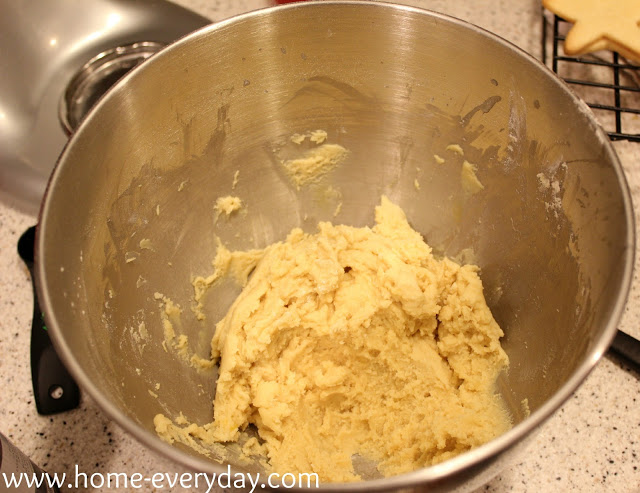
In a large bowl, sift together flour, baking powder and salt and set aside. In another large mixing bowl beat together sugar, eggs, butter, and vanilla until well incorporated. Next, slowly add flour mixture until soft dough is formed.


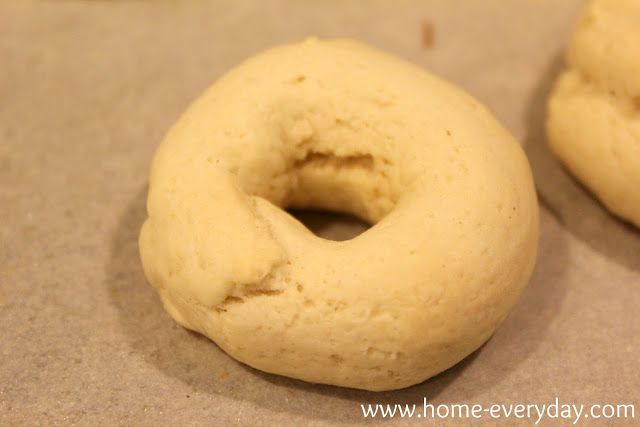
Next, take about a tablespoon of dough and roll into a thin log and then form into a doughnut shape as shown below.


Place on baking sheet, and bake for 10-12 minutes.


While cookies cool, mix together powdered sugar, lemon extract, and milk until a thin glaze is formed. When cookies are cooled, dip into glaze. Store in a air tight container.

For more information regarding Smart Cookies or to volunteer visit their website at http://smart-cookies.org.

To look back at past Smart Cookie recipes you can click here, here, and here.


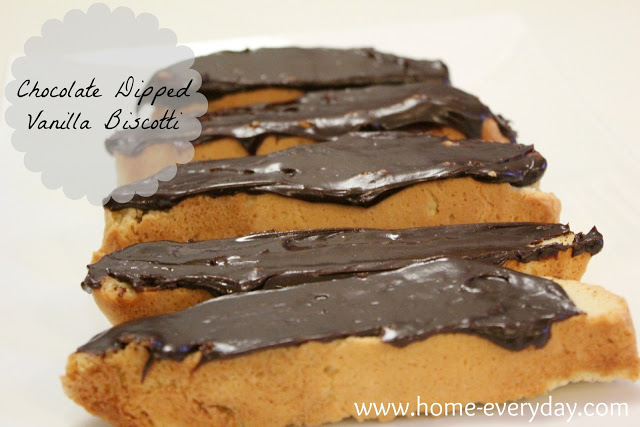
Smart Cookies: Chocolate Dipped Vanilla Biscotti

When I think college in December, I think coffee. Coffee by the gallon. While everyone is hustling and bustling getting ready for the holidays, college students are writing, researching, writing, studying, writing, and testing. This usually means lots of all nighters.

So, this month’s Smart Cookie recipe has to have the perfect combination of Christmas cheer and go great with coffee. Here is what I came up with:

This recipe is a double batch. The reason being it is so good, that there is no way you’ll be able share and not keep any for yourself. As we speak… er as I write this I am enjoying some with a cup of Mighty Leaf Vanilla Tea.

Vanilla Biscotti Dipped in Chocolate

1 1/2 sticks (12 Tbs) butter softened to room temperature
1 1/3 cups sugar
1 tsp salt
2 Tbs pure vanilla extract (I know it seems like a lot but it is vanilla biscotti)
3 tsp baking powder
4 large eggs
4 cups all purpose flour
2 cups milk, dark or semi sweet chocolate chips

Preheat oven to 350 degrees. Line two cookie sheets with parchment paper.

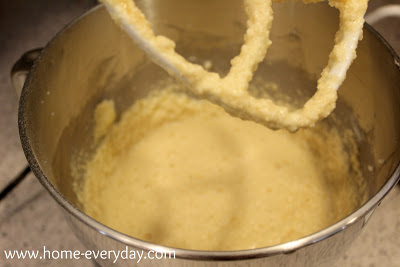
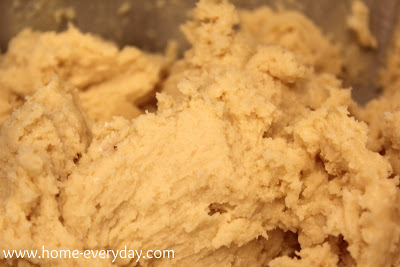
In a large bowl or electric mixer bowl on medium speed beat together softened butter and sugar until smooth. Then turn mixer to low and add salt, vanilla, baking powder. When this mixture is well combined, add eggs one at a time. The mixture kind of appears curdled at this point but this is fine.

With the mixer on low, slowly add the flour (in 1 cup increments). Mix until just combined.

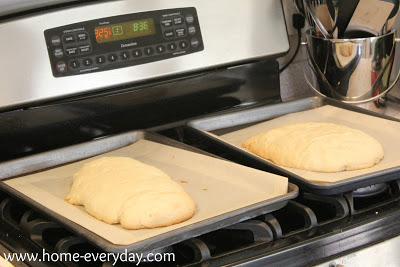
Divide the dough in half and place each half on the lined cookie sheets. Using wet hands to avoid stickiness form the dough into inch high rectangle logs. Bake for 25 minutes.

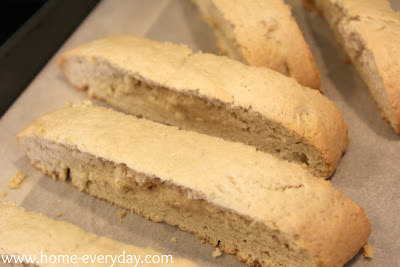
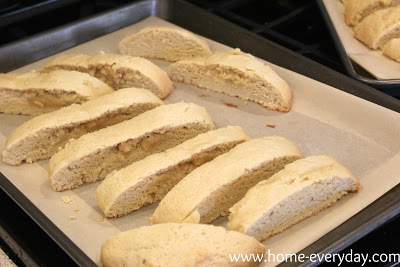
Remove from oven, and reduce temperature in oven to 325 degrees. Cut the logs into one inch wide slices, gently separating them.

Place in oven and bake for 25 minutes.

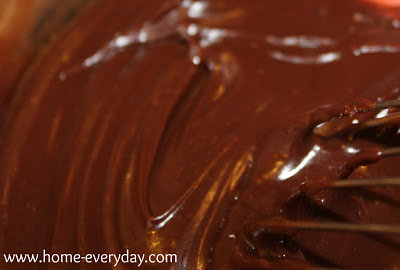
Remove from oven and begin cooling. While biscotti cools, melt chocolate in glass bowl over simmering water or very slowly in microwave.

When chocolate is melted.

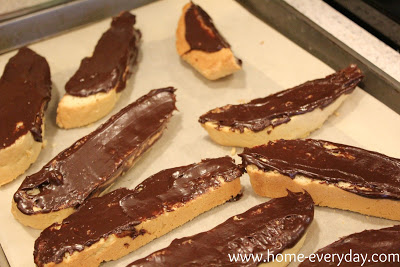
Dip cooled biscotti in melted chocolate. Let chocolate harden before serving.

This is probably one of my new favorite treats. I cannot wait to make more for a Holiday Brunch!

For other Smart Cookie recipes, click here, here, and here.

Linking up at Serenity Now.

Upsy Daisy Cupcake Crazy: S’more Cupcake


Meg Broderick, baker extraordinaire, and founder of Upsy Daisy Cupcake Crazy is a friend from way back. We went to elementary school together as well as were in the same Girl Scout Troop for many years. She is another amazing woman, and I am so happy that she is here today so share this amazing recipe for S’mores Cupcakes. I cannot wait to make these! For more information, you can contact Meg via her Facebook fan page.


I’m so excited to share this fabulous
fall recipe with you, but first I want to tell you a little bit about me (and my
‘cakes).  I’m not one of those girls who
has been baking her entire life.  I
didn’t learn to bake from my mom or even my grandmother.  I learned to bake by being bored and having
nothing better to do.  I really first
started baking about 4 years ago.  I
found myself hanging out at home on a Friday night and wanted something to bide
my time.
I started testing out my skills on my
family who soon told me I needed to stop bringing cupcakes over! (they were
cupcaked-out!).  It soon evolved into
baking for my niece’s   1st birthday to
baking for a friend’s bridal shower and the rest is history!  It truly brings me joy to be that sweet part
of a baby’s 1st birthday or the added touch to the bridal shower.  That being said, I’ve done everything from
baby showers, kids birthdays, bridal showers, bachelorette parties and even
weddings! (though weddings are not my target market, I’ve done one!)
So when I got the call from my good
friend, Amy Waligora (nee Bogatto), about doing some ‘cakes for her wedding, I
was ECSTATIC at the opportunity!  Amy and
Eric’s wedding was on September 23, 2012 and Amy really wanted to incorporate
fall flavors for their rustic themed wedding.
We sat on the phone for about an hour and came up with 6 different
‘cakes: Pumpkin cupcake with whipped cream frosting, white cupcake with Nutella
frosting, carrot cake with cream cheese frosting, apple cider cupcake with
salted caramel frosting, pound cake with brown butter glaze (YUM!), and finally
(my personal favorite) the S’More cupcake!
I wish I had the time to tell you all
about every single cupcake I did for Amy however, I chose to share my favorite
cupcake of them all….the S’More cupcake.
Amy had pinned a S’More recipe that
she liked and so I first studied that recipe before modifying it to my
own.  See the original recipe here.
If you read the recipe, it says you
should melt chocolate in a double boiler to put atop your chocolate
cupcake.  And if you know me, you know
that me + melting chocolate = disaster.
So I opted to switch up the recipe.
This recipe also does chocolate cake from scratch but I highly recommend
using store bought chocolate cake to make your life easier if you’re not an
avid baker (saves you money too!).  I’d
recommend Betty Crocker’s Supreme Moist with a cup of pudding.  Ok so here we go….
Start with making the graham cracker
bottom to your cupcake.  Melt some butter
in the microwave (I used about a stick of unsalted butter, I always bake with
unsalted butter).  Take your graham
crackers and smash them up into very small pieces.  I used about 8 “bars” of graham
crackers.  Combine the graham cracker
crumbs, butter and 2 tbsps of sugar in a bowl.
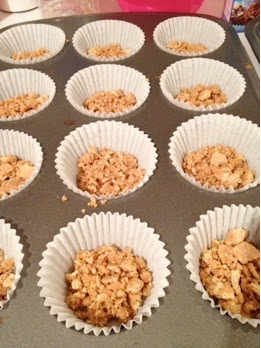
Using a teaspoon, scoop the mixture into the bottom of your cupcake
liners.
You can see I didn’t smash my graham
crackers too small….do whatever you prefer!
The recipe says you should bake your graham cracker crust for about 5
mins before adding your chocolate cake but I didn’t and I think mine turned out
fabulous. Again, whatever you prefer.
So I then scooped my chocolate cake mix
over the crust.  Evenly scoop your batter
over the crust so each ‘cake has about the same amount of batter (I use a
little less than 1/4 cup of batter per ‘cake).
Bake for approximately 15-18 minutes.
It really depends on your oven; I use the “Rule of Nose”…when you can
smell the cupcakes, they are just about ready.
Pop those suckers out of the oven when
your toothpick comes out of the ‘cake clean as a whistle.  While your ‘cakes are cooling, it’s time to
make the marshmallow frosting.
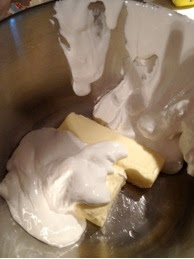
Start with 1 & 1/2 sticks of
unsalted butter at room temperature.  Add
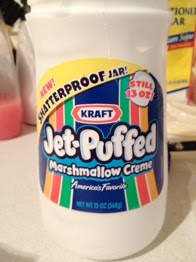
12 oz of marshmallow fluff.  The
container I found was 13 oz so I just used the entire container.  A little extra fluff never hurt, right?!
Cream the butter and fluff together in
your mixer until evenly combined.  This
is the point in the wedding ‘cakes process where my mixer was not too happy
with me so I had to call in the troops: A.K.A a glass of red wine.
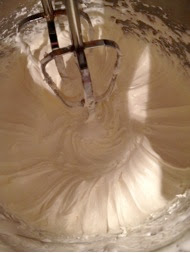
Stay patient….the fluff/butter
mixture eventually will look like this:
The recipe calls for 3 cups of “icing
sugar” which translates to powdered sugar.
I’ve always found that no matter how much the recipe calls for, I always
have to use more; I can tell based on the consistency in the mixture.  Too soft? Add more powdered sugar.  Too dry? add a little milk.  If you can see the butter separating from the
mixture, add more powdered sugar.
It’s an art, not a science!
Once you’ve got the perfect
consistency in the frosting, you’ve probably got some time to make the chocolate
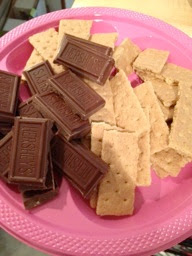
& graham cracker toppers.  I just
broke apart leftover graham crackers into individual pieces and did the same
with a couple of large Hershey bars.
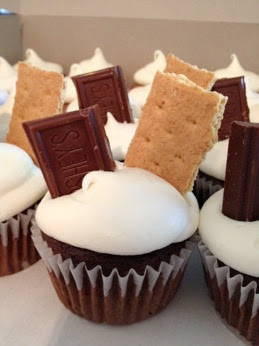
Pipe your marshmallow frosting onto
your cooled chocolate cupcakes  and add
your chocolate & graham cracker toppers almost immediately.
Like so:
I found that the marshmallow frosting
was a little soft for my liking so I popped the ‘cakes in the fridge for a
couple of minutes to set and they turned out perfect.
Before I got to the wedding (I was
also a guest at this shin-dig), I had my eye on one of these.  Thankfully, I snagged one and it was OH SO
GOOD.
These would be perfect for any fall
occasion; from a girl scout over night trip to a family bonfire in the
backyard.
I hope you enjoy this recipe as much
as we all did at Amy’s wedding!
Linking up at Serenity Now.


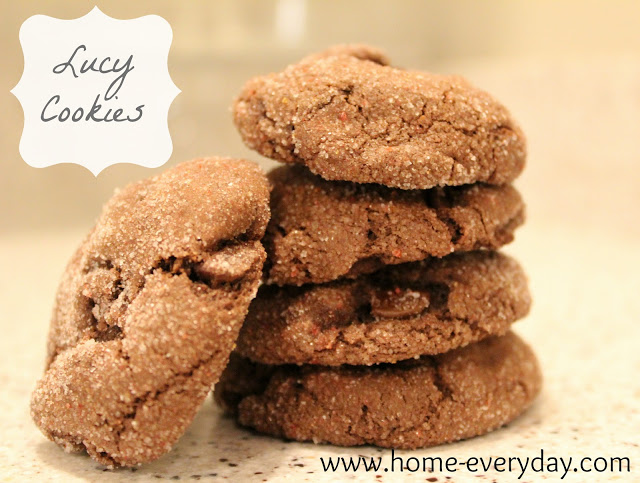
Smart Cookies: “Lucy” Cookies

At the beginning of each month, I will be giving a little love by sharing a cookie recipe with the readers of Home Everyday. The recipe will also be shared with the organization Smart Cookies.


This organization is a group of volunteer bakers that bake cookies and send them in care packages to college students. To read more about Smart Cookies, check out my post from last month. To volunteer or learn more about Smart Cookies, check out this link.


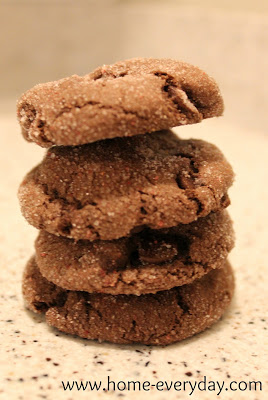
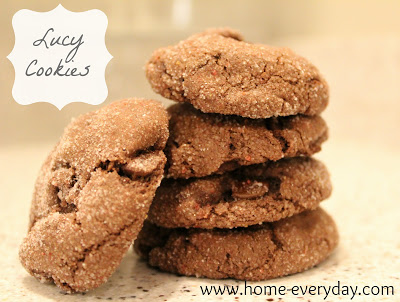
My sister-in-law, Lucy, is an amazing baker. When it comes time for Sunday dinner, I usually ask her to bring dessert as there has never been a dessert that Lucy made that I didn’t like. I’m telling you, this woman has a gift. A few years ago, she shared a cookie recipe with us from her Betty Crocker cookbook. The cookies in our family have come to be known as Lucy Cookies, and they are a staple at family gatherings and holidays. They are almost like a brownie and cookie at the same time.

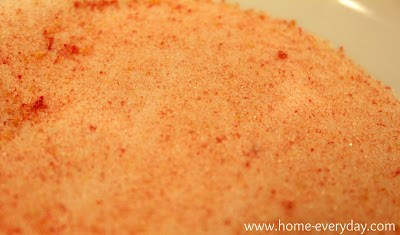
The recipe is listed below, but for Halloween, instead of rolling the cookies in granulated sugar, I thought it might be fun to roll them in orange granulated sugar. FAIL. The sugar was was orange after adding the food coloring.


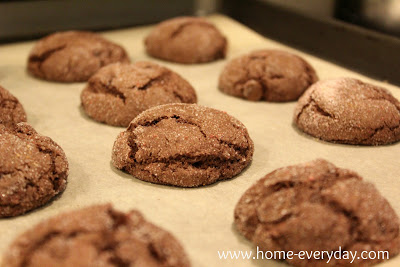
However, once the cookies were baked, you cannot even tell the sugar is orange. No matter, they still taste delicious, and look pretty. (If want to make the sugar orange, I used 2 drops of red food coloring and 1 drop of yellow. Maybe it will work better in your kitchen than in mine).


Betty Crocker Chocolate Chip Crinkles (LUCY COOKIES)

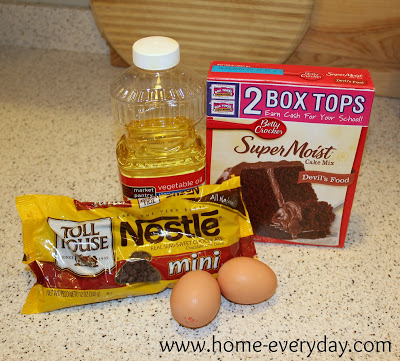
1 box Betty Crocker Devil’s Food Cake Mix
2 eggs
1/3 cup vegetable oil
1 cup semi sweet chocolate chips (regular or mini)
1/4 cup granulated sugar for rolling


Line a cookie sheet with parchment paper.

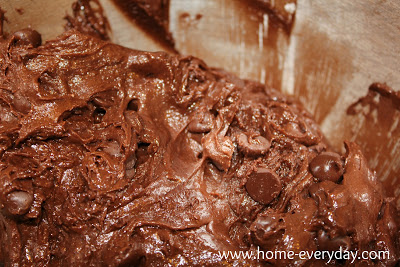
In a large bowl, mix together cake mix, eggs, vegetable oil, and chocolate chips until a dough is formed. Refrigerate the dough for 20-30 minutes.


Preheat oven to 350 degrees.

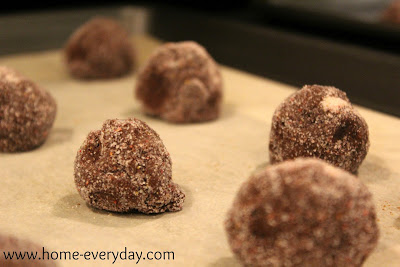
Remove cookie dough from the refrigerator. Shape dough into one inch balls, and roll the balls in the 1/4 cup of granulated sugar until coated. Place on parchment lined cookie sheet about 2 inches apart.


Bake for 9 to 11 minutes. Remove from cookie sheet to cool.


They are amazing warm with milk.
Linking up at Serenity Now.


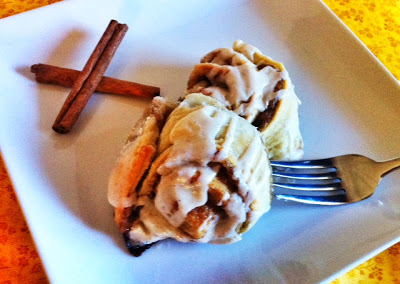
Grandbaby Cakes: Lazy Chai Cinnamon Rolls

Today is a VERY big day at Home Everyday. Jocelyn Delk Adams of Grandbaby Cakes has come to share an awesome Autumn recipe with us. I met Jocelyn in 1995 (OMG that is 17 years ago), when our lockers were right next door to each other in high school. We have since reconnected over blogs and baking. She is a woman of flawless taste with a keen eye for design and combining unique flavors when baking.
Ina Garten, also know as the Barefoot Contessa, is my absolute favorite television chef.  I have whimsical dreams of being invited to visit her and Jeffrey at their amazing home in the Hamptons for a dinner party with all her fabulous friends.  I even imagine we are friends some days.  Yep, my husband pretty much thinks I’m crazy.

Ina is just the quintessential home chef.  I recently watched an episode (for the 15th time I think) during my weekly Food Network DVR marathon where she used puff pastry to create sticky buns.  I thought it was such a genius idea.  Cutting down on the cumbersome yeast dough step sounded so promising considering how busy I am.  As soon as Erin, a high school friend of mine, invited me to write a feature, I figured I would experiment with a concept for quick and easy cinnamon rolls with a twist since sticky buns and cinnamon rolls are first cousins.

These cinnamon rolls are not just ordinary cinnamon rolls.  Oh no!  These are chai spiced cinnamon rolls which literally made me say “yum” out loud.  The best part was my taste testers thinking I spent the whole weekend slaving in the kitchen over these while I knew I was just a lazy bum who whipped these up in 30 minutes.  Enjoy!  I certainly did.


Lazy Chai Cinnamon Rolls
1 pack of frozen puff pastry with two sheets that has thawed out in the refrigerator for at least two hours.  Trader Joe’s has an amazing and reasonable option that is made with all butter.

2/3 cup light brown sugar
3 teaspoons of the chai spice mix (NOTE: I used my favorite chai spice from The Spice House to save time but if you would like, you can make your own! Recipe below)
1 teaspoon cinnamon

3 tablespoons melted butter

For the chai spice mix
1 1/2 tsp. ground cardamom
1 1/2 tsp. ground cinnamon
1/2 tsp. ground ginger
1/4 tsp. ground cloves
1/4 tsp. ground nutmeg

For the icing:1/2 stick of butter at room temperature
1 cup powdered sugar, sifted
1/2 tsp vanilla
1/2 teaspoon chai spice
small sprinkle which ends up being 1/8 teaspoon cinnamon
1-2 tablespoons of milk or chai black tea if you want to amp up the chai flavor

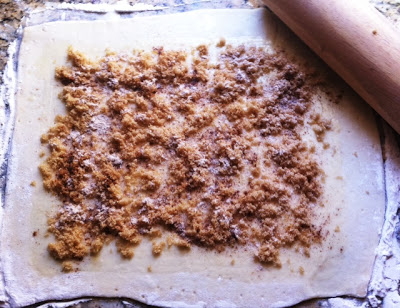
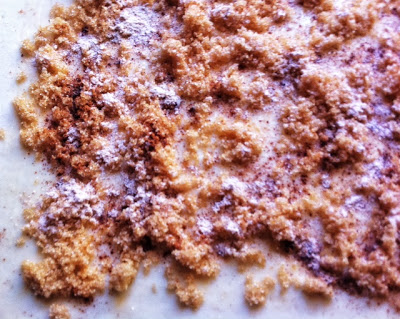
Preheat oven to 400 degrees.  Lightly flour your surface and roll out one sheet of puff pastry until about 1/4 inch thick (leave the other sheet in the refrigerator).  Brush puff pastry with melted butter, leaving 1 inch of space around the edges. Evenly sprinkle puff pastry with half of brown sugar, chai spice mix and cinnamon just over buttered area.


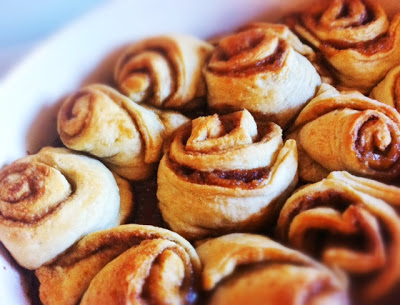
Tightly but gently roll the dough up. Use a little melted butter on the open edge of the roll to seal the seam.  Using a sharp knife, slice the roll into six pieces. Place each roll inside a parchment paper lined baking dish. Place the dish in the refrigerator as you repeat the above steps with the last sheet of puff pastry.  Bake the cinnamon rolls in preheated oven for 25-30 minutes or until golden (watch carefully!).


While rolls are baking, make the icing.  Beat butter until fluffy. Gradually add powdered sugar, then add milk or tea and flavorings. Increase amount of spice, or sugar until desired consistency and flavor are reached.  Then place in the microwave for 10-20 seconds until it melts down and is pourable.  Drizzle over cinnamon rolls when they are fresh out of the oven and enjoy.  Happy Baking!


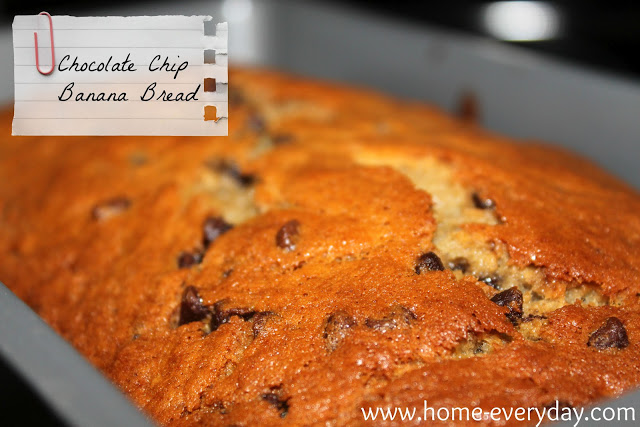
Rainy Day: Chocolate Chip Banana Bread

WOOHOO! The weekend is here! This week included tons of activities, an abrasion on my eye, and my oldest explaining to another Mom, “You don’t have to tell your daughter to stop picking her nose. Sometimes, I pick my nose. We are kids and sometimes kids have to pick their nose!” (total mother of the year moment, I wanted to crawl in a hole and die).

I know yesterday when I put out my autumn decorations it didn’t seem like fall here yet, but the forecast for the weekend calls for cool temperatures and some rain. To me this is perfect baking weather. The kitchen stays cool, and it is the perfect activity to do with the kids. So, after the busy (and crazy) week we have had, I thought I would make one of the kids favorite sweet treats: Chocolate Chip Banana Bread. (The kids like this even more than the chocolate chip zucchini bread I made a few months ago).


A few weeks ago, I browsed around the internet, and from a few different recipes I created this one. Earlier in the week I talked about how baking cookies for someone can show you care, but I think this bread will help bring us some comfort on this rainy weekend.

Erin’s Rainy Day Chocolate Chip Banana Bread

3 large ripe bananas, mashed and set aside
3/4 cup white granulated sugar
1 egg
1/3 cup butter, melted and then cooled to room temperature
1 tsp pure vanilla extract
1 1/2 cups plus 1 Tbs flour
1 tsp baking soda
1 tsp baking powder
1 tsp ground cinnamon
1/2 tsp salt
1 cup mini chocolate chips

Preheat oven to 375 degrees. Grease a bread loaf pan and set aside.

In large bowl sift together 1 1/2 cups flower, baking soda, baking powder, cinnamon and salt and then set aside. In a smaller bowl, take remaining flour and toss together with chocolate chips until chocolate chips are coated with flour (This is my mom’s trick to keep the chocolate chips to well distributed throughout bread).

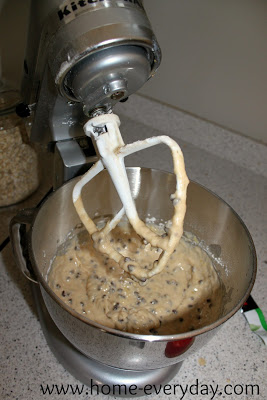
Using a stand mixer to a hand mixer on medium speed, mix together mashed bananas, sugar, egg, butter, and vanilla until well combined. Then with mixer on low speed at flour mixture until just incorporated. Finally, mix in chocolate chips.


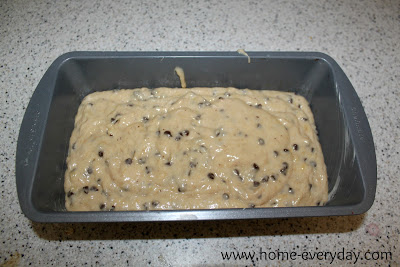
Put in greased bread pan, and bake for 45 – 50 minutes or until toothpick inserted comes out clean.


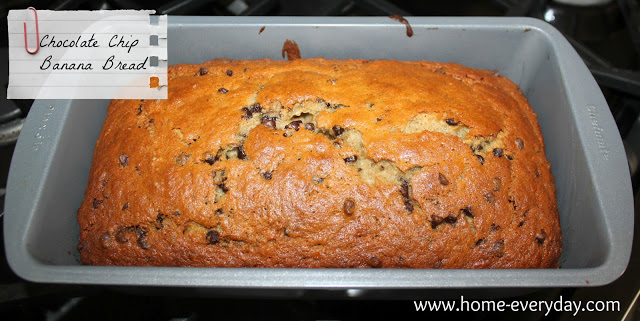
This is what it should look like when done. Hope you enjoy it as much as we do!


Linking up today at Serenity Now for Amanda’s weekend blog reading link up. You have to check it out, there are tons of recipes and craft ideas!

Baking for a Cause: More Cookies


Do you remember receiving your first care package?
I do.
I was a freshman at John Carroll University. I was homesick,
overwhelmed, and sad. Midterms were coming very soon. I went to my mailbox
after lunch and saw the magic card that said there was a box waiting for me in
the mailroom. When I got back to my room, I immediately opened the box to find
fresh baked chocolate chip cookies, a new hoodie, and a card signed by everyone
back home. I felt this overwhelming sense of relief. I knew people were thinking
of me. Proud of me. Loved me.
I know it seems silly that all those emotions came from a
box of cookies, but honestly, nothing says love like someone taking the time to
make something especially for you. Whether it be your favorite meal, a birthday
cake, or a batch of cookies, you cannot deny that a smile immediately spreads across your face.
A few months ago, I met a woman named Mary Beth who also understands the power of a box of cookies. She is the
Director of Communications of Christ the King College Prep in Chicago. This is
a school that serves students who come from some of the most crime ridden areas of Chicago. Many of the students will be the first to graduate high school and
attend college. 


When I met Mary Beth she had just tried an oatmeal, dried
cherry and dark chocolate cookie I had made. She must have liked it because she then asked if I
would be willing to share a cookie recipe once a month with an organization she had recently started for the alumni of Christ the King called
Smart Cookies. After hearing what Smart Cookies was about, I, of course, agreed to help in any way I could. So, once a month I will be sharing a cookie recipe with you, and with with the bakers of Smart Cookies.


After dropping off her own daughter at college, Mary Beth couldn’t help but think of the recent graduates of Christ the King who would be leaving for college soon. She knew these new students wouldn’t be having as easy of a time outfitting their new dorm rooms,  let alone receive any care packages. Then, she had the most amazing idea. Mary Beth decided to get together a group of Moms to start baking cookies and sending them off to all the kids who have graduated from Christ the King. She is organizing Moms (dads, grandmas, grandpas or anyone who loves to bake) to literally send off some home made love in a box to give these kids a little bit of encouragement. A little taste of home. A little way to say, WE ARE PROUD OF YOU.

Next time you are baking cookies, you might want to consider doubling up that recipe and sending them off to some kids that need a little extra love. Isn’t that why we bake?

For more information on how you can help with the SMART COOKIES organization, contact Mary Beth at: marybethsammons@aol.com or go to www.smart-cookies.org


Big Kids Now: Cherry Cola (Pop) Brownies

I know this week has been a little “kid heavy” in the way of posting, but here’s why:


My boys started school this week. They were SO excited. I don’t know if you can tell
However, for bearing with my crazy pictures of my knuckelheads, I will reward you with a recipe.
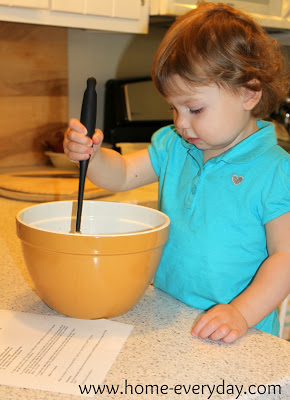
To celebrate heading back to school, and the boys having a great first day, Coco and I decided to make the boys a treat. 


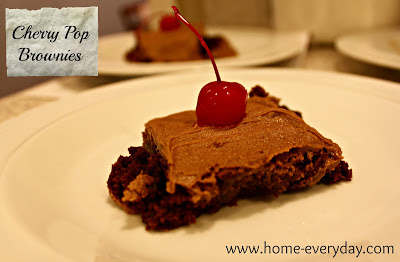
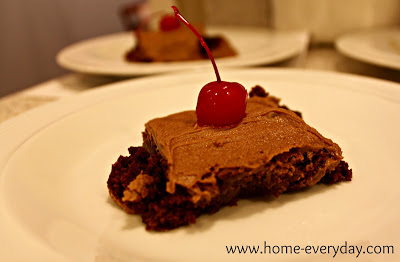
I dug through my baking cabinet and found a box of brownie mix. I wanted something a little doctored up (after all this is a special occasion), and I found this recipe on the Betty Crocker website. I LOVE CHERRY POP (yes, I just said pop. I’m from Chicago, deal with it people). We always have cherry pop of some kind in our house as it is my favorite.
Anyway, what grabbed my attention about this recipe (other than containing cherry pop) is it only contains one egg. My boys have a slight egg white sensitivity, so I like to find recipes that have one or no eggs or can easily have substitutions for eggs. Also, the picture totally captured my eye. The kids like anything with a cherry on top.
So we baked. 


The kids loved, mom and dad loved. It doesn’t get much better than this people. 

Linking up with Adorned from Above.

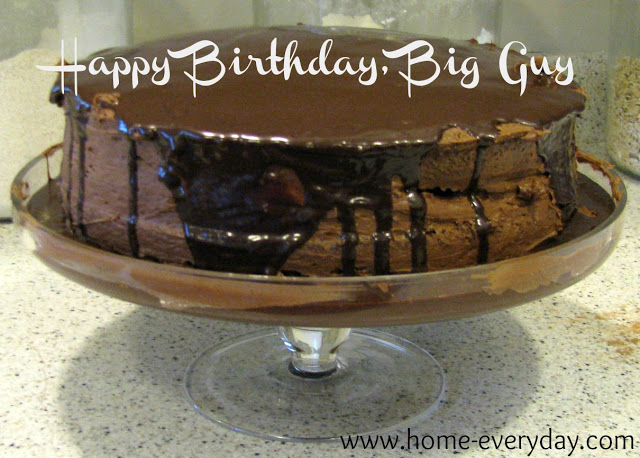
Happy Birthday, Big Guy: Triple Chocolate Layer Cake

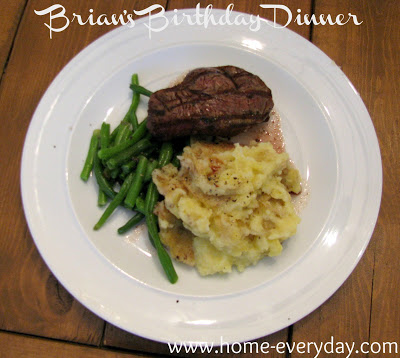
Brian’s birthday is in August, however, this also marks the busiest time for Brian at work. He spends long hours away from home, and when he comes home he spends a lot of time at his computer. Because of this, we typically wait to celebrate his Birthday with our extended family well into September. However, I always make his favorite dinner and a special dessert on his actual birthday.

Brian’s Favorite Dinner is grilled filet mignon, homemade smashed potatoes, and fresh steamed green beans.


This is not really what this post is about though. It is ALL about the dessert. Brian loves all things chocolate. Basically, to Brian, if there isn’t chocolate involved, it isn’t dessert. So, I decided to combine three types of chocolate to make a Triple Chocolate Cake. Apparently, it was so good some people couldn’t wait until after dinner to try it. We are still trying to find the culprit. My guess is one of the boys (as in Brian).
This cake has a three parts to it, but overall is not that hard to make.
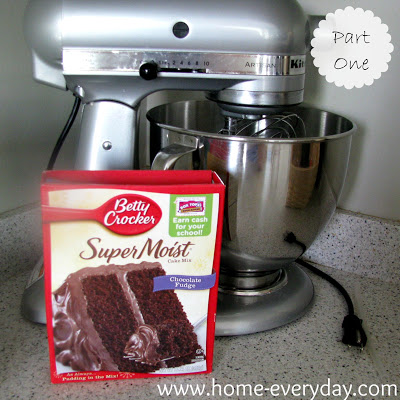
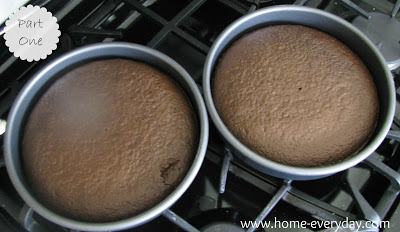
The first was I used a simple Betty Crocker boxed cake mix (Chocolate Fudge), and made it in two 9 inch round cake pans.


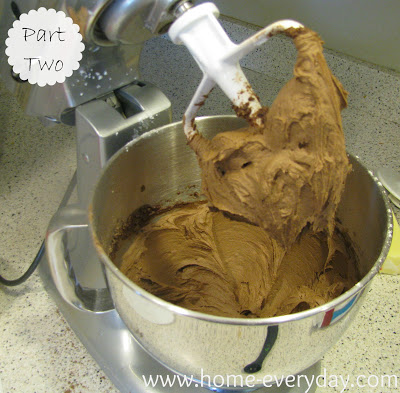
Then, I made a simple chocolate buttercream frosting.

2 sticks unsalted butter softened
3 1/2 cups confectioner’s sugar
1/2 cup cocoa powder
2 tsp pure vanilla extract
pinch of salt

In a mixer with paddle attachment or large mixing bowl with an electric hand mixer, mix all ingredients until well incorporated and set aside.


Then, I made simple dark chocolate ganache.
1 cup heavy whipping cream
1 cup dark chocolate chips
1 tsp vanilla
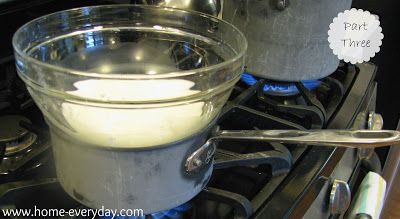
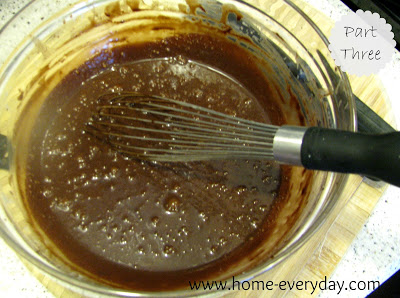
In a large bowl put over simmering water, heat cream. Then slowly add chocolate chips and vanilla. Whisk together until chocolate is completely melted and remove from heat.


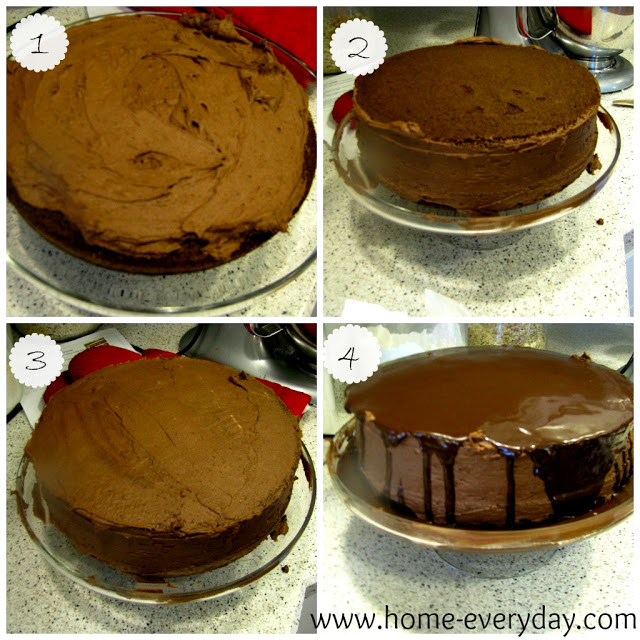
Then, comes time for assembly. Once the cakes are completely cool, place one of the cake rounds on a cake plate and frost the top with a thick layer of the chocolate buttercream. Next, layer the second cake round on top of the buttercream, and frost the sides and top of the cake. Finally, using a ladle, spoon the ganache over the entire cake and let fall down the sides.
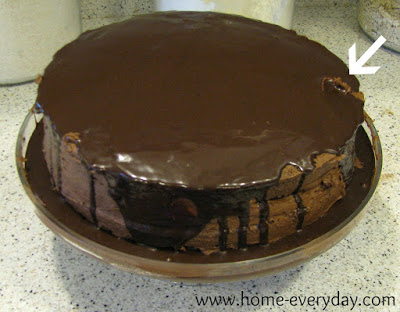
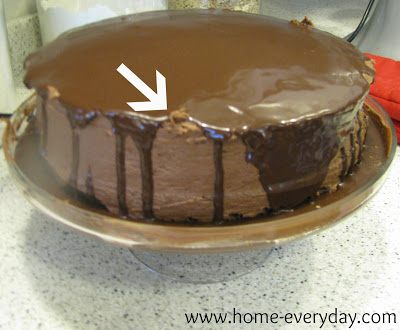
Once the cake was complete, I went to grab my camera, and this is what I found.


Fingerprints! I literally turned my back for two seconds. I guess when there is this much chocolate involved, some people just cannot resist.
The kids and I were happy to make something so special for Brian, and I know with how hard he has been working lately, he appreciated it.


Six Week Round Up: Busy Busy

Monday marked the start of my 6th week blogging, and I have to say I am enjoying it way more than I ever thought. It is definitely a way for me to “talk” to adults as well as showcase some of the things we do with the kids, our home, and in the kitchen.

Thank you so much to those of you that read. I have only received positive feedback, and I totally appreciate it. It makes me want to share more with you. So stay tuned for more kids crazy antics, home projects, and cooking adventures. Please keep reading because my to do list is forever long, and your reading gives me the motivation to keep going.

Blogging also has the added bonus of being a scrapbook for us to look back. So, here is a round up of our last six weeks. Crazy huh?
We have definitely been enjoying summer with the kids and getting to try some new things in our neighborhood like the fishing derby, soccer camp, and the new gelato place.
We’ve also been enjoying some relaxing time at home enjoying some impromptu play time or the fake Olympics.
Let’s not forget time spent with family.
And the projects Brian and I have been working on around here like our vegetable garden that I talked about here and here.
Not to mention the painting projects that I’m constantly doing in Brian’s parking spot of the garage. So far, I’ve fixed up our mailboxrefinished some chairs, painted an old bookshelf, and painted some nightstands. By the looks of things around here, maybe I should open a furniture refinishing shop.
There have been some smaller projects we’ve tackled like the kids’ art display, my ticket stub art, or replacing the kitchen light fixture as well as the HUGE project of hosting a garage sale.
But let us not forget la piece de resistance, the gorgeous plank table Brian built and I stained.
So far this summer too, I’ve been cooking and baking up a storm (too bad it isn’t storming for real around here; the drought has wrecked havoc on my garden). Here are links to all the amazing recipes that I’ve tried. Luckily, they all have been winners, but trust me I’m sure there are several mishaps to come, and I can share those too.
As you can see we are busy around here. Thank you again for reading and the positive feedback! It really does brighten a gal’s day.