Category

Kitchen

Buffalo Check is my New Obsession: Or How I Made No Sew Cafe Curtains (Again)

After adding the new kitchen countertops and installing a subway tile backsplash, I decided that I liked the neutrality of our kitchen. I liked that everything was starting to look more clean and fresh and could kind of be tweaked with some flowers or dish towels to match the seasons.

Backsplash without Thinset 1

Rather than add a pop of color with a rug or curtains, I decided to go with a black/white/gray motif. So, I found a few black and white fabrics that I liked, and went with it.

Kitchen Curtains Black and White Fabrics COLLAGE

Ok, fine what really happened was that I saw this buffalo check fabric at IKEA, fell in love with it (and the price) and had to have it!

Kitchen Curtains Black and White 4

I thought of the “neutral theme” idea later when I realized that everything goes with black and white buffalo check.

If you remember, my old cafe curtains were made from cloth napkins. Which is still an awesome idea and for a non-sewer (or someone who cannot make up her mind) and I highly recommend it to anyone wanting to have a quick, easy, and cheap window cover solution.

Kitchen-Progress-2


That buffalo check fabric though.

Kitchen Curtains Black and White 3

So, I pulled up my big girl pants, and got out the sewing machine iron and extra strength hem tape. I made the curtains similarly to when I made them for Coco’s room a few years back. However, I also got super fancy and made a valence too!

Using my previous cloth napkins curtains as a template, I measured.

Kitchen Curtains Black and White 5

I ironed while watching Brooklyn 99 (Captain Holt, am I right?)

Kitchen Curtains Black and White 6

I hung them up.

Kitchen Curtains Black and White 7

Again, this is one of those projects I waited awhile to post as kind of a “time will tell” experiment. While I have made hem tape curtains in the past, they were decorative curtains that weren’t really open and closed very often and used more as a way to frame a window. These curtains, however, are actual real utility curtains. The kitchen is a high traffic area and the window over the sink is one that is open and closed a lot, which means these curtains would be pulled open and closed a lot. Also, over the sink means water splashing, steam from pasta water being drained, and other cooking shenanigans that happen near the sink. I wanted to make sure that these curtains would hold up to a wash, water, and heat, and some traffic before I posted a tutorial. 

Here they were the first week.

Kitchen Curtains Black and White 7

Here is picture of them yesterday (over three months of cooking, baking, washing dishes, splashing, and one run through the gentle cycle of the washing machine and hung to dry).

Kitchen Curtains Black and White 8


Also, because I don’t know if I mentioned earlier, but I really like this fabric from IKEA, I overbought, so I also had enough fabric to sew iron tie backs, and another valence for the patio door. 

Do you have any easy, quick, and foolproof DIY methods that lasted longer than you thought?


How To Install a Tile Backsplash Without Thinset or Mastic

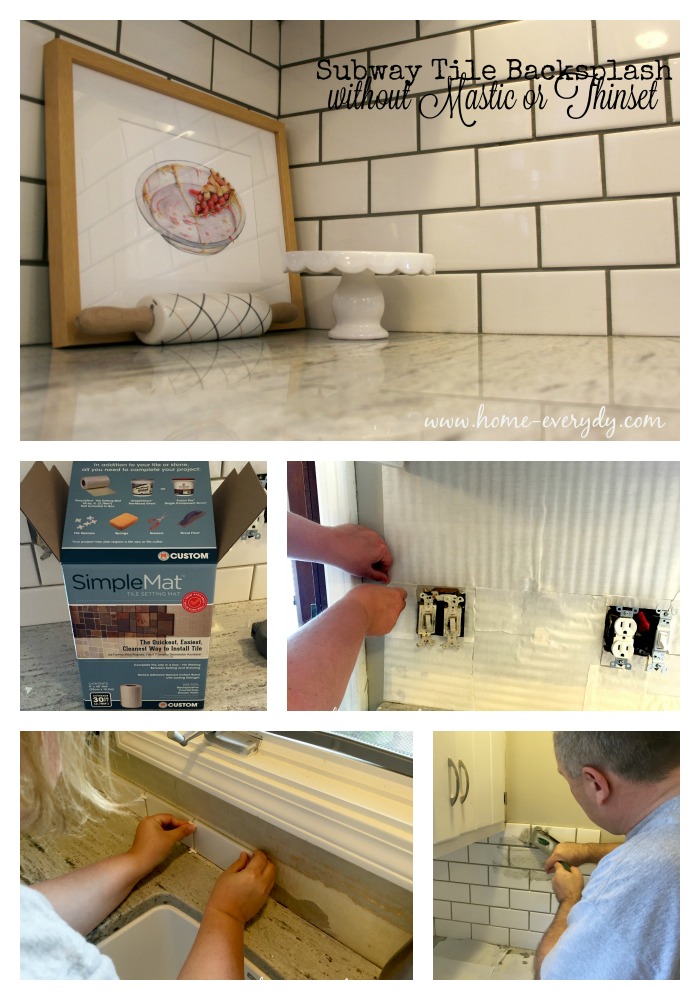
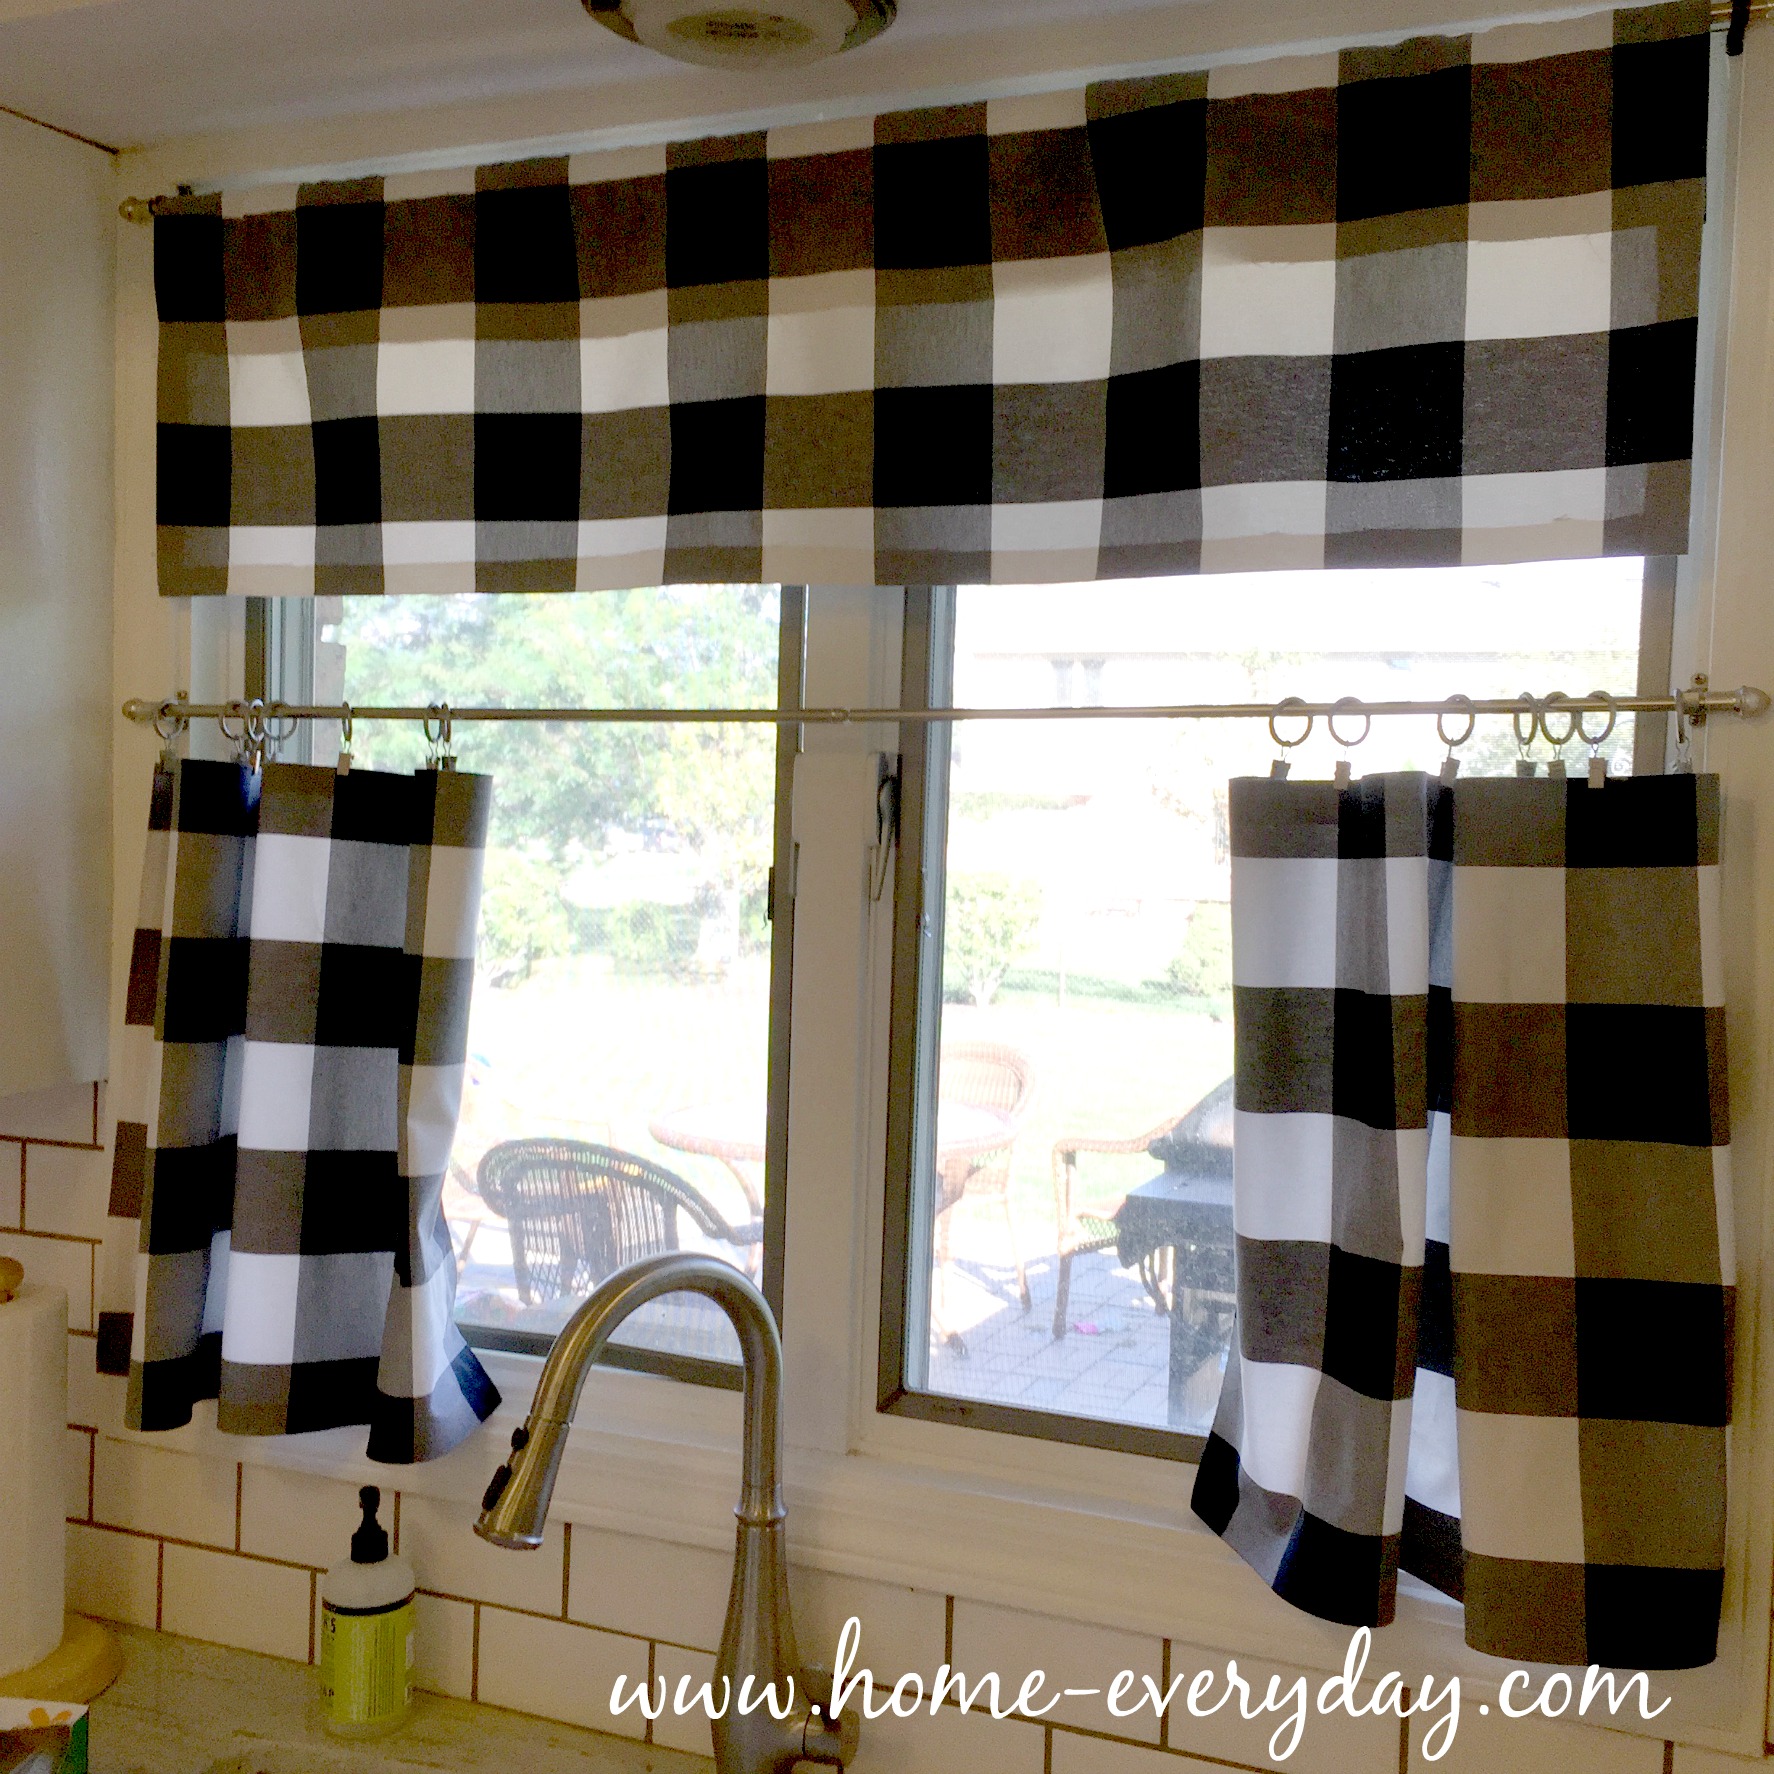
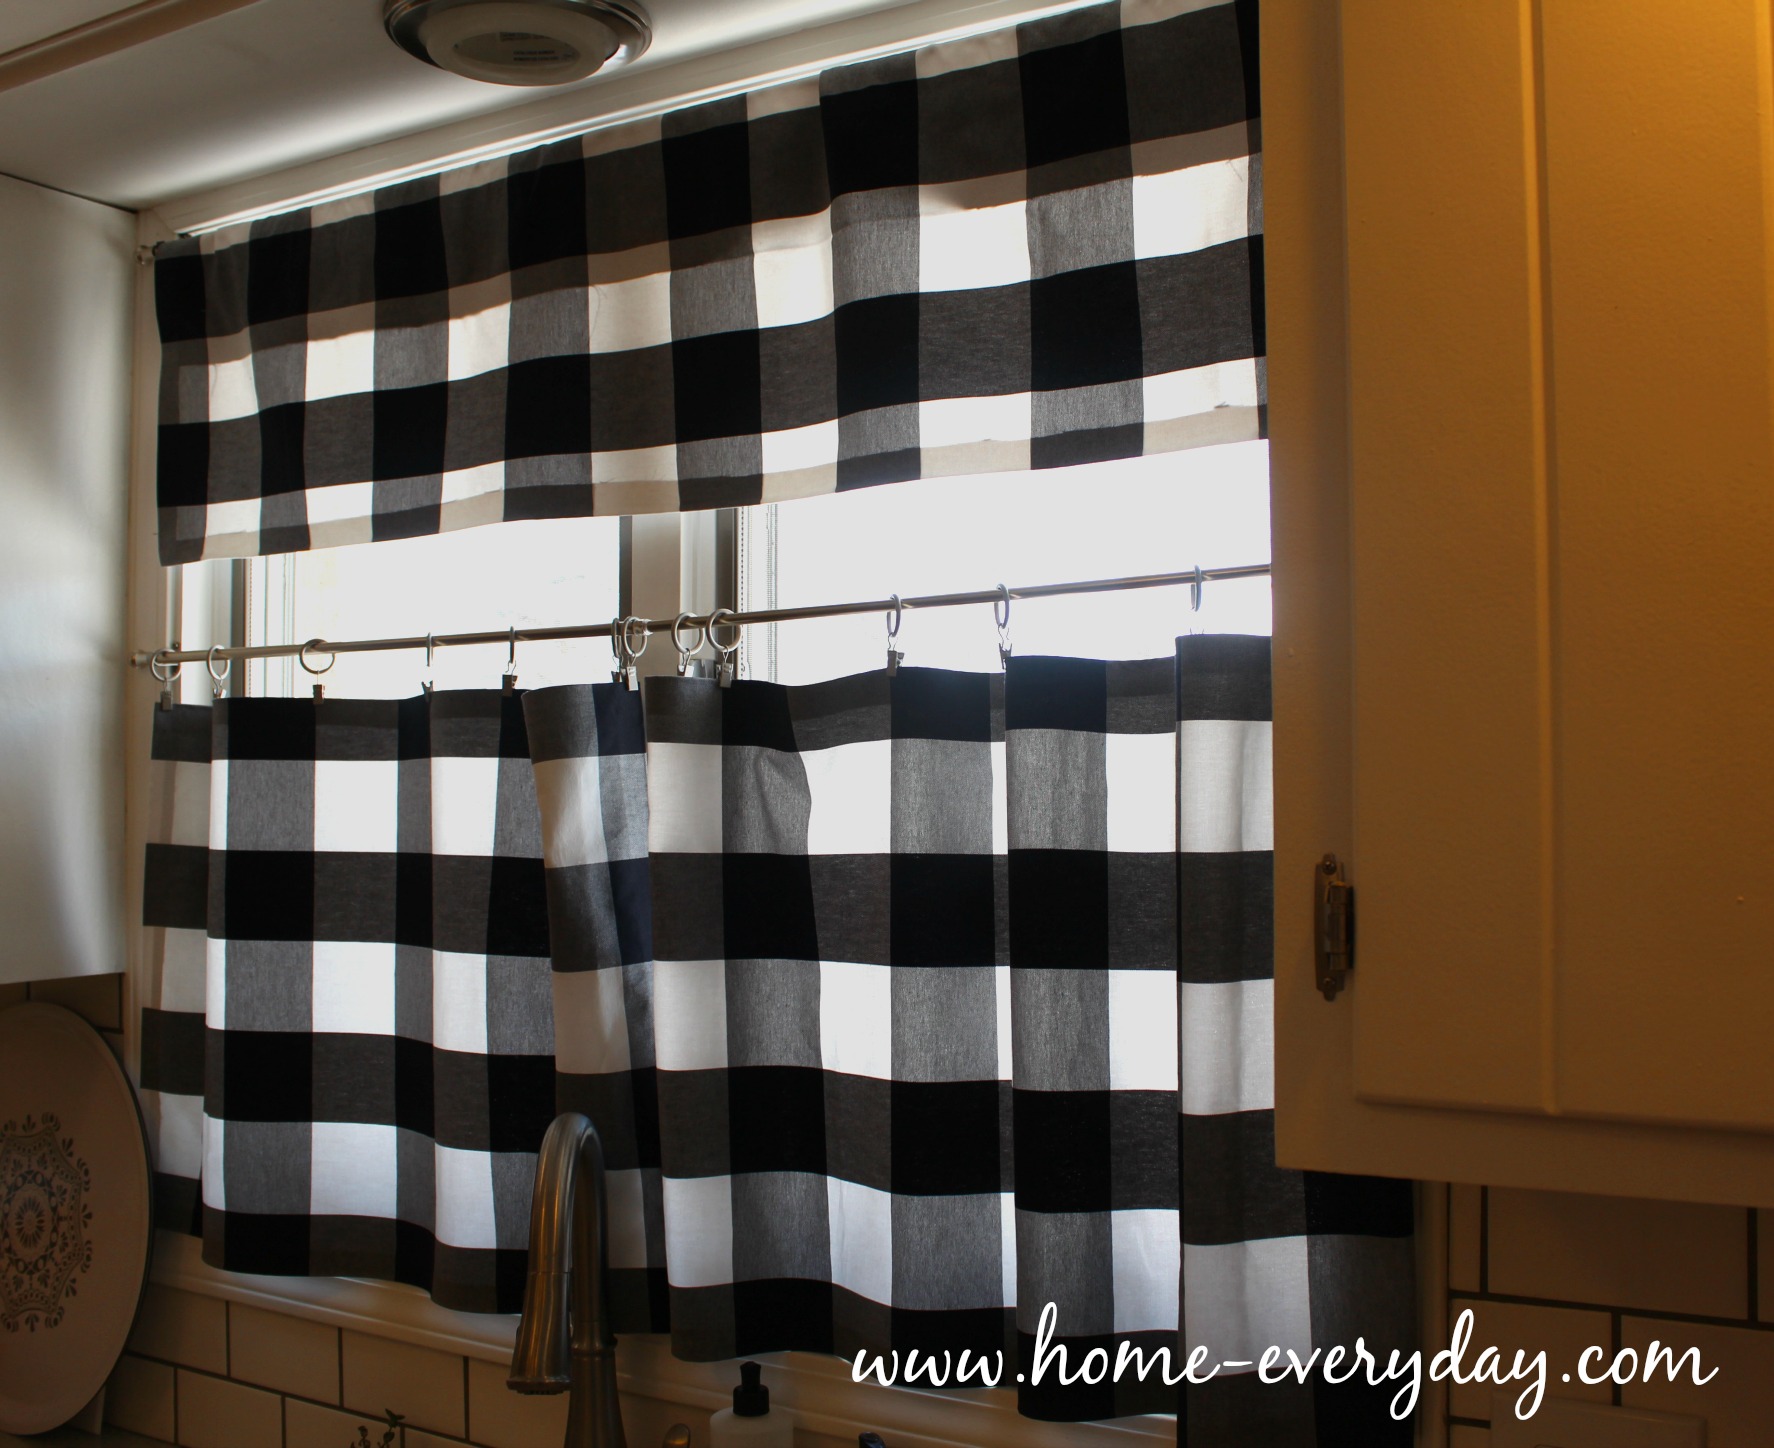
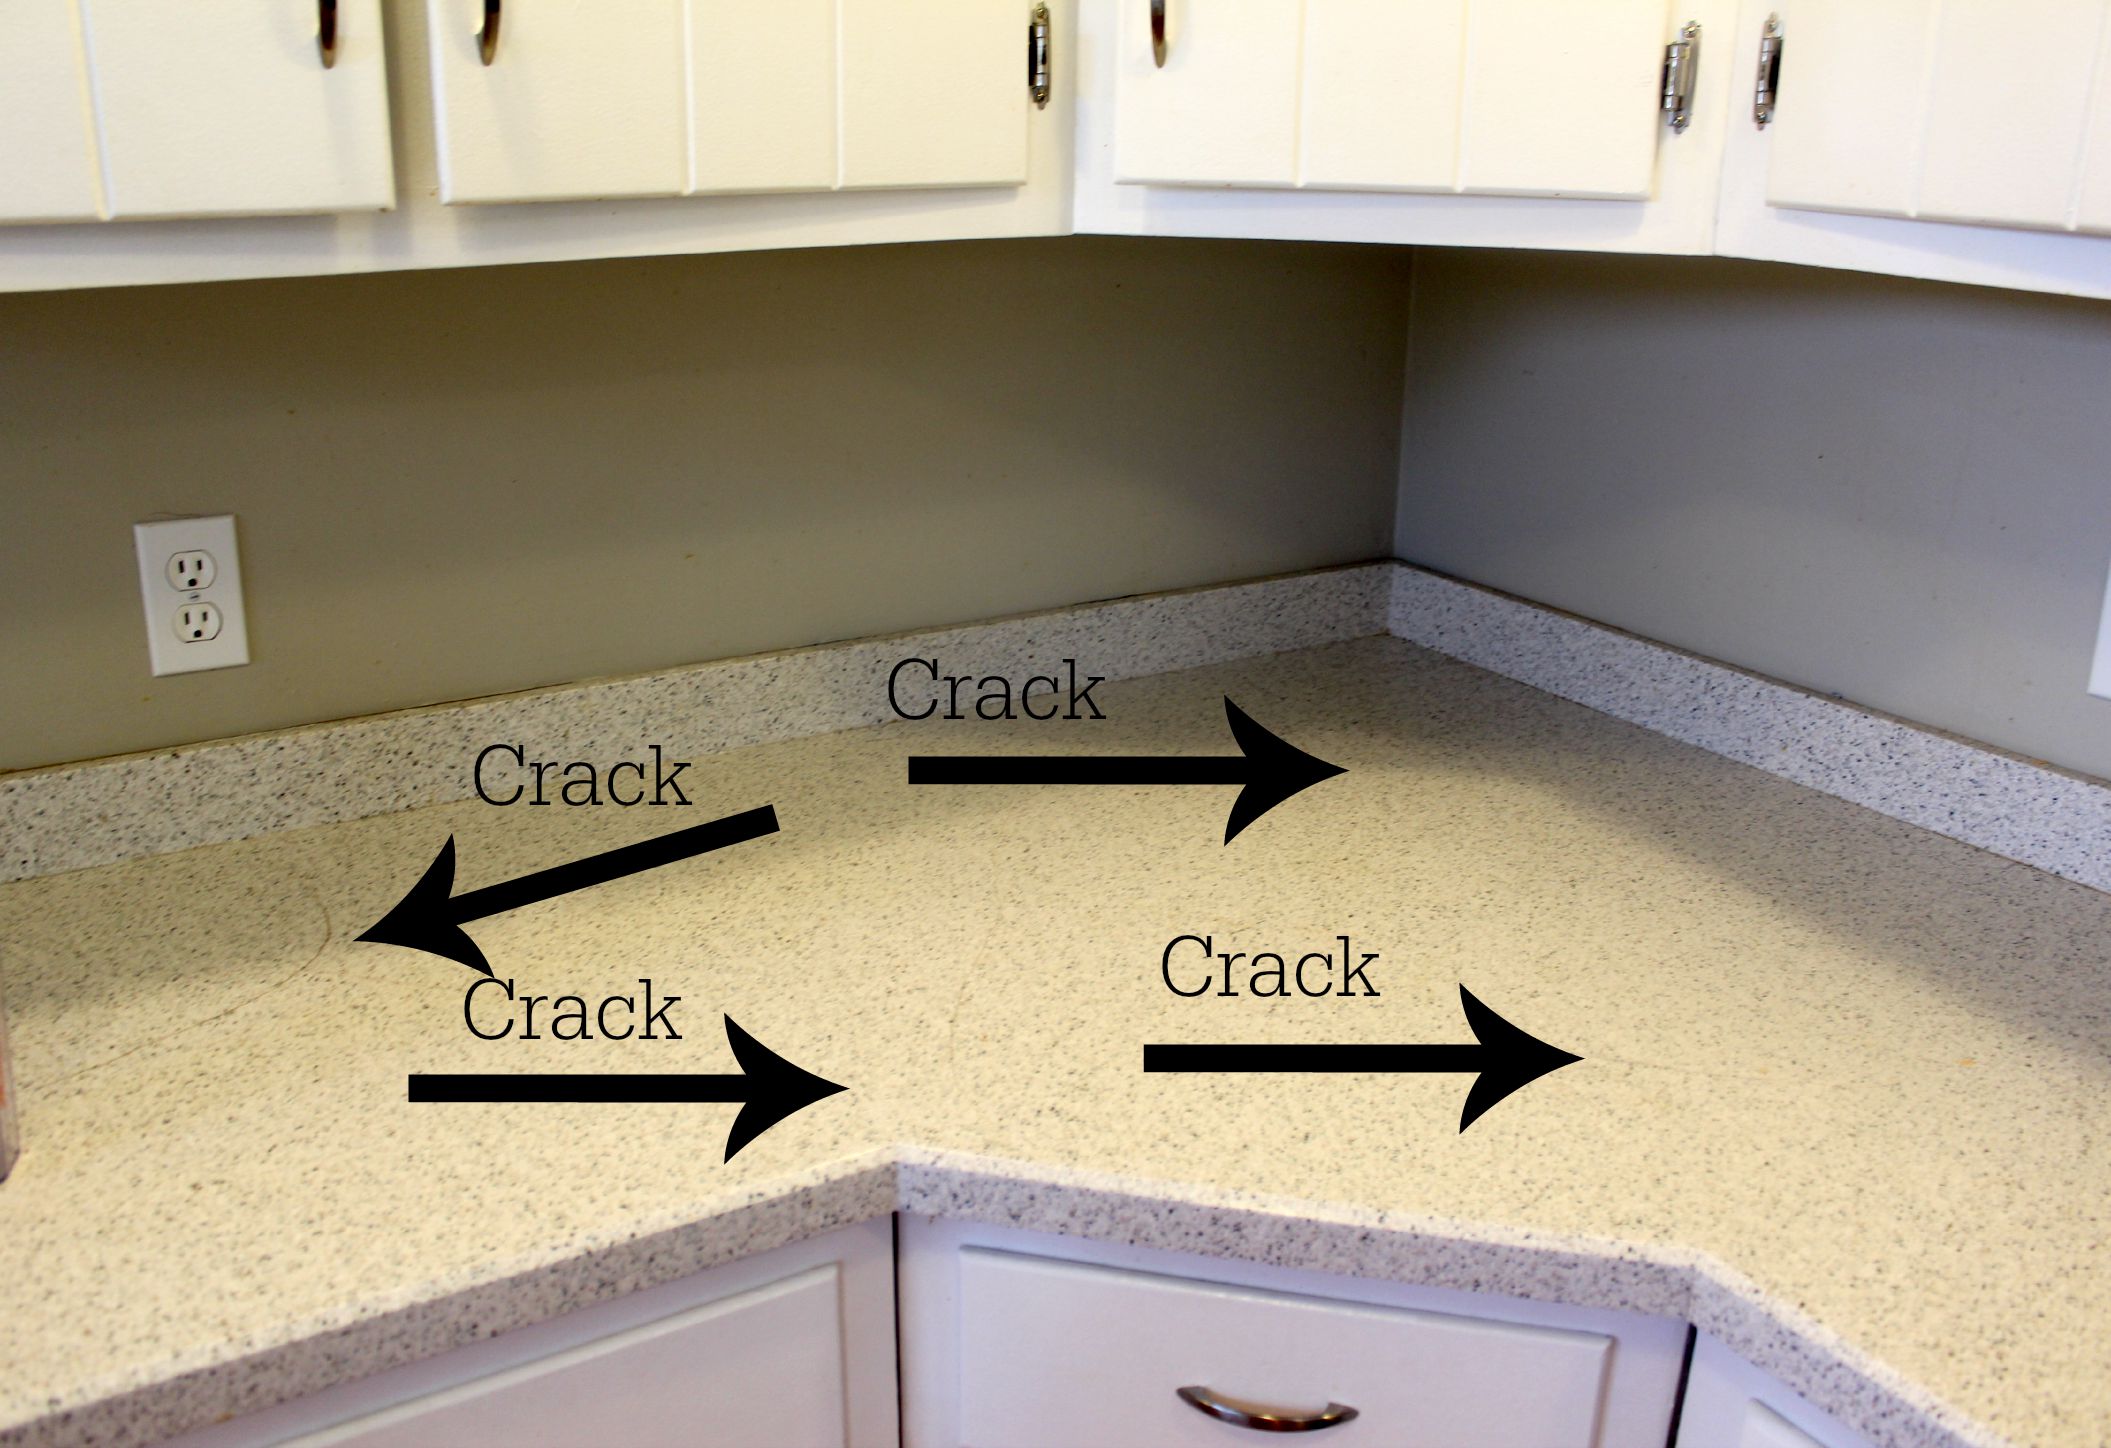
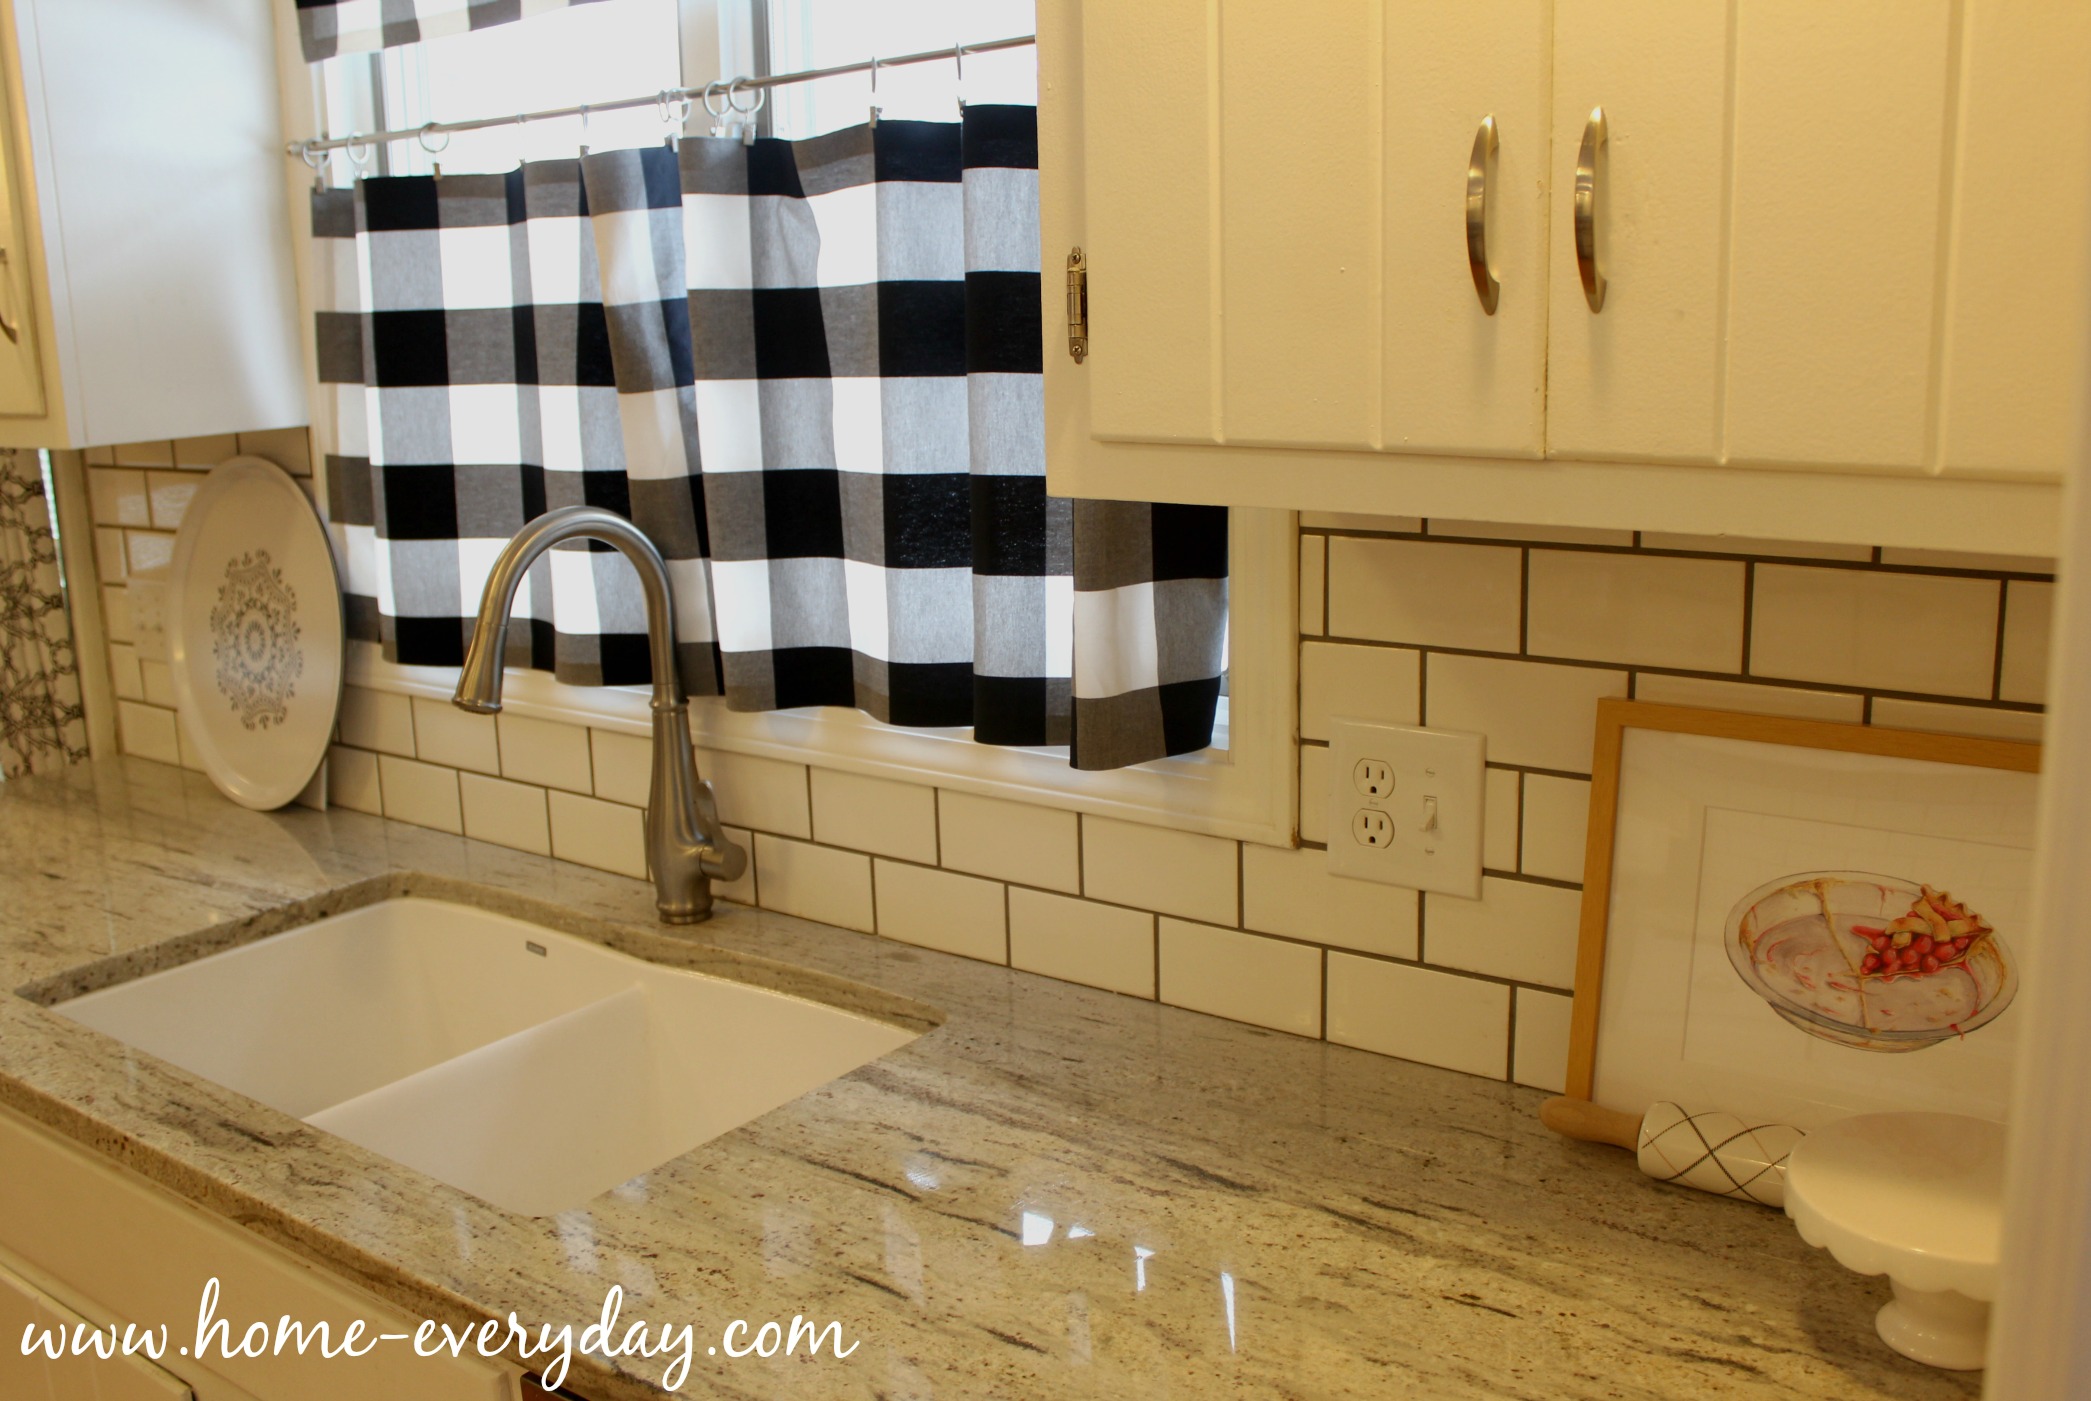
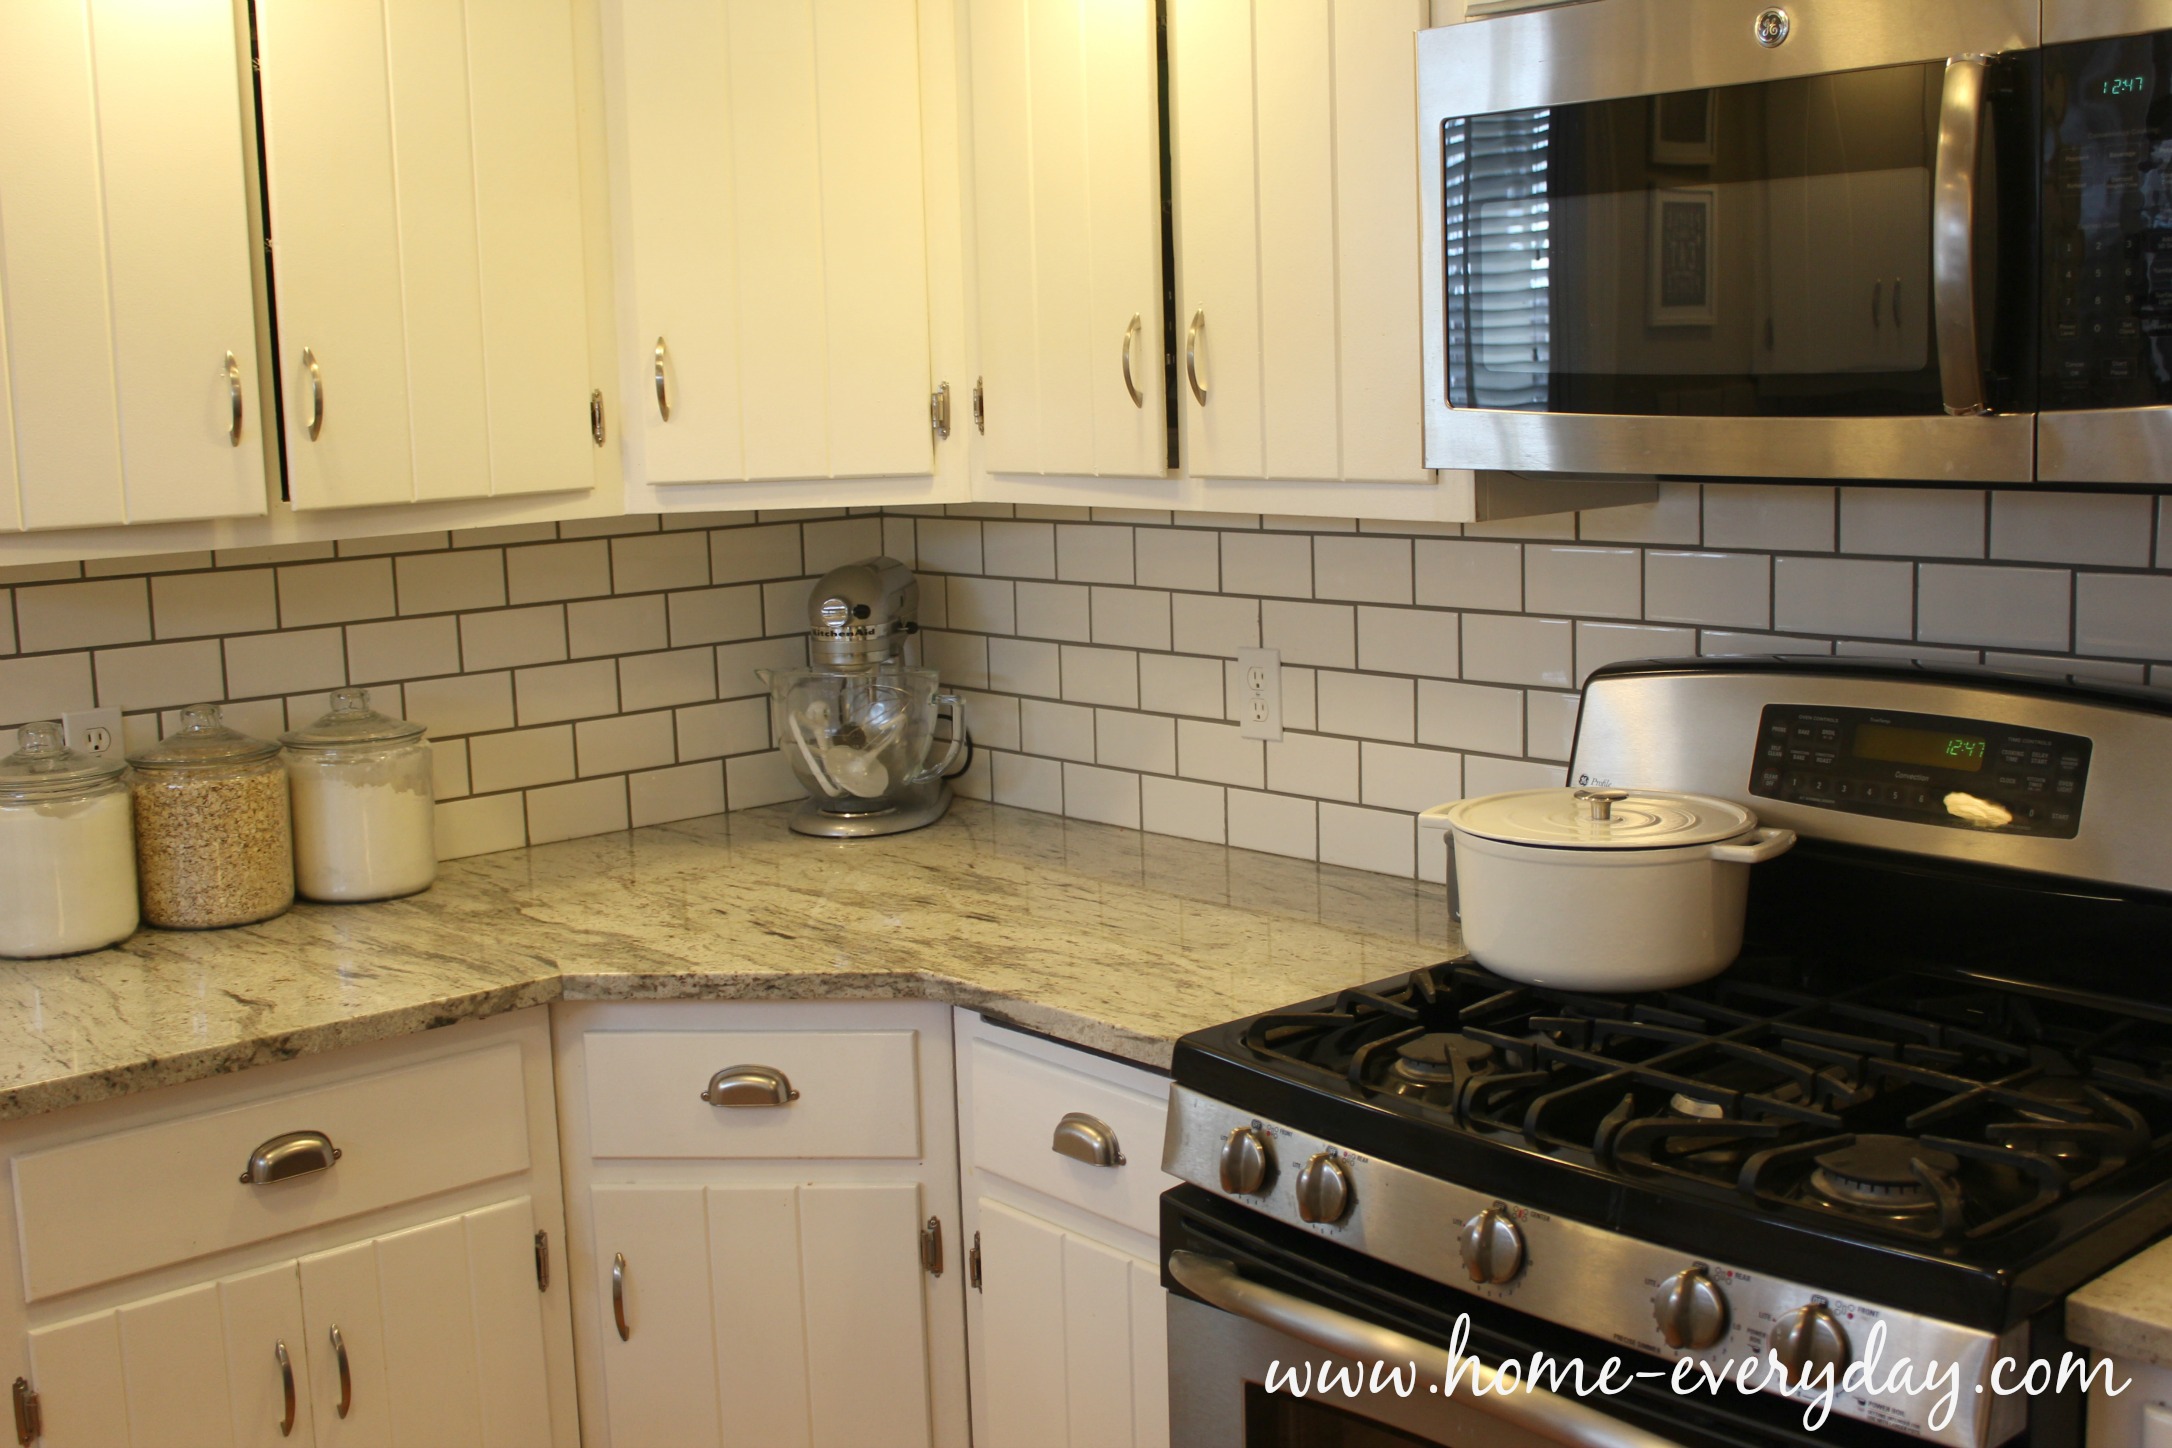
If you read Home Everyday on any regular basis, you know that the kitchen is where I can be found most of the time. I am usually cooking or baking, or crafting at the kitchen table, helping someone with homework at the kitchen table, or cleaning up a ginormous mess I just made. Since updating our kitchen with new countertops, you may have also noticed that we have updated our backsplash too. I love our kitchen even more because the space has become more practical (no more cracked countertops),  but also because of a few more useful and beautiful additions we have made to my most used room: a deeper more functional sink, an extra cabinet, a new microwave (that works correctly), some new curtains, a little paint, and a few new pieces of hardware, and most of all: a gorgeous wipeable subway tile backsplash. 
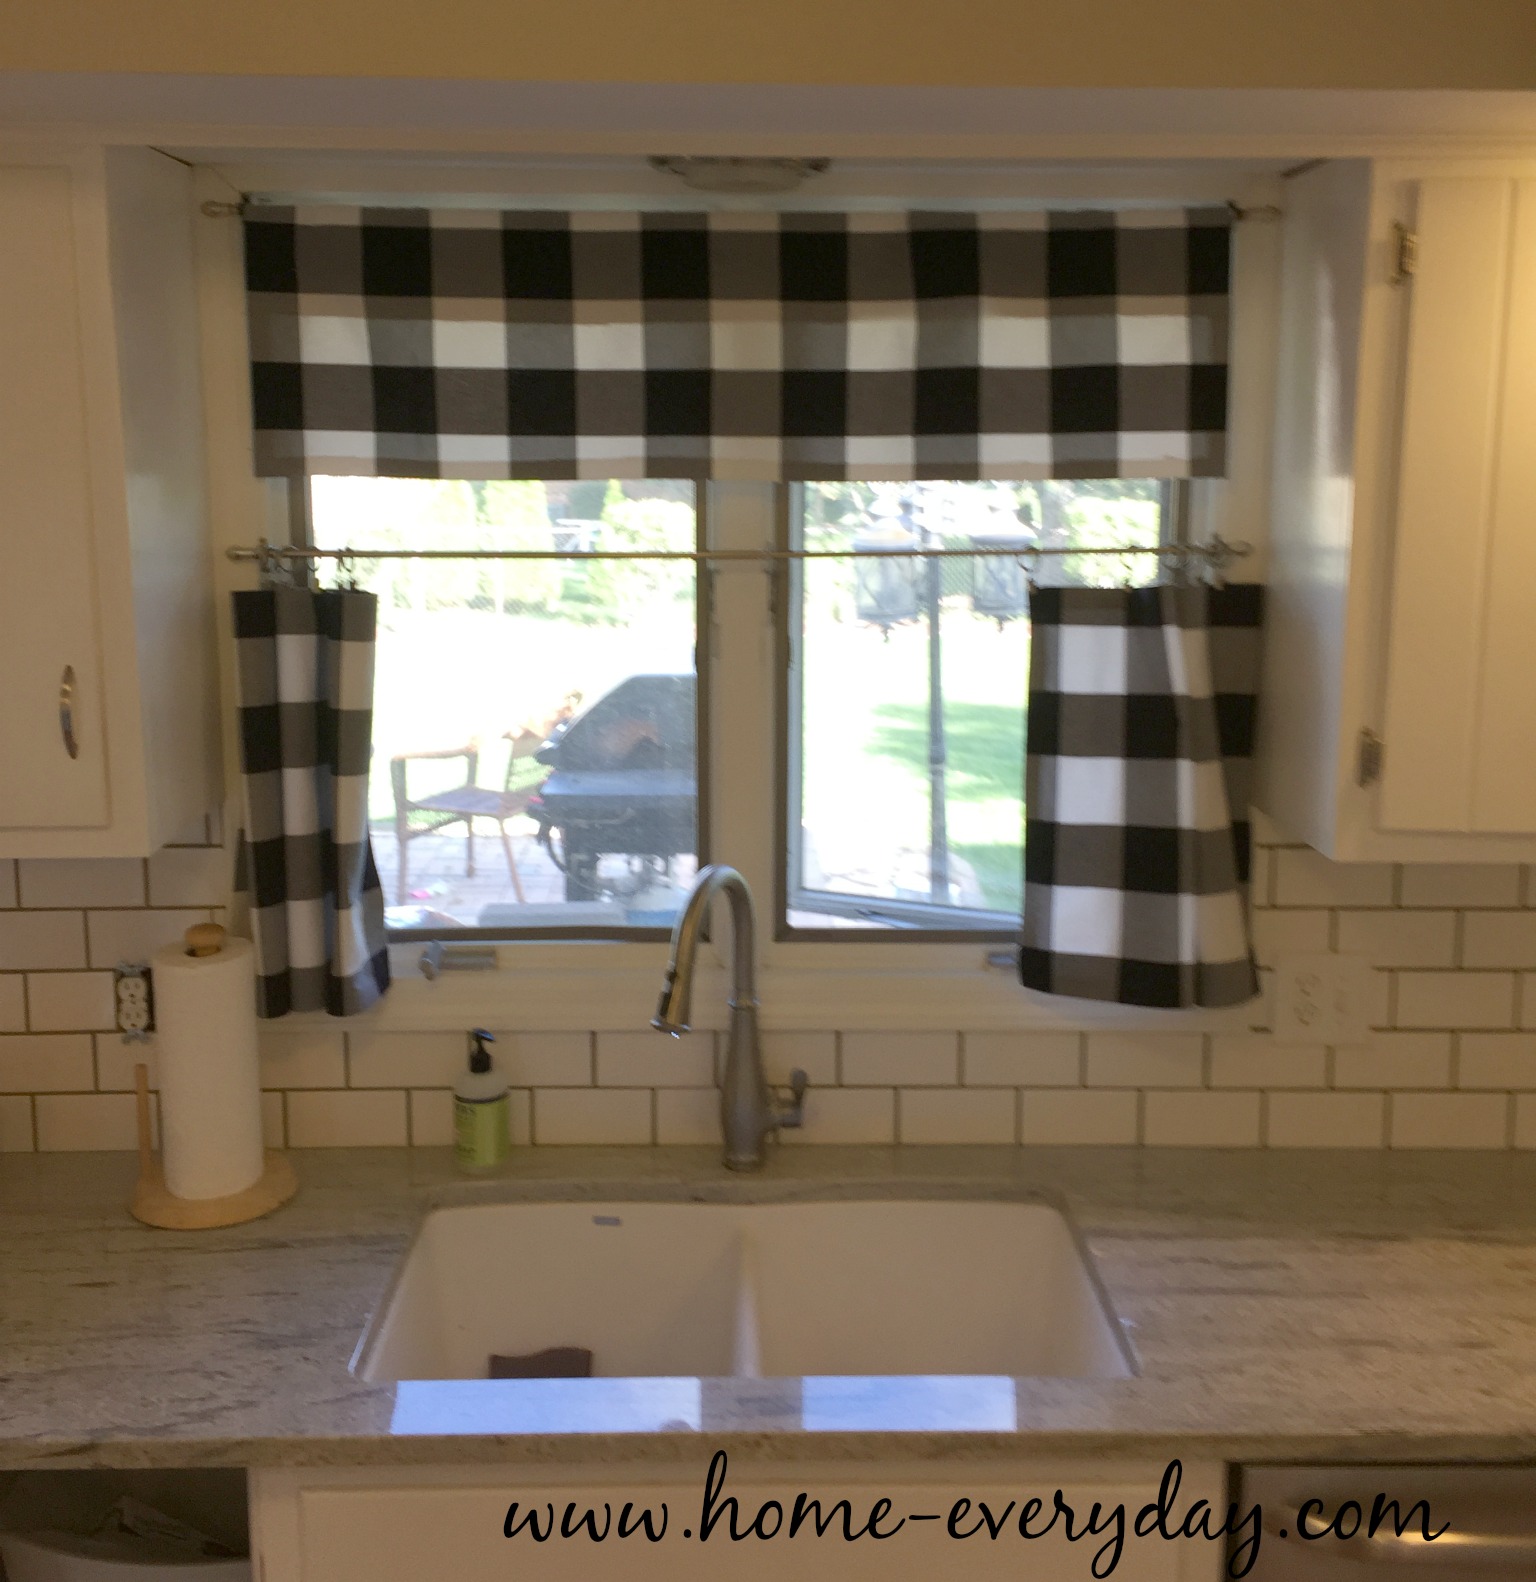
Ta Da!

Backsplash without Thinset 1

Backsplash without Thinset 2

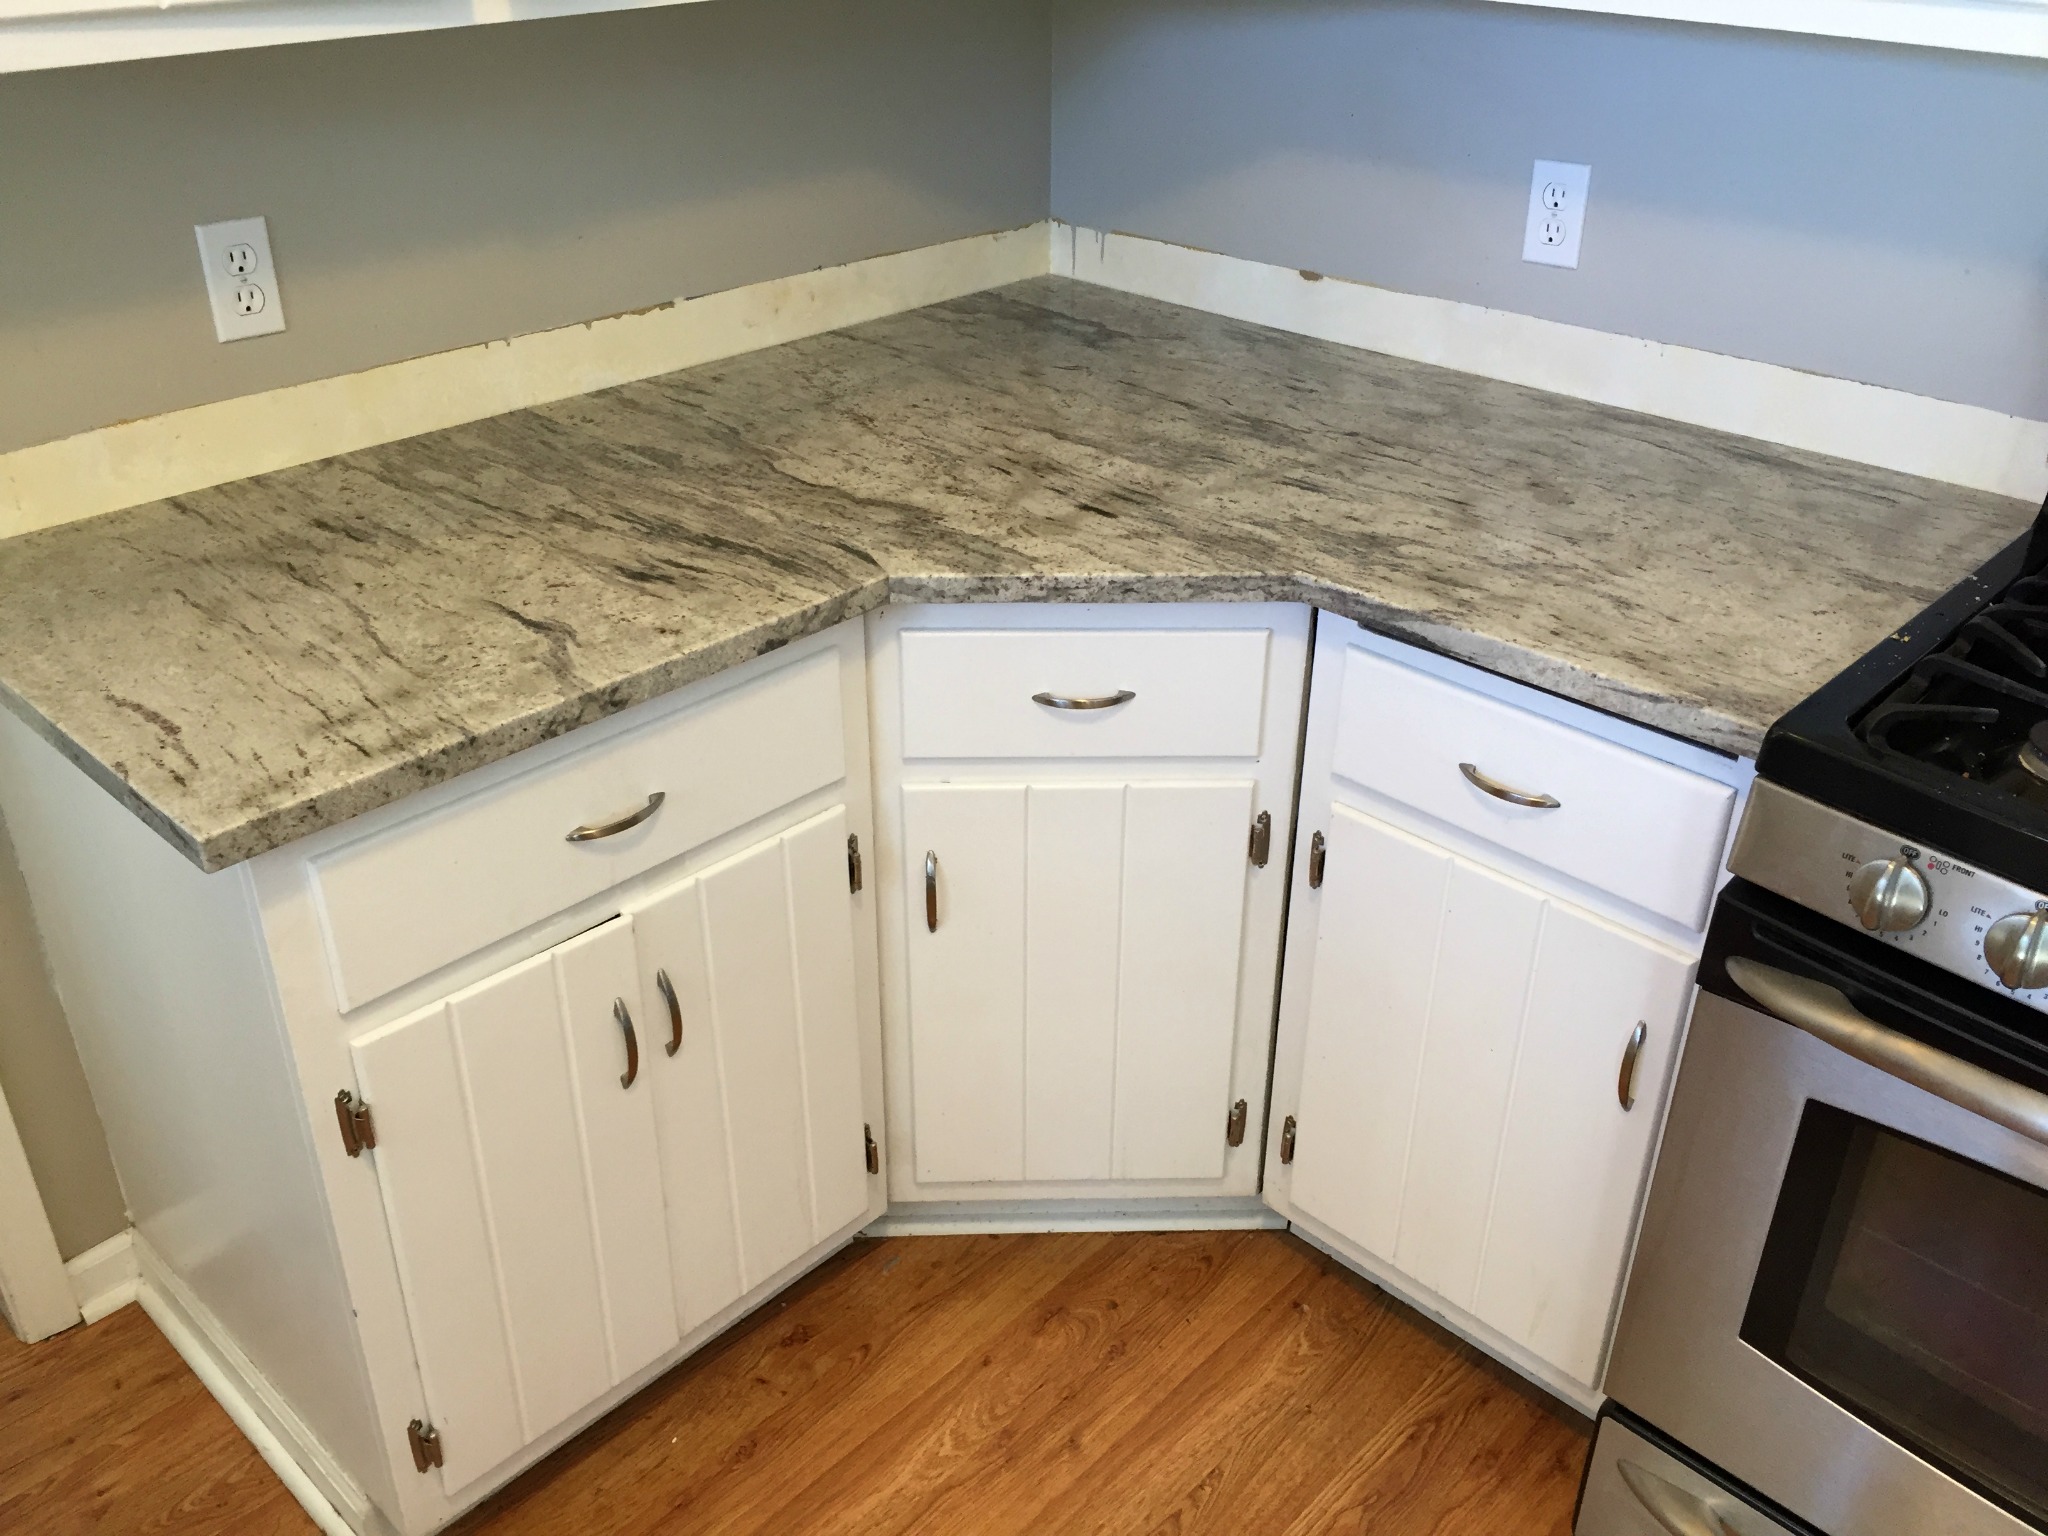
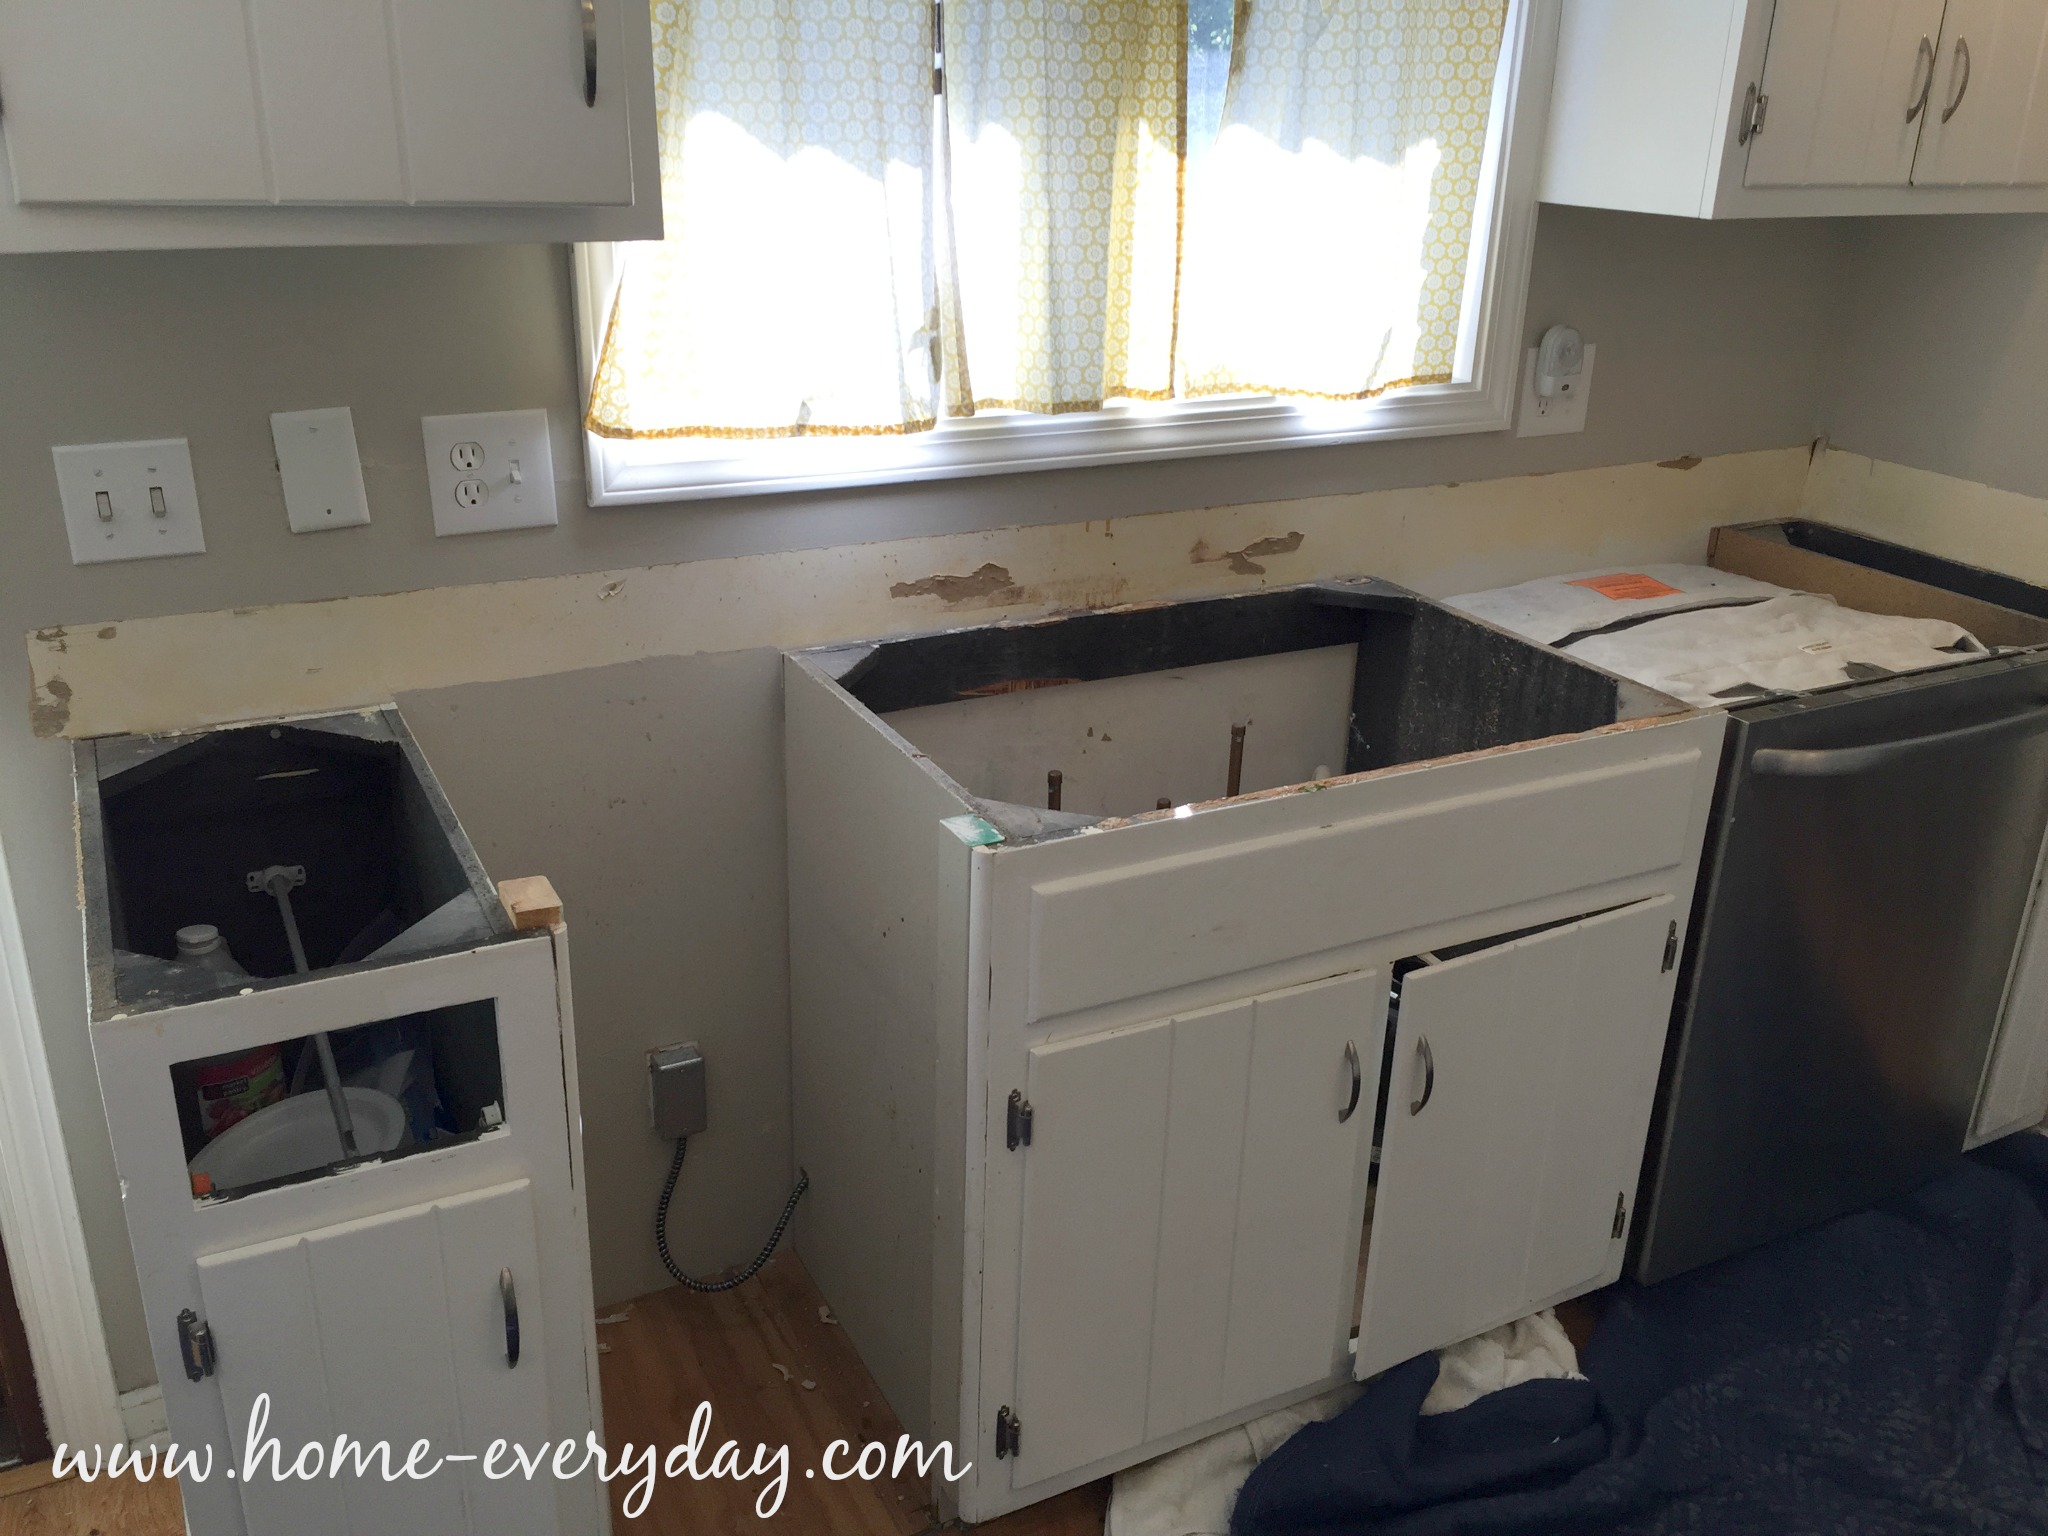
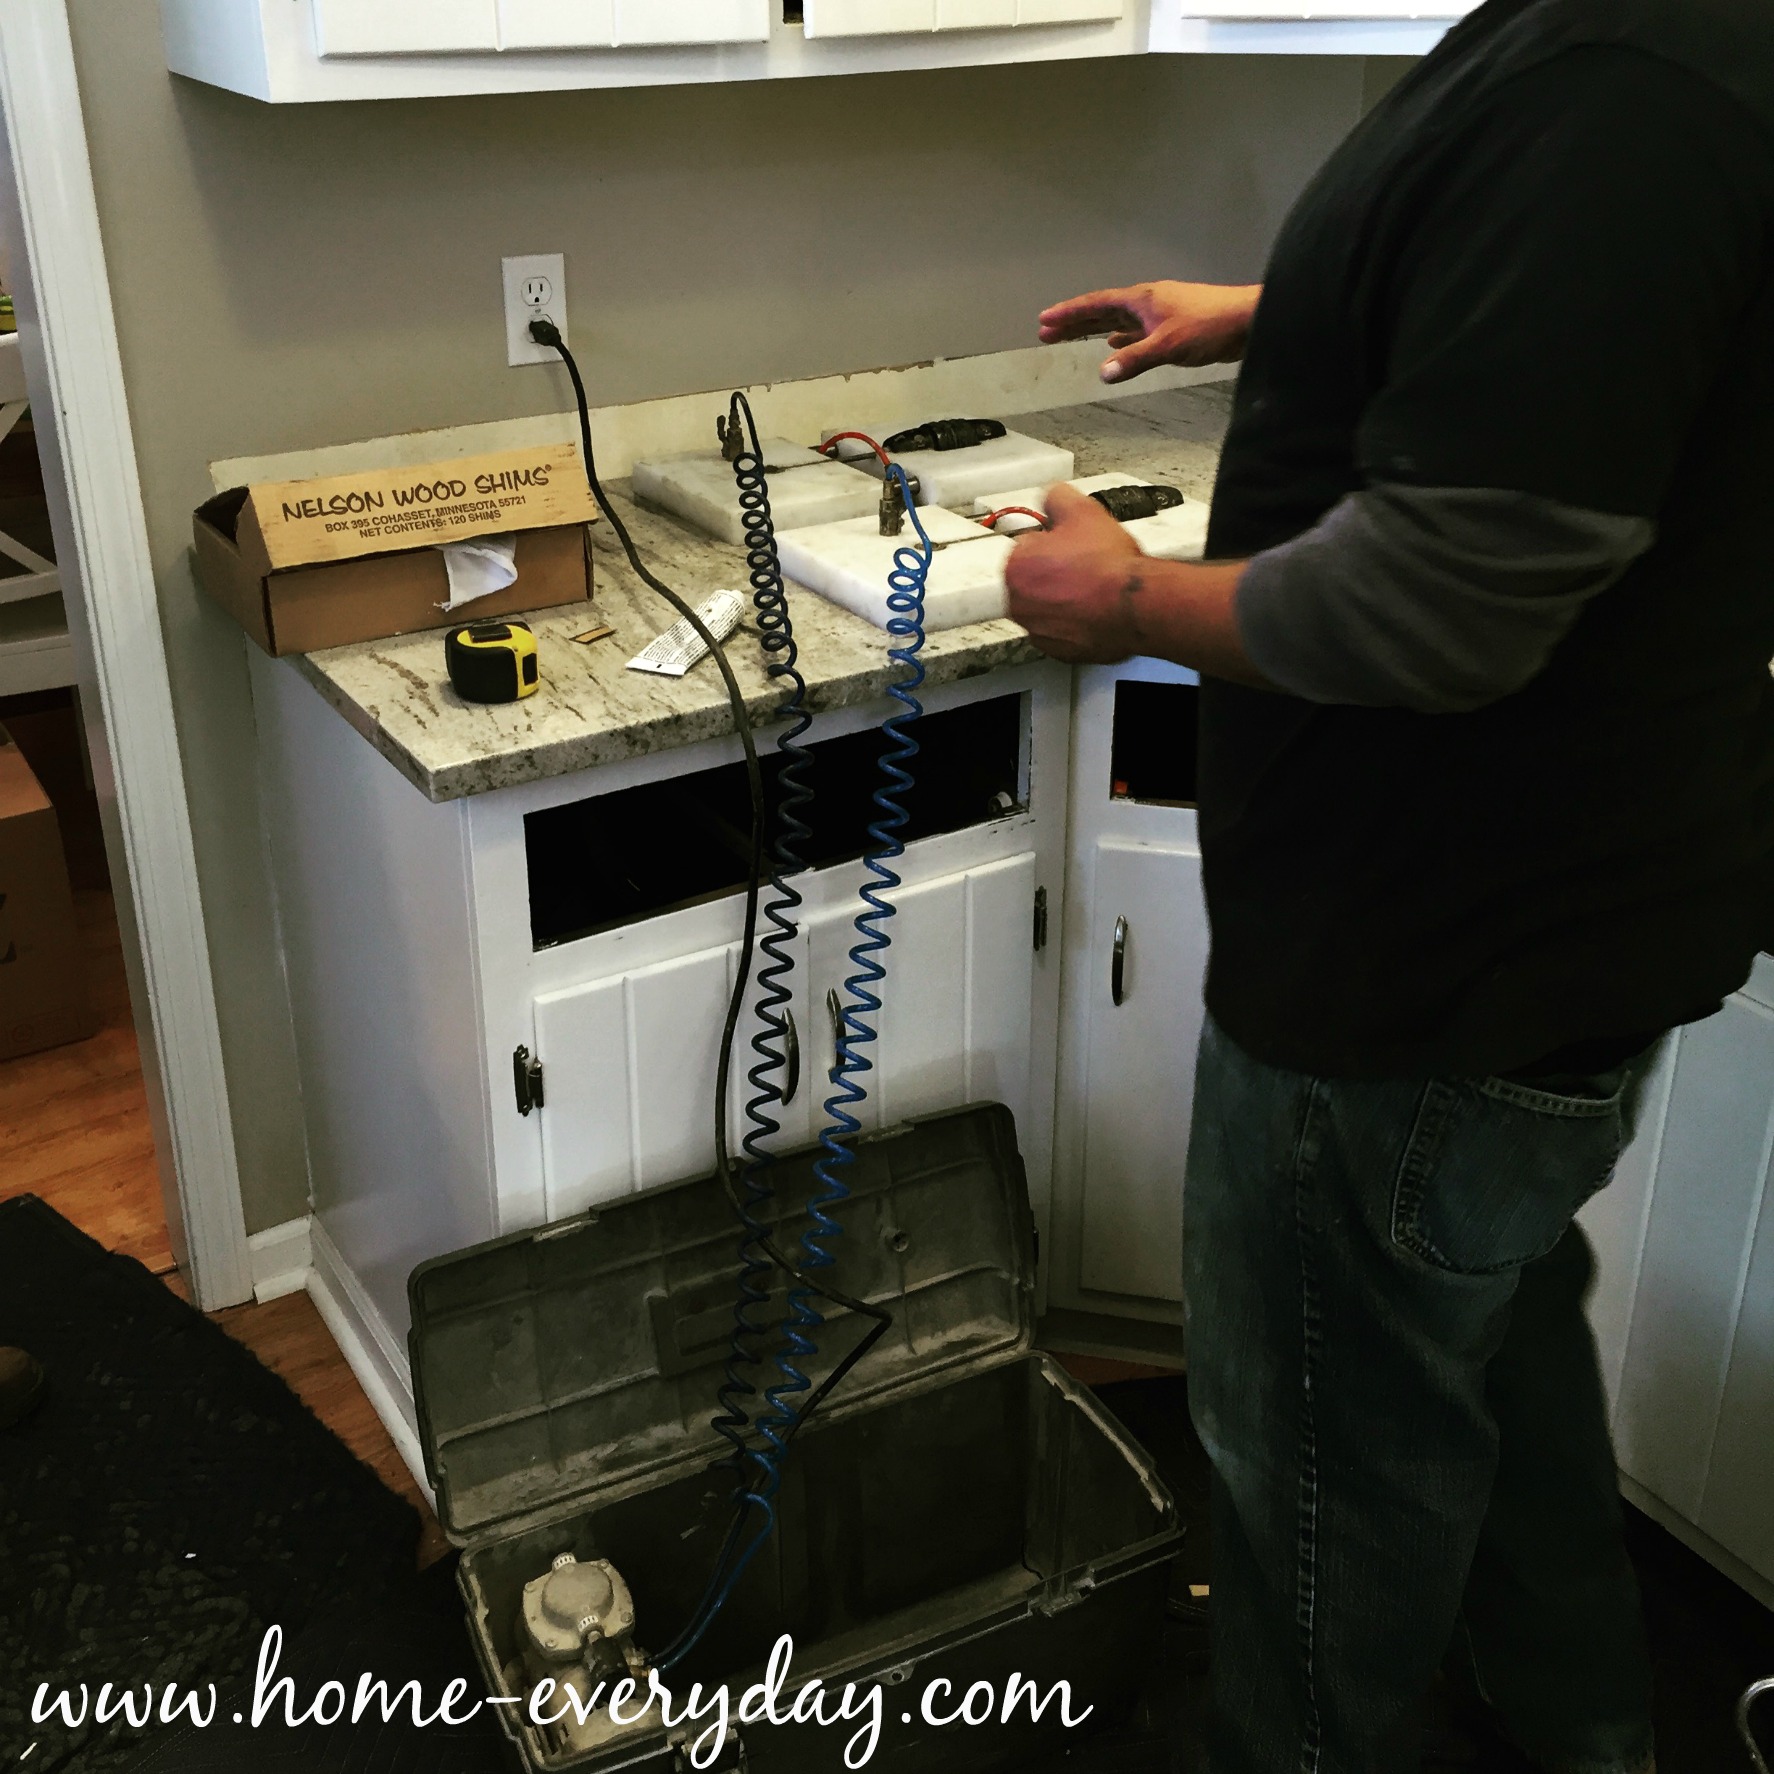
When the old countertops were removed, with them came a small backsplash that was made of the same material. When the countertops were removed, this was left behind.

Backsplash without Thinset 9

We could have had a small granite backsplash cut and attached to the wall, but there’s a few reasons we didn’t do this. 

  1. I don’t think they are practical for cleaning. Why only cover part of a space that is going to get splashed on. Then I have to tile it anyway? No.
  2. Mo granite means mo money.
  3. I think that tiling all the way to the countertop would create a modern cleaner line.

So, we decided to tile.

Ourselves.

With a method that requires no mastic or thinset.

Backsplash without Thinset FINAL

Before this project, I had never tiled anything before. However because I like to watch HGTV, and Ask This Old House like it’s my job, lay in bed and look at Pinterest boards and Instagram accounts of DIY bloggers, take free classes for projects that might happen some day at Home Depot, and talk with anyone I can about DIY, I felt that I could handle tiling a backsplash. Ok, I also asked our awesome friend Scott who has remodeled two houses of his own from top to bottom to lend a hand. 

For this project, we were able to do the entire backsplash including grout in one day! I know what you’re thinking. Whoa, whoa, whoa, Erin. You cannot tile anything in one day. You have to wait for the thinset to dry. Nope. We used SimpleMat. It is like double sided tape for tile that is perfect for basksplashes or other tiling projects that won’t get super wet (think a decorative table, countertop, or behind a wet bar or decorative wall). If you follow this easy tutorial, you can have a gorgeous backsplash, in a day too! (I was not paid or perked in anyway, I just adored this product).

Backsplash without Thinset 20


And if you’re worried, I waited three months before sharing this tutorial to make sure we didn’t have any problems. Even through a busy cooking season of Christmas where I wiped down the backsplash almost daily. So far, so good!

Supplies

SimpleMat

Tile

Tile Cutter or Wet Saw (You should talk to a pro about what you’ll need to rent or purchase depending on what kind of tile you’re using and what you think you’ll be using in the future.)

Scissors (good strong utility scissors, don’t skimp, you’ll thank me)

Simple Grout (This is a premixed grout with a sealer already built into the grout. I used this to cut out the steps of having to mix my own grout and to have to seal it later)

Tile Spacers

Float

Sponges

Buckets

Lots and lots of Paper Towel

Drop Clothes

Waterproof caulk

Getting Started

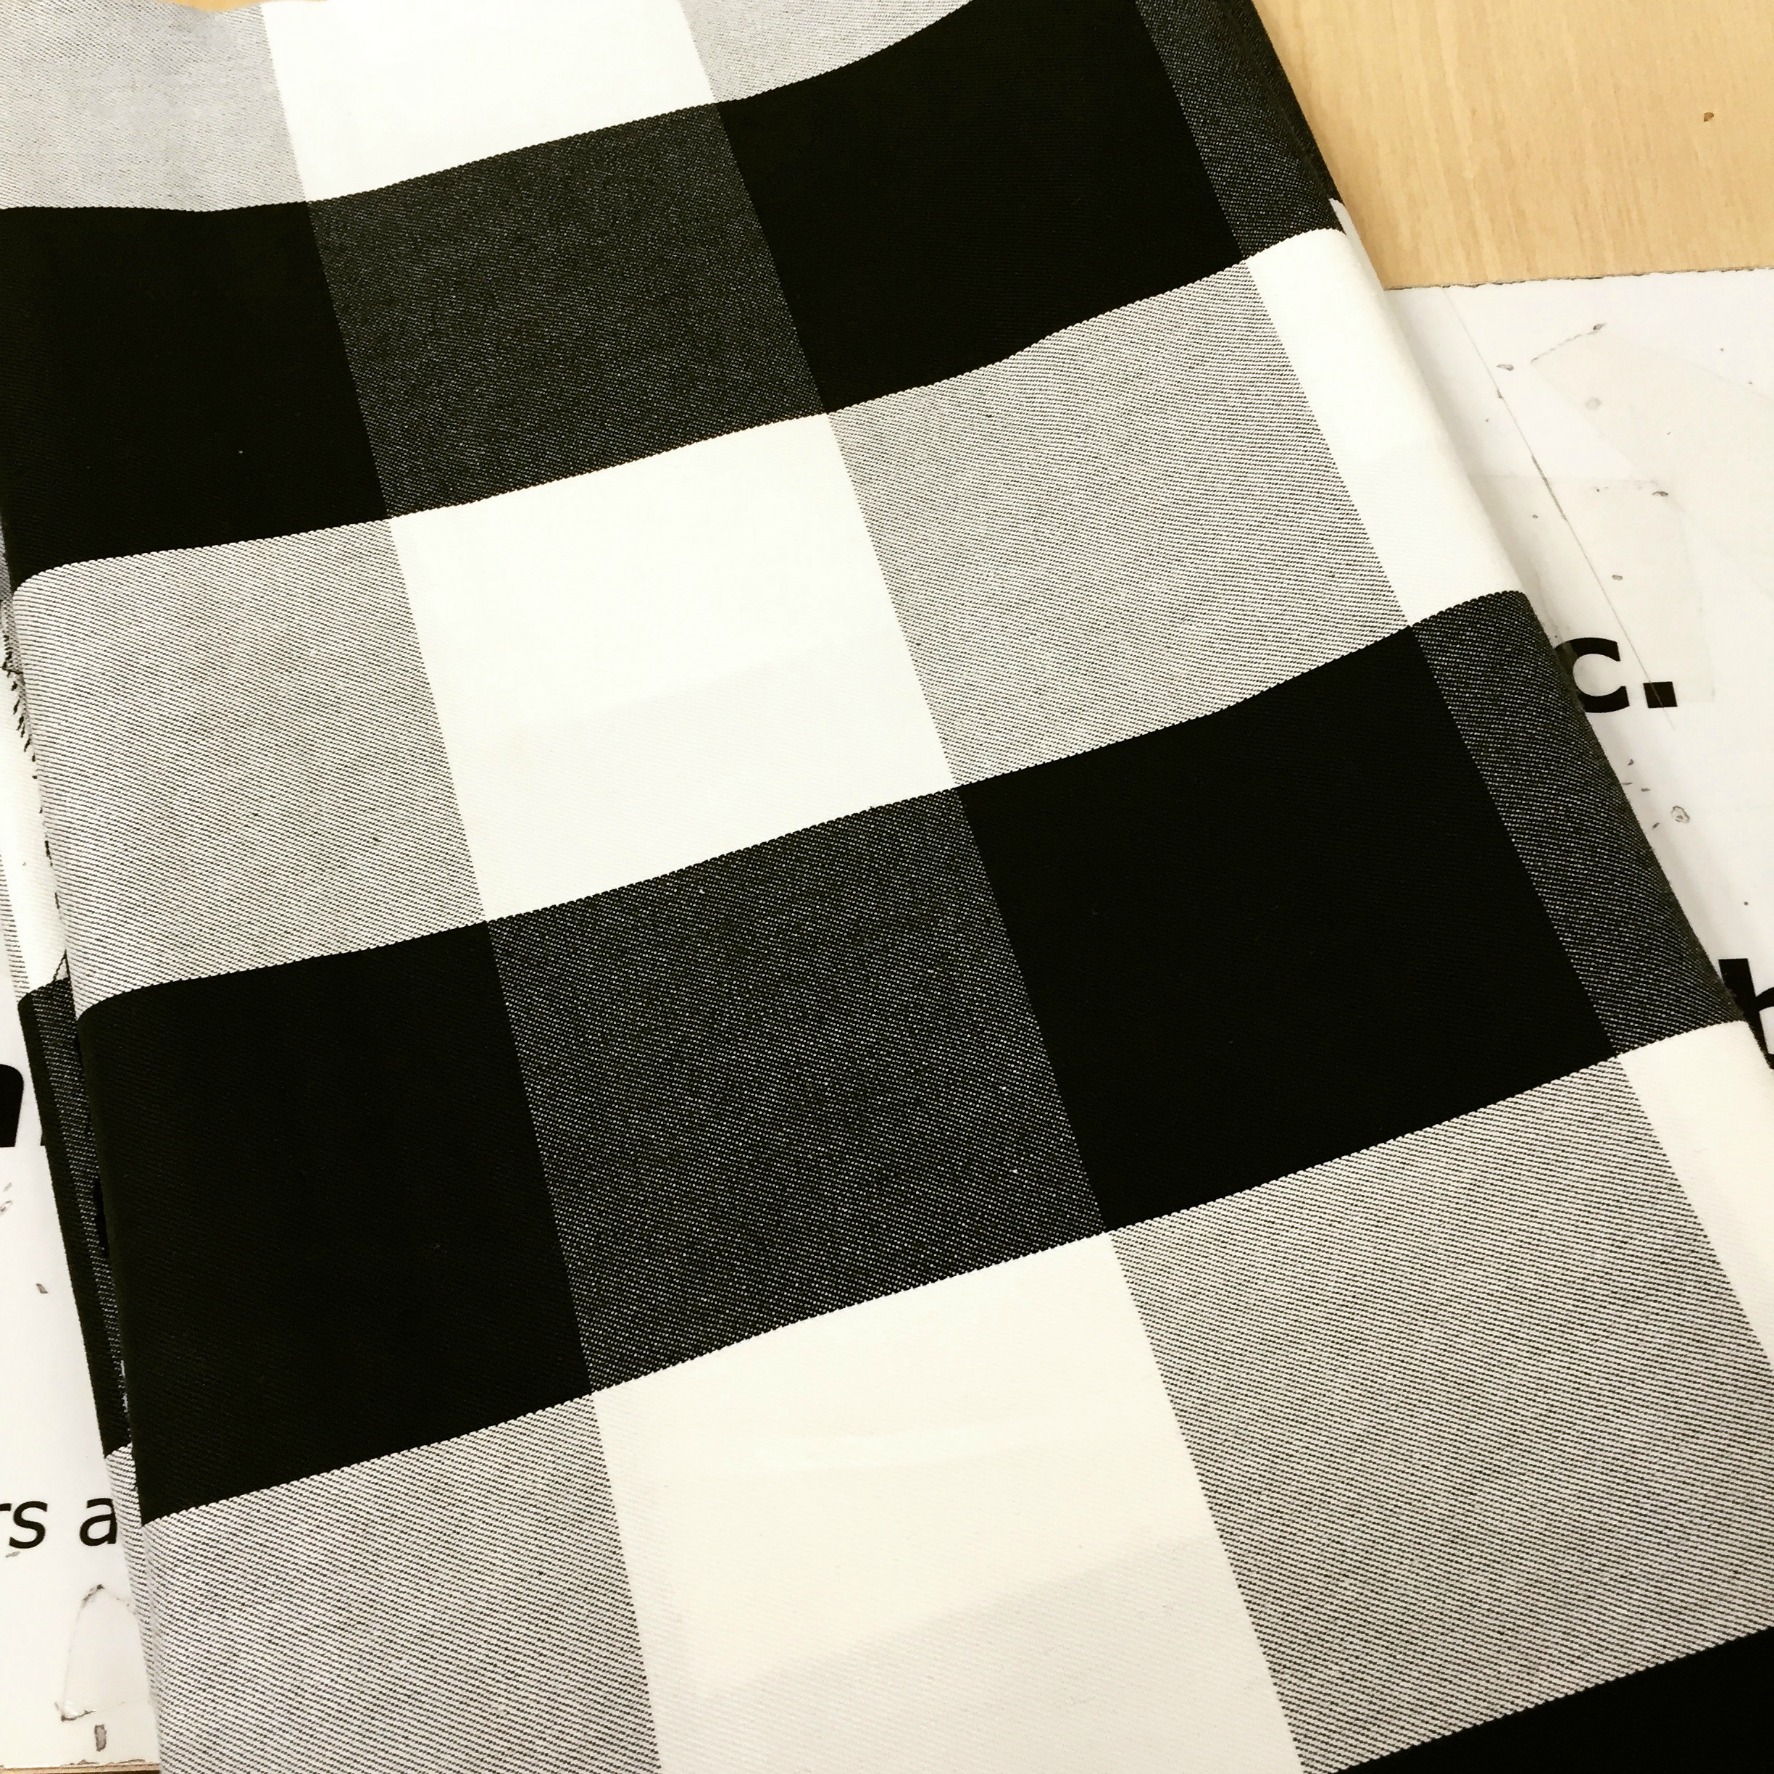
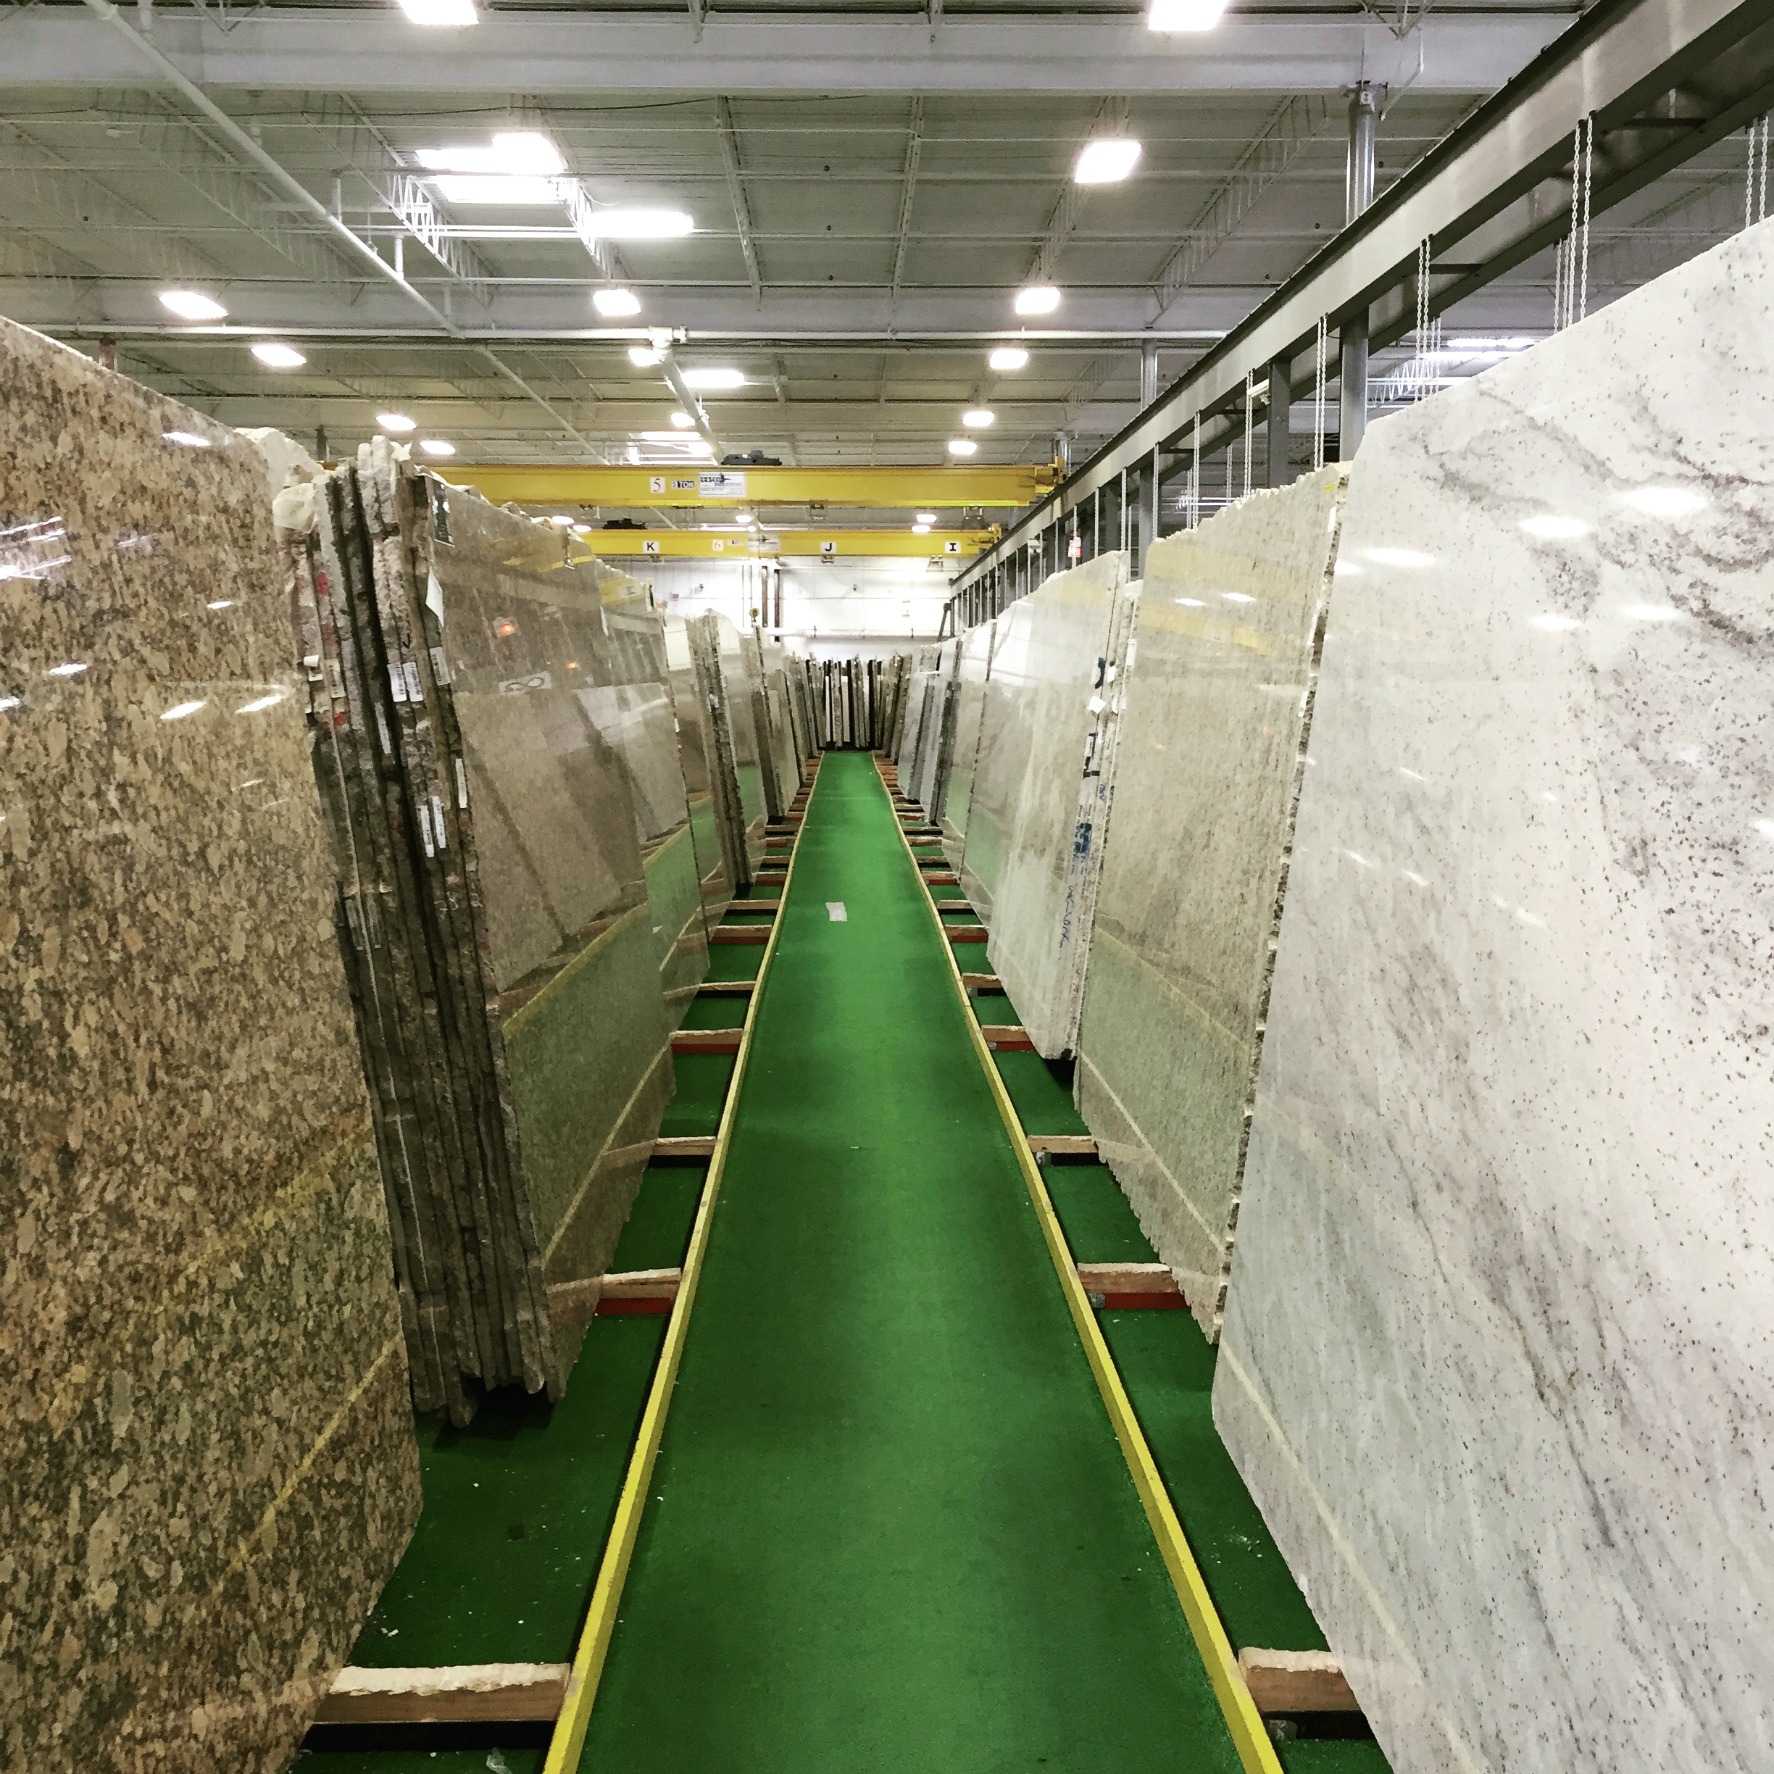
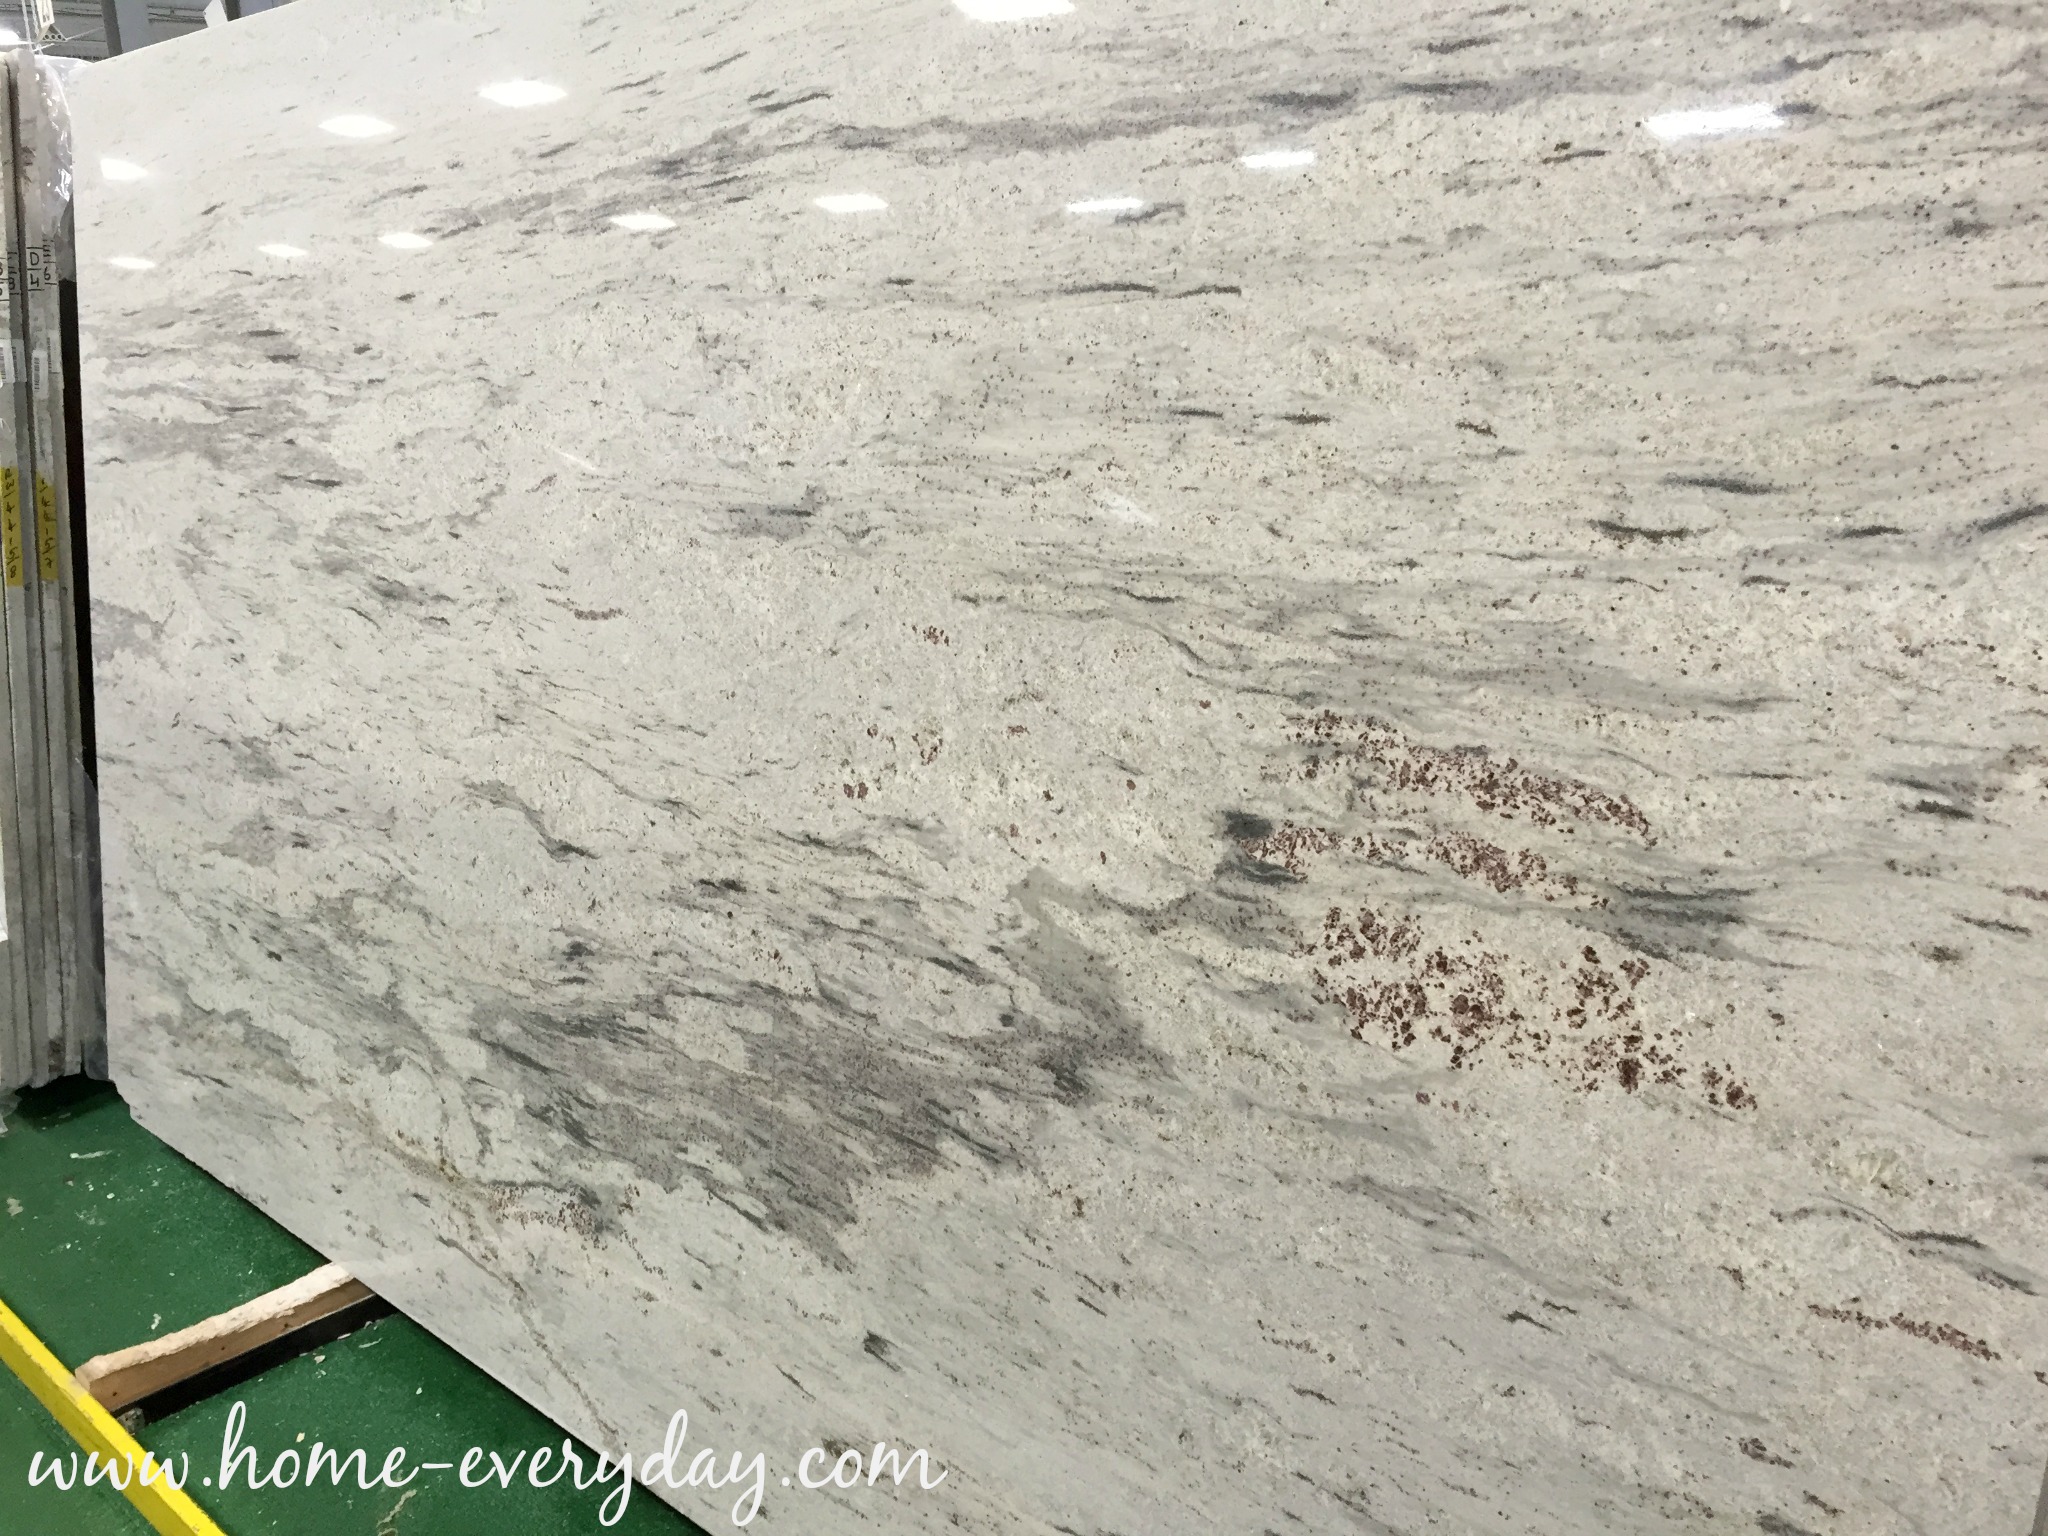
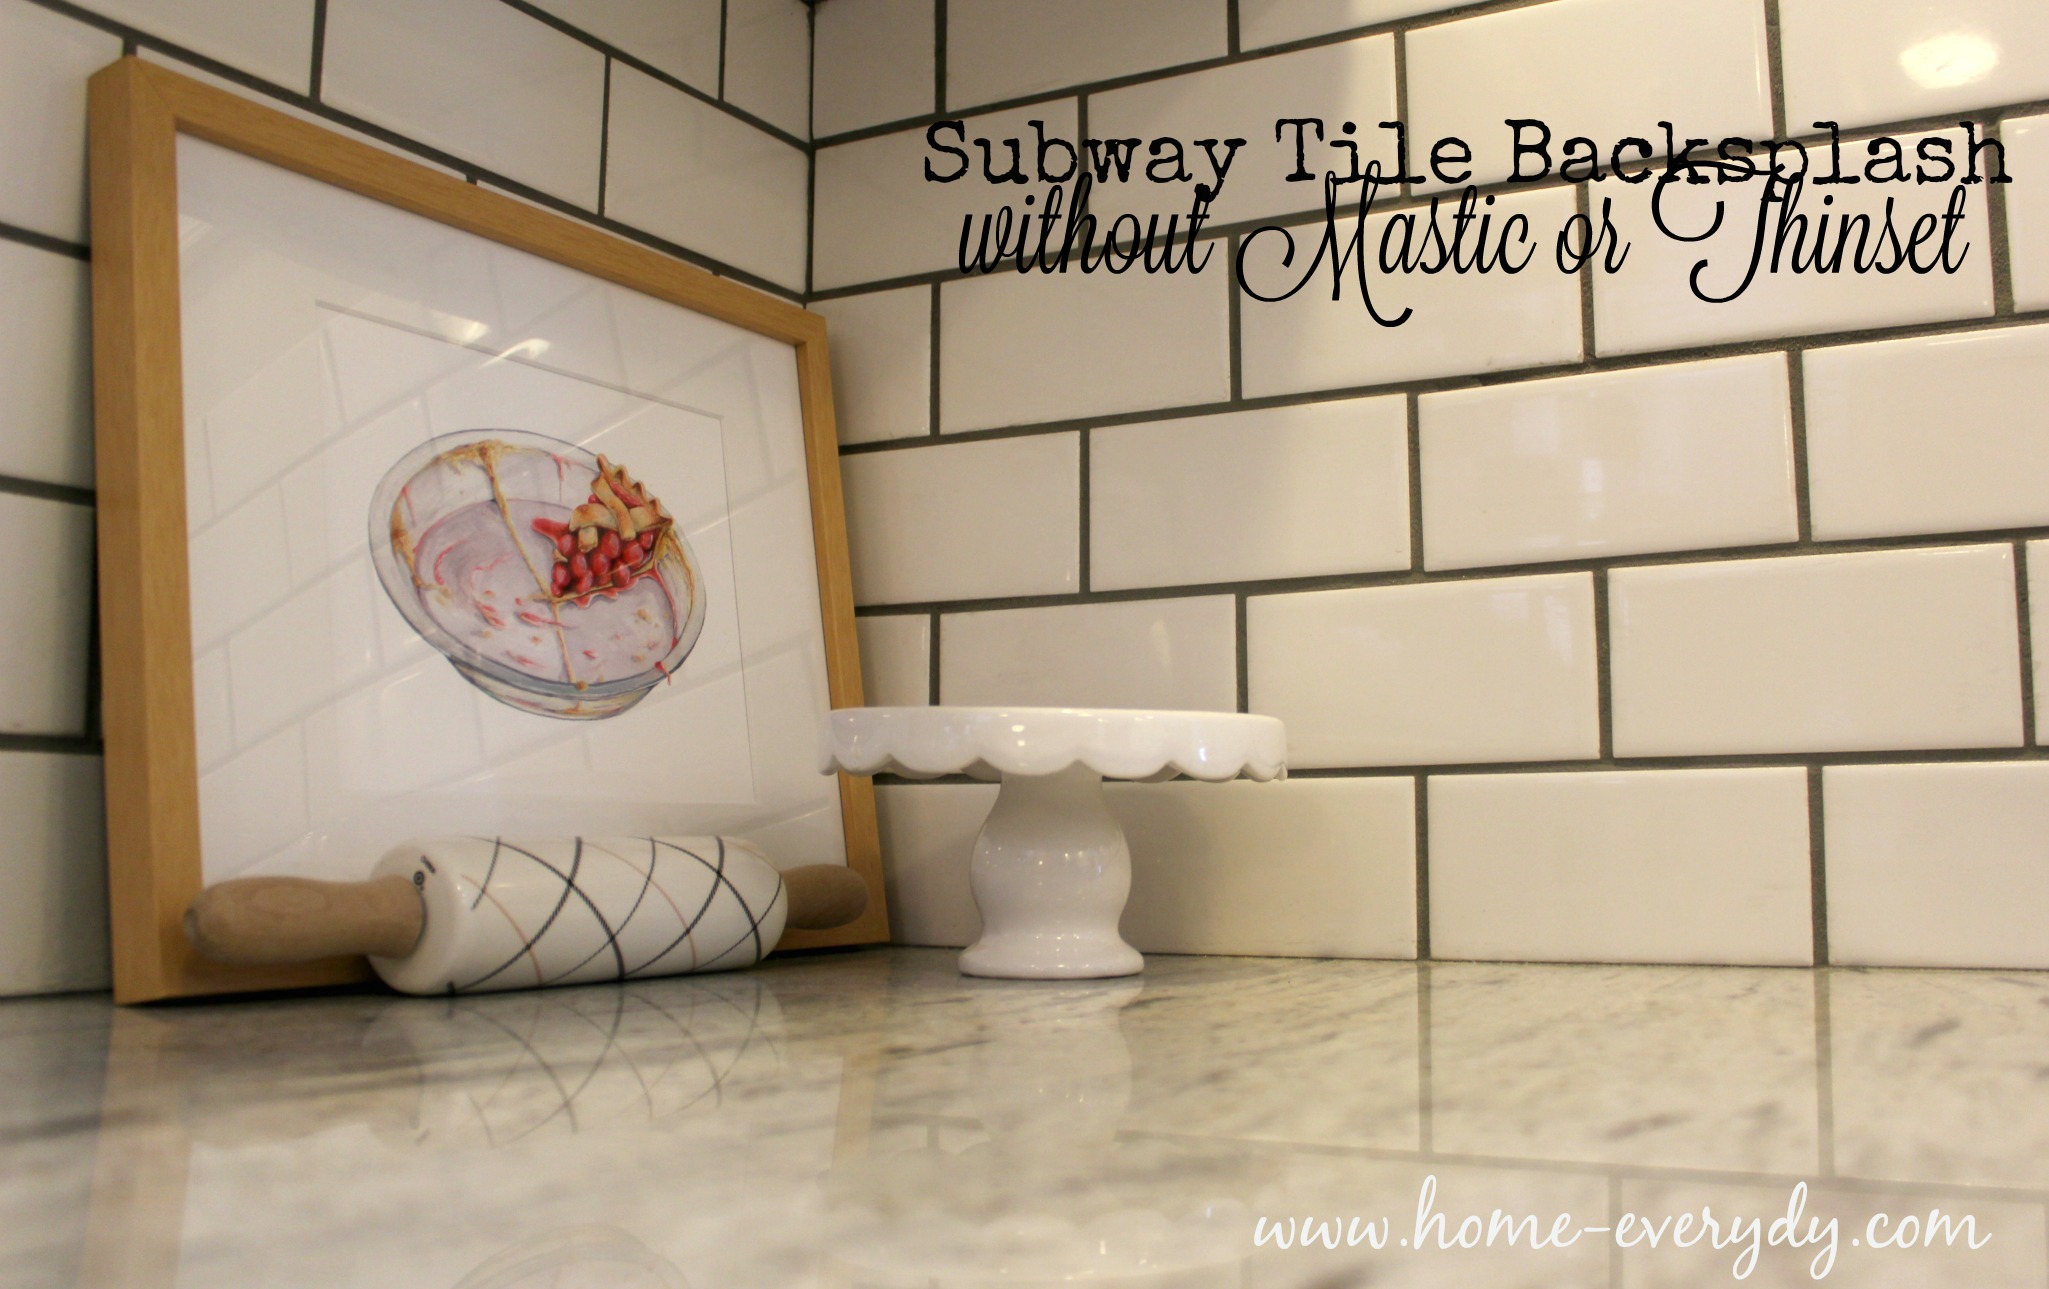
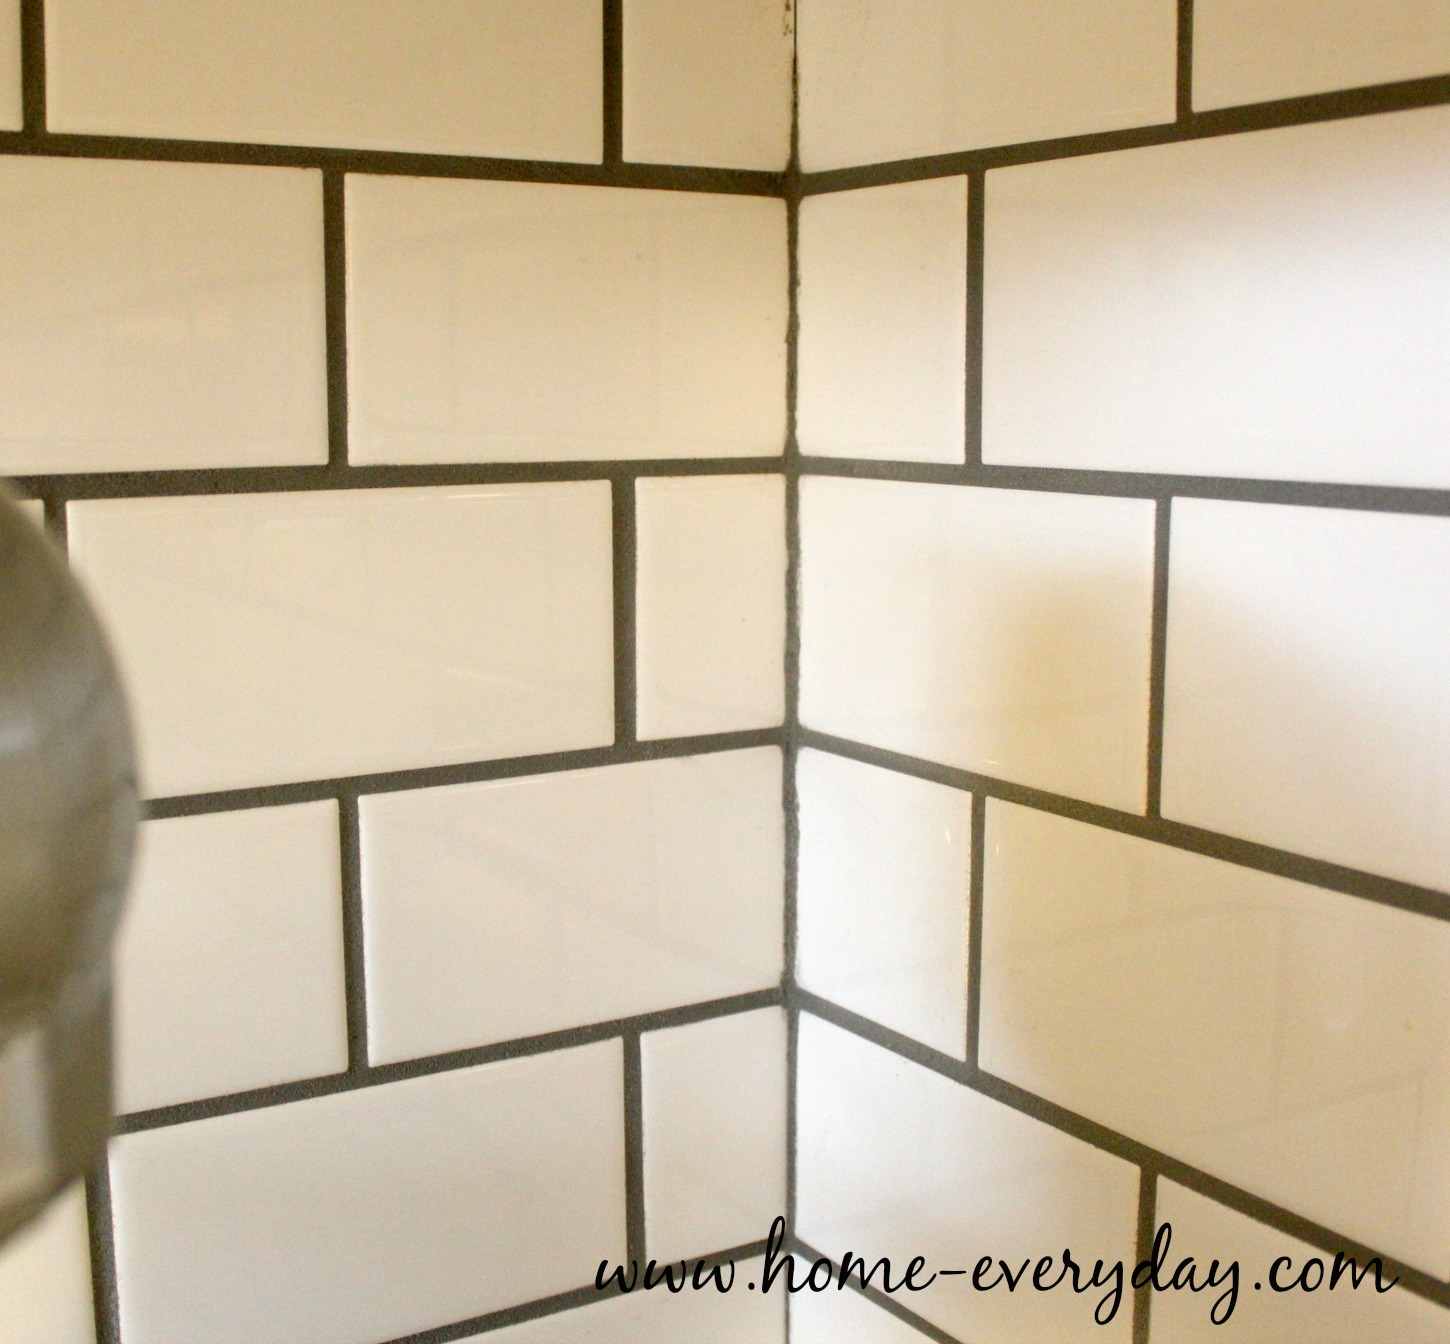
  1. The first thing I did was decide on a tile and a grout color. I chose white ceramic subway tile and a gray grout. I chose this combo for many reasons.
  • I liked how it looked with our new countertops. It was fresh and clean, and with grey grout would be divine.
  • Gray grout would not yellow over time and look new for years to come.
  • Gray grout would also help show off the brick pattern I wanted to do with the subway tile.
  • I knew it this look would stand the test of time. There’s a reason you still see subway tile in houses built forever ago. It never goes out of style.
  • It is easy to work with for a beginner tiler. It is light for those not using thinnest (us), easy to cut with a simple tile cutter or nippers (us).
  • It was cheap and in stock. There was no ordering required in case I miscalculated how much I needed, and everyone has ceramic subway tile. EVERYONE!
  • Did I mention how adorable it looked with our countertops?


Decisions are being made. #HomeEveryday #SkibsSummer

A photo posted by Erin Skibinski (@eskibs) on

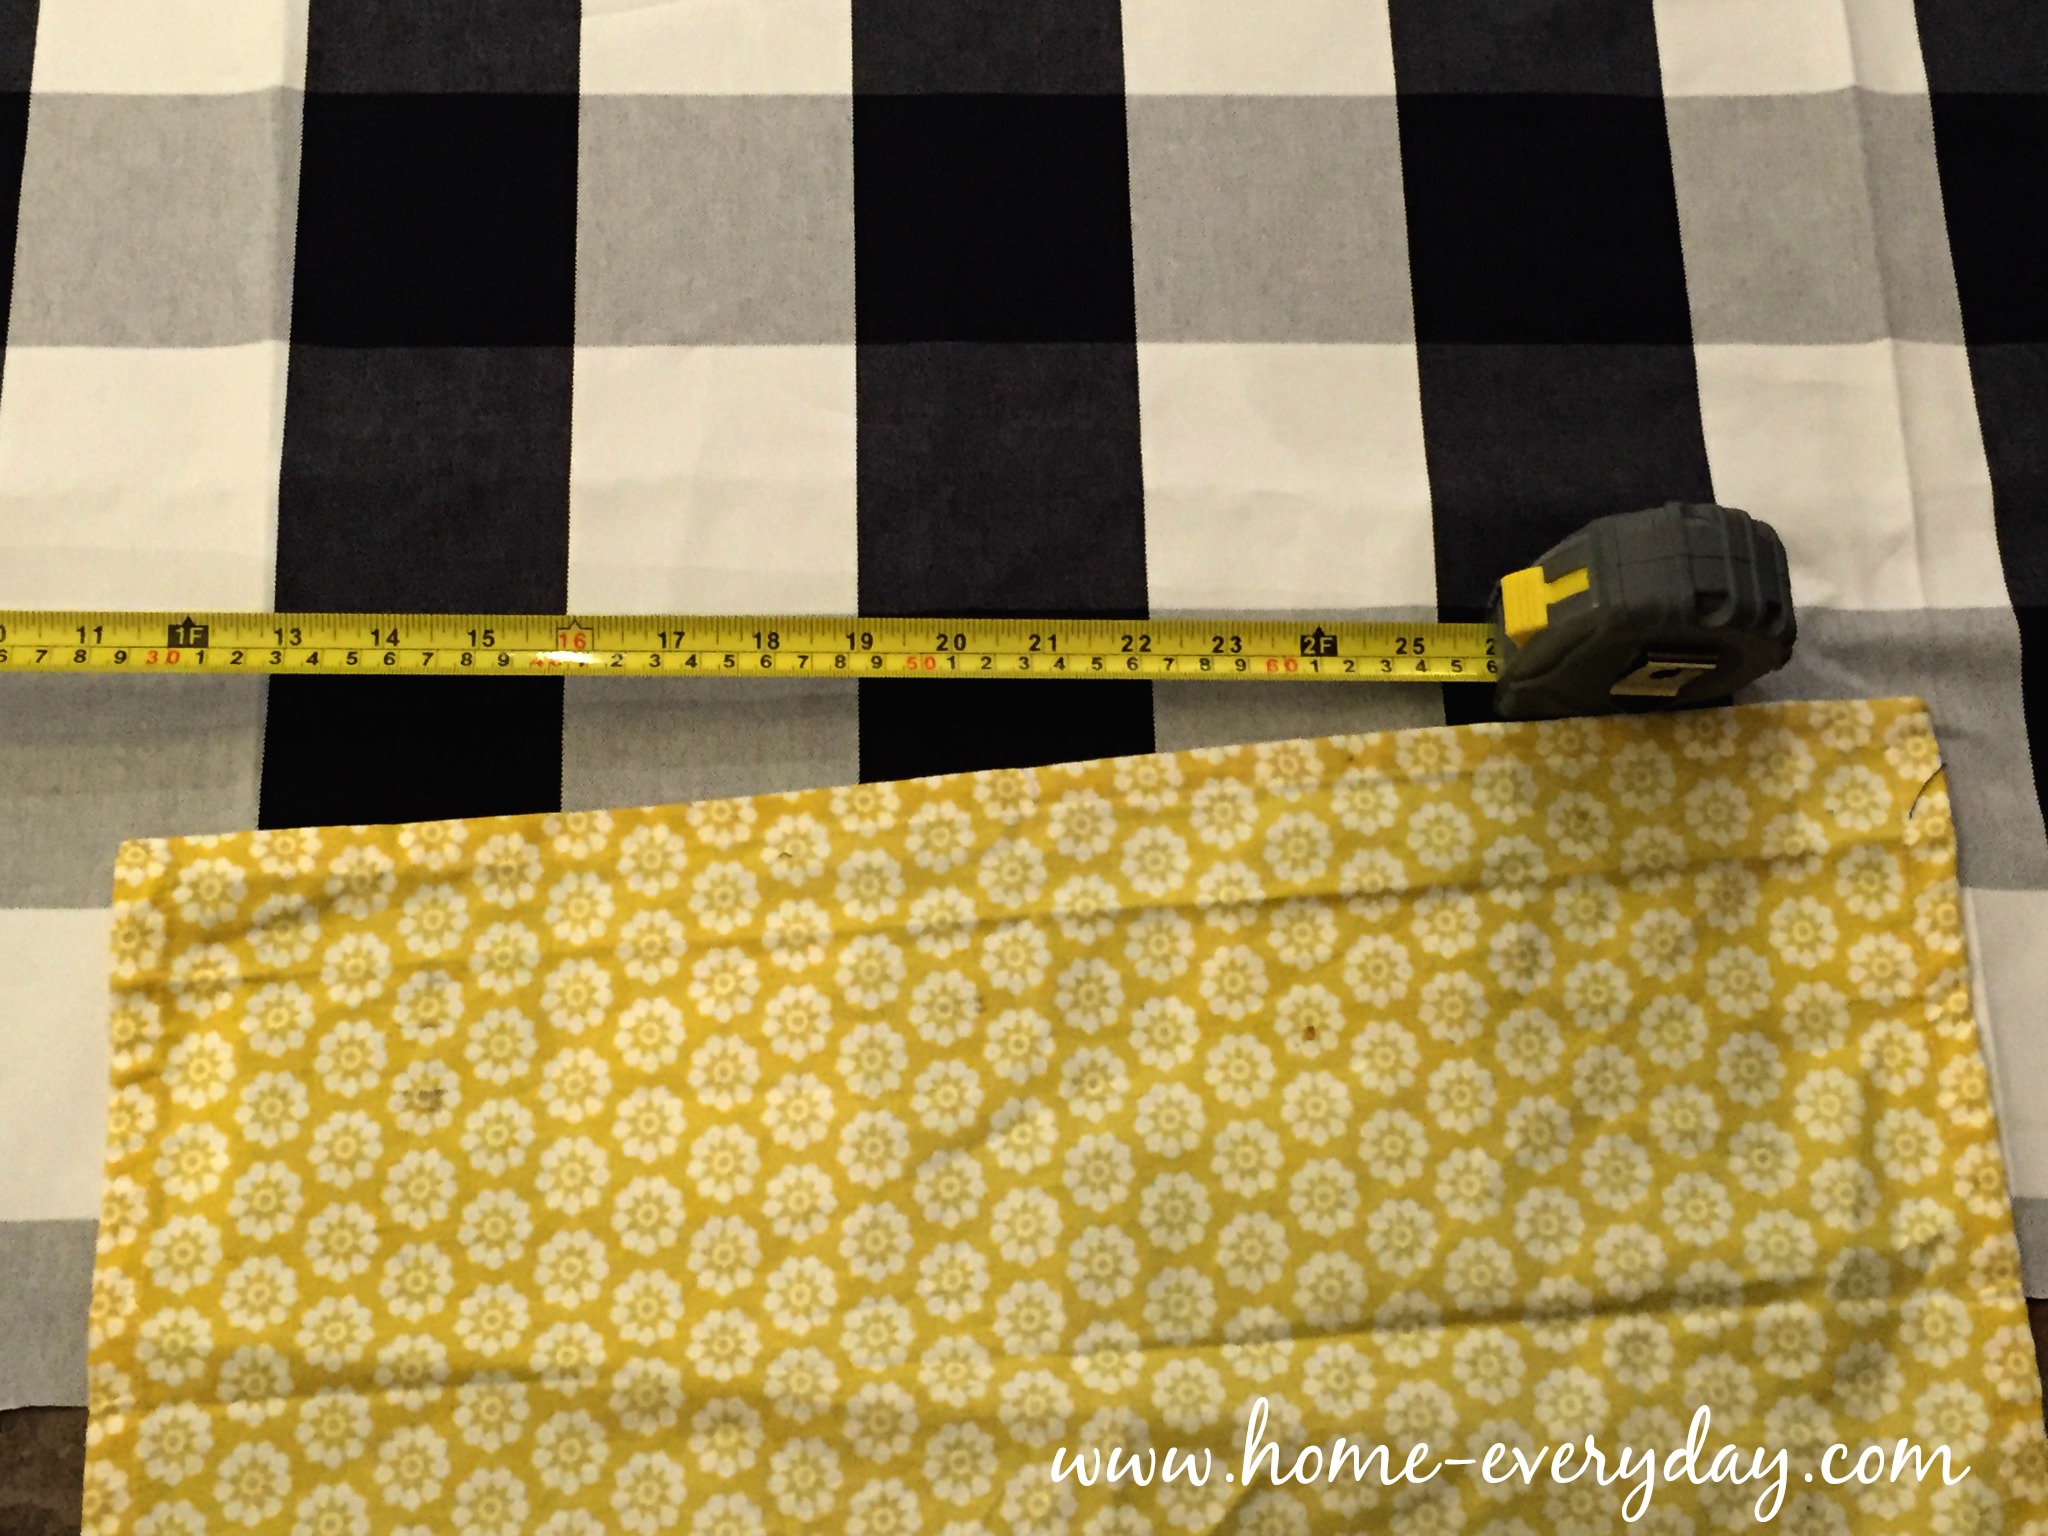
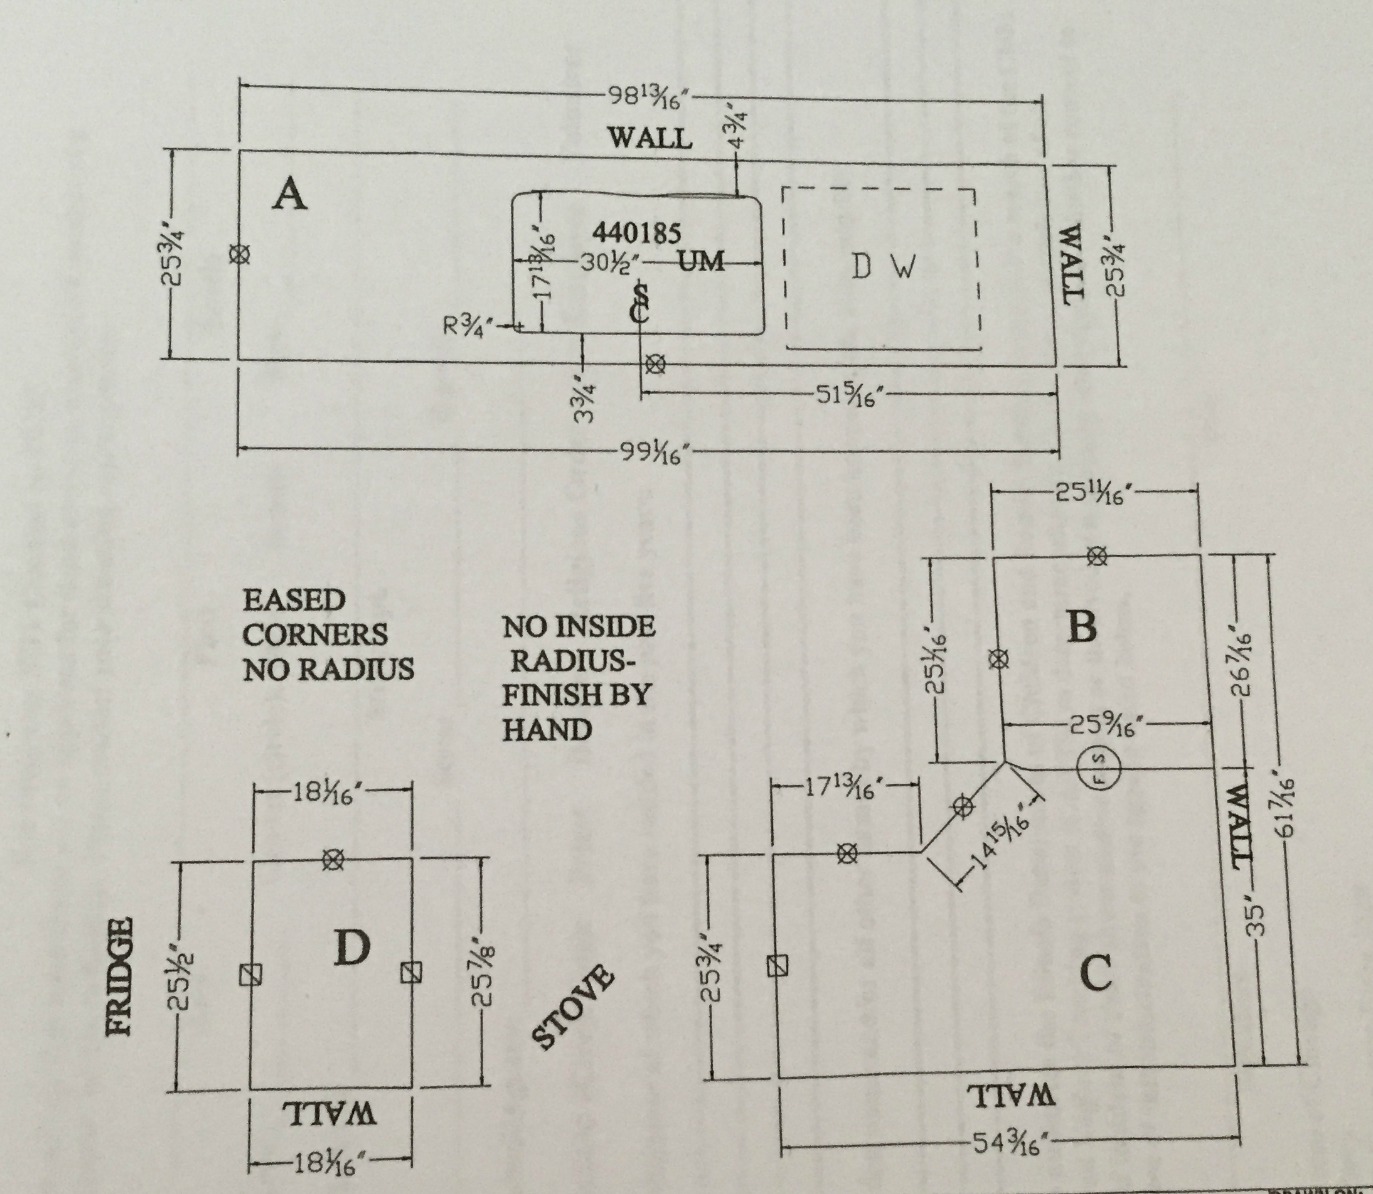
2.  I measured, and then I measured again (then again). I wanted to make sure I had enough SimpleMat, tile, grout, and anything else I may need to complete the project. There’s nothing worse that running to Home Depot again in the middle of a project.

3. Buy what you need and a little more. It is recommended that you purchase about 10% more tile than you will actually need for a project to make up for any cuts made, broken tiles, or any mishaps. We did a little more than that. Just in case. Pro Tip: Make sure you factor extra tile, supplies, and any equipment purchase or rentals into your budget for a project. 

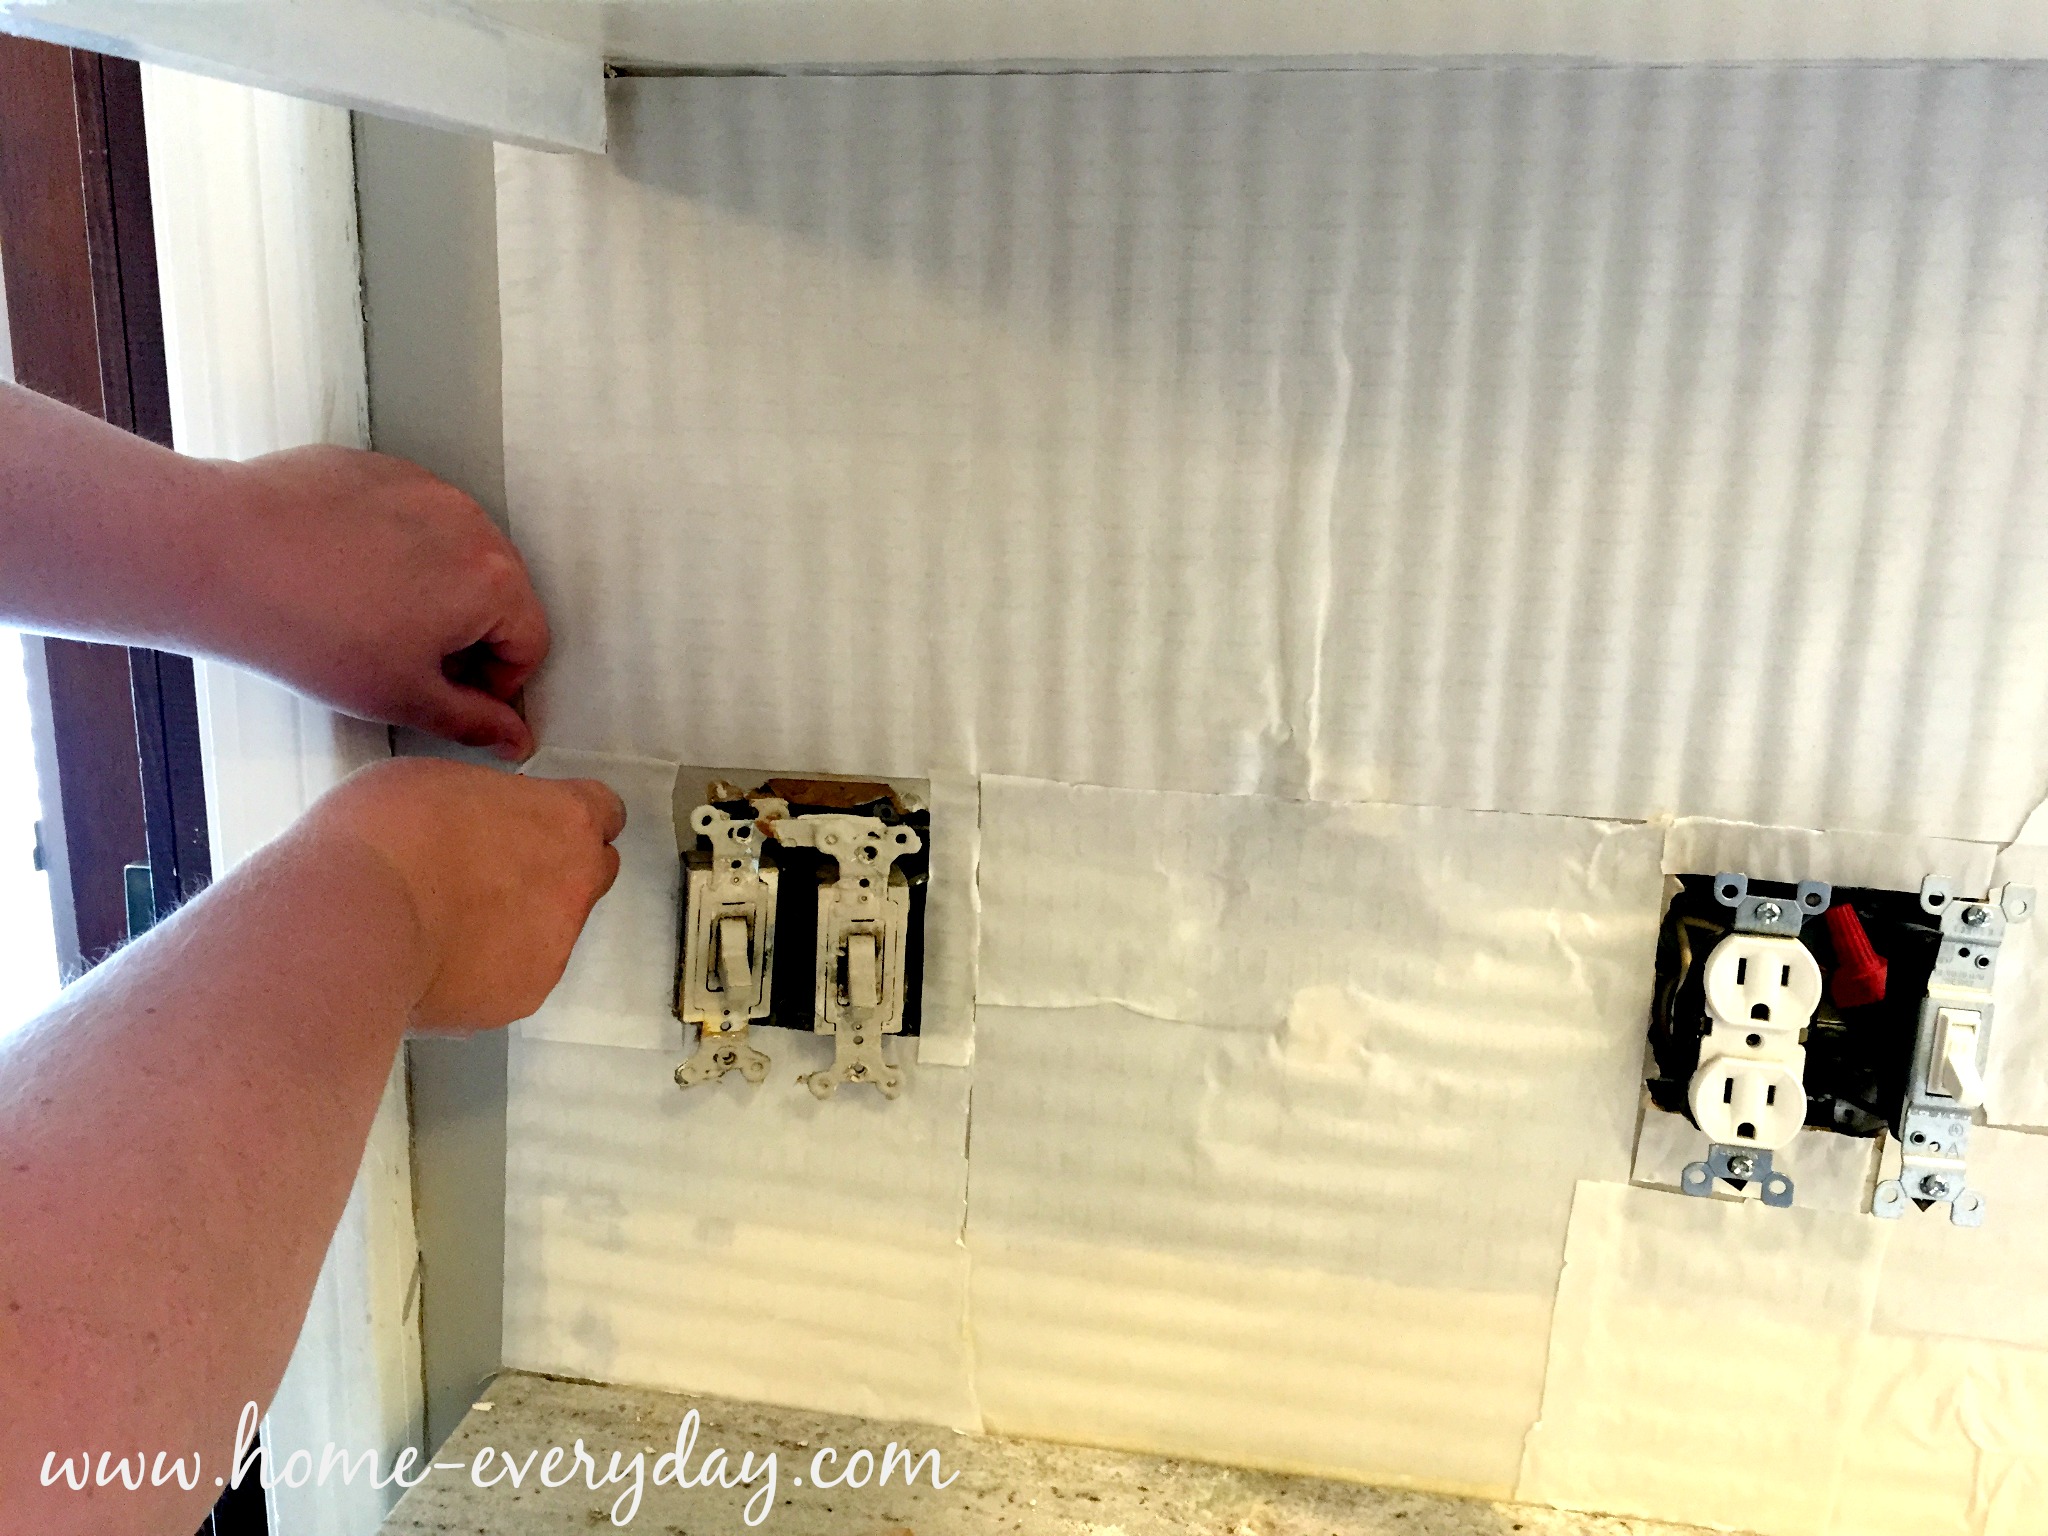
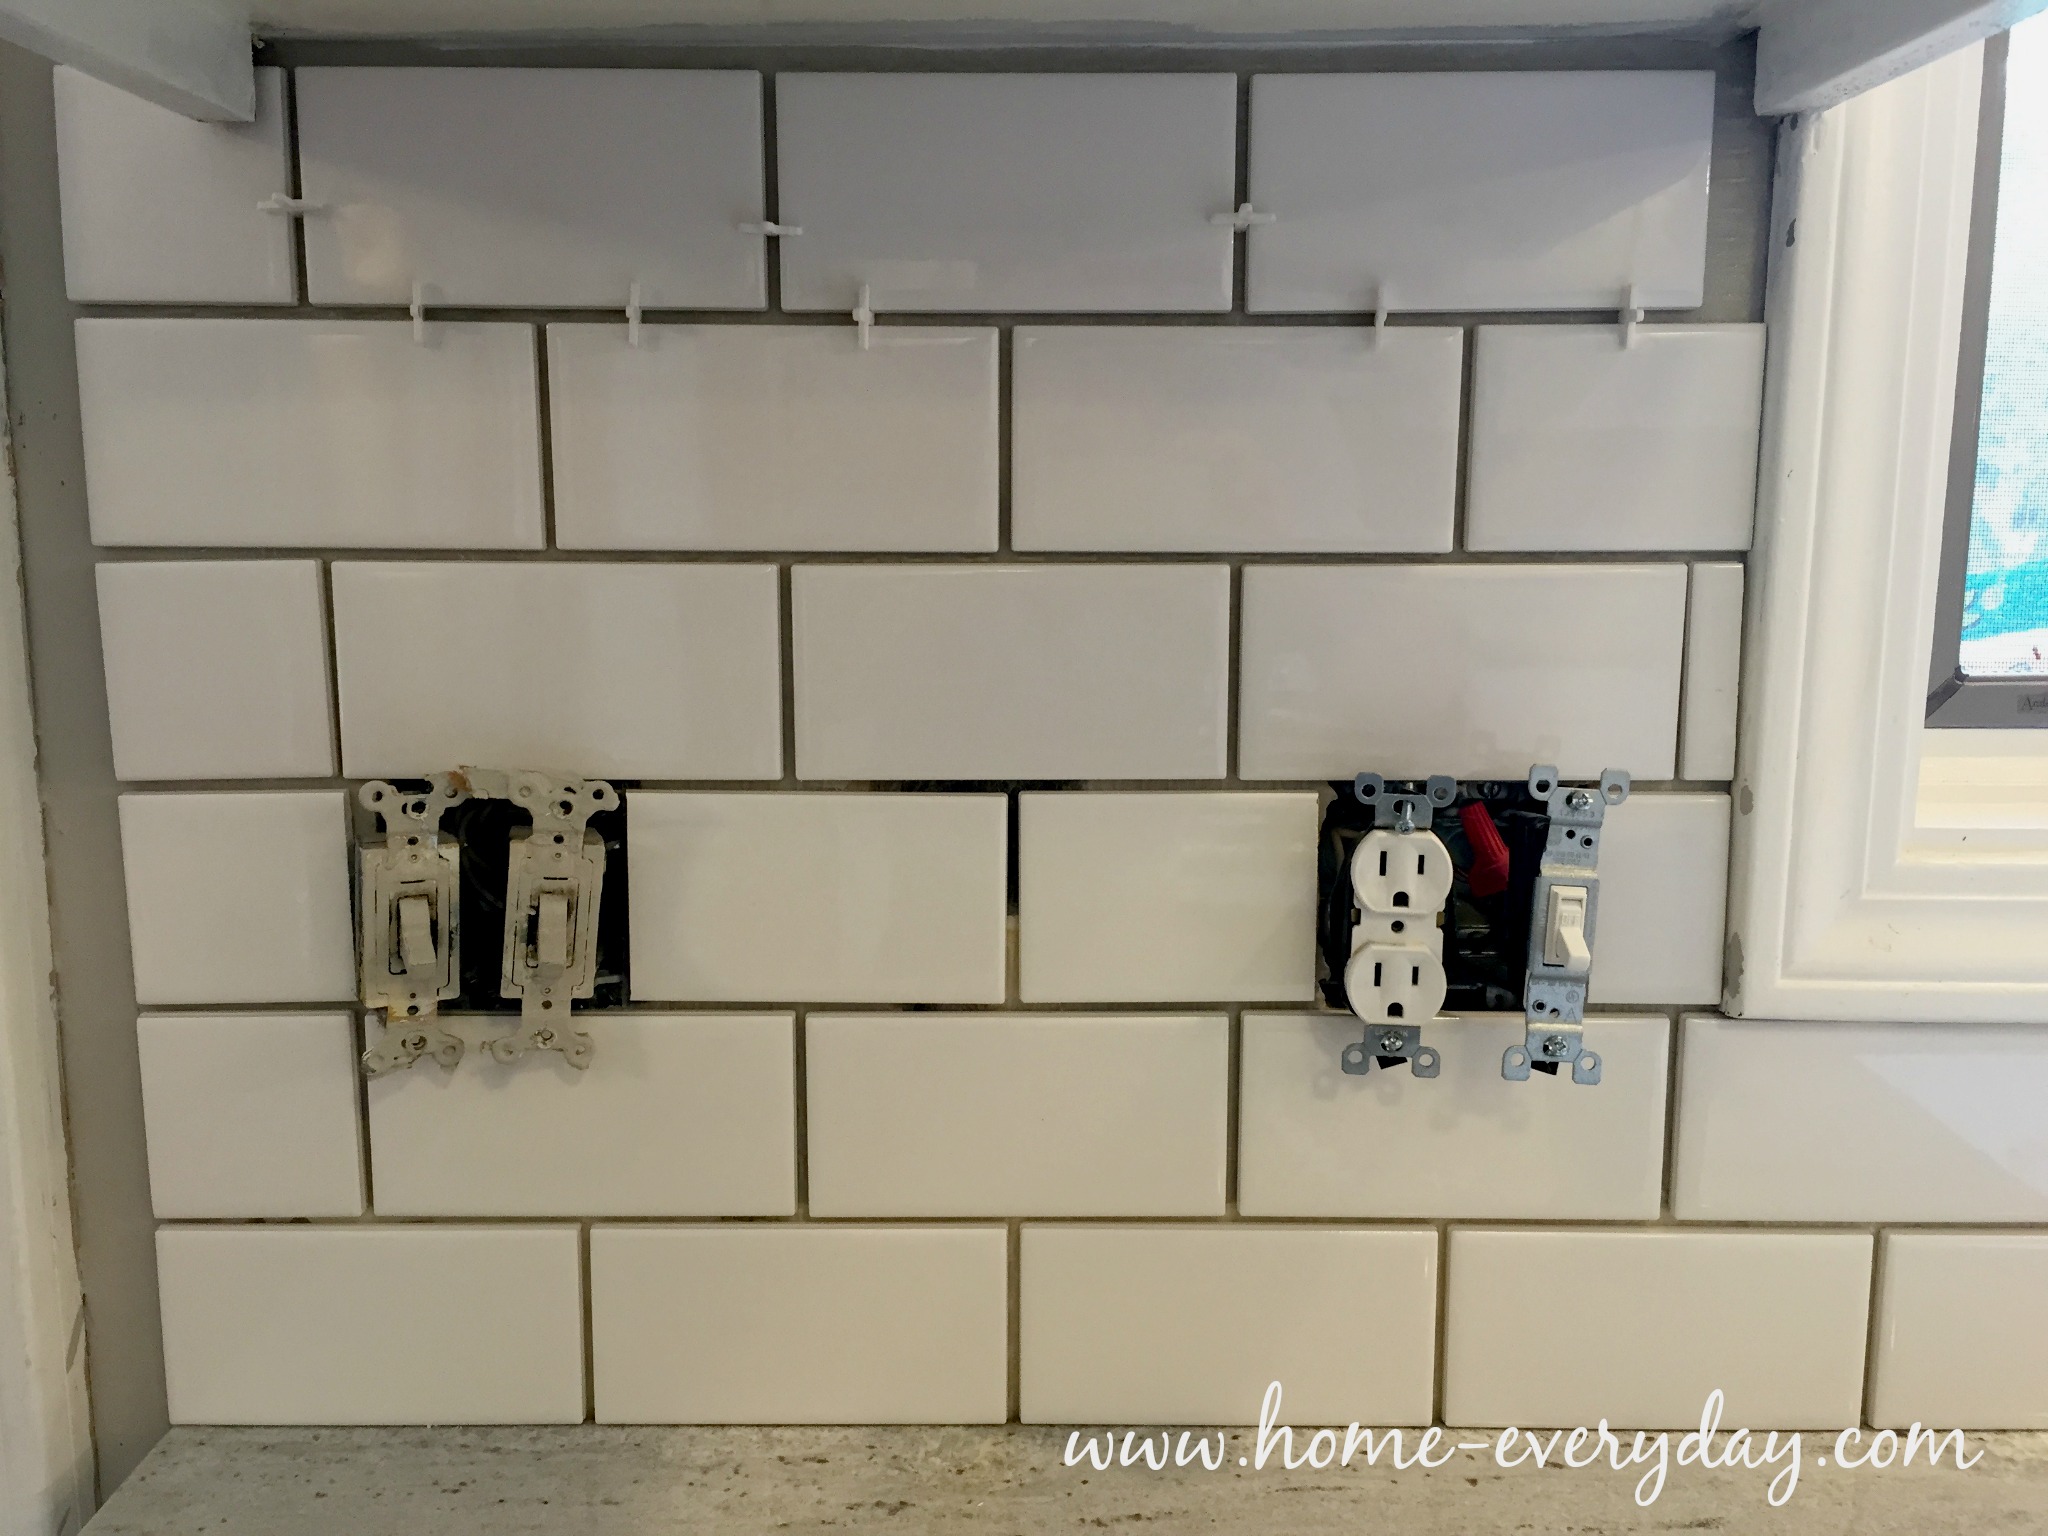
3. I turned off the power to the area, and then removed all the all outlet covers, and unscrewed the outlets from the wall. Pro Tip: You want to be able to get tiles as close to the outlets cut outs as possible for a cleaner more professional look, but to also make sure there’s no gaps when doing replacing outlet covers.

4. I also then prepped the surface by  gently sanding the backsplash area with a low grit sandpaper. Then, I wiped the surface down with a wet cloth and let it dry. This helped the SimpleMat adhere better.

Backsplash without Thinset 10

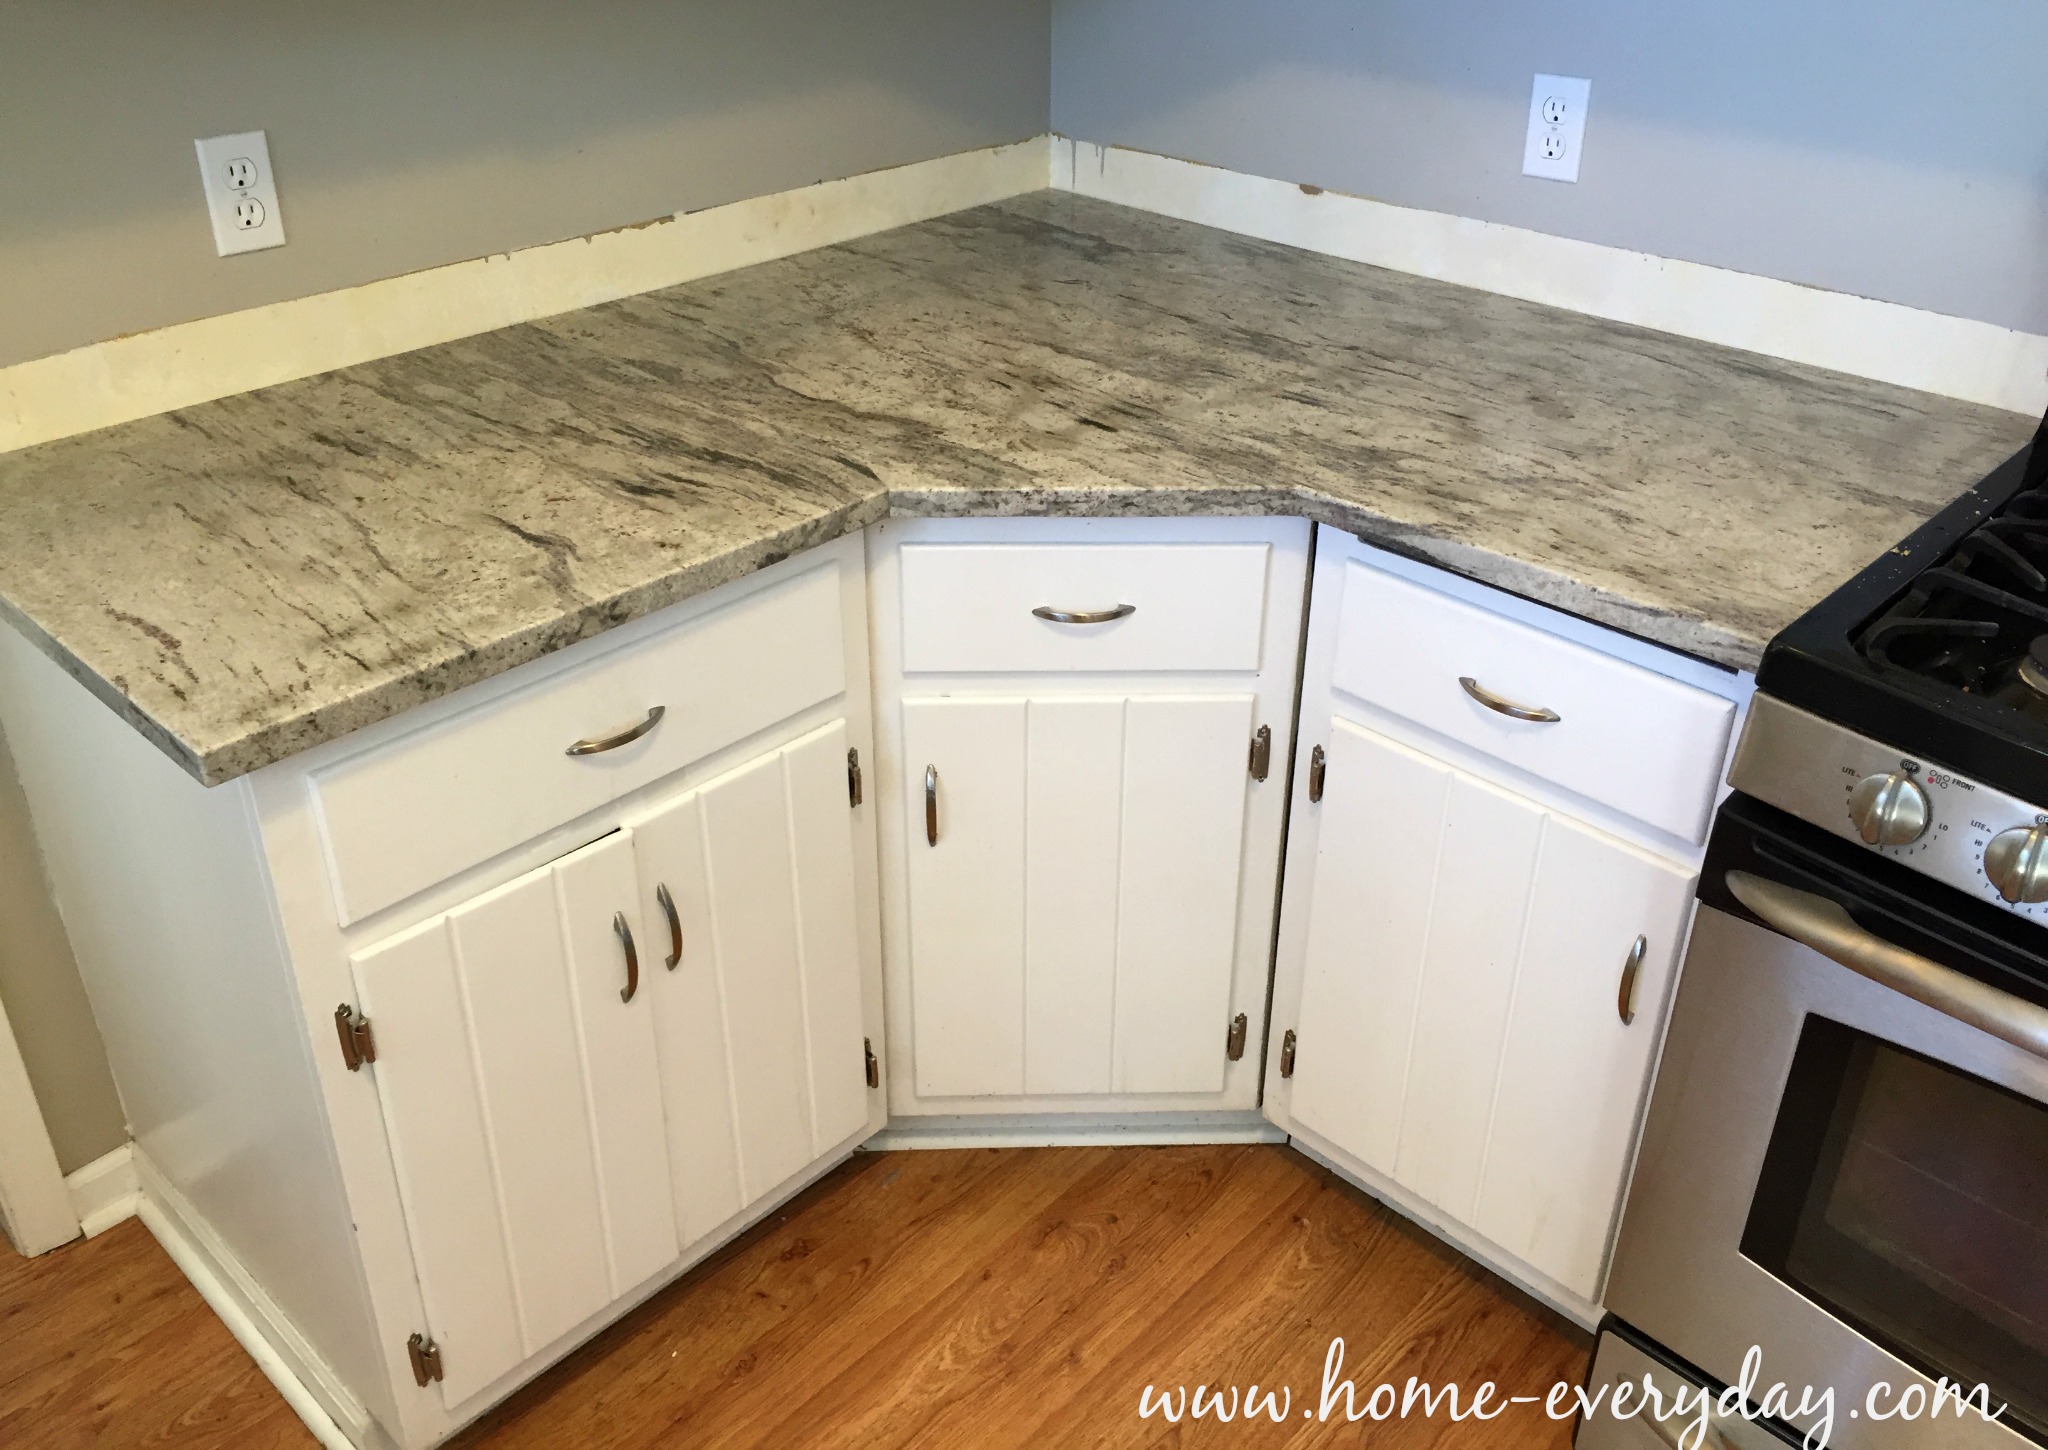
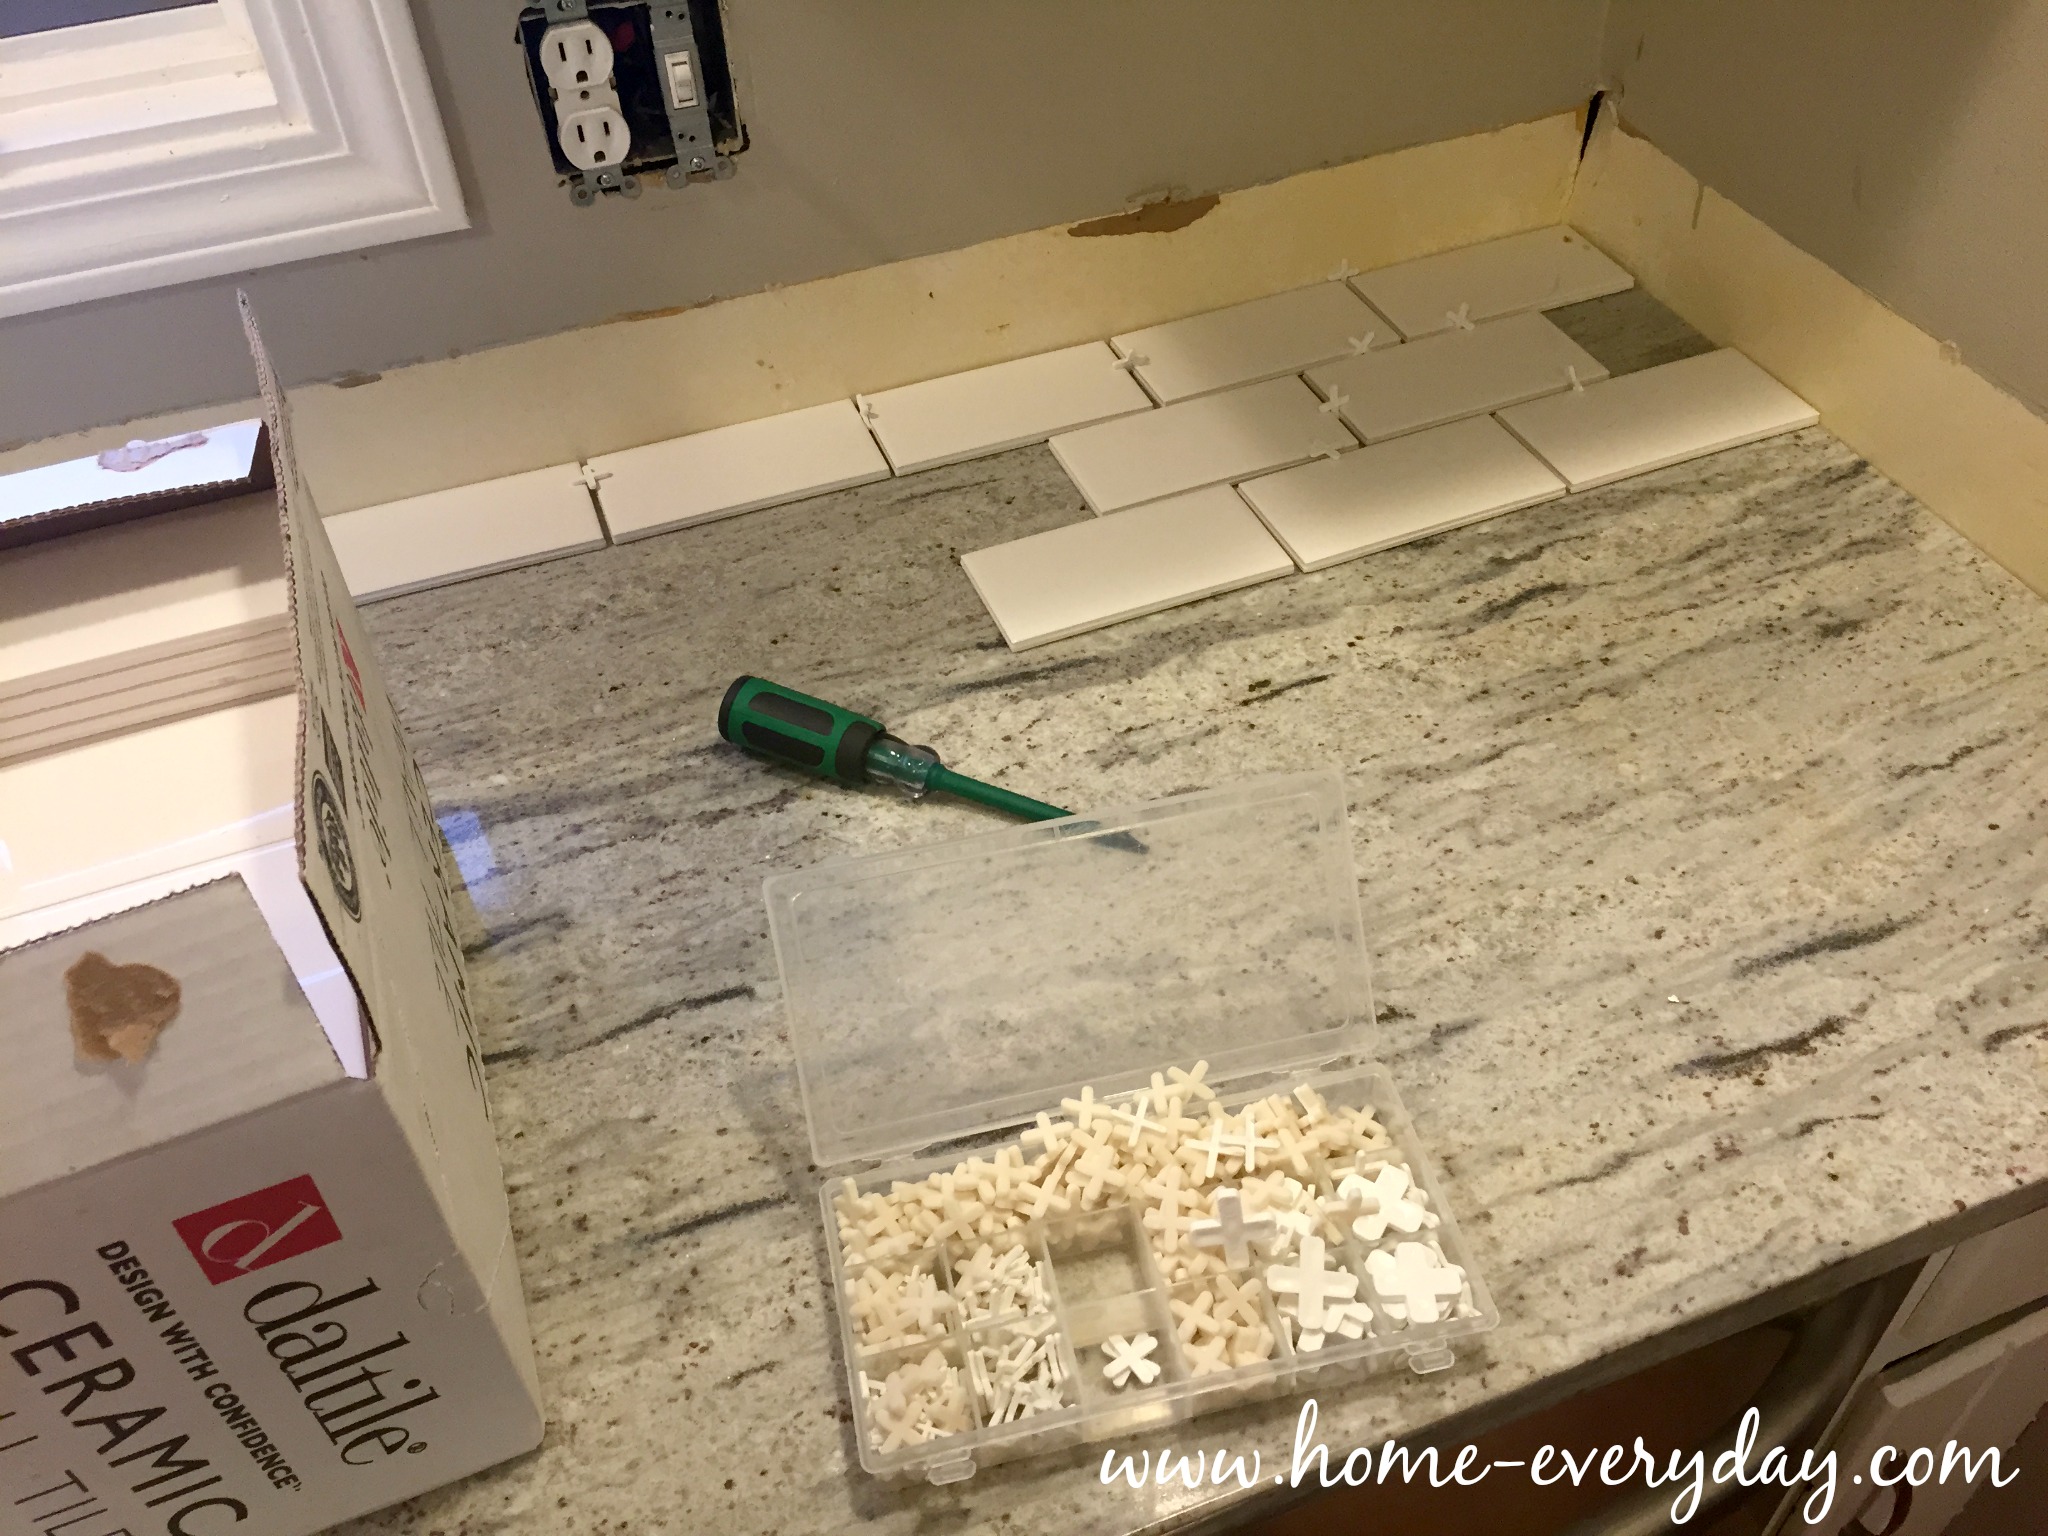
5. We laid out the tile in a dry run on the countertop. ProTip: I know you want to get started, but don’t skip this step. Make sure to use your spacers just as you would on the wall. This will help you predict where cuts will be, how your pattern will work, and how to end the tile in each row. There is nothing worse than a teeny tiny piece of tile at the end of a row, which is a terrible hard cut to make and looks silly, when you could have lined everything up a little bit different and get a whole tile instead. Also, this helps you decide where you want to stop and start your tile. I put tile wherever there was countertop, meaning a had to tile into a corner (I did this for practicality and easy cleaning but love the look too). 

Backsplash without Thinset 8


Tiling

  1. Since I had lots of people helping me, I knew we would be able to get this project done quickly, and we had laid out the tile ahead of time, we cut all of the SimpleMat and adhered it to the wall in one giant step. Pro Tip: We made sure to use the float to press the SimpleMat to the wall to get good adhesion. Also, we made sure to cover every area with Simple Mat where there would be tile.

Backsplash without Thinset 12


Backsplash without Thinset 13

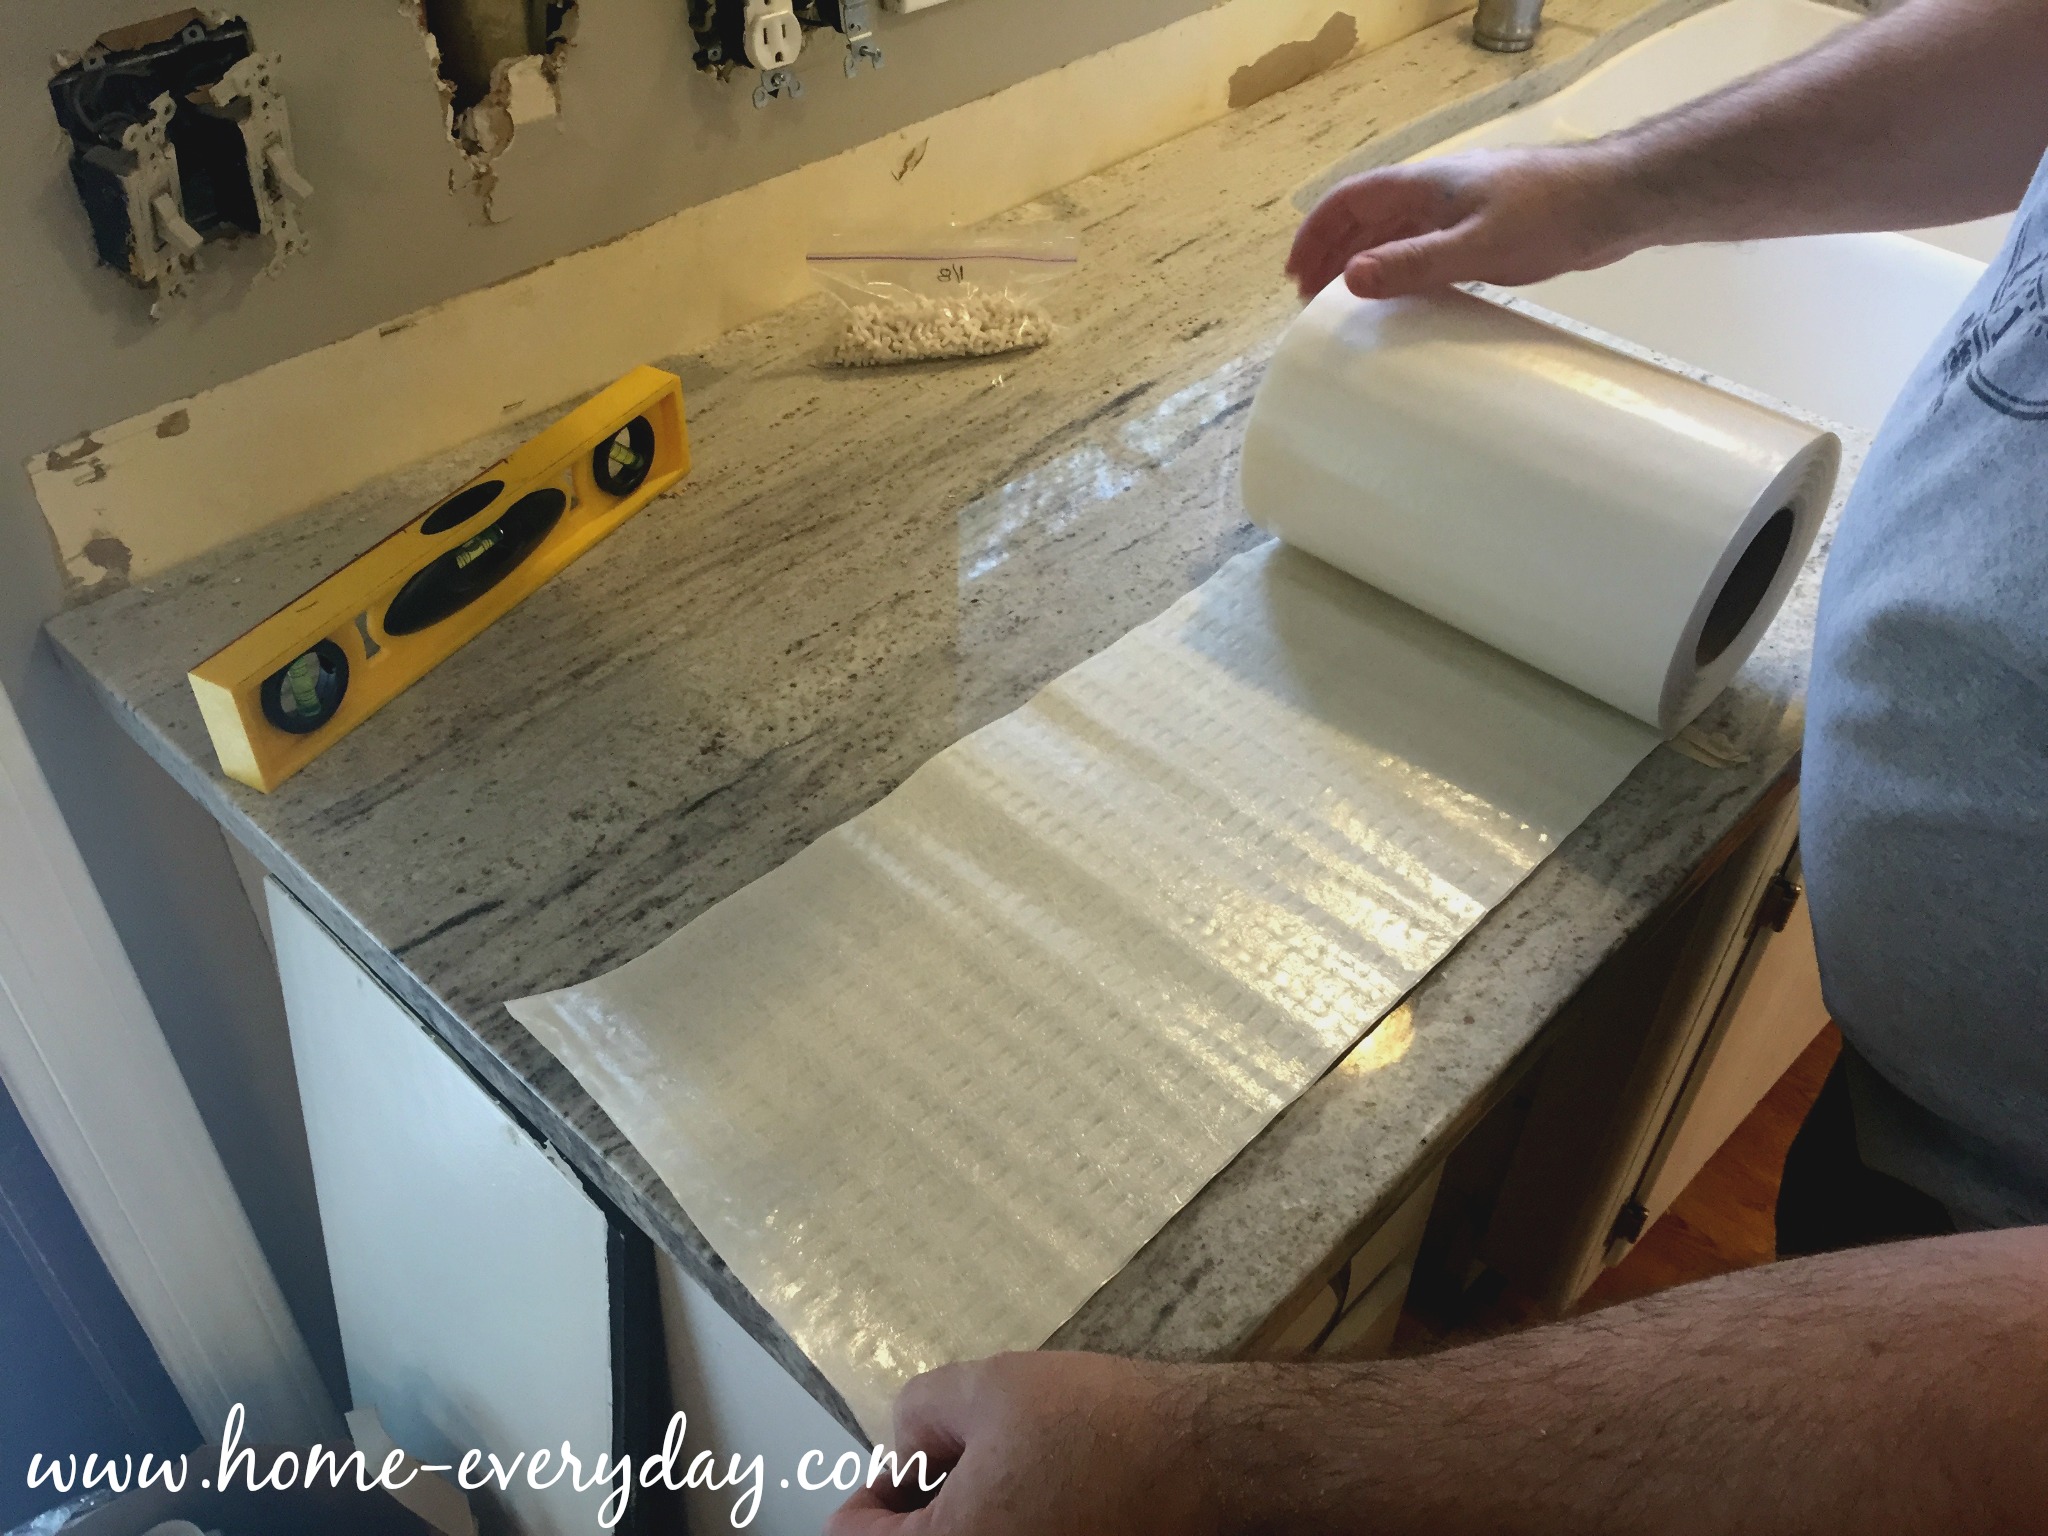
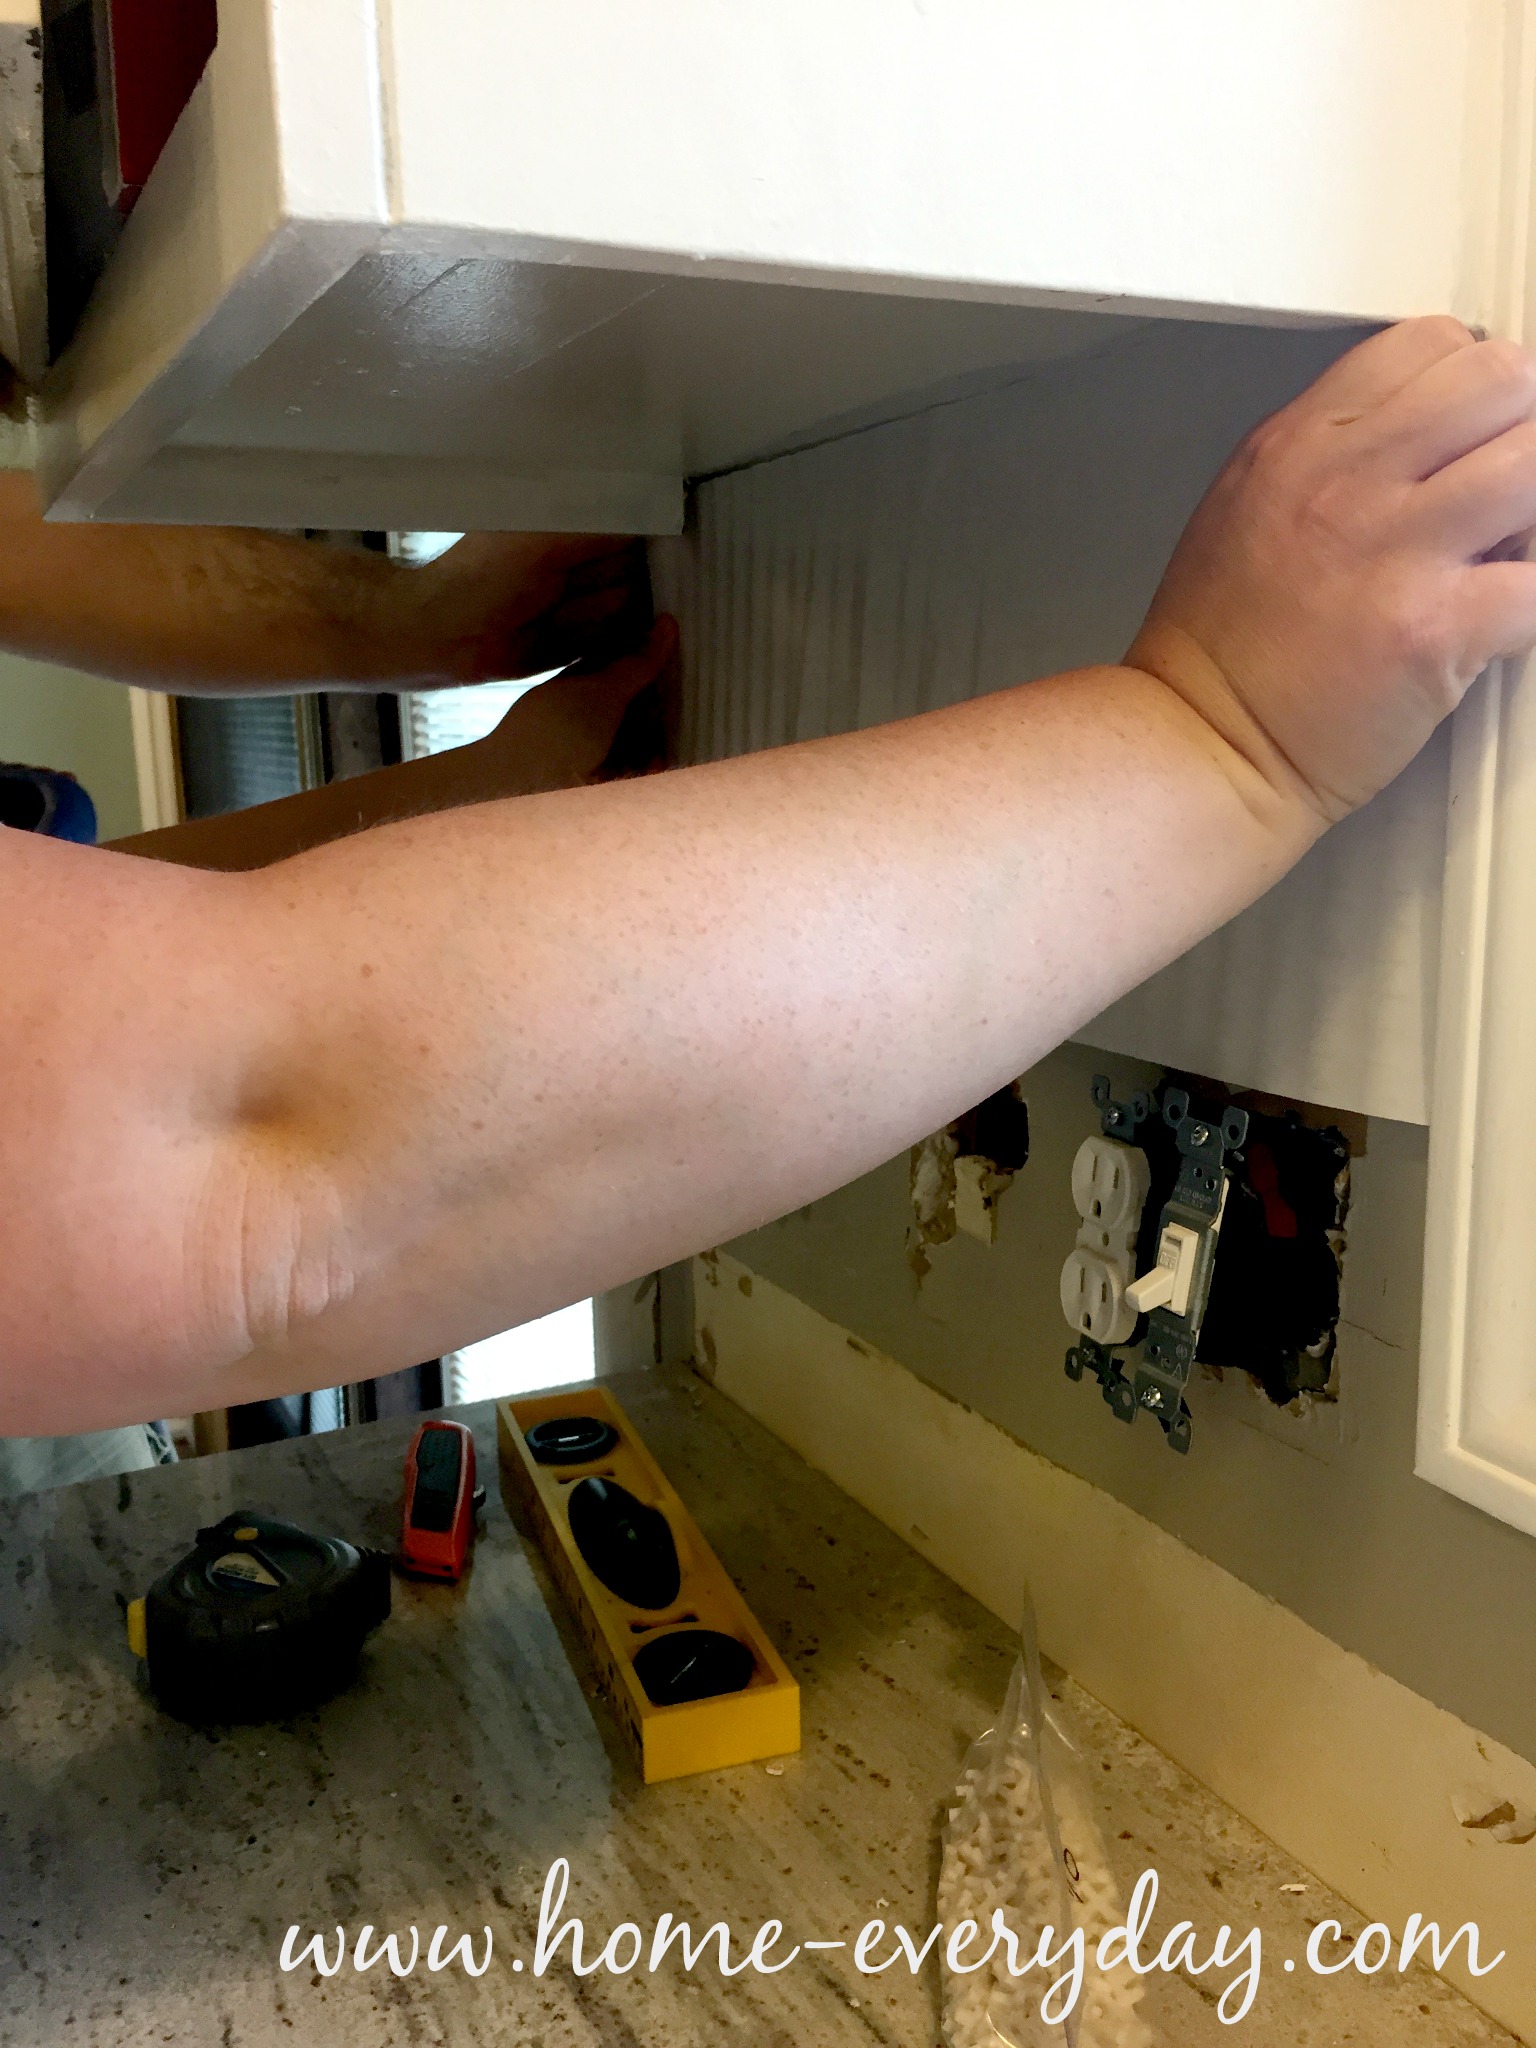
2. Next, we peeled back the paper on the other side. Pro Tip: It should be noted that after you remove the paper, you should start adhering tiles immediately for the best possible security.

Backsplash without Thinset 14

3. Time to tile! Scott would keep laying out tile and show Brian where cuts would need to be made. I would stick the tile to the wall, using tile spacers lay another tile.  Pro Tip: After adhering a few tiles, I would press with a float to make sure the tile was secure.

We had an awesome system going.

Backsplash without Thinset 17

Backsplash without Thinset 15


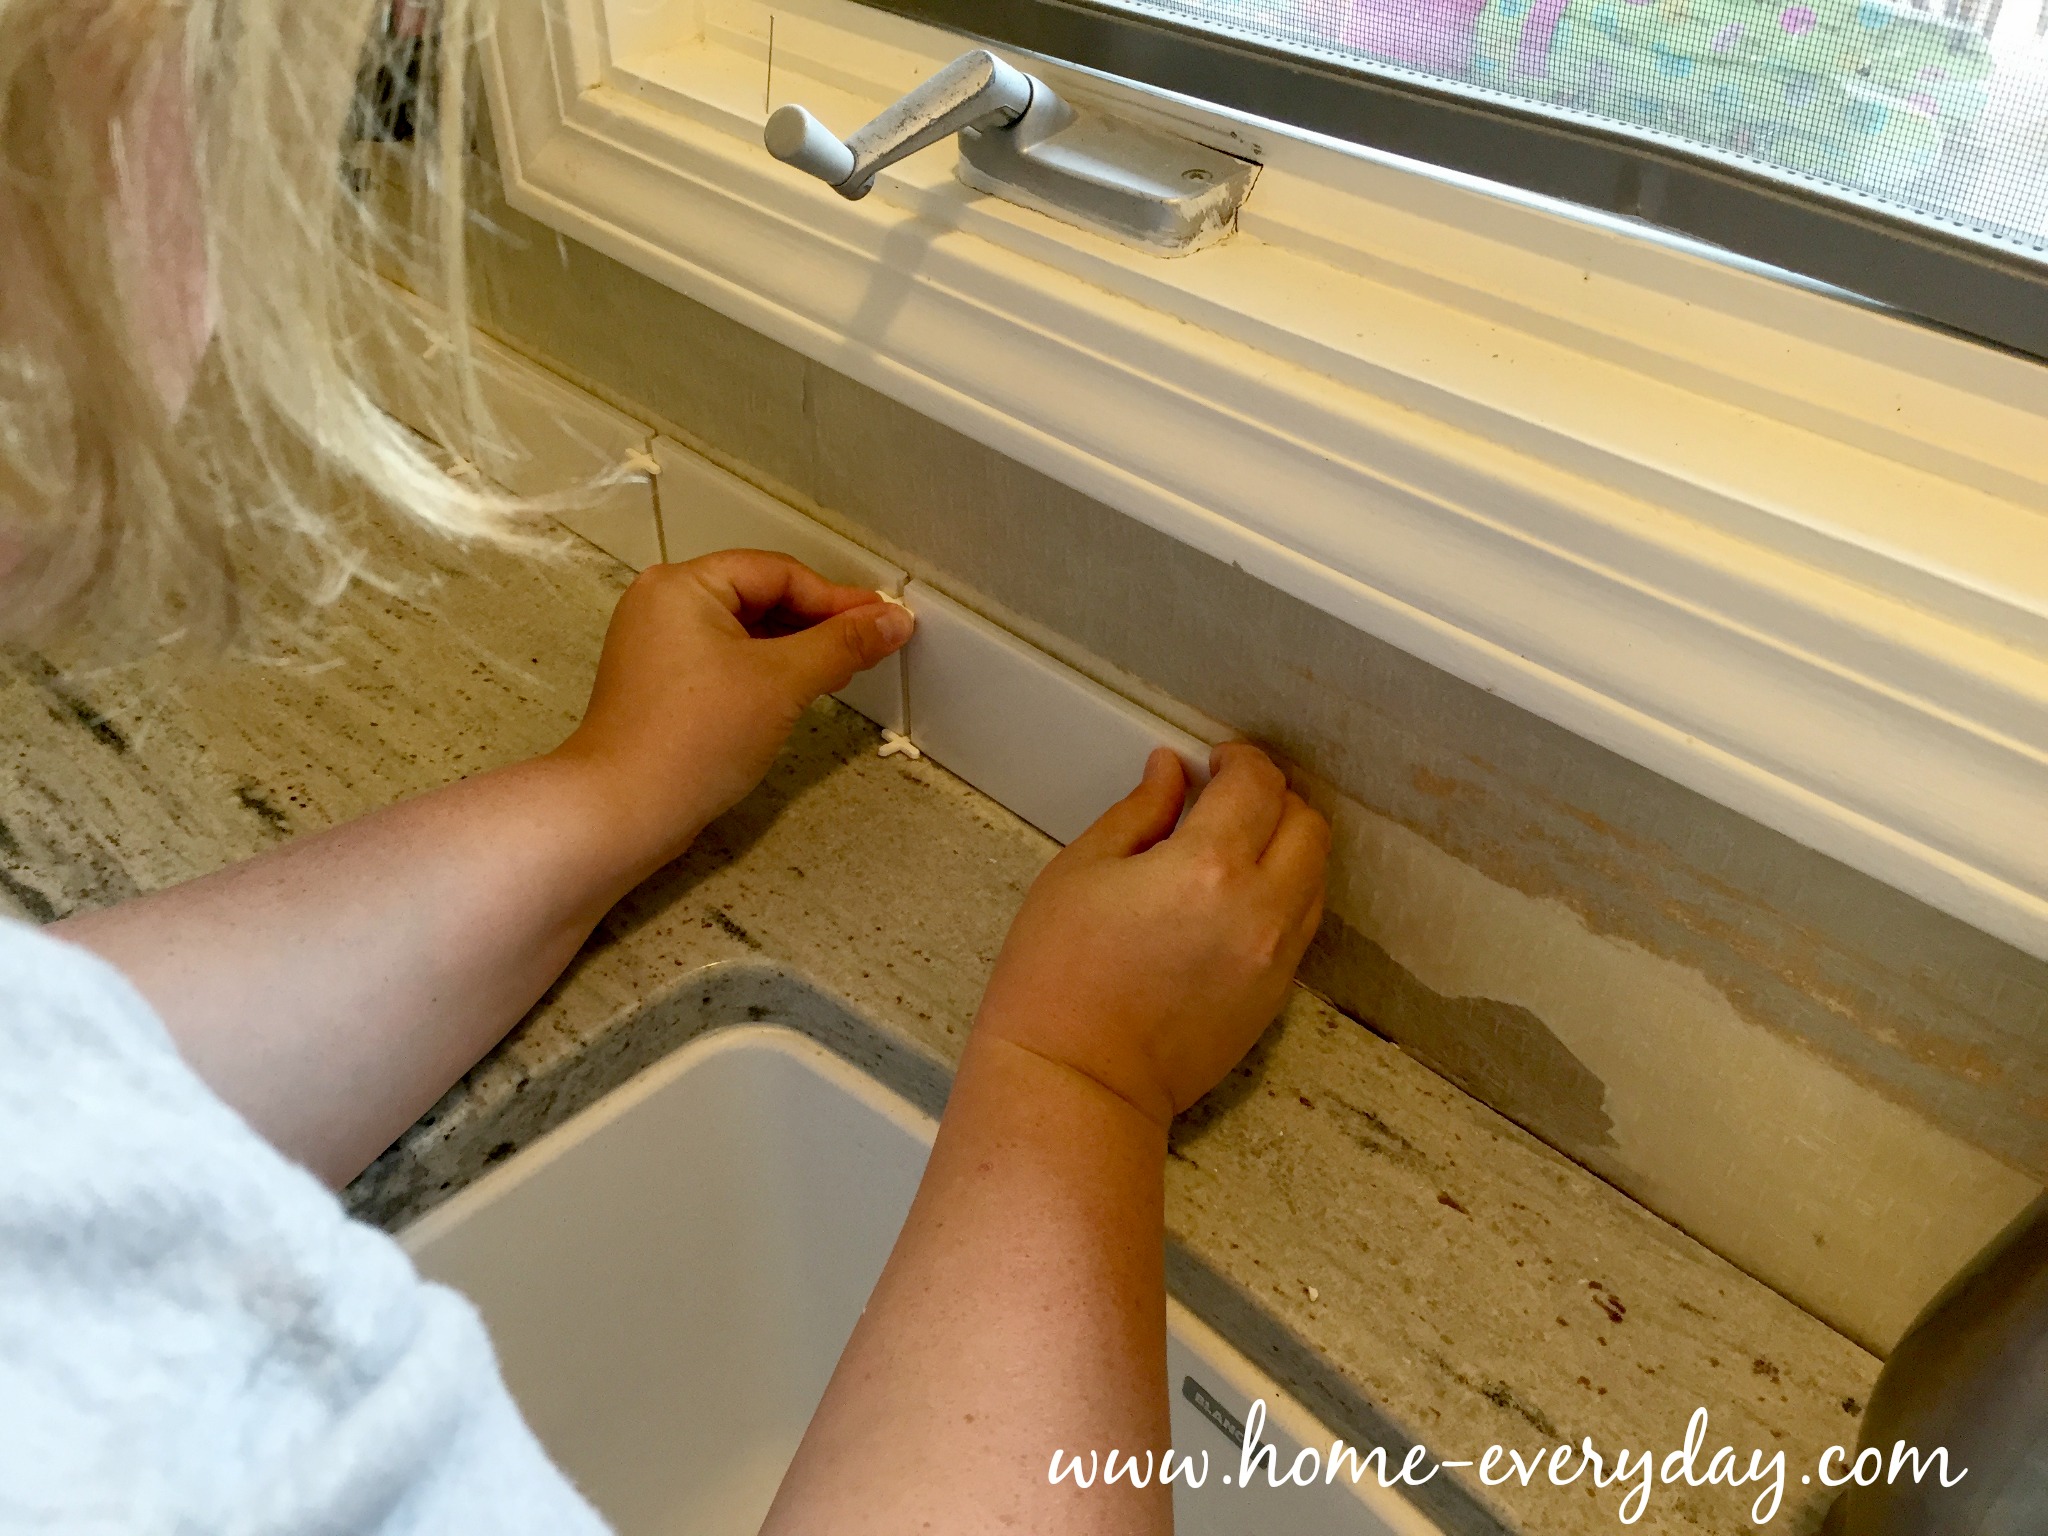
4. For around the outlets, we would use outlet covers and the previous row as a guide to measuring where to cut the tile to keep the brick pattern going. For corner cuts, we made sure to leave a bit of room in the corner for grout.

Backsplash without Thinset 19


Backsplash without Thinset 3

Grouting

ProTip: Before you start remember these three things about grout. Work fast but careful. Wetter is better. Paper Towels are your friend. Now, you may begin. (Also, cameras and grouting do not mix, so sorry for so few pictures.)

1. Once every tile was in place, we removed all the spacers, and made sure that all the surfaces were covered with drop clothes.

2. Next, we filled two buckets with warm water and a sponge. One bucket is your yucky bucket, the other bucket is your not so yucky bucket (technical terms, be careful). 

3. Then, in very small sections, using a float we added grout into all the spaces of the tiles. Make sure that you press the grout into the crevices. Pro Tip: Many people like to use a diagonal stroke with the float to fill the spaces with grout. I found using a rainbow like pattern worked best. Using small strokes from the bottom left, working up and around and back down to the bottom right in a small semi-circle pattern seemed to fill the most spaces with grout.

Backsplash without Thinset 22


Backsplash without Thinset 23

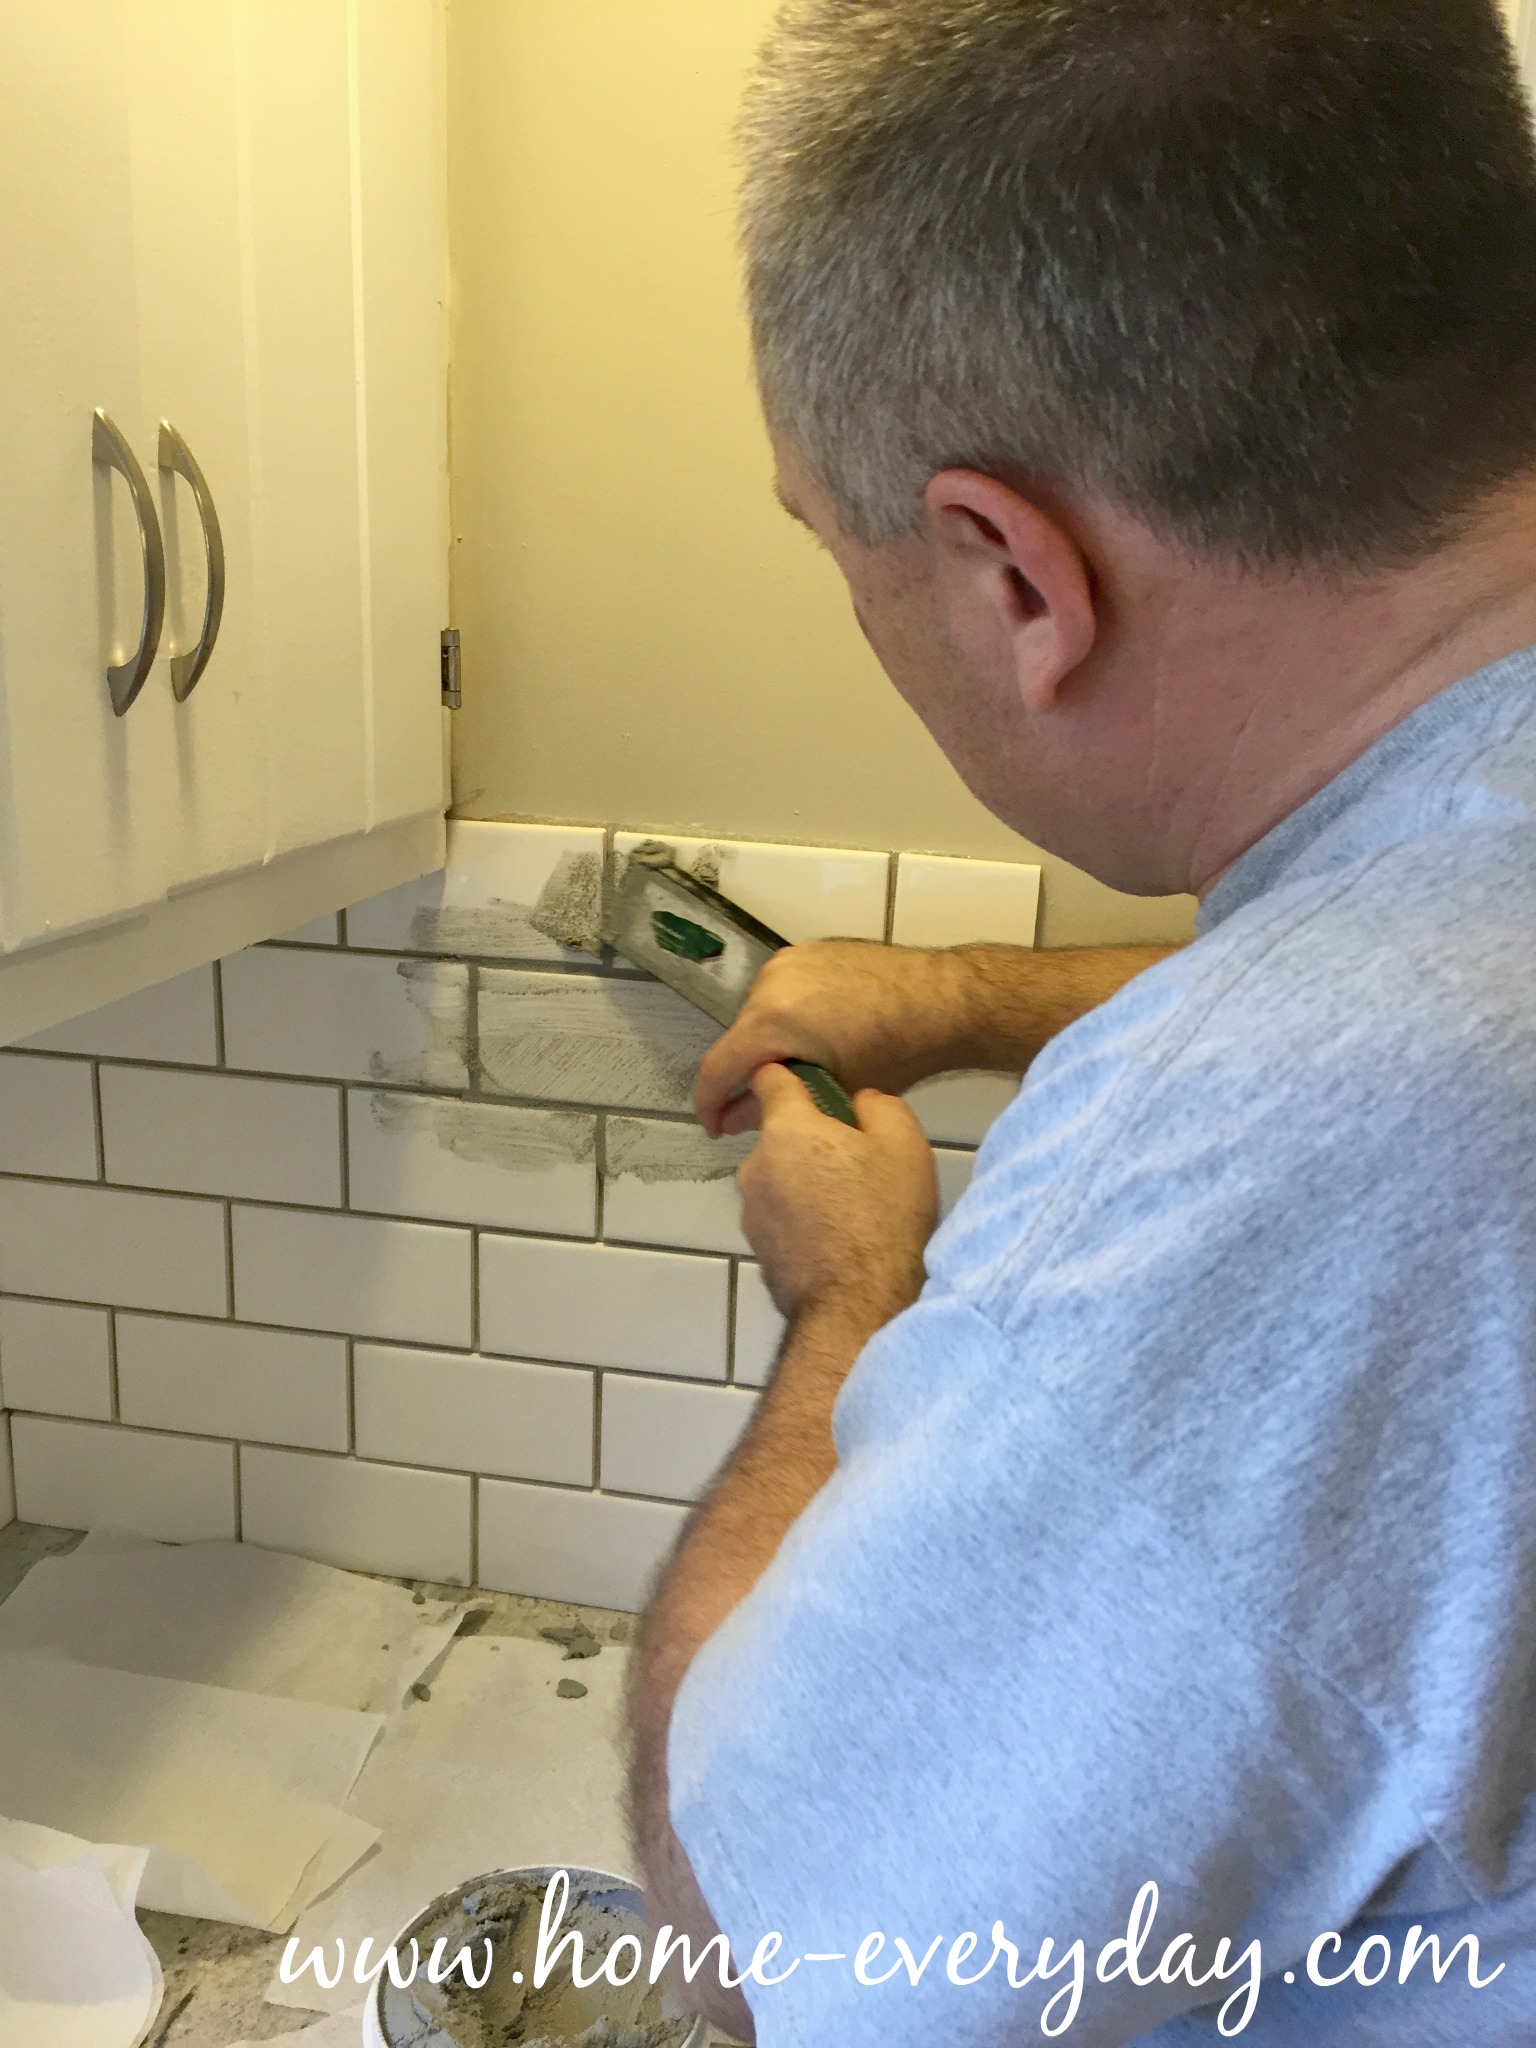
4. Even though we only did small sections of grout at a time, we would wash the float between each section, and close the grout container. Remember, grout is easier to work with when it is wet. Then, we would take a sponge from the yucky bucket, wring it out, and wipe the the section we had just grouted with a VERY light touch. Careful not to removed any grout from the crevices or spaces. Do this step again.

5. Then, wringing a sponge from the not so yucky bucket, we lightly wiped the tiles again. You’ll probably notice drips of cloudy water falling on the tiles, this is fine as long as you notice the water get “cleaner” with every pass. Pro Tip: Keep switching the water in the buckets to help keep haze at bay.

6. Finally, using a bunch of paper tiles, again with a light touch we would wipe the section again a few times until we noticed the tiles were starting to shine up, but also not so hard that the grout was starting to be removed from the crevices. Again, this is a very light touch. You may even want to wipe each individual tile. Pro Tip: While you may feel like you are using a lot of paper towel, this may save time and money later from having to use a tile haze remover. 

7. Repeat these steps until everything is grouted.

Finish it up

  1. Each grout has different rules about dry times. I didn’t wipe or do really anything in the kitchen for about 48-72 hours after we finished tiling and grouting, which I realize may be overkill, but oh well.

2. Once everything was dry, we put the outlet covers back on. 

3. Then we caulked the edges for a finished look.


Here are the after photos again. 

Backsplash without Thinset 2


Backsplash without Thinset 1

I would say for the beginner DIYer this project this project is definitely doable especially if you have the right tools and perhaps you practice grouting at a tile class first. While I realize not everyone has a friend like Scott with all kinds of experience, I would recommend asking  someone who has a little bit of experience using a tile cutter to help out with the first few tile cuts. Even if that means asking the rental facility or someone at your local Home Depot.

Backsplash without Thinset Pinterest Collage


Kitchen Refresh: Countertop Installation

I’m sure you all remember my warning awhile back about being sure to say no to crack (especially in your countertops). The countertops were installed awhile ago, however, because our kitchen is easily the most used room in the house and we also installed a backsplash, a new microwave, a cabinet, did a little painting, and I made some curtains the kitchen was a mess. Then, I immediately started using my new kitchen for cooking and baking out of sheer excitement. Thus, the actual writing about my kitchen got put on the back burner (no pun intended).

I decided to write about the kitchen in stages though as to not overwhelm, otherwise it would be the longest post in the history of the blogosphere, so today we are just starting out with the countertops.

So, here they are! Don’t they look fabulous!?

Countertop Installation 10

Countertop Installation 12

When we finally decided on granite, the installers came out and did a precise measure of our space to let us know exactly how much countertop we would need and to also assist us with what kind of sink would fit best into our base cabinet. We decided on a granite composite sink.

This was my third choice. I wanted a farmhouse sink, but that wouldn’t fit our cabinets (sad), then I wanted a Kohler ceramic sink and that was on a 12 week backorder (I cried), so I did a little research, and this Blanco Granite Composite seemed like a good option. It was large and deep and white. So far I like it.

Once all that drama was done, a schematic drawing of the kitchen was made.

Countertop Installation 6

Next, were given the all clear to pick out two slabs of granite at a granite distributer. We had decided on a color and kind when we purchased our countertops, but since granite is a natural stone taken from the earth there is often many variances. Therefore, the fabricator often will let you pick a specific slab that appeals to you.

Countertop Installation 2

PRO TIP: You can sign off and allow your fabricator to pick out your slab(s) too, but we thought it might be fun to do it ourself AND also see a granite warehouse. Just remember that the slab you see is going to be slightly darker in your home after sealing and will be cut to fit your space.

This was my favorite part of the process. Look at all that natural stone!

Countertop Installation 3

Even though our granite is called River White, we picked a slab that had a lot of gray running through it with a lot of variances. We liked that natural and rustic feel.

Countertop Installation 4

After we picked our slabs, it was a few weeks before the countertops were cut and installed. To prep the kitchen I just had to make sure that everything was off the current counters and remove the drawers.

Countertop Installation 1

The installers removed our old countertops.

Countertop Installation 7

The installers also made sure to shim any areas that were not level due to the house settling too.

Countertop Installation 8

Then carefully installed the new granite countertops.

Countertop Installation 11

We did have to have one awkward area that had a seam, but it is perfectly sealed, and that process was awesome to watch. You can’t even tell where it is now.

Countertop Installation 9

Finally, the sink was installed. PRO TIP: Make sure that the sink you pick out is on site and removed from the box and checked for cracks or imperfections before your installation date. This gives you time to get is exchanged in time for installation day.

When everything was installed, the countertops were sealed and the sink was caulked. PRO TIP: Wait about 24 hours before hooking up the faucet, plumbing, and using your countertops. This gives everything time to dry and settle up. There will be a lot of dust and a slight film on the countertops. When ready for use wipe everything down with a mild soap and water.

Countertop Installation 11 Countertop Installation 12

Next up: Backsplash installation.


Say No To Crack, Especially in Your Kitchen Countertops

When we moved into this house, there was so much updating that needed to be done, we had to prioritize. Obviously we didn’t have the means to do everything all at once, so there were quite a few things that got put on the back burner. One of them, was the kitchen countertops.

Kitchen Countertop Crack 1

The countertops in the kitchen are Corian. Like the original, first draft of Corian. We all know that the first draft of anything always has room for improvement. When we moved in four years ago, there was a small crack above the dishwasher, and also one near the stove area. While this was not exactly ideal, we knew that new countertops was not in the budget. We looked into patching the Corian, which can be done and is inexpensive, but knew that the spot above the dishwasher would most likely keep reappearing due to the expansion and contraction and heat of the dishwasher. We were also wondering what other kitchen upgrades we would want to make in addition to countertops. So, we held off. I used cutting boards for everything, and we made due.

However, if you have read this blog before you know that I spend most of my day in the kitchen. You also know that is where everyone else in the house spends most of their time too. Due to the wear and tear of our family, this is what has now taken place.

Kitchen Countertop 2

There are CRACKS everywhere!

So, we have bitten the bullet and decided to say no to crack once and for all.

Our first choice was butcher block. (If you follow me on Pinterest you can see all the butcher block I pinned.) Brian and I liked how warm wood seemed. We figured that we would be putting in a new backlash with the countertops, which would be tile, and with white cabinets, wood seemed the way to go. We also liked that this was something we could probably do on our own. However, after a great deal of research, we realized that with three kids who like to cook with Mom, this would probably get a great deal of wear and tear. We probably would need to refinish them occasionally, and honestly I don’t want to get into that mess.

DIY-Butcher-Block-copy
Photo courtesy of www.simplymaggie.com

Our next choice was Corian again. Even though we have cracked Corian now, we knew that Corian had come a long way in 20 years. We liked how some of the surfaces looked like natural stone, and that is totally our jam. However, after talking with some people about Corian, we found out that even new Corian can crack, and there have some complaints. In fact one of the places we shopped, doesn’t even sell it anymore due to customer complaints.

That got us thinking about durability, quality, and how often I cook in the kitchen. PRO TIP: Be flexible. Sometimes you might not get the exact material you originally wanted, but after talking to the experts you find it is the best choice for your lifestyle, look, and budget.

So we took a look at natural stones and settled on granite. We loved the natural look and variation of the stone. However, we originally didn’t think it could fit in our budget. Upon doing some good old fashioned shopping around, we were able to find something we loved that fit into our budget. PRO TIP: Make sure you get a written quote from all the places you are shopping. That way they can compete for your business. I was able to get a written quote from a local retailer, and Home Depot was able to beat it, and the quote they gave us was LESS than what we would have paid for Corian.

The counters have since been ordered, and measured. Since our current sink is built into the countertops, we have also had to pick out a new sink.  Also, I have been sampling some tiles. You can follow me on Instagram for updates.

Decisions are being made. #HomeEveryday #SkibsSummer

A photo posted by Erin Skibinski (@eskibs) on


Now we have to pick out our exact slab of granite then wait for installation.

Hopefully, in a couple of weeks, the crack will be gone forever!


ChicagonistaLIVE and Floor & Decor: Great Design and Conversation

I have been compensated for this post, but the thoughts and opinions are my own.

Last week, I had the pleasure of joining the women of ChicagonistaLIVE as they broadcasted live from Floor and Decor in Skokie. There is nothing more wonderful for me than when you combine home decor and good conversation so I was thrilled to be a part of this experience.

Floor and Decor was not only filled with every kind of flooring option possible, but also has everything you need for tiling your bathroom, shower, kitchen backsplashes, mudrooms, stones for outdoor spaces and fireplaces, laminate, and hardwood, but also Floor and Decor also has everything you would need to install it. From the saws to thinset, backer board to waterproofing materials, Floor and Decor has everything. Well, almost everything. For running water, I’d have to head back home.


Thanks to Maria Ramos of A Savings Wow for taking this photo.

Everything that Floor and Decor has can be overwhelming, but that is why there are designers on staff to help you with every decision that needs to be made as well as help you find the materials that will fit your lifestyle and budget. We were able to take a tour of the the store with the designer, who taught us a great deal about design and installation, and perhaps gave me a little confidence to try a backsplash on my own (don’t worry Brian, I won’t do it just yet).


Also, my favorite part of the day was when the wonderful women of ChicagonistaLive allowed me to be a guest on their show and ask for some advice. I was looking for a way to incorporate marble tile into a kitchen or bath without breaking the bank, and Floor and Decor had just the right solution. Long story short: less is more.


I was so excited to be a part of this experience, and hoping that I will be able to do it again in the near future! For more information about ChicagonistaLIVE LIKE them on Facebook or follow them on Twitter. To learn more about Floor and Decor LIKE them on Facebook or follow them Twitter.


If you like this post and would like to read more about all things domestic with a touch of humor, become a Home Everyday follower! For blog updates or to see other places I write such as ChicagoNow or Chicago Parent follow Home Everyday on FacebookTwitter, and Pinterest.

Follow on Bloglovin


Cabin Fever Means Cabinet Organization

HAPPY NEW YEAR!! I don’t know if you heard, but the midwest is in the middle of a big freeze. Road are treacherous and in some cases impassable, schools are not in session, and it is recommended people stay indoors. There are only so many books you can read, TV shows you can watch, and games you can play with three little ones before we start getting a little stir crazy.

So, since we are beginning a new year, and I wanted to get some organizing done anyway, I thought it best to have the little ones help. I thought that helping me do a few projects around the house would help alleviate any cabin fever we were experiencing.

This cabinet is the bane of my existence. The plastic storage container cabinet. This is also where I keep all the “kid dishes” in the house so that the kids are able to help set the table. It is a corner cabinet with a Lazy Susan.


This cabinet was jammed with crap. So much crap that I could no longer turn the Lazy Susan, meaning I only had access to about 1/8 of the things I needed.

The first step to organizing this awful space was to just remove everything. This is where the kids were exceptionally helpful, they were so happy to make a mess and pull everything out of the cabinet.


The next step was to sort all of this stuff. I asked the kids to get all the lids and gather them up. Then, the gathered up all the containers. I sat at the kitchen table and tried to find matches of lids and containers (even princesses need to help sort the Tupperware cabinet sometimes).


I was so happy to sort all this stuff, and get rid of everything we didn’t need anymore. I also used some of the larger containers without matching lids to help house little things like lids and sippy cup straws.


Now, that this cabinet is organized, I wonder what other organizational mischief I will get into with this cold weather.

For more about organization, DIY, gardening, cooking, baking or all other things domestic, become a Home Everyday follower! For blog updates or to see other places I write follow Home Everyday on FacebookTwitter, or Pinterest.


Brushed Nickel Linings Playbook to Faucet Repair

Last week, I shared that we had a bit of stress around here regarding some home repairs. As any homeowner knows, sometimes one thing leads to another when it comes to fixes.
In our case, a new hot water heater, in a kind of distant way led to the installation of a new kitchen faucet. The story kind of has a “Brushed Nickel Lining.”

After attempting with failure a few different options (new hoses, and a sprayer) on the old kitchen faucet, we decided it was time for a new one. We shopped around at Home Depot knowing that they carried Kohler fixtures, and we had a coupon and some gift cards.

While I would like to be upset (because of the time, money, and aggravation) this is now in my kitchen.

As Sarah Richardson always says, “fixtures are like the jewelry to any kitchen or bath.”

The reason we chose Kohler is because in our condo we had tried other brands of kitchen faucets. Also, the fact that we even had to replace a faucet after only living in a house for two years kind of made us feel like it was time for an upgrade. In addition, we read lots of online reviews and talked to people we trust about the brand. We knew this was kind of an expensive purchase, but to be honest, it is probably saving us money in the long run.

We decided on the Kohler Cruette. I liked the high curved neck for filling and washing big pots. Brian liked the built in spray hose that extends from the faucet as opposed to a separate one, and we both have an affinity for brushed nickel.


This decision was made as quickly as most of our major purchases due to A.) When you have 3 kids with you at any store there is a need for urgency B.) Brian and I have similar taste and C.) We typically go for price and practicality.

We brought home our new faucet, and then we sat on it for a day. We were operating without a kitchen sink ok, and Brian wanted to read up and watch a few tutorials on faucet installation and make sure we read through the instructions a few times. He also wanted to make sure we had everything we needed to do this job ourselves.

After living a few days without a kitchen faucet, we decided it was time. Brian was able to do this a few hours with the assistance of our littles ones.


Our kitchen sink went from this:


To this:


Brian and I are in no way plumbers, and I am sure that all faucets might have their own quirks and be installed their own way, so make sure you read the directions for your faucet carefully, watch a few tutorials of your own, or call a professional to install.


With that being said, we did learn a little bit. For example, the hole in our countertop was not large enough to accommodate the new faucet. It was literally millimeters off. So, we sanded the inside of the hole a bit and that allowed enough room for the new faucet while still being a snug fit.

We are so happy with our new faucet, partly because it is so gorgeous but mostly because it isn’t leaking into our sub basement anymore.

If you would like to read more about the home projects that happens here, or enjoy gardening, DIY, Cooking, Baking or all other things domestic you can check me out on Facebook or become a follower of Home Everyday here


Follow on Bloglovin

Tea Time: Cleaning Cupboards

I love tea! In fact, I love all hot beverages. I am often heating the kettle even in the summer to make some iced tea. When I buy tea, I typically just shove the box in the cupboard, and then forget about what teas I even have. The tea cabinet was the pits, as was the snack cabinet.


A mish mash of things that didn’t belong in there. These are the cabinets where I also sometimes hide toys. Don’t judge. This whistle is particularly loud and squeaky and sometimes it has to go in the cabinets when I am on the phone.


I first emptied the tea cabinet and the snack cabinet that was overflowing. I did a little switcheroo, and put all the snacks in the old tea cabinet since it is bigger. I found these baskets awhile ago for little things like boxes of raisins and microwave popcorn packages.


Once I had enough room for all our snacks, I sat and debated what to do with all stuff that was in the tea cabinet. I first decided to put all the mugs in with our dishes where they belong (even my I Heart Jim Halpert Office mug).


They were taking up too much room in a cabinet on there own. Then I thought I should take all the tea out of its boxes to make room. When I surveyed what I had, I thought of the perfect solution.


These adorable Threshold jars from Target, are perfect and look adorable on the kitchen counter, but could be stored away if need be too.

Because of all this organization…. I have ended up with an empty cabinet! GASP! I can hardly contain how organized the kitchen feels now. Now time for a some tea and an episode of The Office.

PS I’m linking this post up at Serenity Now today! Check out all the great links at the Weekend Bloggy Reading party.

Spicey: Cabinet Organization

This time of year, I seem to do more cooking and baking so I thought one of my Pre-Thanksgiving organization frenzy days should be dedicated to kitchen organization. I also stocked up on a few things I know I need on hand like flour, sugar, chocolate chips, and poultry seasoning.


Here is the cabinet stocked up for the holiday season.


When we moved into this house, it came without a pantry so I had to get creative with how I used my cabinet space. I bought a plastic tiered spice rack, some Ikea spice jars, and used my scrapbook skills and tools to make little tags for labeling everything.


As for the other shelves, I bought some baskets for around $3 at Target to keep all my baking supplies organized.


And let’s not forget the glass jars from Target that I keep on my counter.


I am officially ready for a season full of cooking and baking.

Anyone else stocked up for the season?

Linking up at Serenity Now.

Election Hangover: Quick Fix Curtains

I’m currently rocking an awesome Election Night hangover. Not the drinking kind, but the I went to bed way too late, and the kids got up way too early kind. Either way, hangovers stink. Good thing I planned ahead and have an awesome quick update for you today.

One of the first posts I ever wrote before taking a Home Everyday hiatus, was this post about my cloth napkin cafe curtains hanging in my kitchen (as you can see I’ve learned a lot about blogging since then, also, my pictures were of the iPhone variety).

Yes, you read that correctly. Cafe curtains from cloth napkins. I don’t have a sewing machine, hem tape is an option like these curtains I made for Coco, but to be honest, I really like if even the hemming is done already like my master bedroom curtains. So far, the best thing I have noticed about doing inexpensive curtains, drapes or window coverings is that, they are an easy switch when you need a bit of a change. Which is exactly what I did here:


I found some cute yellow cloth napkins at Target on clearance.


I had really been wanting to tie some yellow into the kitchen, so this was the perfect and cheap way. I just used the little clips to attach them to the curtain rod, and this time I even made a little valence by pinning some folded napkins to the top curtain rod (did I mention I don’t have a sewing machine.. yet? Christmas please hurry).

I cannot believe how much bigger the window looks with the valence now too.


There you have it! The quickest update so far. Anyone else jumping on the faux curtain bandwagon with me? Table clothes? Sheets? Shower Curtains? Hem taped fabric?