Category

Furniture

Resting My Feet: A National Craft Month Craft

While I was compensated for this post by JoAnn Fabric and Craft Stores the ideas, thoughts, and opinions in this post are my own.

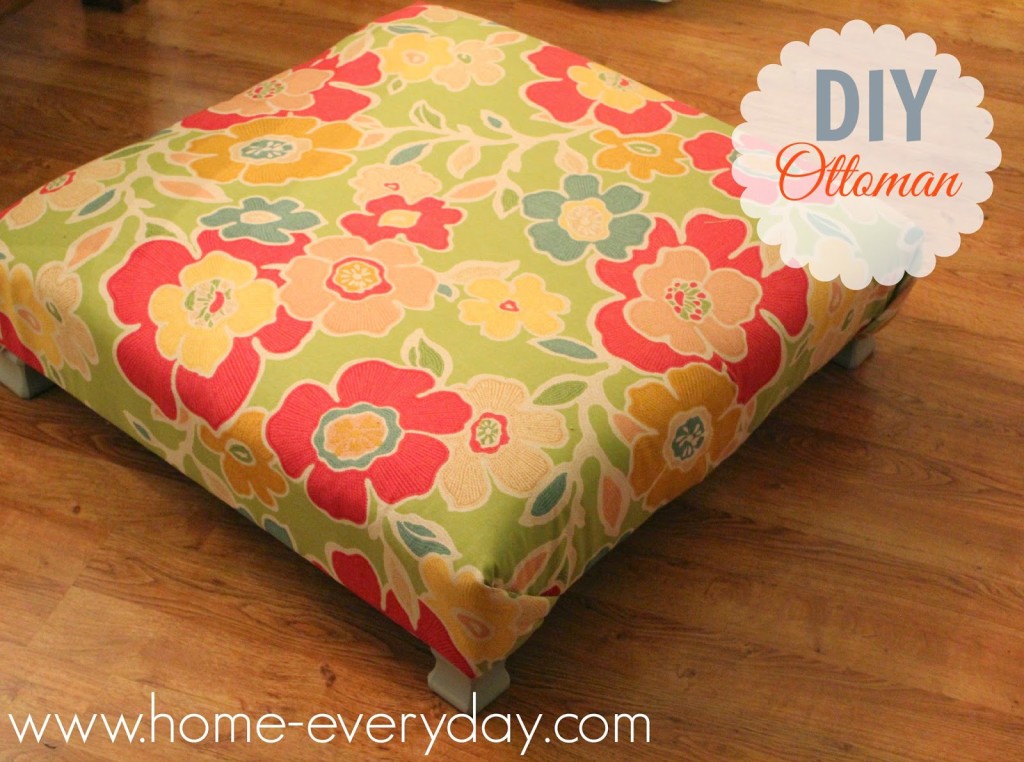
I recently decided that Mr. Home-Everyday and I needed a comfy place to rest our feet other than our coffee table. While I know there are lots of ottomans out there, I was pretty sure that I could make one myself for a pretty reasonable cost. Mr. Home-Everyday had given me some pallets to use for some projects around the house, so I had a base. Now, to find some fabric to upholster it.


When JoAnn Fabric and Crafts asked me to participate in National Craft Month, I knew I would be able to find the perfect fabric. There are so many great trends to take advantage of this season, but my favorite lately are all the great floral fabrics available.

I found this great floral fabric by KAS from Australia, that I love. The colors are saturated, which will match all the color going on in our family room, and it seemed durable enough for us to rest our feet.


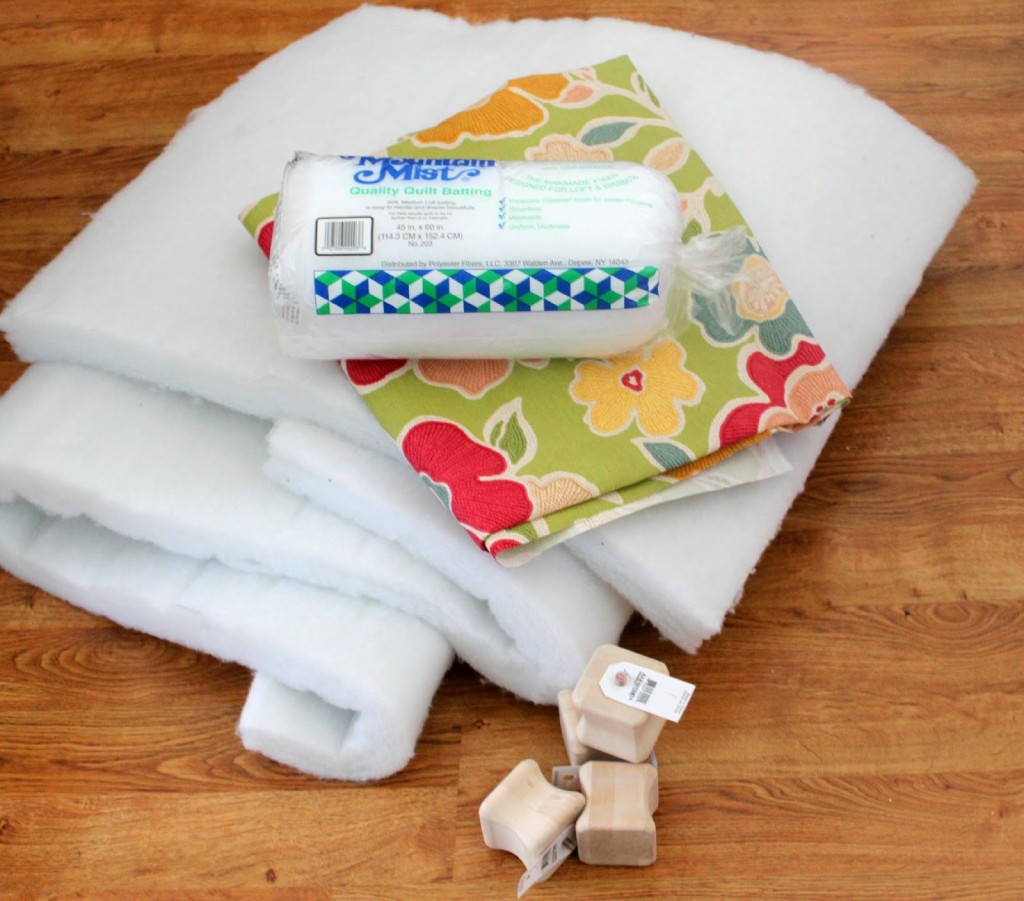
Supplies:
1 pallet
4 table feet
4 feet attachment brackets
white foam cut to size (same size as top of pallet)
batting cut to size (able to be wrapped around pallet on all sides with 2 inch allowance)
fabric cut to size (able to be wrapped around pallet on all sides with 2 inch allowance)
staple gun with heavy duty staples
fabric scissors
paint
paintbrush
drill

Paint and Dry: First, I painted the feet of the ottoman. I thought it best to get this step out of the way as then I could let the feet dry while I completed the other steps.

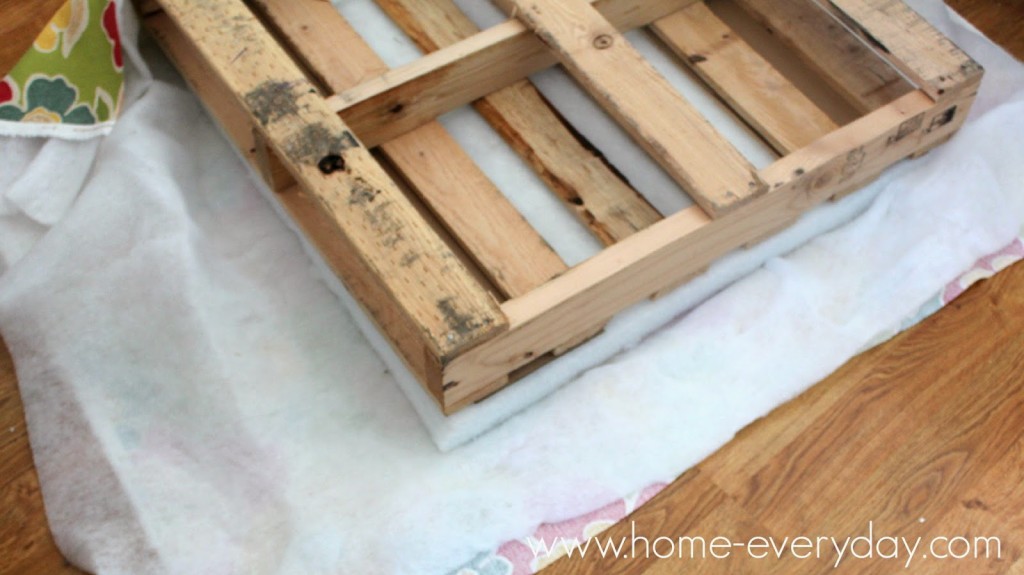
Stack It Up: After the foam, batting and fabric are cut to the correct size, place the fabric face down on a flat clean surface. Then place the batting on top of that. In the center of the batting, add the foam. Finally, place the pallet on top of the foam.


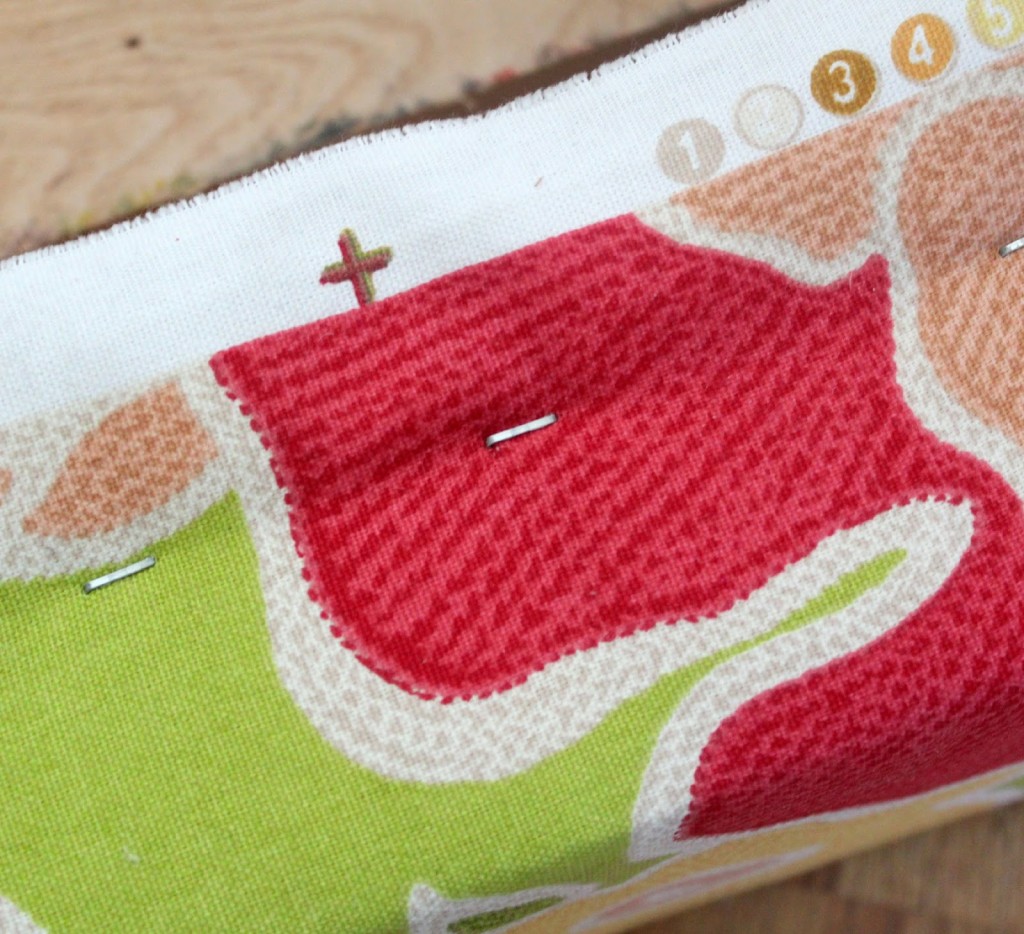
Staple, Staple, Staple: Starting in the center of one of the sides of the pallet, pull the fabric and batting tight and staple. Continue to staple from the center toward the corner, (about every 3 or 4 inches apart)  but DO NOT staple the corner. Do this on each side. Finally, fold the corners in as if you are wrapping a package, hold them tightly and staple them.


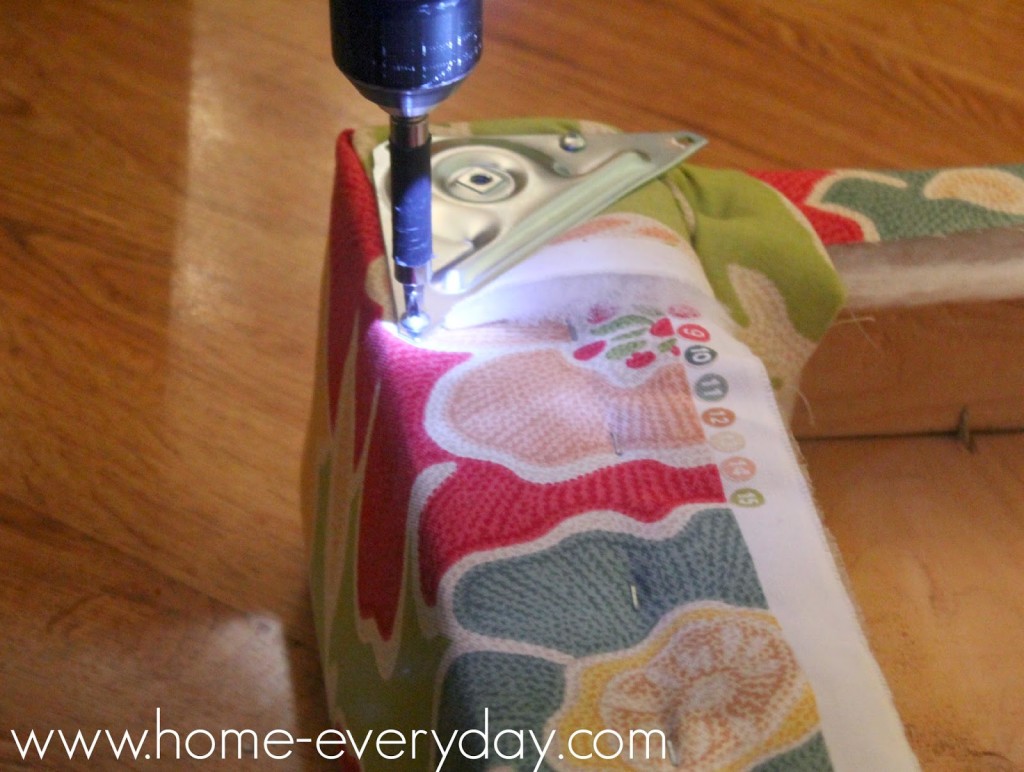
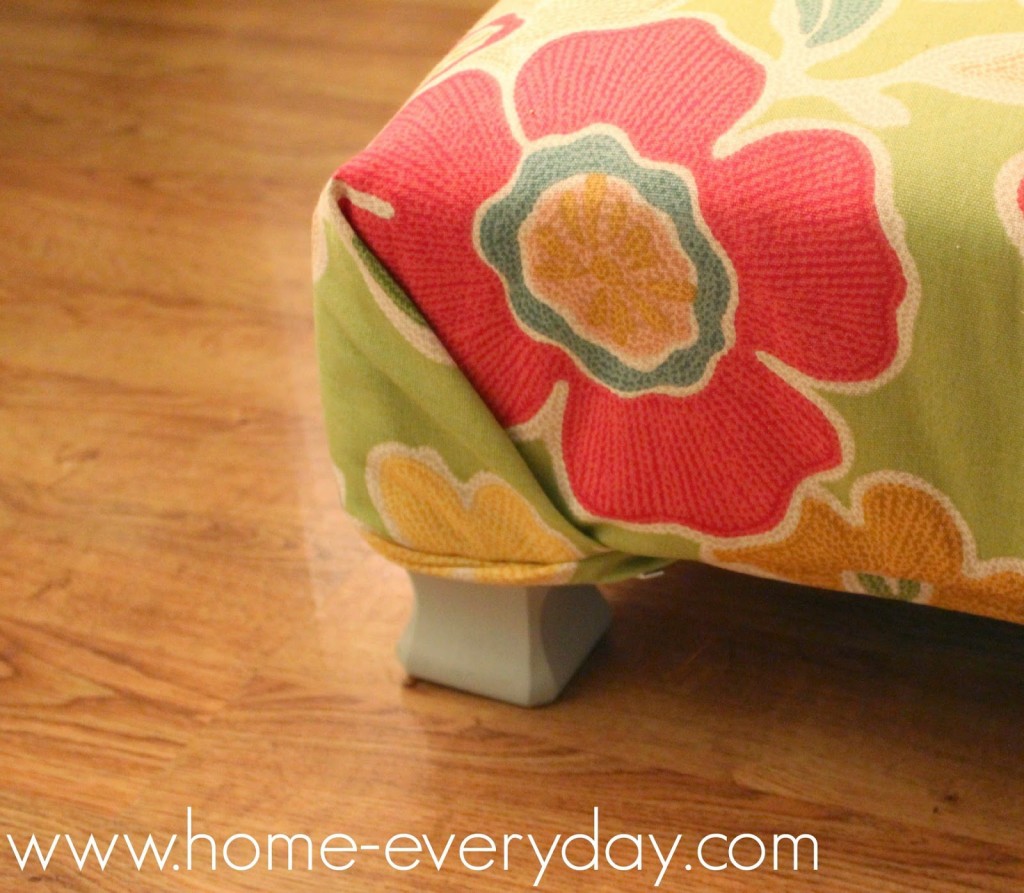
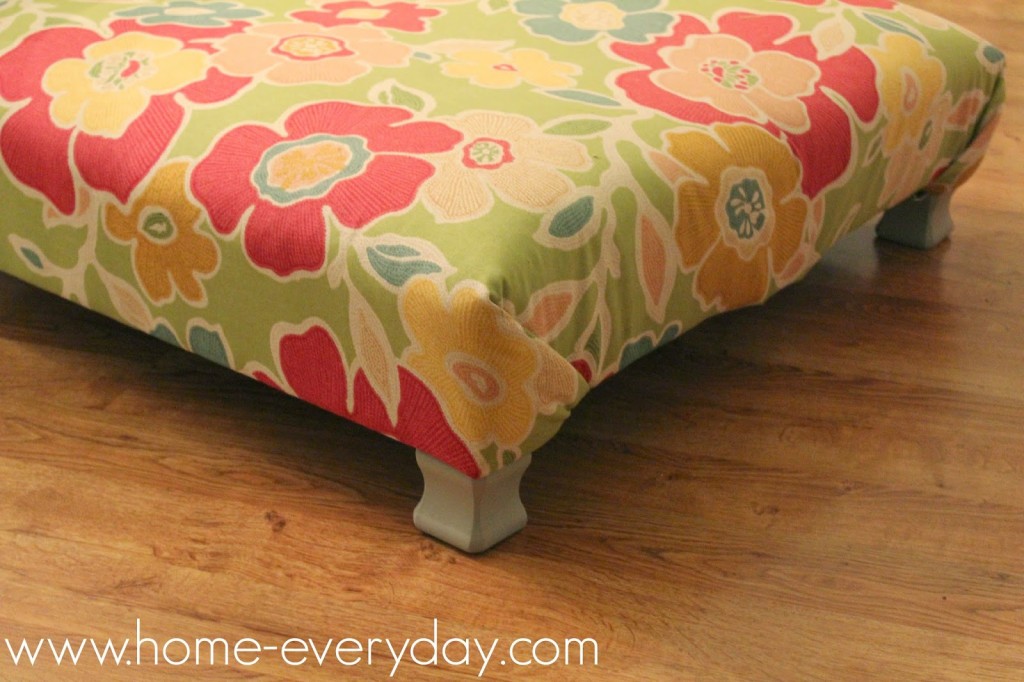
Give It a Leg Up: Finally, using a drill, screw the attachment brackets to the underside corners of the pallet. Screw in the feet to the attachment brackets.


Finally, put your feet up and relax.


Unless, of course, some little people get there to relax before you do!


Linking up at Serenity Now


If you like this post and would like to read more about DIY, gardening, cooking, baking or all other things domestic, become a Home Everyday follower! For blog updates or to see other places I write follow Home Everyday on Facebook here.

Follow on Bloglovin

Gradient Dresser: You’d Never Guess its Garbage

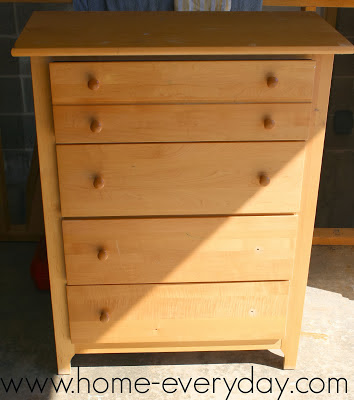
A few weeks ago on the way home from dropping off one of my children at school, I saw this fantastic dresser sitting on the curb. I circled the block a few times trying to take a closer look, and finally parked and gave it a full inspection.


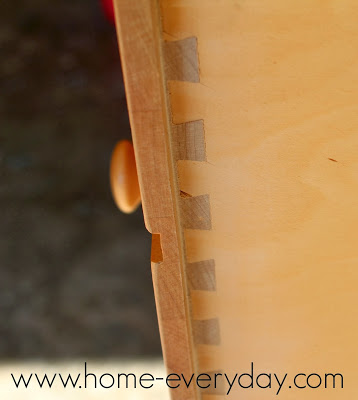
I pretended I was at a furniture store instead of someone’s driveway, and gave the dresser a full look over. It seemed solid, and I opened and closed all the drawers. There were even dovetail joints on the drawers (a tip from my favorite designer Sarah Richardson), and even though there was some hardware missing and the top drawer stuck a teeny bit, I thought I could give this dresser a new life in our home.


Another Mom who happened to see me stopped, and offered to help me put the dresser in the back of my car. So I moved aside all the sporting equipment and stuff, and we put the dresser in the back.

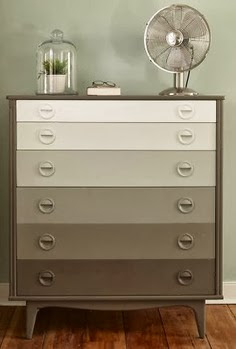
After a couple of weeks of mulling it over, I decided that I would do a gradient style dresser. Ever since I saw this one on Young House Love.


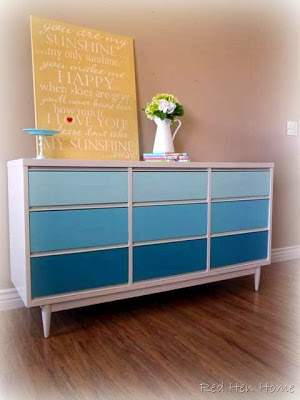
And this one on Red Hen Home.


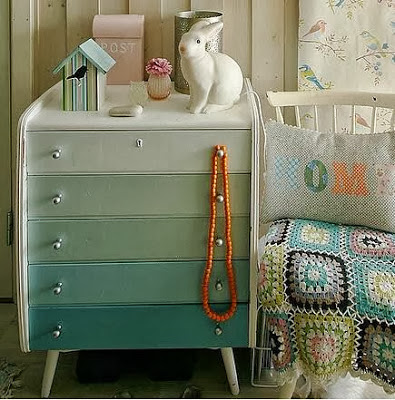
And this one that I pinned a million years ago on Pinterest.


I have wanted one of my own.

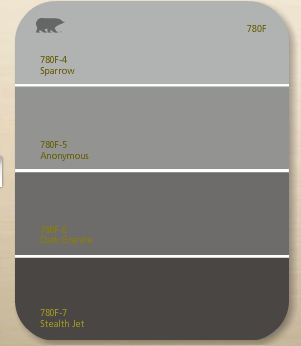
I made a quick trip to Home Depot, and picked up a gray toned color card with four colors (Sparrow, Anonymous, Dark Granite, and Stealth Jet) like the one below and had a color sample made for each color. (Note: Behr can only create color samples for flat paint, so I made sure to pick up some water based Polycrylic to apply over the flat paint for extra protection and easy cleaning).


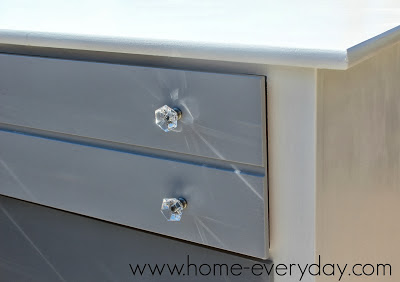
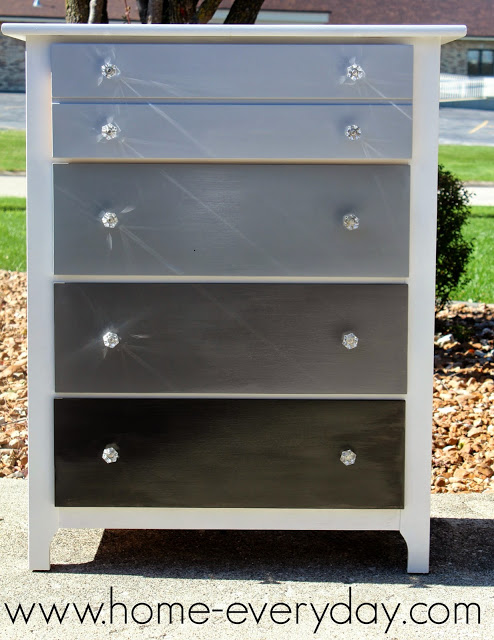
After taking off the hardware, giving the dresser a good sanding and wipe down, I painted the dresser two very thin coats of glossy white. Then, going from lightest (top drawer) to darkest (bottom drawer), I painted the drawers a few thin coats and let it dry for two days.

After the dresser and drawers were fully dry, I put three coats of water based Polycrylic on the drawers according to the manufacturers instructions and let everything dry for a few more days.

Once I thought the dresser was ready to be moved inside, I added some new pretty hardware that I had also bought at Home Depot.


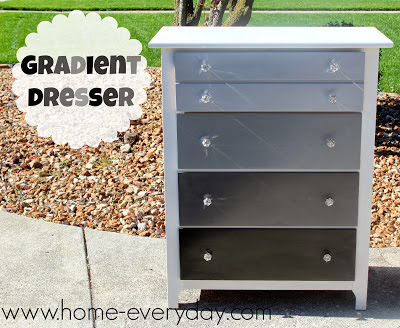
Here is my new (to me) Gradient Dresser.


I have to say, I a thrilled with the results, and I cannot wait to find the perfect place for it in my house. I bet you’d never guess this was once garbage.


You ever do any garbage picking?

If you like this post and would like to read more about DIY, gardening, cooking, baking or all other things domestic, become a Home Everyday follower! For blog updates or to see other places I write follow Home Everyday on Facebook, Twitter, or Pinterest.

Follow on Bloglovin

Oops: Painting a Dresser

I don’t know if you could tell yet, but I like hand me down furniture. We do have a lot of new furniture in our home, but I do like to collect old pieces and give them some new life. So far, our house has become a hodge podge of the old and new, and I thought this would bother me, but I like how nothing in our house is too matchy.

My sister gave me my nephew’s old dresser, which actually belonged to my brother-in-law as a kid. I originally thought it might be nice as some extra storage in the boys’ room, but then I realized I needed some extra storage in our living room. For awhile, it acted as  place for all of my table and kitchen linens, but now it serves as a drop zone near the front door.


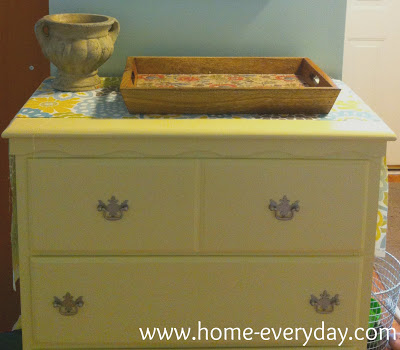
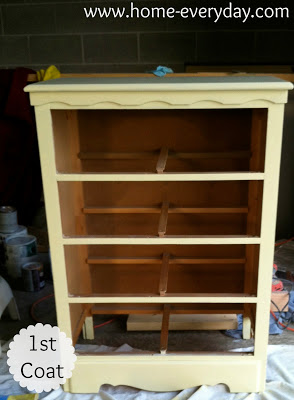
The original color was a medium toned, very shiny, stain. I knew eventually I would want to paint it, but I could not decide on the color. I knew I wanted something different, and perhaps a stand out color. So, I went to my home away from home. Home Depot. I decided that rather than make the difficult decision myself, I would look at the Oops paint section. I found a gallon of this Glidden light yellow color in semi-gloss (which is my favorite finish for painting furniture) for $3. For three measly bucks, I found my new paint color, and there wasn’t a lot of thinking involved.

I have painted a lot of furniture using a few different techniques, but for this project I used the same plan as the dining room chairs. (I didn’t have to strip paint like the bookcase, nor did I use spray paint like my new bedside tables).

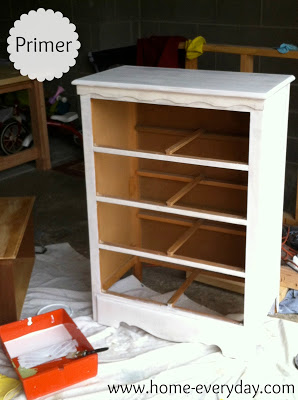
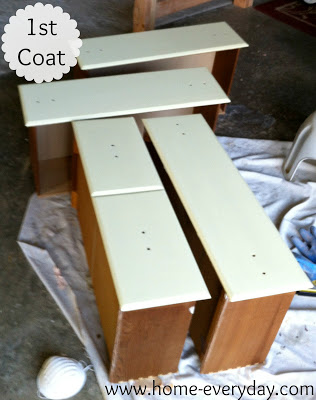
After removing the drawers and hardware, I just did a little sanding, priming, and painting.


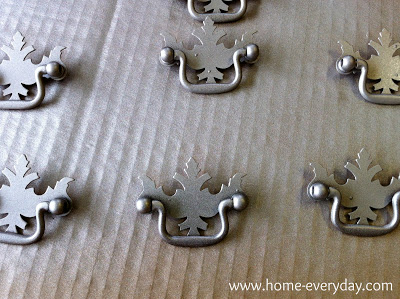
Then, while I was waiting for the second coat of paint to dry, I spray painted the hardware using some Krylon Metallic Spray Paint in Brushed Nickel.


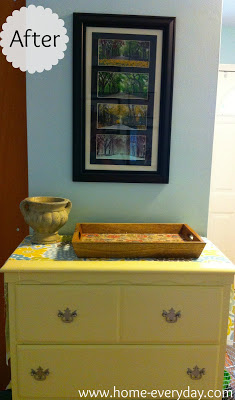
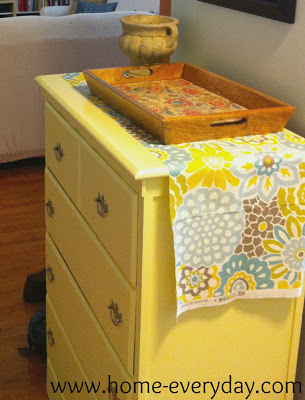
Once everything was dry, I put everything back together, and plopped by the front hall. We drop our mail in the tray and put our keys in the stone urn that was used for floral arrangements at our wedding. The drawers hold all kinds of things that we need to grab as we are heading out the door.


For three dollars of oops paint and some spray paint I already had on hand, I am happy with the results.

Shazam: Painting Nightstands

Brian and I desperately need bedside tables. Right now we are using an old night table that is very small, and a TV Tray. They serve their purpose, but aren’t really doing anything to make our room look pretty. They are blah.

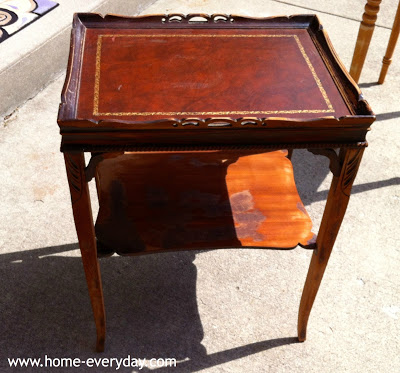
A few months ago, my Mom gave me these two tables. I know what you are thinking, these tables are pretty blah too. Wait for it.


The first one is a printer table. The idea was to put your printer on the table and your paper in the little shelf underneath. The second table, was a table that has been around for a long time. I think it belonged to my grandmother at one time, and then was in my sister’s bedroom when we were growing up. The top of this table is actually leather.
I decided to make these our nightstands. I know they look nothing alike, and from totally  different eras (as in one was made for a computer and the other was around before computers even existed). Brian, however, thought they were perfect as they are both the perfect height for the bed, and they wouldn’t cover the vents on either side of our beds (Brian tends to be a little finicky about that).
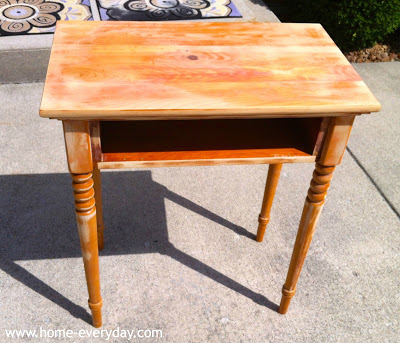
So this is what I had to work with. It was ok that they didn’t match perfectly, and I was eager to paint them. Once they are the same color they will be more unified. Especially after I put some cute matching lamps on top of them too.
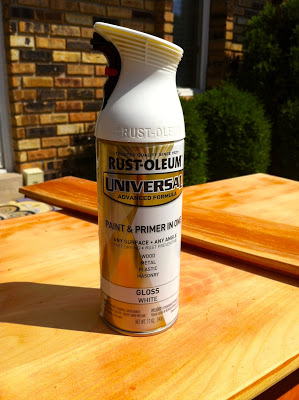
They both have some pretty intricate detail to them, so I was hesitant to use a brush to paint them, so the logical step was to spray them. I do have an electric paint sprayer, but I figured to dirty that thing up and to buy a gallon of paint would be more of a pain and a little expensive for two small tables. So I went to Home Depot, and found this.
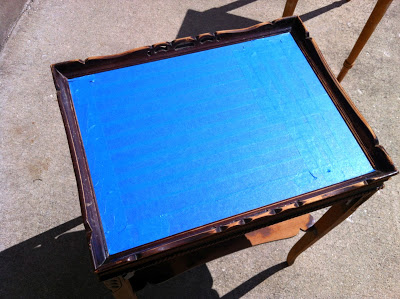
Rust-oleum’s Universal Paint and Primer in one in a nice Glossy White was the perfect solution to the problem of these tables. I roughed both of the tables up a little bit with some fine grit sandpaper. Both tables already had some kind of glossy finish to them already and I wanted to be sure that the paint would adhere to the tables. Then, I taped the leather top of the dark wood table. I’m thinking I will recover it with some cute fabric or something.
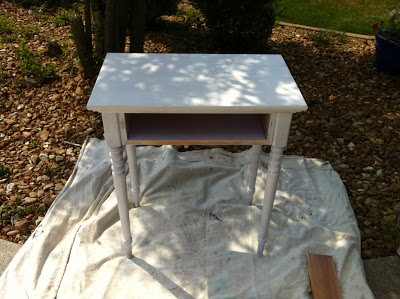
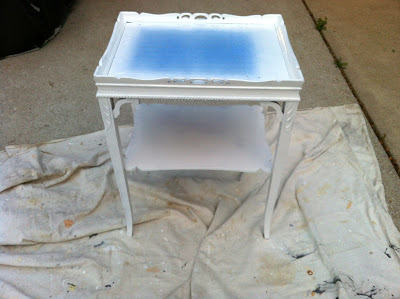
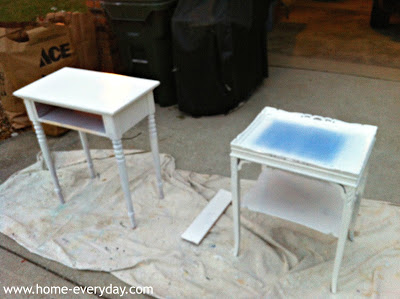
Outside in the driveway with a drop cloth down, I sprayed the tables with fast, long, and even strokes. This is what the tables looked like after one coat.


This is what they look like after the second coat.
When Brian saw them, he said, “SHAZAM.” Which is a good thing. I hope.
Now, I’m almost done. I have to let them sit outside for a bit and make sure they don’t smell too bad before bringing them in the house. Also, I still need to find some fabric.
Stay tuned for the finished product.

The Icing on the Cake: Staining Unfinished Wood

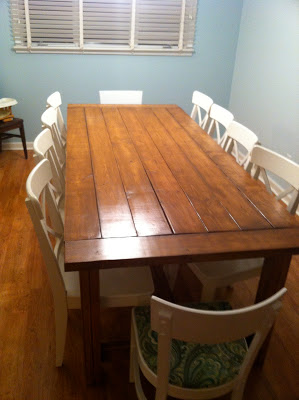
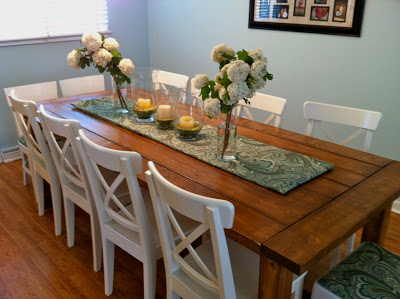
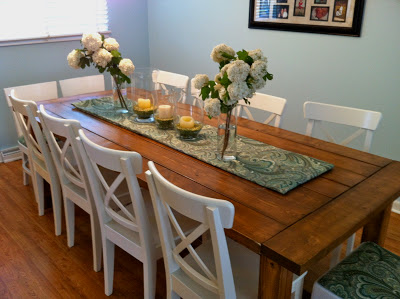
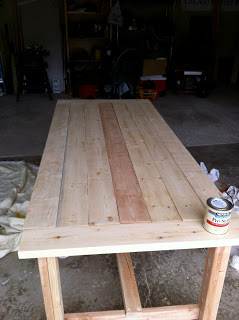
After Brian built me this beautiful farm style plank table, it was time to stain it. I spent an afternoon at Home Depot, learning everything I could about stain, application, drying time, and polycrylic finishes. I also, spent some time picking out the perfect medium toned color as well as assuring I picked out a matte finish so the table would look old and not too shiny. I wanted to learn as much as I could because half of the look of this table was not only the style, but the color and finish.

Here is the finished product:

And this is how I got there.
Supplies
Synthetic Bristle Paint brushes
Lint free rags (I used some of Brian’s old holey white undershirts)
Sandpaper (both course and fine grit)
Electric Sander
Sponge
Bucket of water
Minwax Water Based Pre-Stain Wood Conditioner (1 quart)
Minwax Water Based Wood Stain in Colonial Pine (1 quart)
Minwax Water Based Polycrylic Protective Finishe in Satin (1 quart)
Latex (or non-latex) tight fitting gloves
Safety glasses

Smooth to the Touch: I started this project by sanding the entire table with my electric sander with a course grit sandpaper and then followed up with a find grit sandpaper. I just wanted the table to be smooth to the touch. I figured there was going to be a lot of people eating at this table over the years, and I really didn’t want anyone having their roast chicken with a side of splinter. I was extra careful to do underneath the table as well.

Clean up, clean up, everybody clean up: This part was crucial. The “expert” (I say expert, because she knew an awful lot about staining) at Home Depot said to wipe off the table with damp sponge a few times to try and remove any residual dust from sanding. She said that the more I did it the smoother my staining application would be. I made sure that the table was completely dry and free from any water spots before I started the next step.

Conditioner IS better: This step is one that some people told me to skip ahead of time, but after talking to my new best friend at Home Depot, she assured me that this step is important and not very time consuming. Since this was the first time I was staining something, she said I would get much better and more even coverage if I used a wood conditioner. Using a synthetic bristle brush, I applied the wood conditioner. It only took about five minutes to dry, and was very easy to apply. I am so glad I didn’t skip this step, because it was the least time consuming step, and the color went on perfectly even.

The Scary Part: Applying stain isn’t rocket science, but it does take a light hand and a bit of patience. The key I found, is to not do too big of an area at once. So using a synthetic bristle paint brush, I applied a light layer of stain to a small area of the table (one leg, one plank at a time etc.) and then using a rag, LIGHTLY wiping off any excess stain. You don’t want to have to much stain sitting on the surface for too long of a time as that increases the intensity of the color and then the color becomes uneven. Also, using a light hand to wipe the excess stain, allows for more even color as you are not wiping off too much stain that you have just applied. The first coat of stain was not dark enough for me, so once the first coat was completely dry (I waited until it was dry to the touch, about 5 hours), I applied another coat just like the first coat.

First coat of stain


Second coat of stain

Gettin’ Poly With It: This step is again, not hard, just requires a bit of patience (which, I’m not going to lie I was starting to run out of because I just wanted to eat dinner on our beautiful new table). Using my trusty synthetic bristle brush, I brushed a thin layer of Minwax Water Based Polycrylic on the table. I was very careful to make sure that the layer was thin as to reduce any kind of dripping. Once it was dry (minimum of 2 hours), I lightly sanded the table by hand with a find grit sand paper. Then, using a dry cloth wiped any dust, and applied the next coat. Minwax suggests five (yes, five) coats of the polycrylic for maximum protection. I did do the suggested five coats on the top of the table where there would be more of a chance of drinks spilling and food stains, but on the legs and other exposed areas underneath, I only applied three coats.

This process was much more time consuming than I ever could have thought. But I must admit it was completely worth it.

Just a few things that I think are worth mentioning:
1. Since I decided to go with a water based stain, everything else I used had to be water based as well. Water based wood conditioner and water based polycrylic. If I had chosen an oil based stain, I would have had to use all other oil based products as well.
2. If I could do it over again, I might have stained all the planks on the top of the table BEFORE Brian had put them together. I did a pretty good job of getting in all the cracks of the table, but it would be even better had I been able to reach all sides of each plank with a paint brush.
3. I was extra careful to make sure I did this whole process in a well ventilated area.

Here is a couple more after shots.


As you can see Brian and I do pretty good work, which was first evidenced by our three kids.


Walkin’ the Plank: Our DIY Farm House Table

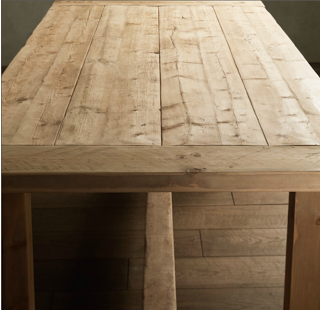
For years, I have wanted an old farm plank style table. I like the rustic look, and I really love how like wine (or a good Wisconsin cheddar) it would just get better with age. Also, since I’ve been hosting these Sunday dinners with my family once a month (mentioned here) I needed something that could seat 10-12 people. That way, I could at least have all the adults in the dining room together.

So, I started some research, and WOWSERS, old looking tables are expensive. Also, the size I was looking for added some serious coinage to the price tag. These are some of the tables I had my eye on (waiting, hoping for them to go on sale, and by sale I mean 99% off).

http://darvin.com/Item.aspx?ItemID=-2001460134&ItemNum=5397-42%2b2x84b%2b3x85b%2b96


http://www.potterybarn.com/products/solomon-rectangular-extension-dining-table/?pkey=csquare-rectangular-tables


http://www.restorationhardware.com/catalog/product/product.jsp?productId=prod1606015&categoryId=cat1537023
After seeing how much these tables were, I then, started looking at GoodWill, garage sales, craigslist, and came up with nada. I was starting to feel a bit of a time crunch too as Sunday Dinners were getting crowded, and I was sick and tired of setting up my portable banquet table every month.
Cue Pinterest! After seeing how many people have built their own tables, I convinced Brian to build us one. It didn’t really take much convincing because Brian was excited at the prospect of buying and using power tools.
So, we went from an old kitchen table with a six foot plastic banquet table covered with table cloths…
… to Brian becoming the next Norm Abram.
We found the plans for this table on www.ana-white.com After reading a bunch of other DIY blogs, and doing a little bit of research on measurements and ease of building, we went with these plans because a.) we’ve never heard anyone complain about anything Ana White builds and b.) it was the perfect size and look we were going for.
Off to Home Depot we went. Ana White makes a very easy buy list to follow, and with the help of some people at Home Depot, we picked out the best pine pieces we could find. I liked the idea of a soft wood like pine so that it could get dinged up and look aged over time.
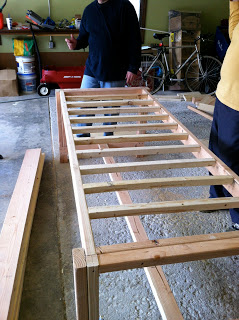
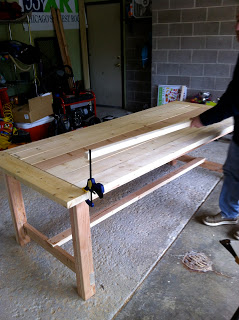
Brian with the help of a friend were able to build the table in about five hours on a Saturday, which isn’t too bad for a first time build. Here are some pictures of building day.


Then came time for staining (another first time project). I’ll share more about that next week.
Now that I know Brian can build things, and use power tools, his “Honey Do List” is getting quite long. In fact, my friends have seen the table, and are giving Brian orders for their own tables too.

And Oldie but a Goodie: Refinishing a Painted Bookshelf

This bookshelf is an Oldie but a Goodie. My Dad built this bookshelf for my oldest brother’s bedroom when he was a little kid, then it got passed around to all of the siblings and even a few of the grandchildren. Growing up, I can remember my Dad building a few sets of bookshelves as well as other furniture and tackling a lot of DIY home improvement projects.

Anyway, his love for doing projects has been handed down to me, and when my sister said I could have one of the bookcases Dad built, I of course said yes. This particular bookcase has been passed around and repainted so many times it looked pretty
shabby (as in it needed some serious TLC).
The original paint color was red, then yellow, then pink,
then white. I decided to bring it into the boys room for their toys, money
banks, and books, and paint it a fresh coat of white with a different color on
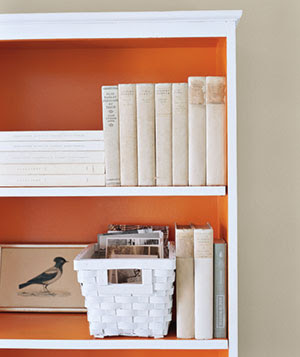
the back part of the shelves. Similar to this photo I found in my favorite magazine, Real Simple.

I loved the orange, and thought it would be ok to tie that
into the boys room because their room has become hodge podge of a bunch of
different colors to accommodate their likes.

So here’s how I freshened up this old bookcase, built by my
Dad probably 40 or more years ago.
Supplies:
Paint Stripper (Citristrip)
Putty knife
Mineral Spirits
Steel Wool
Electric Sander (Black and Decker)
Sand Paper (course and fine grit)
Primer (Behr)
Painter’s Tape (Froggy Green Tape)
Behr Decorator White in Semi-Gloss (leftover gallon)
Behr Orange Peel in Semi-Gloss (I bought 1 quart)
Gloves
Face Mask
Safety Glasses
Shop Vac
Sponge
Bucket of Water
Paint Brushes
Small Roller
Painter’s Trays.
Strip, Ooo la la: I decided to strip the bookcase simply because of the
number of layers of paint it had. I used a very gentle paint stripper I
found at Home Depot called Citristrip (I’m starting to see an orange citrisy theme here), and followed the directions to a T. Which, I know is so
un-Erin like, but since I’ve never used paint stripper before, I figured this
was the best way to go. Depending on the kind of paint stripper you use, you
may or may not need the steel wool and mineral spirits. I liked this step as it
removed any paint stripper residue and got rid of all the yucky leftover layers
of paint. I made sure I wore gloves and my face mask for this step. 


Getting Sandy: I put
on my mask and safety goggles, and got sandy. Using my electric sander, I first used the course grit
sand paper to try and remove any paint that the stripper couldn’t get. I also
tried to sand away as many knicks in the surface as possible. Then, I used the
finer grit sandpaper and sanded until the surface was smooth to the touch.
There was still some paint on the surface but if I closed my eyes and ran my
hand over the surface I couldn’t even tell. Also, to get in the corners I couldn’t use the electric sander, so I just used some pieces of sandpaper.So fresh and so clean: For this step, I used my shop vac to suck up all the dust from
stripping and sanding. Then, I used a damp sponge to wipe away all excess dirt
and dust from the surface and in the corners to get it ready for priming. After all this prep work
I’m finally ready to break out some paint brushes.

Prime: This step
was very easy. I used Behr Primer. I find it easy to use, and it goes on and
dries quickly. To get in all the corners I used my favorite paint brush, and
then on all the flat surfaces I rolled using a small roller. The picture below is after a coat of primer. 


Sticky Situation:
I went back and forth on where I wanted to tape off the bookcase to do the two
colors. I finally settled on only painting the back the bright orange color.
Once, the primer had time to cure, I taped off the the back of the bookshelf
and painted the back portion using the same mehod as the primer. I used a paint
brush to paint in the corners and then used a roller for the flat surface. This
required two coats. Before the second coat was too dry,  I peeled of the tape and was
ready for the last step.
Last but not least: The
last step was to paint the outside of the bookcase as well as the shelves a
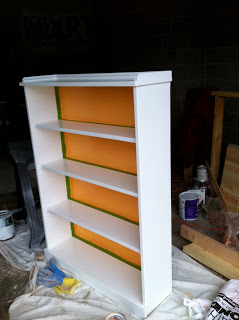
good clean white. Once the orange paint was dry (about 24 hours), I taped the orange corners to
help prevent any white paint getting on the orange back. Then using the same
method with a paintbrush and roller, I painted the bookshelf white.
Here is the finished product: The boys love it and enjoy
putting their book, toys, and money banks on it.

In The Hot Seat: Painting and Recovering Old Chairs

As in, check out this HOTNESS!
Pretty cute right? Especially considering this is what they looked like when I got them. The eighties called, and they want their powder blue back.
Why three new chairs? Well, once a month, I host my whole family for a Sunday Dinner. My
grandma used to host people EVERY Sunday. After Grandma Nano passed away, my
sister kept it going for awhile, and since moving to our “new” house (I guess
its time I stop saying new), I decided have everyone over once a month for good
food and to catch up.
When everyone is here, it is over 20 people, so I was
constantly using folding chairs, and even running out of those. That is when my
Mom said I could have her old kitchen chairs. It is an incomplete set, but any
extra chairs would work, so she sent over three sturdy chairs.
According to my Mom, these chairs were hand me downs from a
neighbor when her and my Dad were first married. And once I removed the layers
of paint and seat coverings, it was apparent these chairs were OLD.
Here is how I refinished these chairs from luke warm to HOT,
and had them done in time for Sunday Dinner!
Supplies:
Electric Sander
Sandpaper
Paint brushes
Primer
Behr Decorator White Paint
Batting
Fabric
Drop clothes
Staple gun and staples
Flat head screwdriver
Phillips head screwdriver
Take it off: Using a Phillips head screwdriver, I removed
the seats and set aside.
Rough it up: The chairs had a few layers of paint, but not
enough layers that I felt I had to strip them with paint stripper. I just
sanded them using my electric sander, and roughed them up everywhere. This was
an important step, as the last layer of paint used seemed pretty glossy, and I
knew the new coat of primer and paint wouldn’t stick to that. These chairs have
a lot of different surfaces and corners, so on the areas that I couldn’t reach
with the sander, I just ripped a few pieces of sandpaper and did it by hand.
Prime Time: I cleaned the chairs up with a damp cloth to
remove all the dust from sanding. Once completely dry, it was time to put on a layer
of primer.
Thinner the Better: I used Behr’s Decorator White Paint in
Semi-Gloss. Using a pant brush, I painted using an almost a dry brush. What this
means is, I didn’t slap too much paint on the chairs, as this causes a lot of
dripping which you then later have to sand and also causes there to be lots of
visible brush strokes. Once finished, I let the chair dry for a few hours
before doing the next coat. I did a total of three coats, which while I know
this can be a pain, and time consuming, but I wanted them to look sleek.
That’s a Wrap: The last few steps involve recovering the seats. I
found this awesome paisley fabric at JoAnn Fabrics that had a lot of the
colors I’m hoping to incorporate in our house. This is where the fun part comes
in. Using a flathead screwdriver to remove the staples, I first removed all the layers of old wallpaper that the chairs had been
covered in. I took pictures of each layer. Uncovering each layer felt like I was uncovering a decade.
80’s powder blue:
70’s Brady Bunch plaid:
60’s Jimmy Hendrix floral
 50’s burnt Orange (which you can see a tiny corner of underneath the floral).
I, next, measured the seat and cut my batting and fabric to
size with about 4 or 5 inches extra on each side to allow for wrapping around
the seat. Then, pulling tightly, I stapled the fabric in place (for another
look at how to upholster check out my post on making a headboard HERE). Once the seats were recovered, and I had the chairs cure up for a few days, I reattached the seats.
VOILA! Three extra comfy, sturdy, and cute chairs for Sunday Dinner.