Category

Cooking

You’d Think They’d Say, “No!”: Butternut, Gruyere, and Sage Mac and Cheese

I have never been so excited to see my old friend, Fall. As you can see from Home Everyday’s new look (designed by yours truly) Fall has always motivated me to start with some new goals, plan ahead, and clean house. I don’t know if it the start of school or the change of weather, but this time of year has always seemed like the perfect time to begin anew.


It has also seemed like the perfect time to try some new recipes in our dinner repertoire. Last week, I was looking for some new ideas for one of our old favorites: homemade mac and cheese. I came across this recipe from A Pretty Life in the Suburbs for Cheesy Butternut Squash Pasta Bake.
The other day when I hit up the grocery store, I was telling my cheese lady of my plans for butternut squash mac and cheese and she recommended adding some gruyere. Yes, I have a person in the cheese department that I talk to regularly. What can I say? I like cheese. (#ProTip: If you are thinking of trying out a new recipe, or making something of your own talk to the employees in your supermarket, they might have some tips for you.) While gruyere is typically pretty pricey, I only needed a small amount (about half a cup) and she was right it added just the right amount of creaminess, nuttiness, and melted perfectly.So, I took my basic macaroni and cheese recipe and doctored it up a bit. I thought everyone in my house would say no (I have some squash haters in this house), but everyone devoured it!)


Butternut, Gruyere, and Sage Mac and Cheese
1 pound short cut pasta (I used cavatapi)
1 small butternut squash peeled and diced
2 tsp olive oil
2 tsp salt
1 tsp black pepper
2 Tbs unsalted butter
2 Tbs flour
2 cups milk
1 1/4 cups shredded sharp cheddar
1/2 cup shredded gruyere
1/4 shredded parmesan
1 tsp rubbed sage
Salt and Pepper to taste 


Preheat oven to 375 degrees. 


On a baking sheet coat squash with olive oil salt and pepper. Roast in the oven for 25 minutes or until fork tender. When squash is done, mash with potato masher or puree in food processor until smooth. Reserve. 

In a large pot, bring water to a boil and prepare pasta according to instructions. Reserve the pasta in the large warm pot.

In a medium sauce pan, over medium low heat, melt butter. Whisk in flour to form a roux. Stirring constantly for about 1 to 2 minutes until flour is cooked. Next, whisk in milk. Slowly cook milk stirring occasionally until it is thick enough to coat the back of a spoon. Season with salt, pepper, and sage. Lower heat to low, and slowly add cheeses stirring until they are well incorporated.

Fold squash puree, cheese mixture, and noodles together until combined.

I served this mac and cheese with a side of veggies, but it would be great with this orchard salad!


RECIPE CARD!


If you like this post and would like to read more about all things domestic with a touch of humor, become a Home Everyday follower! For blog updates or to see other places I write such as ChicagoNow or Chicago Parent follow Home Everyday on FacebookTwitter, and Pinterest.

Linking up at Skip to My Lou for Made by You Monday.

Your Choice Herb and Lemon Hummus

Tired of the same old bland store bought hummus? I was too!

Hummus is one of the easiest things you can make, and it can be customized so many ways to appease anyone’s palate. I wasn’t always a hummus fan, and then I started making it myself. Once I did that, I was addicted to this healthy and delicious snack (so was everyone else in my house). There is now always some in the fridge.


I have found, the keys to a good hummus, are flavor and texture.

Hummus is made with chick peas. However, I realized that one of the main reasons I didn’t like hummus in the past was because I prefer a smoother texture so I wondered if I could use something else. Also, while there are some excellent brands of hummus that can be bought in the store, I found that many of the flavors were much too strong for me. So, after doing a bit of research, I have come up with the perfect formula to creating my own hummus recipes.

I made a small graph below: basically first you choose your beans (choose 1), then your acid (choose 1), then your flavorings (any combo you like), add olive oil, salt and pepper, and zip in in a food processor and you will have the perfect hummus that is customized to your taste.


With summertime here and my garden flourishing, I have been using all the herbs growing. My favorite combination right now is either Thyme or Basil and Lemon with Cannellini Beans.


Herb and Lemon Hummus
1 15.5 ounce can of Cannellini beans, drained and rinsed
1 lemon zested and juiced
1 clove of garlic
1 large handful of basil leaves OR 2 sprigs of thyme
1 TBS extra virgin olive oil
Salt and Pepper to Taste


In a food processor, add all the ingredients.


Blend until desired texture. You can serve with pita chips, vegetable, or on a veggie wrap.


If you like this post and would like to read more about all things domestic with a touch of humor, become a Home Everyday follower! For blog updates or to see other places I write such as ChicagoNow or Chicago Parent follow Home Everyday on FacebookTwitter, and Pinterest.

Follow on Bloglovin

Refreshing and Mild Pineapple Salsa

When it comes to dinner in our house, Mexican food is a safe choice. We usually all agree as I get to show off some of my culinary skills and try new recipes, and the kids aren’t opting for chicken nuggets (what IS it with kids and chicken nuggets anyway?). Also, Brian loves all kinds of cuisine, so he happily tries all of my new recipes.

Sometimes, I will try and think of a great place that Brian and I ate at when were dating or on vacation, and recreate a recipe to reminisce. That is what I did with this pineapple salsa. When we were dating, we used to eat at this great place on the North side of Chicago that had great pineapple salsa, and I have wanted to recreate it every since. I had some fresh pineapple in the house, and the kids wanted Mexican, it seemed like the perfect thing to accompany tacos and quinoa salad.

I was not worried about the kids enjoying it as it is mild and refreshing. (NOTE: I made this batch without cilantro, but you could easily add in a handful of fresh chopped cilantro and it would be awesome!)


Pineapple Salsa
1/2 pineapple finely chopped
1 large red bell pepper finely chopped
1/2 red onion minced
1 lime zested and juiced
Salt and pepper to taste


In a large bowl, mix all the ingredients. Serve with chips or top tacos or quesadillas. Store in an aright container and refrigerate, good for about 4 days. (ours didn’t last nearly that long).


Are there any recipes that you try to recreate to remember a special time?

If you like this post and would like to read more about all things domestic with a touch of humor, become a Home Everyday follower! For blog updates or to see other places I write such as ChicagoNow or Chicago Parent follow Home Everyday on FacebookTwitter, and Pinterest.

Follow on Bloglovin

Salad Season is Here: 5 Tips for Building a Perfect Salad Plus a Berry and Goat Cheese Salad

It is like the world has sighed a deep breath of relief. The sun is shining, the breeze is blowing, and going outdoors is tolerable again.

My friend Tracy Jensen of It Builds Character and someone I shared the Listen to Your Mother stage with in 2013 said, “Salad in the summer is refreshing and delicious. Salad in the winter is nothing but a cold plate of disappointment.” Which is why, now that it is FINALLY nice, I am making salads on the regular, and cannot wait to share recipes all spring and summer long.
There is nothing worse than a salad with bland lettuce, a few wedges of tomato and gloppy dressing. If you are relying on salads as meals and to eat a little healthier, you should consider the following tips.
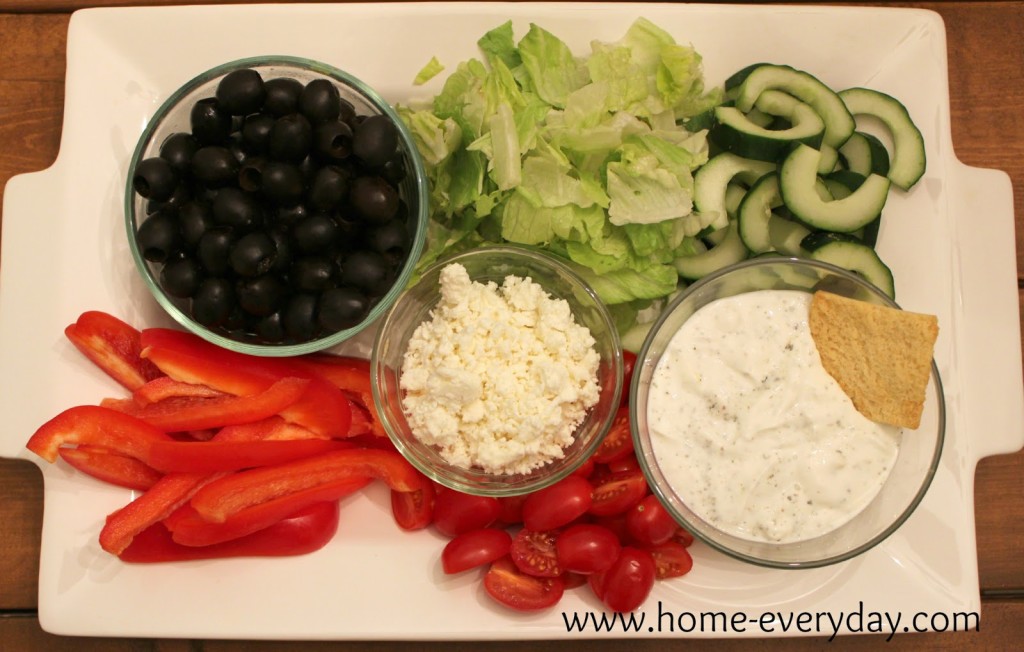
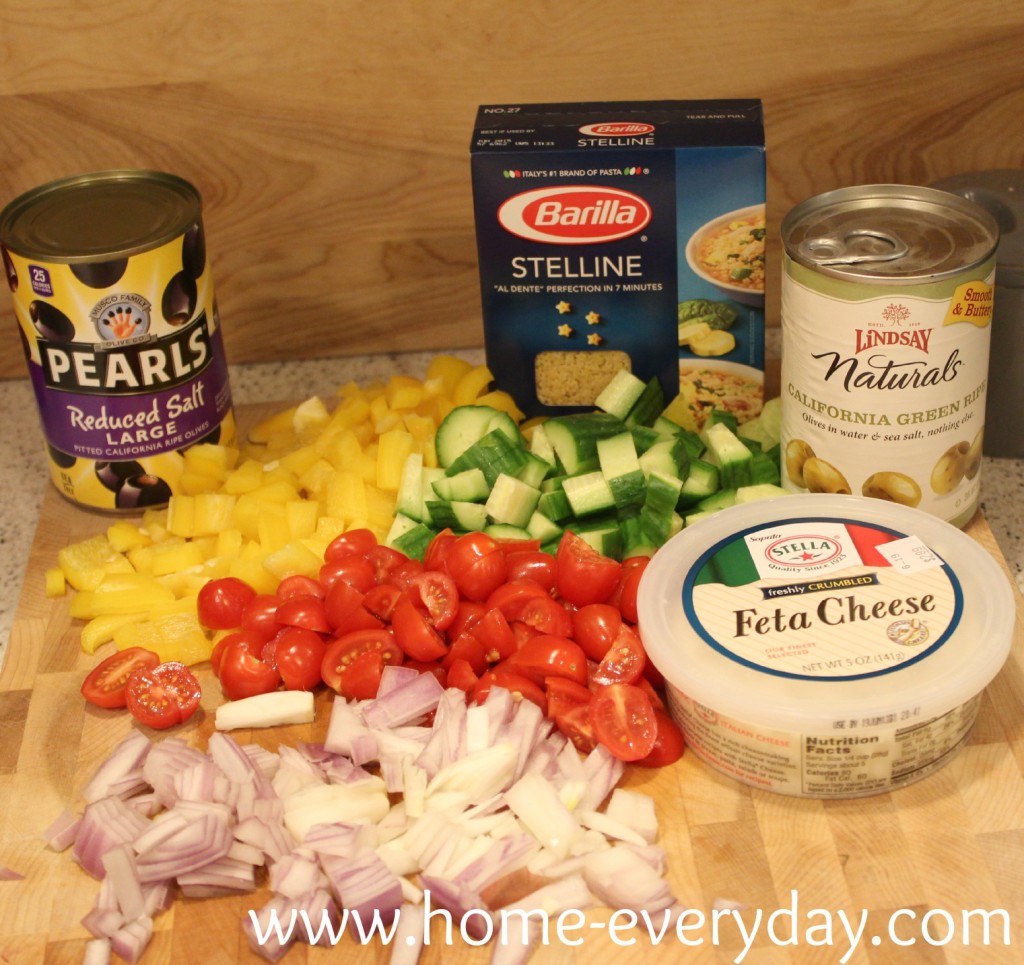
1. Consider Your Favorite Cuisine – Whether it be Asian or French, Mexican or American make a salad that is conducive to your palate. You will be more likely to enjoy salads and eat them more frequently if they contain flavors and ingredients that you like. If you don’t like Greek food, don’t make a salad with red onions, feta cheese, and olives.
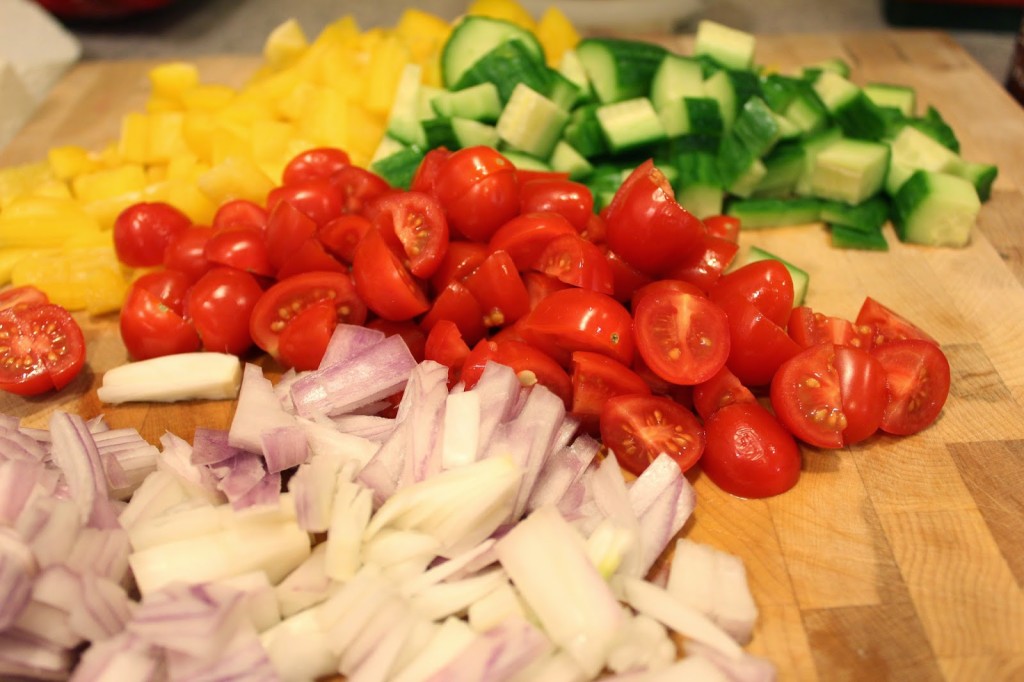
2. Think Outside the Box – When most people think about salads, they are in a strict vegetable mindset. Adding different fruits, grains, proteins, and fats not only add flavor and interest, but round out the health factor. Sure we have all see pasta salad, but how about a salad with a tablespoon or two of cous cous or quinoa as a grain option. Instead of the typical shredded cheese, how about some crumbled goat cheese or a few pieces of shaved parmesan for a different take. Instead of the same old croutons which add crunch, but are not particularly healthy how about a few walnuts? Instead of the same old chicken how about some lean shredded pork or hard boiled eggs or even half an avocado?


3. Just a Little Bit – Remember Elaine Bennis in Seinfeld talking about “The BIG Salad?” A salad is the sum of its parts. If you are tossing or shaking (like my Mason Jar Salads) salads well enough, you don’t need to add to much of any one ingredient. The lower calorie items like veggies and fruits can get a handful or two thrown into the mix, but the higher calorie items like grains, nuts, proteins or cheese get a TBS or two and I usually only do a TBS of dressing.
4. Mix it Up – When it comes to dressings sometimes I make my own sometimes I use store bought. I have found a really good balsamic and a really good strawberry poppyseed that I buy at the supermarket, but when it comes to a cilantro lime dressing I make my own. Again, this is up to you, but I will say if there is more dressing in your salad than salad, then you need to up the ante a bit in what you are putting in your salad.
5. Storage – Whether it be tupperware, glass mason jars, or storage bags there are several ways to store salads. However, there are two things that ruin salads. Moisture and stink. My tip for keeping the moisture out is a little piece of paper towel at the top of whatever container I happen to be using. This helps to absorb any extra moisture or condensation when you put your salad in the fridge. Let’s face it, some foods are stinky. Red onions, broccoli, hard boiled eggs, fish are all examples of stinky foods. If I am making a salad that contains a food that I believe to be in the stink column and I am not eating it right away, I will leave that ingredient out and store it in a separate container and add it in when I am ready to eat.
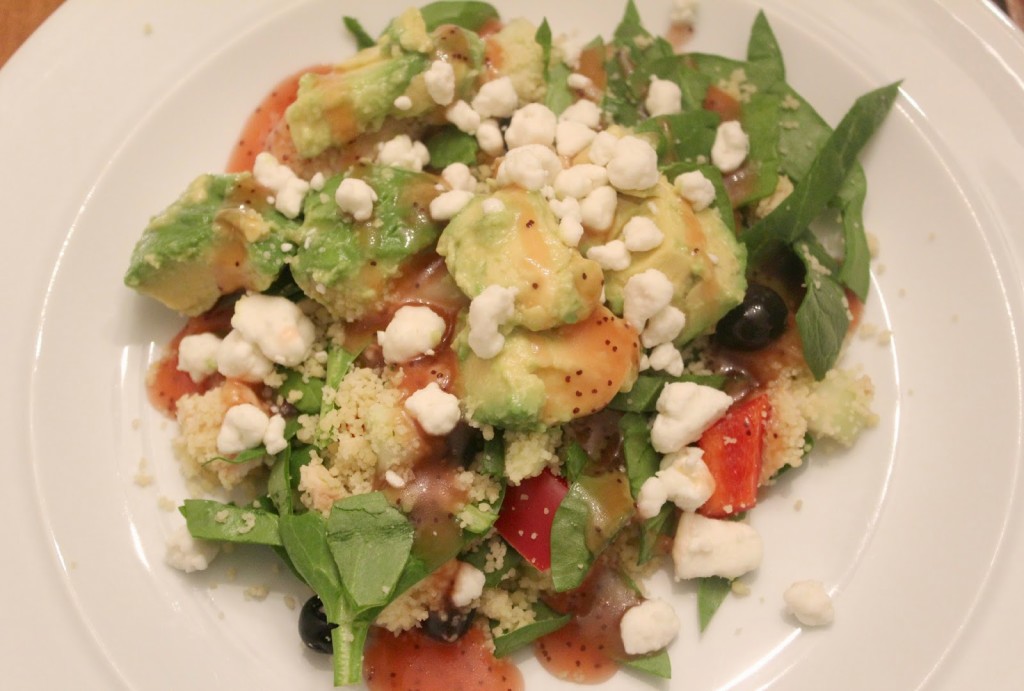
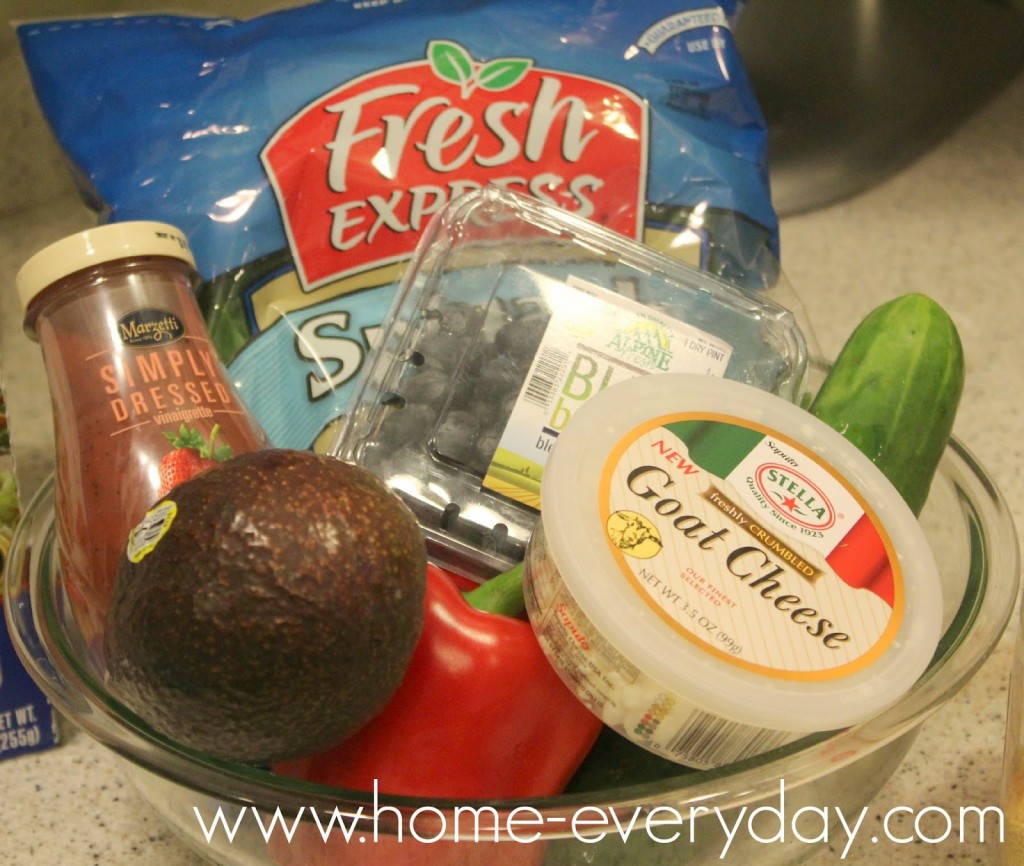
BONUS: Last week, I happened to have the following ingredients in the fridge and I came up with this amazing salad and had to share.
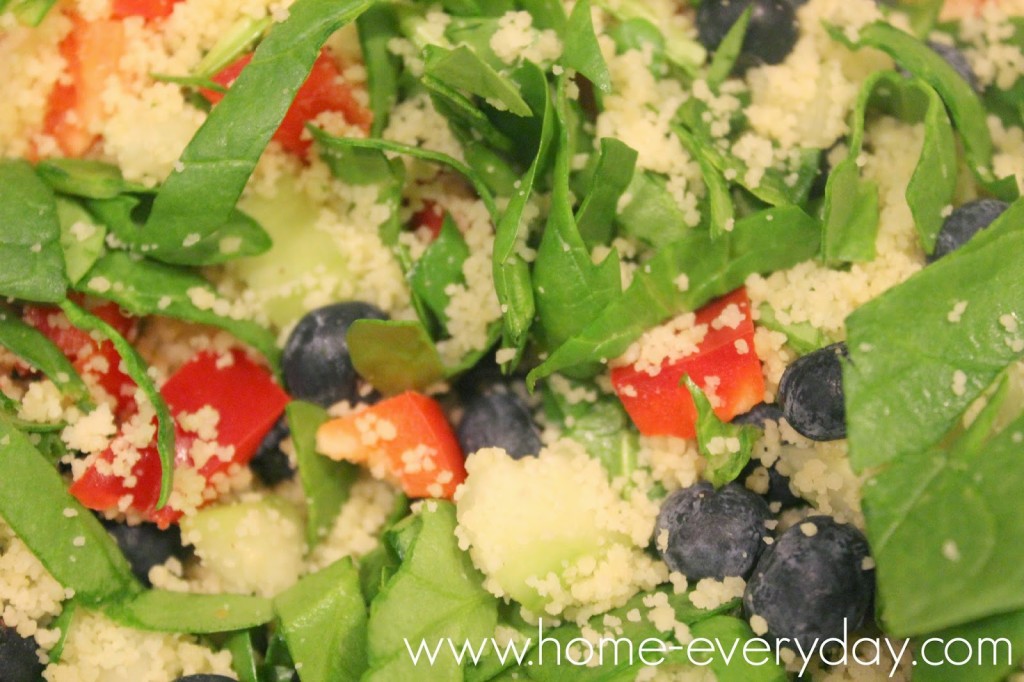
1 bag baby spinach
1 cucumber (peeled, seeded and chopped)
1 red Bell Pepper (seeded and chopped)
1 avocado chopped (squeeze a bit of lemon juice over avocado to prevent browning)
1 handful blueberries
1 cup cooked cous cous
1 grilled boneless skinless chicken breast chopped
3 Tbs goat crumbled goat cheese
1 Tbs Strawberry Poppyseed Dressing (I used Marzetti’s Simply Dressed)
In a large bowl add all the ingredients except dressing. Toss together. Serve and then add dressing to each individual’s portion.
What is your favorite salad?
If you like this post and would like to read more about all things domestic with a touch of humor, become a Home Everyday follower! For blog updates or to see other places I write such as ChicagoNow or Chicago Parent follow Home Everyday on FacebookTwitter, and Pinterest.

Follow on Bloglovin


6 Ways To Use Leftover Hardboiled Eggs

Easter has come and gone! Leftover candy is easy to deal with, but leftover hardboiled eggs, not so much. Let’s face it, once hard boiled egg is yummy, knowing that you have two dozen more in your refrigerator is daunting.

We had a great time decorating our eggs, but I spent the weekend eating chocolate and thinking what to do about my leftover hardboiled eggs. Here’s what I came up with!

1. Garbage Salad – make a salad and add a sliced egg for some added protein. My favorite is a “Garbage Salad” which includes any fresh veggies left in the fridge spinach, peas, tomatoes, peppers, carrots, cucumber, zucchini. A little cheese like feta or mozzarella. Whatever protein available some chicken or in this case hard boiled eggs. Then, I top it off with balsamic vinaigrette. This is the perfect lunch!


2. Eggs Benedict Arnold – this is a cheater version of a classic Eggs Benedict, but is perfect  to use up leftover hardboiled eggs, and is much quicker than going through all the effort for real eggs benedict on a week day. Take a toasted English muffin, place a some baby spinach on the muffin, a slice of leftover Easter ham, sliced hard boiled egg, some salt and pepper, and your favorite cheese. I use swiss. Place under the broiler for 1 minute until bubbly and serve with some fresh fruit. Pretty fancy for a weekday.

3. Egg Salad –  is a classic standby for all of those leftover hardboiled eggs. Ask your Mom, aunt, grandmother or best gal pal for their favorite recipe. Every family has one. Mine is 2 hard boiled eggs chopped, 1 or 2 stalks celery finely chopped, 2 tablespoons mayo, salt and pepper to taste. I put it on whole wheat bread with lettuce and tomato. Ta Da!

4. Deviled Eggs –  again this is an old standby and everyone has their favorite recipe. My family’s is finely mashing the egg yolks with some mayo and paprika salt and pepper.


5. Nicoise Platter – this very traditional French salad is one that is perfect now that the weather is getting warm. Boiled potatoes, fine green beans, olives, tomatoes, hard boiled eggs, and a nice piece of grilled tuna arranged beautifully on a platter is an easy dinner for a warm night.

6. BLT and E – with Easter comes brunch, and with brunch comes bacon. If you are like our family, you may have some of that leftover as well. Add some sliced egg to your BLT. You won’t regret it.

There you have it, a run down of the best way to use your leftover hard boiled eggs. How do you use yours?

If you like this post and would like to read more about all things domestic with a touch of humor, become a Home Everyday follower! For blog updates or to see other places I write such as ChicagoNow or Chicago Parent follow Home Everyday on FacebookTwitter, and Pinterest.

Follow on Bloglovin

Cruciferous Green Remedy: Roasting

Believe it or not, I didn’t always have the refined palette that I do today. In fact, I would say that it was fairly recently that I even started to be able to like cruciferous greens. Cruciferous greens are greens that I used to refer to as the “yucky greens.” They include but are not limited to: kale, cabbage, brussels sprouts, broccoli, and bok choy. They are loaded with all kinds of healthy nutrients, and to be honest I really wanted to like them, but I couldn’t get past some of their more unpalatable characteristics. Cruciferous greens tend to be extremely fibrous and can be a bit stinky.


Turns out, all these years I was preparing them the wrong way! All you have to do is ROAST THEM! Roasting has always been a go to cooking method for me as it always seems so inviting. I love how the whole house heats up and smells delicious when something is roasting in the oven, but to be honest, I really never thought to roast “yucky greens.” Now, it is the only way I prepare them.


When it comes to roasting these veggies it is more of a method and less of a recipe, so I am just going to share to examples of how I roast cruciferous vegetables, and then you can try them at home.

For brussels sprouts, I cleaned them and cut them in half. I preheated the oven to 375 degrees, and then on a clean jelly roll pan, I put the sprouts and drizzled them with a little bit of olive oil and a little bit of good balsamic vinegar. Then, I sprinkle them with some salt and pepper. Next, using my hands I just toss the mixture around a bit. Then, I roast the sprouts for about 15 – 20 minutes until they are caramelized and tender. I serve immediately. This is a great side to go with roast chicken or meat loaf since the oven is on anyway.


For kale, the method is very similar. I clean and dry the kale. I remove the fibrous stems and put the kale on a jelly roll pan. I drizzle with just a tiny bit of olive oil and salt. I toss with my hands, while the oven preheats to 375 degrees. I roast the kale for 10 – 12 minutes. When I remove the kale, I sprinkle it with parmesan cheese and then let it cool. The kale is best served at room temperature. Some people eat this like kale chips, but we eat it as an almost a side dish to lemon chicken breast or grilled flank steak.


Now, that you have an idea of how to make these healthy and nutritious greens more tasty, what will you be roasting up? I think next, I’m going to try Broccoli.

If you like this post and would like to read more about DIY, gardening, cooking, baking or all other things domestic, become a Home Everyday follower! For blog updates or to see other places I write follow Home Everyday on Facebook here.

Follow on Bloglovin

Versatile Valentine’s Treat: Red Berry Sauce

I love when I can make one recipe, but use it for a bunch of different things. My favorite example of this kind of recipe is a roasted chicken. You can use it for so many different things: eat it right out of the oven, put on top of a garden salad, make chicken salad, make tacos, have a sandwich, stir it into soup. The possibilities are endless. It’s a wonder we all don’t keep one in our refrigerator at all times.

I am starting to think Red Berry Sauce is going to be ranking right up there with a roast chicken as a pretty versatile recipe.


This wonderful smooth sauce could be used to top pound cake, ice cream, pancakes, french toast, or even be used to make a neat cocktail (come back for ThirstyThursday to see that recipe). So far it has been a nice alternative to chocolate, and is a gorgeous shade of red which is perfect for the upcoming Valentine’s Day.

Red Berry Sauce

1 pint fresh strawberries hulled and sliced
6 oz fresh raspberries
1/2 cup granulated sugar
1/2 cup water
1 tsp fresh lemon zest


In a sauce pan over medium heat add sugar and water and stir until sugar is completely dissolved. This should take about 1-2 minutes. Stir in berries and lemon zest. Bring to a slight simmer. Lower heat, and cover pan with a tight fitting lid. Cook on low for 3 – 5 minutes. Remove mixture from heat and let cool for 10-15 minutes.


When mixture is cooled, pour into a blender. Blend on medium speed for about 1 minute until berries until berries are completely broken down. Finally, pour mixture through a fine strainer.


You can eat right away or store in an airtight container and refrigerate for 3 or 4 days.


I poured ours with homemade pound cake with whipped cream.


Later this week I will be sharing a cocktail made with this treat!

If you like this post and would like to read more about DIY, gardening, cooking, baking or all other things domestic, become a Home Everyday follower! For blog updates or to see other places I write follow Home Everyday on Facebook here.

Follow on Bloglovin

Heaven in a Jar: Homemade (Nut Free) Chocolate Spread

Ahhh Nutella. Everyone who can have it loves it. However, there is a huge portion of the population that cannot have this delicious treat because of the hazelnuts in it. I was feeling bad that my littles were being denied such a wonderful and versatile treat and was trying to find something that would be similar. Unfortunately, many of these spreads have nuts or are processed in the same facilities as nuts or other allergens.

I had to take matters into my own hands. I scoured the internet, and to my delight I found ONE recipe sans nuts.

Thank you so much, SugarHero! My kids now know the joys of spreading chocolate on toast. They know how glorious pretzels and chocolate taste together. And they will never look at graham crackers the same way again.

The only change I made to the original recipe was I did add a bit more sugar and vanilla, but it is truly Heaven in a Jar.

Heaven in a Jar
1/2 cup of water
3/4 cup granulated sugar
1 Tbs unsweetened cocoa powder
2 tsp pure vanilla extract
4 squares of Baker’s unsweetened chocolate finely chopped
1 stick of unsalted butter cold and cut into small chunks
pinch of salt

In a small sauce pan, over medium heat add water, sugar and cocoa powder. Stirring constantly, cook until sugar is completely dissolved. Then, bring to a slight simmer. This should take about 2 – 3 minutes.

Remove from heat, and stir in the vanilla, chocolate, butter, and salt until a smooth texture is formed and all the ingredients are melted and incorporated.

Pour the mixture into a jar or airtight container. Cover with plastic wrap so the wrap is touching the top of the chocolate (so a skin doesn’t form), and then cover with lid.

Refrigerate overnight, and enjoy. (According to SugarHero! the spread will last for 2 weeks in the refrigerator.)

There’s only one thing I can say about this recipe. You’re welcome!

For a Printable Version of this recipe CLICK HERE!

If you like this recipe and would like to read more about DIY, gardening, cooking, baking or all other things domestic, become a Home Everyday follower! For blog updates or to see other places I write follow Home Everyday on Facebook here.

Follow on Bloglovin


Still Stranded: Turkey, Corn and Three Bean Chili

When it is as cold as it had been around here lately, I make chili. It is one pot meal, you can change it up with toppings, it is great leftover, and it warm up even an -14 degree day (You read that right. I told you it was cold).

Here is a recipe for a very hearty chili, but is healthy as it is made with ground turkey. Perfect for those who are looking to eat a little more healthy in the New Year.


Turkey, Corn, and Three Bean Chili
1 lb ground turkey
1 Tbs extra virgin olive oil
1 medium onion chopped
2 or 3 ribs celery chopped
3 cloves garlic minced
2 Tbs ground chili powder
1 Tbs ground cumin
2 tsp ground coriander
1/4 tsp ground cayenne pepper
1 tsp dried Thyme
1/2 bottle of your favorite beer
1 14 oz can white cannellini beans drained and rinsed
1 14 oz can black beans drained and rinsed
1 14 oz can red kidney beans drained and rinsed
1 cup frozen whole kernel corn
1 28 oz can crushed tomatoes
Salt and Pepper to taste
Avocado for garnish


In a large pot over medium heat add olive oil. When the oil is glistening, add ground turkey, breaking with a spoon. Add onion, celery, garlic, salt, and pepper and cook for about 5 – 7 minutes until onions are soft and turkey is cooked through. Stir occasionally. Next stir in chili powder, cumin, coriander, cayenne pepper, and thyme. Stir until well incorporated and then add beer. Bring this to a simmer (about 3 minutes) and then add all the beans, the corn, and the crushed tomatoes. Stir, lower heat, and cover with a tight fitting lid for about 10 minutes or until chili is just bubbling. Serve with sliced avocado.


This was the perfect dinner for being snowed in the past few days. Also, the leftover held us over until I could get to the grocery store.


For another great chili recipe, check out THIS ONE I made awhile ago.

For more about organization, DIY, gardening, cooking, baking or all other things domestic, become a Home Everyday follower! For blog updates or to see other places I write follow Home Everyday on FacebookTwitter, or Pinterest.


Fancy Side Dish: Sparkling Wine Risotto

Remember that part in Wayne’s World when Rob Lowe is explaining that Champagne is only from the Champagne region of France? That movie is funny and informative! Well, today recipe is called Sparkling Wine Risotto as I didn’t use real champagne but sparkling wine. I wouldn’t want to make Rob Lowe upset.


Thank you, Rob Lowe.


With the holidays fast approaching, it is time to start thinking menu. There are many recipes for champagne risotto. Two of my favorites are Rachael Ray’s recipe from her Big Orange Cook Book, and Giada DiLaurentis’s recipe with prosciutto. Both are fancy enough for a holiday dinner or fun for a weeknight dinner. Also, the fact that you have to stay nearby the stove is the perfect reason to pour a little bubbly for yourself relax a little.
In my version I add frozen peas at the end, but all risotto is made very similarly in order to get the creamy consistency. So here is my version of champagne sparkling wine risotto.
Sparkling Wine Risotto
2 tsp extra virgin olive oil
1 medium onion diced
1 clove of garlic minced
1 cup white arborio rice
1 cup sparkling wine (save the rest for toasting at dinner)
32 oz low sodium chicken or vegetable stock
1/4 cup parmesan cheese
1 tsp fresh thyme
3/4 cup frozen peas
Salt and Pepper to taste
In a small sauce pan over medium low heat pour the chicken stock and leave it to simmer.
In a large deep skillet over medium heat add olive oil. When oil is hot add onions and cook, stirring occasionally, until soften about 3 minutes. Next, add garlic and arborio rice. Stir constantly until the rice starts to toast up a little bit. This should take about one minute.
Add sparkling wine to the mixture, stirring occasionally until evaporated.
Next, add one or two ladles of chicken stock, and stir the mixture occasionally until the stock has been absorbed. Then, add one or two more ladles of stock stirring occasionally. Keep doing this until you have used all the stock.
Turn off heat and stir in thyme, parmesan, peas, salt and pepper.
Serve immediately.
Keep reading this week and next for the Home Everyday Holiday MiniSeries for more ideas on holiday decor, holiday recipes, and last minute gift ideas.

For more about DIY, gardening, cooking, baking or all other things domestic, become a Home Everyday follower! For blog updates or to see other places I write follow Home Everyday on FacebookTwitter, or Pinterest.