
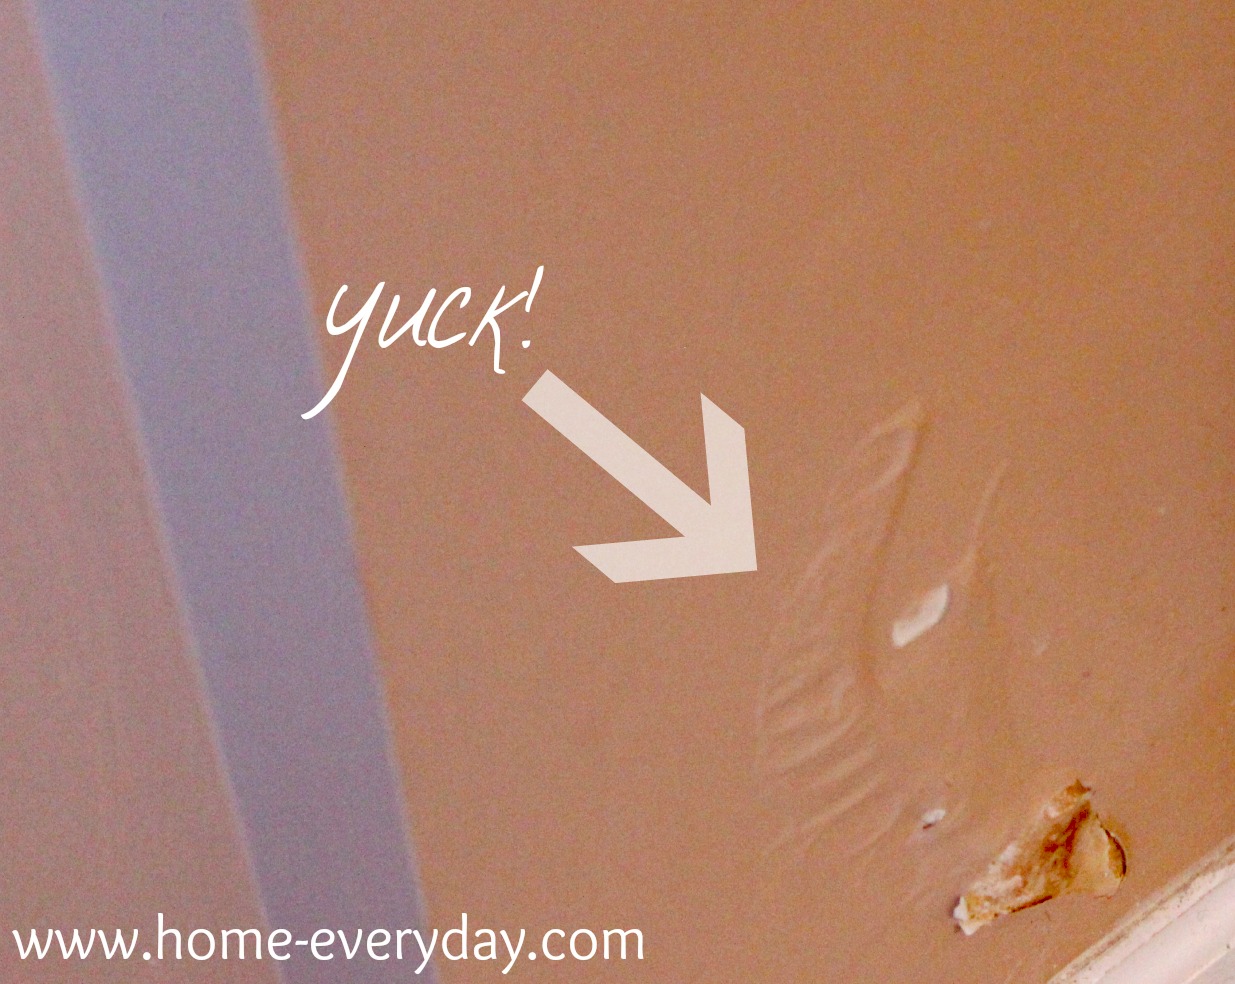
Over the summer, we noticed that some of the paint around the shower in our downstairs bathroom was starting to peel and bubble off the wall like this:
After talking to some bathroom experts, they advised us to re-caulk everything in the shower to prevent water seeping onto the drywall. We hired a professional to come and make sure that every corner of the shower was water tight. After a few weeks of making sure there were no more leaks, I decided to re-paint the bathroom.
This room was left pretty much untouched out of necessity. It was the only working bathroom in the house when we moved in, as the upstairs bathroom was getting a few facelift type upgrades (you can check that out here). Now that I have the time to paint (sort of) and we have another bathroom we can use while I work on this one, I thought I would patch up that nasty drywall and give it a fresh coat of something new.

The room is so so small, however it gets a great deal of sunlight from the window, so I wanted to do something light and soft. I also wanted to take into consideration the fact that Brian and I have been mulling around painting the nearby family room in the next few months and we like rooms to kind of flow. After seeing these beautiful pictures from my favorite blog Young House Love (I actually got to meet these creative geniuses in November, you can check that out here), I thought I would try some horizontal striping in our small bathroom too.
Brian and I made the trip to Home Depot and picked out the two perfect shades of soft gray. The base color for the room is Behr’s Barnished Clay in satin and the darker stripe is Behr’s Perfect Taupe also in satin. The paint expert at Home Depot said the satin finish is perfect for bathrooms for easy clean-up.
This is what it is looking like so far:

Brian and I think it has turned out better than we could have imagined. This technique is pretty easy and I used time saving tips for lazy people on striping from this Skinny Boppy for help (anything that caters to lazy people is up my alley). We are already thinking of other places to incorporate this easy technique. I still have to do the other walls, and as you can see I still have paint supplies all over the bathroom, but I couldn’t wait to share the progress. Hopefully, I can have a finished room to show at the end of the week. In the meantime it is time to put the paint clothes back on and finish up the stripes.


4 comments
Erin, this is SO cool–I would love to try it when we have our own home someday (and not renting)! I love stripes and never thought about incorporating them into home decor, so this has given me something to look forward to!
I also love stripes. I put on my favorite striped shirt today to keep up with the stripe theme we have going 🙂 As for incorporating stripes, I have seen a few tutorials on painting wide horizontal stripes on canvas to make curtains. That would be a great way to do it while you are renting.
Take care,
Erin
This turned out amazing! I learned the hard way in Little Mans old room the importance of prep work with striping and you just might have given me the push I need to try it again!
Thanks, I cannot wait to finish (there's paint in my hair). Try the tutorial that I linked to, it is awesome!
Take care,
Erin