Month

October 2014

Fall Decor: Better Late Than Never

It’s Fall Ya’ll, and about time I got my act together with some seasonal decor don’t you think? Sure, I have some Halloween decorations, but mostly I like to put up Autumnal decorations that can last through Thanksgiving. So, it’s ok that I didn’t put up anything until last week. That’s what I keep telling myself anyway.

Rather than trying to rush through each holiday and looking forward to the next, I have found myself enjoying the process much more this way too. We took our time putting out decorations, putting the summer stuff away, and I feel like we are living more in the present this way. That’s what I keep telling myself anyway.

My favorite space so far is the dining room. 


When I started to take everything out, I thought, “What is with all the pumpkins?” Apparently, I have a pumpkin problem. Rather than scatter them all over the house, I thought it would be nice to put them all together in one space to create kind of a centerpiece.  (My mom has since baked us some cookies to fill the pumpkin jars, thanks Mom.) 

The wreath is something I have had forever, but decided to hang with some leftover burlap to dress up the window.


In the living room, I created a couple little Fall inspired vignettes. 


The rest of the house I have kept pretty much the same, as the kids love the candles on the mantle, and the curtain sillouettes in the window I made last year.

And let’s not forget the best part of putting Autumn decor up, I finally got some new slipcovers for the living room couches, and a few new pillows. Which means our house is ready for lounging now that the weather is getting chilly.


Now, I can relax for a few weeks before I even have to think about Christmas, right? That’s what I’m going to keep telling myself, anyway.


If you like this post and would like to read more about all things domestic with a touch of humor, become a Home Everyday follower! For blog updates or to see other places I write such as ChicagoNow or Chicago Parent follow Home Everyday on FacebookTwitter, and Pinterest.

Thirsty Thursday: Warm Salted Caramel

You knew a hot beverage was coming, right? I cannot help myself! After a super chilly soccer finale this past weekend, getting my youngest bundled for a trip to a pumpkin patch, and a walk in the leaves the other day, I had to come up with something. So for this Thirsty Thursday, I came up with the perfect Autumn beverage. Warm Salted Caramel.


With the kids allergies, it is hard for me to find a Hot Cocoa mix that is safe, so we have been making lots of hot vanilla. However, I thought with the Homemade Caramel Sauce I made the other day, I thought I would try mixing that with some warm milk. When I did, I added a  little whipped cream, and sprinkle of sea salt, and it was perfection. It is what I always imagined butter beer from the Harry Potter books to kind of taste like (I’m sure that this has nothing to do with what JK Rowling had envisioned).

Warm Salted Caramel (makes one mug)

1 cup milk
1 TBS caramel sauce (Homemade Caramel Sauce Recipe link)
whipped cream for garnish
pinch of sea salt
More caramel sauce for garnish


If caramel sauce is not heated, in a heat proof dish, warm in microwave for 10 – 20 seconds or in a water bath.

In a small sauce pan over low heat, add milk. When tiny bubbles form around edges of pan, whisk in caramel sauce. Continue to stir for about 1 minute. Remove from heat and pour into mug.


Add whipped cream, drizzle of caramel sauce, and pinch of sea salt.


Serve immediately. Best enjoyed with blanket, and a Harry Potter book.

If you like this hot beverage you may like this warm vanilla spiced cider. For all things beverage related, check out the THIRSTY THURSDAY page for recipes for all kinds of drinks, cocktails, and all things drinkable!


Want to read more about all things domestic with a touch of humor? Become a Home Everyday follower! For blog updates or to see other places I write such as ChicagoNow or Chicago Parent follow Home Everyday on FacebookTwitter, and Pinterest.


Homemade Caramel Sauce

Autumn is my absolute favorite time to cook, bake, and just be in the kitchen. However, this time of year is also one of our busiest times. I often find myself putting meals in the slow cooker before we head out the door for the day, or I am whipping up a 30 minute chili after soccer practice.

Because of this, I was looking for a dessert that was quick to whip up, but could be versatile. That is when I thought of Caramel Sauce. It really is a cinch to make, takes no time at all, and like dessert sauces, can be used to top all kinds of things (cakes, brownies, ice cream, a spoon).


Plus, what is more Fall like that a caramel dipped apple?


Home Made Caramel Sauce
1 stick of unsalted butter (you don’t even have to bring it to room temperature)
3/4 cup packed brown sugar
1/2 cup heavy whipping cream or half and half
1/2 tsp sea salt
1 tsp pure vanilla extract (optional)


In a medium sauce pan over medium heat, melt butter.


Next, whisk in brown sugar until completely dissolved.


Add cream, salt, and vanilla.


Then, stirring continuously for 5-7 minutes stir mixture. It will simmer and bubble gently. You may want to lower heat slightly as to not hurt yourself while you stir.


Remove from heat, and continue to stir for about 3 or 4 minutes to let the mixture cool gently.

Pour into a heat safe container.


You can use sauce now, or let cool to room temperature, cover, and store in the fridge.


To reheat place in microwave without lid or put in a water bath of gentle simmering water.

Stay tuned for a fun Thirsty Thursday recipe with this awesome Caramel Sauce later in the week.


If you liked this dessert sauce, check out my recipe for Red Berry Sauce.

If you like this post and would like to read more about all things domestic with a touch of humor, become a Home Everyday follower! For blog updates or to see other places I write such as ChicagoNow or Chicago Parent follow Home Everyday on FacebookTwitter, and Pinterest.

You Mean I Don’t Need a Coupon at Ross? A GIVEAWAY

While I was compensated for this post, the thoughts and opinions are all my own.
 
If you have read my blog in the past, you know that I am always happy to get a good deal. Like a great sale, two coupons that do not exclude each other, the stars are aligned just right in the clearance aisle kind of deal. I will shop, scope, and look for the best deal possible. I have always been this way (I learned it from my dear Dad at a very young age). Sure, sometimes I splurge. However, when I know I can wait and get a good deal, why pay full price?That is why when Ross Dress for Less reached out, and asked me to come to their Grand Opening event at their new store on Randolph in Chicago, I thought I should check it out as  I had never been to Ross before (I know I couldn’t believe it either!) I cannot wait to go back!


Ross is like being at the best sale you’ve ever been to, with coupons on steroids! Only its not a sale! Just low prices. As I am an experienced shopper, there were items I would peruse that I would assume I would know how much they were based on brand, material, or how trendy they were, and every time I was wrong. The item was always LESS than I had anticipated it would be!


Photo courtesy of Ross Dress for Less
I am seriously in “Deal Heaven”

I went to Ross looking to round out my Fall/Winter wardrobe, but mostly I was looking for a non-denim jacket(I have a thing about wearing a denim jacket when I’m wearing jeans, I can’t do it) I could wear while running errands or on the soccer field. I found an adorable wool, lined, jacket with belt that I assumed would cost more than I was willing to spend. It was only $19.99! #SOLD


My new jacket even helps me cheer on the little ones better at soccer.

As I continued to make my way through the store, this home decor enthusiast and lover of all things domestic could not pass by the home section without at least a browse, and I noticed there were 5′ x 7′ rugs for as low as $30 and home accessories starting at $4.99.


I worked my way through the kitchen section and found the perfect bundt pan, and purchased it for less $6.99. I baked with it the next day! (Recipe to come.)


Long story short, you need to get to Ross! To help you out Ross is sponsoring a $25 Gift Card Giveaway to get you started! You will be so excited to see how far $25 can go at Ross. To enter, leave a comment telling me how you will spend your $25 at Ross. Also, for two additional entries, follow Home Everyday on Facebook and Twitter.


a Rafflecopter giveaway

If you like this post and would like to read more about all things domestic with a touch of humor, become a Home Everyday follower! For blog updates or to see other places I write such as ChicagoNow or Chicago Parent follow Home Everyday on FacebookTwitter, and Pinterest.


Free Friday: Teal Pumpkin Project

If you love someone with food allergies as I do, you might also experience the same anxiety with holidays, birthdays, occasions, and other special events. I have a confession to make. When my little ones were old enough to start reaching the tops of tables, we took a hiatus from such occasions for awhile (hangs head in shame). I hosted a lot of things, but was afraid to attend functions at other people’s houses (except family) because I was so afraid of what my kids might accidentally consume.

We have talked with our kids about how knowledge is power, and in their case knowledge means safety, but there is only so much a 2 year old can absorb. The point being: the village surrounding my kids had to be on board with helping to keep them safe, because at one point my kids were just too little to help themselves.


Now, that they are older, I am a little better about letting them out into the big wide world because they are starting to become more knowledgable about protecting themselves when it comes to what they can eat. My oldest can read labels, my middle know which adults to ask, and everyone knows to refrain from having a snack unless they are absolutely sure it is safe for them to eat when they are out and about.

However, we are coming on the scariest time of year, and it has nothing to do with terrifying costumes or spooky decorations. Halloween for people with food allergies and those that love them, can be more frightening than The Ring (seriously that movie is THE WORST).

Halloween for allergy kids often meant Trick or Treating and giving all your candy away. Attending parties and not being able to eat anything there. Bringing your own special treats to functions. It even meant being a social outcast at some schools because of certain allergy policies.

That is why when I found out about the Teal Pumpkin Project being sponsored by Food Allergy Research and Education, I was so excited! This is a chance for every single kid to enjoy Halloween. FARE is being fair. (Plus, anytime we get to do a craft project, I’m a happy camper).


The Teal Pumpkin Project operates as follows. You can download a sign here OR paint a pumpkin teal. Place the sign or pumpkin in a visible place on Halloween night. This will indicate that not only do you have traditional Halloween treats for Trick or Treaters, but you have a NON FOOD treat to hand out for allergy kids too. Some sample treats include: stickers, faux tattoos, mini bottles of bubbles, wrist bands, pencils, erasers, tiny yo-yos, super balls, or any other kind of small toy or treat you might put in a treat bag for a birthday party.

When I told the kids about this, they were so excited, and we got to painting right away.


We decided to paint one big pumpkin (this is a faux pumpkin because I thought it would be nice to have from year to year) and the kids each painted their own small one (these are real).


I found acrylic teal paint at Michael’s, and we used sponge brushes to paint. Keep in mind because of the pumpkins sheen, it is actually easier to dab the paint on rather than brush it on.


While painting we thought of good ideas for treats to hand out on Halloween night.


So, what say you? Instead of buying 5 bags of candy, will you buy 4 bags of candy and one bag of non food treats? Will you put out a sign or a teal pumpkin? Will you make Halloween a fun for everyone?

If you want to know more about the Teal Pumpkin Project you can read my post about it on Chicago ParentThis article in the where I was interviewed for Chicago Tribune. Or here, here, or here.

If you like this post and would like to read more about all things domestic with a touch of humor, become a Home Everyday follower! For blog updates or to see other places I write such as ChicagoNow or Chicago Parent follow Home Everyday on FacebookTwitter, and Pinterest.


Thirsty Thursday: Tea

Happy Thirtea (see what I did there?) Thursday!

One of my absolute favorite beverages is TEA! Hot or cold (or luke warm because I cannot get to it quick enough after folding laundry), with family or alone, while reading or writing, at the soccer field or at my dining room table.  I drink a cup almost every single day. Some of my best conversations have happened over a cup of hot tea on a cold evening or even a glass of iced tea on a hot afternoon. Plus with all the ways there are to doctor it up, it’s no wonder over half of all Americans drink it.

I’m not sure if it stems from my Irish ancestry, my Grandma Nano always offering someone a cup when someone walked through her door, my Mom serving up a tray for us after dinner, or my sister’s desire to serve me iced tea when I walk in her home, but for me tea says hospitality, home, and love. It is the perfect beverage when you’re feeling blue, it is perfect when you’re sick, and let’s face it, it is the perfect excuse to have a treat mid afternoon to accompany your tea.


Grandma and Grandpa on their wedding day.

So, with a little help from the inter webs, here are some awesome facts about tea. Maybe you will join me in a cup today.

1. Icey: According to the Tea Association of the USA, Americans prefer their tea iced. In fact, 85% of the tea drank here is cold. I will drink it iced or hot, but if I am going to have it cold it must be perfectly sweet.


2. Caffeination: While most people like a little spring in their step and prefer caffeine in their tea, there are many decaffeinated varieties. Also, here’s a tip from my Grandma if you don’t have any decaf at home and have a guest who prefers the less zippy kind. Steep the tea for about 5-10 minutes, then reuse the same tea bags, or loose tea and brew again with fresh water. The tea will have the same flavor (you may have to steep a little longer), but will be caffeine free!


3. Leaves: I learned this fun tip from my friend Emily (a fellow tea drinker). She told me that Black Tea comes from leaves that are mature and wilted, Green Tea comes from mature leaves which are untitled and sometimes steamed after harvesting help keep their green color, and White Tea comes from leaves that are immature or barely grown.

4. Who Loves It? According to The Richest the top three countries who consume the most tea are Turkey, Morocco, and Ireland.


5. Popular: Tea is so popular across the globe and is one of the oldest beverages around. In fact, according to She-Tea it is the second most consumed beverage. Water is the first.

6. Favorite Stir Ins: Everyone has their favorites, and while I prefer my hot tea black (with nothing in it at all). Many people like to add sugar or honey for sweetness. Others add citrus like lemon or orange wedges for some flavor. Like coffee, there are even people who will add a splash of cream or milk.

7. Tea Time: When my brother lived in Ireland, he told us all about Evening Tea. Which was a light meal which would be served at a time comparable to an early dinner. The largest meal of the day was served in the middle of the day. When I would go to my Grandma’s house after school, we would sometimes have tea while she made dinner. Sometimes while the kids are having afternoon snack, that is when I am making tea for myself. My vote is tea time is anytime.

If you like Tea, check out this Julep Tea or Nectarine Green Tea. For all things beverage related, check out the THIRSTY THURSDAY page for recipes for all kinds of drinks, cocktails, and all things drinkable!


Want to read more about all things domestic with a touch of humor? Become a Home Everyday follower! For blog updates or to see other places I write such as ChicagoNow or Chicago Parent follow Home Everyday on FacebookTwitter, and Pinterest.


Venturing into the Sub Basement: Planning a Man Cave for My Man

We are in the very beginning stages of thinking of what to do with our sub basement. That’s right! I bet you didn’t know that we had a sub-basement.


It is because, since we have moved into this house, it literally has been our dirty little secret. When we moved in, the previous owners had divided up this space into bedrooms. However, we started tearing down walls in the hopes of creating another living space or perhaps office space for me and Brian.


Upon tearing down walls, we found one of the most awful things you can find in an older home: 

BLACK MOLD!


Obviously, rather than do the pretty upgrades and make a cool space, we had professional mold remediation done immediately before moving in. That pretty much sucked up any money we had to do anything cosmetically to the space. So, it has sat empty with a concrete floor and partially demo’d for the past few years while we figured out what to do.


Now, that the trauma is over time has passed we are starting to figure out what we want to do down there again, and we are kind of toying with the idea of an adult space. Maybe even a Man Cave.
Brian has never been one to actually ask for such a space. He deserves it though, and if I could do this for him I definitely would in a heartbeat. I know a lot of men work hard for their families, but I was thinking about my man, and he really loves his job. He works trying to make technology better for school districts every single day. He wants kids, teachers, and administrators to have a better and easier time with technology. He hopes they can have the best possible equipment they can afford and to use it in a way that will better the educational experience. When he isn’t working his day job, he is helping other schools in need by consulting or helping on committees to make them better too. He knows his own kids are blessed, and wants other kids to have the same opportunities too.
This year he coached soccer for both boys, meaning some Saturdays he was running form one game to the other. He dubbed himself the CEO (Chief Encouragement Officer), and was the loudest cheerer for Kindergarten and First Grade soccer teams. He came home with a scratchy voice almost every Saturday. He volunteers in our church, and despite the fact he is a Green Bay fan spends a fair amount of time helping with laundry, cutting the lawn, and helping me with my little (ok sometimes big) projects. 

And he’s handsome too!


If you walk into any room in the house you’ll see it definitely has the Erin Thumbprint, so I was thinking of things that would be awesome to incorporate into the new room that would make it seem more Brian.Man Crates Gifts for Men the very manly gift baskets you have to open with a crow bar, recently reached out, and wanted to know what I would include in a space for Brian. Man Crates is trying to class up the traditional Man Cave, and thank goodness! I am so over the futons!!

Since it has been on my mind lately, I thought I would make up a mood board.


Brian's Man Cave


Brian’s Man Cave by erin-debruin-skibinski featuring graphic wall art

First up, practicality is huge for Brian, so the space would need to have all the things that Brian would use.
Desk: A nice industrial spirited desk for him to work from home. The sub basement has a closet for him to store all of his tech gear, but the desk would give him a place to spread out and work in peace (or with some hockey on in the background.)
A treadmill: This is something Brian has been toying with for awhile, and it would be great for him to have a place to when we have brutally cold winters.
Couch, Chairs, Rustic Coffee table, and TV: These things are where he can escape and watch the Packers, Blackhawks, or his favorite funny movies with the kids or when his friends come over.  The extra large coffee table is great too for all the times he likes to play cards or board games.
The outlets with USB portals: These are perfect when his friends want to plug in their phones and check in on their fantasy teams.
A Mini Fridge: This is great for all the cold beverages he want to have on hand for after a workout or while watching a game.
I chose a green and yellow color scheme with the rug and chairs as a nod to his beloved Green Bay, and left everything extremely rustic as he loves doing wood work. I’m thinking we could even make the desk and coffee table ourselves. As for decor, I thought it might be fun to find some vintage movie posters or even put up his Vince Lombardi poster.
This is a man cave, I don’t think I would mind hanging out in, what about you?If you like this post and would like to read more about all things domestic with a touch of humor, become a Home Everyday follower! For blog updates or to see other places I write such as ChicagoNow or Chicago Parent follow Home Everyday on FacebookTwitter, and Pinterest.

Fire Prevention Week: MORE Safety Tips to Make your Home a Haven

Yesterday, I shared some tips on how to maintain the fire safety equipment in your home. While I wish every home came with a one size fits all manual, they don’t, but we all have our stories. Today, I am going to share some tips we have learned living in an older home, and things we have learned from friends along the way. These tips have kept our home and the people in it safe. Hopefully, this can help you too.

After all, knowledge is power, or in this case… safety.

In The Kitchen


Keep it Clean: While this seems like common sense, keeping your oven, stop top, and grill clean can help prevent kitchen cooking fires. Make sure that you also keep the surrounding areas (counters, backsplashes, inlets) around your cooking area free of decor, electrical appliances, or anything else that could catch fire. Heat radiates off the surfaces.

Scrub, Scrub, Scrub: Regulary clean your stove, oven, microwave, toaster, toaster oven, grill, deep fryer, or any appliance that uses heat for cooking. Any scraps, oil, leftover food, or crumbs, can easily catch fire.


Get Out: When we were kids, the advice regarding kitchen fires was to assess the kind of fire (grease or other) then put out the fire with the appropriate tool (lid, baking soda, water, fire extinguisher). According to the National Fire Protection Association, the solution is now if there is a fire in your kitchen, the solution is to immediately GET EVERYONE OUT! CALL 911! The fear is the fire can spread quickly and noxious fumes can hurt you.


Electrical


Basics: When we moved into this home, we had the home inspected by a licensed electrician. It is a good idea when moving (even if the home is newer) to have an electrician take a look at all the outlets, light fixtures, and existing appliances. It is also good to know information like where your electrical panel is, and how full it is. Before making any home improvements, this is excellent information to have. You don’t want to overload your electrical panel.

Outlets: Our home is almost 40 years old and many of the outlets were original to the home. Also, outlets in the kitchen, bathrooms, and outside where not GFI (ground fault circuit interrupters). In order to be safe, we had all the outlets replaced. This has helped give us piece of mind.

Appliances: The big ticket appliances like washer, dryer, and refrigerator are all plugged directly into the wall. NEVER use an extension cord to bring power to your large appliances. Also, this is another area where keeping clean is important. Make sure to vacuum out the vents of your refrigerator regularly  to prevent dust to prevent overhearing. With all appliances (lamps, hair dryers, fans etc) even small ones make sure that the cord is in tact, there is no burning smell when in use.

A Special Note About Your Dryer: We all know to clean our lint trap every use to prevent a fire, but did you know you should also clean your dryer vent regularly to prevent fires too. Check out this great tutorial from Pretty Handy Girl.

Prevention


Garbage: Proper disposal of certain items can help save your entire home from a potential disaster. Did you know that 9Volt Batteries tossed together in the trash can cause a fire? According the to NFPA, THIS is the proper way to dispose of them: In addition, make sure other flammable items like rags with stain or varnish used from DIY projects or perhaps leftover paint cans, are disposed of safely.

Chimney: Make sure your fireplace and chimney are inspected and cleaned regularly to help prevent chimney fires.

Does anyone else have any other safety tips they would like to share?

If you like this post and would like to read more about all things domestic with a touch of humor, become a Home Everyday follower! For blog updates or to see other places I write such as ChicagoNow or Chicago Parent follow Home Everyday on FacebookTwitter, and Pinterest.


Fire Prevention Week: Tips for Making Your Home a Haven

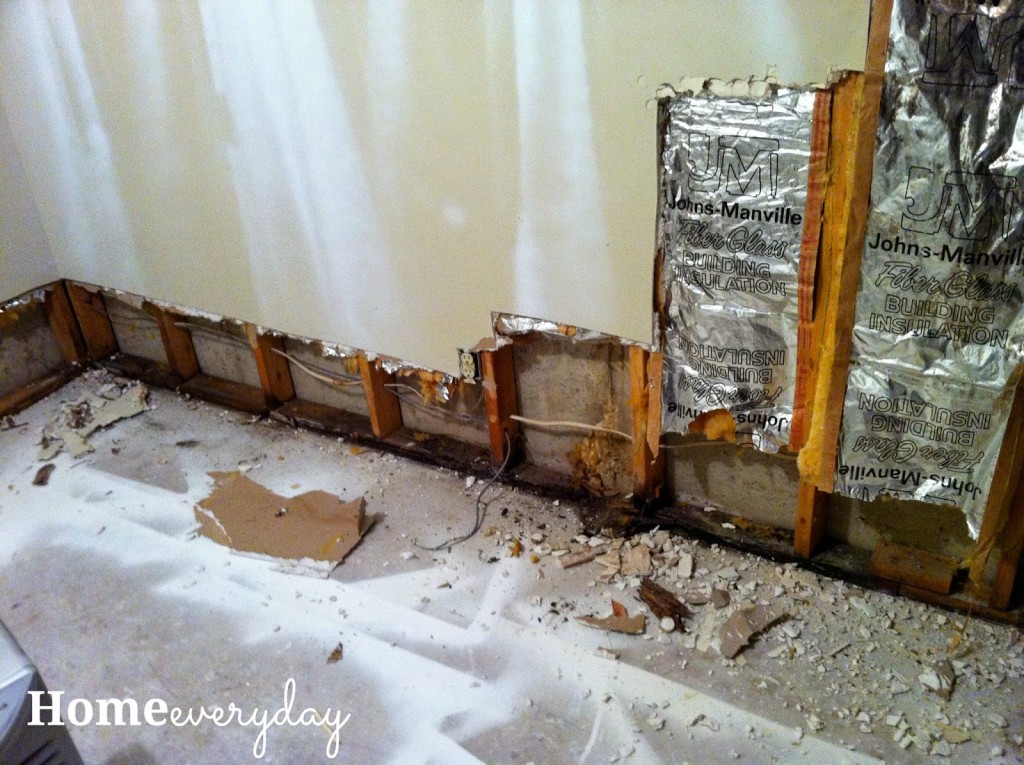
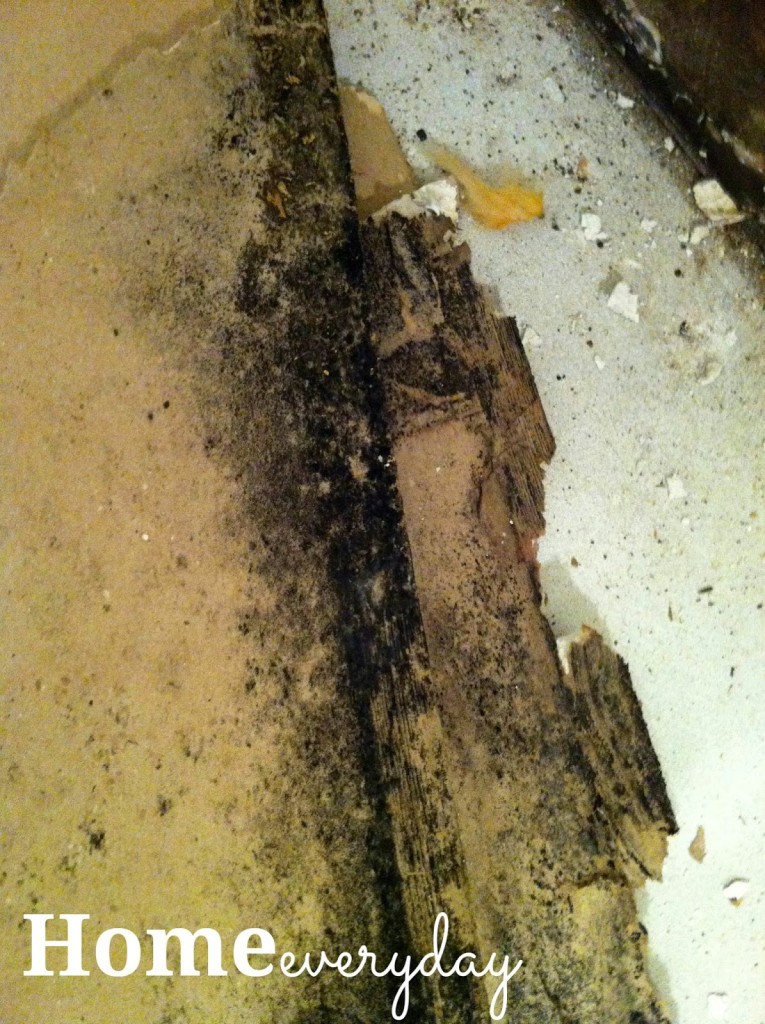
Here at Home Everyday, I love to talk crafts, cooking, baking, and decor, those are only a few things that make a house a home. When we bought this older home a few years ago, the first things we did, were to fix many of the safety concerns we had. First, we replaced the 35 year old furnace, outsourced a complete mold remediation, ripped up every ounce of old carpeting, had the chimney rebuilt, replaced and repaired the dryer vent, and took care of any part of the house that could be deemed unsafe.

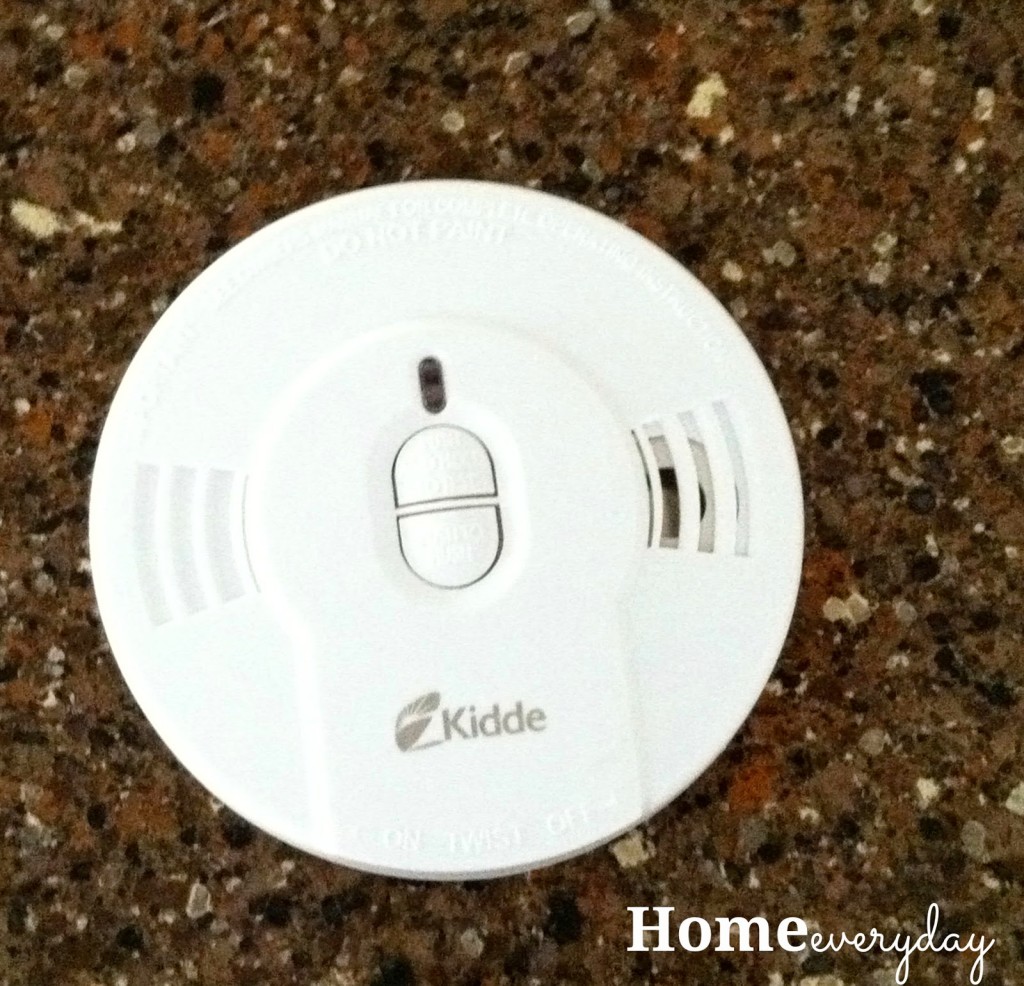
We also replaced all the smoke detectors, carbon monoxide detectors.

While these things aren’t the most fun of things to do, when it comes to a home, it is SAFETY FIRST.  After all, you keep your most precious thing in your home: your family. 

Home is a haven, and every part of is should be safe.

So, since it is FIRE PREVENTION WEEK, I thought I would share some great tips for keeping your home safe all week long.

Today, we are going to be talking equipment. There are things in your home that you must have in order to keep your family safe from fire. Here are some tips for how to use and maintain these things in case of an emergency.

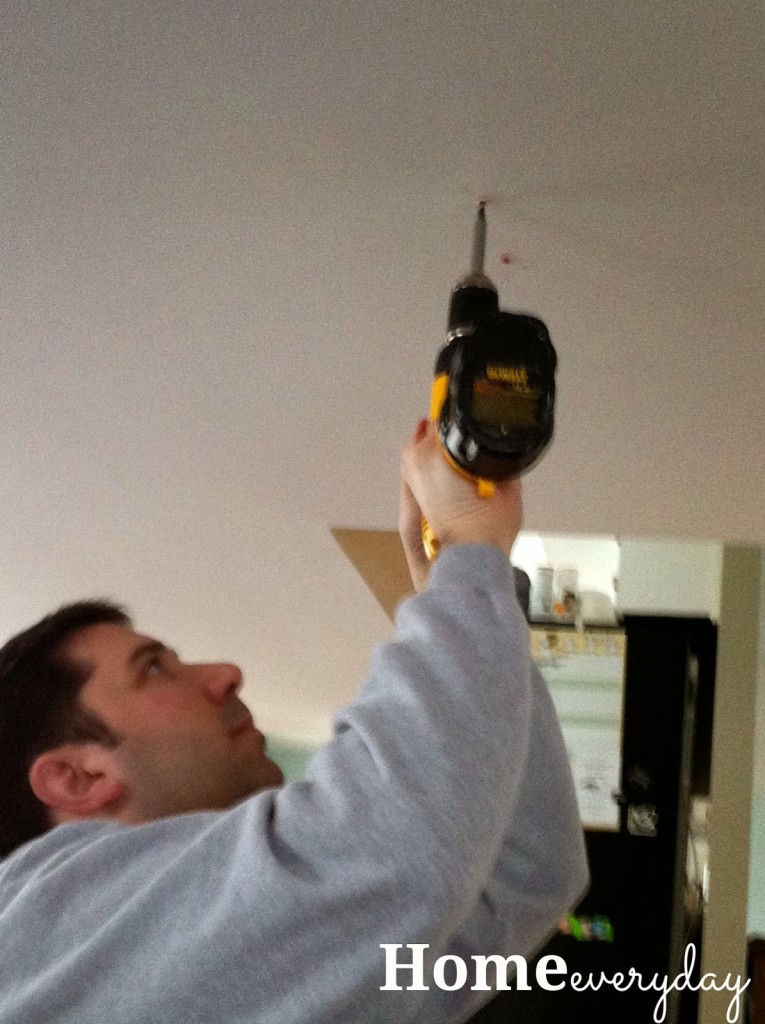
Brian’s little helper. This was over three years ago!


Smoke Detectors


Where: The best plan of action for smoke detectors is to have one on every level of your home, and one in every bedroom.


Batteries: we all know the old adage about changing the batteries when we change the clocks, which is twice a year. If they are hard wired, make sure you test them to make sure they are working.

Replace: Did you know smoke detectors are only guaranteed to work for ten years? That’s right! I couldn’t believe it either. If you know that your smoke detectors are at least that old it is time to replace them. (NOTE: If you’ve recently moved into a home that is at least ten year old, chances are they haven’t been replaced. It is time to get new ones too.)


Wireless: If you don’t have hardwired electric smoke detectors, meaning that they will all go off when one goes off, look into the new wireless battery models. These are battery operated smoke alarms that have a wireless mechanism that will sense when another smoke alarm in the house is going off and will in turn alert if there is a fire in the the house. Home Depot has them.

Practice: If you are living with little ones, let them hear the sound of the smoke alarm, and do a few fire drills to practice. Small children can be startled by the piercing sound of the smoke alarm and often hide in the event of a fire. Teach them that this loud noise is not to be afraid of, but it is a sign to get out of the house. The more they hear it and practice, the more prepared they will be if the unfortunate does occur.

Fire Extinguishers


Where: Knowing where to keep fire extinguishers is extremely important in helping to prevent a fire spreading in your home. In our home, we have one in the kitchen, one in the garage, and I am thinking of putting one in the basement where we have the laundry room.

Replace: Every fire extinguisher is different, but make sure you replace according to the manufacturer’s expiration dates. Why take the chance in a last minute situation, when you could prevent a fire from spreading further?

Used: Also, if you’ve used an extinguisher, it needs to be replaced. They cannot be re used as the pressure goes down in the extinguisher can.

Carbon Monoxide Detectors:


Where: The same rules  smoke detector apply for carbon monoxide detectors. There should be one on every level of the home as well as outside the sleeping area. Many people only have one carbon monoxide detector in their home. This is dangerous as by the time the sleeping area detector has detected the colorless, odorless, and tasteless gas, the lower levels could be filled with it. Your house needs more than one!

Batteries: Check the batteries at the same time you check the batteries in your smoke detectors.

Interconnected: Just like smoke detectors you can find carbon monoxide detectors that will are wireless or interconnected so that when one sounds, all of them will sound. This is especially helpful for multilevel houses.

What safety tips do you have for your home?


If you like this post and would like to read more about all things domestic with a touch of humor, become a Home Everyday follower! For blog updates or to see other places I write such as ChicagoNow or Chicago Parent follow Home Everyday on FacebookTwitter, and Pinterest.


Thirsty Thursday: Pear Vanilla Smoothies

There are some flavors of fall that I find completely under rated. Of course, there is always the pumpkin spice craze and then there is the apple, but for me, it’s all about PEARS lately. I have been trying to incorporate them into everything. Pear tarts, pear salads, if you follow me on Instagram or Twitter, you’ll see I tried Pear Hard Cider, and for this week’s THIRSTY THURSDAY, I made Pear Vanilla Smoothies.


They are great for a healthy breakfast or a nutritious after school snack for the kids, and contain some old fashioned oats to help keep you full.


Pear Vanilla Smoothies (makes 1)

1/2 cup vanilla yogurt (I used Fruyo)
1 large ripe pear cut into chunks
1 tsp vanilla extract
1/4 cup old fashioned oats
1/2 cup ice

Add ingredients to a blender, and blend until smooth. Serve immediately.


If you like Autumn drinks, check out this pumpkin pie shake. For all things beverage related, check out the THIRSTY THURSDAY page for recipes for all kinds of drinks, cocktails, and all things drinkable!


Want to read more about all things domestic with a touch of humor? Become a Home Everyday follower! For blog updates or to see other places I write such as ChicagoNow or Chicago Parent follow Home Everyday on FacebookTwitter, and Pinterest.