Month

October 2013

GIVEAWAY! Aquatic Experience Chicago

Yesterday was a glorious day! I am taking a mini hiatus from my Second City courses until after the holidays, so yesterday was pure family time. We were able to get some pumpkins, drink apple cider, spend some time in the crisp autumn weather, and do a few little projects around the house. To me, being able to have a day to just spend time together is nice.
After having some much needed family time, I am already looking at the calendar for some local activities to another day of uninterrupted time together before the holidays start up. That is when I put on our calendar the Chicago Aquatic Experience and I want you to put it on your calendar too! So much so that I am offering a GIVEAWAY of a FREE Daily Family Pass.
Chicago Aquatic Experience is the first of its kind and will be holding their inaugural event at the Renaissance Schaumburg Convention Center November 15th through the 17th. This amazing experience will have everything aquatic under one roof!

Photo courtesy of Chicago Aquatic Experience and the Silverman Group

Families will enjoy the floor show complete with colorful displays and creatures such as saltwater and freshwater fish as well as aquatic reptiles. (My kids are going to love it!)

Photo courtesy of Chicago Aquatic Experience and the Silverman Group

There will even be a Kid’s Aquarium Contest where children will be able to design their own aquarium (I may have to lie about my age because that sounds too much fun!)

Also, there will be plenty of speakers including Zeb Hogan host of National Geographic’s Monster Fish.

Photo courtesy of Chicago Aquatic Experience and the Silverman Group

My kids adore all things under the sea, and I cannot wait to surprise them with this amazing experience. For more information about the Chicago Aquatic Experience visit their website HERE!

If you would like some quality time with your family too and a FREE Daily Family Pass to Chicago Aquatic Experience, enter the giveaway below! Winner will be announced November 5.

a Rafflecopter giveaway

If you like this post and would like to read more about DIY, gardening, cooking, baking or all other things domestic, become a Home Everyday follower! For blog updates or to see other places I write follow Home Everyday on FacebookTwitter, or Pinterest.

Follow on Bloglovin

Apple Crisp: An Impromptu Dessert

Last week the temperatures started to plummet and I could tell everyone was kind of getting a bit worn down. So, right before I started dinner I put together the apple crisp and popped it in the oven. When dinner was ready, I took the crisp out of the oven to cool. Right after dinner, I surprised everyone with warm apple crisp and it literally only took about an extra 10 minutes before dinner to put together. Because of our impromptu dessert, I don’t have any pictures (sad trombone).

I guess you’ll just have to make it yourself.


FOR PRINTABLE RECIPE CARD CLICK HERE

Apple Crisp seems like one of those desserts that tastes, looks, and feels like it takes a ton of work and preparation, but actually I bet you would be surprised to learn that you probably have everything on had already and it only takes a few minutes to put together before baking. Also, with it being autumn, there are so many wonderful kind of apples that are fresh and readily available.

Weeknight Apple Crisp
6 to 8 large apples (I used Honeycrisp) cored and sliced
3 Tbs. granulated sugar
1 tsp. ground cinnamon
1 cup packed brown sugar
1 cup old fashioned oats
2/3 cup all purpose flour
1/4 tsp. salt
1 stick of cold butter cut into small pieces
Vanilla Ice cream for serving

Preheat oven to 350 degrees.

Spray non stick cooking spray in a 9 x 13 baking dish and set aside.

In a large bowl, combine the apples, granulated sugar, and cinnamon and toss until apples are coated with sugar and cinnamon. Put the mixture in the baking dish.

In the same bowl, whisk together brown sugar, oats, flour, and salt until well combined. Then, either with your fingers or with beaters on a very low setting cut the cold butter into the flour mixture until pea size clumps are formed.

Spread the flour and oat mixture over the apples.

Bake for 50 – 60 minutes or until top is golden brown.

Let cool for 15 minutes and then serve with vanilla ice cream.

Anyone else have any impromptu dessert ideas?

If you like this post and would like to read more about DIY, gardening, cooking, baking or all other things domestic, become a Home Everyday follower! For blog updates or to see other places I write follow Home Everyday on FacebookTwitter, or Pinterest.

Follow on Bloglovin


Gradient Dresser: You’d Never Guess its Garbage

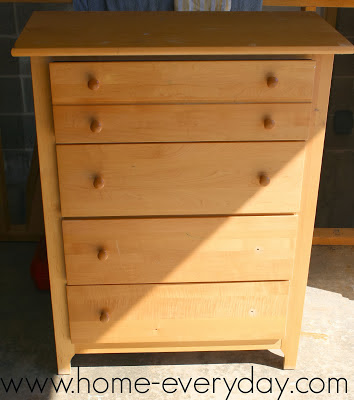
A few weeks ago on the way home from dropping off one of my children at school, I saw this fantastic dresser sitting on the curb. I circled the block a few times trying to take a closer look, and finally parked and gave it a full inspection.


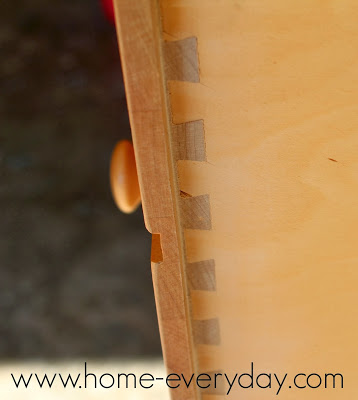
I pretended I was at a furniture store instead of someone’s driveway, and gave the dresser a full look over. It seemed solid, and I opened and closed all the drawers. There were even dovetail joints on the drawers (a tip from my favorite designer Sarah Richardson), and even though there was some hardware missing and the top drawer stuck a teeny bit, I thought I could give this dresser a new life in our home.


Another Mom who happened to see me stopped, and offered to help me put the dresser in the back of my car. So I moved aside all the sporting equipment and stuff, and we put the dresser in the back.

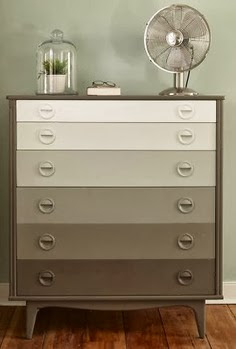
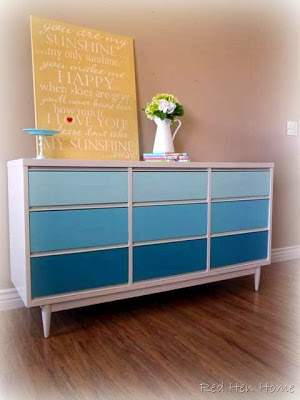
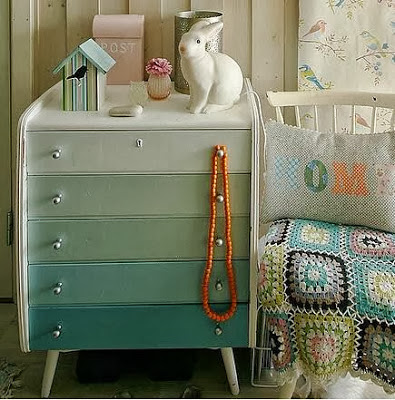
After a couple of weeks of mulling it over, I decided that I would do a gradient style dresser. Ever since I saw this one on Young House Love.


And this one on Red Hen Home.


And this one that I pinned a million years ago on Pinterest.


I have wanted one of my own.

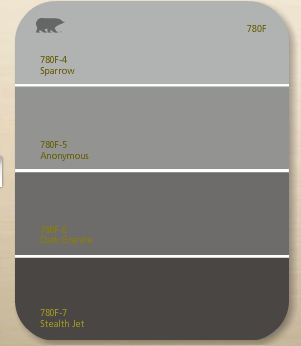
I made a quick trip to Home Depot, and picked up a gray toned color card with four colors (Sparrow, Anonymous, Dark Granite, and Stealth Jet) like the one below and had a color sample made for each color. (Note: Behr can only create color samples for flat paint, so I made sure to pick up some water based Polycrylic to apply over the flat paint for extra protection and easy cleaning).


After taking off the hardware, giving the dresser a good sanding and wipe down, I painted the dresser two very thin coats of glossy white. Then, going from lightest (top drawer) to darkest (bottom drawer), I painted the drawers a few thin coats and let it dry for two days.

After the dresser and drawers were fully dry, I put three coats of water based Polycrylic on the drawers according to the manufacturers instructions and let everything dry for a few more days.

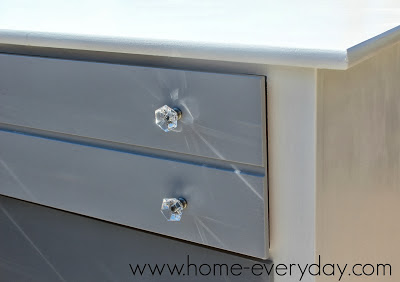
Once I thought the dresser was ready to be moved inside, I added some new pretty hardware that I had also bought at Home Depot.


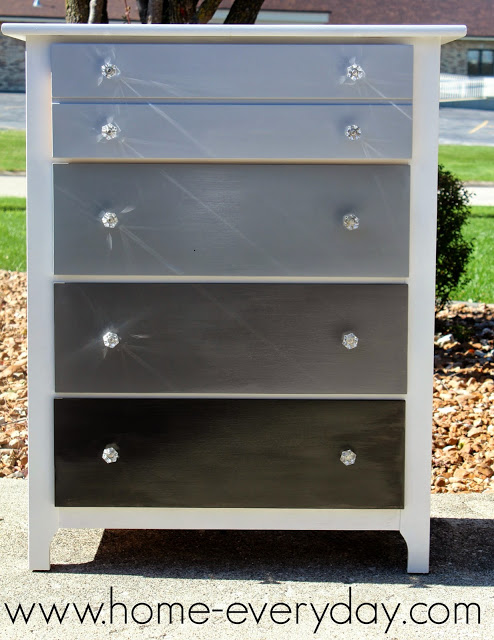
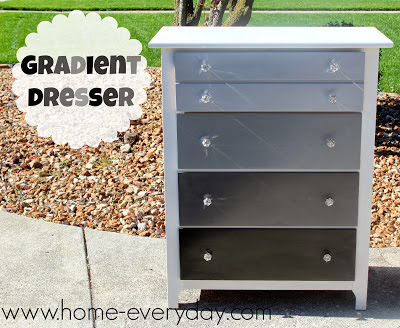
Here is my new (to me) Gradient Dresser.


I have to say, I a thrilled with the results, and I cannot wait to find the perfect place for it in my house. I bet you’d never guess this was once garbage.


You ever do any garbage picking?

If you like this post and would like to read more about DIY, gardening, cooking, baking or all other things domestic, become a Home Everyday follower! For blog updates or to see other places I write follow Home Everyday on Facebook, Twitter, or Pinterest.

Follow on Bloglovin

Thirsty Thursday: Salted Caramel Hot Cocoa

FINALLY! Things are starting to cool off here, and it is time for hot chocolate! So for this week’s THIRSTY THURSDAY recipe is a sophisticated version my favorite hot beverage.

You all know I have a love of all things salted caramel as was evidenced by the salted caramel brownies and salted caramel dark chocolate truffles. Last week, I had a salted caramel hot chocolate at Starbucks, I knew I could make it myself with some things I already had at home.


This is one of the easiest, but most decadent treats you will ever make. I used William and Sonoma Hot Chocolate mix that I had received as a gift, but you can make hot chocolate however you like and some caramel syrup and salt. The recipe for what I made is below.

Salted Caramel Hot Cocoa
1 cup Skim Milk
5 Tablespoons William and Sonoma Hot Chocolate Mix
2 Tablespoons Hershey’s Caramel Syrup
Pinch of Kosher Salt
Marshmallows for Garnish


In a small sauce pan pour milk and when small bubbles form, add hot chocolate mix and caramel and whisk until well combined. Add pinch of salt. Pour into your favorite mug and top with marshmallows.


I promise you will love this drink for a cozy and delicious start to cooler weather!

If you like Thirsty Thursday and would like to read more about DIY, gardening, cooking, baking or all other things domestic, become a Home Everyday follower! For blog updates or to see other places I write follow Home Everyday on Facebook here.

Follow on Bloglovin

Working Together: Kid Benches

When Brian or I are working on a household project, the kids definitely have their interest peaked. They want to be involved, and while that is not always possible, we do the best we can creating projects for them.

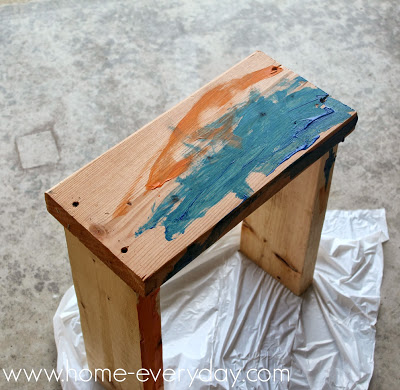
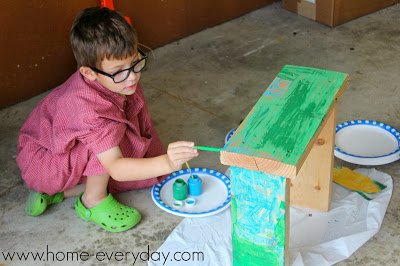
A few months ago, Brian was working on a home repair and the kids were “helping.” Brian said the idea just came to him. He grabbed a few pieces of wood, and he made benches with the boys. He said it took all of 10 minutes and the boys got to use screw drivers so that that made them very happy.


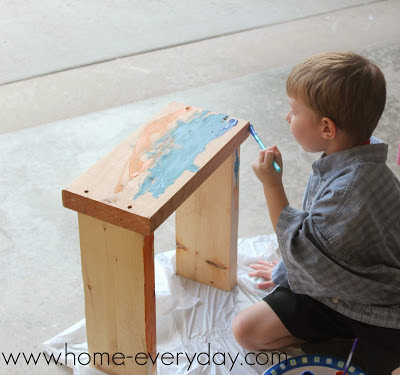
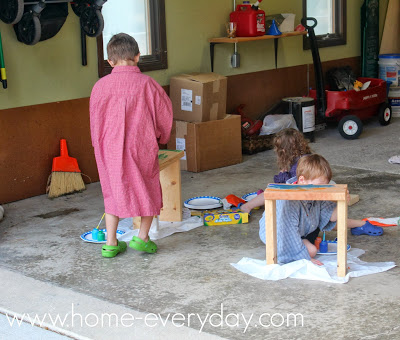
Last week, when I doing a paint project in the garage, we decided it was time for the kids to paint the benches they made with Brian. I just got out some paint smocks, brushes, and poster paints (Note: While they don’t have the best coverage Crayola Poster Paints are kids safe, no odor, and washable.)


This project was great because it used up some scrap wood we had on hand, the kids were able to create something themselves, we were all able to work together and be involved, oh and I had time to finish painting the garbage picked dresser (reveal soon, I promise).


Sometimes, people ask how am I able to do these projects when I have three little kids, and I have to say the main reason is because Brian is incredibly supportive, but the other reason is, we try to include the kids with their own projects at the same time.


I have even been known to bring out the dreaded Play-Doh when I am working on a craft. That way we are all at the table doing something fun together.

Isn’t that what this is all about anyway? To be together.


If you like this post and would like to read more about DIY, gardening, cooking, baking or all other things domestic, become a Home Everyday follower! For blog updates or to see other places I write follow Home Everyday on Facebook here.

Follow on Bloglovin

Spooky Silhouette Curtains Tutorial: A JoAnn Fabric Celebrate the Season Craft

I have been compensated for this project by JoAnn Fabrics, but all thoughts and opinions are my own.


When JoAnn Fabrics asked if I would like to participate in their Celebrate the Season Campaign, I jumped on this opportunity in a heart beat. I have always been a JoAnn shopper when it comes to crafts and DIY projects around the house.

For Halloween, the theme is Spooky Spaces. Nothing says spooky to me more than some creepy night time forest creatures. With all the windows we have in the front of our house I thought it would be spooky to have some creepy creature silhouettes hiding in the windows.


While I could have cut some shapes or painted some silhouettes onto some plain white paper, I really wanted these decorations to last from year to year. I decided to make them out of fabric and then I can hang them every year for Halloween as well as give them a quick wash in the washing machine if they happen to get a little dusty. We all know, that I don’t sew, so I had to think of another solution. When I was walking around JoAnn, I found sheets of iron on fabric adhesive. PERFECT!

Supplies:
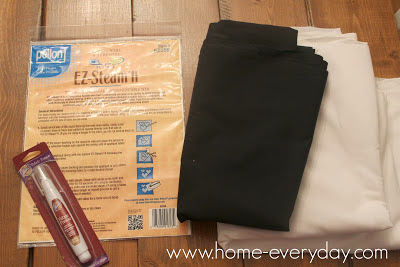
White Muslin Fabric
Black Muslin Fabric
EZ Steam Fusible Web Adhesive Sheets
Stencils or Silhouette Pictures


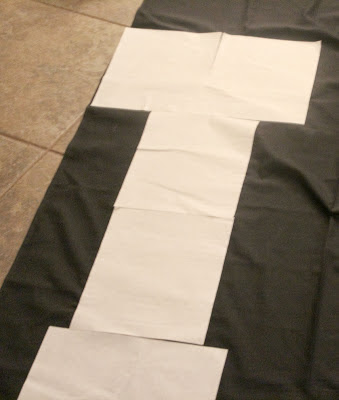
Measure, then Measure Again (and then Maybe one more time for luck): I carefully measured each of the windows. In my case, I wanted to make sure that the white fabric completely covered the glass portion of the window. I, then, cut all my white fabric to size.

Create Some Stencils: While I can do some things free hand, I thought it would be better to trace out the creatures. I searched via Google Images and found a bat, a crow, an owl and a spider. I enlarged the photos and printed them on card stock, and then carefully cut them out. (The tree was too large to print, so I did draw that myself).
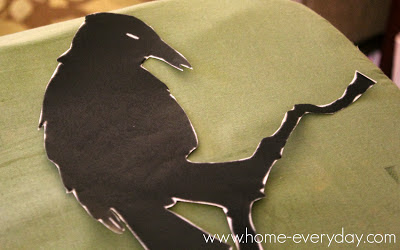


Stencil printed and cut out on card stock

Trace and Cut: Using my stencil, I traced my spooky creatures onto the paper side of the EZ Steam sheets in PENCIL. I did not want there to be any chance of marker on the fabric or blending through onto anything, so I thought that pencil was the safest way to go. (Note: Since I was doing silhouettes I did not really worry to much about which way they were facing, but keep in mind you want to trace your stencils right side down so that when you iron them on your fabric they are facing the correct way.) Next, I peeled the wax like backing off the EZ Steam sheets, and carefully pressed them onto my black fabric. Using the tracings as a guide, I carefully cut out the shapes.
 

Adhesive webbing with traced creatures affixed black fabric.

Heat it Up: Once all the shapes were cut out of the black fabric with webbing still affixed, I carefully arranged the shapes onto the white fabric. Once I was happy with their placement, I began ironing. I laid a cloth napkin over the black fabric cut out, and using a medium setting on my iron, I pressed the creature onto the white fabric for a few seconds. (Note: Different brands adhesive webbing have different instructions, please make sure to read carefully.)


Hang Them Up: There are several ways to hang these curtains in the window, but because the fabric is so light, I just used a bit of duct tape in the corners of the windows to hold the fabric in place.


Here are my creepy creatures hanging in the window. I think they are pretty spooky, and I am thrilled that I can use the decorations from year to year.

To see this craft again or more spooky spaces from other awesome bloggers, check out the JoAnn Fabric Creativity Made Simple site HERE!

If you like this post and would like to read more about DIY, gardening, cooking, baking or all other things domestic, become a Home Everyday follower! For blog updates or to see other places I write follow Home Everyday on Facebook here.

Follow on Bloglovin

Linking up at Hope Studios for Tutorial Tuesday.


Don’t forget, you can check out more creative inspiration here:  http://bit.ly/creativitymadesimple

Thirsty Thursday: Apple Orchard Punch

This week has been incredibly busy and also fairly productive for all of us. Weeks like this call for a treat at the end of the week, and this week’s THIRSTY THURSDAY is the perfect treat for adults AND kids!

The weather here has been gorgeous and unseasonably warm, so as much as I cannot wait to make some hot apple cider or some cool hot cocoa recipes, it just isn’t time. However, when I saw this recipe on allrecipes.com, I was thrilled that there was a refreshing beverage for this time of year.


Apple Orchard Punch

1 32 oz bottle of apple juice
1 12 oz can of frozen cranberry juice
1 cup orange juice
2 liters ginger ale (or sparkling wine for the grownups)
1 apple or pear

In a large punch bowl or pitcher mix ingredients. Garnish with apple slices.

I served this wonderful punch in Mason jars with lots of ice on the back patio, soaking in the last of this warm weather. The kids LOVE it! I cannot wait to surprise them with some on Friday after school, maybe with a pumpkin cookie to celebrate all we accomplished this week!


If you like Thirsty Thursday and would like to read more about DIY, gardening, cooking, baking or all other things domestic, become a Home Everyday follower! For blog updates or to see other places I write follow Home Everyday on Facebook here.

Follow on Bloglovin

Smart Cookies: Pumpkin Cookies with Cinnamon Glaze

It is Smart Cookie time again. When you think of October, of course we all think Pumpkin. In fact my friend, Shannan over at Tween Us just wrote an amazing post on all facts regarding pumpkins.

Since it is the month of pumpkins, jack o lanterns and pumpkin spiced lattes, I thought it was only fitting to include a recipe with those same flavors. These Pumpkin Cookies with Cinnamon Glaze are a unique twist and far more portable than pumpkin pie.


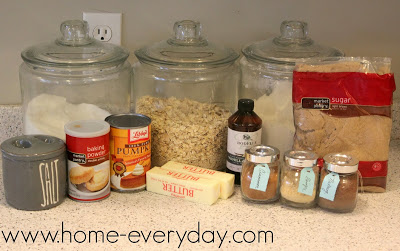
Pumpkin Cookies with Cinnamon Glaze (for printable version of recipe click here)

2 cups all purpose flour

1 1/2 cups real Quaker oatmeal
1 1/4 tsp baking powder
1 tsp salt
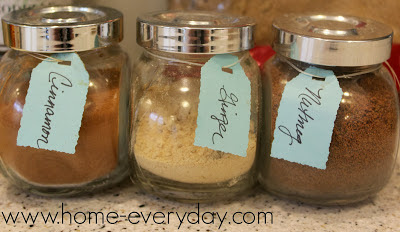
1 1/2 tsp ground cinnamon
1 tsp ground ginger
1/2 tsp ground nutmeg
2 sticks unsalted butter softened
1 cup packed brown sugar
1 cup granulated sugar
1 egg
1 tsp vanilla pure vanilla extract
1 15 oz can of pumpkin puree

Glaze
2 cups powdered sugar
3 or 4 Tbs milk
1/2 tsp pur vanilla extract
1/2 tsp cinnamon


Preheat oven to 350 degrees.

Line baking sheets with parchment paper and set aside.

In a large bowl whisk together flour, oats, baking powder, salt, cinnamon, ginger, and nutmeg and set aside.


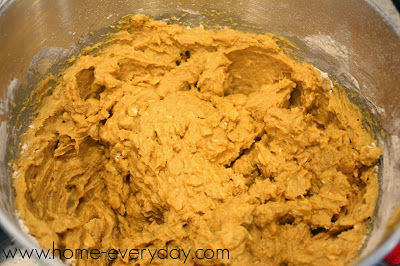
In a stand mixer with paddle attachment or large bowl using beaters, cream together butter and sugars until well combined. Add egg, vanilla, and pumpkin and mix until well incorporated. Next, add flour mixture in thirds until just incorporated (do NOT over mix).


Drop dough in about 1 Tbs. portions onto lined cookie sheets and bake for 17 – 20 minutes or until set. Let cool on wire racks.


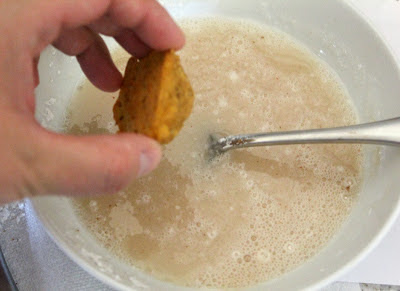
While cookies cool, mix together glaze ingredients. Then, dip each cookie into glaze and set aside for glaze to dry.


Enjoy with tea or hot apple cider!


YUM!


For Printable Version of this Recipe Click Here

For past Smart Cookie recipes, check out the links below:
Oatmeal Dark Chocolate and Dried Cherry CookiesLucy CookiesWhite Chocolate and Cranberry BlondiesChocolate Dipped Vanilla Biscotti Italian Butter Cookies with Lemon Glaze, and Salted Carmel and Dark Chocolate TrufflesIrish Creme DelightsErin’s Light Lemon Squares, Salted Caramel Brownies, Cran Apple Cookies

If you like this recipe and would like to read more about DIY, gardening, cooking, baking or all other things domestic, become a Home Everyday follower! For blog updates or to see other places I write follow Home Everyday on Facebook here.

Follow on Bloglovin

Slow and Steady: September Wrap Up

Slow and steady was the theme for September. I blogged less, but I feel like I was able to get some projects accomplished, even if it was slow and steady work. With two in school, you’d think my life would be a bit less hectic, but unfortunately school age kids come with a whole new set things to do.


Why didn’t anyone tell me about sight words?

Also, let’s not forget the other challenges like forgotten lunch pails, subbing in as a soccer coach, and parent volunteer meetings.

While I was trying to navigate the first official month of the school year, I was able to do a few of my favorite things like bake some Cran Apple Cookies, try a new Thirsty Thursday recipe, look through some old photos with my kids, and start some projects around the house.


 

Now, I totally have Halloween on the brain! The kids are deciding what to be, and I am planning some spooky decorations for around the house!

What do you have planned for October?


If you like this post and would like to read more about DIY, gardening, cooking, baking or all other things domestic, become a Home Everyday follower! For blog updates or to see other places I write follow Home Everyday on Facebook here.

Follow on Bloglovin