I am thrilled to be writing a sponsored post on behalf of Quaker and their amazing line of breakfast foods.While I was
compensated for this post by Quaker, the opinions are my own.
compensated for this post by Quaker, the opinions are my own.
This summer has been pretty active. Between soccer, ballet,
swimming, baseball, and all of the other fun activities that summer entails, I
am always trying to think of new and creative breakfasts that will keep us full
until lunch.
swimming, baseball, and all of the other fun activities that summer entails, I
am always trying to think of new and creative breakfasts that will keep us full
until lunch.

I have
been eating Quaker oatmeal for a long time, so I was thrilled to be a part of
their ongoing commitment to fueling active and healthy families. Also, because
I have three little soccer fans in my house, I was excited to learn about
Quaker’s ongoing partnership with Major League Soccer (MLS) club, The Chicago
Fire. As part of the partnership, Quaker serves as the title sponsor of
the Chicago Fire Juniors, the club’s youth player development program that
supports more than 10,000 soccer kids and families in Chicago and nationally.
On
August 9 through August 11, Quaker and The Chicago Fire will team up to host
The Quaker Invitational, which brings together hundreds of Chicago Fire Juniors
teams from around the country for a weekend of soccer, community and fun.
The two winning youth teams will earn a chance to play on The
Chicago Fire’s home field, Toyota Park in Bridgeview, IL on Sunday, August 11,
and each player in the tournament will receive a free game ticket to attend the
Chicago Fire vs. Montreal Impact MLS game at Toyota Park on Saturday, August
10.
Luckily, I only have to feed my family of five, and I cannot
even imagine fueling all of those active little bodies that will be at Toyota
Park. However, I think I have come up with the perfect summer breakfast using Quaker
Oatmeal that does not involve hot cereal. Let’s face it, in the summer, cold is
where it’s at.
even imagine fueling all of those active little bodies that will be at Toyota
Park. However, I think I have come up with the perfect summer breakfast using Quaker
Oatmeal that does not involve hot cereal. Let’s face it, in the summer, cold is
where it’s at.
Brian and I will often eat a Quaker Chewy Granola bar for
breakfast as we chase the kids out the door to an activity. The kids on the
other hand, enjoy smoothies and love anything with yogurt. I like making them
parfaits, but, often times I have to leave out the granola because of their
food allergies. This is when I came up with the awesome idea to make my own nut
free granola with my favorite Quaker Old Fashioned Oatmeal.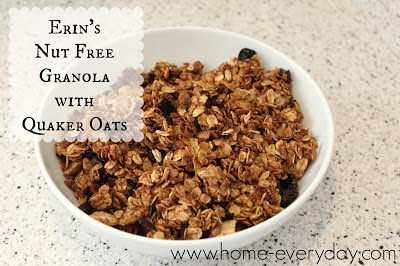

Erin’s Nut Free Granola with Quaker Oats
3 Cups Quaker Old Fashioned Oats
1 ½ Cups Rice Cereal (I used Rice Chex)
1 Cup dried berries
2 Tbs milled flax seeds
¼ cup brown sugar
¼ cup pure maple syrup
¼ cup honey
2 Tbs vegetable oil
1 tsp pure vanilla extract
½ tsp salt
Preheat oven to 350 degrees
In a large bowl, mix together oats, cereal, and berries and
until well combined. Add brown sugar, syrup, honey, oil, vanilla, and salt and
fold together gently.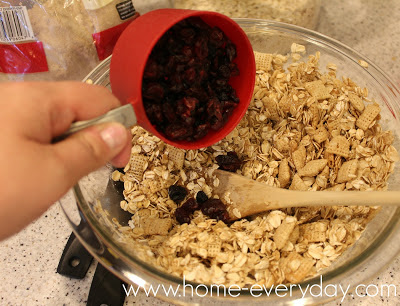
until well combined. Add brown sugar, syrup, honey, oil, vanilla, and salt and
fold together gently.

Put on a greased baking sheet, and bake for 20-24 minutes
stirring occasionally (about every 6 minutes). Remove from oven, and let cool
before serving.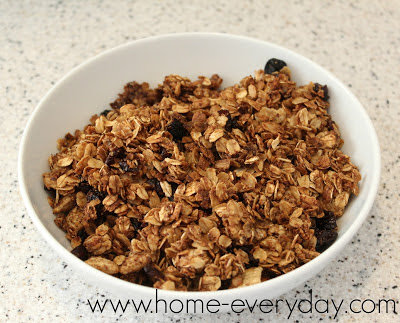
stirring occasionally (about every 6 minutes). Remove from oven, and let cool
before serving.

This recipe is great, and it would be great with a little milk poured over it as a cereal or as an afternoon snack in the car. So far though, we have already made yogurt and
berry parfaits.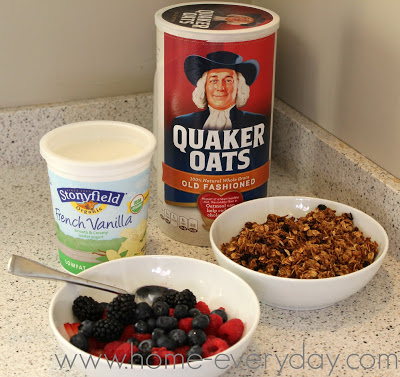
berry parfaits.

There almost as many things to do with Quaker Oats as there
are activities to do in the summer. Almost!

For more information about Quaker and their partnership with
Chicago Fire, click HERE.
Chicago Fire, click HERE.
If you would like to read more recipes or enjoy gardening, DIY, Cooking, Baking or all other things domestic you can check me out on Facebook or become a follower of Home Everyday here.