Month

June 2013

Thirsty Thursday: Homemade Lemonade

With the first official day of Summer upon us, I thought there is no better drink that represents summer than lemonade.

For this week’s Thirsty Thursday, it took a little bit of experimentation. I played around with some proportions, and have come up with the perfect mix of sugar, lemon juice, and ice cold water. This lemonade is not too tart and not to sweet.

The kids loved it and so did all the adults in the house.

Kick off to Summer Lemonade
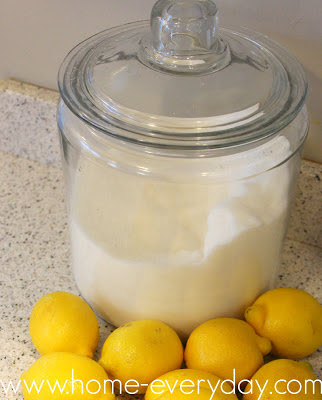
1 cup of fresh squeezed lemon juice (about 10 lemons)
1 cup sugar
1 cup water
4 additional cups of very cold water
Ice
Lemon slices for garnish

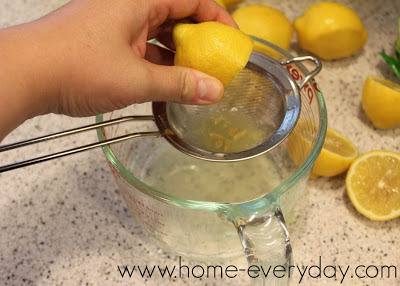
First squeeze the lemons straining any seeds or pulp. (Note: I used a very small strainer over a measuring cup as I squeezed lemons.)

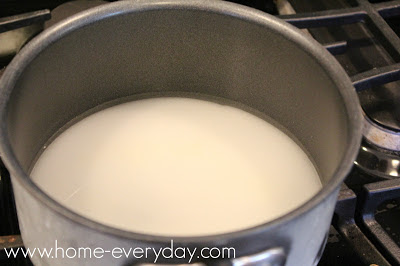
Next, in a small sauce pan over low heat bring sugar and one cup water to a simmer stirring occasionally until sugar is completely dissolved (about 3-5 minutes). Remove from heat and set aside to cool.

Once sugar mixture is cooled, pour into a pitcher with lemon juice and stir until well combined. Finally, add remaining 4 cups of chilled water and ice. Pour into glasses and serve with lemon slices.


I was also thinking how this lemonade would be great with some iced tea mixed in for an Arnold Palmer.

Now back to your regularly scheduled summer.

If you liked this recipe, and would like to read more about DIY, Cooking, Baking and all other things domestic you can check me out on Facebook or become a follower of Home Everyday here


You Better Bring It: Bunny Control


Picture yourself, waking up late on a Saturday morning with
no alarms. There is just the faintest sound of little pitter pats running into
your room and little kids yelling, “Can we have Chocolate Milk?!” Then, you let
the little ones climb into your bed and as they are looking out the window,
they say, “Mommy, Daddy, BUNNIES!”
They giggle and watch the bunnies, we all look out and see a
little teeny gray bunny hopping around the yard stopping once in awhile to
nibble on some grass. The kids giggling and shouting words like, CUTE, SNUGGLY, and FLUFFY!
Those images are cute, right? Bunnies are cute. They are fun
to look at with their little cotton like tails and fluffiness. That’s why there
are hundreds of children’s stories surrounding bunnies, rabbits, and hares.
They are lovable. I mean who doesn’t love a bunny?
ME! That’s who! Not anymore anyway.
The weeks I spent planning, and the care taken to buy just
the right amount of mushroom compost, and have the kids help me water, and
fertilize. The strategic placement of broccoli, carrots, lettuce, peas,
zucchini, cucumbers, peppers, tomatoes, watermelon was all working out
wonderfully. The weekly weeding that caused my sunburned neck. Every morning I walk out to water the garden, I’m amazed that after years of killing houseplants, I can actually grow food.
The cute, sweet, and innocent little bunnies no longer seem
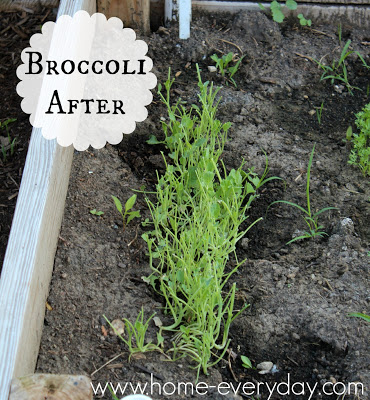
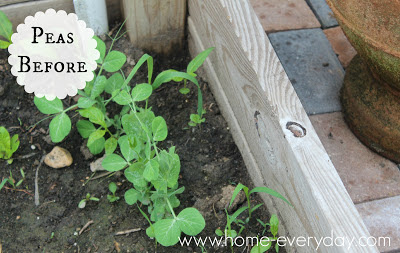
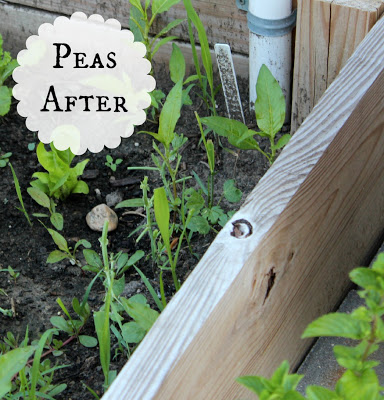
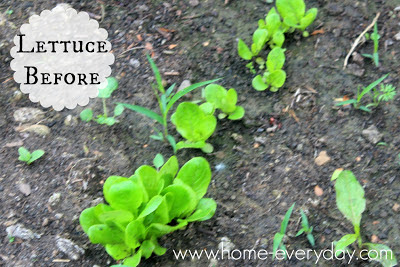
so sweet and are definitely no longer so innocent! They are ruining my garden!
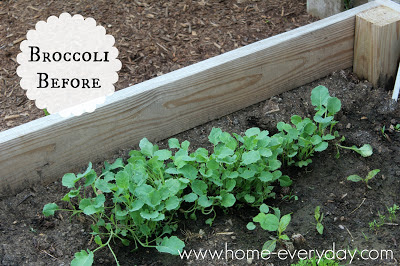
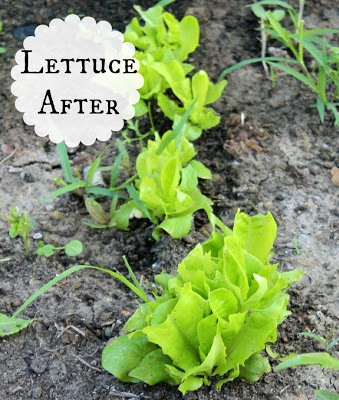
They are like GOATS! They would probably eat tin cans if I tried to plant them.Check out these before and afters:


There is no way to sugar coat this, I’m angry. I’m going to bring it! Well, as much as I can bring it without hurting the bunnies.


I’ve done a little research, and have read about marigolds,
and cayenne pepper, and fences, but before I did anything that might ruin what
I have left, and before my neighbors start calling me Farmer McGregor, I thought I would ask a wonderful resource that I have right at my fingertips: You! My readers.
How do I get these bunnies out of my garden? (Yesterday, I
walked out to water, and there was a bunny sitting in the RAISED BED staring me
down as he ate my lettuce. I did the only thing I could think of and turned the
hose on the little buggar, and he scampered away, probably glad for the shower
on a hot morning.)
Also, will my vegetables come back? I am worried that I might have to replant some of these things. Is that true?
So, to all the seasoned gardeners out there,what should this novice do about the bunnies?

Thirsty Thursday: Minty Mojitos

Welcome to the first ever THIRSTY THURSDAY on Home Everyday!

Back when I was a young single gal, my favorite night to grab a drink with my sister was Thursday. It was a great night because a lot of times our weekends were booked, and we figured we could grab a bite to eat and a cocktail and stay out a bit later talking and laughing when we knew we only had one more day at work to get through before the weekend. A lot of times our friends would join us, and we dubbed the day Thirsty Thursday.


I’ve decided to keep the Thirsty Thursday tradition alive by sharing recipes for cocktails, mocktails, sodas, milkshakes, smoothies, and other fun beverages. These beverages won’t necessarily be alcoholic, they will just a little something to wet our whistles and get us ready for the weekend.

One of my favorite cocktails especially in the summer is a Mojito. I can still remember the first time I had one. It was at a Cuban restaurant in the River North neighborhood of Chicago with Brian.


Since, I also have PLENTY of mint growing in the herb garden, I thought this would be the perfect drink to start our THIRSTY THURSDAY tradition.

Minty Mojitos
Recipe makes two cocktails
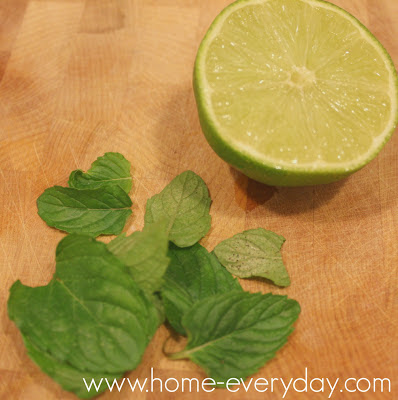
1/2 a lime cut into wedges (use the other 1/2 for garnish)
2 Tbs extra fine sugar
6-8 fresh mint leaves plus 2 leaves for garnish
3 oz light rum
Club Soda
Ice


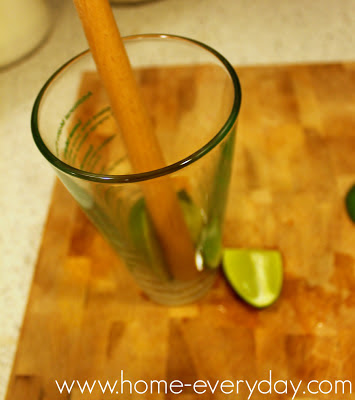
Fill two glasses or tumblers with ice to begin to chill. In a large shaker muddle together (I have a muddler, but you can use the end of a wooden spoon), limes, sugar, and mint leaves.


Add ice and add rum to the shaker. Shake for about 2 minutes and strain into glasses. Top with club soda. Garnish with extra lime and mint leaves.


Off to call my sister and see if she’d like to come by for Thirsty Thursday. Maybe I’ll make some guacamole too.

If liked these Mojitos and would like to read more about DIY, Cooking, Baking and all other things domestic you can check me out on Facebook or become a follower of Home Everyday here


Brick Paver for Beginners

As I mentioned yesterday, the previous owners of this house left a lot of things behind for us. Some were annoyances that had to be thrown away, but other thing turned out to be some pretty nice gifts.

We have a beautiful and very spacious brick paver patio on the back of the house. It was here when we moved in and it was one of the only parts of the backyard that didn’t need some TLC. As a result of the brick paver installation, the previous owners had a lot of pavers left over, and left them on the side of the house.

Brian and I have been trying to think of a wonderful way to use them, and last weekend on a whim, we came up with the perfect plan.

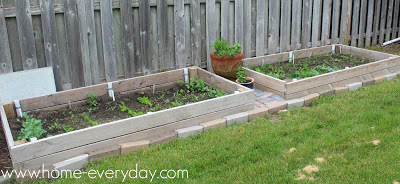
Between my two raised beds it is a veritable weed trap. It is annoying. Also, after watering it becomes pretty muddy in there, and my shoes are a mess after trying to weed.

This is when we (For the record this is one of those times, when I say “we” I mean I came up with the idea and Brian executed it.) decided to put a small section of brick pavers between the garden beds to cut down on the weeds, and help save my cute new summer kicks.

First, Brian removed any weeds and raked up the soil. He then flattened everything out as best he could by hand. He also put down a good layer of weed killer to help prevent any weeds from growing in between the crevices.

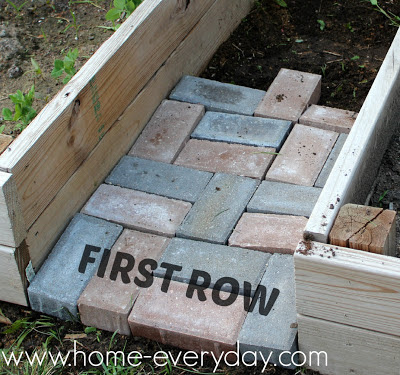
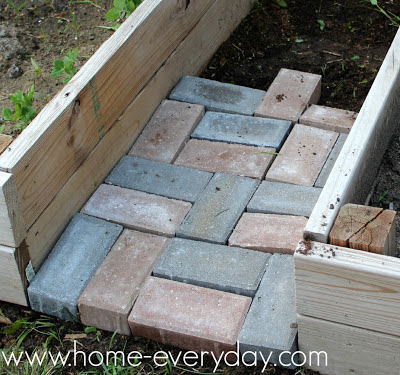
We then started laying bricks in kind of a pattern between the beds. there is only room for 5 bricks between the garden beds so it was not hard to come up with a pattern. Starting from left to right. We started with placing two bricks vertically. Then we placed two horizonally, and then one vertically again.

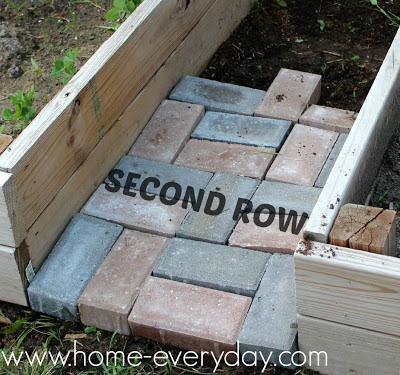
The next row kind of alternated. We placed two horizontally, one vertically and two horizontally again.

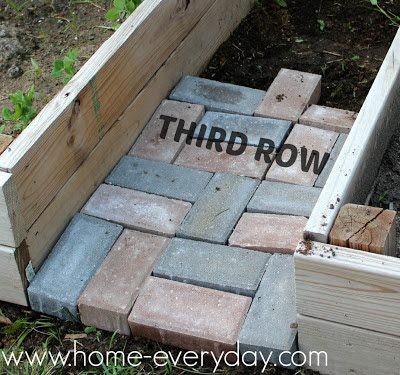
Finally, the third row is one brick vertically, two horizontally, and two vertically.

Once we had a pattern we only had to repeat it one more time to reach the end of the small “walkway.” Also, we tried to mix up the colors a bit for some variety.

I know they don’t seem level in these pictures, but once the pavers were placed I had to put down the camera and start gently tapping them into place.

Once that was done, Brian took the leftover bullet edging from the mulch project a few weeks back and continued it in front of the garden beds.

The whole project only took about an hour, oh and did I mention it was FREE? Thank you previous owners, for leaving some of the things you did.

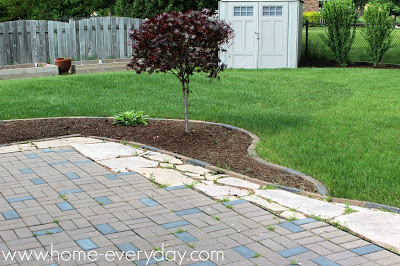
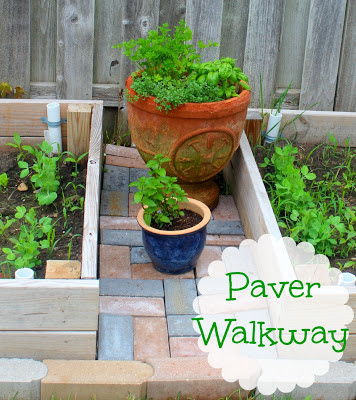
Voila! No more weeds (hopefully), and no more importantly, no more muddy shoes. I could have gotten a pair of gardening shoes, but I like the pavers better. The little walkway is also a nice place for my pots of herbs.

Also, from these pictures, you can see the vegetable garden is doing pretty well this year. I better get out there and weed the INSIDE of the beds now.

If you liked this project, and would like to read more about DIY, Cooking, Baking and all other things domestic you can check me out on Facebook or become a follower of Home Everyday here

It’s Easy Being Green

When we moved into this house, the previous owners had left behind a TON of stuff. I don’t think they were trying to make life difficult for us, I just think that there was only so much they could do. Regardless, there were a few things we ended up having to throw out, and a few things we were happy to score.
For example, we got some awesome patio furniture, box fans, and an assortment of nice ceramic planting pots. However, we also received some other not so useful things.

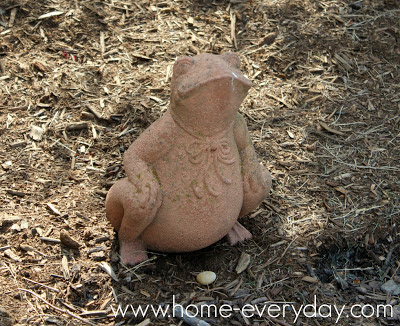
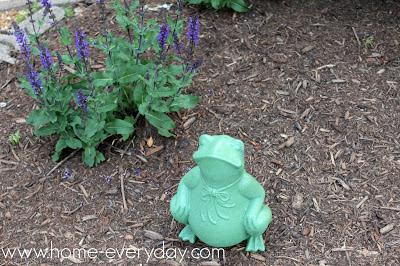
There was also this little guy waiting in the garden.

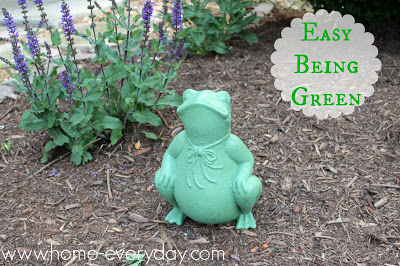
He has sat there now for the past three years, and he is sort of cute, but I thought he would be even cuter in a nice shade of green. Especially since we did some backyard updates, I decided this guy needed a makeover too. Kermit says it’s not easy being green, but honestly this project took maybe 10 minutes of my time. Therefore, EASY!
This past weekend, I grabbed a glossy can of leafy green spray paint, and I did a few coats. I made sure to protect the grass with some boxes and garbage bags. I also wore some gloves, my paint clothes, and sprayed him in the middle of the backyard with no chance of getting paint anywhere near the house, patio, or fence. I also made sure to let the paint dry for about an hour before I moved him.

I think Russell was the happiest about the transformation as green is his favorite color, AND frogs are his favorite animal. I know you shouldn’t judge a book by its cover, but let’s face it, the guy doesn’t have much else going on in the way of personality. Our old friend is new, and looks so much better.

If you liked this quick update and would like to read more about DIY, Cooking, Baking and all other things domestic you can check me out on Facebook or become a follower of Home Everyday here

Oops, How could I forget about May?

At the end of every month, I do a little wrap up of sorts, and to be honest, June just kind of snuck up on me. I looked at the calendar and thought, now it’s already the 6th?! So, before we get any further into June, let’s wrap up May shall we?

The kitchen was busy this past month. I started with salted caramel brownies. I know I’ve made some salted caramel deliciousness in the past with these truffles, but let’s face it when you find a good flavor combination it is hard to not want more.

Speaking of flavor combinations, I admitted that I probably have a caprese problem with these caprese sandwiches. Also, I put together some grilled steak fajitas, which have so far been a great and easy go to dinner for the summer. I also a made little treat to celebrate the end of the school year and celebrate summer: brownie pops.

Many of the projects that have been taking place around here have involved some curb appeal and the great outdoors. Since we spend a great deal of time outside in the summer, it was important that we finish up a few projects. The first thing we did was work on was getting a new front door. Also, we finished up some projects in the backyard like removing some overgrowth and adding mulch and brick bullet edging. FInally, I planned and planted the seeds in our vegetable garden.

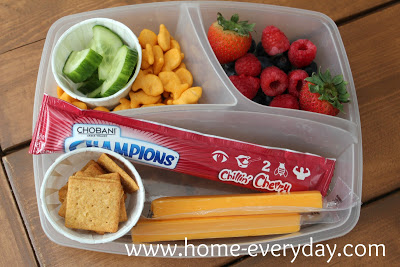
May was also busy with the end of the school year for the kids. Also, with all the outings we have been going on lately now that SCHOOL’S OUT FOR SUMMER (sung like Alice Cooper) I shared a few tips on packing meals on the go for summer picnicking. Also, I have been trying my best on working on some photography skills.

As you can see, it has been busy around here, but the highlight of this month was my performance in Chicago’s Second Annual Listen To Your Mother Show. I was honored to be a part of such a wonderful program and in the company of such talented ladies. To see my posts about LTYM you can click HERE, HERE, and HERE. If you would like to see what I wrote and performed you can click HERE!

Photo Courtesy of Sabrina Persico

Whew if you thought that was busy, check me out on Facebook or become a follower of Home Everyday here


An Herb Garden

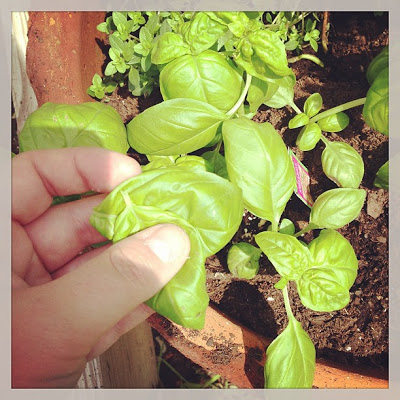
If you follow my fan page on facebook, you’ll see I was picking some basil in my garden yesterday for lunch. Yes, I was making another caprese sandwich. I cannot help it, they are delicious.

As most of you know, this year marks the start of my second vegetable garden (you can read about 2012’s garden here, here, and here and 2013’s garden here). After lots of planning, and year of growing under my belt, I already feel more confident. However, there is one thing that I have tried over and over without success and that is growing herbs from seeds.

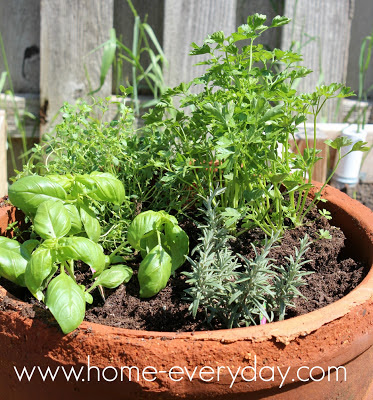
For whatever reason, my herb seeds never do well and very rarely survive. So, for the second year in a row I have bought herb plants at Home Depot, and put them in a pot near the vegetable garden.


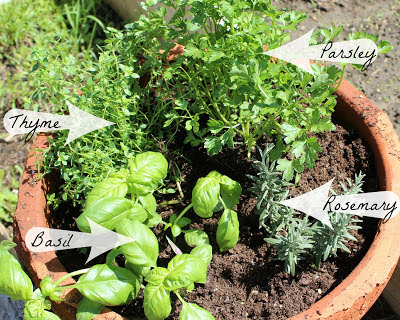
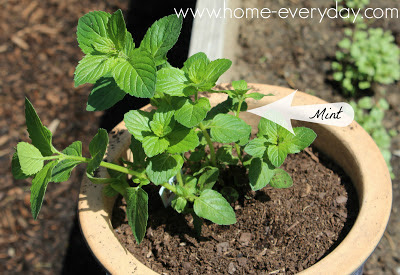
This year, I decided to plant sweet basil, rosemary, Italian flat leaf parsley, thyme, in one pot and mint in another.

I chose herbs that I would use a lot of in my cooking. This is my first experience with mint, but I have to say I’m pretty excited about making some mojitos very soon.

Anyone else have an herb garden? Want to share some cilantro with me?

If you liked this post and would like more information on gardening, cooking or DIY projects, check me out on Facebook or become a follower of Home Everyday here


Summer Treat: Banana Chocolate “Ice Cream”

When the kids are watching Disney Channel, I sometimes watch with them. Ok, ok, you caught me sometime I watch without the kids. I cannot help it, I think Good Luck, Charlie is pretty funny for a kids show.

Anyway, sometimes in between shows there is this little cooking segment. I’m not really sure who hosts it, but I do take notice anytime anything cooking related comes on television.

A few weeks ago, I saw them make banana “ice cream.” I couldn’t believe how healthy and simple this “ice cream” was to make. The reason I keep putting “ice cream” in quotes is because there is no cream, milk, eggs, or sugar in this ice cream, but I’m not really sure what else to call this treat. In the thirty second spot on TV, I pretty much got the gist of the recipe and and I could not wait to try it as a summertime treat.


As you can see, I did make one change though, I added some chocolate syrup, because let’s face it… everything is better with a little chocolate. However, the chocolate is completely optional, and I think would be great with all kinds of other toppings or mix ins.

Chocolate Banana “Ice Cream”

4 large ripe bananas cut into sliced
2 Tbs chocolate syrup

Put the sliced bananas in a freezer safe container or freezer bag. Put in the freezer for at least 6 hours or overnight.


Next, put in a food processor and begin to blend until fluffy consistency is formed.


Add chocolate syrup and blend for 10 seconds until well combined. Serve.


Suggestions for Other Toppings or Mix Ins
– Sliced strawberries
– Sprinkles
– Chocolate chips
– Almonds
– Pineapple chunks
– Nutella
– Peanut Butter
– Blueberries
– Sprinkle of Cinnamon

Do you think you could get any healthier than whipped frozen bananas that taste like Ice Cream for dessert?

I love my readers! If you liked this post and would like to read more, check me out on Facebook or become a follower of Home Everyday here.