Month

January 2013

Baby Tips: Homemade Babyfood

When my kids were babies, I made home made baby food. I’m sure there are moms out there that want to roll their eyes, but honestly, it wasn’t that difficult.

There were a few reasons that prompted the whole thing, such as I like to save money, I like to cook, I like to know what my kids are eating, and we were already starting to see some food allergies developing in the kids.

While I do realize this is not the choice for everyone, I was happy that I did it, and I feel like my kids got to try some variety of food that they would not have otherwise gotten to taste until they were much older.


Here are some tips I learned along the way:

– Baby feeding is typically a hot topic, and pediatricians are sometimes changing their minds on when to start feeding purees and also, what types of with which to start. Also, every child is different, so please talk to your pediatrician before starting any type of pureed food.

– There are baby food cook books and awesome resources. Some books I read were: Top 100 Baby Purees by Annabel Karmel and Super Baby Food by Ruth Yaron.

– The best online resource I have found for homemade baby food and recipes is Wholesome Baby Food. It is like a one stop shop for all you need to know.

– The supplies I had on hand in addition to a regularly stocked kitchen were a food processor, a fine strainer, and ice cube trays with covers.


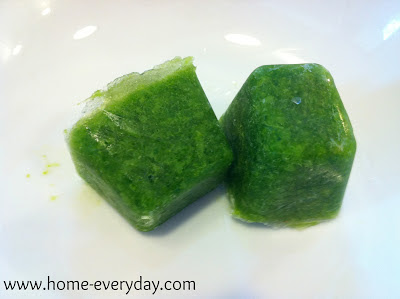
– When I cooked, I would make huge amounts, freeze it, and then store the cubes in freezer bags. I would only actually have to cook about once a month.

– Make sure you know all the rules regarding safe handling instructions for food. You can get a lot of information regarding food prep and storage from Wholesome Baby Food or Super Baby Food.

– There are several ways to cook baby foods, but certain methods help food retain their nutrients better. For example baking, steaming or boiling all have different advantages.


– The only thing I did not make myself were the cereals. I thought they would be too difficult to make, as well as there are several healthy and inexpensive brands. I bought the Earth’s Best brand.

If this is something you decide to do, I hope these tips are helpful. Happy Cooking!

P.S. Take a walk down memory lane with me today over at South of I-80. I’m talking my two favorite pizza places.

If You Say So: Rocket Ship Construction

My kids are learning about outer space in school. Planets, rockets, stars, moon, etc. You can only imagine the questions. I have been a little scared to mention the whole NASA space exploration thing to them. I know they would be heartbroken, but by the time they are of age, maybe they can go to space.

If you follow me on Facebook or Instagramyou saw that my kids created something.


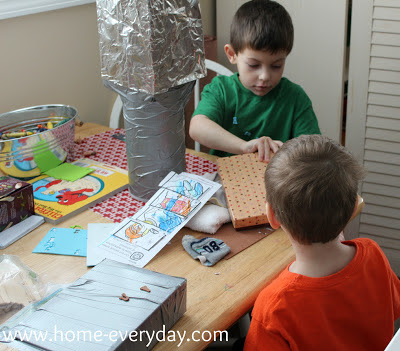
A few weeks ago, the teachers asked us to save boxes of all shapes and sizes for in class projects regarding space. They also asked for paper towel and toilet paper tubes. I guess I went a little overboard. When my husband dropped them off, they said they didn’t need this many boxes. So, we brought some of them back home. I was going to throw them in the recycle bin, but the kids squealed, “Let’s make a rocket!”

So we did.

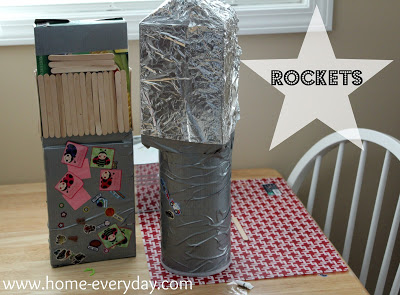
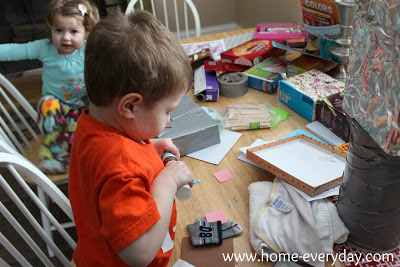
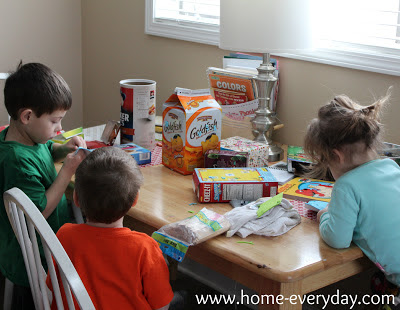
I gave them all the boxes we had, aluminum foil, duct tape, stickers, popsicle sticks, and this is what happened.


Caroline lost interest in the rockets, and decided to color instead.


They boys say they are very advanced rockets. I said, “If you say so.” Here are the final products again.


I’m still not convinced that these could make it to space, but the kids are happy.

Breakfast for One: Banana, Berry, and Almond Oatmeal

Out of the five of us, only two of us like oatmeal. Russell and I sometimes enjoy it together in the morning, but when given the option of yogurt or oatmeal, Russell usually picks yogurt. This means I am often enjoying oatmeal alone, and because of this, I am experimenting with very healthy and tasty variations.

As I have mentioned before, when I cook I kind of throw things together. Then, I often have to make the dish again to factor in measurements so that I can share it with you. This is one of those recipes that was so easy and so delicious, I didn’t mind making it over again. In fact, I have eaten it for breakfast the past few mornings after workouts. It is so healthy, but you won’t even know it. It is that delicious!


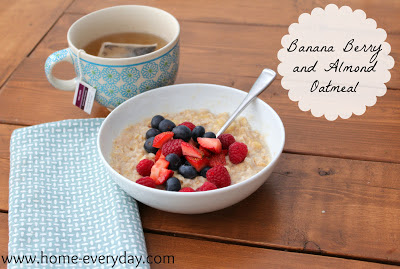
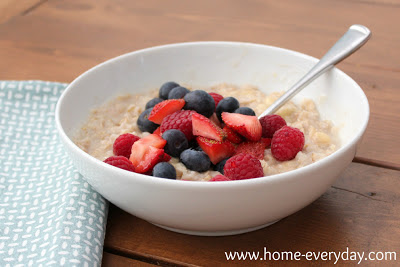
Banana Berry and Almond Oatmeal

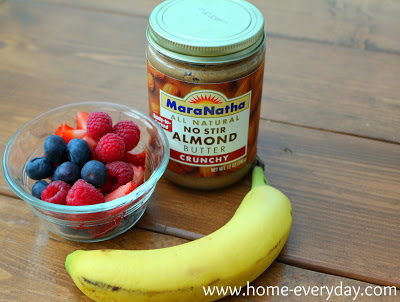
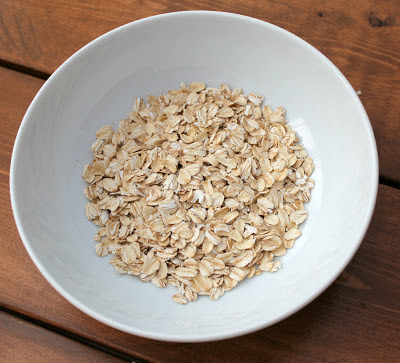
1/2 cup Quaker Old Fashioned Oatmeal
1 cup water
1 Tbs almond butter
1 small banana mashed
1/2 cup various berries (I used strawberries, raspberries, and blueberries)
Pinch of salt


In a microwave safe bowl, combine oats, water, and salt.


Microwave on high for 2 minutes. Carefully remove oatmeal from microwave and stir in almond butter and banana. Finally, top with berries.


What is your favorite quick cooking breakfast?

Linking up at Serenity Now for Weekend Bloggy Reading.

Shopping: Fabric Style

Fabric shopping, to me, is probably the most overwhelming of all shopping. I would consider myself and very experienced shopper, and I come from a long line of bargain hunters (aka cheap-o’s), but fabric shopping gets me completely overwhelmed.

There are just too many options. Too many colors. Too many textures. I wish I had the Sarah Richardson gift of being able to purchase and coordinate fabrics.
via
I don’t know if any of you stopped by JoAnn last week when they were having their huge store sale and clearance, but I did, and that made the shopping more overwhelming. When all the prices are good, it is hard to narrow anything down. Also, I don’t like to shop for just one fabric when I am making something, I like to do things that coordinate to help help bring some interest to the project (which is a secret right now, sorry).
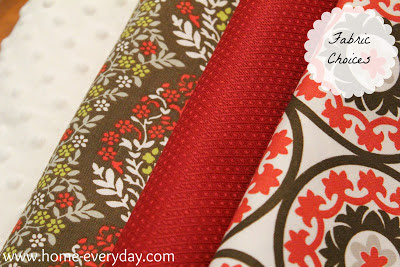
Anyway, after hours of searching, I found this set of three fabrics that met my criteria of coordinating and being a great price (they were on clearance and half off of that!) and contained neutrals that I love (crisp white, chocolate brown, and soft gray).
Now the fabric is bought, it is time to start looking at sewing machines.
Anyone else have trouble fabric shopping? Think it is overwhelming? What do you do to get through a sea of gorgeous fabric on sale?

Healthy Breakfast: Raspberry Smoothie

It is no secret that I have been trying to make some healthier foods for us in this new year. I must admit however, old habits die hard. When I wake up in the morning, I still wanted a bowl of cereal and a cup of coffee, and was wondering what would give me give me a little perk up in the morning.

I got on the internet and started researching super smoothies. I found the Dr. Oz 3-day detox. While, I don’t think I am wanting to do a full three day detox, the breakfast drink looked delicious and chock full of energy producing ingredients.

I made a few changes to the original recipe which is here, but below I made a few suggestions.


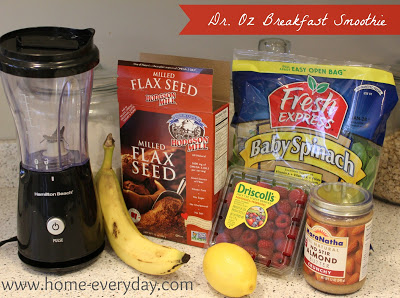
Dr. Oz Breakfast Smoothie
1 cup raspberries (or any other berry you have available)
1 whole banana cut into chunks
1/3 cup baby spinach leaves
1/2 cup water
1/2 cup almond milk
1 Tbs flax seed (I used ground flax seed)
1 Tbs almond butter
2 Tbs lemon juice

In a blender, add raspberries and blend until pureed. To avoid seeds, you can strain raspberry puree (hey, that sounds like Prince’s Raspberry Beret). Add the rest of the ingredients to the blender and blend until smooth. Garnish with a few berries

Does anyone else have any energy boosting smoothie recipes they want to share?

P.S. If you need a laugh to get this weekend started, I guarantee my latest post on South of I-80 will give you one.

Tea Time: Cleaning Cupboards

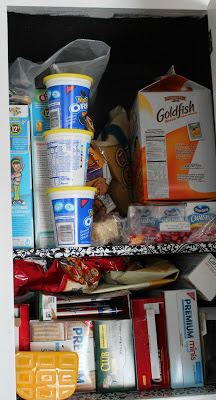
I love tea! In fact, I love all hot beverages. I am often heating the kettle even in the summer to make some iced tea. When I buy tea, I typically just shove the box in the cupboard, and then forget about what teas I even have. The tea cabinet was the pits, as was the snack cabinet.


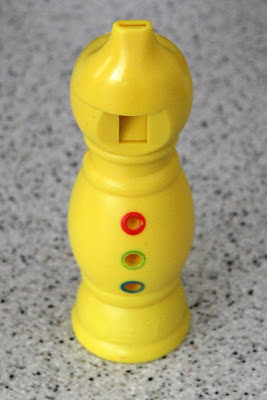
A mish mash of things that didn’t belong in there. These are the cabinets where I also sometimes hide toys. Don’t judge. This whistle is particularly loud and squeaky and sometimes it has to go in the cabinets when I am on the phone.


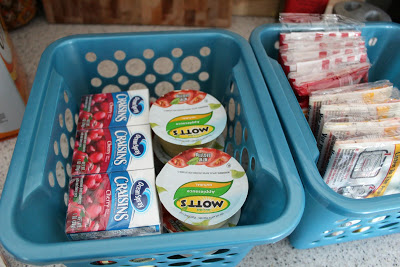
I first emptied the tea cabinet and the snack cabinet that was overflowing. I did a little switcheroo, and put all the snacks in the old tea cabinet since it is bigger. I found these baskets awhile ago for little things like boxes of raisins and microwave popcorn packages.


Once I had enough room for all our snacks, I sat and debated what to do with all stuff that was in the tea cabinet. I first decided to put all the mugs in with our dishes where they belong (even my I Heart Jim Halpert Office mug).


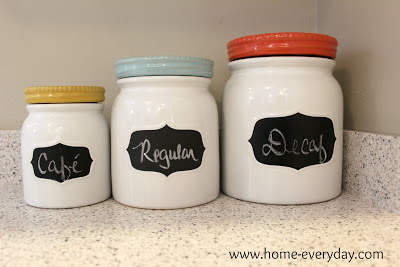
They were taking up too much room in a cabinet on there own. Then I thought I should take all the tea out of its boxes to make room. When I surveyed what I had, I thought of the perfect solution.


These adorable Threshold jars from Target, are perfect and look adorable on the kitchen counter, but could be stored away if need be too.

Because of all this organization…. I have ended up with an empty cabinet! GASP! I can hardly contain how organized the kitchen feels now. Now time for a some tea and an episode of The Office.

PS I’m linking this post up at Serenity Now today! Check out all the great links at the Weekend Bloggy Reading party.

I Heart My Readers!

This is just a post to say THANK YOU to all of my fabulous readers!

I am approaching my 150th post on Home Everyday. There have been two things that amaze me every day:

1.) That I have found enough to write about both here and at South of I-80 
2.) That there are people that actually read what I am writing, and take time out of their day to give some positive feedback.
I never knew that writing was in the cards for me, but apparently it is something that I really enjoy. Whether it is writing about bathroom stripes, doing a baking tutorial, or commenting on the news of the day, I have found a voice, and am proud to share it.
Also, the comments. Seriously, you guys are the best! If it is an email I have received, a Facebook message, or a comment here on Home Everyday or South of I-80 the feedback has been nothing but positive. People have written me to simply encourage me, or to tell me how I have inspired them.
Here are some comments and notes I have received lately:


“Ok, Erin, this is crazy!!! Not only can I not believe what kind of transformation a color change did for the room; but how you also give me the ‘how to’ of doing it w/mistakes and corrections made [through] the process. NOW, when…and I seriously mean…WHEN are we going to see “erin at home everyday” on a daily TV show? You have that kind of spirit going right now. An every day, how to, can’t figure out where to stare…neither did I, but I tried…something. I LOVE IT!!! Erin, I feel that this IS your calling, or at least where you should be right now. It allows for what you want, which is time with your children. And, freedom, time to be you. (At least this is my interpretation in a simple form.) Rambling, but still..don’t stop, I enjoy.” ~ Angela
 
“I read your South of I-80 article about childhood toys and careers and I cracked up! Great article! Also after your last Home Everyday post about the Lemon Cookies, I reached out to Mary Beth and will be helping with the cookie care packages! Thanks for sharing that link! You’re making a difference, girl, keep up the great work!” ~Andrea
 

“First, I have to say I love your blog. As someone who is not anywhere close to being a stay at home mom (I’d have to have kids for that, right?) I still love reading about all the projects (and especially the recipes) you blog about. I’ve been sick at home the past two days so I was just catching up on your posts and I saw the one about your oldest looking to donate glasses. I just got Lasik, so I won’t need mine anymore. Please let him know that he has inspired me to donate my two pairs of glasses to New Eyes for the Needy. Hope you and your beautiful family have a wonderful holiday!” ~Deirdre

“These look AMAZING! It’s like Thanksgiving in an appetizer. High Five! :)” ~Maria

Because of this, I want to keep writing. Every single day! I cannot believe that there are people out there willing to donate their time or their glasses because of something that I mentioned. THANK YOU very much! Also, THANK YOU for the positive feedback, keep the comments, likes and virtual HIGH FIVES coming. They are truly appreciated by this gal who likes to share.  As I have mentioned before, if it weren’t for you guys, I’d be talking the Target clerk’s ear off. Now she can work in peace (she thanks you too).

Also, if you want to receive and email every time I post, you can become a Member on the right side bar. If you want to stay connected you can follow me on Facebook here, follow me on Twitter here, follow my Pinterest boards here, or check me out on Instagram here.

Linking up at Mom of 6 for her weekly Share Your Life Series.


Super Bowl Nosh: Cranberry, Turkey Roll Ups

The Super Bowl is coming. Soon. Because of this, I figured people might be planning parties already and would want some menu ideas. Now, to be honest, I will of course be watching with the rest of America (the world), but neither team is one that I follow. Regardless of who is playing, however, it is the perfect day to showcase some yummy appetizers.


I made these delicious Cranberry, Turkey Roll-ups for New Year’s Eve and then again for a dinner party. They have been such a hit, I think they are going to be a regular appetizer. They are perfect because they combine two classic flavors, they are easy, and they are more satisfying than cheese and crackers or chips and dip. I hope you enjoy them as much as we did.

Cranberry Turkey Roll-Ups

1 can of Pillsbury refrigerated seamless crescent sheet
3 to 4 slices of deli roasted turkey breast
1/3 cup jellied or whole cranberry sauce
1/2 cup shredded Gruyere or Swiss cheese.

Preheat oven to 350 degrees.

Grease a large baking sheet.

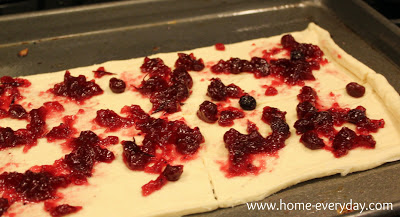
Open the can of seamless crescent sheet and spread cranberry sauce evenly to the edges.


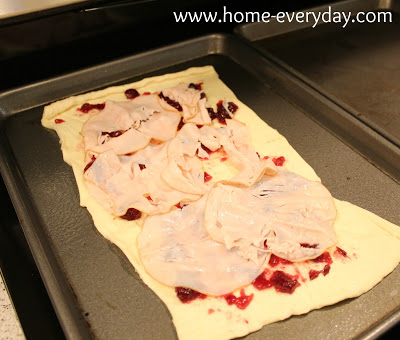
Then add turkey slices in an even layer.


Finally, add cheese in an even layer.


Very carefully, starting with the long end, roll the crescent sheet. Pinch the seam together.


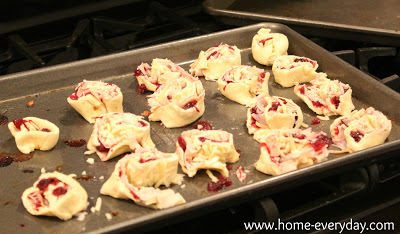
Cut the roll with a serrated knife into about half inch slices. Place slices on cookie sheet. Bake for 12-14 minutes.
 

Anyone out there have plans for Super Bowl Sunday? What are you serving?


Stripes: Bathroom Reveal

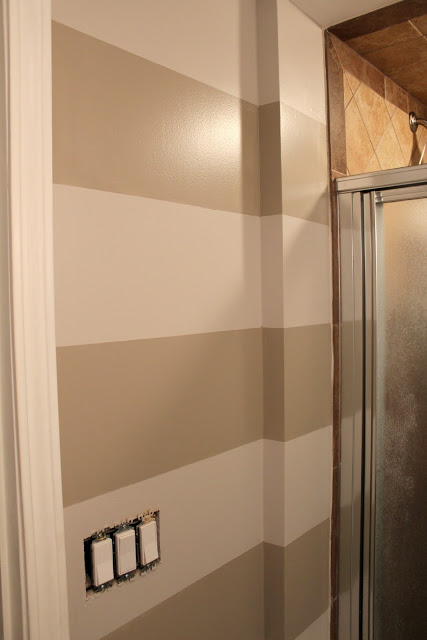
On Tuesday,  I told you I started striping the bathroom. Well, I think I have a problem. Now that I am finished, and it is functional again, I am already thinking of other places I can paint stripes. So far… it is everywhere. I know I cannot/should not do that, but the technique was so easy and it created such an awesome effect. Let’s get to the pictures shall we?

Before:


After:


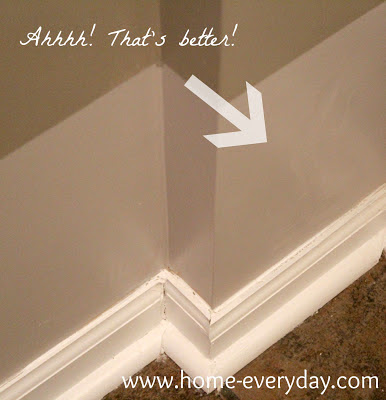
I also repainted the trim in Behr’s ultra white in semi-gloss since the previous paint job wasn’t so good. Now everything looks crisp and clean.


As I said on Monday, I used these directions for measuring and painting from Skinny Boppy’s tutorial which can be found here. She took a lot of the guesswork out of painting the stripes.

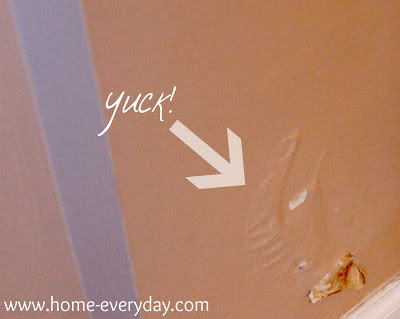
I first, patched up any holes left behind from the water damage we had. Then I sanded any uneven parts, and painted the entire bathroom a base coat of Behr’s Barnished Clay in satin (I typically love flat paint with glossy trim, but in the bathroom is just makes sense to use satin). I actually did two coats of this color to help fully cover the peachy tan that was in the bathroom before.


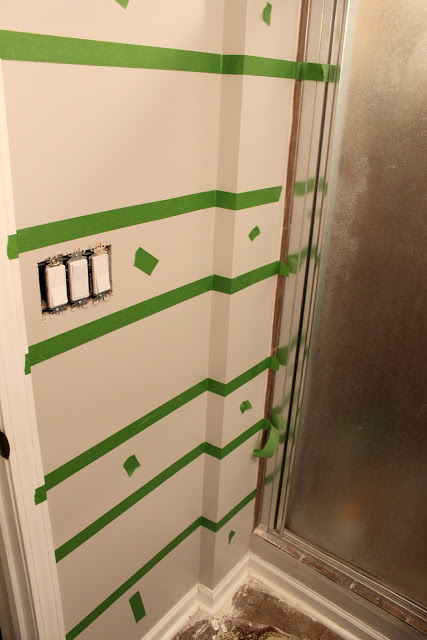
Once I was sure that was dry, I began measuring. When you paint stripes, you want to keep cutting in again at a minimum. Therefore your bottom stripe and top stripe should be your base coat color. In order to make sure this happens, I measured from where the top of the wall meets the ceiling to the top of the baseboards. Then, I took that measurement and divided by an ODD number. Most people when painting stripes divide by seven, but that is typically for a larger room. This bathroom is so small that stripes that wide I thought would be a bit much, so I divided by nine. For example: 83″/9 = 9.222222 inches. That is not an even number of inches, but I started from the top of wall and measured 9″ from the ceiling and using a laser level I began taping. Then I repeated the process for each stripe measuring 9″ from the previous stripe. This causes the bottom stripe to be a little larger than the other, but it is barely noticeable with the toilet, vanity, shower,  and door in the way. When taping I also made sure that I noted which stripes would be the base color and which stripes would be the darker color. This helped me determine in which side of the level line I would put the tape. You always put the tape on the BASE COAT side of the stripe. Also, I put tiny pieces of tape on the base color stripes to remind me not to paint there.


After everything was all taped up, I cut in around windows, doors, shower, and corners, and then rolled on on the stripes with Behr’s Perfect Taupe also in satin. Finally, I carefully peeled the painter’s tape right away (while the paint is still a little wet) to get a perfectly clean line.


TA DA! I love it! Now to convince Brian we need stripes in the family room.


P.S. Today, I am Linking up at Serenity Now for Weekend Bloggy Reading! Check out all the awesome recipes and projects. It is a Pinner’s paradise.


Flowers, Candy, and Books: Valentine’s Dining Table Decor

I know everyone in the home blogosphere is decorating their houses for Winter, but to be honest, I’m a little lazy. I don’t like having to put things up and take things down all the time. Occasionally, I will skip a holiday or a whole season in this case. This year, I decided to skip the snowflakes and the winter white decor, and start on Valentine’s Day.


When I think of Valentine’s Day, I think of my parents bringing home little gift bags of flowers, candy, and the latest Ramona book as a treat. My siblings would get their favorite candies and magazines. It was just a small gesture, but it is one I want to continue with my kiddies.

Since I don’t know how to decorate with books, and my favorite flower (tulips for those who ever want to send me flowers) isn’t really in season right now, I thought it would be cute to decorate with some candy.

Valentine’s Candy is the best because it is in small amounts, doesn’t count toward your New Year’s Resolution eat healthy plan (at least that is what I am telling myself), and it is wrapped in pretty colors.


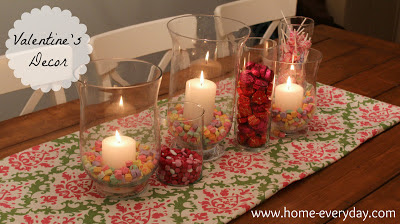
The first thing I did, was buy a few bags of conversation hearts and fill the glass hurricanes I keep on my dining room table with them. We are not conversation heart people, I actually think they taste chalky, so I stuck candles in the hurricanes and used the candy strictly for decorative purposes. I felt kind of weird using food for decoration, but there are people that use bags of lemons that go wasted, so I didn’t feel so bad after that.


The rest of the candy is for consumption though (trust me I keep sneaking dark chocolates). I bought all our favorites: Dove dark chocolates, Dum Dum suckers, and a bag of Valentine M&M’s and then put them in some glass vases at different heights.


I then found some leftover fabric from this curtain project, and Ta Da! I made a simple, easy, sweet, and edible tablescape for the cost of some candy, that let’s face it, I would have bought this time of year anyway. Plus, at the rate we are going, the vases will be empty in time for Valentine’s day for Brian to fill with flowers (hint, hint).

Happy Valentine’s Day!!