Month

December 2012

I’m pretty sure…

…that this will be my last post of 2012! I might do a few updates next week (I cannot make any promises). My goal it to be spending lots of time enjoying the holiday season with my family.

First off, I just wanted to share our family holiday picture. We took it a few weeks ago. I was totally stressing about what we should all wear, but I think it turned out great. Everyone wore some combination of black, white, gray, and bright kelly green. I tried to use things we already had on hand instead of buying everyone new outfits for pictures. These outfits look so nice, I now have a plan for Christmas Mass. WOOHOO!


Secondly, I just wanted to thank everyone for supporting and reading Home Everyday this year. I have received nothing but positive feedback and am so grateful to everyone for their support. Without Home Everyday, I wouldn’t have gotten another writing opportunity at ChicagoNow. All of your support, wonderful comments, and emails keep me going. Thank you so much!


Thirdly, I cannot wait for all that 2013 will bring. In the new year, you can look forward to a new design and plenty of new projects and family adventures.

Lastly, I want to wish all my readers a very Merry Christmas and a safe, happy and healthy New Year!

Take care,
Erin

Linking up at Michaela Noelle Designs today!

A Few Christmas Decoration Traditions

There is so much to write about when it comes to Christmas, I feel like I might be writing for weeks after Christmas about all our experiences so far. While everyone has gotten a chance to see tree 1 and tree 2 as well as our mantel and our dining room table. I thought it would be nice to show you a few other decorations we have put up around the house that have been around for many many years.

This was my grandmother’s nativity that I inherited after she passed away. Every year when I take it out of its box, I am reminded of her and the millions of cookies we all helped her bake, seeing her at Christmas Mass, and Christmas Eve and Christmas Day dinners of my youth.
Here is a smalls snippet of my collection of snowmen. Some were gifts from family, some were made for me like the ceramic one by my mother in law. I did the needlepoint one many years ago. But my favorite is the sock snowman with the red hat made for me by my niece and god daughter when she was a little one. Now she is a senior in high school. Time goes too fast!
My parents had an idea pretty early on that I was Christmas crazy, so when I was in high school, they started a Christmas village for me. People have added to it over time. The kids love it.
Since Brian and I have been dating, I have bought him a penguin ornament every year. Some are fancy silver from Pottery Barn and, some are plastic from Target . But it is our tradition, and I love the quest of trying to find a unique one every year for our tree.
Do you have any family heirloom type Christmas decorations? Do you have a holiday collection that has been gathered over time? Share!

She Came Tumbling Down: Our Rusty Basketball Hoop

When we bought this house there were some weird things about it. Thankfully, Brian and I don’t judge a book by its cover.One of the weirdest things was this rusty DIYed basketball hoop in the driveway. We didn’t think it was safe anymore, and quite frankly it was an eyesore.

We thought about spray painting it, but after closer examination we realized it wasn’t really safe, so down it came. With the help of our friend Scott, Brian removed all the bolts, and let the backboard and hoop fall on some pallets put in the driveway to cushion the fall.

After the bolts were removed we noticed they were all bent, thus solidifying the fact that this thing needed to come down.

Then it was time for the post to come down. Thank goodness for the Milwaukee SawsAll.


TIMBER!

The kids watched this whole process from the living room window, but Brian and I let them outside to help cleanup. The kids had much more fun playing. Scott showed them how to use ratchet wrenches.


The boys favorite part was putting the pallets back in the garage. Look at those muscles!


Happy Birthday: Chocolate Buttercream

It is with a heavy heart that I write today. For someone who spends a lot of time talking and writing, I really have no words to share today. I simply want to offer my condolences, thoughts, and prayers to everyone involved in this horrible tragedy. As a former educator and now a Mom, I know that heading back to school after something like this will never be the same. Blessings of comfort and hope as we all heal.


Since today is my birthday, and I kind of want to spend the day eating cake and hugging my kids, I’m keeping it short and sweet today.

Chocolate Buttercream Frosting

2 sticks of unsalted butter softened (room temperature)
3 cups powdered sugar sifted
1/2 cup unsweetened cocoa powder
1/2 tsp salt
2 tsp pure vanilla extract
1-4 Tbs milk

In a large mixing bowl using beaters or an electric mixer, cream butter until smooth. Then slowly add powdered sugar until well incorporated. Then add cocoa powder, salt, vanilla and mix until mixed thoroughly. Finally, add milk one tablespoon at a time until mixture is consistency you want. (I typically need about 2 tablespoons).

There is enough to cover a 9 inch layer cake, 9 x 13 sheet cake, or 24 cupcakes. Or you could do what I do with the kids and dip Nabisco vanilla wafers in it and make reverse Oreos.


Sweet Dreams: Baby Sleep

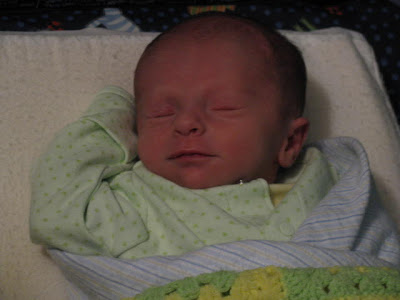
I recently got an email asking me questions about baby sleep, and I thought it would make a good post for any readers that have young ones. Again, I am in no way a sleep expert, but this is what worked for us.


When our oldest was born, we thought we had it covered. After 24 hours of being at home with our newborn, we realized we really did not have a clue about anything. I mean a person can dream about what parenthood is going to be like, she can read about it, and do all the babysitting of her friends kids she wants, but it is wildly different than anything you could imagine. Both the good and the bad.

With the help of my sister, sister-in-law, pediatrician, mom friends, a few books, and some good old fashioned motherly instinct, we were able to have kids that slept in their own beds through the night (and still do).


First let’s talk books:

On Becoming Baby Wise by Gary Ezzo and Robert Bucknam – This book is pretty hardcore with sleep training. It basically sticks to a pretty strict “cry it out” mentality. While we did like the idea of a self soothing, child the main thing we learned from this book was the beauty of routine. We learned that the order of events in the life of a baby is pretty important, and it helps to establish comfort for a baby. Routine (not schedule) with eating, bathing, play time etc, can really help establish a sleep routine as well.

The Sleep Lady’s Good Night Sleep Tight by Kim West – This woman is the sleep whisperer. She uses gentle very effective methods for getting a baby to sleep at night. Her approach also keeps in mind that babies go through growth spurts, developmental changes, and other things that will affect a baby’s sleep and offers coping with these scenarios. It is worth the read and also gives some perspective to how much a baby is going through developmentally. It also explains baby’s sleep needs and the importance of napping routines to help with night time sleep.
The Happiest Baby on the Block by Harvey Karp – This book (or DVD) and the methods proposed were extremely helpful. The key thing that we took away from this book was white noise. All three of our kids loved it, and Caroline still loves her white noise CD. For whatever reason, this totally worked for our kids. The day we don’t have white noise in our house, I am wondering if I will be able to sleep without it. (After 5 years of having it, my guess is not). 


Daily Routine (times were never set in stone… ever).
7:30 a.m. – Baby wakes, change diaper, nurse or bottle feed
8:00 a.m. – Get dressed, eat purees (if you have started that)
8:45 a.m. – Play time, stories
9:30 a.m. – A little bit of nurse or bottle. Morning Nap
11:30 a.m. – Wake up, change diaper, play time
12:15 p.m. – Eat purees, clean up
12:45 p.m. – Stories, nurse or bottle, afternoon nap
3:00  p.m. – Wake up, change diaper, nurse or bottle snack
3:30 p.m. – Play time, stories, walk or play outside
5:00 p.m. – Dinner purees (again if you are there), clean up, play with Dad
6:30 p.m. – Begin baths, jammies, dim lights, stories, nurse or bottle
7:30 p.m. – Bed

Tips:
– Swaddle! Swaddle! Swaddle! If your baby is less than 12 weeks old or cannot roll over on their own yet. Make the investment and get a Miracle Blanket. Young babies love it!
– Last Feeding: As you can see from the above routine, I pretty much would nurse or give my kids a bottle before nap/bed as part of the routine. When they stopped nursing or bottle feeding they would get a small sippy of milk. Here’s the deal, some people are really against nursing or bottle feeding before bed, but it really worked for us, and helps calm everyone down. We would try and coincide this time with a story as part of the bedtime routine. Also, babies love the close contact or snuggle time. If you’re at your wits end, give it a whirl, and see how it goes. If your child is done with bottle and nursing try a sippy cup of water while reading a story or snuggling.
– Darkness: When it was time for naps/bed, the shades would get closed, The darkness really helps as it helps release melatonin for easy sleep.
– Lovies: All three of my kids have lovies which we introduced around the age of 4-6 months old. Kids will start attaching to something around this age as part of their development. It helps them to sooth themselves and gives comfort. When they were really little I would make sure we had it for stories and snuggle time. I know this sounds weird, but kids are associate smell with comfort too. So, if you want to carry their lovie with you for a little while, the lovie will smell like mom’s shampoo, perfume, or dad’s after shave and kind of be a comfort to the baby.
– Soothies: My kids were all different. Russell didn’t like to suck anything, George had a paci til about 18 mos old (just for sleeping and he gave it up on his own) and Coco sucks her thumb. There are a lot of people who are against this type of soothing, but my theory is: if it makes them happy and they sleep through the night then it cannot be too bad of a thing. Also, no one will go to college (or Kindegarten for that matter) sucking their thumb.
– Getting Up: If we had a crabby baby in the middle of the night, we tried not to establish a “let’s get up at 2 a.m. every night for a snack” routine. Try everything you can just to make sure you’ve explored all your options: changed diaper, checked for fever, give some snuggles, read another story, make sure he/she isn’t too hot or too cold. However, if you have tried everything, kids go through growth spurts, and he/she really may be hungry, and you may have to nurse or give a small bottle or sippy cup of water.

Good Luck and Hopefully Sweet Dreams!

What’s in the Fridge Guacamole

Sometimes I am stumped for lunch ideas for the kids. Even though I meal plan, sometimes the kids are not up for what is planned, so I try to improvise. Last week, the kids said they had a taste for some guacamole. Luckily I had some essential ingredients on hand from Chili night.

This is one of those recipes where, I kind of threw everything together, and it was awesome. The kids gobbled it up with some quesadillas. I even got a little fancy and served it in little bowls made out of limes. Nothing like classing it up for preschoolers.

What’s in the Fridge Guacamole
3 large or 4 medium avocadoes peeled, pitted, and chopped into small chunks
zest of 1 lime
juice of 2 or 3 limes
1/4 red onion minced
1 clove garlic finely minced
1 large bunch cilantro chopped
Salt and Pepper to taste

Lightly mash avocados with a fork while still leaving some chunks of avocado for texture. Stir in the rest of the ingredients and mix until well combined. Enjoy with tortilla chips, quesadillas, tacos, or as George likes it with a spoon.


Getting Crafty with Storage: Creating a Creative Space

I thought I would break up the Christmas Cheer a bit with some other things that have been going on around here.

 
The kids have always liked doing arts and crafts, but lately with it too cold to play outside some days they seem to be coloring, drawing, play doh-ing, and wanting to craft more often. Caroline is constantly carrying crayons in her purse. Russell asked for some art supplies for his birthday. And even George has been saying, “Let’s do a project! You know, like with a smock.”
Since, I hear this every day, and since pre-school sometimes has homework. I knew I needed to create a space for the kids to do all things creative. I also needed to find a way to store their things that was easy for them to access and put away. I also needed it to be somewhat stylish as I am sick of buying primary colored bins and then trying to hide them in closets.
Here is what I came up with:
I decided to bring back our old kitchen table and chairs that had previously been used in the dining room before Brian and I built a new table. I wasn’t about to buy something new and my kids are growing so fast I didn’t want to use a kid sized table that they won’t be able to use for much longer.
Then, I thought it might be a nice idea to cover the table with some painter’s paper. This doubles as a protective surface for crafting, but also the kids like to draw and color on the paper. I got a partial roll for free from Meema and Peepa.
Next, the inspiration for this project were these galvanized buckets there were on clearance at Target for $1.24. I would have bought more but there were only two left. I thought they were the perfect size for our collection of crayons and storing coloring books and sketchpads.


Finally, I have an old canister set that I still love, but just didn’t work in the kitchen. They were too small to really hold any of my baking things like flour etc. but they are the perfect size to hold colored pencils, marker, scissors and glue, and chalk.
I put a lamp on this table for some extra light. Currently this lamp has been relocated because of Christmas decorations, but for now it works.
Finally, next to the table I put an old computer desk I’ve had since my single days. Currently, it sits in the family room waiting for its rightful place in the sub basement to hold scrapbooking supplies, but until the sub-basement is renovated it has served as a great place to store toys and our printer. I emptied it out, and put a small cart of drawers I got from my friend, Colleen. In here I put things that don’t need to be as accessible or need Mom’s help. Paints, paint smocks, play doh, etc. It has also been a wonderful place to store the kids art work that is no longer hung on the art wall.


The grand total for this project was $2.48 for the bins at Target. Everything else I had on hand. This has become one of the best spaces. I love that nothing here is expensive, but looks so organized and pretty. I also love the unconventional storage containers. We finally have a place for everything, and the kids have a place to do homework or start a project and be able to leave it out to finish later.
Is there a designated space in your home for crafting or homework?

It Isn’t Much, but It’ll Do: Christmas Tablescape

I’m Christmas crazy. I admit I have an almost unacceptable amount of Christmas cheer this time of year. Because of this, we have a fair amount of Christmas decorations. I have a Christmas village that my parents started for me when I was young, two Christmas trees, stockings hung with care, outdoor lights, my Grandma’s natvity, a small collection of snowmen, so by the time I get to the dining room I’m tired. The dining room needs something though, we are in there every single day.

Here is what I was able to do with what was leftover.

I used my favorite table runner found last year at Target on after Christmas clearance. I love the snowflakes stitched on it.

Then, I filled hurricanes with sparkly pear ornaments found at Home Goods last year and berries from Michael’s.

Finally, I added these felt snowflakes from the chandelier.

Not too shabby for leftovers. What do you do with extra holiday decorations?

Check back soon for a full scale tour of our house decorated for Christmas!

It’s All About the Toppings: Homemade Chili

Am I the only one who loves toppings, garnishes, sauces, etc.? I just love how they can take something that is kind of a cookie cutter recipe, and make it personal for everyone. My family is big on these types of dishes. When you have three little ones with various allergies and aversions it helps to not be a short order cook for everyone, but still give everyone some choices.

Chili is one of those dishes in our house. I make a pretty basic chili, but it is all about everything that goes along with it. My kids like the cornbread, rice, guacamole, avacados, cheese, tortilla chips etc. Which is fine, they are so consumed with their favorite toppings they don’t even realize they are eating chili sometimes. Brian and I have our favorite toppings too.

Brian likes his kind of old school. He likes it poured over home made cornbread with a little sharp cheddar on top.


Me on the other hand, I like a little squirt of lime, cilantro, and avacado slices. I also have some tortilla chips on the side for dipping.


Erin’s Chili
2 Tbs. olive oil
1 lb ground beef or ground turkey
3 ribs of celery chopped
1 bell pepper chopped
1 medium yellow onion chopped
2 cloves of garlic minced
1 to 2 Tbs. chili powder
1 Tbs. cumin
1 tsp Tobasco (a few shakes)
Salt and Pepper to taste
1 bottle of your favorite beer (I use Goose Island 312)
1 14 oz can white cannelini beans drained and rinsed
1 14 oz can red kidney beans drained and rinsed
1 28 oz can tomato sauce or crushed tomatoes


In a large pot over medium to medium high heat, pour olive oil. When the oil is rippling hot, add ground beef or turkey and crumble. When ground meat is thoroughly cooked, about 3 – 5 minutes later, add celery, bell pepper, onion, and garlic stirring occasionally. Cook for another 3-5 minutes or until vegetables are just soft. Then add chili powder, cumin, hot sauce, salt and pepper and stir until spices coat meat and vegetables.


Add beer and stir for about one minute scraping the bottom of the pot to deglaze. Then, add beans and tomato sauce and stir. Cover the pot and lower heat. Let cook for about 5 minutes or until chili is heated through.


What will you top yours with?

Suggestions for toppings
Cheddar Cheese
Chihuahua Cheese
Cornbread Crumbles
Sour Cream
Crumbled Tortilla Chips
Avocado Slices
Lime Juice
Cilantro
Green Onions
Guacamole
(Note: Some people like to serve chili over rice or pasta too!)

Smart Cookies: Chocolate Dipped Vanilla Biscotti

When I think college in December, I think coffee. Coffee by the gallon. While everyone is hustling and bustling getting ready for the holidays, college students are writing, researching, writing, studying, writing, and testing. This usually means lots of all nighters.

So, this month’s Smart Cookie recipe has to have the perfect combination of Christmas cheer and go great with coffee. Here is what I came up with:

This recipe is a double batch. The reason being it is so good, that there is no way you’ll be able share and not keep any for yourself. As we speak… er as I write this I am enjoying some with a cup of Mighty Leaf Vanilla Tea.

Vanilla Biscotti Dipped in Chocolate

1 1/2 sticks (12 Tbs) butter softened to room temperature
1 1/3 cups sugar
1 tsp salt
2 Tbs pure vanilla extract (I know it seems like a lot but it is vanilla biscotti)
3 tsp baking powder
4 large eggs
4 cups all purpose flour
2 cups milk, dark or semi sweet chocolate chips

Preheat oven to 350 degrees. Line two cookie sheets with parchment paper.

In a large bowl or electric mixer bowl on medium speed beat together softened butter and sugar until smooth. Then turn mixer to low and add salt, vanilla, baking powder. When this mixture is well combined, add eggs one at a time. The mixture kind of appears curdled at this point but this is fine.

With the mixer on low, slowly add the flour (in 1 cup increments). Mix until just combined.

Divide the dough in half and place each half on the lined cookie sheets. Using wet hands to avoid stickiness form the dough into inch high rectangle logs. Bake for 25 minutes.

Remove from oven, and reduce temperature in oven to 325 degrees. Cut the logs into one inch wide slices, gently separating them.

Place in oven and bake for 25 minutes.

Remove from oven and begin cooling. While biscotti cools, melt chocolate in glass bowl over simmering water or very slowly in microwave.

When chocolate is melted.

Dip cooled biscotti in melted chocolate. Let chocolate harden before serving.

This is probably one of my new favorite treats. I cannot wait to make more for a Holiday Brunch!

For other Smart Cookie recipes, click here, here, and here.

Linking up at Serenity Now.