Month

September 2012

Working Late: Cheater Lasagna

Brian had to work a little later than normal one night this week, so I decided to bring him and a coworker dinner at work. Coco offered to help, if you call playing on her Magna Doodle, eating popcorn and drinking juice helping.


We(?) made what I call Cheater Lasagna. It is fast, easy, and compared to making most other lasagnas with bechamel sauce and home made tomato sauce, it is much less time consuming. I call this Cheater Lasagna because I use jarred sauce (gasp!) which, even Giada DeLaurentiis herself has been known to use jarred sauce, and no boil noodles. This helps cut down on a few steps and makes homemade lasagna on a weeknight a possibility.


Cheater Lasagna
1 tsp olive oil
1 lb ground turkey
48 oz of your favorite jarred tomato sauce
1 15 oz container of ricotta cheese
1 egg beaten
1 Tbs Italian seasoning
10 slices mozzarella cheese
2 cups shredded Italian cheese blend
1-9 oz box of Barilla No Boil lasagna noodles
Salt and Pepper to taste


Preheat oven to 350 degrees.

In a large pot over medium heat add olive oil and ground turkey. Season with salt and pepper, and then breaking apart with a spatula, cook ground turkey until cooked through (no longer pink) about 5 minutes. Reduce heat to low and add sauce and stir occasionally until heated through 5-7 minutes then remove from heat.

While sauce heats through, in a large bowl add ricotta cheese, egg, and Italian seasoning, and mix until well combined and set aside.

In a greased 9 x 13 baking dish start layering:

1/2 cup of tomato sauce mixture spread around dish
4 or 5 noodles
2 cups of sauce mixture
5 slices of mozzarella cheese
1/2 ricotta mixture
4 or 5 noodles
2 cups of sauce mixture
5 slices of mozzarella cheese
1/2 of ricotta mixture
4 or 5 noodles
remaining sauce mixture
2 cups of shredded Italian cheese blend sprinkled over top


Bake for 50-60 minutes.

Brian and his coworker were thankful! Coco was even more thankful for the leftovers (you know, because she was such a good helper).

Leftovers: More Autumn Decor

So, I’m finally finished decorating the house for Autumn. I know most people go all out, but I only decorated three small areas of my home. I first put together an Autumn tablescape for Sunday Dinner, put a few small decorations near the front door, and then I put together a spooky Halloween mantle. All of these decorations only took a few minutes each to put together, and they help to make the house seem a little more festive.

Which brings me to this shelf.


It is the perfect place to create seasonal vignettes like a mantel, but, Houston, we have a problem. It is right above where we keep all the kids’ toys. So, to be honest, I didn’t want anything too fancy there, and most of the time it is empty as practicality tells me something could get knocked over. Someday, when I come up with more of a cohesive look for the family room, I will probably have a better idea of what to do in this space.

So this is what I came up with to spruce it up a little for the season:


These are all things that I have had on hand for years. I thought the red canisters bowl and pitcher added a nice pop of color in an otherwise very neutral space. The pumpkin sign, ceramic pumpkin, and maple leaf bowl helped to bring some seasonal flair. Also, the framed photo is of Brian and I the Autumn before we got married. You cannot tell from this photo but the picture has some pretty fall foliage behind us.

So that is it for fall decor around here. Now, I think it is time for cooking up some comfort food and finding some more indoor projects to do with the kids.

Linking up today at Thrifty Decor Chick for the last installment of the “It’s Fall Ya’ll” Autumn Decor Link Parties!

Baby Tips: Cloth Diapering

Since I was one of the first people out of my group of gal pals to have babies, a lot of them ask me for advice regarding all things baby. A few weeks ago, I posted my list of baby must haves, and a lot of my soon to be and new mommy friends thought it was helpful, so here I am again to share a little knowledge. Recently, a friend wrote me and wanted to know about Cloth Diapering. I have cloth diapered three kids, and remember a time when I was cloth diapering three at the same time (my kids are pretty close in age), I thought I would fill her in, and anyone else that needs some advice in this department.

Ok, I admit, I had to be sold on cloth diapering. I try to be green whenever possible, but this seemed… well frankly gross, but after a little coaxing from my friend, Colleen, doing some research, and Brian sharing with me how much money we would save cloth diapering, I jumped with both feet and actually liked it a lot.

Here’s my step by step guide to Cloth Diapering. Don’t let this intimidate you, I am just over sharing. As usual.


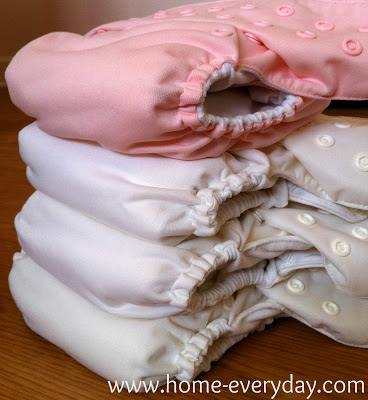
1.) Do some research and choose a brand and kind. The brand we chose is called BumGenius. BumGenius has a few different kinds of cloth diapers, but we chose the One Size 3.0 and later the One Size 4.0. One size diapers, are just that, ONE SIZE. This is nice as you can use the same diapers for the entire time your child is in diapers without having to spend more money every time your kid grows. The diapers have snaps to adjust the size. Also, these diapers come with an option of velcro closures or button closures. In the beginning, we used the velcro closures with the boys, but as time went on and we had washed them a few hundred times, the velcro closures lost their stickiness. The BumGenius website has all kinds of tips on how to regain velcro stickiness, but to be honest I had two kids in diapers, was pregnant with a third, and didn’t really have time to worry about velcro stickiness, so when my daughter came along, we bought the button closures for her and they worked out wonderfully. She is two and the snaps are still working great. I strongly recommend using One Size diapers if you can as they are the most cost effective option.


2.) Buy all the accessories. Ok, I know when you have a baby, there are countless expenses, and the last thing you want to do is drop about $300 or more on cloth diapers and THEN purchase everything that comes along with cloth diapering, but honestly, you WILL save money in the long run. Here are some things you will need: wet bags, diaper pail, pail liners, BacOut, detergent, and a diaper sprayer. What are all these things, you ask. Here is the breakdown: Wet Bags – they are zippered waterproof bags to keep in your diaper bag. They are where you put your dirty diapers when you are away from home. Several places sell them, and you can even get them on Etsy. Diaper Pail – There are specially made diaper pails for cloth diapers, but honestly I just use a Rubbermaid tall trash can with a lid. Pail Liners – these are reusable bags to put in your diaper pail. It was always nice to dump the diapers in the washing machine and then throw the pail liner right in with the diapers (this can be done with the wet bags as well). BacOut – This is a specially made all natural stain remover and the only one that is safe to use on cloth diapers. Detergent – depending on the type of cloth diaper you buy, you will have to purchase the detergent that is safe for that particular diaper. BumGenius makes their own detergent so that helped narrow down what we should use. Diaper Sprayer – this is a little contraption that you attach to your toilet tank to spray any waste into the toilet.


3.) Come up with a system. I will be the first to admit that using cloth diapers seemed really scary to me at first, but I honestly it isn’t that hard. Here is what we did for a streamlined cloth diapering system in our house. We had about 20 diapers on hand, and because of my crazy personality, I have 16 white and 4 in a color (I will explain why). When I wash and dry the diapers, I always put them together right out of the dryer, just like I do when I fold clothes. Putting diapers together means adjusting the size of the diaper cover and the insert and putting the insert in the diaper. Also, the color diapers always would receive an extra liner and I would designate those to be “overnight” diapers. After changing the baby, I empty any mess into the toilet using the diaper sprayer, spray any stains with BacOut, remove the liner and throw everything into the diaper lined diaper pail. When, it comes time to wash (which you should do every other day or every two days) I dump the whole pail liner into the wash and just throw the pail liner in the wash too.


Some things worth mentioning
– If you decide to use cloth diapers, it is probably best to use reusable wipes too. This helps cut down on waste, and you can just throw everything into one pail.
– Some great places to buy cloth diapers and accessories are Cotton Babies, Diaper Daisy, or Buy Buy Baby.
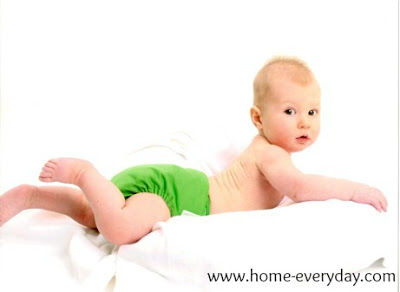
– Cloth diapers help save money, are good for the environment, help prevent diaper rash, and help with potty training. For more information on the benefits of cloth diapering click here.
– If your child needs to use diaper rash cream, you might want to switch to disposable as creams can harm the absorbency of the diapers. Also, you can put a small piece of fabric between baby and diaper at this time too.
– Some brands or cloth diaper stores offer trial packages where you can try out cloth diapers to see if it is for you.

I hope this helps to answer any questions or concerns regarding cloth diapers.


Kid Craft Time: Canvas Art

As the weather begins to get cooler, more time is spent indoors with the kids. While the boys are in school now, it is only for a few mornings a week, so sometimes I am trying to find something to do indoors other than bringing out the Play-Doh again (ugh, someday I will talk about my love hate relationship with Play-Doh).

A few months ago, I pinned a few awesome craft ideas for the kids, so I thought it was time to break one out. My kids really like crafting and they also like when we display their work. Armed with a 40% off coupon and a sale on canvas I hit up JoAnn Fabrics, and got some supplies.
Here’s what we created: 


Here is how we did it: 


Supplies:
Canvas
Froggy Tape
Acrylic Paint
Stencil Sponge Brushes
Paint Smocks
Plastic Bags 

Prep the Site: First, I covered my children with smocks (basically Brian’s old shirts), and covered my table and floor with plastic bags. This made for easy cleanup.


Tape it Up: Then, I taped off a small section of the canvas with Froggy Tape. 


Pour it Out: I put a small dot of each color paint on a take out container top. I deginated one sponge brush per color to help keep things a little cleaner and help the colors not bleed into each other so much. 


Let Them Create: The kids started blotting the entire canvas with dots of paint. 


Dry: I let the paint dry for a few hours, and then VERY carefully removed the Froggy Tape. Then, in the empty space I added a sticker I found at Archiver’s with one of my favorite quotes. 


The total cost for this project was under $20. The kids got to participate, and we made some awesome sentimental art for our living room gallery.What a perfect way to spend a cool afternoon indoors. The only thing that would make this better is some cookies.


LInking up at Hi Sugarplum. Everyone there is posting ideas for crafts that can be done in about an hour. Check it out!

 
Also, linking up at Serenity Now for plenty of quick and easy weekend project ideas.


Grandbaby Cakes: Lazy Chai Cinnamon Rolls

Today is a VERY big day at Home Everyday. Jocelyn Delk Adams of Grandbaby Cakes has come to share an awesome Autumn recipe with us. I met Jocelyn in 1995 (OMG that is 17 years ago), when our lockers were right next door to each other in high school. We have since reconnected over blogs and baking. She is a woman of flawless taste with a keen eye for design and combining unique flavors when baking.

Ina Garten, also know as the Barefoot Contessa, is my absolute favorite television chef.  I have whimsical dreams of being invited to visit her and Jeffrey at their amazing home in the Hamptons for a dinner party with all her fabulous friends.  I even imagine we are friends some days.  Yep, my husband pretty much thinks I’m crazy.

Ina is just the quintessential home chef.  I recently watched an episode (for the 15th time I think) during my weekly Food Network DVR marathon where she used puff pastry to create sticky buns.  I thought it was such a genius idea.  Cutting down on the cumbersome yeast dough step sounded so promising considering how busy I am.  As soon as Erin, a high school friend of mine, invited me to write a feature, I figured I would experiment with a concept for quick and easy cinnamon rolls with a twist since sticky buns and cinnamon rolls are first cousins.

These cinnamon rolls are not just ordinary cinnamon rolls.  Oh no!  These are chai spiced cinnamon rolls which literally made me say “yum” out loud.  The best part was my taste testers thinking I spent the whole weekend slaving in the kitchen over these while I knew I was just a lazy bum who whipped these up in 30 minutes.  Enjoy!  I certainly did.


Lazy Chai Cinnamon Rolls
1 pack of frozen puff pastry with two sheets that has thawed out in the refrigerator for at least two hours.  Trader Joe’s has an amazing and reasonable option that is made with all butter.

2/3 cup light brown sugar
3 teaspoons of the chai spice mix (NOTE: I used my favorite chai spice from The Spice House to save time but if you would like, you can make your own! Recipe below)
1 teaspoon cinnamon

3 tablespoons melted butter

For the chai spice mix
1 1/2 tsp. ground cardamom
1 1/2 tsp. ground cinnamon
1/2 tsp. ground ginger
1/4 tsp. ground cloves
1/4 tsp. ground nutmeg

For the icing:1/2 stick of butter at room temperature
1 cup powdered sugar, sifted
1/2 tsp vanilla
1/2 teaspoon chai spice
small sprinkle which ends up being 1/8 teaspoon cinnamon
1-2 tablespoons of milk or chai black tea if you want to amp up the chai flavor

Preheat oven to 400 degrees.  Lightly flour your surface and roll out one sheet of puff pastry until about 1/4 inch thick (leave the other sheet in the refrigerator).  Brush puff pastry with melted butter, leaving 1 inch of space around the edges. Evenly sprinkle puff pastry with half of brown sugar, chai spice mix and cinnamon just over buttered area.


Tightly but gently roll the dough up. Use a little melted butter on the open edge of the roll to seal the seam.  Using a sharp knife, slice the roll into six pieces. Place each roll inside a parchment paper lined baking dish. Place the dish in the refrigerator as you repeat the above steps with the last sheet of puff pastry.  Bake the cinnamon rolls in preheated oven for 25-30 minutes or until golden (watch carefully!).


While rolls are baking, make the icing.  Beat butter until fluffy. Gradually add powdered sugar, then add milk or tea and flavorings. Increase amount of spice, or sugar until desired consistency and flavor are reached.  Then place in the microwave for 10-20 seconds until it melts down and is pourable.  Drizzle over cinnamon rolls when they are fresh out of the oven and enjoy.  Happy Baking!


Spoooooooky: Halloween Mantel

Sometimes, more is more. I usually do not subscribe to this methodology as I like clean lines, simple decor, and practicality, but when it comes to Halloween candy… er I mean decor, I cannot get enough.


This year, again, with the help of my niece Allison, I have put together a Halloween Mantel with all of my Halloween candles. These candles have been collected slowly over time. I can usually find them after Halloween at places like Party City and Target for deep discounts. Together with some ceramic decor made by my mother in law, some faux cobwebs, and glittery spiders, I think we came up with a pretty spooky mantel.


When the candles are lit, it creates the perfect spooky atmosphere for watching a spooky movie (which at our house is Monsters Inc.) with some cozy throws and popcorn.

Linking up at Centsational Girl as part of It’s Fall Ya’ll Link Up Series. Come and see everyone’s Autumn Mantels.


Rainy Day: Chocolate Chip Banana Bread

WOOHOO! The weekend is here! This week included tons of activities, an abrasion on my eye, and my oldest explaining to another Mom, “You don’t have to tell your daughter to stop picking her nose. Sometimes, I pick my nose. We are kids and sometimes kids have to pick their nose!” (total mother of the year moment, I wanted to crawl in a hole and die).

I know yesterday when I put out my autumn decorations it didn’t seem like fall here yet, but the forecast for the weekend calls for cool temperatures and some rain. To me this is perfect baking weather. The kitchen stays cool, and it is the perfect activity to do with the kids. So, after the busy (and crazy) week we have had, I thought I would make one of the kids favorite sweet treats: Chocolate Chip Banana Bread. (The kids like this even more than the chocolate chip zucchini bread I made a few months ago).


A few weeks ago, I browsed around the internet, and from a few different recipes I created this one. Earlier in the week I talked about how baking cookies for someone can show you care, but I think this bread will help bring us some comfort on this rainy weekend.

Erin’s Rainy Day Chocolate Chip Banana Bread

3 large ripe bananas, mashed and set aside
3/4 cup white granulated sugar
1 egg
1/3 cup butter, melted and then cooled to room temperature
1 tsp pure vanilla extract
1 1/2 cups plus 1 Tbs flour
1 tsp baking soda
1 tsp baking powder
1 tsp ground cinnamon
1/2 tsp salt
1 cup mini chocolate chips

Preheat oven to 375 degrees. Grease a bread loaf pan and set aside.

In large bowl sift together 1 1/2 cups flower, baking soda, baking powder, cinnamon and salt and then set aside. In a smaller bowl, take remaining flour and toss together with chocolate chips until chocolate chips are coated with flour (This is my mom’s trick to keep the chocolate chips to well distributed throughout bread).

Using a stand mixer to a hand mixer on medium speed, mix together mashed bananas, sugar, egg, butter, and vanilla until well combined. Then with mixer on low speed at flour mixture until just incorporated. Finally, mix in chocolate chips.


Put in greased bread pan, and bake for 45 – 50 minutes or until toothpick inserted comes out clean.


This is what it should look like when done. Hope you enjoy it as much as we do!


Linking up today at Serenity Now for Amanda’s weekend blog reading link up. You have to check it out, there are tons of recipes and craft ideas!

Autumn is here… Sort of: Outdoor Decor

I absolutely love Autumn. It is my favorite season. Crisp weather perfect for running, hooded sweatshirts perfect for snuggling, hot chocolate perfect for drinking, and the colors. Did I mention the COLORS?

Well, so far, my area didn’t get the memo that fall is on the way. The weather has been a little too warm for my taste. I just feel like there is something wrong with still having to wear shorts this time of year. I was kind of resisting putting out any fall decor outside because I thought it was still too warm to fully embrace it, I mean I still have pentunias in full bloom, but I couldn’t take it anymore. So here is what I did.

I started slow and hung a wreath, which I found at Michael’s. I love that the colors are a little muted. Just some small pops of soft orange, but mostly green and gold which contrast nicely on the black door. The autumn greetings sign I hung on the brick to the side of the door. I bought this years ago at Michaels.


Also, our old door mat was kind of yucky, so I replaced it. I found this one at Target on clearance for $7.48. It was a great find and freshens things up around the front door.


Finally, using this beautiful gold pot that the previous owners of our house left behind, I planted some neutral mums. I love how everything I used has a soft golden tone to it.


Anyone else having a hard time putting out fall decor in this weather?

Linking up at Southern Hospitality outdoor decor link party.

She’s Two: Coco’s Birthday

My youngest is two. No more babies in the house.

Birthdays at our house often get celebrated a few times. Sometimes it is a little crazy, but it works for us.

Because of this, we have lots of cake, and lots of opportunities for adorable photos.

On Coco’s ACTUAL birthday, we had a very busy day, so the boys wanted to give Coco the gifts they had picked out before they left for school. We don’t have a ton of dolls in the house, and because of this, the boys thought it might be a nice gift for her. They picked out toddler versions of Rupunzel from Tangled and Merida from Brave. Needless to say she loved them at first sight.


The next night she got to celebrate with Brian’s family. I made a cake for her with the sun from Tangled and her Meema got her a Tutu. She danced and twirled for everyone to see.


Sunday, my family got to sing happy birthday to her at our monthly Sunday Dinner, which of course meant more cake!


You don’t turn two every day you know… well unless you are at our house, you get to do it three times.


Baking for a Cause: More Cookies


Do you remember receiving your first care package?
I do.
I was a freshman at John Carroll University. I was homesick,
overwhelmed, and sad. Midterms were coming very soon. I went to my mailbox
after lunch and saw the magic card that said there was a box waiting for me in
the mailroom. When I got back to my room, I immediately opened the box to find
fresh baked chocolate chip cookies, a new hoodie, and a card signed by everyone
back home. I felt this overwhelming sense of relief. I knew people were thinking
of me. Proud of me. Loved me.
I know it seems silly that all those emotions came from a
box of cookies, but honestly, nothing says love like someone taking the time to
make something especially for you. Whether it be your favorite meal, a birthday
cake, or a batch of cookies, you cannot deny that a smile immediately spreads across your face.
A few months ago, I met a woman named Mary Beth who also understands the power of a box of cookies. She is the
Director of Communications of Christ the King College Prep in Chicago. This is
a school that serves students who come from some of the most crime ridden areas of Chicago. Many of the students will be the first to graduate high school and
attend college. 


When I met Mary Beth she had just tried an oatmeal, dried
cherry and dark chocolate cookie I had made. She must have liked it because she then asked if I
would be willing to share a cookie recipe once a month with an organization she had recently started for the alumni of Christ the King called
Smart Cookies. After hearing what Smart Cookies was about, I, of course, agreed to help in any way I could. So, once a month I will be sharing a cookie recipe with you, and with with the bakers of Smart Cookies.


After dropping off her own daughter at college, Mary Beth couldn’t help but think of the recent graduates of Christ the King who would be leaving for college soon. She knew these new students wouldn’t be having as easy of a time outfitting their new dorm rooms,  let alone receive any care packages. Then, she had the most amazing idea. Mary Beth decided to get together a group of Moms to start baking cookies and sending them off to all the kids who have graduated from Christ the King. She is organizing Moms (dads, grandmas, grandpas or anyone who loves to bake) to literally send off some home made love in a box to give these kids a little bit of encouragement. A little taste of home. A little way to say, WE ARE PROUD OF YOU.

Next time you are baking cookies, you might want to consider doubling up that recipe and sending them off to some kids that need a little extra love. Isn’t that why we bake?

For more information on how you can help with the SMART COOKIES organization, contact Mary Beth at: marybethsammons@aol.com or go to www.smart-cookies.org