Month

July 2012

Know Anyone who Doesn’t Like Chicken Salad? Me either…


Remember this clip from Scrubs? I still love that show. It is one of the only shows I own on DVD, so sometimes it comes up in conversation.Anyway, it’s summertime, so as much as I love the warm weather, when it gets REALLY hot (as in the heat index was about 108 degrees last week) I like to stay away from the stove, oven, and even the grill as much as possible. This is when I start breaking out the chicken salad recipes.

Brian likes chicken salad (is there anything he doesn’t like?), and he doesn’t mind eating it for lunch or dinner. I’m sharing two recipes that have been family favorites for years, and are perfect when you don’t want to be near anything hot, as I use precooked rotisserie chicken from the deli section of the grocery store. However, you can poach or cook your own too.

The first recipe is one I kind of adapted from a few other recipes based on likes and dislikes. The second recipe is one that my Mom used to make all the time.

Sweet Chicken Salad

3 cups cooked chicken chopped
1/2 cup dried cranberries
1/2 cup green grapes diced
1/2 cup celery diced
1/2 bell pepper diced
1/3 cup mayonnaise (more or less depending on taste)
Salt and Pepper to taste
Red Onion Slices
Lettuce leaves
Favorite sliced bread, wraps, or rolls
Mix first eight ingredients until well incorporated. Serve on bread/wrap/roll with lettuce and red onion slices.
Mom’s Chicken Salad
1/2 cup raw slivered almonds
2 1/2 cups cooked chicken chopped
3 medium size stalks of celery diced2 green onions diced
1/4 cup sour cream or plain green yogurt
1/2 cup mayonnaise
2 tbs fresh dill removed from stem and chopped
1/2 cup of seedless grapes cut in half
Salt and Pepper to taste
Lettuce leaves
Favorite bread, wraps, or rollsIn a small dry skillet over low heat, put in slivered almonds and heat until fragrant. This takes about 2 or 3 minutes (don’t burn), and set aside in large bowl until cool. Then in the same the with almonds, add chicken, celery, green onions, sour cream, mayonnaise, dill, and  salt and pepper and combine thoroughly. Serve on bread, wrap or roll with lettuce leaves.

Enjoy!

Our Garage Sale: Also Known As a Horders’ Heaven

Having a garage sale is no small feat. It does takes some work and some planning, but after hosting our first garage sale a few weeks ago, I would definitely do it again. We made some extra cash AND we have the added bonus of having more room in closets, drawers, garage, and sub-basement.

Brian and I had never hosted a garage sale before, and we weren’t sure where to start, but we knew we had plenty of useless crap great treasures to sell. Usually, when we are purging, these things make their way to our local GoodWill or to a local charity, but we decided a few months ago that we would start a “sale pile” in the basement. As we did our purging we would save it for the garage sale instead of donating it. Before we knew it, we had a pretty large pile going (it was about to topple over), and it was time to set the date and register.


Brian and I looked in our local newspaper to see if there were any town events coming up. We thought that if we picked a weekend that more people would be visiting our neighborhood, maybe more people would stop by our garage sale. The weekend we hosted our garage sale was the weekend of our town’s art festival as well as a huge charity benefit at the church across the street from our house. This kind of planning really paid off, as a lot of people would wander over from across the street or on their way to the art fest.

Once we set the date and our registration was complete the REAL work began. The week before our garage sale, we did some advertising. We advertised on craigslist and by placing signs all over our neighborhood. Both of these forms of advertising were free!(TIP: If you are having a garage sale, please make sure your signs are large, legible, sturdy, and have all information. Also, include pictures and details about what is for sale in your craigslist posting).


Next, I got rid of everything in the garage that wasn’t for sale. I made sure to put our lawn mower, snow blower, wagon and kids’ bikes in our shed.  Also, anything that could be hung from the walls or ceiling, I hung up and then draped with sheets. This helped make room, and discourage potential buyers from asking me about things that were not for sale.

Once the garage was clear I put in several long banquet tables (we borrowed about 9) so I would have plenty of room to display items, and then labeled each banquet table with a sign signifying what kind of items would be on the table. The categories of items I had were: Baby Clothes (sizes 0-3, 3-6, 6-9, 9-12, 12-24), Toys, Baby Gear, Kitchen Supplies, Housewares, Teaching Materials, School/Office Supplies, Books and Media, Clothes and Jewelry.


The next thing I did, was create a “one touch policy” on all items to save time. Basically, what this means is: when I brought an item up from the sub-basement, I packaged it, priced it, and put it exactly where I wanted it to be the day of the sale. This saved a bunch of steps. I didn’t have to sort all the items into groups, then go back and package or group the item, and then go back again and price the item, and then re-sort the items for display in the garage.

I know it sounds weird to “package” items, but this is where my Type A personality was brought to light. I tried to pretend I was the customer. If I had a baby outfit that included pants and a shirt, I would fold the item, tie it together with twine, and then put a price tag on it. With sheet sets I would fold the fitted sheet, flat sheet, and shams all together and put in a large ziplock bag. Then, I would label the bag with the sheet set size, what was included, and the price. I also tied together place mats, cloth napkins, toys, earrings, silverware sets, and dish sets. All of these items were labeled in detail. Long story short, if it is a set or is supposed to be together, keep it together. (TIP: The cleaner and prettier items are displayed the more likely people will want to buy what you are selling. I got several compliments from buyers on the cleanliness, and organization of the items I was selling. Also, price your items fairly based on condition, cleanliness, and if you have a complete set).


The last thing I did was to move any furniture I was going to sell to our driveway. Brian and I thought if some of the big ticket items were on the driveway, it might catch the eye of people walking past our house.
Finally, garage sale day was here! Brian and I went into the day with the mindset that our stuff is not gold. To us, these items were something we don’t need or want anymore, and if we weren’t really willing to haggle, then we shouldn’t be selling the item at a garage sale. Because of this mentality, we did a little bit of haggling, but most people thought our prices didn’t really need any adjustment, and were willing to pay the price that was on the item. I did however offer a few deals. For example, if someone bought 5 baby outfits, I would tell them to go pick out another one for free. That was my way of saying, thank you for taking our old stuff away.  A new teacher asked if she could buy all of my old classroom decorations at one price for the whole bin, and since she was taking the whole bin off my hands, I gave her about two dollars off each item in the bin. (TIP: How you price items at a garage sale does help people buy more, so do your research ahead of time).
All of the organizing and research had completely paid off. For a little bit of work we walked away with a pretty hefty sum and a ton of compliments. One woman even came back three separate times with different friends every time, AND she bought something every time. I really believe that a garage sale is one of those things that you get out of it, what you put into it.


Flashback Friday: Kitchen Progress

Last week, a friend asked if I would please post some pictures of our house as a way to kind of see some more ideas as well as our decorating style and such. So, I am in the midst of trying to put together a House Tour page. While it sounds good in theory, with three little ones, it is sometimes hard to keep a room clean long enough to take pictures. So, it will be quite the process to post a whole house tour at one time.

At the risk of never showing pictures of our house, I thought I would try and do “Flashback Fridays” where I will try and feature each room of our house. I will show pictures of the house when we bought it, and then update you on where we are right now. No room in the house is complete, and probably won’t be for a long time (baby steps), but we have done so much since we bought this 35 year old gem in a great neighborhood, and I thought it might be fun to share the progress we have made so far.

So, for the first Flashback Friday, I am going to feature our kitchen. My favorite room in ANY house. When we first put an offer on this house, the kitchen was honestly the least of our problems. The whole house has some issues. We had to do mold remediation, remove all the carpeting on the upper level and sub-basement, replace the furnace, clean all the ducts, replace all the trim, buy and install new doors for the upstairs, paint almost every room, and tile the upstairs bathroom. While most people like to live in a space for awhile until they decide on paint, flooring, etc. This house REEKED of dog everywhere, and plus with us finding mold we wanted make this house as safe as possible. So anything that could possibly have dog dander or mold spores had to go.

Closing day December 2010

So, while Brian was doing major demolition and helping put in flooring, I started painting the kitchen. With a little help from the internet, I researched how to paint cabinets from my favorite blog here. I also talked to some people at my second favorite store, Home Depot (the first being Target, duh).

We kept a crazy schedule while we were getting this house ready for us to move in, but honestly it was totally worth it! So,after Brian would work all day, go to the new house with his dad and put in a few hours, then he would come home eat dinner and go to bed. Then, when my kids and husband were in bed, my sister, my niece, mom and I would head over to the house and do some work until I had to be home for my youngest child’s 4 a.m. feeding (she was only 3 months old at the time). We moved in just six weeks after closing.

Here is the kitchen before move in. I bet you are wondering why we would ever paint these awesome avocado two tones cabinets and mustard walls. Can you sense my sarcasm?


Here are some pictures of the cabinets being painted as well as the walls.


So after painting, adding our stainless steel appliances that we brought with us from our previous house, and a few finishing touches. This is our kitchen now.


Brian and I are always trying to improve, so I know this kitchen will probably change a lot in the time we live in this house, but it is miles and miles from where we started.

There is More Than One Way…To Make a Chicken Pot Pie

Yes, I know it is blazing hot outside, but it was all I could think to make. You see, my friend just had a baby, and when people have babies I bring them food. Reason being, the last thing anyone wants to do when they bring a baby home is cook. I wanted to make something that was casserole-ish, that was easy to re-heat, and I could make in a short amount of time. I also was hoping to double up the recipe so I would have dinner for my family too.

While I made Brian watch cooking shows with me this past weekend (don’t feel too bad for him there is only so much baseball, car racing, and Holmes on Homes re-runs a girl can withstand), I saw a great recipe for a chicken pot pie with crumble topping on America’s Test Kitchen. I have made chicken pot pie in the past, and it usually involves home made pastry crust, which I have yet to master, and it comes out soggy and doesn’t reheat well. I decided that this would be the perfect dinner to bring my friend.
Since, America’s Test Kitchen requires a paid membership to their web-site for certain recipes, and I didn’t DVR the episode, I tried to make it from memory so bear with me on measurements and directions.
Filling:
4 or 5 boneless, skinless chicken breasts and/or thighs
3 cups low-sodium chicken stock
2 tbsp vegetable oil
1 medium onion chopped
3 medium carrots peeled and chopped
2 stalks celery chopped
Salt and pepper to taste

1 small package mushrooms sliced (I used baby portabella)

1 tsp soy sauce

1 tsp tomato paste
1/2 stick unsalted butter
1/2 cup all-purpose flour
1 cup whole milk
1 small bunch fresh parsley chopped
1 cup frozen peas

Crumble Topping

2 cups all-purpose flour

2 tsp baking powder
3/4 tsp salt
1/2 tsp black pepper
1 pinch cayenne pepper

1/3 cup parmesan cheese grated

1 stick unsalted butter cut into small cubes
1/2 cup – 3/4 cup whole milk (ATK used cream, but I didn’t have any)
Preheat oven to 450 degrees.

Combine flour, baking powder, salt, black pepper, cayenne pepper, and parmasen cheese in a large bowl. Sprinkle butter pieces over top of flour. Using fingers, rub butter into flour mixture until it looks like coarse cornmeal. Add milk and stir until just combined. Crumble mixture onto parchment-lined rimmed baking sheet. Bake until  starting to brown but not completely baked through. About 10 to 13 minutes. Set aside.

In a large pot with a lid, bring chicken and broth to simmer over medium to medium high heat and simmer the chicken until cooked through. About 10-12 minutes.

Transfer cooked chicken to large bowl. Strain broth through a fine strainer and reserve in another bowl. In same large pot as you cooked chicken, heat 1 tablespoon oil over medium heat, and  add onion, carrots, celery, salt, and pepper. Cover and cook, stirring occasionally, until just tender, about 5 to 7 minutes.

While vegetables are cooking, cut chicken into small bite-size pieces. Transfer cooked vegetables to bowl with chicken; set aside. Heat remaining tablespoon oil in empty pot over medium heat until shimmering. Add mushrooms; cover and cook, stirring occasionally, until mushrooms have released juices, about 5 minutes. Remove cover and stir in soy sauce and tomato paste. Increase heat to medium-high and cook, stirring frequently, until liquid has evaporated, and  mushrooms are well browned. About 5 minutes. Transfer mushrooms to bowl with chicken and vegetables. Set aside.
In empty pot (same pot you have used the whole time) over medium heat, melt butter. When butter is melted, stir in flour and cook 1 minute. Slowly whisk in reserved chicken broth and milk. Bring mixture to a simmer until sauce thickens. Season to taste with salt and pepper. Remove from heat and stir in parsley.
Transfer all reserved chicken, vegetables, mushrooms, and peas to pot and combine well.
Pour mixture into a 9 x 13 inch baking dish. Scatter crumble topping evenly over filling. Bake until filling is bubbling and topping is well browned. This should take about 12-15 minutes.
Here is the picture my friend sent me after her family had eaten the pot pie. I guess they liked it!

Baby Must Haves

In the past year or so, I feel like there has been a HUGE baby boom. Maybe it’s Fifty Shades of Grey or maybe there is a lack of good television, but I know so many ladies who are planning to start a family,who are pregnant or who have just had babies. All these moms, always have the same question for me: “What do I need? What should be on my registry?”


After rewriting the same email to my family and friends at least ten times, I decided to post here our (Brian has had some serious input), favorite things and must haves for baby. Now keep in mind, I am not an expert, I just know what worked for us.So here goes, our favorite baby must haves:

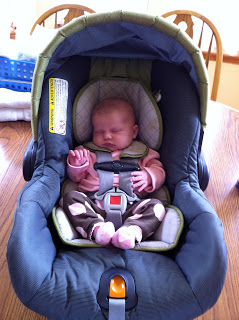
1.) Carseat and Stroller (also known as a travel system): For obvious reasons, we absolutely knew we needed a carseat. We registered for both the carrier carseat with base and the carseat that is for older children. While we wouldn’t need the larger one until much later, we figured it was an expense that would be nice not to have down the road. We personally have a Chicco carrier carseat and stroller for our infants. We love it and installation is easy. We actually started out with a Graco carrier carseat, but because our oldest was very small, his head was always falling forward so we switched to a Chicco. However, both have extremely high safety ratings, and I have never heard anyone complain about either brand. For the larger size up carseat, we did a Britax. They are highest rated in safety and easy to install. They can also serve as rear facing and forward facing which in some states the law requires  kids stay rear facing until age two, and there is no way any kid can stay in those carrier things past 10 months because they are just too heavy to carry around. Also, the Britax models are a bit pricey, but there are ways to find bargains. As far as strollers go, this is basically personal preference. Some people like jog strollers, while others like more basic models. Some decisions are based on ease of pushing or how high the handle is for taller parents. When we registered for a stroller, the best advice we got was to make sure that whatever carrier carseat we purchased could fit into or be adapted to fit into the stroller. When babies are really little (younger than six months) it is safest for them to be in the carrier carseat even in the stroller. Most sales people at stores like Babies R Us and Buy Buy Baby will know what works. Also, we tried to consider quantity here. It is nice to not have to move carseats around to different cars. For the carrier carseat we just registered for a second base which is cheaper than buying a whole carseat. (Whew, overwhelmed yet?) 


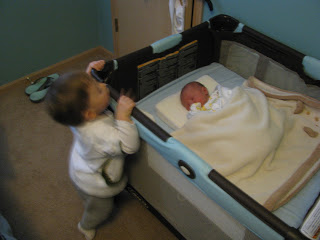
2.) Crib/Bassinet/Play-yard: I don’t know if a crib is something that parents will register for, but in some cases a bunch of family members will go in on a big purchase like a crib. Cribs are kind of tricky because there are a lot of safety things associated with them for obvious reasons. Our theory with the crib was as long as it is safe, pretty, and can be used for a long time and multple kids we were good. We actually went with a model that Babies R Us sells, and I think they still carry. It is also a convertible crib, which means it can be converted to a toddler bed, and then later can serve and a head/footboard for a double sized bed (talk about bang for your buck). As for bassinets, we thought this was not a good idea as they can only be used for a short period of time, also bassinets require different sized sheets and bedding. We have a play-yard (Graco Pack and Play the bare bones basic model) that has a bassinet feature, and we just put that in our room for the first few weeks. I know Moms that kept the play-yard set up on a lower level of the house as they weren’t able to walk stairs after a c-section. After the bassinet phase, it is nice to have a “travel bed” for Nana’s and trips and such. This is another quantity item. Some people like to keep one at Nana’s or in the car and keep one at home especially if you use it every day in your house (however they are easy to fold up, and we got buy with only one). 


3.) KCU: This is my own little term I made up. I call it a Kid Containment Unit (KCU). Things that fall under this category are swings, bouncey seats, exersaucers, play mats, jumperoo’s, Bumbo’s etc. We narrowed it down to two or three of these things, as they take up so much space and honestly, our kids liked roll around on the floor. I used them mostly when I needed to fold laundry or cook dinner. I knew the baby was safe, contained, and occupied. We did end up with all of these things, but people gave them to us as hand me downs. The two things we used the most were the bouncey seat and the exersaucer. Also, any time we could register for a travel one of these things we did (we were living in a condo at the time). They are smaller, can be folded, easy to hide, and do the same thing as the “bells and whistles” models. When we had babies, we only had one level, but I know Mom’s who have two or three levels in their house that liked to have a KCU on each level. 


4.) Change Table: We didn’t register for those old school ones like we had growing up. Ours was just a dresser with one of those pads on top. It was nice to have a designated space for baby supplies and clothes, and later we used it as an actual dresser (some play-yard models have change tables built in).

5.) Breastfeeding Supplies: This depends on if you plan to breastfeed, if not skip ahead. Boppy Pillow: (some Moms like the My Breast Friend) either way, I honestly could not have lived without this. It made nursing so much easier, and came in handy when I needed to answer the phone or change the channel on the TV for a 3 a.m. feeding. Breast pump: I had a Medela Pump in Style. Again, I know its pricey, but was so worth it, and for as much as I used it, it had paid for itself 3 times over. Another thing I thought was so convenient were the Slimlines freezer trays. They are freezer trays for breast milk, but they freeze the milk in one ounce sticks so they can fit in the bottle and since they are each one ounce you know EXACTLY how much milk you’re putting in the bottle.


6.) Baby Carrier: I liked our Baby Bjorn. It was so nice to sometimes just be able to use that instead of packing a bulky stroller. I liked it for the grocery store, church, walks outside, and doing some things around the house. A lot of moms swear by Moby wraps or baby slings, but I could never get it to work right, and I didn’t feel like the baby was in there safely (again, personal preference). Also, the weight limit on a Bjorn is nice. They also make carriers that you can use for kids up to 45 pounds and go on your back. We considered this, but our kids were happy in the stroller, and once they started walking, they didn’t want to stop. (Almost done, I promise).

7.) High Chair: We had an old school model. The separate high chair with a tray. We liked it a lot and we liked having something that we could save for grandkids. However, some moms find the ones that attach to your kitchen chairs much more convenient. They are smaller, don’t take up floor space in the kitchen, and can later be used as a booster seat without the tray. We did not register for the travel ones that attach to counters or tables, they did not seem safe to us at the time.


8.) Baby Tub: We had a baby tub, and used it. We also liked it because it was nice to have even when our kids were older. We put the little tub inside our bath tub, and just filled the baby tub. It saved water, and it helped with a transition to the big tub.


9.) Linens: Crib sheets are specially made to only fit a crib mattress (I would say to have 3 or 4 on hand, it’s always nice to have a lot of these in case there is a middle of the night diaper leak or something). Hooded towels are not a necessity, but I liked having designated baby towels (three is enough, when they are little babies, they only bathe every few days as to not dry out their skin. Also, it is nice to keep one in your diaper bag in case you have to do an impromptu bath at Nana’s after messy cake. True story). Baby washcloths are just softer and I like them better (we had at least 6 of these, as I used these all the time and even kept one in my diaper bag for emergency nose wipes and spit ups). Play-yard sheets are for the pack and play (I had two in case of an accident). Change pad covers are covers for the pad that goes on the change table (two or three are nice for laundry rotation). Burp cloths are nice to have all over the house (I had about 8 and kept 2 in the diaper bag). Lap pads or multi purpose pads are not a necessity, but my trick for these was I put one in the boucey seat,  and one in the carseat so if there is a diaper leak you don’t have to wash the WHOLE seat cover, as they are kind of a pain to wash). I also had an extra Boppy Pillow cover in case of an accident. 


10.) Miracle Blanket: You’ll see on my list below of things to not register for, and you’ll see I put blankets, however, we absolutely loved our Miracle Blankets. This was my Mommy secret for getting the kids to sleep through the night, and fall asleep on their own. If you want more information on Miracle Blankets click here. Seriously, they are a Miracle and really work. I used them with all three kids, and they were all sleeping through the night pretty early on, and even now they all older I can just put them in their beds and they fall asleep on their own. Brian and I owe the Miracle Blanket for not only how well rested our kids are, but how well rested we are. 


11.) Bottles: I know this seems like a common sense thing, so I just want to share our experience here. We liked Breastflow bottles. My kids never experienced nipple confusion with them, and they are BPA free to boot. I know Moms that like Avent, Dr. Brown’s and lots of other brands. The advice I got here was to ask the baby’s pediatrician, lactation specialist, other Moms, or labor and delivery nurses for suggestions.12.) Diaper Bag: I actually just have a nice backpack that I love, but they have some really nice diaper bags out there now that I wish they had when I was registering. Some things I would would have done is get one that comes with a change pad, as well as get one that has insulated pockets for bottles and sippy cups. Early on, we learned it is sometimes a pain to bring a large diaper bag if we were just running out for a little bit, so I also have a small one that I keep a few diapers, some wipes, and an extra outfit. It is nice for church or quick runs to the store.

13.) A nice thermometer. We have a Summer Three in One Family Thermometer. We like it and know other Moms that love it. It is easy to use, which is nice in the middle of the night.
14.) Grooming Supplies: Tiny nail clippers, soft bristle brush, and a little comb.
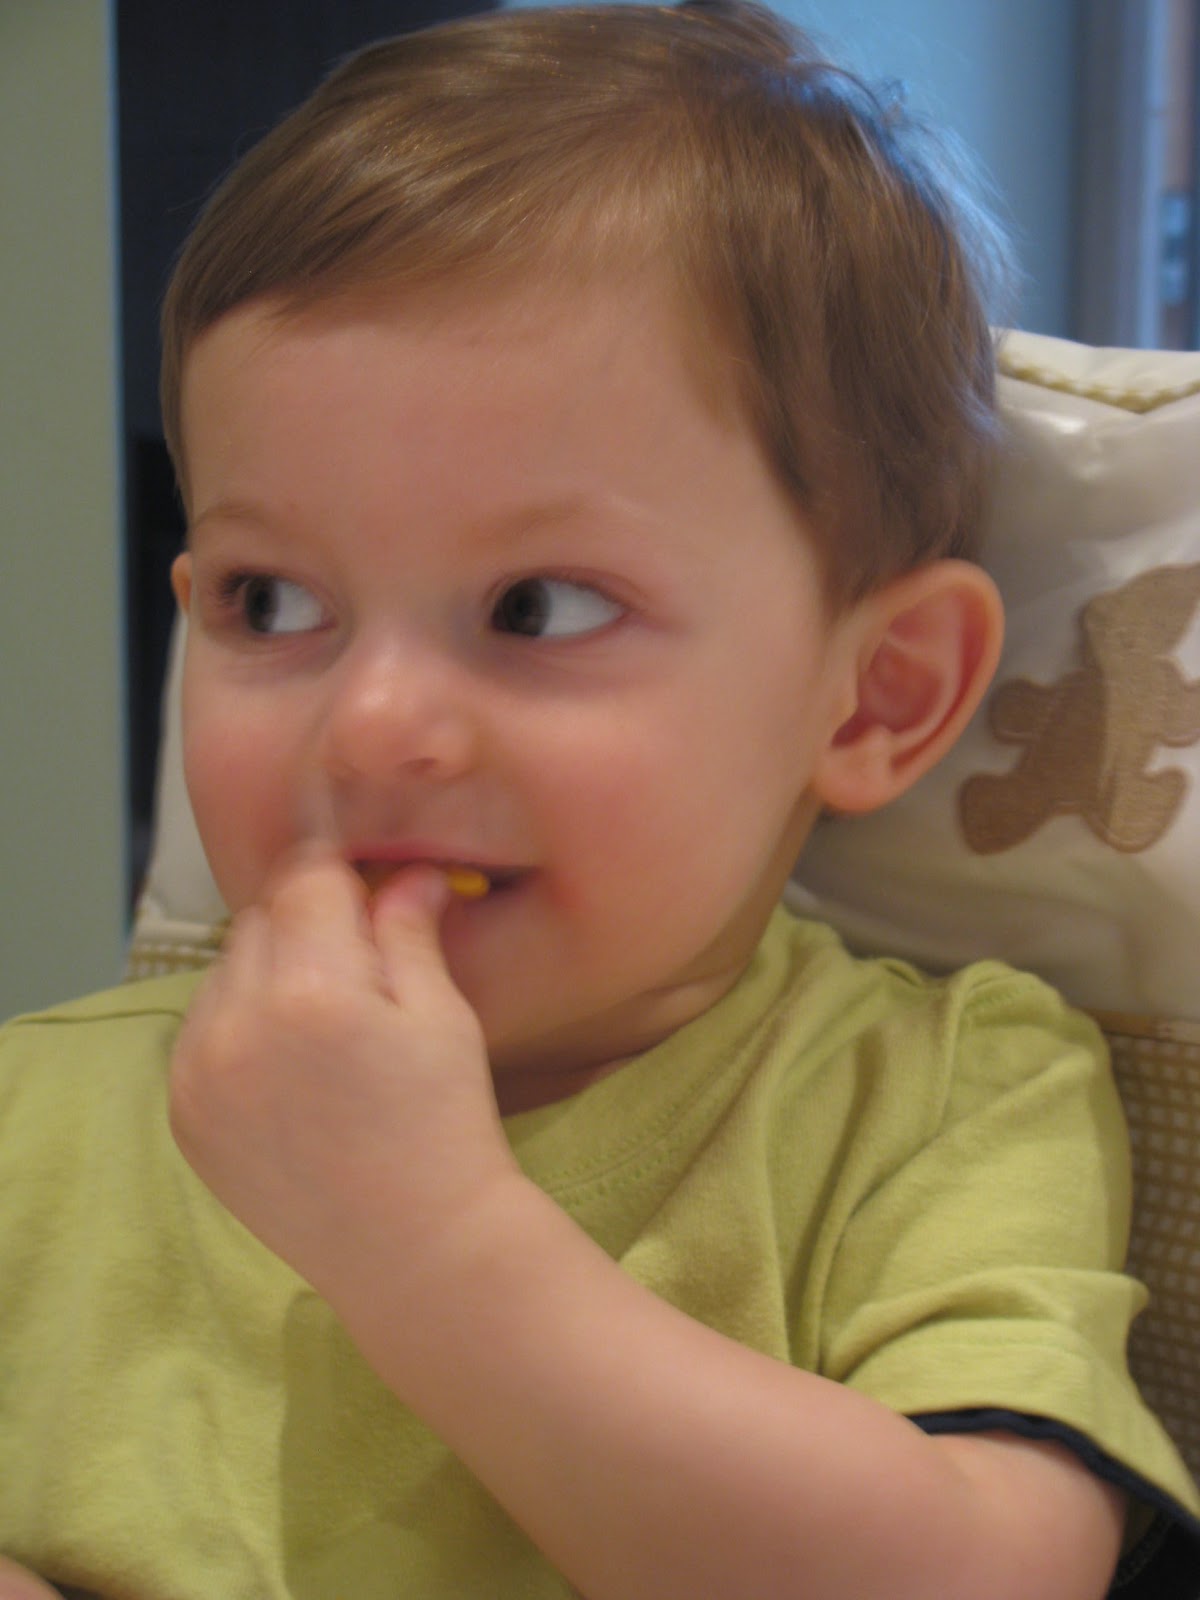
15.) Feeding Supplies are something we didn’t need until the kids were a little older, but we were happy to receive at our baby shower.  Little bowls, spoons, forks, and plates. I registered for bowls that came with lids which were awesome for traveling or refrigerating leftovers. There are different sized spoons for different ages too, so we made sure to order a few of each size. Also, I made my own baby food so there are all kinds of contraptions for this, but my favorite is the OXO Ice Trays for storing an freezing all the purees. (No really, almost done this time). 


Below is a list of things I didn’t add to our registry. I had heard from friends people often like to give these kinds of things once the baby comes.

– Outfits (the only exception here is I personally picked out two or three outfits and purchased them myself for coming home from the hospital and the first couple days home.)
– Onesies
– Pajamas
– Socks, Hats
– Blankets
– Books and Toys (this is a personal preference of course, but some parents prefer no plastic or only toys made in the USA)
– Sippy cups (this was tricky for us because our kids had preference with them so I just returned any we received and then bought ones that our kids liked).
– Pacifiers (we delivered in a hospital so we asked our nurse at the hospital for a few extra just in case and we were good to go).
I know it doesn’t seem like a lot (or it does and you are totally overwhelmed) in comparison to the registry sample lists they give you at Babies R Us and Buy Buy Baby, but honestly, these are the things we used EVERY single day. When I registered, I tried to think of what my parents, grandparents, etc. had access too, and honestly all the baby needs is love, food and diapers.

Time Flies… Or Does It?

The other day, I came upstairs to find this:

Three munchkins playing in the tupperware cabinet. At first, I’m not going to lie, I was a little annoyed. There they are sitting right in my way, and it is almost time for lunch. Then, I took a deep breath, and started to thank my lucky stars that they are still young enough to enjoy playing in the tupperware cabinet. Thanking God they are still little, and enjoy simple things.


Time has gone so fast it seems in the past few years, that in this moment I was so happy that it had slowed down, just a bit.


Someone once told me that someday I will miss the quiet and the mess so enjoy it. So that is what I’m going to do from now on.


Even if that means I have to re-organize the tupperware cabinet once in awhile.

French Bread, Oui? Easy to Bake Bread for the First Timer

I found this recipe over a year ago, and I have made it several times. I know what you are thinking, “Baking your own bread sans bread maker… are you nuts?” No, its really not that hard, and it was the second bread I ever tried to bake (the first bread turned into a Thanksgiving disaster). This French bread is easy, and so far comes out perfect every time I make it. I sometimes double up the recipe and use a loaf for French Toast.

I found this recipe doing a simple Google search, and I pinned it on Pinterest only having made it a few times. I wanted to make sure that even me, a newbie to bread baking could make it before I shared it. Here is the link.


The key for me to making this bread, was patience and a thermometer. Before I made this bread, I bought a Taylor Tru-Temp instant read thermometer at Target for around 8 bucks.


http://www.target.com/p/taylor-trutemp-instant-read-thermometer/-/A-11010672#?lnk=sc_qi_detaillink

It was wonderful for making sure my water was not too hot or too cold when trying to proof the yeast, and also for measuring the internal temperature of the bread when baking (which is suggested in the recipe). Without the thermometer, I don’t think my first attempt at home made bread would have been such a flop. For an eight dollar investment, I couldn’t go wrong.

As I mentioned above this bread is great for making French toast, but it is also wonderful fresh out of the oven slathered with my favorite garlic and herb compound butter.

Garlic and Herb Compound Butter

1 stick unsalted butter softened
1 large or 2 small cloves of garlic grated
1 tsp chopped oregano leaves
1 tbsp chopped thyme leaves
1 tbsp chopped rosemary leaves
1 tbsp chopped parsley leaves
2 tbsp grated parmasen cheese
Salt and Pepper to taste

In a small bowl using a fork, smash together butter, garlic, herbs, cheese, salt and pepper until well incorporated. Spread on favorite bread or grilled corn on the cob. Keep refridgerated.

The Icing on the Cake: Staining Unfinished Wood

After Brian built me this beautiful farm style plank table, it was time to stain it. I spent an afternoon at Home Depot, learning everything I could about stain, application, drying time, and polycrylic finishes. I also, spent some time picking out the perfect medium toned color as well as assuring I picked out a matte finish so the table would look old and not too shiny. I wanted to learn as much as I could because half of the look of this table was not only the style, but the color and finish.

Here is the finished product:

And this is how I got there.

Supplies
Synthetic Bristle Paint brushes
Lint free rags (I used some of Brian’s old holey white undershirts)
Sandpaper (both course and fine grit)
Electric Sander
Sponge
Bucket of water
Minwax Water Based Pre-Stain Wood Conditioner (1 quart)
Minwax Water Based Wood Stain in Colonial Pine (1 quart)
Minwax Water Based Polycrylic Protective Finishe in Satin (1 quart)
Latex (or non-latex) tight fitting gloves
Safety glasses

Smooth to the Touch: I started this project by sanding the entire table with my electric sander with a course grit sandpaper and then followed up with a find grit sandpaper. I just wanted the table to be smooth to the touch. I figured there was going to be a lot of people eating at this table over the years, and I really didn’t want anyone having their roast chicken with a side of splinter. I was extra careful to do underneath the table as well.

Clean up, clean up, everybody clean up: This part was crucial. The “expert” (I say expert, because she knew an awful lot about staining) at Home Depot said to wipe off the table with damp sponge a few times to try and remove any residual dust from sanding. She said that the more I did it the smoother my staining application would be. I made sure that the table was completely dry and free from any water spots before I started the next step.

Conditioner IS better: This step is one that some people told me to skip ahead of time, but after talking to my new best friend at Home Depot, she assured me that this step is important and not very time consuming. Since this was the first time I was staining something, she said I would get much better and more even coverage if I used a wood conditioner. Using a synthetic bristle brush, I applied the wood conditioner. It only took about five minutes to dry, and was very easy to apply. I am so glad I didn’t skip this step, because it was the least time consuming step, and the color went on perfectly even.

The Scary Part: Applying stain isn’t rocket science, but it does take a light hand and a bit of patience. The key I found, is to not do too big of an area at once. So using a synthetic bristle paint brush, I applied a light layer of stain to a small area of the table (one leg, one plank at a time etc.) and then using a rag, LIGHTLY wiping off any excess stain. You don’t want to have to much stain sitting on the surface for too long of a time as that increases the intensity of the color and then the color becomes uneven. Also, using a light hand to wipe the excess stain, allows for more even color as you are not wiping off too much stain that you have just applied. The first coat of stain was not dark enough for me, so once the first coat was completely dry (I waited until it was dry to the touch, about 5 hours), I applied another coat just like the first coat.

First coat of stain


Second coat of stain

Gettin’ Poly With It: This step is again, not hard, just requires a bit of patience (which, I’m not going to lie I was starting to run out of because I just wanted to eat dinner on our beautiful new table). Using my trusty synthetic bristle brush, I brushed a thin layer of Minwax Water Based Polycrylic on the table. I was very careful to make sure that the layer was thin as to reduce any kind of dripping. Once it was dry (minimum of 2 hours), I lightly sanded the table by hand with a find grit sand paper. Then, using a dry cloth wiped any dust, and applied the next coat. Minwax suggests five (yes, five) coats of the polycrylic for maximum protection. I did do the suggested five coats on the top of the table where there would be more of a chance of drinks spilling and food stains, but on the legs and other exposed areas underneath, I only applied three coats.

This process was much more time consuming than I ever could have thought. But I must admit it was completely worth it.

Just a few things that I think are worth mentioning:
1. Since I decided to go with a water based stain, everything else I used had to be water based as well. Water based wood conditioner and water based polycrylic. If I had chosen an oil based stain, I would have had to use all other oil based products as well.
2. If I could do it over again, I might have stained all the planks on the top of the table BEFORE Brian had put them together. I did a pretty good job of getting in all the cracks of the table, but it would be even better had I been able to reach all sides of each plank with a paint brush.
3. I was extra careful to make sure I did this whole process in a well ventilated area.

Here is a couple more after shots.


As you can see Brian and I do pretty good work, which was first evidenced by our three kids.


Walkin’ the Plank: Our DIY Farm House Table

For years, I have wanted an old farm plank style table. I like the rustic look, and I really love how like wine (or a good Wisconsin cheddar) it would just get better with age. Also, since I’ve been hosting these Sunday dinners with my family once a month (mentioned here) I needed something that could seat 10-12 people. That way, I could at least have all the adults in the dining room together.

So, I started some research, and WOWSERS, old looking tables are expensive. Also, the size I was looking for added some serious coinage to the price tag. These are some of the tables I had my eye on (waiting, hoping for them to go on sale, and by sale I mean 99% off).

http://darvin.com/Item.aspx?ItemID=-2001460134&ItemNum=5397-42%2b2x84b%2b3x85b%2b96


http://www.potterybarn.com/products/solomon-rectangular-extension-dining-table/?pkey=csquare-rectangular-tables


http://www.restorationhardware.com/catalog/product/product.jsp?productId=prod1606015&categoryId=cat1537023
After seeing how much these tables were, I then, started looking at GoodWill, garage sales, craigslist, and came up with nada. I was starting to feel a bit of a time crunch too as Sunday Dinners were getting crowded, and I was sick and tired of setting up my portable banquet table every month.
Cue Pinterest! After seeing how many people have built their own tables, I convinced Brian to build us one. It didn’t really take much convincing because Brian was excited at the prospect of buying and using power tools.
So, we went from an old kitchen table with a six foot plastic banquet table covered with table cloths…
… to Brian becoming the next Norm Abram.
We found the plans for this table on www.ana-white.com After reading a bunch of other DIY blogs, and doing a little bit of research on measurements and ease of building, we went with these plans because a.) we’ve never heard anyone complain about anything Ana White builds and b.) it was the perfect size and look we were going for.
Off to Home Depot we went. Ana White makes a very easy buy list to follow, and with the help of some people at Home Depot, we picked out the best pine pieces we could find. I liked the idea of a soft wood like pine so that it could get dinged up and look aged over time.
Brian with the help of a friend were able to build the table in about five hours on a Saturday, which isn’t too bad for a first time build. Here are some pictures of building day.


Then came time for staining (another first time project). I’ll share more about that next week.
Now that I know Brian can build things, and use power tools, his “Honey Do List” is getting quite long. In fact, my friends have seen the table, and are giving Brian orders for their own tables too.

Molto Zucchini: Fresh Zucchini Frittata

Are you sick of zucchini? I hope not because I have so much zucchini in my garden that I will be trying to use it up. I actually had to start giving some away.


So, when Brian was a kid zucchini frittata was his absolute favorite thing that his grandmother would make him. She never had written the recipe down, but after talking to Brian, I think I have mastered it. The last time I made it Brian had a Ratatouille flashback moment like this. He said it tasted just like grandma used to make.

Grandma Yo Zucchini Frittata
2 tsp extra virgin olive oil
1 medium zucchini cut into thin discs
4 eggs beaten thouroughly (add a splash of water)
Pinch of nutmeg
Salt and Pepper to taste
1/4 cup freshly grated parmesan cheese
1 sprig fresh thyme

Preheat broiler.

In large oven safe skillet over medium heat add olive oil and zucchini tossing occasionally until zucchini is slightly brown around edges, about 2 to 4 minutes. Add nutmeg, salt and pepper. Then, add scrambled egg and water mixture. As egg mixture begins to set around edges, about 25 to 30 seconds, using a heat safe spatula, carefully push cooked egg from side of skillet toward center so uncooked egg can reach bottom of hot skillet. Repeat constantly 8 to 10 times or for 1 to 2 minutes until eggs are almost set but still creamy and moist on top. Turn off flame on stove sprinkle with parmesan cheese and put in oven for 1 to 2 minutes until eggs are set and cheese is melted (watch carefully as to not burn). Remove from oven and sprinkle with fresh thyme. Cut into wedges and serve immediately.

This is a great summer recipe, and is awesome with some fresh crusty bread and a summer salad.